Loading ...
Loading ...
Loading ...
- 42 - - 43 -
at hole A and B in the drawing; also wood
screws(#10×2 9/16"(ST5×65mm)) must be xed
at bracket bores with corresponding wooden
stakes in area C.
Firstly determine the installation central point of
the range hood according to the central point
of the cooker, determine the bracket installation
location based on cooker table and mark the
place for drilling. The cooker table is about 27
7/8" (708 mm) to 30 7/8" (783 mm) away from
the central point of bracket;
The location to install the safety buffer baffle
should be 4 9/16" (115.5 mm) to the left of the
duct bracket and 2 5/16" (58.5 mm) straight up.
The location to install the decorative cover
bracket should generally be 29 15/16 " (760
mm) above the central point of the duct bracket.
If the distance between the ceiling and duct
bracket equals to or is less than the value,
secure the decorative cover bracket on the wall
right under the ceiling. If the distance is more
than the value, taller decorative covers (27
9/16" (700 mm) and 35 7/16" (900 mm) in height
respectively) need to be bought separately.
Embed the expansion tube in the punch marks:
1) Punch marks are on tiles (marble): Punch
holes (φ3/8"(φ8mm)) with an electric drill at
the marks, and embed expansion tube for
tiles(φ1/4"×1 5/16"(φ5.3×32mm)).
2) Punch marks are on plasterboards: Screw
the expansion tube for plasterboards(φ3/16"×1
5/8"(φ4×40mm)) into walls with screwdrivers at
the marks.
4. Secure the duct bracket and decorative cover
bracket to the wall with corresponding screws
and tighten the screws. Make sure the bracket
is leveled.
Caution:
One of the wood screws(#10×2
9/16"(ST5×65mm)) for duct bracket must be
fastened to the wooden beam.
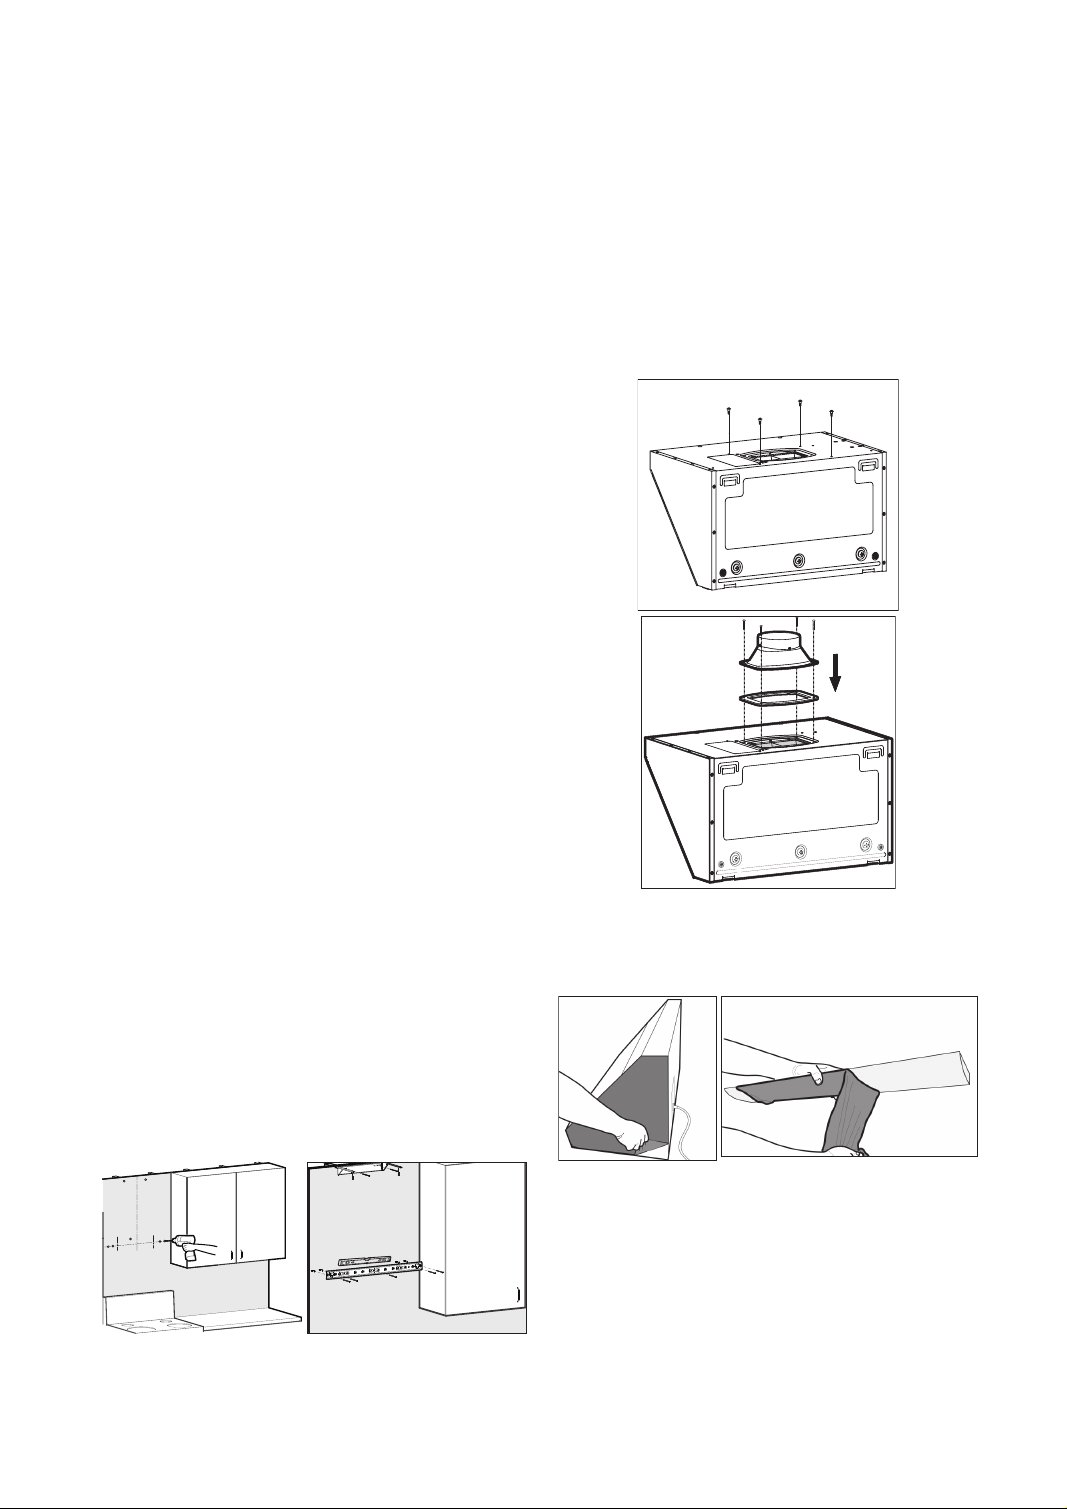
5. Place the seal (notch downward) at the
air outlet of the machine and fix the outlet
housing with 4 outlet-housing bolts of
#8×3/4"(M4×18mm). Fix four outer cover bolts
of #8×7/16" (M4×10mm) at the corresponding
positions (The cover screws is provided in
the accessory bag in the packing box of the
decorative cover assembly.).
6. Remove the protective film of the stainless
steel surface and Grease Cup at both sides of
the range hood.
7. Lift and position the hood onto the mounting
screws. Make sure the hood is stable and
leveled by using a spirit level. Install the safety
buffer baffle above the hood(The safety block
is provided in the accessory bag in the packing
box of the decorative cover assembly.).
Caution:
Two installers are required to ensure
safe installation. Please install the safety stop
as required. The main function of the safety stop
is to prevent the range hood from being lifted up
accidentally, which will cause it to unhook and
potentially fall.
8. Secure the duct to the duct cover and seal the
connection with aluminum tape.
Make sure the hood is leveled. Install the Grease
Cup, and plug the appliance for a test run.
Caution:
Please run the machine and test if
the smoke pipe leaks air after it is sealed with
aluminum foil tape. The smoke pipe should be
able to be straightened as much as possible.
9. First, tear off the protective lm on the decorative
cover and fan cover, and put the decorative cover
into the fan cover. Then take up the decorative
cover and fan cover, hang the decorative cover
on the decorative cover hook, lower the fan cover
slowly, and push the decorative cover and fan
cover inward until the fan cover is fastened to the
corresponding cover screws.
10. Install the Grease Cup.
Warning:
Please wear the qualified protective
gloves in operation.
6.6 Test Run After Installation:
1. Lightly press the POWER button. Next,
lightly press the LIGHTING button. At this time,
the smoke baffle plate and lights should work
normally.
2. Lightly press the fan buttons to check the motor.
If any of the following malfunctions occurs, unplug
the hood immediately and re-check the installation
process. (If the malfunction continues, contact our
authorized service center as soon as possible.)
(1) The hood vibrates violently
.
(2) The impeller does not work
.
(3) The impeller grates while rotating.
(4) The motor makes strange sounds.
3. Lightly press the POWER button again to turn
off the fan and close the smoke bafe plate.
Loading ...
Loading ...
Loading ...