Loading ...
Loading ...
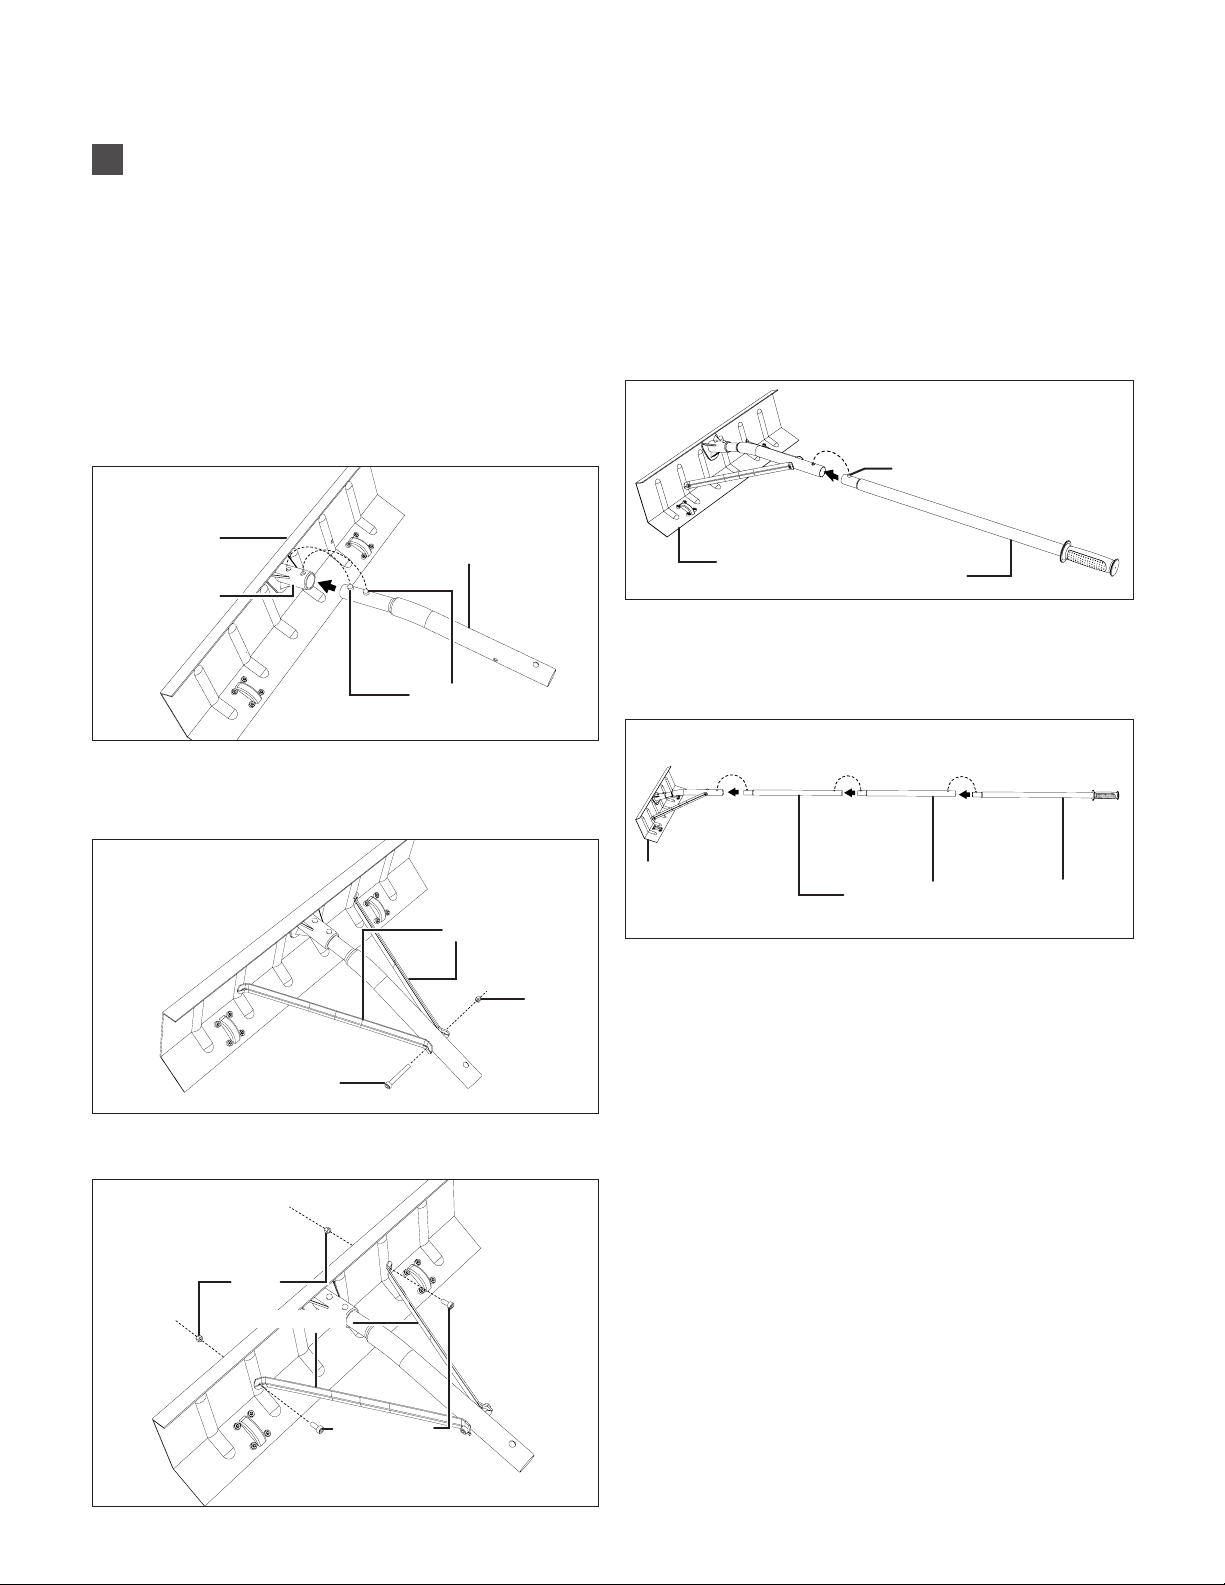
Roof Rake Head Assembly
The assembly of the roof rake head requires hardware (nuts
and bolts) included in the pack. Use the equipped open
wrench for nuts and the hex wrench for bolts. Make sure to
tighten the hardware connections for a secure assembly.
1. Depress the small buttons on the pole adapter and insert
the pole adapter into the connector on the back of the roof
rake head. Push rmly until the two small buttons pop up
in the holes on the connector (Fig. 1).
2. Align the holes of the metal braces with the hole on the
end of the pole adapter. Secure with the long bolt and one
nut (Fig. 2).
3. Connect the metal braces to the rake head with 2 small
bolts and the remaining nuts, as shown (Fig. 3).
Connecting the Poles
1. To connect the roof rake head assembly with the pole
handle, depress the small button at the end of the pole
handle and insert it into the end of the pole adapter. Make
sure the small button pops up in the hole on the pole
adapter so the assembly is secured (Fig. 4).
2. If additional reach is needed, connect the provided pole
extensions between the pole handle and the rake head
assembly. Make sure the small buttons pop up in the hole
on the pole so the assembly is secured (Fig. 5).
NOTE: Make sure the pole handle is the last piece of the
assembly.
NOTE: Only connect the minimum number of pole
extensions needed to reach the roof. This will minimize the
weight of the roof rake and reduce the eort required.
If you have any questions, please call the Snow Joe
®
+
Sun Joe
®
customer service department at 1-866-SNOWJOE
(1-866-766-9563) for assistance.
Fig. 1
Connector
Rake head
Pole adapter
Small buttons
Fig. 2
Metal braces
Long bolt
Nut
Fig. 3
Metal braces
Nuts
Short bolts
Fig. 4
Roof rake
head assembly
Small button
Pole handle
Fig. 5
Roof rake
head assembly Pole handle
Pole Extensions
3
EN
Loading ...
Loading ...
Loading ...