Loading ...
Loading ...
Loading ...
9
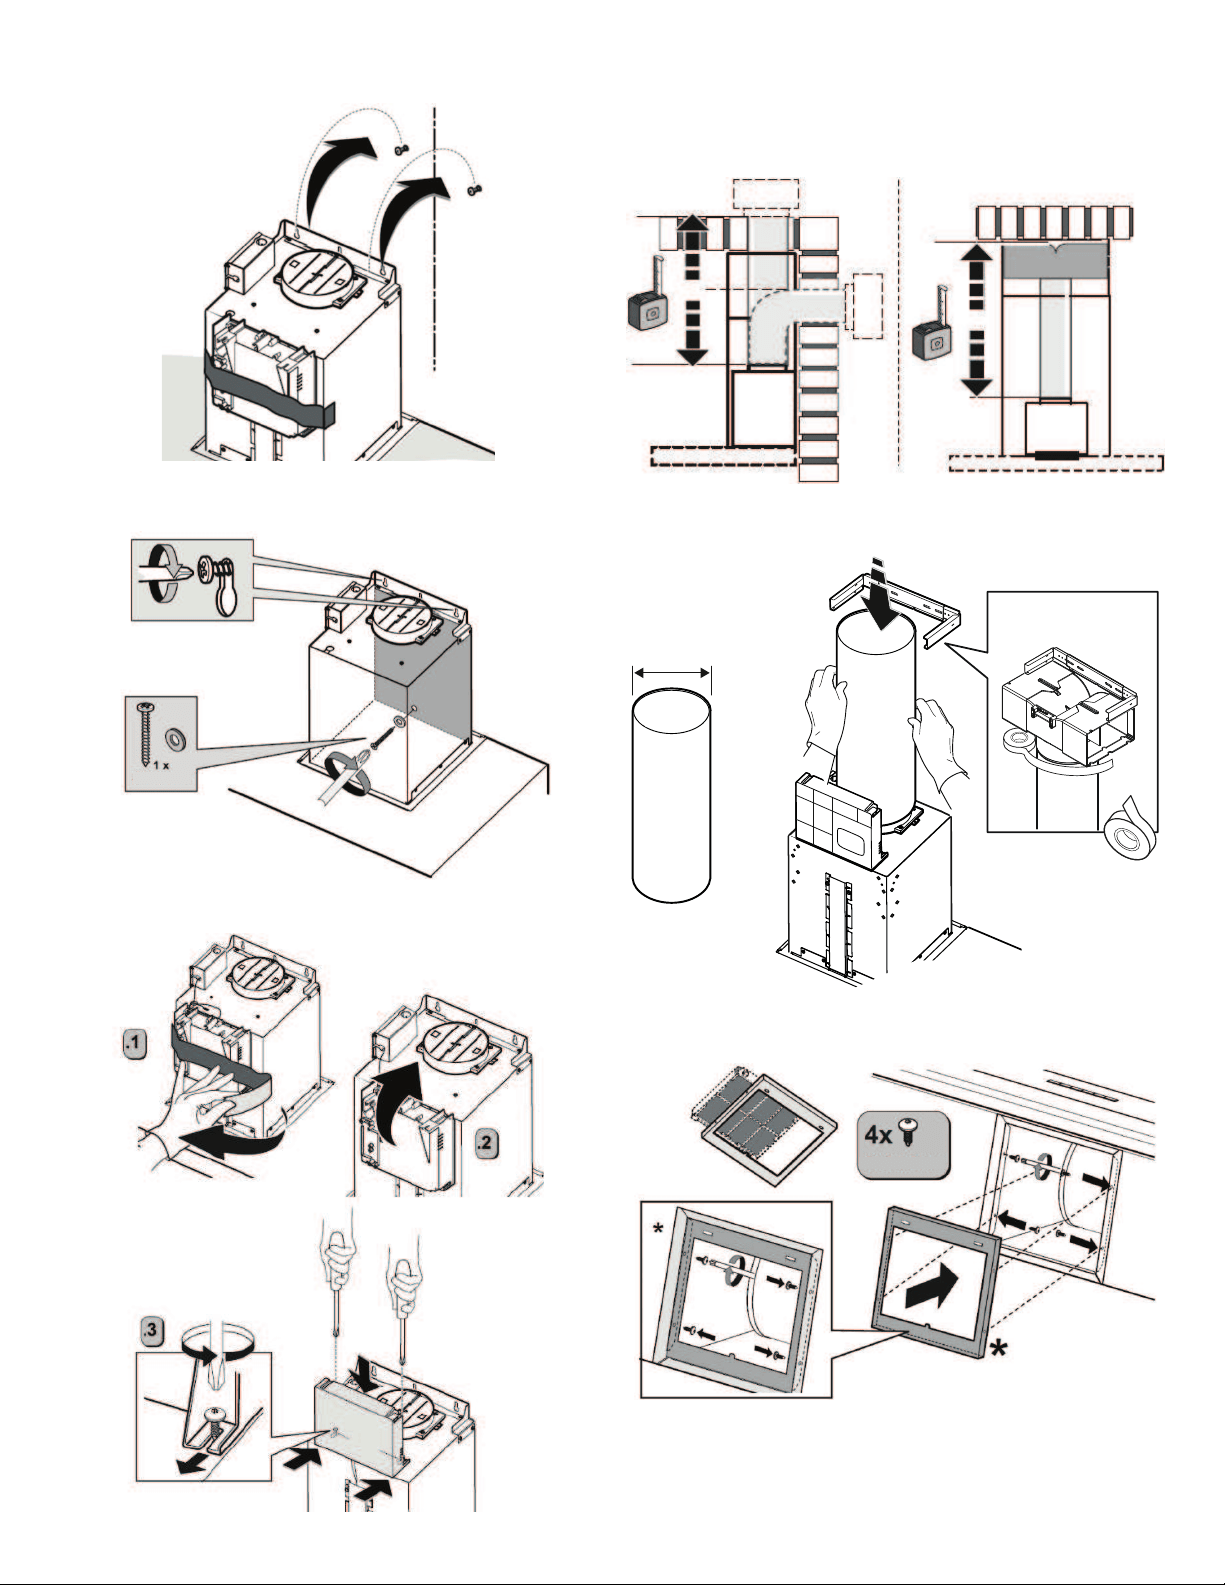
2. Hang the hood with the help of at least two people on the two
screws previously xed to the wall as shown in gure.
3. Tighten the two screws and denitively x the hood to the
wall with the Ø5x45 mm safety screw and washer as shown in
gure.
Ø 5x45 mm
4. Remove the sticker from the electrical system box as shown
in gure and follow steps 1-2-3.
5. Fixing the air outlet pipe in the Exhaust version or in the
Recirculation version gure 16. Use a pipe with a diameter no
smaller than that of the hood connection and the minimum
number of bends required. adjust and if necessary cut off
the excess pipe. The tube must be purchased and must be
compatible with the regulations in force in your country.
6. Fix the tube to the lower part of the product and connect it
to the external outlet in the Exhaust version, and to the air
diverter in the Recirculation version gure.
*
7. The kit is composed of a carbon lter, a bracket and 4 screws
Ø3.5x9.5 mm, the bracket must be xed to the lower part of
the hood with the 4 screws supplied, gure.
Ø3.5x9.5 mm
Ø6''
Ø152 mm
Loading ...
Loading ...
Loading ...