Loading ...
Loading ...
Loading ...
–4–
ENGLISH ESPAÑOL FRANÇAIS
GETTING STARTED
Thank you for purchasing this Impecca 21.2Cubic Foot
Refrigerator. Please follow these operating instructions
carefully. Keep these instructions in a safe place and con-
sult them as needed.
Note: All images in this instruction manual are for illustra-
tion only; the physical appearance and options on your
model may vary.
SERIAL AND MODEL NUMBER
Please record your model number and serial number be-
low. You can find the number plate in the upper-le wall
inside the refrigerator.
Model Number: RS-2265__________________
Serial Number: ______________________________
Date of Purchase: ______________________________
SAFETY NOTICES
This appliance is intended to be used in household and
similar applications such as:
• Sta kitchen areas in shops, oices and other working
environments
• Individual use in hotel rooms and other residential
type environments
INSTALLING YOUR APPLIANCE
LOCATION
When selecting a position for your unit, ensure the floor
is a flat, level surface and the room is well ventilated.
Avoid locating your unit near a heat source, such as an
oven, stove-top, boiler, or radiator. Avoid direct sunlight,
as it may increase the unit’s electrical consumption.
Extremely cold ambient temperatures may also prevent
the unit from operating eectively. This unit is not de-
signed for use in a garage or outdoor installation. Do not
place any covering (such as a drape or sheet) on the unit.
When installing the unit, ensure that a minimum of
4 inches of free space is le at both sides and in the
rear, and 2 inch at the top of the unit. This will al-
low cold air to circulate around the refrigerator
and improve the eiciency of the cooling process.
The refrigerating system in this refrigerator is a “Frost Free”
system. This type of system requires no user interven-
tion (i.e. defrosting) other than selecting required cool-
ing temperatures and the usual care and maintenance.
This unit is a FREE-STANDING INSTALLATION ONLY, and is
NOT intended to be built-in. In the final installation loca-
tion, the unit’s door must be able to open fully and with-
out posing any safety risk.
LEVELING THE UNIT
It is very important to keep the unit level so that the door
will close properly and prevent problems that will cause
eective cooling to fail. To level the unit, turn the adjust-
able legs clockwise or counterclockwise to raise or lower
the corner.
Note: If the unit is not
level, the door and mag-
netic seal alignments will
not be covered properly.
Note: By design, doors
shut automatically within
a 20° opening arc.
Install this appliance in
an area where the ambi-
ent temperature is between 55°F (13°C) and 110°F (43°C).
If the temperature around the appliance is too low or
high, cooling ability may be aected.
CLEANING BEFORE USE
Wipe the inside of the unit with a weak solution of baking
soda (bicarbonate). Then rinse with warm water using a
damp sponge or cloth. Wash the shelves and bins in warm
soapy water and dry completely before putting back in
the unit. Clean the exterior of the unit with a damp cloth.
GROUNDING INSTRUCTIONS
This appliance must be grounded. The refrigerator must
be plugged into its own dedicated 115 Volt electrical out-
let. Performance may be aected if the voltage varies by
10% or more. Operating the refrigerator with insuicient
power can damage the compressor. Such damage is not
covered under your warranty. The power cord of the ap-
pliance is equipped with a three-prong grounding plug
for your protection against electrical shock hazards. It
must be plugged directly into a properly grounded three-
prong receptacle. The receptacle must be installed in ac-
cordance with local codes and ordinances. Do not use an
extension cord or adapter plug. You must make sure all
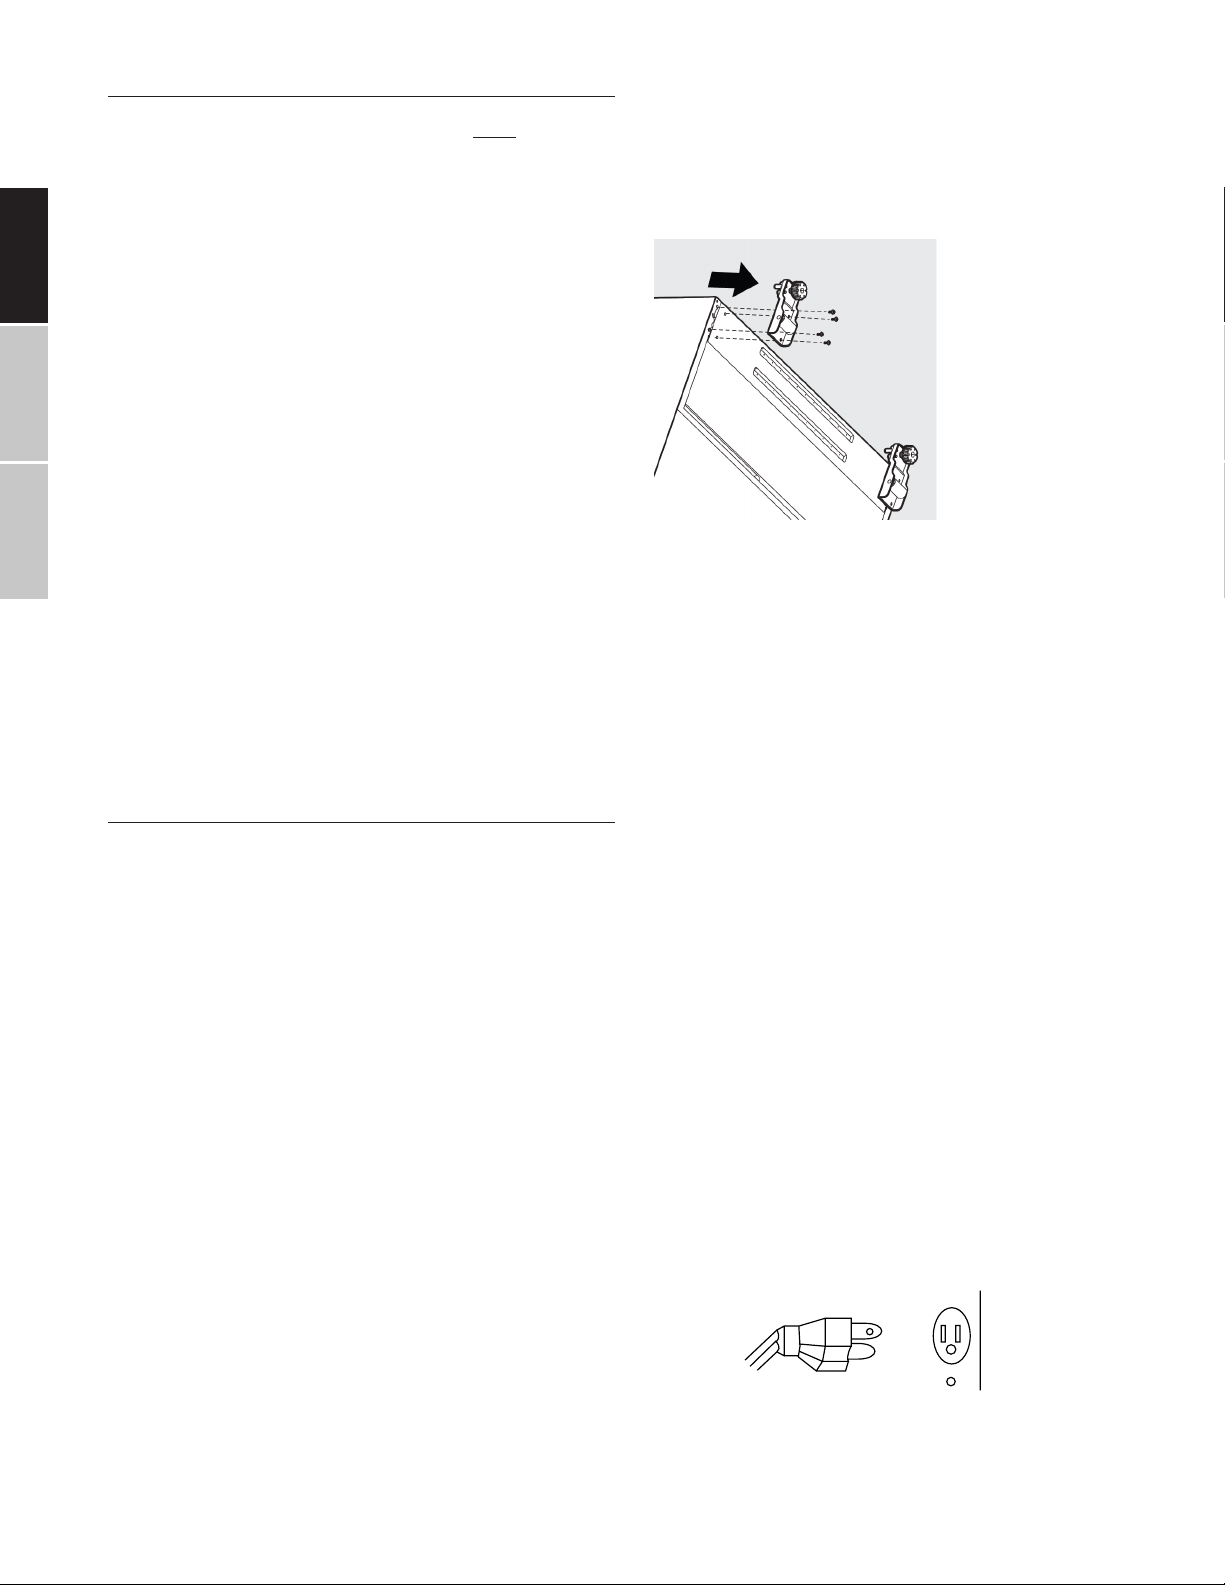
three prongs are in a 3-pronged outlet (see figure).
WARNING: Improper use of the grounding plug can result
in a risk of electric shock. Consult a qualified electrician
or service person if the grounding instructions are not
completely understood, or if doubt exists as to whether
the appliance is properly grounded.
Receptacle
3-pronged
Receptacle
Box Cover
3-pronged
plug
When using a 3-pronged outlet
Receptacle
3-pronged
Receptacle
Box Cover
3-pronged
plug
When using a 3-pronged outlet
Receptacle
3-pronged
Receptacle
Box Cover
3-pronged
plug
When using a 3-pronged outlet
Loading ...
Loading ...
Loading ...