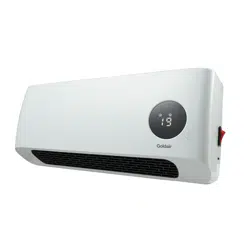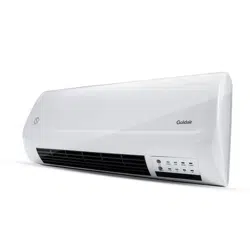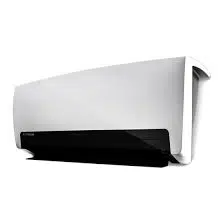
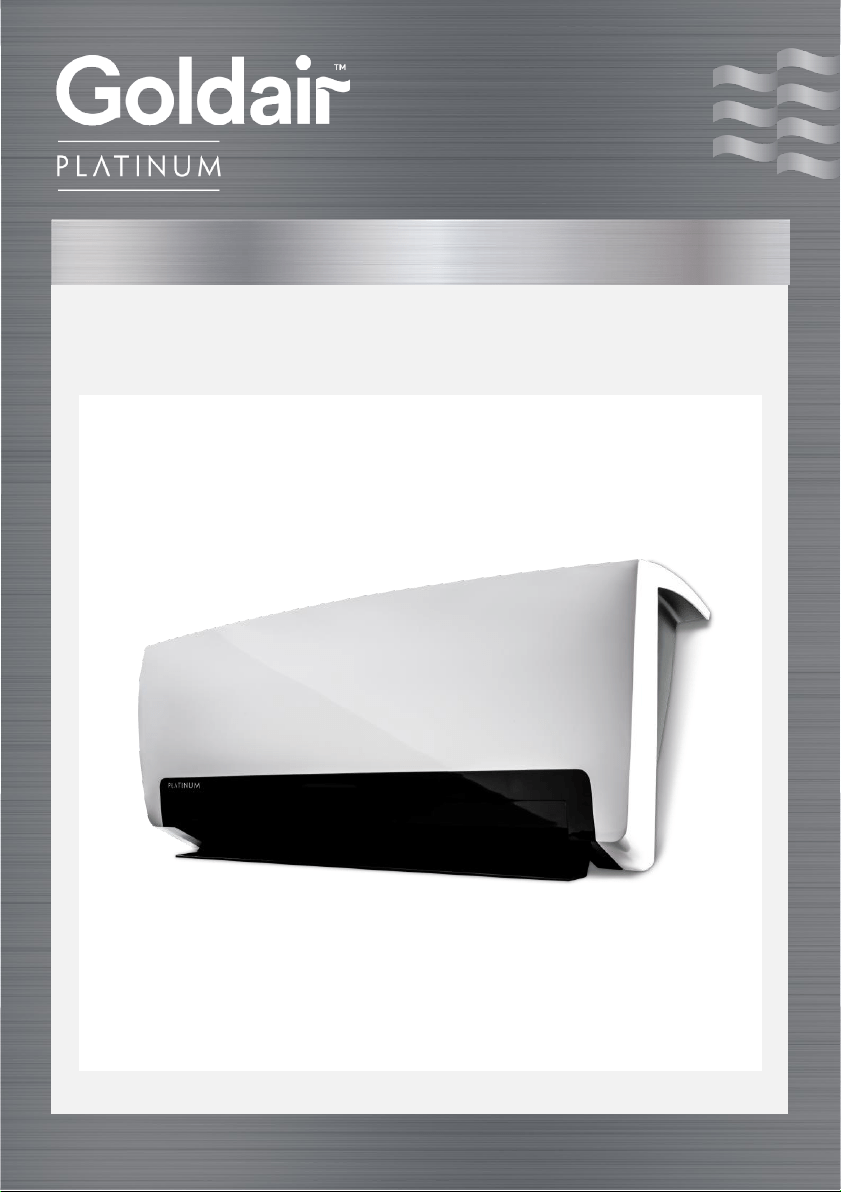
2000W Ceramic Wall Heater
Operating Instructions
Model: GPCW100

CAUTION: In order to avoid a hazard due to inadvertent resetting of the
thermal cut-out, this appliance must not be supplied through an external
switching device, such as a timer, or connected to a circuit that is regularly
switched on and off by the utility.
• This appliance is not intended for use by persons (including children) with
reduced physical, sensory or mental capabilities or lack of experience and
knowledge, unless they are supervised or have been given instruction
concerning the use of the appliance by a person responsible for their safety.
• Children should be supervised to ensure that they do not play with the
appliance.
• If the supply cord is damaged, it must be replaced by the manufacturer, its
service agent or similarly qualified persons in order to avoid a hazard.
WARNING: You must not cover this appliance. Covering this appliance
presents fire risk and will activate the safety fuse; permanently disabling the
unit.
WARNING: Do not use this appliance in small rooms when they are
occupied by persons not capable of leaving the room on their own, unless
constant supervision is provided.
WARNING: To reduce the risk of fire, keep textiles, curtains, or any
flammable material a minimum distance of 1 metre from the air outlet.
General Care and Safety Guide
• Use only the voltage specified on the rating label of the appliance.
• Keep all objects at least 1 metre from the front and sides of the appliance.
• This appliance is intended for household use only and not for commercial or
industrial use.
• Indoor use only.
• Use this appliance only as described in this manual. Any other use is not
recommended by the manufacturer and may cause fire, electric shock or
injury.
• Do not use the appliance if it has been dropped or damaged.
• The common cause of overheating is deposits of dust or fluff in the appliance.
Ensure these deposits are removed regularly by unplugging the appliance and
vacuum cleaning the air vents and grills.
YOUR SAFETY IS IMPORTANT TO US. PLEASE ENSURE YOU TAKE NOTE OF THE
INSTRUCTIONS AND WARNINGS OUTLINED IN THIS MANUAL.

• Never use the appliance to dry clothes.
• Always unplug appliance when not in use.
• When the appliance has been unpacked, check it for transport damage and
ensure all parts have been delivered. If parts are missing or the appliance has
been damaged, contact the Customer Services Team.
• Do not use if there are visible signs of damage to the appliance.
• Do not connect the appliance to mains supply until completely assembled and
adjusted.
• Ensure hands are dry before handling the plug or main unit.
• Ensure appliance is on a flat, stable, heat-resistant surface.
• Do not operate with cord set coiled up as a heat build up is likely, which could
be sufficient to become a hazard.
• Carry out regular checks of the supply cord to ensure no damage is evident
• Do not operate this appliance with a damaged cord, plug or after the appliance
malfunctions or has been dropped or damaged in any manner. Take to a
qualified electrical person for examination, electrical service or repair.
• Do not twist, kink or wrap the cord around the appliance, as this may cause the
insulation to weaken and split. Always ensure that all cord has been removed
from any cord storage area and is unrolled before use.
• It is recommended that this appliance is plugged directly into the wall socket.
Power boards are not rated to supply power to high wattage appliances.
• A correctly specified, undamaged extension cord may be used with this
appliance provided it is used in a safe manner.
• Do not remove plug from power socket until the appliance has been switched
off.
• Do not remove plug from power socket by pulling cord; always grip plug.
• Don’t place appliance on bedding or on thick & long carpet where the openings
may get blocked.
• Switch off and use handle provided when moving
• Do not place appliance close to radiant heat source.
• Do not insert or allow foreign objects to enter any ventilation or exhaust
opening, as this may cause an electric shock, fire or damage to the appliance.
• Do not sit on the appliance.
• Do not use abrasive cleaning products on this appliance. Clean with a damp
cloth (not wet) rinsed in hot soapy water only. Always remove plug from the
mains supply before cleaning.
• Do not operate in areas where petrol, paint or other flammable liquids are used
or stored.
• Do not use this appliance in the immediate surrounds of a bath, a shower, or a
swimming pool or other liquids.
General Care and Safety Guide
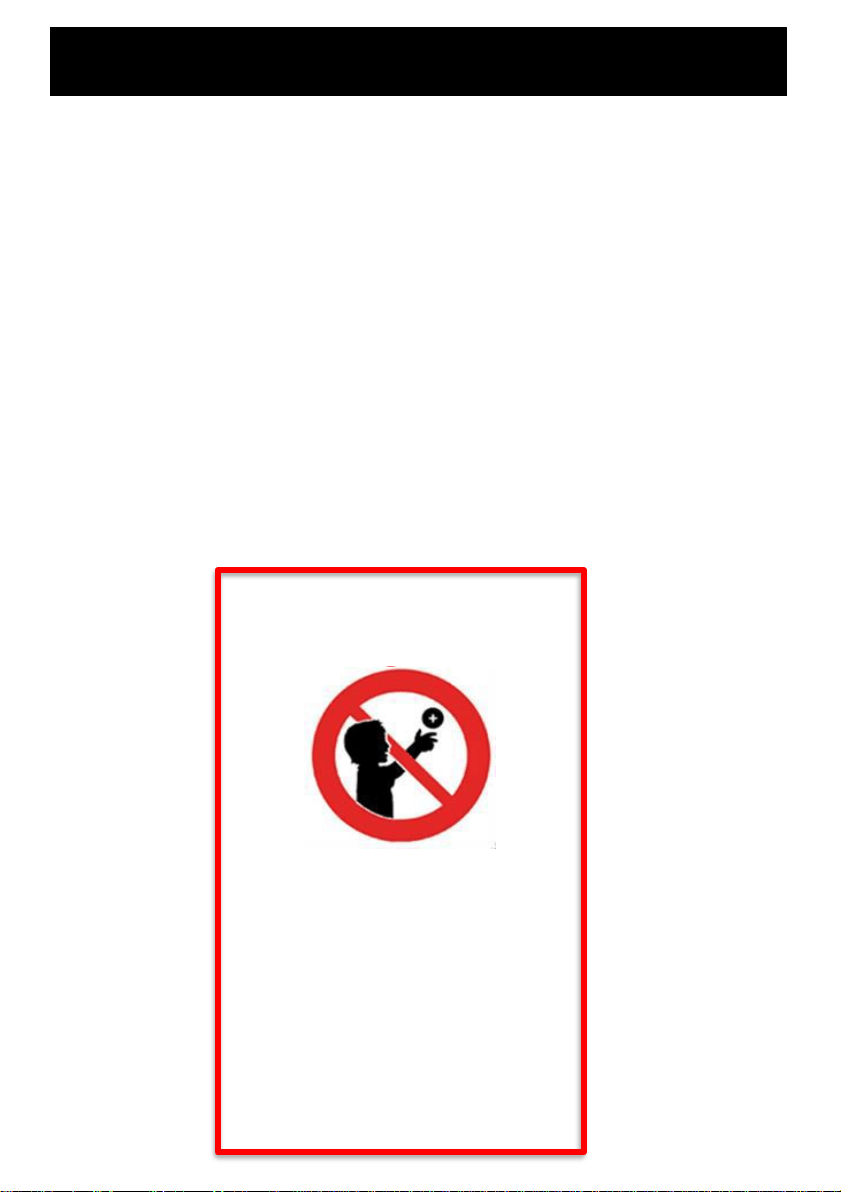
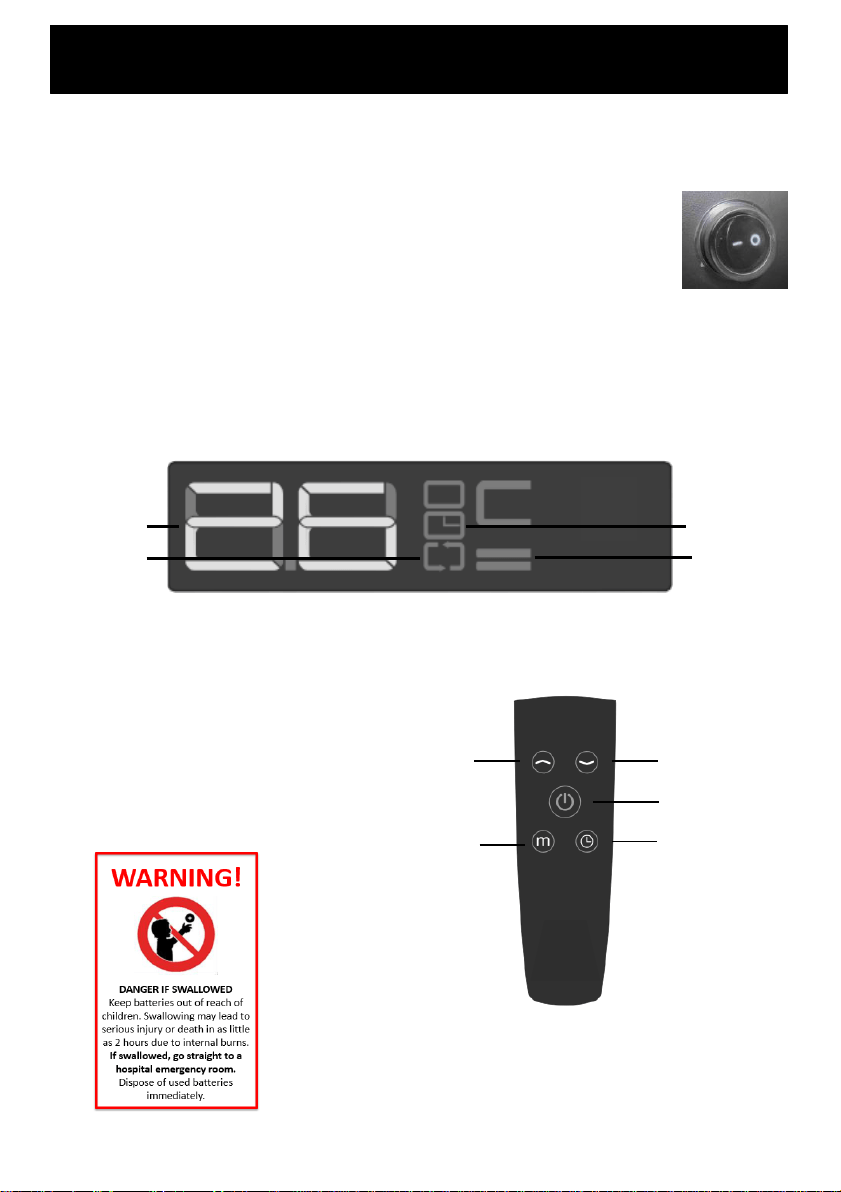
WARNING!
G!
DANGER IF SWALLOWED
Keep batteries out of reach of
children. Swallowing may lead to
serious injury or death in as little
as 2 hours due to internal burns.
If swallowed, go straight to a
hospital emergency room.
Dispose of used batteries
immediately.
The remote control supplied with this appliance uses a CR2025 coin type battery.
DANGER IF SWALLOWED
Keep batteries out of reach of children. Swallowing may lead to serious injury or
death in as little as 2 hours due to internal burns.
If swallowed, go straight to a hospital emergency room.
Dispose of used batteries immediately.
• The appliance must not be immersed in any liquids.
• There are no user serviceable parts installed in the unit.
• Do not place the unit in wardrobes or other enclosed spaces as this may cause
fire hazards.
• This unit is not supposed to be used in or around locations where foodstuffs,
works of art or delicate articles of science, etc. are stored.
• If your appliance does not work, or is not working properly, contact the place of
purchase or the Customer Services Team.
General Care and Safety Guide
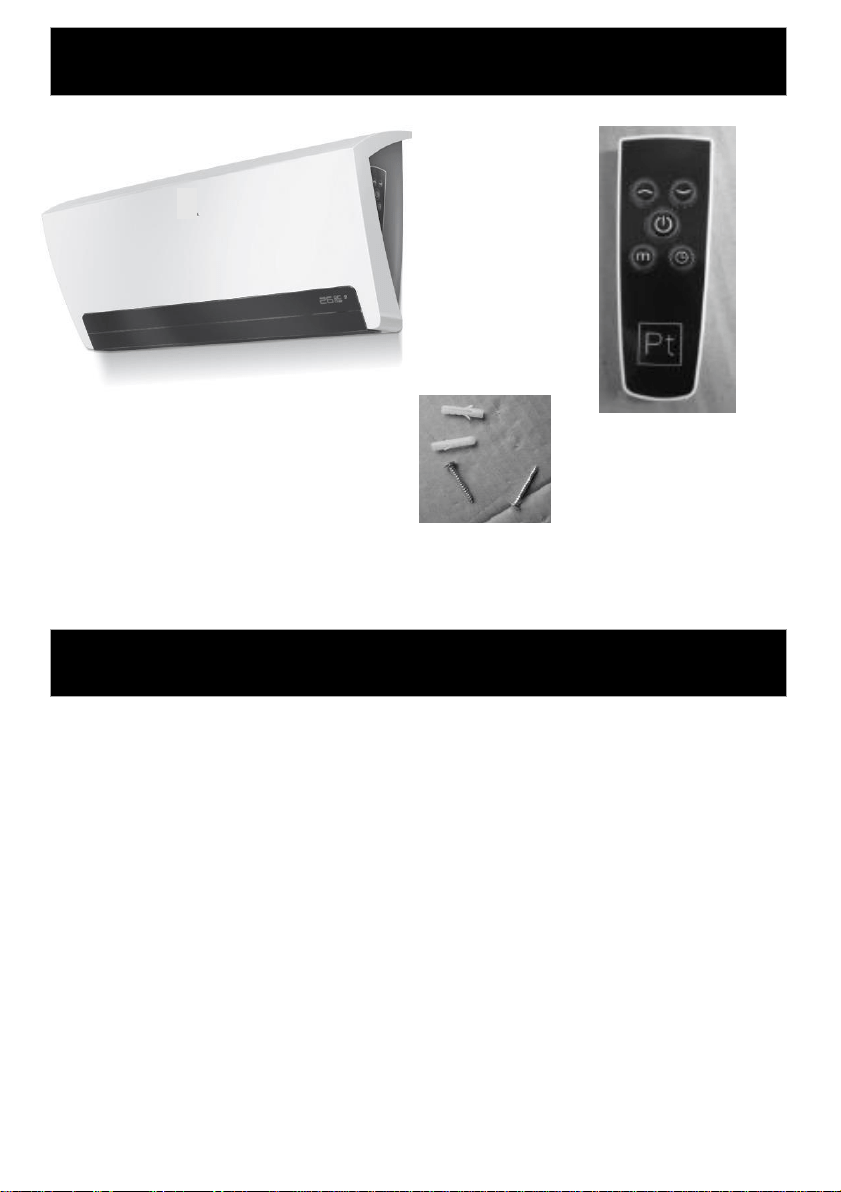
Components
SCREWS:
2 X EXPANDING SCREW PIPES
2 X SCREWS
MAIN BODY X 1
REMOTE X 1
NOTE: Before using this appliance, it must be wall mounted. The screw
pack to mount the appliance to the wall will be taped to the plug.
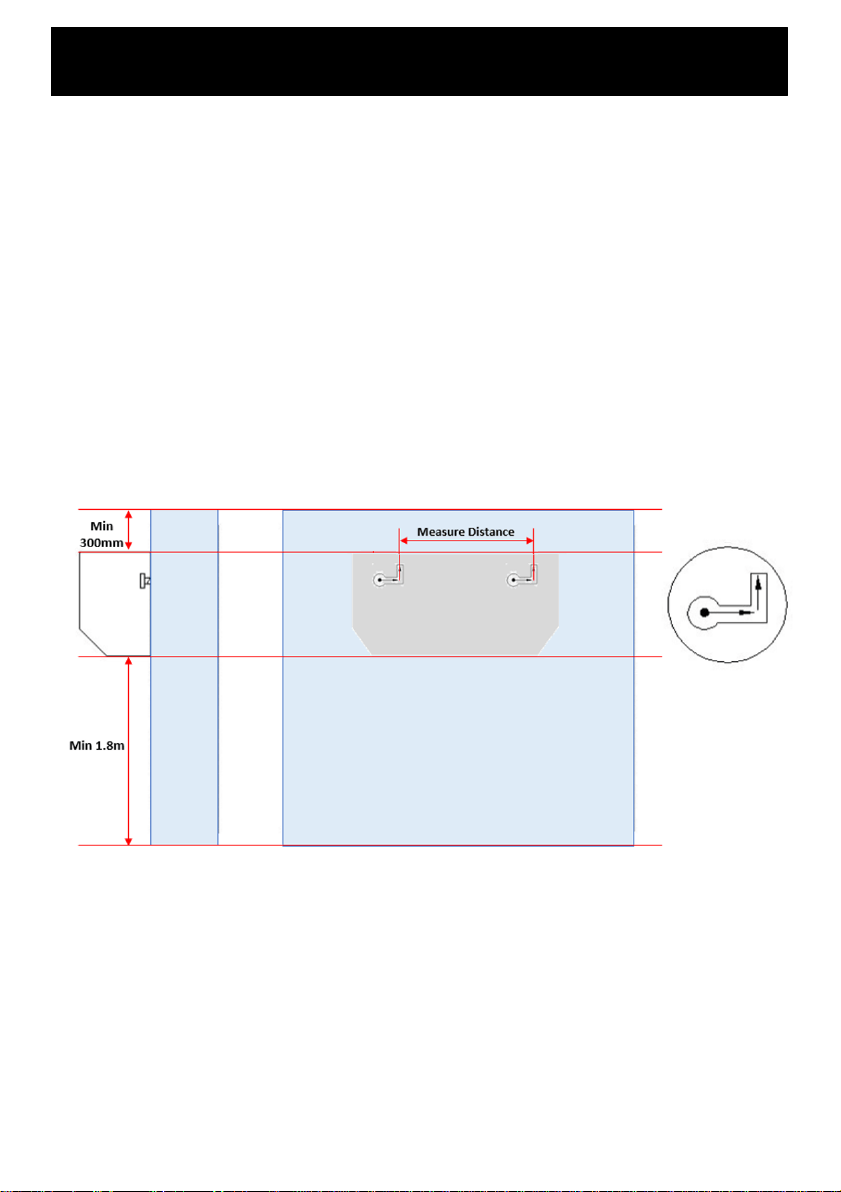
NOTE: Your Goldair Ceramic Wall Heater should be installed with at least
1.8m clearance from the floor at least 300mm clearance form the ceiling and
200mm clearance from any other surrounding parts including other
appliances, side walls, shelves and soft furnishings.
NOTE:Do not run the power cord behind the heater.
Installing your Appliance
WALL MOUNTED HEATERS ARE ONLY TO BE MOUNTED ON HEAT
RESISTANT WALLS THAT COMPLY WITH CURRENT AS/NZS
SPECIFICATIONS & BUILDING REGULATIONS
Installing your Appliance
Always choose a safe location for the heater, keeping in mind the safety
precautions outlined. Ensure all packaging has been removed from the unit before
use.
CAUTION: Do not mount directly under or over an electrical power socket.
It is recommended to install the heater to the side of the power socket.
The cord length is 1.5m, an electrician may be required to install a power socket
nearer to the appliance.
LOCATION
The heater should be placed with a minimum distance of 1 metre between the unit and
flammable objects such as curtains, paintings or other materials that may pose fire risk.
Installation of the heater on the wall MUST BE 1.8m above the floor to the bottom of the
heater, 300mm from the ceiling to the top of the heater and 200mm away from closest
side walls.
INSTALLATION
1. Measure the distance between the mounting holes on the back of the appliance and
then mark the wall at the measured distance. Ensure that the marks you make are
level.
2. Drill holes to the same diameter as the wall plugs.
3. Place the wall plugs into the hole in the wall and then fix two screws into the wall
plugs.
4. Keep the heads of the screws out approximately 10mm.
5. Now hang the heater on screws and slide the heater across to the right and then
down, locking the heater to the screws in the wall.

Operating Your Heater
Always choose a safe location for the heater, keeping in mind the safety precautions
outlined. Ensure all packaging has been removed from the unit before use. Please
follow the below instructions.
WARNING: In order to avoid overheating or fire, do not cover the heater.
WARNING: Keep all objects at least 1 metre from the front and sides of
the appliance.
WARNING: Do not use this heater with a programmer, separate timer,
remote-control system or any other device that switches the heater on
automatically, since a fire risk exists if the heater is covered or positioned
incorrectly.
WARNING:Never leave this heater unattended when in use.
Ensure heater is on a flat, stable, heat-resistant surface.
Once the heater is in a safe operating position and all switches are in the off
position, insert the power plug into the mains outlet and switch on.
CAUTION: Ensure the power cord is not tight because if pulled it may
partially pull the plug from the socket. A partially inserted plug will overheat
the plug and socket and could result in fire.
Always choose a safe location for the appliance, keeping in mind the safety
precautions outlined. Ensure all packaging has been removed from the unit before
use.
Operating Your Heater
• Turn the Power Switch at the side of the appliance to the “I” position.
• Press the Power Button (ON/OFF) on the remote control to turn the appliance
on, You will hear a beep. The unit will start in Fan Only mode and begin to
blow out room temperature air. For best results, aim the remote directly at
the remote sensor on the front panel of the appliance. The remote has a 3
metre range of operation.
• The LED will display the current room temperature
1
4
3
2
DISPLAY PANEL
1. Timer Indicator 3. Temperature/Time Indicator
2. High/Low Heat Mode 4. Fan Only Mode
REMOTE CONTROL
1. Power Button (ON/OFF)
2. Timer Button
3. Mode Selection Button
4. Increase Time/Temperature
5. Decrease Time/Temperature
1
2
5
4
3
NOTE: The appliance can only be operated by the remote control

• Press the Power Button again to switch from Fan Only mode to Low Heat mode.
• You will hear a beep, and 1 High/Low Heat mode bar will illuminate on the control panel.
• Press the Power Button again to switch from Low Heat mode to High Heat mode.
• You will hear a beep, and 2 High/Low Heat mode bars will illuminate on the control panel.
• If you press the Power Button a fourth time, you will hear a beep, and the louvre will operate
automatically.
• Pressing the Power Button again will turn the appliance OFF.
NOTE: The appliance will continue to operate for an additional 30 seconds in the Fan mode after
the unit has been switched off. This is normal. This will help cool the internal components down
and prolong the life of the unit.
To switch between the operating modes press the MODE button.
Temperature range: 5 to 35 degrees.
Press the ‘˄’ button to increase the temperature.
Press the ‘˅’ button to decrease the temperature.
TIMER
Press the TIMER button to use timer function.
Press the “˄” button to increase the length of time before the unit switches off.
Press the “˅” button to decrease the length of time before the unit switches off.
Timer range: 1 to 24 hours in 1 hour increments.
After the desired set time has displayed on the control panel, the set time will flash before the
control panel goes back to display the current room temperature. The Timer icon will remain
displayed on the control panel.
To switch the Timer off, press the TIMER button again.
Press the POWER button to turn the device OFF.
NOTE: If the device is operating, pressing the POWER button for the first time activates the
louvres’ vertical movement mode, pressing it for the second time turns this mode off, and
pressing the button for the third time turns the appliance off.
Operating Your Heater

SUPPORT AND TECHNICAL ADVICE
Goldair – New Zealand
Monday – Friday 8am-5pm
Phone +64 (0)9 917 4000
Phone 0800 232 633
Goldair – Australia
Monday – Friday 8am-5pm
Phone +61 (0)3 9365 5100
Phone 1300 465 324
Operating Your Heater
TECHNICAL SPECIFICATION
Model No: GPCW100
Supply: 220-240VAC 50Hz
Wattage: 2000W
SAFETY DEVICES
This appliance has one protection device:
• Resettable Thermal Link - this will automatically disconnect the power to the appliance at a
pre-set overheat temperature. After cooling down it will reset and power on again. If this
occurs, investigate what is causing the appliance to overheat.
• For example, if the louvres become covered by an obstacle such as a curtain. If this occurs,
disconnect the appliance from the mains, wait for about 30 minutes to let it cool down and
remove the obstacle.
• After 30 minutes, turn on the appliance to the desired mode. It should start normally. If the
appliance does not work correctly, please contact your nearest service centre.
CAUTION: The appliance generates heat during use. Precautions must be
taken to prevent the risk of burns, scalds, fires or other damage to persons.
CARE AND CLEANING
The heater requires regular cleaning to ensure trouble free operation:
• Unplug the heater from the mains supply before cleaning.
• Ensure that the heater has been allowed to cool down completely before cleaning.
• The common cause of overheating is deposits of dust or fluff in the appliance. Ensure these
deposits are removed regularly by unplugging the appliance and vacuum cleaning the air
vents and grills.
• Use a damp cloth (not wet) to wipe the exterior of the heater to remove dust and dirt.
• Never use solutions such as petrol, thinners or polishing agents.
• Ensure the heater is dry before plugging back into the mains supply.
• Do not attempt to dismantle the heater.
• There are no user serviceable parts. For service or repair, contact an authorised electrical
service technician.
PROOF OF PURCHASE
To receive warranty retain receipt as proof of purchase.
Thank you for purchasing this Goldair Platinum product. Your product is warranted against faults and manufacture when used in
normal domestic use for a period of three years. In non-domestic use Goldair limits the voluntary warranty to three months.
Goldair undertake to repair or replace this product at no charge if found to be defective due to a manufacturing fault during the
warranty period.
This warranty excludes damage caused by misuse, neglect, shipping accident, incorrect installation, or work carried out by anyone
other than a qualified electrical service technician.
PLEASE KEEP YOUR RECEIPT AS THIS WILL HELP VERIFY YOUR WARRANTY.
The benefits given to you by this warranty are in addition to other rights and remedies available to you under law in relation to the
goods or services to which this warranty relates.
In Australia, our goods come with guarantees that cannot be excluded under the Australian Consumer Law. You are entitled to a
replacement or refund for a major failure and compensation for any other reasonably foreseeable loss or damage. You are also
entitled to have the goods repaired or replaced if the goods fail to be of acceptable quality and the failure does not amount to a
major failure.
In New Zealand this warranty is additional to the conditions and guarantees of the Consumers Guarantee Act (1993).
Three Year Warranty
Goldair Three Year Warranty (IMPORTANT: Please complete and retain this warranty card)
Name
Address
Place Of Purchase Date Of Purchase
Name Of Product Model Number
Attach a copy of the purchase receipt to this warranty card
Due to continual design improvements, the product illustrated in this User Manual may differ slightly from the actual product.
Goldair – New Zealand
CDB Goldair
PO Box 100-707
N.S.M.C
Auckland
Phone +64 (0)9 917 4000
Phone 0800 232 633
www.goldair.co.nz
Goldair – Australia
CDB Goldair Australia Pty
PO Box 574
South Morang
Victoria, 3752
Phone +61 (0)3 9365 5100
Phone 1300 GOLDAIR (1300 465 324)
www.goldair.com.au
New Zealand
PO Box 100707,
North Shore Mail Centre,
Auckland, 0745
www.goldair.co.nz
Australia
PO Box 574,
South Morang,
Victoria, 3752
www.goldair.com.au