Loading ...
Loading ...
Loading ...

en Operating the appliance
6
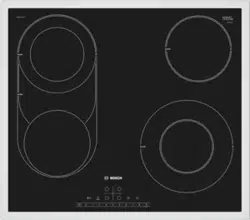
Combination cooking zone
The single and dual-circuit hotplate can be operated
without the bridge heating element independently of
each other or combined with the bridge heating
element as described in the table.
The small extended cooking zone (1 +3) and the single-
circuit hotplate (2) can also be operated independently
of each other with different heat settings. Different
temperature ranges are therefore generated at the large
roaster, the teppanyaki or the grill plate, for example:
the small extended cooking zone can then be used to
fry a meal and the single-circuit hotplate can
simultaneously be used to keep a meal warm.
Note: Suitable cookware is available from the after-
sales service or our e-Shop.
Residual heat indicator
The hob has a two-stage residual heat indicator for
each hotplate.
If • appears in the display the hob is still hot. It may be
used, for example, to keep a small meal warm or to
melt cooking chocolate. As the hotplate cools down
further, the display changes to œ. The display remains lit
until the hotplate has cooled sufficiently.
1Operating the appliance
Oper at i ng the appl i anc e
In this section, you can find out how to set the
hotplates. The table shows heat settings and cooking
times for various meals.
Switching the hob on and off
The main switch is used to switch the hob on and off.
To switch on: touch the # symbol. A signal sounds.
The display light above the main switch and the ‹
indicators light up. The hob is ready for use.
To switch off: Touch the # symbol until the display light
above the main switch and the displays go out. All
hotplates are switched off. The residual heat indicator
remains on until the hotplates have cooled down
sufficiently.
Notes
■ The hob will switch itself off automatically once all
hotplates have been switched off for a while (10-
60 seconds).
■ The settings remain stored for 4 seconds after the
hob has been switched off. If you switch it on again
during this time, the hob will operate using the
previously stored settings.
Setting a hotplate
Set the desired heat setting on the control panel.
Heat setting 1 = lowest setting
Heat setting 9 = highest setting
Every heat setting has an intermediate setting. This is
marked in the control panel with the û symbol.
Setting the heat setting
The hob must be switched on.
1. Touch the $ symbol to select the hotplate.
‹ lights up in the heat setting display, ¬ lights up
under the heat setting display.
2. Select the required heat setting in the control panel.
Changing the heat setting
Select the hotplate and set the desired heat setting in
the control panel.
Switching off the hotplate
Use the $ symbol to select the hotplate. Set the control
panel to 0. After about 10 seconds, the residual heat
indicator appears.
1 = dual-circuit hotplate
2 = single-circuit hotplate
3 = bridge heating element
Combination Activation Suitable for
Small extended
cooking zone:
Combination of 1
+ 3
Select hotplate 1 and touch
the ö symbol. The 2nd fila-
ment circuit is connected.
Touch the ö symbol again.
The small extended cooking
zone is activated.
The | display lights up.
Small roaster
Small teppanyaki.
Large extended
cooking zone:
Combination of 1
+ 3 + 2
Select hotplate 1 or 2 and
touch à symbol.
The large extended cook-
ing zone is activated.
The à display lights up.
Large roaster
Large teppanyaki
Large grill plate
Loading ...
Loading ...
Loading ...