Loading ...
Loading ...
Loading ...
— 12 —
Installation
STEP 6
Preparations
NOTE: To avoid damage to your hood, prevent debris from entering the vent opening.
• Determine and mark the center line on the ceiling or wall where the range hood will be installed.
• Make sure there is proper clearance within the ceiling or wall for exhaust vent.
• Duetotheweightandsizeofthisunit,pleasemakesurethatthesupportsystemorframeworkbeingusedisstableand
secure in the ceiling or wall.
• Put a thick, protective covering over counter top, cooktop or range to protect from damage or dirt.
• Removeanyhazardousobjectsaroundtheareawheninstalling.
CAUTION
If moving the cooking range is necessary to install the hood, turn OFF the power on an electric range at the main
electrical box. SHUT OFF THE GAS BEFORE MOVING A GAS RANGE.
STEP 7
Installing the Hood Mounting Bracket and Hood
• Using references in Height & Clearance on Page 10 and Measurements and Diagrams on Page 7, use a pencil to mark
the leveling point of the hood. Position two mounting screws on the wall, leaving 1/8 in. space away from the wall.
• Position the chimney-mounting bracket directly above the hood-mounting bracket, mark the leveling points and secure
it using two mounting screws.
NOTE: Use threaded drywall anchors only when mounting the hood on sheet rock. Mounting the hood on wall studs
or lumbers is highly recommended.
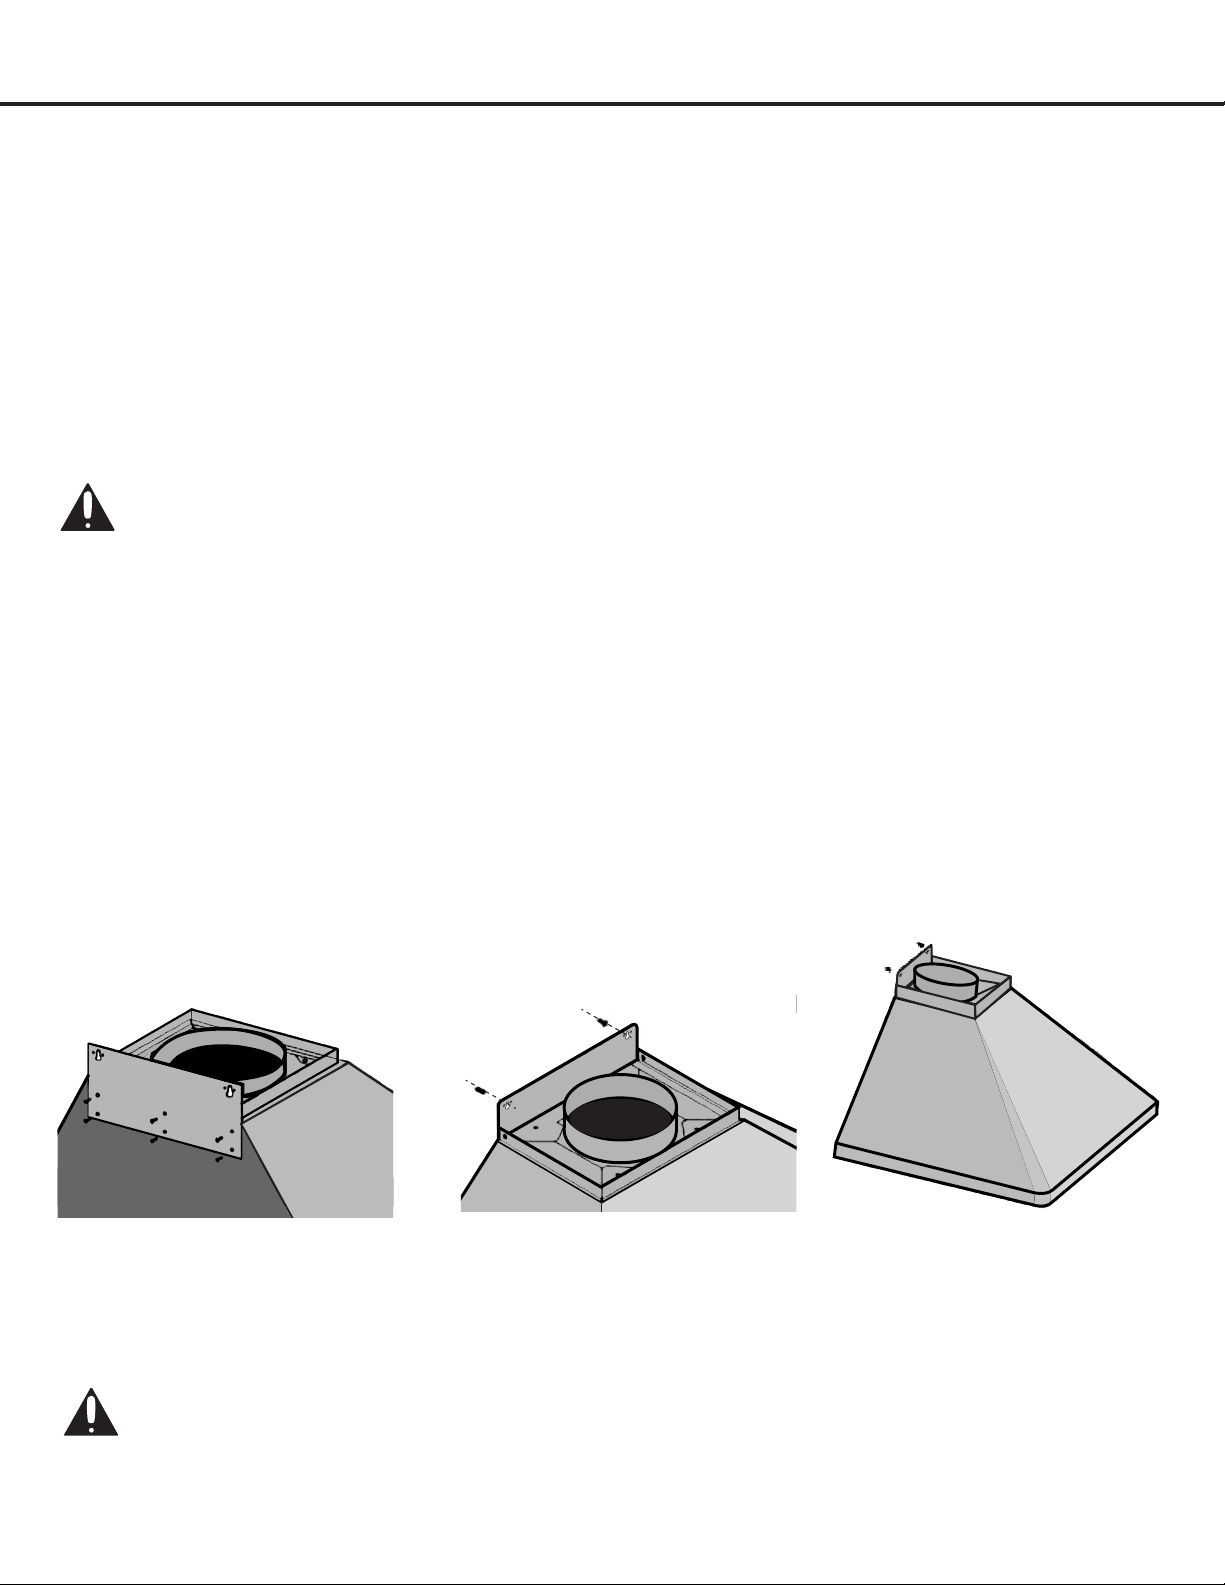
Fig #1
Fig #2
• Attach the hood-mounting bracket to the back of the hood with six screws as shown in Figure 1.
• Align hood-mounting bracket to the screws on the wall and hook hood into place as shown in Figure 2 and Figure 3.
Tighten screws to secure hood to the wall.
• For safety purpose, pre-drilled mounting holes are provided through the back of the hood. For a more secure
installation, use as many mounting holes as needed to secure from the inside of hood.
CAUTION - Make certain the range hood is secure before releasing!
Fig #3
Loading ...
Loading ...
Loading ...