Loading ...
Loading ...
Loading ...
NOTE:Referencesto rightorleftsideofthe snowthroweraredetermined
fromtheoperatingpositionlookingforwardto thefrontof themachine.
Handle
REMOVING FROM CRATE
1. Removescrewsfrom the bottomof the crate securingthe sides,
andendsof the shippingcrate.
2. Lift off the top off of thecrate and set out of the way of the
assemblyarea.
3. Removeanddiscardplasticbag that coversunit.
4. Removeany looseparts includedwith unit(e.g.,Operator's
Manual,etc.).
5. Pushdownon the lowerhandleand pullunitbackout of crate.
6. Makecertainthe cratehas beencompletelyemptiedbefore
discardingit.
ASSEMBLY
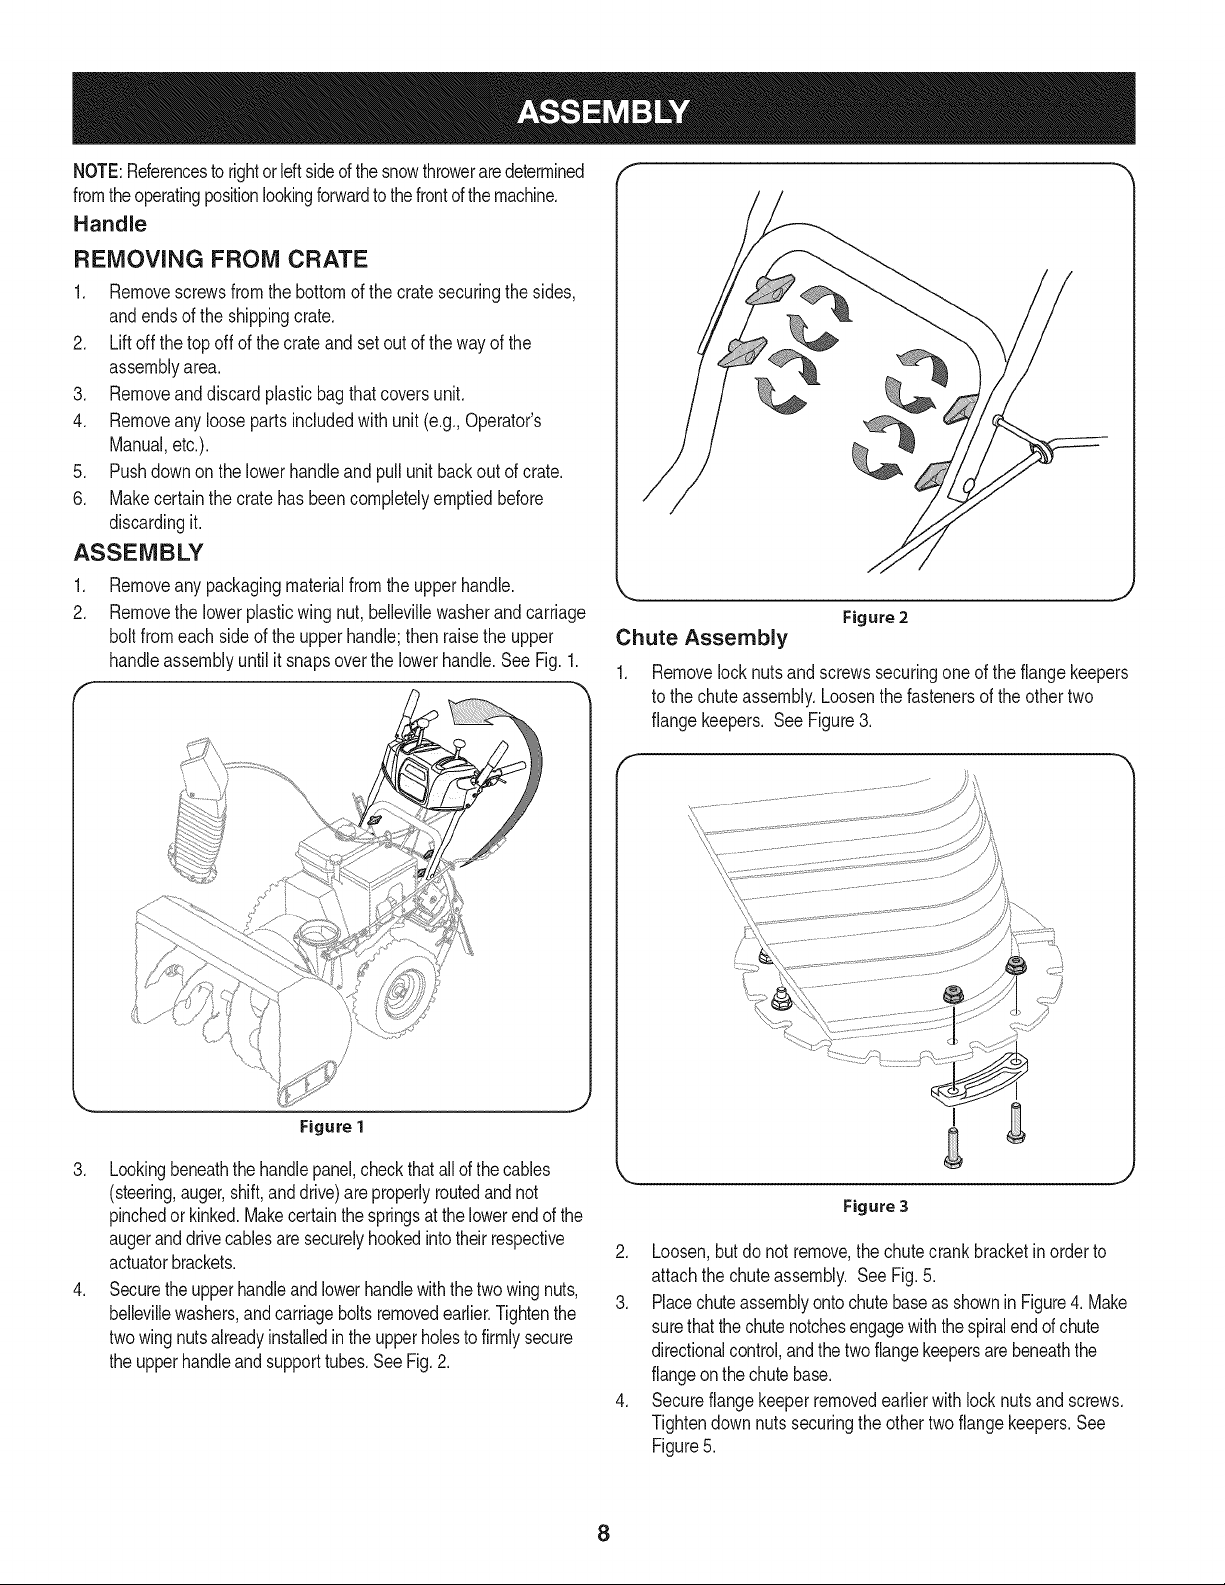
1. Removeany packagingmaterialfromthe upperhandle.
2. Removethe lowerplasticwing nut, bellevillewasherand carriage
bolt fromeachsideof the upperhandle;then raisethe upper
handleassemblyuntilit snapsoverthe lowerhandle.SeeFig. 1.
Figure 1
3. Lookingbeneaththe handlepanel,checkthatallof thecables
(steering,auger,shift,anddrive)areproperlyroutedand not
pinchedorkinked.Makecertainthe springsat thelowerend of the
augeranddrivecablesare securelyhookedintotheirrespective
actuatorbrackets.
4. Securethe upperhandleand lowerhandlewiththe twowingnuts,
bellevillewashers,andcarriageboltsremovedearlier.Tightenthe
twowingnutsalreadyinstalledintheupperholesto firmlysecure
the upperhandleandsupporttubes.See Fig.2.
Chute Assembly
Figure 2
,,J
1. Removelock nuts and screwssecuringoneof the flangekeepers
to the chuteassembly.Loosenthe fastenersof the othertwo
flangekeepers. See Figure3.
\
Figure 3
2. Loosen,but do not remove,the chutecrankbracketinorderto
attachthe chuteassembly. SeeFig. 5.
3. Placechuteassemblyontochutebaseas shownin Figure4. Make
surethatthechutenotchesengagewiththespiralend of chute
directionalcontrol,andthe twoflangekeepersarebeneaththe
flangeonthe chutebase.
4. Secureflangekeeperremovedearlierwith lock nutsand screws.
Tightendownnutssecuringthe othertwo flangekeepers.See
Figure5.
8
Loading ...
Loading ...
Loading ...