
Loading ...
Loading ...
Loading ...
ENGLISH
5
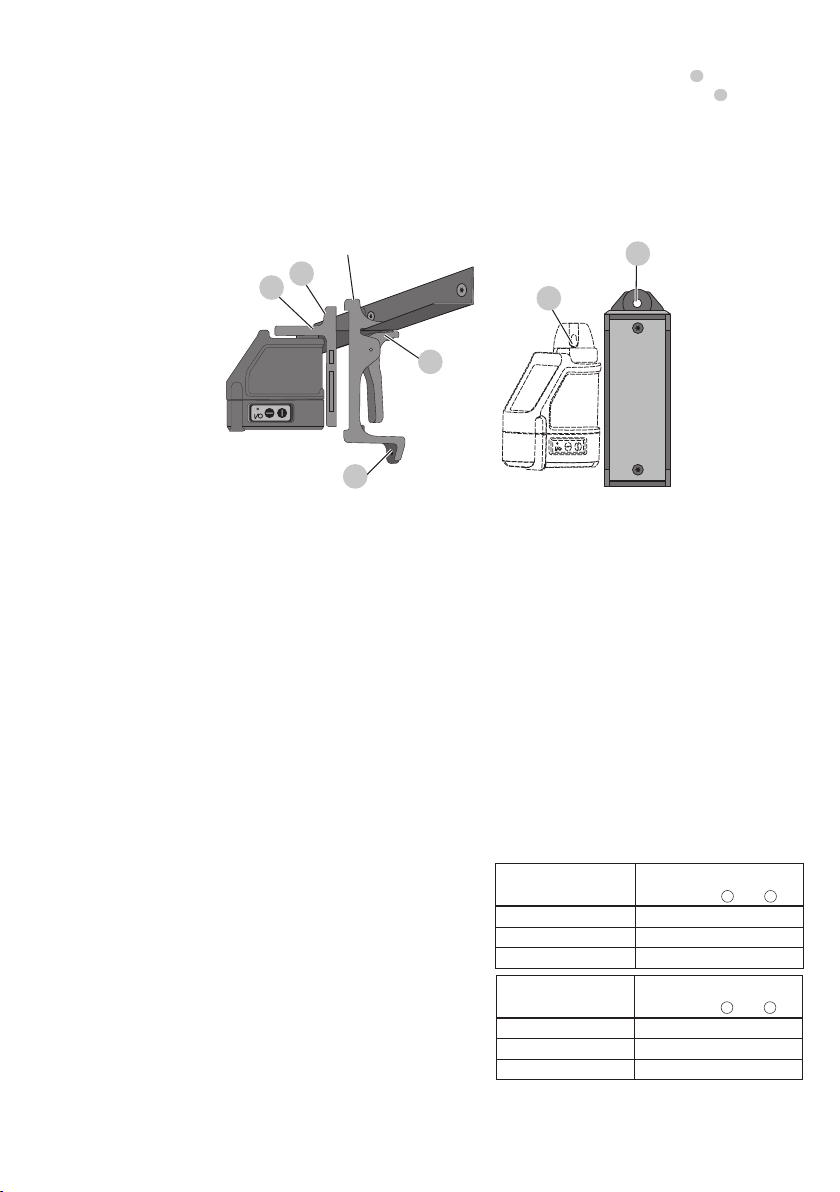
Using the Laser with the Wall Mount (Fig.E)
The DW0860 Laser Wall Mount offers more mounting options for the DW088 lasers. The wall mount has a clamp
7
at one end
which can be fixed to a wall angle for acoustic ceiling installation. At the other end of the wall mount is a screw hole
8
, allowing
the wall mount to be attached to any surface with a nail or screw.
Once the wall mount is secured, its steel plate provides a surface to which the magnetic pivot bracket can be attached. The position
of the laser can then be fine-tuned by sliding the pivot bracket up or down on the wallmount.
Leveling the Lasers
As long as the lasers are properly calibrated, the lasers are self-leveling. Each laser is calibrated at the factory to find level as long as it
is positioned on a flat surface within average ± 4° of level. No manual adjustments must be made.
Fig. E
DW0860
DW0860
5
6
7
8
6
8
MAINTENANCE
• To maintain the accuracy of your work, check the laser often to make sure it is properly calibrated. See Field Calibration Check.
• Calibration checks and other maintenance repairs may be performed by DeWALT service centers.
• When not in use, store the laser in the kit box provided. Do not store your laser at temperatures below -5˚F (-20˚C) or above
140˚F (60˚C).
• Do not store your laser in the kit box if the laser is wet. The laser should be dried first with a soft dry cloth.
Cleaning
Exterior plastic parts may be cleaned with a damp cloth. Although these parts are solvent resistant, NEVER use solvents. Use a soft,
dry cloth to remove moisture from the tool before storage.
Field Calibration Check
Checking Accuracy – Horizontal Beam, Scan Direction (Fig.F)
Checking the horizontal scan calibration of the laser requires two walls at least 30' (9 m) apart. It is important to conduct a
calibration check using a distance no shorter than the distance of the applications for which the tool will beused.
1. Attach the laser to a wall using its pivot bracket. Make sure the laser is facing straightahead.
2. Turn on the laser's horizontal beam and pivot the laser approximately
45˚ so that the right-most end of the laser line is striking the opposing
wall at a distance of at least 30' (9 m). Mark the center of the beam (a).
3. Pivot the laser approximately 90˚ to bring the left-most end of the laser
line around to the mark made in Step 2. Mark the center of the beam (b).
4. Measure the vertical distance between themarks.
• If the measurement is greater than the values shown below, the laser
must be serviced at an authorized servicecenter.
Distance
Between Walls
Allowable Distance
Between
a
and
b
30' 1/8"
40' 5/32"
50' 7/32"
Distance
Between Walls
Allowable Distance
Between
a
and
b
9.0 m 3.1 mm
12.0 m 4.2 mm
15.0 m 5.2 mm
Loading ...
Loading ...
Loading ...