Loading ...
Loading ...
Loading ...
Installation instructions en
25
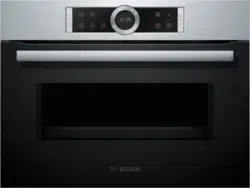
17.5 Installation below a worktop
Observe the installation dimensions and the safety
clearances when installing below a worktop.
To ventilate the appliance, the intermediate floor must
have a ventilation cut-out.
The worktop must be secured to the fitted unit.
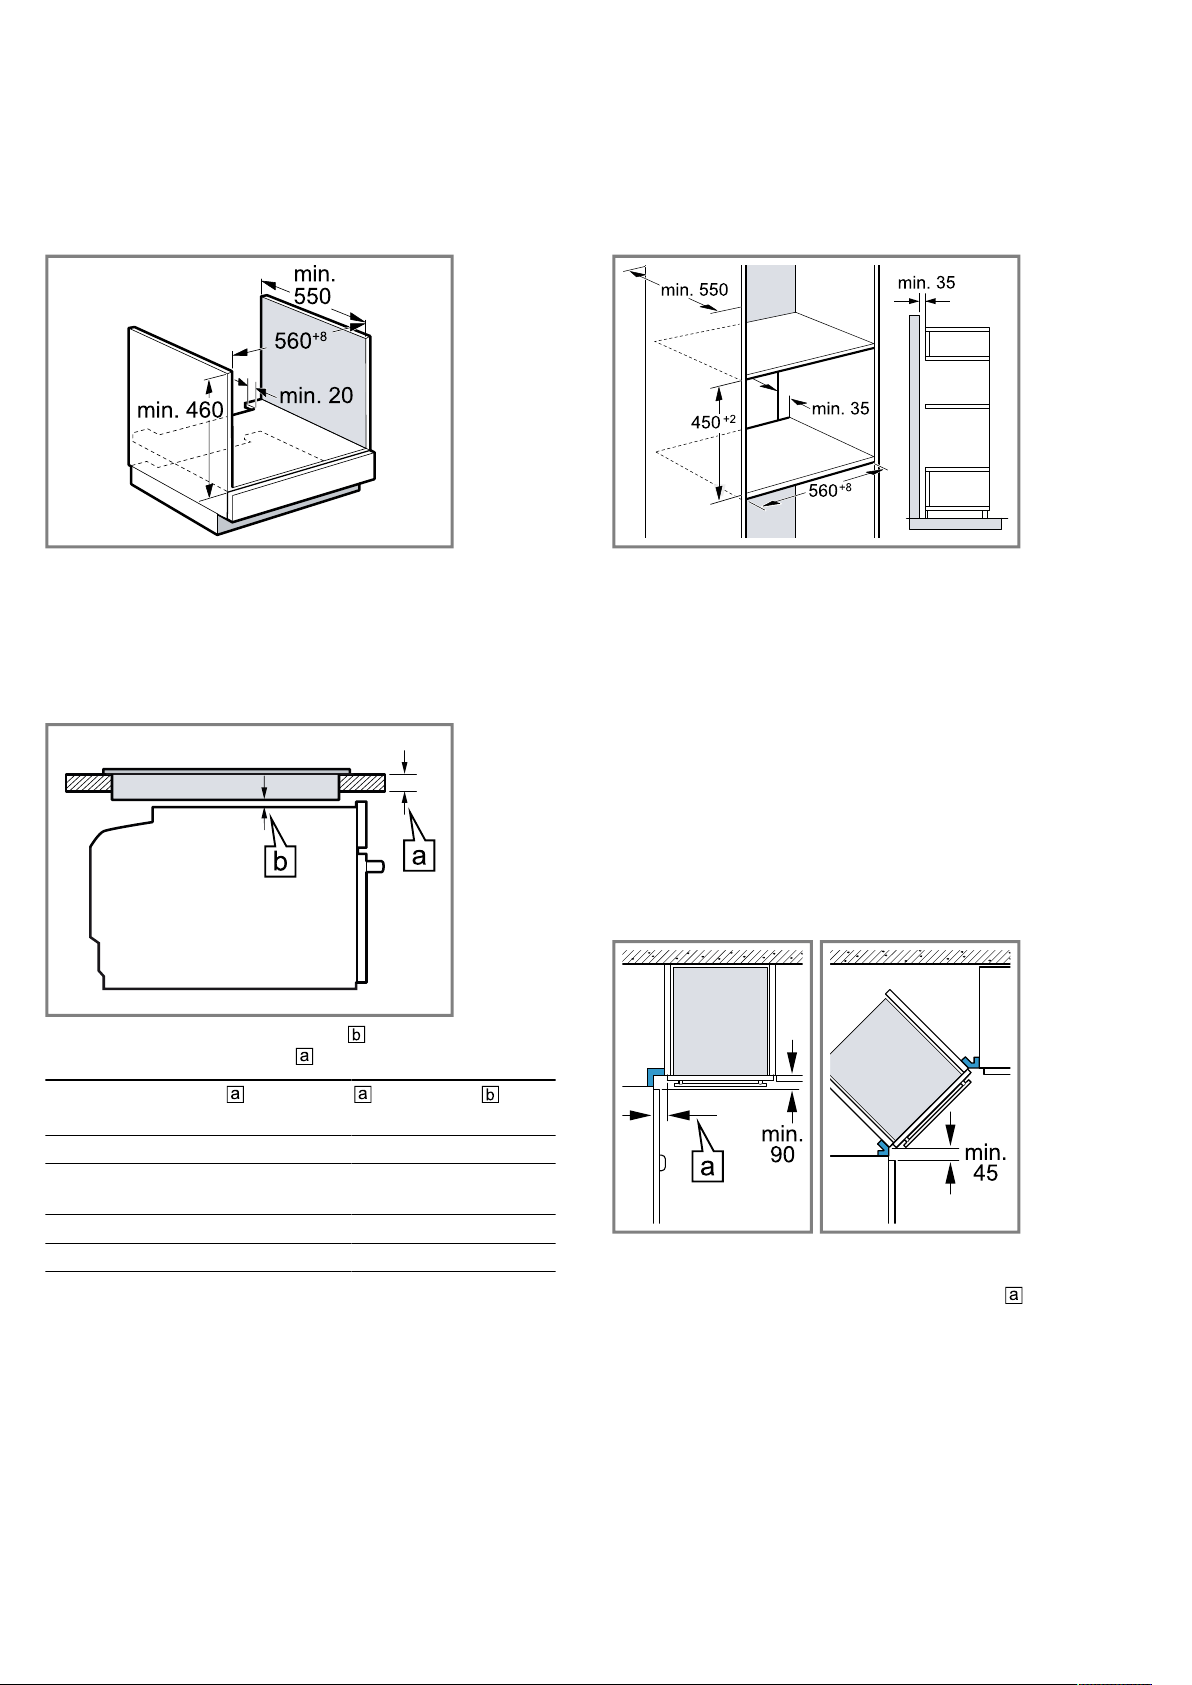
17.6 Installing below a hob
If the appliance is installed below a hob, the following
minimum dimensions must be adhered to (including
substructure, if applicable).
The minimum worktop thickness is based on the re-
quired minimum clearance .
Hob type raised in
mm
flush in
mm
in
mm
Induction hob 48 49 5
Full-surface in-
duction hob
58 59 5
Gas hob 38 49 5
Electric hob 38 41 2
Observe the installation instructions for the hob.
17.7 Installation in a tall unit
Observe the installation dimensions and the safety
clearances in a tall unit.
To ventilate the appliance, the intermediate floor must
have a ventilation cut-out.
If the tall unit has another back panel in addition to the
element back panels, this must be removed.
Do not fit the appliance too high up; it must be pos-
sible for accessories to be removed easily.
17.8 Combination with a warming drawer
First fit the warming drawer. Follow the installation in-
structions for the warming drawer.
Slide the appliance, on the warming drawer, into the fit-
ted cabinet. When sliding in the appliance, do not dam-
age the warming drawer's panel.
17.9 Corner installation
Observe the installation dimensions and the safety
clearances when installing in a corner.
To ensure that the appliance door can be opened, you
must take the minimum dimensions into consideration
when installing in a corner. The dimension is de-
pendent on the thickness of the unit front and the
handle.
17.10 Installing the appliance
ATTENTION!
Using a cordless screwdriver may damage the panels.
▶ Do not use a cordless screwdriver to secure the
panels.
1.
Push the appliance in fully.
Loading ...
Loading ...
Loading ...