Loading ...
Loading ...
Loading ...
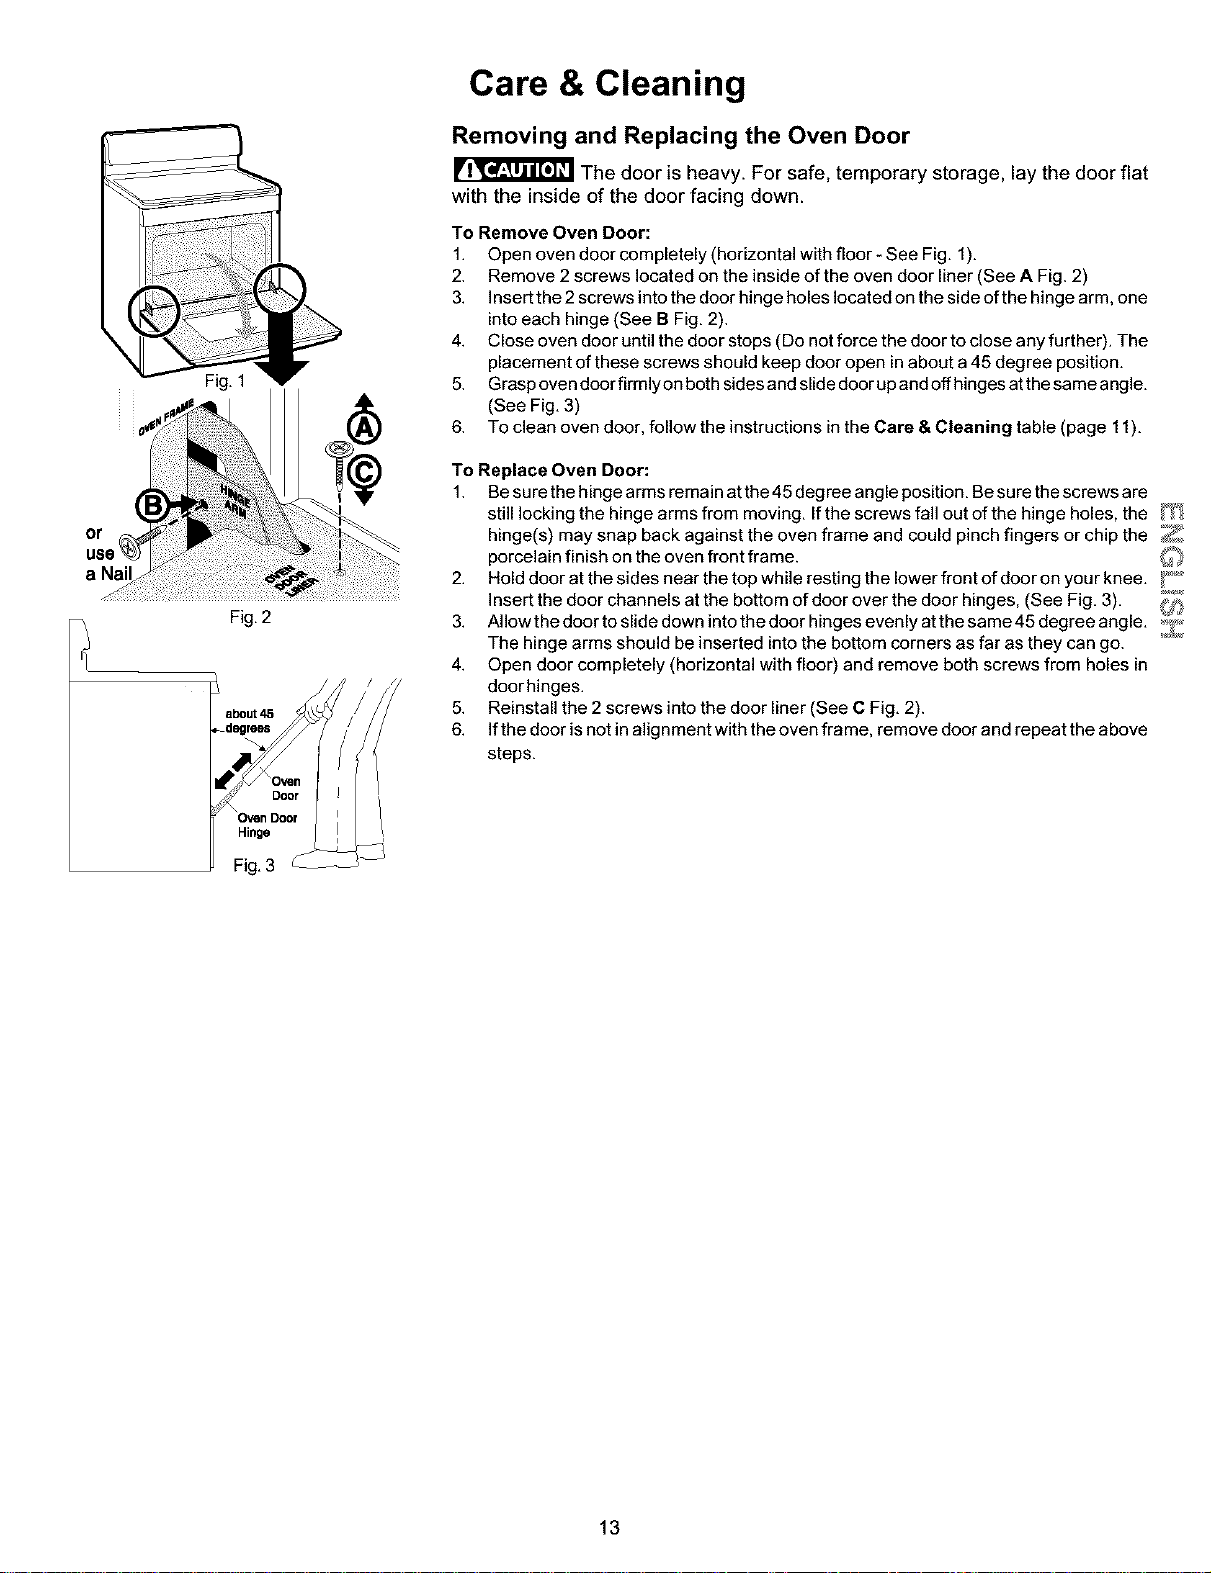
Fig. 1
or
use
a Nail
Fig.2
Hinge
Fig.3
Care & Cleaning
Removing and Replacing the Oven Door
r_ "J_'_IT_'_'_!IThe door is heavy. For safe, temporary storage, lay the door flat
with the inside of the door facing down.
To Remove Oven Door:
1. Open oven door completely (horizontal with floor- See Fig. 1).
2. Remove 2 screws located on the inside of the oven door liner (See A Fig. 2)
3. insert the 2 screws into the door hinge holes located on the side ofthe hingearm, one
into each hinge (See B Fig. 2).
4. Close oven door until the door stops (Do notforce the door to close any further). The
placement of these screws should keep door open in about a 45 degree position.
5. Grasp ovendoor firmlyon both sides and slide door upand offhinges atthe same angle.
(See Fig. 3)
6. To clean oven door, follow the instructions in the Care & Cleaning table (page 11).
To Replace Oven Door:
1. Be sure the hinge arms remain atthe 45 degree angle position. Be sure the screws are
still locking the hinge arms from moving. If the screws fall out of the hinge holes, the _¢t
hinge(s) may snap back against the oven frame and could pinch fingers or chip the _
porcelain finish on the oven front frame.
2. Holddooratthesidesnearthetopwhilerestingthelowerfrontofdooronyourknee. _"*_
insert the door channels at the bottom of door over the door hinges, (See Fig. 3). _
3. Allowthedoortoslidedownintothedoorhingesevenlyatthesame45degreeangle. _J¢,.,
The hinge arms should be inserted into the bottom corners as far as they can go.
4. Open door completely (horizontal with floor) and remove both screws from holes in
door hinges.
5. Reinstall the 2 screws into the door liner (See C Fig. 2).
6. if the door is not in alignment with the oven frame, remove door and repeat the above
steps.
13
Loading ...
Loading ...
Loading ...