Loading ...
Loading ...
Loading ...
©2022 BISSELL Inc. All rights reserved.
Part Number 1633682 09/22 RevA
Every Purchase Saves Pets
™
BISSELL proudly supports BISSELL Pet Foundation®
and its mission to help save homeless pets. When you
buy a BISSELL® product, you help save pets, too. We’re
proud to design products that help make pet messes,
odors and pet homelessness disappear.
Visit BISSELLsavespets.com to learn more.
For a comprehensive walkthrough of your product and support tips visit
support.BISSELL.com. Any other servicing should be performed by an authorized
service representative.
Troubleshooting
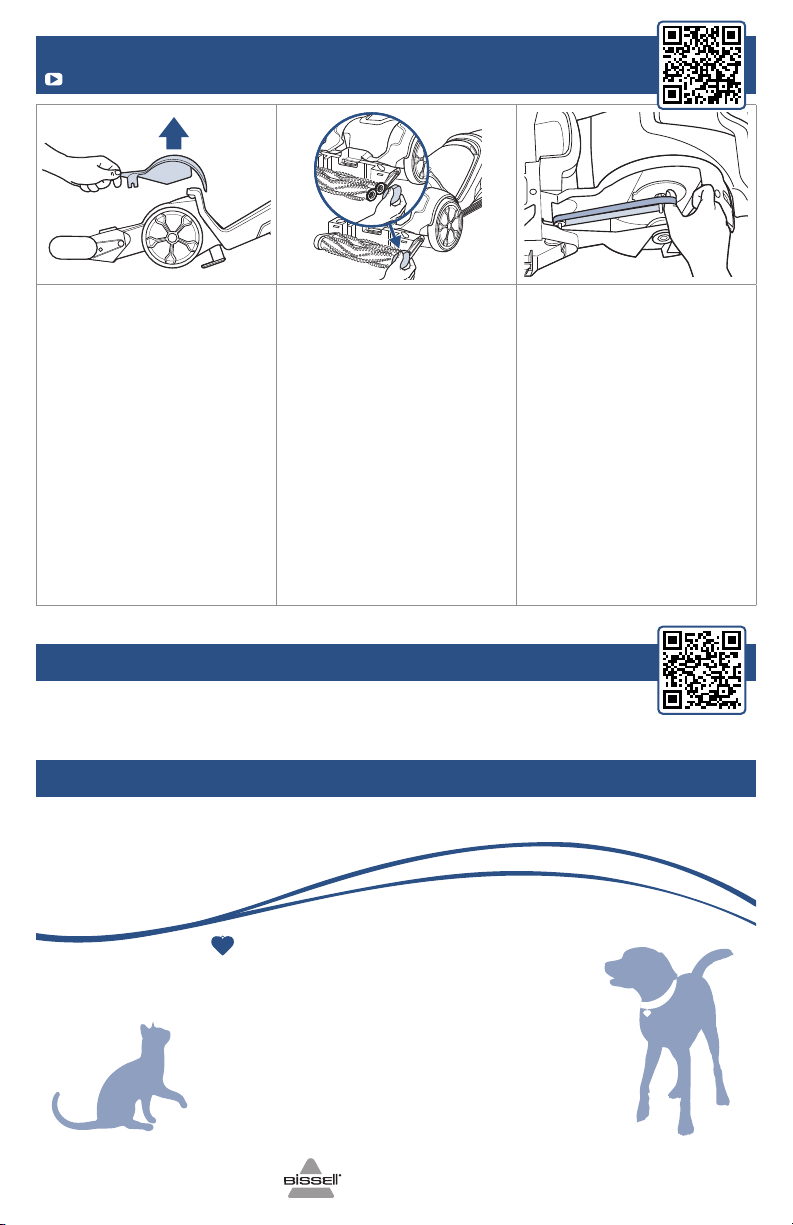
Replacing the Belts and Brush Rolls
Scan the QR code or visit support.BISSELL.com for videos.
Warranty
Limited 5-year warranty, may vary by state. Visit support.BISSELL.com or call 1-800-237-7691 for
complete warranty information.
1. Unplug machine and remove
both tanks. Remove nozzle
and brush roll cover (see steps
in “After-Cleaning Care”).
Press the recline pedal and lay
machine on its back.
2. Use a flathead screwdriver
to press into the slot at the
back and then front of the belt
access door. Lift to remove. Use
a Phillips-head screwdriver to
remove the screw under the
wheel, slide down to remove.
3. Lay machine on its back.
Use a Phillips-head screwdriver
to remove the screw on the
brush roll endcap.
4. If the gear belt is broken
or if replacing brush rolls,
remove the belt. Be careful
the washers at the end of the
brush rolls do not fall off or
get lost.
5. Align brush rolls with
belt at other end. To ensure
alignment, hold the end of one
brush roll and twist. Check
that washers are in place.
Reassemble the belt and
endcap, securing with screws.
6. If the flat belt is broken,
gently remove. If it needs
replacing for any reason,
remove the gear belt before
removing the flat belt. With
machine on its side, feed the
new belt through the opening
and wrap around red pulley.
7. Lay machine on its back.
Stretch the flat belt to wrap
around the metal axle.
8. Slide the wheel back into
the slot and secure with screw.
9. Snap the belt access door
back into place.