Loading ...
Loading ...
Loading ...
For your convenience, your refrigerator and freezer controls are
preset at the factory. When you first install your refrigerator, make
sure that the controls are still set to the "mid-settings."
To view set points, press the TEMP button on your dispenser
panel. The factory recommended set points are 0°F (-18°C) for
the freezer and 37°F (3°C) for the refrigerator.
IMPORTANT:
• Wait 24 hours before you put food into the refrigerator. If you
add food before the refrigerator has cooled completely, your
food may spoil.
NOTE: Adjusting the set points to a higher (colder) than
recommended setting will not cool the compartments any
faster.
• If the temperature is too warm or too cold in the refrigerator or
freezer, first check the air vents to be sure they are not
blocked before adjusting the controls.
• The preset settings should be correct for normal household
usage. The controls are set correctly when milk or juice is as
cold as you like and when ice cream is firm.
• Wait at least 24 hours between adjustments. Recheck the
temperatures before other adjustments are made.
• The display screen on the dispenser control panel has a
backlight, which will turn off automatically when the control
buttons have not been used for 30 seconds or more. When
the backlight is off, the first press of a control button will only
reactivate the backlight, without changing any settings.
Within 30 seconds after the backlight has been reactivated,
additional presses of control buttons will change the
applicable settings.
Adjusting the Controls
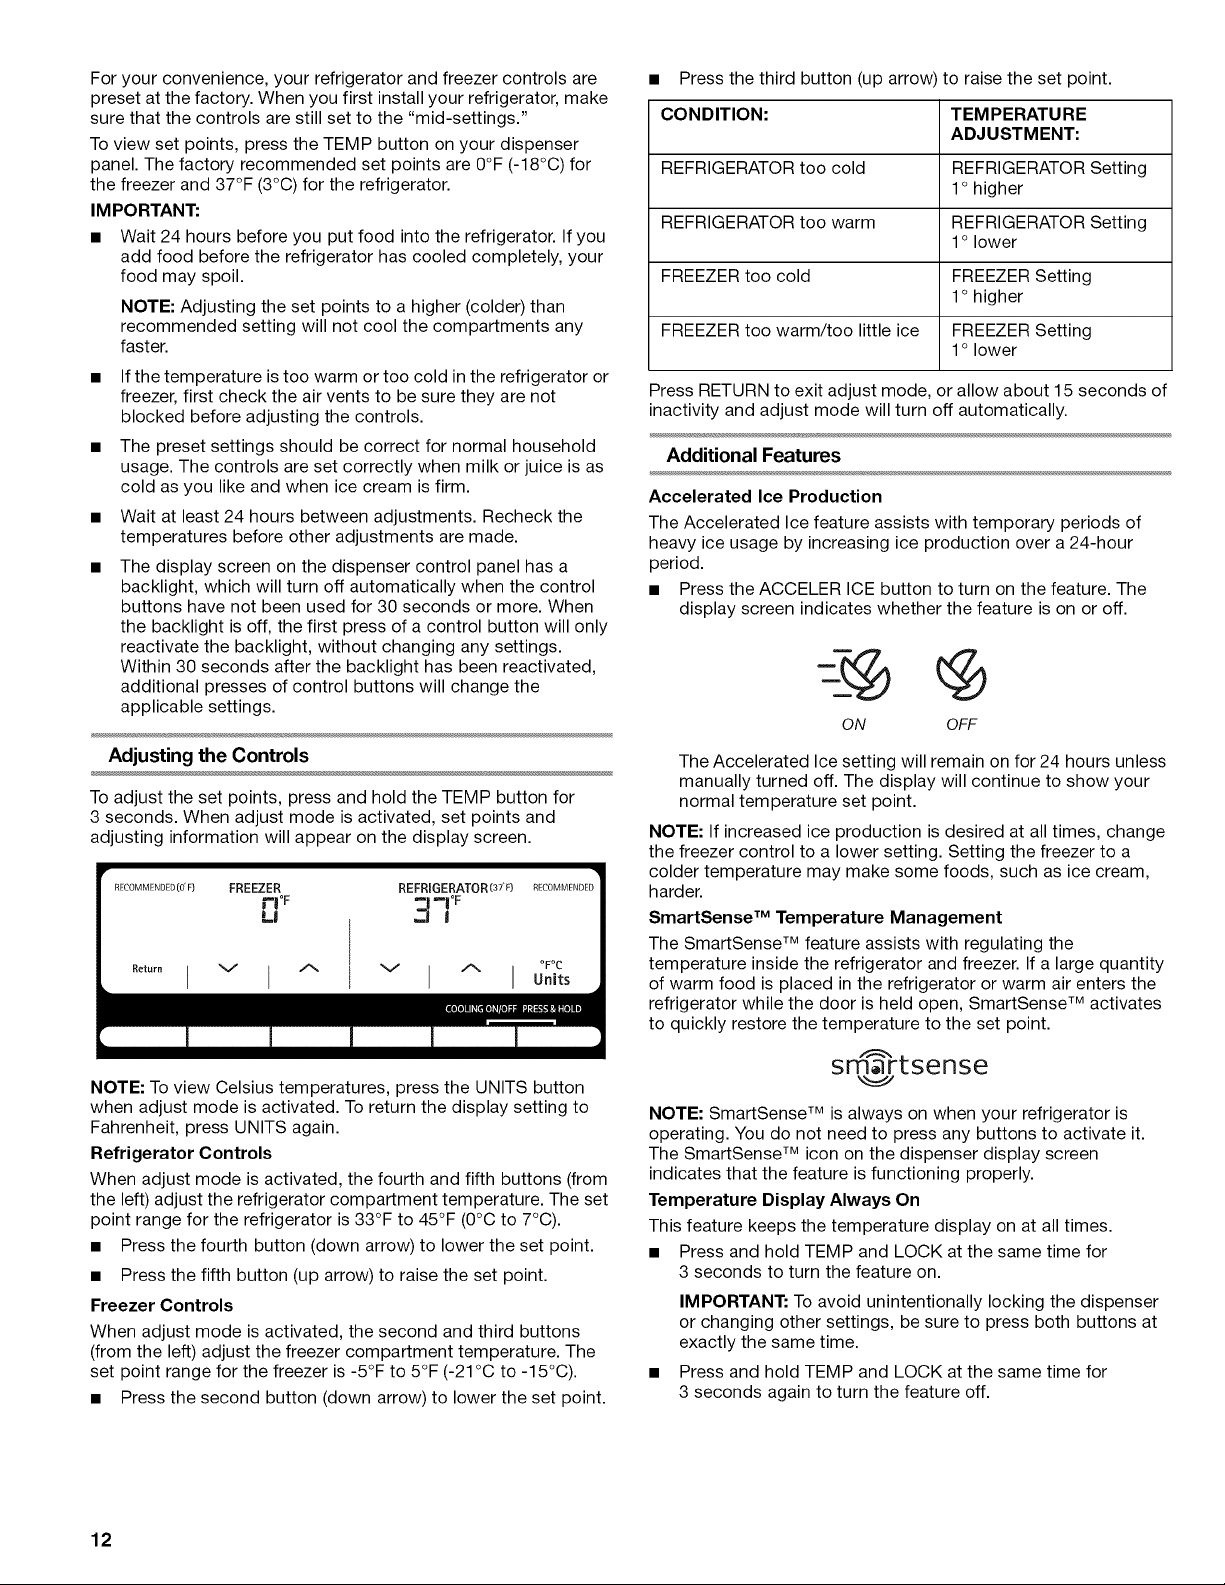
To adjust the set points, press and hold the TEMP button for
3 seconds. When adjust mode is activated, set points and
adjusting information will appear on the display screen.
RECOMMENDED(OF) FREEZER REFRIGERATOR[37F) RECOMMENDED
rl°F - -°
Ro,o oI v I ^
OFOC
v I ^ I Units
NOTE: To view Celsius temperatures, press the UNITS button
when adjust mode is activated. To return the display setting to
Fahrenheit, press UNITS again.
Refrigerator Controls
When adjust mode is activated, the fourth and fifth buttons (from
the left) adjust the refrigerator compartment temperature. The set
point range for the refrigerator is 33°F to 45°F (0°C to 7°C).
• Press the fourth button (down arrow) to lower the set point.
• Press the fifth button (up arrow) to raise the set point.
Freezer Controls
When adjust mode is activated, the second and third buttons
(from the left) adjust the freezer compartment temperature. The
set point range for the freezer is -5°F to 5°F (-21°C to -15°C).
• Press the second button (down arrow) to lower the set point.
• Press the third button (up arrow) to raise the set point.
CONDITION: TEMPERATURE
ADJUSTMENT:
REFRIGERATOR too cold REFRIGERATOR Setting
1° higher
REFRIGERATOR too warm REFRIGERATOR Setting
1° lower
FREEZER too cold FREEZER Setting
1° higher
FREEZER too warm/too little ice FREEZER Setting
1° lower
Press RETURN to exit adjust mode, or allow about 15 seconds of
inactivity and adjust mode will turn off automatically.
Additional Features
Accelerated Ice Production
The Accelerated Ice feature assists with temporary periods of
heavy ice usage by increasing ice production over a 24-hour
period.
• Press the ACCELER ICE button to turn on the feature. The
display screen indicates whether the feature is on or off.
ON OFF
The Accelerated Ice setting will remain on for 24 hours unless
manually turned off. The display will continue to show your
normal temperature set point.
NOTE: If increased ice production is desired at all times, change
the freezer control to a lower setting. Setting the freezer to a
colder temperature may make some foods, such as ice cream,
harder.
SmartSense TM Temperature Management
The SmartSense TM feature assists with regulating the
temperature inside the refrigerator and freezer. If a large quantity
of warm food is placed in the refrigerator or warm air enters the
refrigerator while the door is held open, SmartSense TM activates
to quickly restore the temperature to the set point.
smartsense
NOTE: SmartSense TM is always on when your refrigerator is
operating. You do not need to press any buttons to activate it.
The SmartSense TM icon on the dispenser display screen
indicates that the feature is functioning properly.
Temperature Display Always On
This feature keeps the temperature display on at all times.
• Press and hold TEMP and LOCK at the same time for
3 seconds to turn the feature on.
IMPORTANT: To avoid unintentionally locking the dispenser
or changing other settings, be sure to press both buttons at
exactly the same time.
Press and hold TEMP and LOCK at the same time for
3 seconds again to turn the feature off.
12
Loading ...
Loading ...
Loading ...