Loading ...
Loading ...
• The air supply system must be able to provide air pressure
of 60 to 100 pounds per square inch at tool.
• The lubricator should be filled with a non-detergent air tool
oil.
• All hoses and pipes in the air supply system must be clean
and free of moisture and foreign particles.
• Do not mount swivel connector in air supply line.
• The air pressure should be properly regulated.
• Different workpiece materials and different fastener lengths
will require different operating pressure.
° Be sure all connections in air supply system are sealed to
prevent air loss.
° Never connect a female quick-disconnect coupling to the
tool side of air system. A male, free-flow coupling should
be connected to the tool side of air system.
WARNING: The female coupling provides a seal preventing
loss of compressed air from compressor tank when discon-
nected from male coupling. If connected to tool side of air
supply, the female coupling could seal a compressed air
charge in the tool which could discharge if the tool trigger is
actuated.
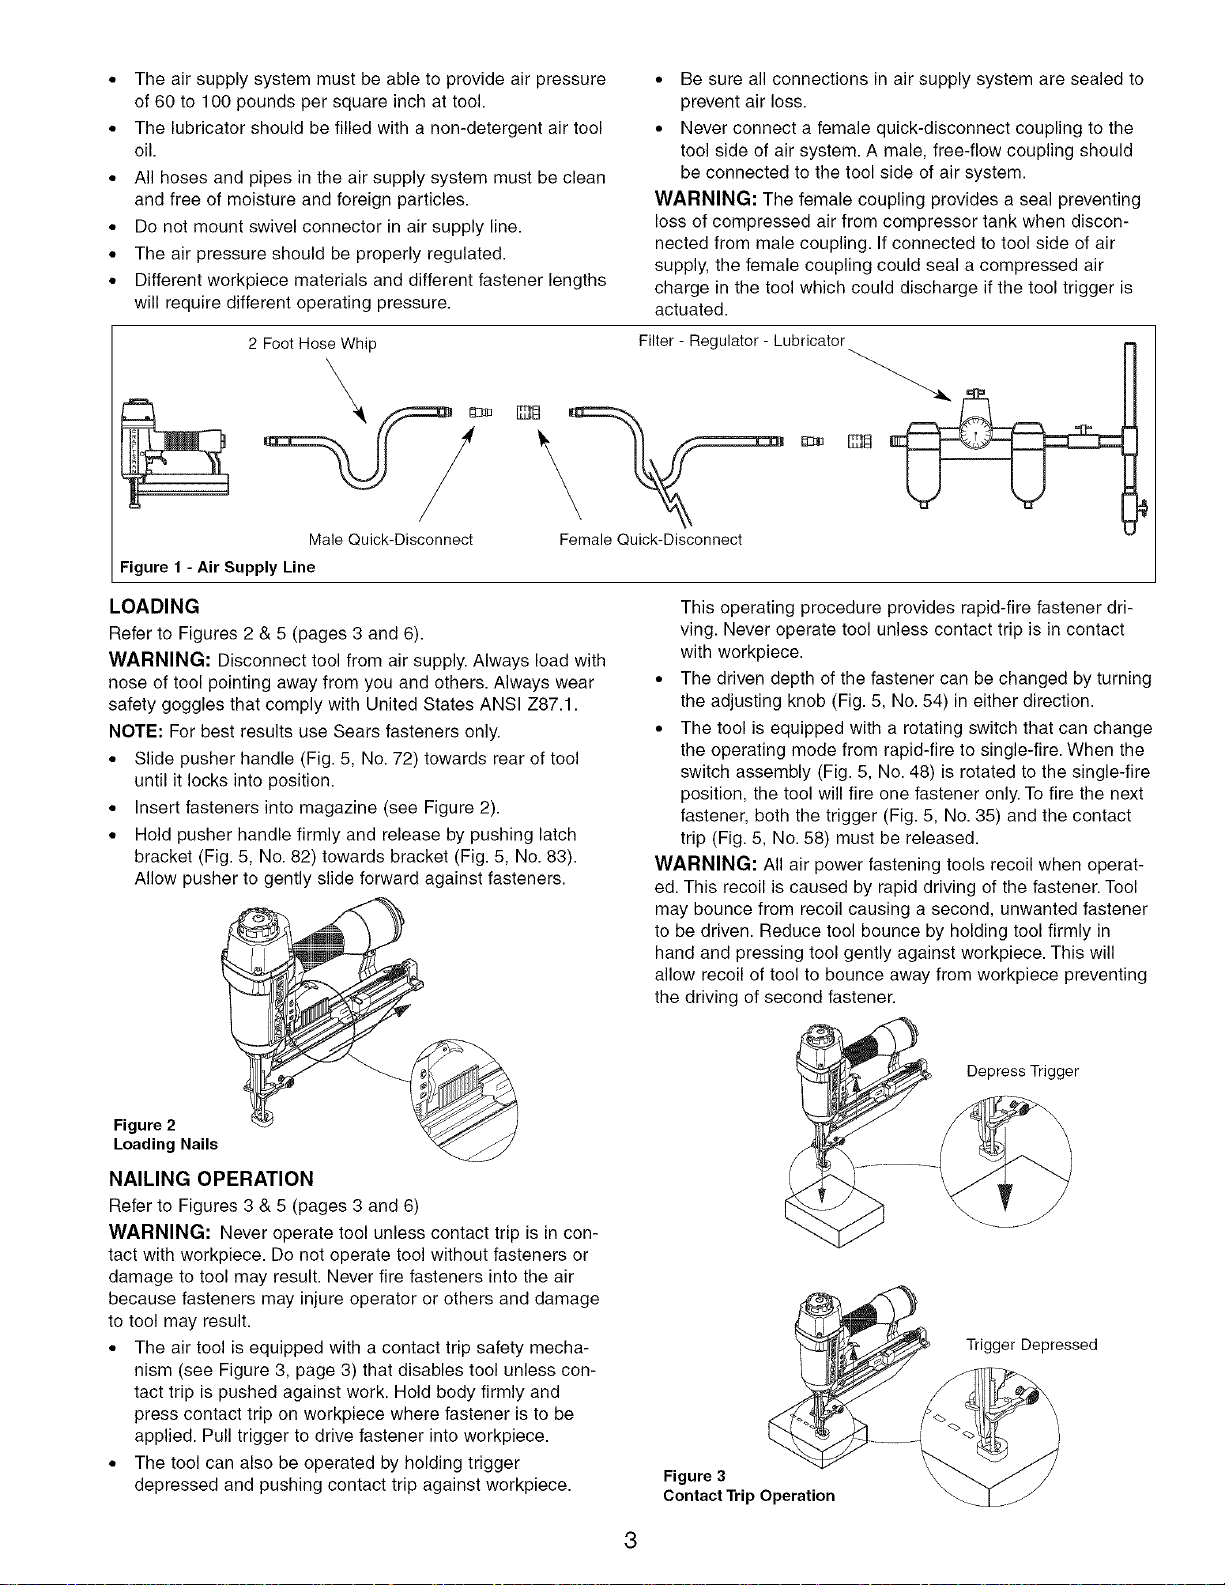
2 Foot Hose Whip
MaleQuick-Disconnect
Filter - Regulator - Lubricator
Female Quick-Disconnect
Figure 1 - Air Supply Line
LOADING
Refer to Figures 2 & 5 (pages 3 and 6).
WARNING: Disconnect tool from air supply. Always load with
nose of tool pointing away from you and others. Always wear
safety goggles that comply with United States ANSI Z87.1.
NOTE: For best results use Sears fasteners only.
• Slide pusher handle (Fig. 5, No. 72) towards rear of tool
until it locks into position.
• Insert fasteners into magazine (see Figure 2).
• Hold pusher handle firmly and release by pushing latch
bracket (Fig. 5, No. 82) towards bracket (Fig. 5, No. 83).
Allow pusher to gently slide forward against fasteners.
Figure2 __
Loading Nails
NAILING OPERATION
Refer to Figures 3 & 5 (pages 3 and 6)
WARNING: Never operate tool unless contact trip is in con-
tact with workpiece. Do not operate tool without fasteners or
damage to tool may result. Never fire fasteners into the air
because fasteners may injure operator or others and damage
to tool may result.
• The air tool is equipped with a contact trip safety mecha-
nism (see Figure 3, page 3) that disables tool unless con-
tact trip is pushed against work. Hold body firmly and
press contact trip on workpiece where fastener is to be
applied. Pull trigger to drive fastener into workpiece.
• The tool can also be operated by holding trigger
depressed and pushing contact trip against workpiece.
This operating procedure provides rapid-fire fastener dri-
ving. Never operate tool unless contact trip is in contact
with workpiece.
° The driven depth of the fastener can be changed by turning
the adjusting knob (Fig. 5, No. 54) in either direction.
° The tool is equipped with a rotating switch that can change
the operating mode from rapid-fire to single-fire. When the
switch assembly (Fig. 5, No. 48) is rotated to the single-fire
position, the tool will fire one fastener only. To fire the next
fastener, both the trigger (Fig. 5, No. 35) and the contact
trip (Fig. 5, No. 58) must be released.
WARNING: All air power fastening tools recoil when operat-
ed. This recoil is caused by rapid driving of the fastener. Tool
may bounce from recoil causing a second, unwanted fastener
to be driven. Reduce tool bounce by holding tool firmly in
hand and pressing tool gently against workpiece. This will
allow recoil of tool to bounce away from workpiece preventing
the driving of second fastener.
Depress Trigger
Trigger Depressed
Figure 3
Contact Trip Operation
Loading ...
Loading ...
Loading ...