Loading ...
Loading ...
Loading ...
4
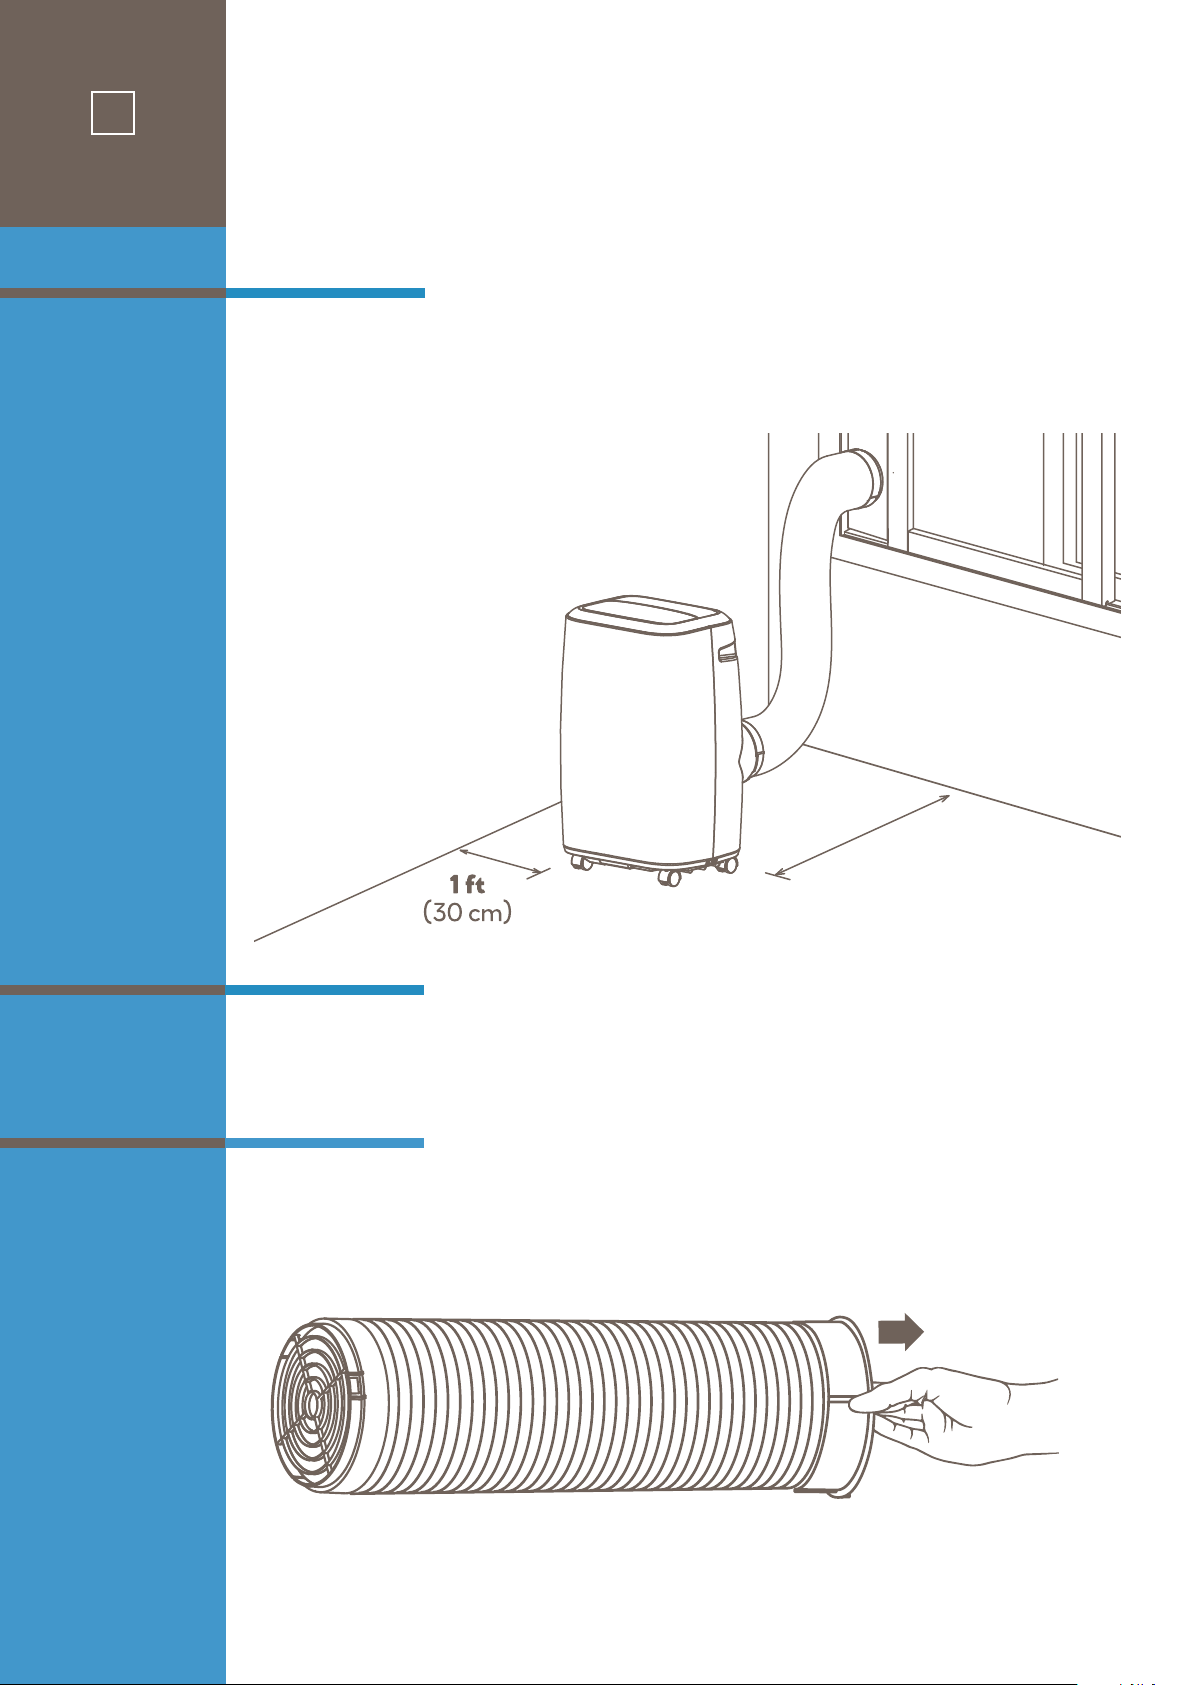
Make sure that you install your unit on an even surface for minimal noise and vibration.
The unit must be installed near a grounded plug and the Bottom Tray Drain Outlet (on the back of the
unit) must be accessible.
• Medium Philips screwdriver
• Tape measure or ruler
• Knife or scissors
• Saw (optional, to shorten Window Slider Adapter for narrow windows)
Begin with taking a small portion of the vent tube end and extend it out by grasping end with your fingers
and pulling out and away.
Before
You
Begin
Tools
Needed
STEP ONE:
Preparing
the Vent Tube
Assembly
2.6 ft - 3.0 ft
(80 cm - 90 cm)
Minimum unit to wall surface distance
assembly
preparation
1
Alignment
Tab
1
2
STEP TWO:
Installing the
Vent Hose
Assembly to the
Unit
STEP THREE:
Preparing the
Adjustable
Window Slider
5
Insert the Unit Adapter (the Unit Adapter Tab should remain right-side up) of the Vent Tube assembly
into the lower groove of the air outlet while the tab on the adapter ring is aligned with the air outlet.
Slide down the Unit Adapter. The tube will slide in and lock in place.
13 2
A B
Underside
View
Based on the size of your window, adjust the size of the Window Slider.
If the width of the window is short use slider section “A” and cut to size, sections “A” and “B” for
mid-length or all three sections “A” and “B” and “C” for extra length if needed for vertical installations.
Assembly steps:
• Start with slider section (A) and insert a T-screw
mount (1) through the underside hole (2) and screw on
locking knob (3) VERY LOOSELY.
• Slide the assembled section (A) around the end of
section (B) with the T-screw sliding into the center
channel groove.
• Repeat for section (C) if needed and adjust completed
slider length to window measurement.
• Tighten locking knobs to secure panel connection.
C B A
Topside View
Loading ...
Loading ...
Loading ...