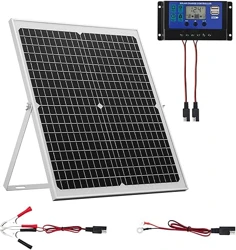

USB Solar Panel
• Mark the mounting locations of either the short or
long-arm base using the screw holes as guides.
• Before drilling, check that the marked areas are clear
of obstacles such as cables and electrical lines.
• If mounting with screws, drill into wood or other
composite materials using a 3/32 in. drill bit. Then
secure the base in place with screws
• If mounting with wall anchors drill into masonry or
other composite materials using a 7/32 in. drill bit.
Then insert the wall anchors, and secure the base in
place with the screws.
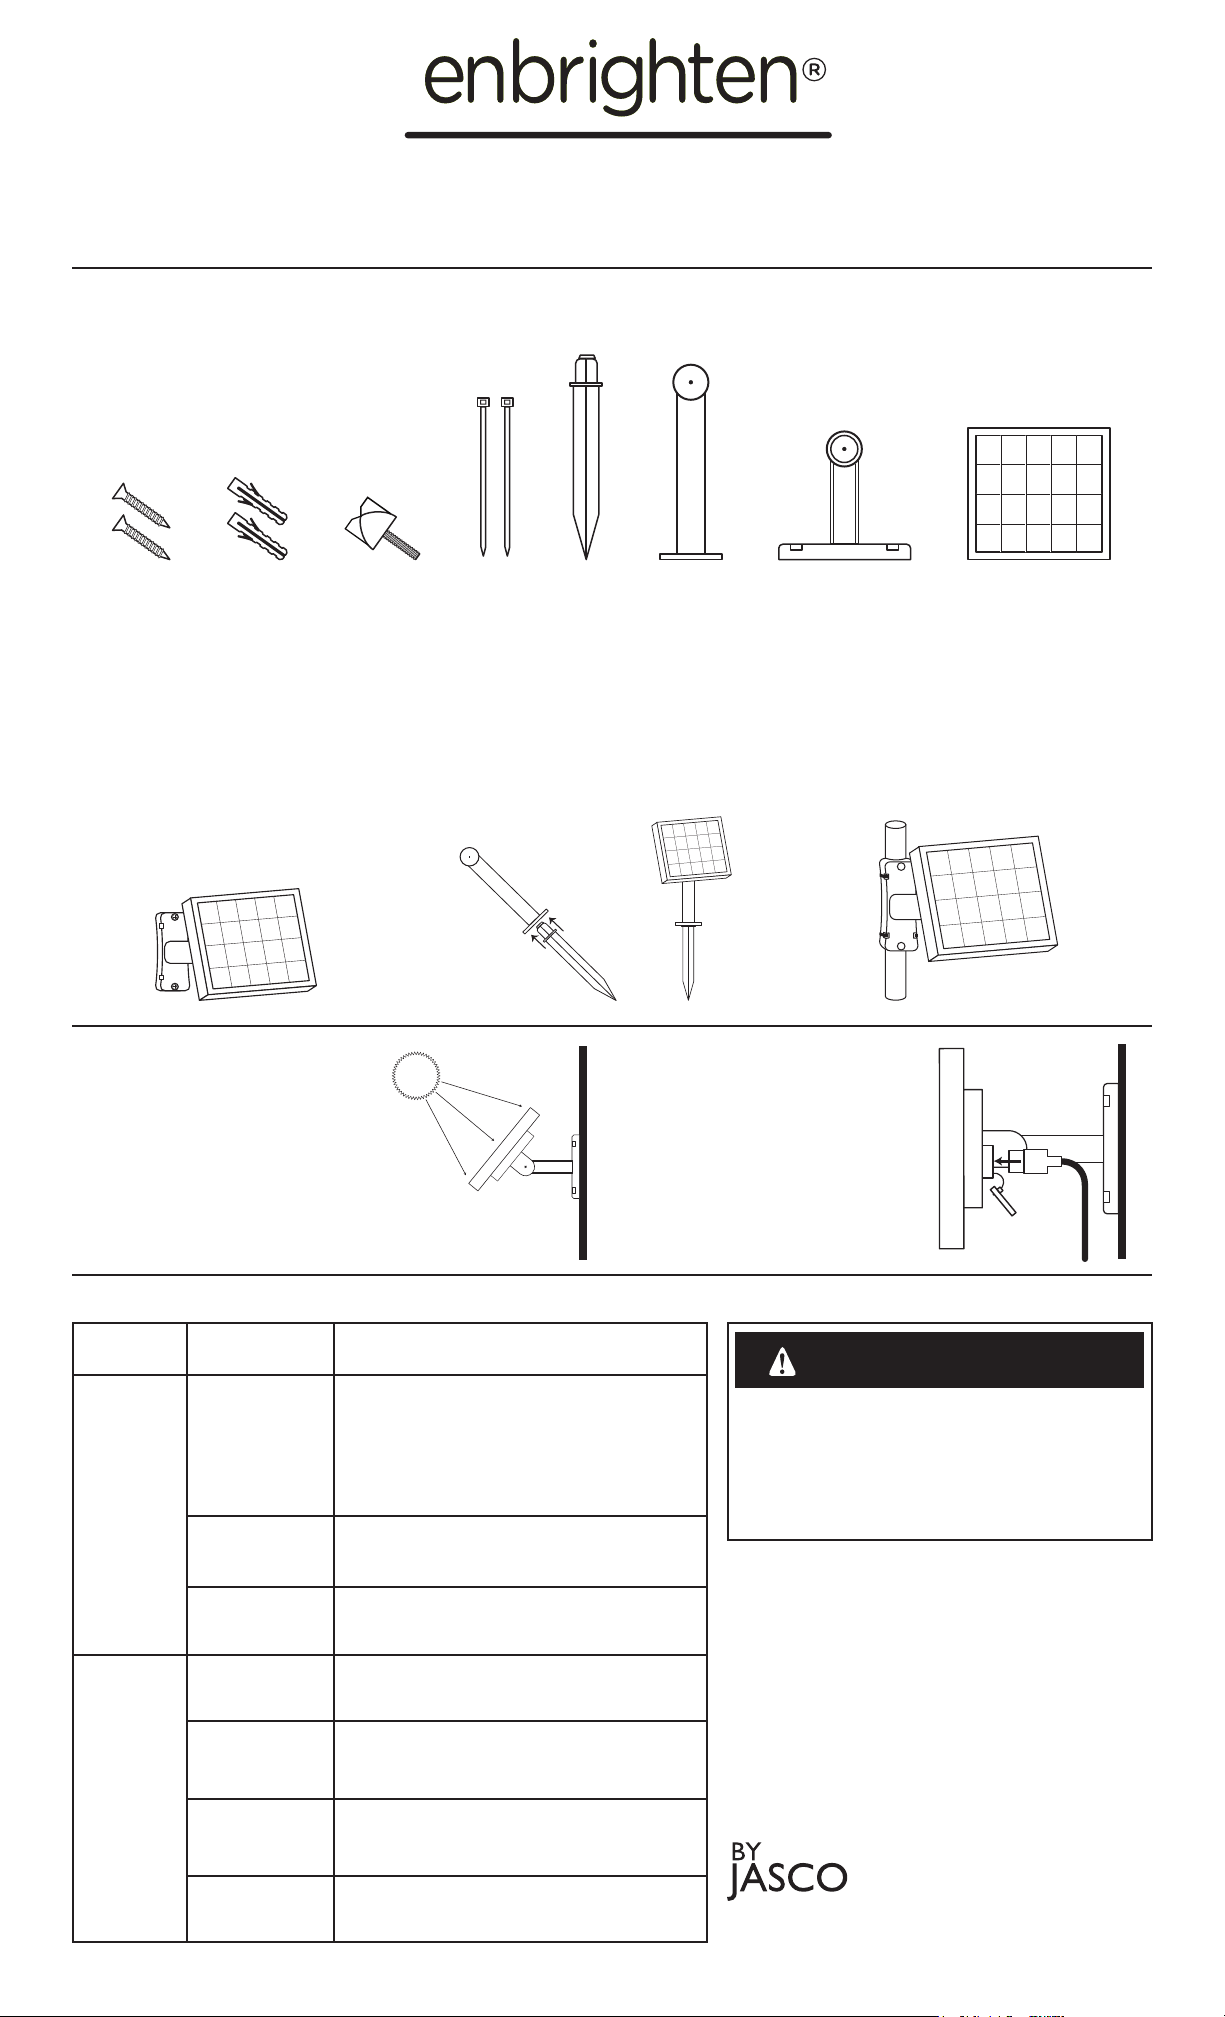
• Align solar panel with top of mounting arm and
adjust angle for optimum sunlight exposure. Secure
to arm with wing nut.
IMPORTANT: Before installation, please read all warning statements included at the bottom of these instructions.
Surface Mounting:
Included Parts:
Features This solar panel is designed to work with the Enbrighten USB-Powered Café Lights and the EcoScapes USB-Powered Café Lights.
Installation
Operation
• Combine stake with the long-arm base.
• Carefully, but firmly, place stake in the ground.
• Align solar panel with top of mounting arm and
adjust angle for optimum sunlight exposure.
Secure to arm with wing nut.
Note: If the stake requires more than a firm push to be
inserted into the ground, please loosen soil or remove
obstacles to ensure the stake is not damaged.
• Ensure your solar panel is placed so that its
exposure to the sun is optimized. Be aware of
objects such as trees or property overhangs that
may impede the panel’s ability to generate a charge.
• A full charge (up to seven hours) oers six hours
of operation while your lights are on
maximum brightness.
• To adjust the solar panel, loosen the wing nut and
position the panel. When desired position is
achieved, tighten wing nut until secure.
Stake Mounting:
Charging the Solar Panel:
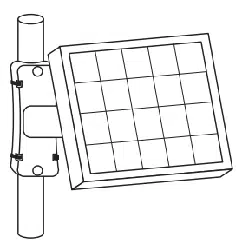
Zip-Tie Mounting
Connecting the Solar Panel:
Problem
Possible
Cause
Solution
Short
lighting
time
Panel is not
properly exposed
to sunlight
When using solar power ensure the solar panel is located
in an area where it can receive the maximum amount
of full, direct sunlight every day. If the solar light does
not receive enough sunlight during daytime the battery
will be recharged on the next sunny day and resume
normal operation. Keeping the solar panel clean is equally
important to ensure the maximum charging performance
Failing battery life
Internal battery is non-serviceable, and the solar panel
should be replaced. Contact Jasco Products to get a new
solar panel.
Timer setting
Select a longer timer setting using the in-line controller for
your USB-powered café lights
No lights
or
flickering
lights
Poor USB
connection.
Check the USB plug and socket for dirt or foreign matter,
and ensure that the plug is properly inserted
POWER
button hasn’t
been pressed
Press the button on the back of the solar panel to ensure
that power is being supplied to the café lights and press the
POWER button on the café light’s in-line controller.
The solar panel is
over-exposed at
night
When the light exposure reaches a certain intensity, the
product may not automatically light up. The product needs
to be installed in a dark place at night
Insufficient power
supply
When using solar power, make sure the product is charged
for more than 3 hours under strong sunlight before testing.
49582 Manual V1
01/10/20
®
MADE IN CHINA / HECHO EN CHINA
Distributed by Jasco Products Company
LLC, 10 E. Memorial Rd., Oklahoma City,
OK 73114.
This Jasco product comes with a 3-year
limited warranty. Visit www.byjasco.com
for warranty details.
Questions? Contact our U.S.-based Con-
sumer Care at 1-800-654-8483 between
7AM-8PM, M-F, Central Time.
RISK OF ELECTRIC SHOCK
• DO NOT SUBMERSE.
• DO NOT USE AROUND AQUARIUMS.
• SOLAR PANEL IS A WET LOCATION PRODUCT AND HAS NO SERVICEABLE PARTS.
• KEEP SOLAR PANEL AT LEAST 16 FEET FROM POOLS AND SPAS.
• AVOID DAMAGE TO SOLAR PANEL. INSPECT THE SOLAR PANEL FOR PHYSICAL
DAMAGE OR OTHER DAMAGE CAUSED BY OUTDOOR EXPOSURE TO THE
ELEMENTS.
• REPLACE THE SOLAR PANEL IF DAMAGED.
• DO NOT INSTALL IN LOCATIONS WHERE SOLAR PANEL CAN BE STEPPED ON.
• CHILDREN SHOULD NOT PLAY WITH SOLAR PANEL.
• ONLY USE SOLAR PANEL WITH USB POWERED CAFÉ LIGHTS.
WARNING
Troubleshooting
READ IT OR WATCH IT
Read instructions or watch easy-to-follow video.
Scan QR code or visit http://bit.ly/2PC7J8z
• For mounting to round poles, utilize the rounded top and
bottom features of the short-arm base.
• Loop zip ties through screw holes and fasten in place as
shown below.
• Once the solar panel has been mounted, remove
the USB cover located on the back of the panel,
and insert the USB plug from your USB-powered
café lights.
• Press the POWER button on the back to supply
power to the connected USB-powered café lights
Screw (2) Anchor (2) Wing Nut (1) Zip Tie (2) Stake Long-Arm Base Short-Arm Base Solar Panel
WARNING: Read all safety precautions and installation instructions
carefully before installing or operating this fixture.
• Do not expose the solar panel to fire or intense heat
• Do not immerse in water
BATTERY INSTRUCTIONS:
• This product contains a rechargeable lithium battery. The battery
is non serviceable, please contact Jasco Products for a replacement
solar power unit.
CARE AND MAINTENANCE:
• The solar panel is not allowed to dip into water or any other liquid.
The water-resistant function is limited to correct installation or within
a certain angle in rain.
• To optimize the eectiveness of your solar panel, do the following:
Choose a location for your solar panel that gets the most sunlight
throughout the year. Wipe the panel every few months to remove
dust or debris that might aect the solar energy harvesting eciency
of the panel.
Panel solar USB
• Marque las posiciones de armado del brazo largo
o del brazo corto usando los orificios para tornillos
como guía.
• Antes de perforar, revise que los lugares marcados
no tengan obstrucciones, como cables o alambres.
• Si usará tornillos para el armado, perfore la madera
u otro material con una punta de 3/32 in. Luego, fije
la base con tornillos.
• Si usará tacos para el armado, perfore la mampostería
u otro material con una punta de 7/32 in. Luego,
inserte los tacos y fije la base con los tornillos.
• Haga coincidir el panel con la parte superior de
la base de armado. Ajuste el ángulo para exponer
el panel al sol lo más posible. Fíjelo a la base con la
tuerca mariposa.
IMPORTANTE: Antes de instalar, lea todas las advertencias, inclusive las del final de estas instrucciones.
Armado en la superficie:
Piezas incluidas:
Características Este panel solar fue diseñado para funcionar con luces colgantes USB Enbrighten y para luces colgantes USB EcoScapes.
Instalación
Funcionamiento
• Una la estaca con la base larga.
• Coloque la estaca en el suelo con cuidado y firmeza.
• Haga coincidir el panel con la parte superior de
la base de armado. Ajuste el ángulo para exponer
el panel al sol lo más posible. Fíjelo a la base con la
tuerca mariposa.
Nota: Si la estaca no está firme en el suelo al darle
solo un empujón firme, afloje la tierra o quite los
obstáculos para asegurar que la estaca no se dañe.
• Asegúrese de que el panel solar esté lo más
expuesto al sol como sea posible. Tenga cuidado con
los árboles u objetos colgantes en su
propiedad que puedan afectar la carga del panel.
• Una carga completa (máximo de siete horas) le da
seis horas de funcionamiento con las luces
encendidas en brillo máximo.
• Para ajustar el panel solar, afloje la tuerca mariposa
y ponga el panel en posición. Cuando consiga la
posición deseada, ajuste la tuerca mariposa.
Armado con estaca:
Carga del panel solar:
Armado con abrazadera plástica:
Conexión del panel solar:
Problema
Causa
posible
Solución
Tiempo
corto de
exposición
a la luz
El panel no está
expuesto
adecuadamente a
la luz solar
Cuando use energía solar, asegúrese de que el panel solar
se encuentre en una zona donde pueda captar la mayor
cantidad de luz solar directa posible a diario. Si el panel
solar no recibe suficiente luz solar durante el día, la batería
se recargará durante el próximo día soleado para continuar
funcionando con normalidad. Es igualmente importante
mantener el panel solar limpio para asegurar que pueda
cargarse lo mejor posible
Falla en duración
de la batería
La batería interna no es reparable, y el panel solar no debe
reemplazarse. Contáctese con Jasco Products para obtener
un nuevo panel solar.
Configuración de
cronómetro
Seleccione una configuración de cronómetro más
prolongada con el mando incorporado al cable para las
luces colgantes USB.
Luces no
encienden
o
parpadean
Mala conexión
USB.
Revise si el conector USB o el tomacorriente tienen tierra
o materiales externos, y asegúrese de que el conector esté
colocado adecuadamente
No se presionó
el botón de
ENCENDIDO
Presione el botón en la parte trasera del panel solar para
asegurar que las luces colgantesreciban energía y presione
el botón de ENCENDIDO en el mando incorporado al cable
de las luces.
El panel solar está
sobreexpuesto
durante la noche
Cuando la exposición a la luz alcanza cierta intensidad, es
posible que el producto no se encienda automáticamente.
El producto necesita colocarse en un lugar oscuro durante
la noche
Energía
insuficiente
Al usar energía solar, asegúrese de que el producto se
cargue por más de 3 horas bajo luz solar intensa antes de
probarlo.
49582 Manual V1
01/10/20
®
HECHO EN CHINA
Distribuido por Jasco Products Company LLC, 10 E
Memorial Rd., Oklahoma City,
Oklahoma 73114.
Este producto de Jasco tiene una garantía limitada
de 3 años. Visite www.byjasco.com para conocer los
detalles de la garantía.
¿Preguntas? Comuníquese al 1-800-654-8483 entre
las 7AM y las 8PM CST (hora central estándar).
RIESGO DE DESCARGA ELÉCTRICA
• NO SUMERGIR.
• NO USE CERCA DE PECERAS.
• EL PANEL SOLAR ES UN PRODUCTO PARA LUGARES HÚMEDOS Y NO TIENE
PIEZAS REPARABLES.
• ASEGÚRESE DE QUE EL PANEL SOLAR ESTÉ AL MENOS A 5 METROS DE
PISCINAS Y SPAS.
• EVITE DAÑAR EL PANEL SOLAR. REVISE QUE EL PANEL SOLAR NO TENGA
DAÑOS FÍSICOS U OTROS CAUSADO POR LA EXPOSICIÓN A LOS ELEMENTOS
A LA INTEMPERIE.
• REEMPLACE EL PANEL SOLAR SI ESTUVIERA DAÑADO.
• NO LO INSTALE EN LUGARES DONDE PUEDAN PISARLO.
• LOS NIÑOS NO DEBEN JUGAR CON EL PANEL SOLAR.
• USE EL PANEL SOLAR SOLO CON LUCES COLGANTES USB.
ADVERTENCIA
Solución de problemas
• Para el armado en varas cilíndricas, use la parte superior e
inferior con orificio circular de la base corta.
• Amarre las abrazaderas plásticas luego de pasarlas por
los orificios para tornillos y ajústelas como se muestra a
continuación.
• Cuando el panel esté armado, quite la cubierta
del USB en la parte trasera e inserte el conector
USB de las luces colgantes USB.
• Presione el botón de ENCENDIDO en la parte
trasera para encender las luces USB conectadas.
Tornillo (2) Taco (2) Tuerca
mariposa (1)
Abrazadera
plástica (2)
Estaca Base larga Base corta Panel solar
ADVERTENCIA: Lea todas las precauciones de seguridad y las
instrucciones de instalación detenidamente antes de instalar u
operar el equipo.
• No exponga al panel solar al fuego ni al calor intenso
• No lo sumerja en agua
INSTRUCCIONES DE LA BATERÍA:
• Este producto contiene una batería de litio recargable. La batería
no es reparable. Contacte a Jasco Products si necesita reemplazar
la unidad de energía solar.
CUIDADO Y MANTENIMIENTO:
• El panel solar no debe sumergirse en agua ni en otros líquidos. La
característica de resistencia al agua sirve para corregir una instalación
o, en ciertos ángulos, para la lluvia.
• Para optimizar la efectividad del panel solar, haga lo siguiente: Elija
una ubicación para el panel solar donde haya la mayor luz solar posible
durante el año. Limpie el panel cada varios meses para eliminar polvo
o restos que puedan afectar la eficiencia del panel para recolectar
energía solar.