Loading ...
Loading ...
Loading ...

10
1. Plug the coffeemaker in. Add clean ltered water to your Mr. Coffee Iced
tumbler to brew a concentrated coffee shot. Lift the lid of the unit and pour the
water in to the water reservoir to the 4-ounce mark. Discard any excess water in
your tumbler.
2. Place the reusable coffee lter (or standard 5-cup basket-style paper lter) into
the brew basket.
3. Using the HOT side of the coffee scoop, add 1 ½ scoops of coffee grounds to the
coffee lter. Move the shower head over the coffee lter and grinds. Close the lid.
NOTE: If you want a stronger coffee shot, add an additional ½ scoop of coffee
grounds.
4. Fill your Mr. Coffee Iced Tumbler with ice to the Ice line indicator.
5. Place the tumbler under the brew head. Press the Hot Brew button – ensure the
LED is illuminated.
6. While your coffee is brewing, prepare your frothed milk.
NOTE: Before adding milk, ensure that your whisk is properly placed at the
bottom of frother jar by clicking in-place and securely fastening it.
For an Iced Latte:
7. Add 6.5 ounces of the milk of your
choice to the latte line indicator in
the frothing jar.
8. Place frothing jar on mount. Put lid
back on the frothing jar.
9. Press the Cold Froth button to
create a creamy cold foam. Ensure
the LED is illuminated and frothing
will begin. Frothing jar will stop
automatically once the cycle
is complete.
NOTE: Do not ll frothing jar past
lines for best froth outcome. Do not
remove frothing jar from mount mid-
cycle. If removed, turn off frother by
pressing Cold Foam button again.
10. Pour frothed milk into tumbler, add
straw and lid then enjoy!
For an Iced Cappuccino:
7. Add 5 ounces of the milk of your
choice to the latte line indicator in
the frothing jar.
8. Place frothing jar on mount. Put lid
back on the frothing jar.
9. Press the Cold Froth button to
create a creamy cold foam. Ensure
the LED is illuminated and frothing
will begin. Frothing jar will stop
automatically once the cycle
is complete.
NOTE: Do not ll frothing jar past
lines for best froth outcome. Do not
remove frothing jar from mount mid-
cycle. If removed, turn off frother by
pressing Cold Foam button again.
10. Pour frothed milk into tumbler, add
straw and lid then enjoy!
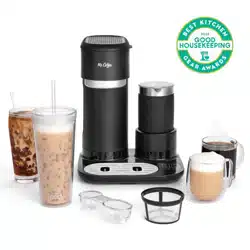
LET’S MAKE AN ICED LATTE OR CAPPUCCINO!
NOTE: Clean frothing jar after each use.
Loading ...
Loading ...
Loading ...