Loading ...
Loading ...
Loading ...
QUICK START GUIDE
8
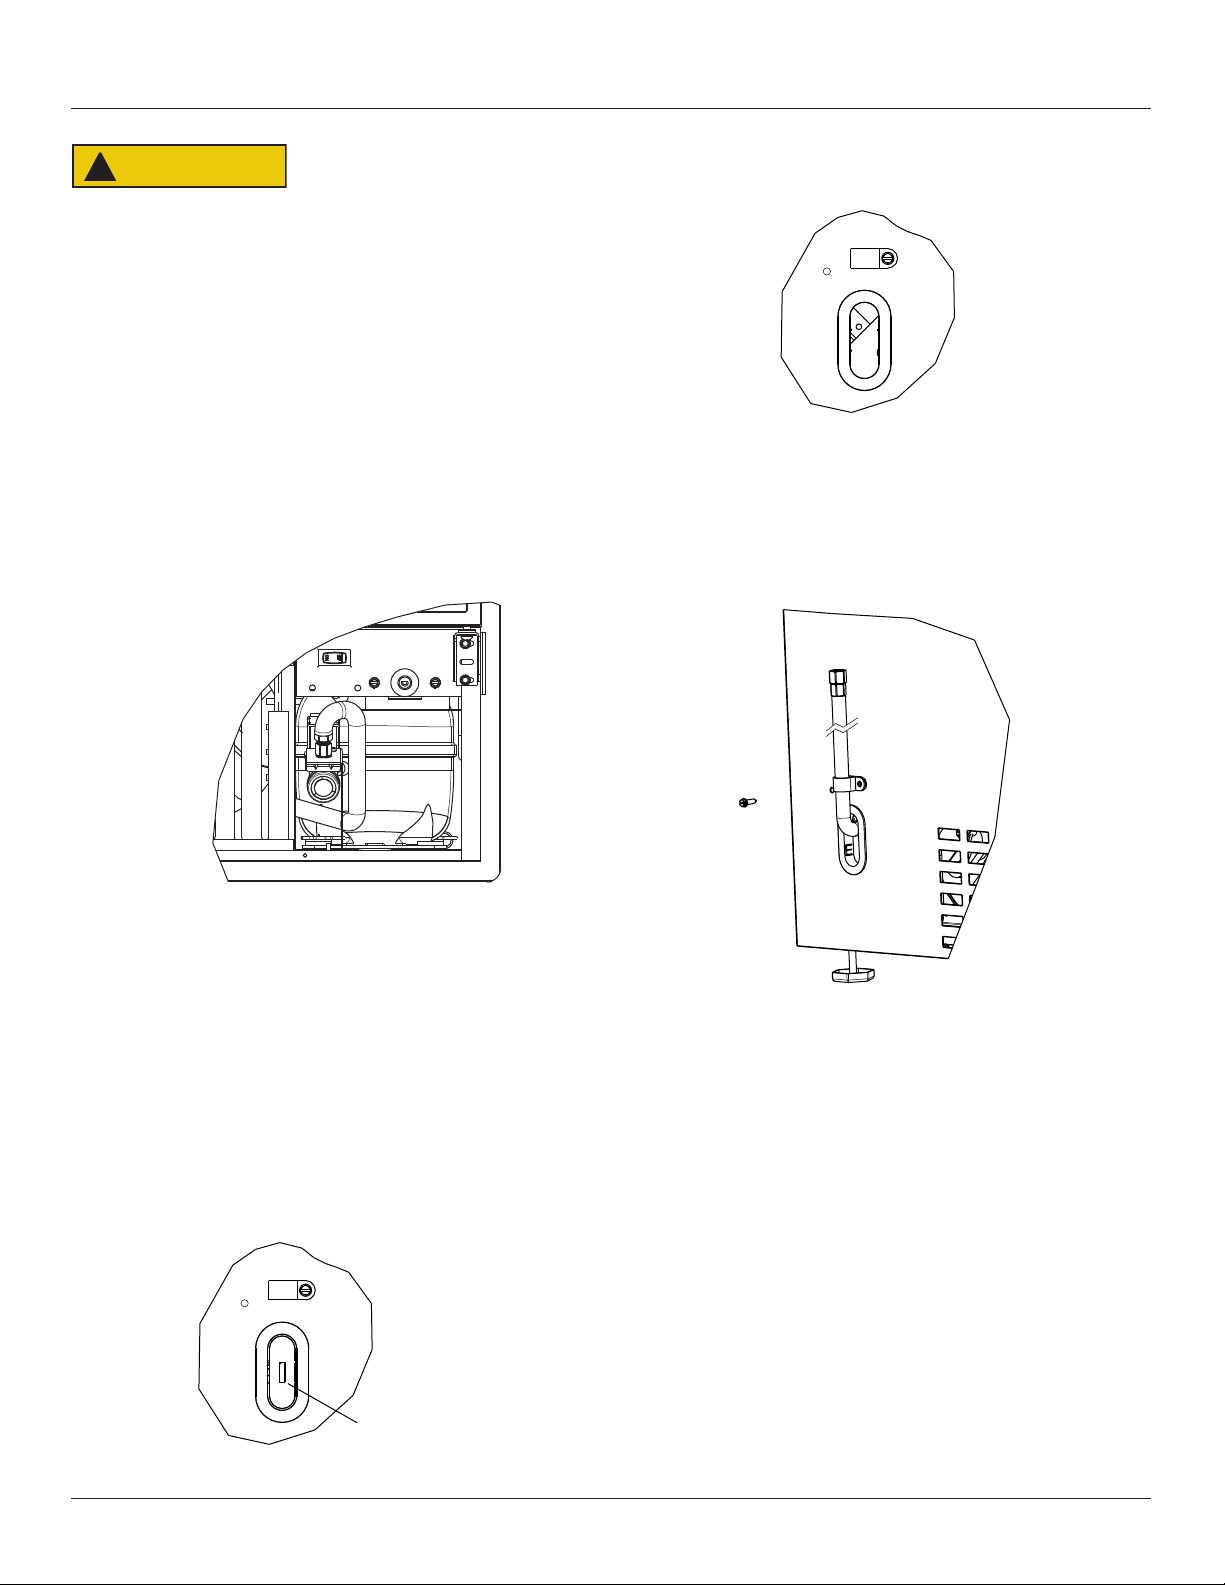
Turn o water supply and disconnect electrical
supply to unit prior to installation.
Use caution when handling back panel. The edges
could be sharp.
1.
to product prior to attempting installation.
2. Remove the grille/access panel in the front and the
back panel.
3.
water supply line through.
NOTICE
Route the water supply line through the unit
so it does not come into contact with any
internal components other than the solenoid
valve. Normal operation creates some vibration.
A water supply line contacting an internal
component or cabinet wall can cause excessive
noise during operation or damage to the line.
4.
CAUTION
!
u-line.com
INSTALLATION & INTEGRATION
NOTICE
Route the water
supply line
through the unit so it does not come into contact
with any internal components other than the
solenoid valve. Normal operation creates some
vibration. A water supply line contacting an
internal component or cabinet wall can cause
excessive noise during operation or damage to
the line.
ZLWKɠDW
u-line.com
INSTALLATION & INTEGRATION
NOTICE
Route the water
supply line
through the unit so it does not come into contact
with any internal components other than the
solenoid valve. Normal operation creates some
vibration. A water supply line contacting an
internal component or cabinet wall can cause
excessive noise during operation or damage to
the line.
Remove
ZLWKɠDW
screwdrive
r
u-line.com
INSTALLATION & INTEGRATION
NOTICE
Route the water
supply line
through the unit so it does not come into contact
with any internal components other than the
solenoid valve. Normal operation creates some
vibration. A water supply line contacting an
internal component or cabinet wall can cause
excessive noise during operation or damage to
the line.
ZLWKɠDW
5. Thread water line through back panel hole (with
bushing) and connect to cold water supply line.
6. Turn on water supply and check for leaks.
7. Reinstall back panel and grille/front access panel.
8. Install retaining clip.
Loading ...
Loading ...
Loading ...