Loading ...
Loading ...
Loading ...
QUICK START GUIDE
Install top hinge and door:
1. Use alternate hinge supplied with unit and reinstall the
screws. Do not tighten.
ift the door on to the
bottom hinge.
Align flat edge of the hinge with the outer edge of
theunit.
Tighten three screws.
Align and adjust the door:
Align and adjust the door (see DOOR ALIGNMENT AND
ADJUSTMENT).
Install grille:
Install the grille.
Remove bottom hinge:
Install bottom hinge:
Door Adjustments
DOOR ALIGNMENT AND ADJUSTMENT
Align and adjust the door if it is not level or not sealing
properly. If the door is not sealed, the unit may not cool
properly, or excessive frost or condensation may form in
the interior.
NOTICE
Properly aligned, the door’s gasket should be
firmly in contact with the cabinet all the way
around the door (no gaps). Carefully examine
the door’s gasket to ensure that it is firmly in
contact with the cabinet. Also make sure the
door gasket is not pinched on the hinge side of
the door.
Do not attempt to use the door to raise or pivot
your unit. This would put excessive stress on
the hinge system.
Alignment and Adjustment Procedure
Note: One hinge includes a metal spacer. Spacer
must be used with that hinge when reversing the
Align and adjust the door:
CAUTION
!
firmly in contact with the cabinet all the way
around the door (no gaps). Carefully examine
the door’s gasket to ensure that it is firmly in
contact with the cabinet. Also make sure the
door gasket is not pinched on the hinge side of
the door.
Do not attempt to use the door to raise or pivot
your unit. This would put excessive stress on
the hinge system.
Alignment and Adjustment Procedure
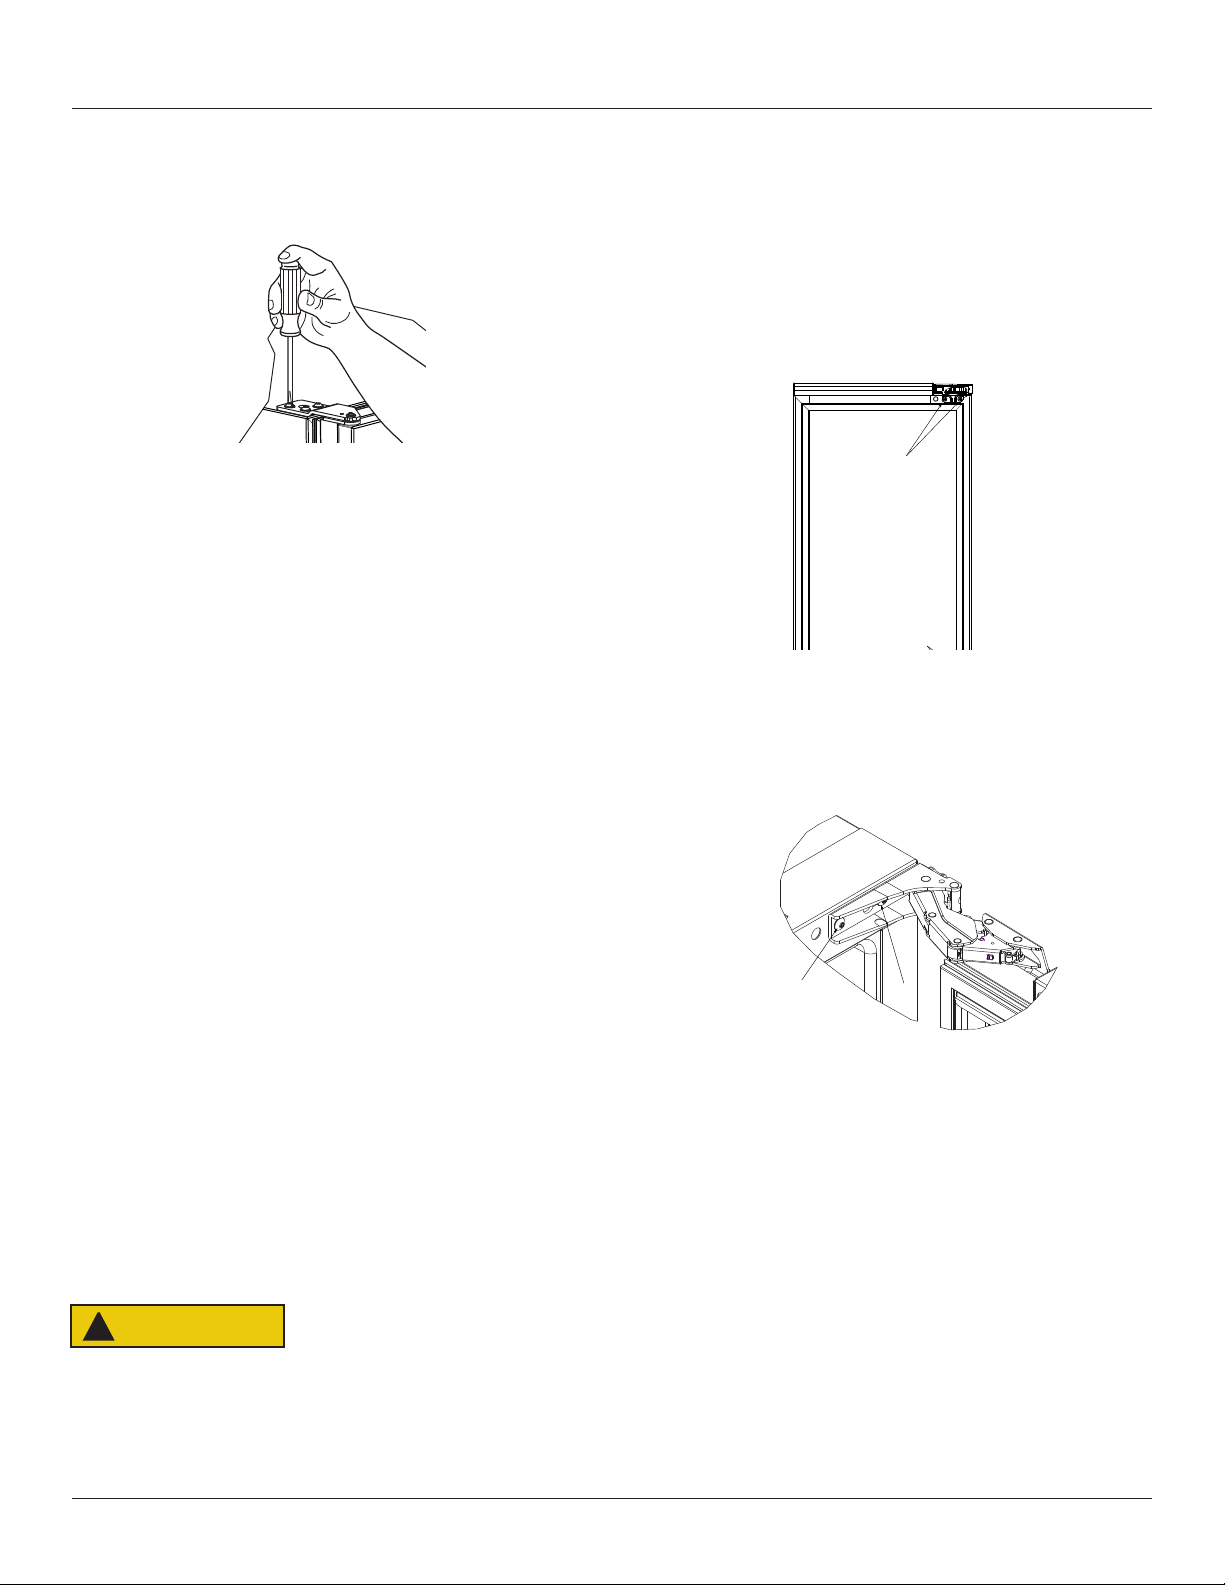
Open door and remove gasket near the hinges.
Using a T-25 Torx bit, loosen each pair of Torx head
screws both the upper and lower hinge plates.
Square and align door as necessary.
Tighten Torx head screws on hinge.
Reinstall gasket into the channel starting at the corner.
Note: One hinge includes a metal spacer. Spacer
must be used with that hinge when reversing the
Align and adjust the door:
T-25 Torx Screw
T-25 Torx Screw
firmly in contact with the cabinet all the way
around the door (no gaps). Carefully examine
the door’s gasket to ensure that it is firmly in
contact with the cabinet. Also make sure the
door gasket is not pinched on the hinge side of
the door.
Do not attempt to use the door to raise or pivot
your unit. This would put excessive stress on
the hinge system.
Alignment and Adjustment Procedure
REVERSING THE DOOR
Open door.
Using T-25 Torx bit loosen screw #1 and remove screw
#2 on top and bottom hinge. Slide and remove the
door from the unit.
Note: One hinge includes a metal spacer. Spacer
must be used with that hinge when reversing the
door.
Remove caps from screw heads on opposite side (2 on
top and 2 on bottom). Using #2 Phillips bit, remove
the 4 underlying screws. Reinstall the screws and caps
on the opposite side.
Partially install screw #1 in the outer most holes on
top and bottom. Rotate door 180o, align hinge over
screw #1 and slide/seat into position. Reinstall screw
#2 on top and bottom. Tighten both screws and install
hinge cover.
Align and adjust the door:
Align and adjust the door (see DOOR ALIGNMENT
AND ADJUSTMENT).
2
1
5 CLASS REFRIGERATOR & NUGGET ICE MACHINE
15
Loading ...
Loading ...
Loading ...