
Loading ...
Loading ...
Loading ...
Useextremecautionunpackingthismachine.Somecomponentsare
veryheavyandwill requireadditionalpeopleor mechanicalhandling
equipment.
NOTE:Yourlog splitteris shippedwithmotoroilinthe engine.However,
youMUSTcheckthe oil levelbeforeoperating.Be carefulnot tooverfill.
NOTE:All referencesin thismanualto the leftor right sideof the log
splitterarefromtheoperatingpositiononly.SeeOperatorZonein the
Operationsectionof the Safetyinstructions.
UNPACKING & ASSEMBLING THE LOG
SPLITTER
TOOLS NEEDED: Safetyglasses,leathergloves,wirecutters,prybar
and/orclawhammer.
1. Use a pry bar or claw hammerto loosenand removethe topof
thecrate.
2. Use a pry bar or claw hammerto removethe sidesof thecrate,
beginningwiththe short sides(or left and rightsideof the log
splitter).Setthe sides of the crateasideto avoid injury.
3. On the frontsideof the cratethetongueassemblyis attachedon
the insideof thecratewitha cabletie.Cutthe cabletie to remove
thetongue.
4. Removethe largeplasticcoveranddiscard.
Do NOTremoveanywoodor cutany strapssecuringthe log splitter
[ or its componentsto the log splitteror thecrateat this time. Only
[ removestrapsand/orwoodwhen instructedto doso.
5. inspectthe bottomof the crate for anyprotrudingstaplesor wood
splintersand remove.
6. Removeany looseparts includedwiththe log splitter(i.e. opera-
tot's manual,etc.).
7. Removethe springclip andclevispinfromthejack standon the
tongueand then pivotthe jack stand towardsthe groundintothe
operatingposition.SeeFigure1.
8. Securethejack standin positionwiththeclevis pinandspring
clip.See Figure1.
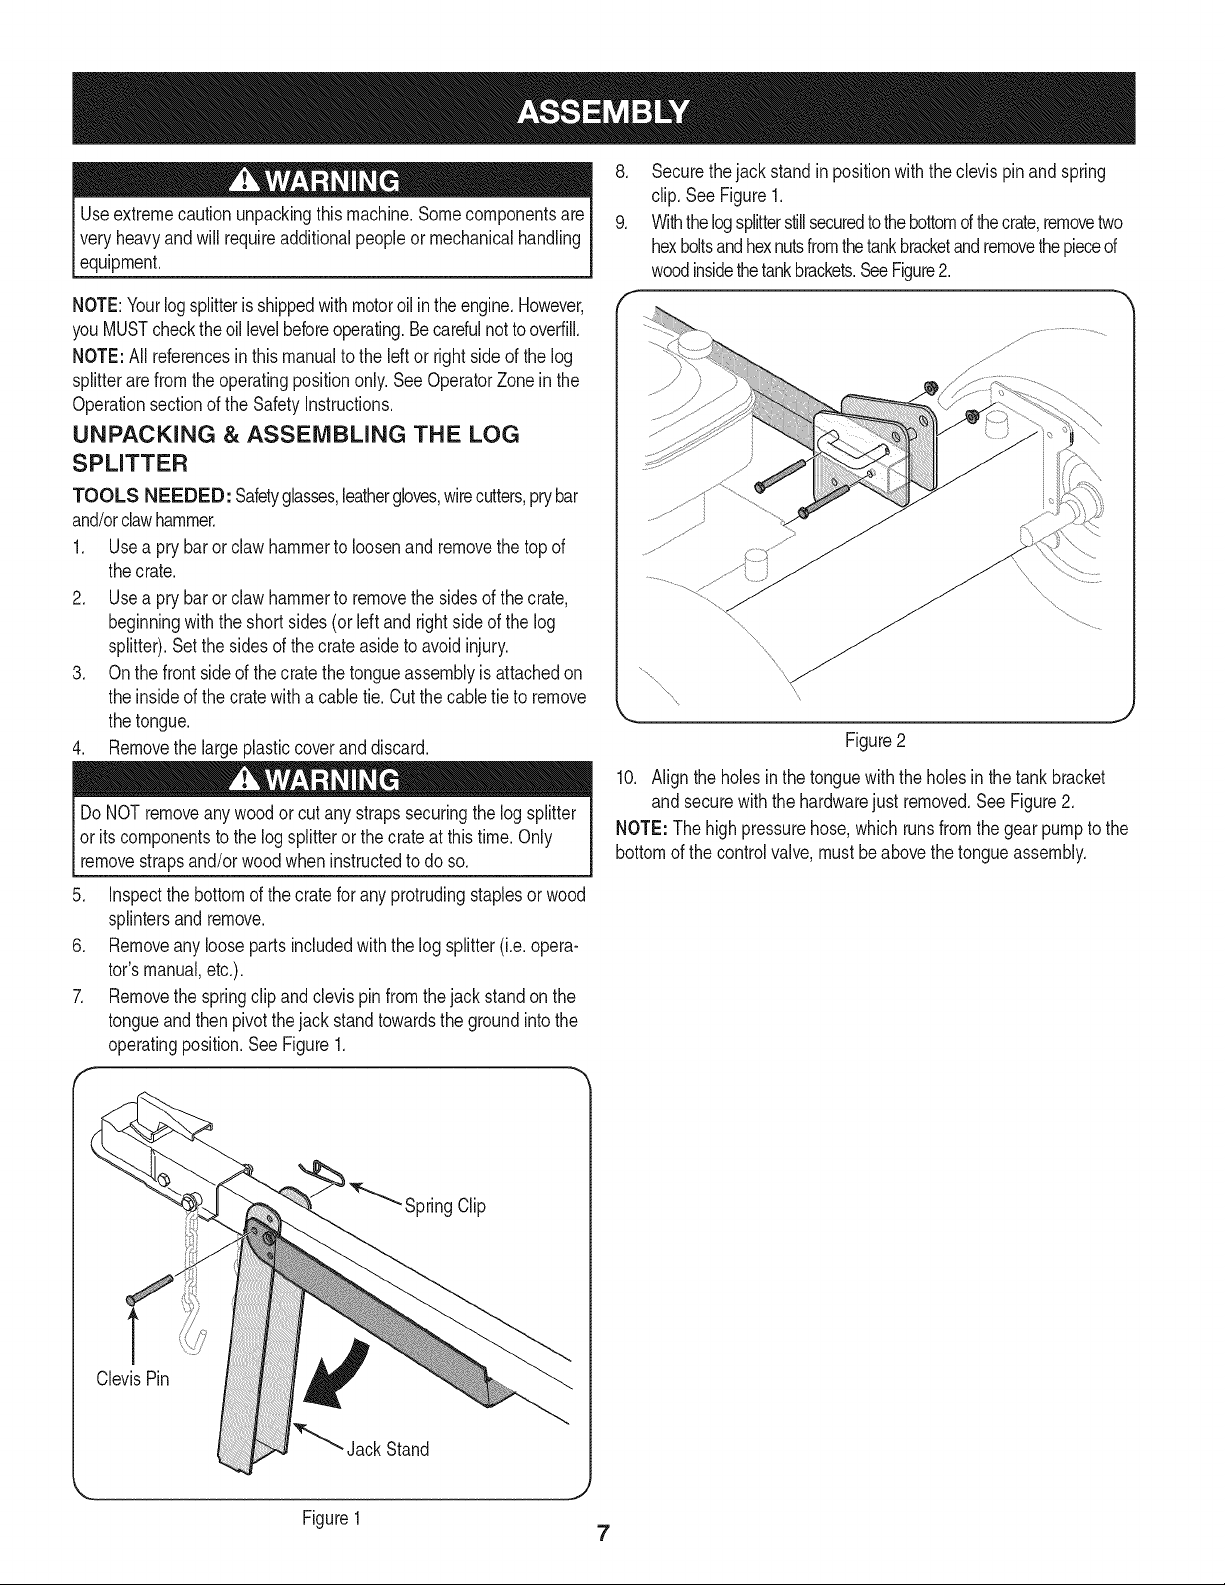
9. Withthelogsplitterstillsecuredtothebottomd thecrate,removetwo
hexboltsandhexnutsfromthetankbracketandremovethepieced
woodinsidethetankbrackets.SeeFigure2.
Figure2
10. Align the holesinthe tonguewith the holesinthe tankbracket
and securewith the hardwarejust removed.See Figure2.
NOTE: Thehigh pressurehose,which runsfromthe gearpumpto the
bottomof the controlvalve,mustbeabovethetongueassembly.
SpringClip
ClevisPin
Jack Stand
Figure1
7
Loading ...
Loading ...
Loading ...