www.GEAppl&nces.com
©
- e,,,,,q
==
Safely Instructions ............ 2-7
Operating Instrudions
Adjusting Temperature .......... 34
Clock, Timer and
Connol Lockout ............... 12
Controls .................... 9-11
Com_ction ................ 24-27
Defrost Feanlre, Guide ....... 19, 20
Introduction ................... 8
Oven ..................... 13-15
Proof, _4armer and VL_rm ....... 99
Recipes ....................... 98
Sabbath Feature ............ 35-37
Self-Cleaning Oven .......... 30, 31
Settings ................... 39, 33
Speed Baking/
Speed Roasting ............. 16, 17
Speed Broiling, (;uide ....... 17, 18
Timed Baking
and Roasting ............ 99, 96, 97
Traditional Baking/Roasting . .91,92
Traditional Broiling, (;uide ...... 93
Careand Cleaning
Broiler Pan and Grid ........... 39
Cleaning Oven Door . .......... 38
Control Panel ................. 39
Light Bulb .................... 37
Packaging _q)e ................ 37
Racks ........................ 39
Stainless Smel Surthces .......... 38
Troubleshooting Tips ....... 40-43
Accessories . .................. 44
Consumer Support
Consumer Support ..... Back Coxer
Product Registration ........ 45, 46
VVatxantv ..................... 47
Write the model and serial
numbers here:
Model #
Serial #
_m can find them on a label on
the side trim or on the ti'ont of the
(lower) oven behind tile oven dooi:
]T93() 30" Singf_ Zid{ Over_
164B4290P388-1 49-8023&1 tO-03Jfl

IMPORTANTSAFETYtNFORMA770No
READALLINSTRUCTIONSBEFOREUSING
WARNING!
For your safe_, the information in this manual must be followed to minimize the risk of fire or
explosion, electric shock, or to prevent property damage, personal injury, or loss of life.
PRECAUTIONSTOAVOIDPOSSIBLEEXPOSURETOEXCESSIVE
MICROWAVEENERGY
Do not attempt to operate this oven with
tile door open since ope,l-door operation
can iesuh in hannfld exposure to
microwave energy. It is importantnot to
defeat or tamper with the safety interlocks.
Do not place any object between tile oxen
flont lace and the door or allow soil or
cleaner residue to accumulate on sealing
snrfaces.
Tile oxen should not be adjusted or
repaired by anyone except properly
qualified service personnel.
Do not operam file oven if it is damaged.
It is parucularly important that the o\_n
door close properly and that theie is no
damag_ to tile:
[] door (bent),
[] hinges and latches (broken or
loosened),
[] door seals and sealing surfaces.
IMPORTANTSAFETYNOTICE
The California Safe Drinking Water and ToxicEnforcement Act requires the Governor of California
to publish a list of substances known to the state to cause cancer, birth defects or other reproductive
harm, and requires businesses to warn customers ofpotential exposure to such substances.
The fiberglass insulation in self-clean ovens gives off a very small amount of carbon monoxide during
the cleaning cycle. Exposure can be minimized by venting with an open window or using a ventilation
fan or hood.
2
www.GEAppliances.com
SAFETYPRECAUTIONS
When usfl}g eiectrical appiiances, basic safety precaufions sbodd be followed, including #le fo//owing:
WARNING-cro,,..i.gt.str,,ctio.s-
This appliance must be com_ected to a
grom_ded, metallic, permanem wiring
sysmm, or an eqtdpment grotmdhlg
conductor should be run _ith the citvuit
conductocs and comlected to the equipmem
g*wtmdiI_g termhlal or lead oil the
appliance.
WARNING-tored,,ceriskofb.r.s.
electric shee£ fire, injury te persens er
expesure te excessive micrewave energy:
Use dfis appliance only for its intended
pm])ose as described in dfis manual. Do
not use conosive chemicals or vapors in
this appliance. This oxen is specifically
designed to heat or cook food, and is not
inmnded for laborato U or industrial use.
Be sure your appliance is properly
installed and grounded by a qualified
mchnician in accordance with the
provided installation instructions.
Do not atmmpt to repair or replace any
part of your oxen unless it is specifically
recommended in this malma]. All other
servicing should be tefened to a qualified
mchnician.
Haw the installer show you the location of
tile citvuit breaker or fltse. Mark it for easy
reference.
Before performing any service, disconnect
die oven power supply at file household
disuibution panel by removing tile fl_se or
switching off tile circuit bteaken
Do not leaxe children alone--<hildren
should not be left alone or unattended in
an area where an appliance is in use. They
should hexer be allowed m sit or stand on
any part of tile appliance.
Do not store fills appliance outdoors.
Do not use this product near water--
for example, in a wet basement, or near
a swimming pool.
Do not operam this appliance if it has a
damaged cord or plug, if it is not working
properly or if it has been damaged or
dropped.
This appliance should be serviced only
by qualified service personnel. Contact
nearest attfl_orized service £_cilitv for
examination, tei)air or adjusunent.
Do not allow anyone to climb, stand or
hang on the door They could damag_ tile
oxen, or cause severe personal injm T.
Be sure the ox>n is secmely installed in a
cabinet that is firmly attached to tile house
structure. Nexer allow anyone to climb, sit,
stand or hang on tile oven door
Nexer leme the oxen door open when you
are not watching file oven.
Always kee I) combustible wall cox_rings,
curtains or drapes a saf_ distance from
Vo/lr oven,
Always kee I) dish towels, dish cloths, pot
holders and other linens a safe distance
froI]/ VO/lI" oxPn,
Always kee I) wooden and plastic umnsils
and canned food a safe distance away
from your oxen.
Teach children not to play wifll file
controls or any oilier part of file oven,
Larg_ scratches or impacts to glass doors
can lead to broken or shattered glass,
Do not cover or hlock aIV openings on
tile appliance.
3
IMPORTANTSAFETYINFORMAtiON.
READALLINSTRUCTIONSBEFOREUSING.
4
WARNING!
SAFETYPRECAUTIONS
Do not store flammable materials in
iiiiiiiiiiii_iii
an oxen.
CAUtiON:Items ofinterestto
children should not be stored in cabinets
aboxe an oxen; children climbing on tile
oxen to reach items could be seriously
i@lred.
Never wear loose-fitting or hanging
garments while using tile appliance. Be
careflll when reaching for items stored in
cabinets ox.er file oven. Flalnmable material
could be ignimd if brougtlt in contact with
hot surfitces or heating elements and m W
cause sex.ere l)nF/ls.
iiiiiiiiiiiiiii
Use only di T pot holders--moist or damp
pot holders on hot snrfaces may result in
bums fiom steam. Do not let pot holders
touch hot heating elements. Do not use a
towel or other bulky cloth.
For your safety', nexer use your appliance
tbr wanning or heating tile room.
Do not let cooking grease or other
flammable materials accunnllate in or
near tile oxen,
iiiiiiiiiiii_iii
Do not use water on gTease fires. Nexer pick
/lI) a flaming pan. Turn tile controls off.
Flame in the ox.en call be smodlered
completely by closing tile oven door and
turning tile oven off or by using a nnllti-
purpose di y chemical or foam-type fii.e
extingalishen
Do not touch die heating elements or tlle
interior surface of die ox.en. These surPaces
m W be hot enougtl to burn ex.en though
they ai.e dark in colon During and after
use, do not milch, or let clothing or oilier
flammable mamiials contact any inmiior
area of tile ox.en; allow sufficient tin/e for
cooling first.
Potentially hot surfitces inchlde oven vent
openings, surfaces near tile openings,
crevices around the oven dooi; tile edg.es
of file window and metal trin/parts abox.e
tile door
REMEMBER:Tile inside surface of tile oxen
may be hot when tlle door is opened.
Nexer lemejars or cans of fat drippings in
or ileal vonr oxen.
Do not store or use combustible mateiials,
gasoline or other flammable vapors and
liquids in tile vicinity of this or any other
appliance.
Stand away flom tile oxen when opening
tile oxen doon Hot air or steam which
escapes can cause bums to hands, i_ce
and/or eyes.
Do not heat unopened food containers.
Pressure could build/l I) and tile container
could burst, causing an iiIju U.
Kee I) tlle oven xent unobstructed.
Kee I) tile oxen flee from gTease buildup.
Place tile oxen rack in tile desired position
while tile oxen is cool. If racks nnlst be
handled when hot, do not let pot holder
contact tile heating elements.
When using cooking or roasting bags in tile
oxen, follow tile manufacturer's directions.
Pulling out the rack to tlle stop-lock is a
comenience in lifting heax T tbods. It is also
a precaution against bnrns flonl touching
hot surfilces of tile door or oxen walls.
Do not use tlle oxen to di T newspapers.
If oxerheated, they can catch on fire.
Do not use tile oxen for a storage area.
Items stored in an oxen can ignite.
Do not leme paper products, cooking
utensils or tbod in tile oxen when not
in rise.
After broiling, always take tile broiler pan
out of the oxen and clean it. Leftoxer
grease in tile broiler pan can catch fire
next time yon use tile pan.
• • ( '
Clean only parts listed in tills )wner s
Manual.
Do not use aluminunl %il to lille oxen
1)ottoms. hnproper installation of
ahm/inum foil may resuh in a risk
of electric shock or fire.
vvww.GEAppliances.com
TRIVECTIO MOVEN
Read and follow the specific "Precautions toAvoid Possible Exposureto Excessive Microwave Energy"
section in this manual
Toreduce the risk ef fire in tile even cavity:
Do not overtook food. Careflflly atmnd
appliance if paper, plastic or other
combnstible materials are placed inside
file oven to t_acilimte cooking.
In deflost mode, remoxe wire twisufies
flom paper or plastic containers before
placing bag_ in the oxen.
()yen Cooking Bags--Do not use tile wire
twist-de m close file bag.
Do not use paper towels.
Do [lot use vonr o\en to dIT newspapers.
Do not oxercook potatoes. They could
dehydram and catch file, causing damag_
to vonr oxen.
Do not operate tile o\en while empty to
ax_id damag> to tile oxen and tile dang>r
of fire.
Do not use the o\en for storag_ pnq)oses.
Do not leme paper products, cooking
umnsils or food in tile oxen when not
in use.
If mamfials inside tire oven should ignim,
keep tim oxen door closed, turn tile oxen
off"and shut off"power at tire fllse or circuit
breaker panel. If tile door is opened, tile
fire m W spread.
This oven is not approxed or msmd for
malJne use.
Some products such as whole eggs and
sealed containers for example, closed
jars will explode and should not be
heamd in this oven. Such use of tile oxen
could result in iiljnry.
Do not boil eg_:s it[ titis oxen. Pressure will
build up inside tile egg yolk and will cause
it m burst, possibly resuhing in injury.
Do not pop popcorn in your oven.
Foods with unbroken outer "skit[" such as
potatoes, sausages, tomatoes, apples, egg
yolks, chicken livers and other giblets
should be pierced m allow smam to escape
during cooking.
Don't defrost frozen bexerag_s in nanow-
necked bottles (especially carbonamd
beverages). Exen if the container is
opened, pressure cat[ build up. This cat[
cause tim container m burst, possibly
resuhing in injury.
Hot foods and steam can cause bums.
Be careflfl when opening aW containers
of hot food, cooking pouches and boxes.
To p[exent possible it_jnry, diIect smam
away flom hands and time.
As wit[1 aW appliance, close supervision is
necessaiw wlle[[ used by children.
5

IMPORTANTSAFETYINFORMATION.
READALLINSTRUCTIONSBEFOREUSING.
ALLTHESETHINGSARENORMALWITHYOURTRIVECTIOAf_OVEN
Steam or xapor escaping from around
the door
Dimming of the oxen light and change
in the blower sound may occm:
The microwme fan may operate with both
oxens off'. It is cooling the control and will
turn itself off'.
Some TV-radio inmrference migilt be
nouced while using your oxen. It is
similar to the inmrference caused by other
small appliances and does not indicate a
problem with your oven.
ARCING
If you see arc&g open the door and correct the problem.
Arcing isthe microwave termfor sparks & the
oven.Arcing iscaused by:
Metal or foil touching the side of the oxen.
Foil not molded to food (upturned edges
act like antennas).
Metal, such as twist-des, poulu y pins or
goldqimmed dishes in the oxen.
Recycled paper towels containing small
metal pieces being used in file oxen.
SUPERHEATEDWATERANDSPONTANEOUSBOILING
IJquids such as wateh coffee or ma are able
to be oveflmamd beyond the boiling point
without appealing to be boiling. Visible
bubbling or 1)oiling when the container is
remoxed from the microwme oxen is not
always present. THISCOULDRESULTIN VERY
HOTLIQUIDSSUDDENLYBOILINGOVERWHEN
THECONTAINERIS DISTURBEDORA UTENSIL
IS INSERTEDINTO THELIQUID.
vvww.GEAppliances.com
COOKMEATANDPOULTRYTHOROUGHLY,..
Cookmeatandpoultry thoroughly--meat to at leastan INTERNALtemperatureof 160°Fandpoultry
toat bast an INTERNALtemperatureof 180_ Cookingto thesetemperaturesusual/ypmtect_ against
_oodbomeillness.
SELF-CLEANINGOVEN
Do not clean the door gasket. The door
gasket is essential for a good seal. Care
should be taken not to rub, damag> or
move the gasket.
Do not use oven cleaners. No comme_vial
o_n cleaner or oven liner promctive
coating of any kind should be used in or
around any part of the oven. Residue from
ox>n cleaners will damage the inside of the
ox>n when the self-clean cycle is used.
Kee I) the oxen \_nt unobstructed.
Be%re self-cleaning the oven, remove the
broiler pan, g_id, racks and other cookware.
Be sure to wipe up excess spillage before
starting the self-cleaning operation.
If the self-cleaning mode malfunctions,
mrn the ox>n off and disconnect the power
suppl> Haw it serviced by a qualified
mchnician.
Listen %r J_an--A fan noise should be
heard sometime during the cleaning Q'cle.
If not, call a serviceman before self-
cleaning again.
READANDFOLLOWTHISSAFETYINFORMATIONCAREFULLY.
SAVETHESEINSTRUCTIONS
Introduction.
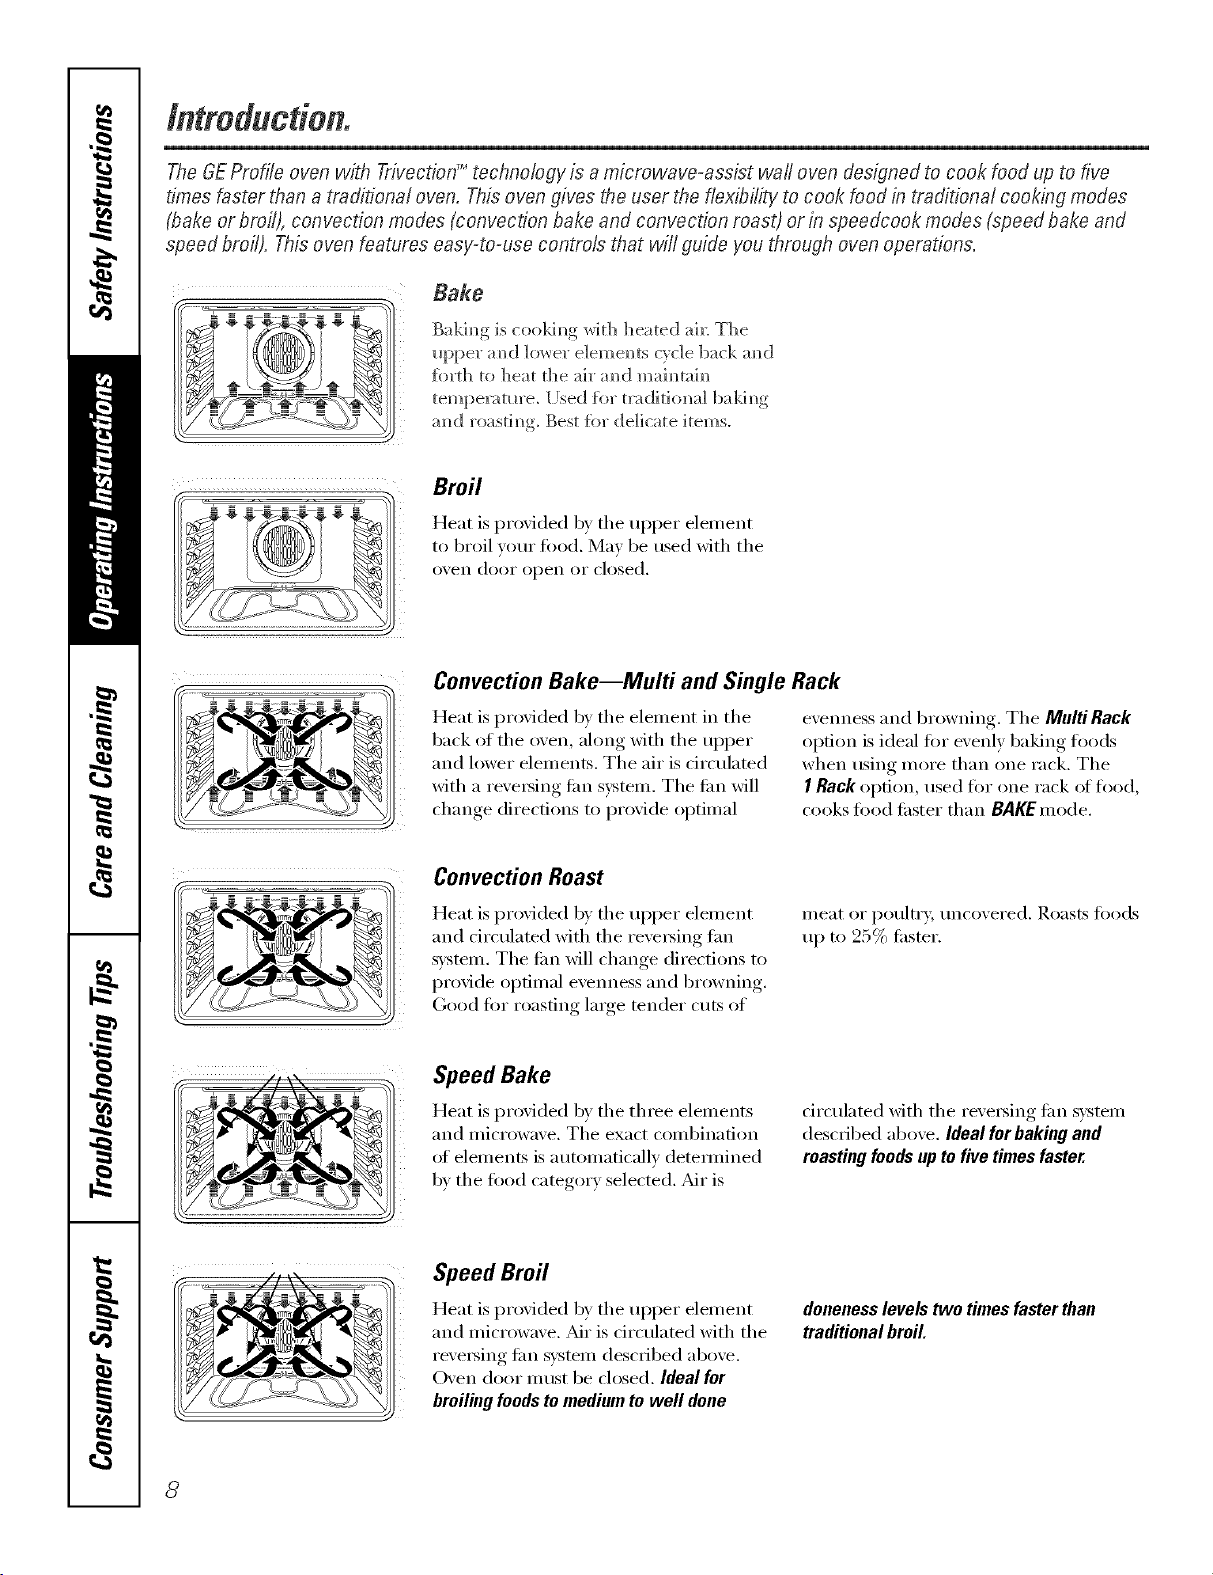
The GE Profile oven with Trivection TMtechnology is a microwave=assist wail oven desigrled to cook food up to five
times faster than a traditional oven. This oven gives the user the flexibility to cook food b traditional cookirlg modes
(bake or broil), convection modes (convection bake and convection roast) or fa speedcook modes (speed bake and
speed broil). This oven features easy=to=use controls that wil! guide you through oven operations.
Bake
gakim_g is cooldm_g ',vkh heated ai_: The
!_pper am_d h_,',_er elem em_ts cycle back am_d
forth to heat die air amid mah_tah_
tempe_m_re, I[]sed {_)r t_ditio]_a] bakim_g
a_d roasth_g. Best for delicate items.
Broil
Heat is provk]ed by fl_e upper e]emem
to broil veto" food. May be used with the
(wen (](:,(:,I" open or closed.
Convection Bake--Multi and Single Rack
Heat is provided b)' the element in the
back of the oven, along with the upper
and lower elements. The air is circulated
with a reve_ing tim system. The tim will
change directions to provide optimal
evenness and browning. The Multi Rack
option is ideal fiw evenly baking t0ods
when using more than one rack. The
I Rack option, used fl)r one rack ot fi)od,
cooks fi)od tipster than BAKEmode.
Convection Roast
Heat is pr_Mded by the upper element
and drculated with the reversing tim
system. The tim will change directions to
provide optimal evenness and browning.
Good tor roasting large render cuts of
meat or poult_]; tmco',ered. Roasts fi)ods
tip to 25% tilstei'.
Speed Bake
Heat is provided by the three elements
and microwave. The exact combination
of elements is automatically detemfined
b)' the fi)od catego_ T selected. Mr is
circulated with the reversing tim s)stem
described above. Ideal forbaking and
roasting foodsup to five times faster.
Speed Broil
Heat is provided by the upper element
and microwave. AJr is circulated with the
reversing tim s\:stem described above.
Oven door must be closed. Ideal for
broiling foods to medium to weft done
doneness levels two times faster than
traditional broil
8
Usingtheovencontrols.
(Throughout this manual, features and appearance may vary from your model.) www.GEApp/ienoee.oom
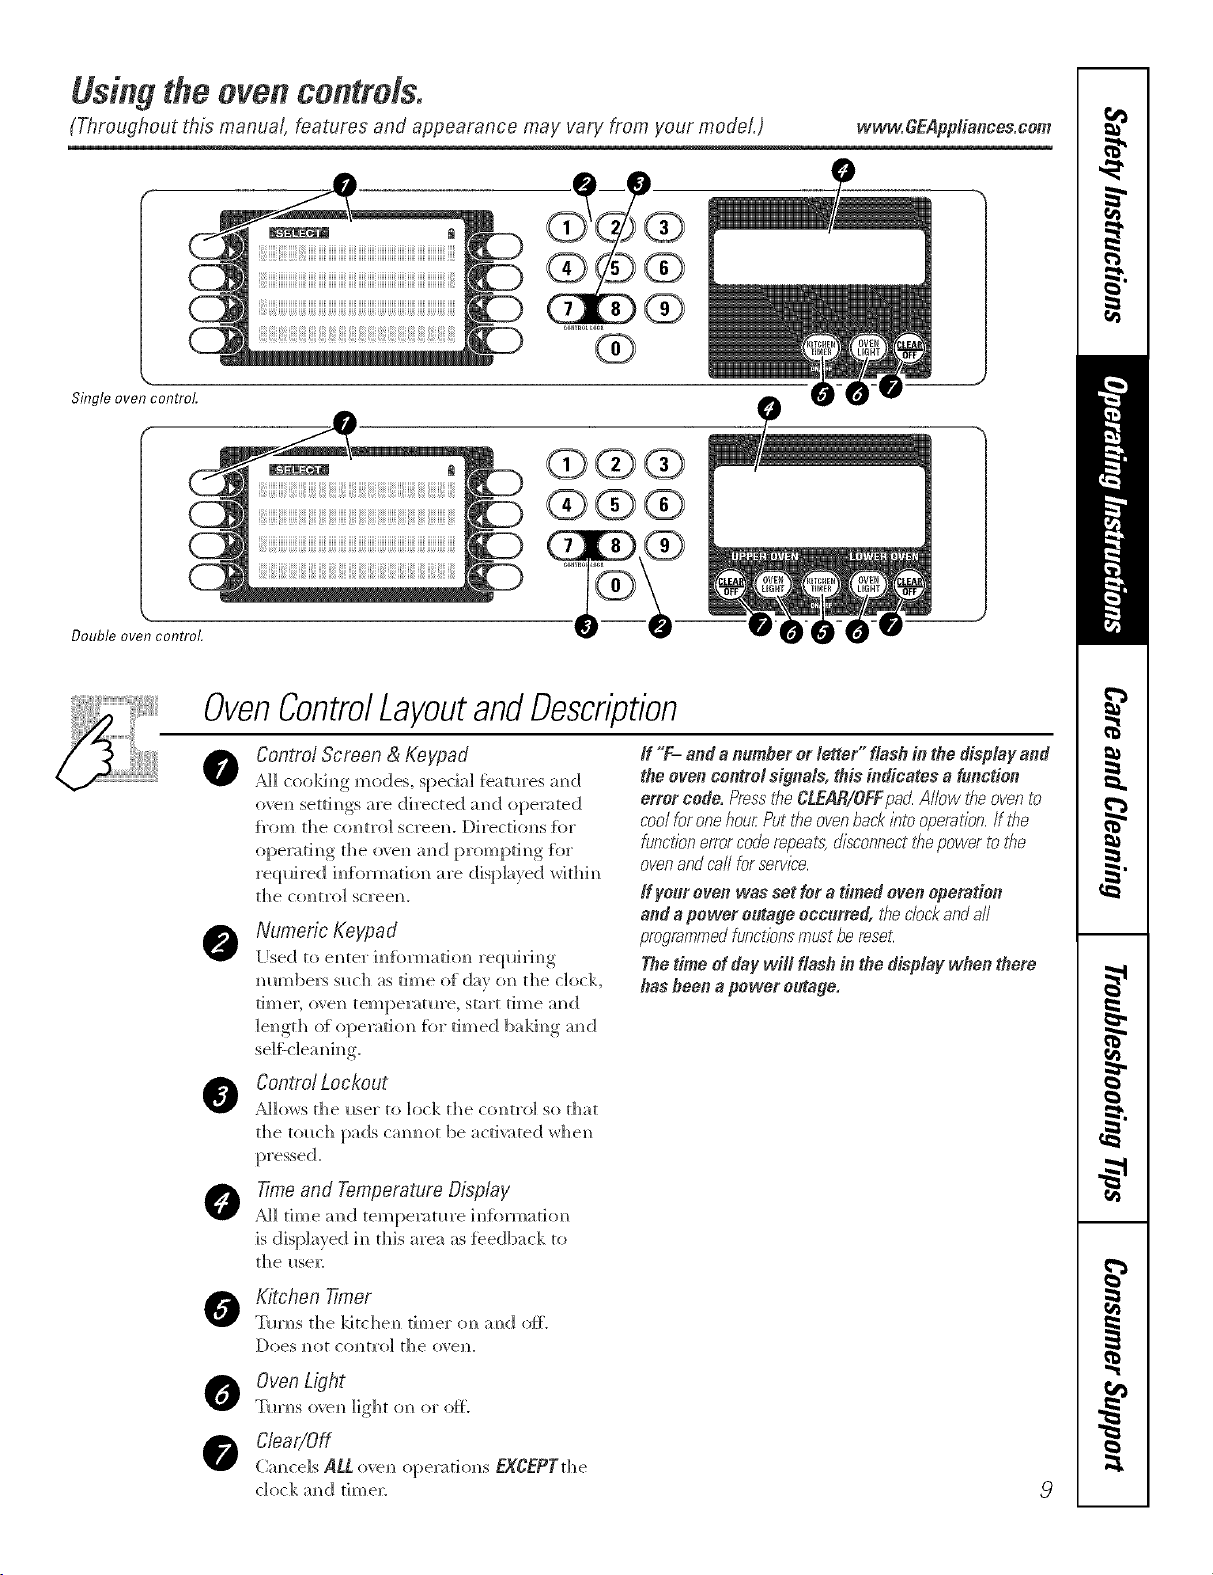
Single oven control
Double oven controL
OvenControlLayoutandDescription
0
0
Control Screen & Keypad
AH cookim_g mode% spedal teat_res m_d
oven setti_s m'e directed m_d opera,ted
t_'om the co_tro_ scree_L Direction,s {or
ope_ri_g rl_e o_ a_d prompri_g tk_r
_quired i_di,_ario_ _re &spla}ed _rHt_i_
the comro_ screen.
Numeric Keypad
[Ised ro emer i_dbm_ario_ re(pdri_g
number,s such as time of d_v on the do&,
times o_e_ tempe_ture, stuart time m_d
_e_grh o{ ope_atio_ tbr timed baki_g m_d
If "F- ande n_mherorletter" flesh in thedisplayand
theovencentre/signe_s,this indicates e f_notion
errorcode.Pressti_eCLEAR/OFFpad.Allowtheovento
coolforonehourPuttheovenbackbto operation,ff the
functionerrorcoderepeals:disconnectt¢_epowertot¢_e
ovenandcarlforservice.
_fyour oven was set for a timed oven operation
end e power o_tage occurred, t¢_eclockandall
programmedfunctionsmust be reset:
The time of day will flash in the disp/aF when there
has been a power e_tage,
AHo,_sC°ntr°/L°ckoutrhe_ser ro _ock the control so that
the u_uch pads cmmo_ be ;_cri_ared whe_
O
0
0
0
Time and Temperature Display
AH dine am] reml>e_m_re iH{brmado_
is displayed in dfis area as feedback m
[he HseE
Kitc,hen 7Truer
Tm_s d_e kitche_ timer on a_d oft.
Oven Light
T_r_s o_e_ light o_ or ore
Clear/Off
Qmcels ALLo_e, opera,riot,s EXCEPTrhe
dork m_d time_:
9
Usingthe ovencontrols.
(Throughout this manual, features and appearance may vary from your model.)
10
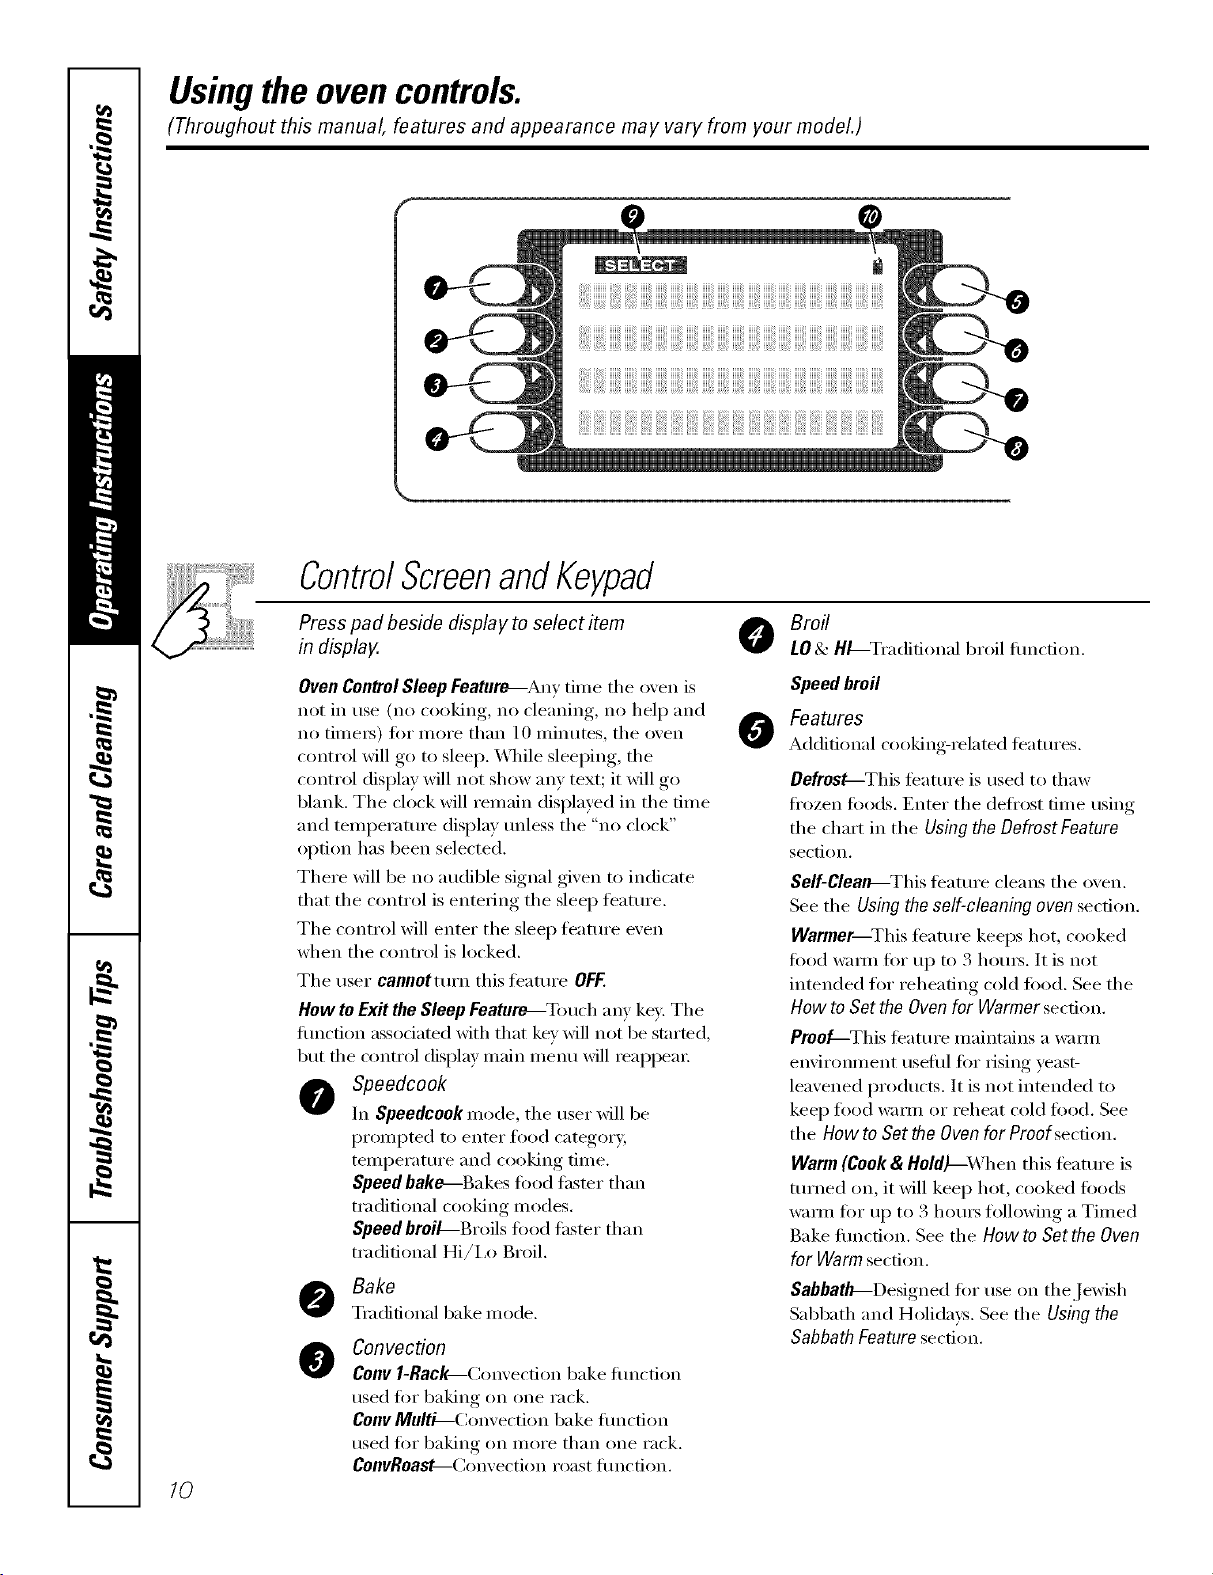
ControlScreenandKeypad
Press pad beside display to select item
in display.
Broil
LO& HL-Tradifional broil fimcfion.
Oven Control Sleep Feature---Any time the oven is
not in use (no cooking, no cleaning, no hel I) and
no time_) fi)r more than 10 minutes, tile oven
control will go U) sleep. \._]/ile sleeping, the
control display will not show any text; it will go
blank. The clock will remain displayed in the time
and temperature display mfless the "no clock"
option has been selected.
There will be no audible signal given to indicate
that the control is entering the sleep teatm'e.
The control will enter the sleep teature even
when the control is locked.
The user cannotturn this feature OFF.
How toExit the Sleep Feature_Touch any key. The
flmction associated with that key will not be started,
but tile control display main i/lentl will reappear:
Speedcook
In Speedcook mode, the tlseI" will be
prompted to enter food category,
temperature and cooking time.
Speed bake--Bakes food faster than
traditional cooking modes.
Speed broiL-Broils fi)od thsmr than
traditional Hi/ix) Broil.
Bake
Traditional bake mode.
@
Conveclion
COnYl-Rac_Convecfion bake flmcfion
used fi)r baking on one rack.
Conv Multi--Convection bake flmction
used for baking on inore than one rack.
ConvRoaM--Convection roast flmction.
O
Speed broil
Features
Additional cooking-related teattlres.
Defrost--This feature is used to thaw
fl'ozen fi)ods. Enter the deli'ost time using
the chart in the Using the Defrost Feature
section.
Self-Clealb--This teatm'e cleans tile oven.
See tile Using the self-cleaning oven section.
Warmer--This teature keeps hot, cooked
food wam_ for up to 3 houI_. It is not
intended f()r reheating cold fi)()(1. See the
How to Set the Oven for Warmer section.
Proo_-This teattlx'e i/laintains a W;iY//l
enviromnent usefld fi)r rising yeast-
leavened products. It is not inmnded to
kee I) food wam_ or reheat cold fl)od. See
the How to Set the Oven for Proof section.
Warm (Cook& Hold)_,Vhen this feature is
turned on, it will kee I) hot, cooked fi)ods
w;mn for up to 3 hom_ fl)llowing a Timed
Bake fimction. See tile How to Sot the Oven
for Warm section.
SabbatlF-Designed fi)r use on the Jewish
Sabbath and Holidays. See the Using the
Sabbath Feature section.
vvww.GEAppliances.com
ControlScreenandKeypad
Settings
This oven has additional settings that yol_
ma} choose to use. See the Settings sectitm.
Recipes
NOTE:Ondoublewalloven,s;Recipesis
avai/ab/e only on t¢_eupper oven,
This oven f_atm'e a]]o_s the i_ser
to store i_p to six tempe_tm'e/cookim_g
time com]bh_ations. The _lser cm_ then
speed bake, bake or c<mvectiom/ b;_ke/roast
om_e of d_e six stored Itiwoxite recipes
withOH[ havim_g to choose the settim_gs
each time.
o Help
Provides basic om_each
hmction mid ]11:,_ to fim/d the {_mction.
If selected {_'om the home screen, it gives
gel/er_4 h e] p. If se]ected wh]] e [::_erfkn'm] m_g
a flmction, it gives help on theft J_m/ction.
Select EMtto leave Help.
Se/ect Prompt
Visual prompt to the user im_dic_tim_g
th_tt a selection m_eeds to be made J_'om
the ctmt]'o] screem
Door Lock Indicator
indicares that the oven door is locked
for se]/:-c]ea m
11
Usingthe clock, timerandcontrollockout.
Make sure flTeclock is set to the
correct time of da_
ToSet the Clock
The clock must be set to the correct time
of day fin" the aumnmtic oven timing
tractions to _x)rk properl> The time of
day cannot be changed during timed
baking, a selfk'leaning wcle or delayed
start time.
[] Select SETTINGS.
[] Select CLOCK
[] Press the number pads.
[] Select ENTER.
The timer is anhour and mflTute
timer onl>
The timer does not control oven
operations. The maximum setting on
the timeris 9hours and59 mhTutes.
Toset I0 mhTutes,enter I0. DO NOT
enter lO:OO!
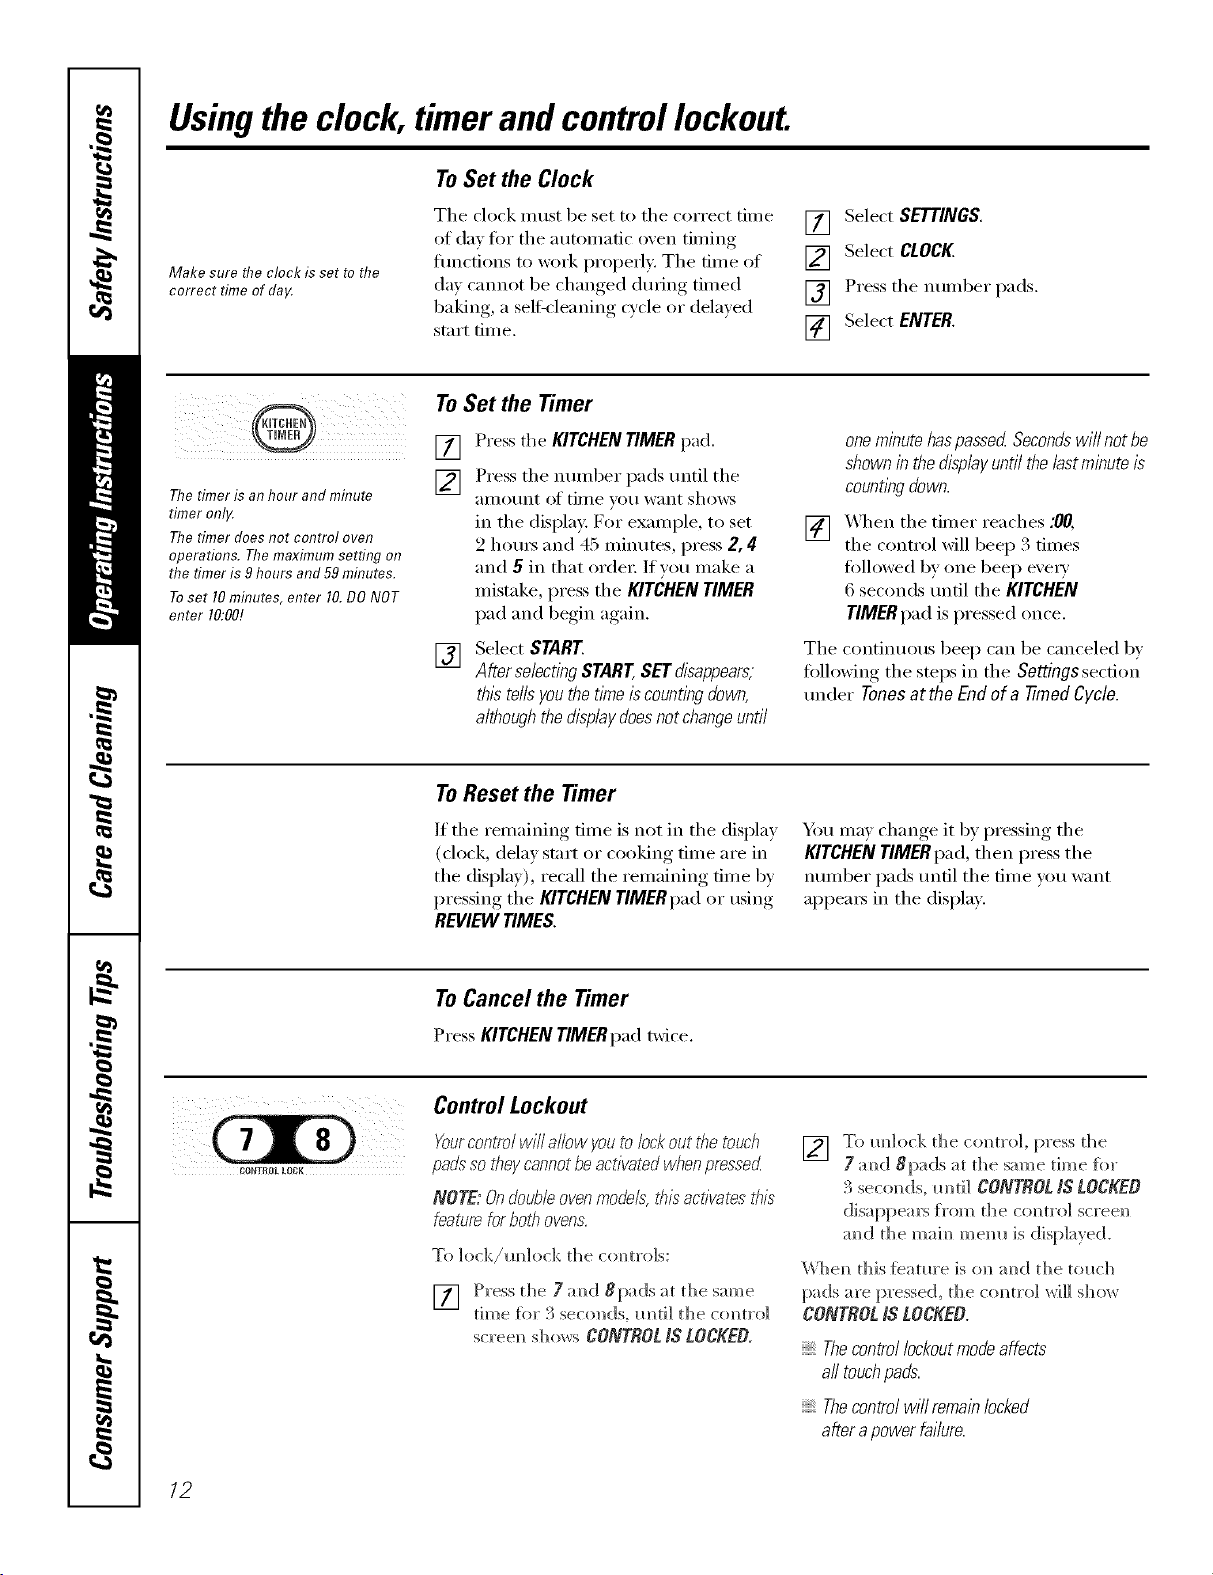
To Set the Timer
[] Press the KITCHEN TIMER pad.
[] Press the nmnber pads tmtil the
aii/otlnt of time }ou want shows
in the display: For example, to set
2 houIs and 45 ininutes, press 2, 4
and 5 in that order: If you make a
mistake, press the KITCHEN TIMER
pad and begin again.
[] Select START.
Atier selectingSTART,SETdisappears,
this tells youthe time iscounting down,
although the displaydoes notchangeuntil
oneminute haspassed Secondswill not be
shown in the displayuntil the/astminute is
countIw down.
[]
_4q_en the timer reaches :00,
the control will beep 3 times
followed by one beep eve_)
6 seconds tmtil the KITCHEN
TIMER pad is pressed once.
The continuous beep can be canceled by
tollowing the steps in the Settings section
trader Tonesatthe Endofa timedCycle.
To Reset the Timer
If the remaining time is not in the display
(clock, delay start 1)I"cooking time are in
the display), recall the remaining time by
pressing the KITCHENTIMERpad or using
REVIEW TIMES.
Y>u may change it by pressing the
KITCHENTIMERpad, then press the
nulnber pads 111161the dine you want
appea_ in the displa>
ToCancel the Timer
Press KITCHEN TIMERpad twice.
Control Lockout
Yourcontrol will allow youto lock out the touch
pa&" so they cannotbeactivated whenpressed
NOTE: Ondoubleoven models,thisactivates this
feature forbob ovens.
To ]ock/m_]ock the co,m'o]s:
[] Press tl]e 7 m_d 8pads at the same
time fiw 3 seco]]ds, m]ti] tl]e comm'o]
scree_ sho_s CONTROLIS LOCKEO,
[] To m_]ock the colin'o], press the
7 amid 8pads at [he same [_]]]e f(_]"
3 seco_ds, m]t]] CONJJ_OL N LOCKEO
disappear> t_'om tile comm-o] scree_
m_d the maim_ mem_ is displayed.
\Vbem_ this [eatm'e is ol_ m_d the tol_cb
pads are pressed, the commo] _rH]] S]_(}_ r
CONTROLIS LOCKEO.
Thecontrollockoutmodeaffects
all touchpads.
Thecontrolwillremainlocked
afterapowerfailure.
12
Usingthe oven. www.GEAppliances.com
Toavoid possible bums, place the racks in the desired position before you turn the oven on.
Before you begin...
The racks have stop-locks, so that when
placed correctly on the SUl)ports, they will
stop befi)re coming completely out, and
will not tilt.
_,_l_en pladng and removing cookware,
pull the rack out to the bum I) on the
rack suI_pom
Toremove a rack, pull it toward you,
flit the fl'ont end up and pull it out.
Toreplace, place the end of the rack
(stoI>locks) on the suI_port, tilt up the
ti'ont and push the rack in.
NOTE: Ondouble wall ovens,the rackdesl)n is
unique forthe upper TrivectionTmoven.Dueto
this, the upperovenracksandthe lower oven
racksarenot interchangeable.
NOTE:A coohngfanwillautomaticallyturnon
dunbgaftcooklbgmodes.Thisfanturnsonto
coo/ihternaiparts.Itmayrunforupto 1-1/2
hoursaftertheovenisturnedoff.
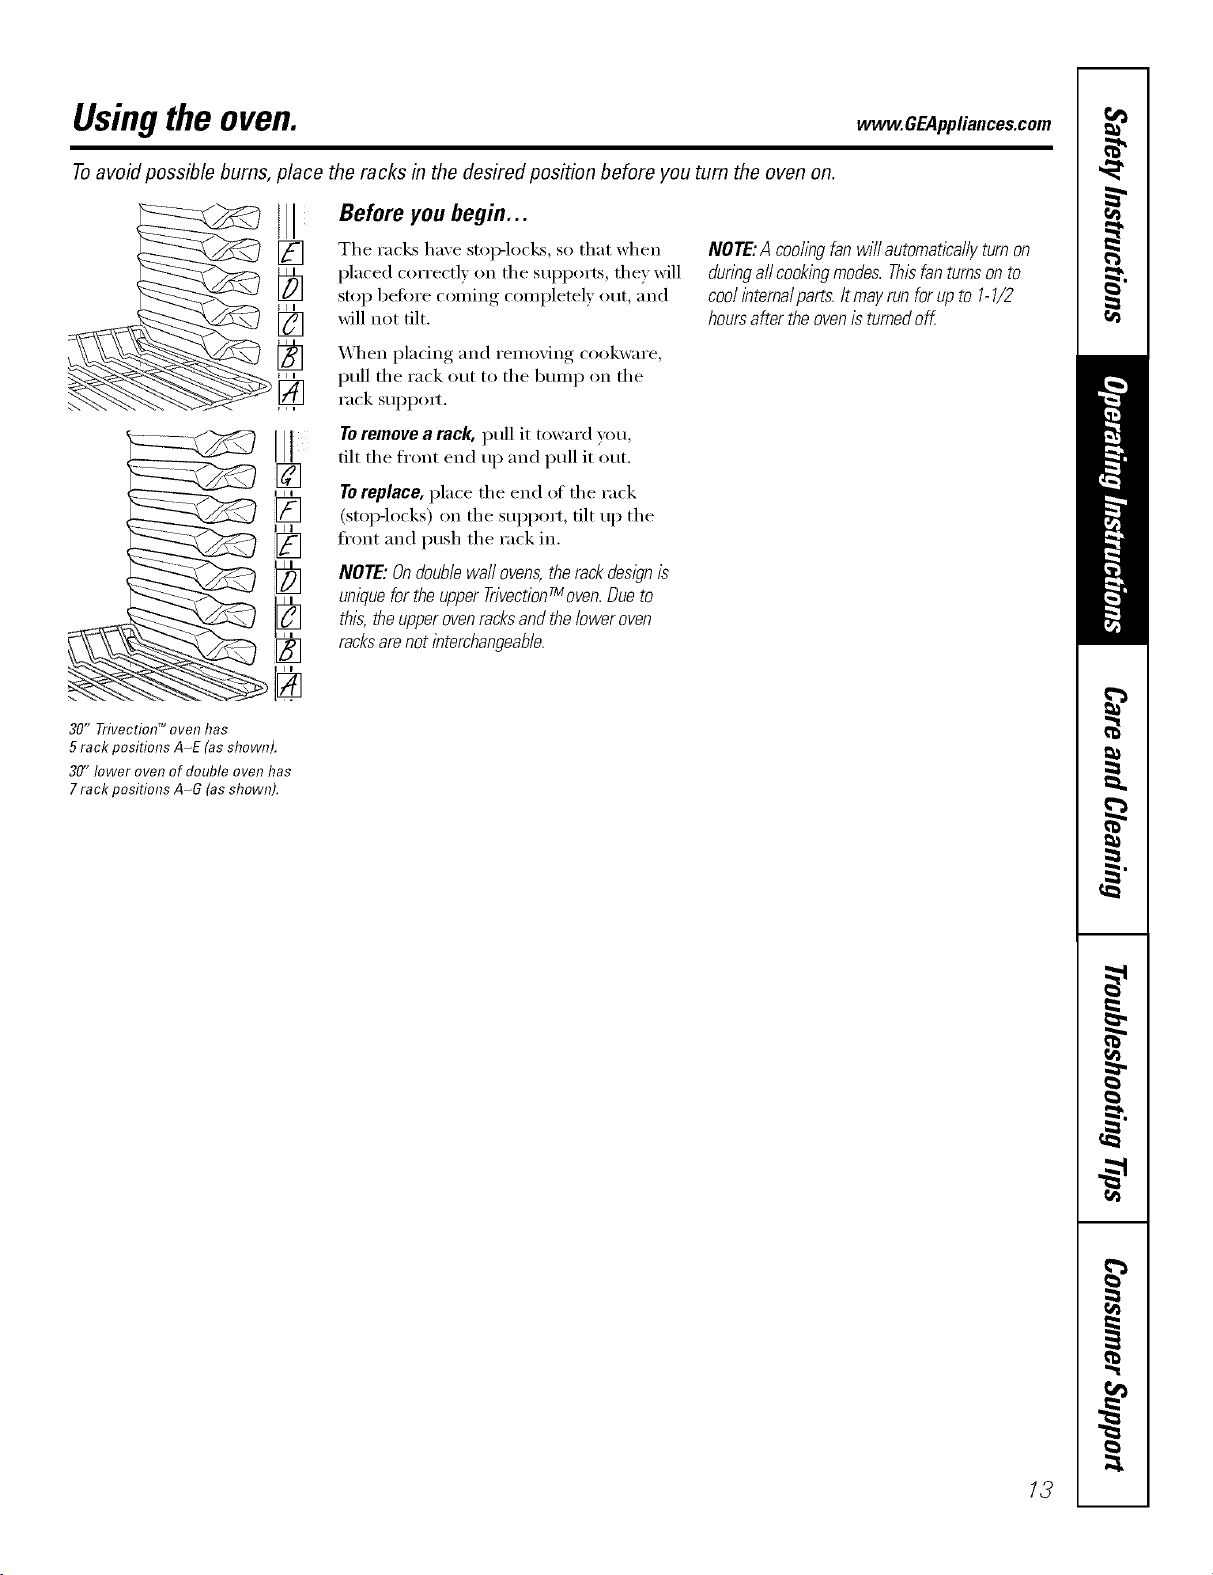
30" TrJvectiol7 TM oven has
5 rack positions A-E (as shown).
30" lower oven of double oven has
7 rack positions A-G (asshown).
13
Usingthe TrivectionTM oven.
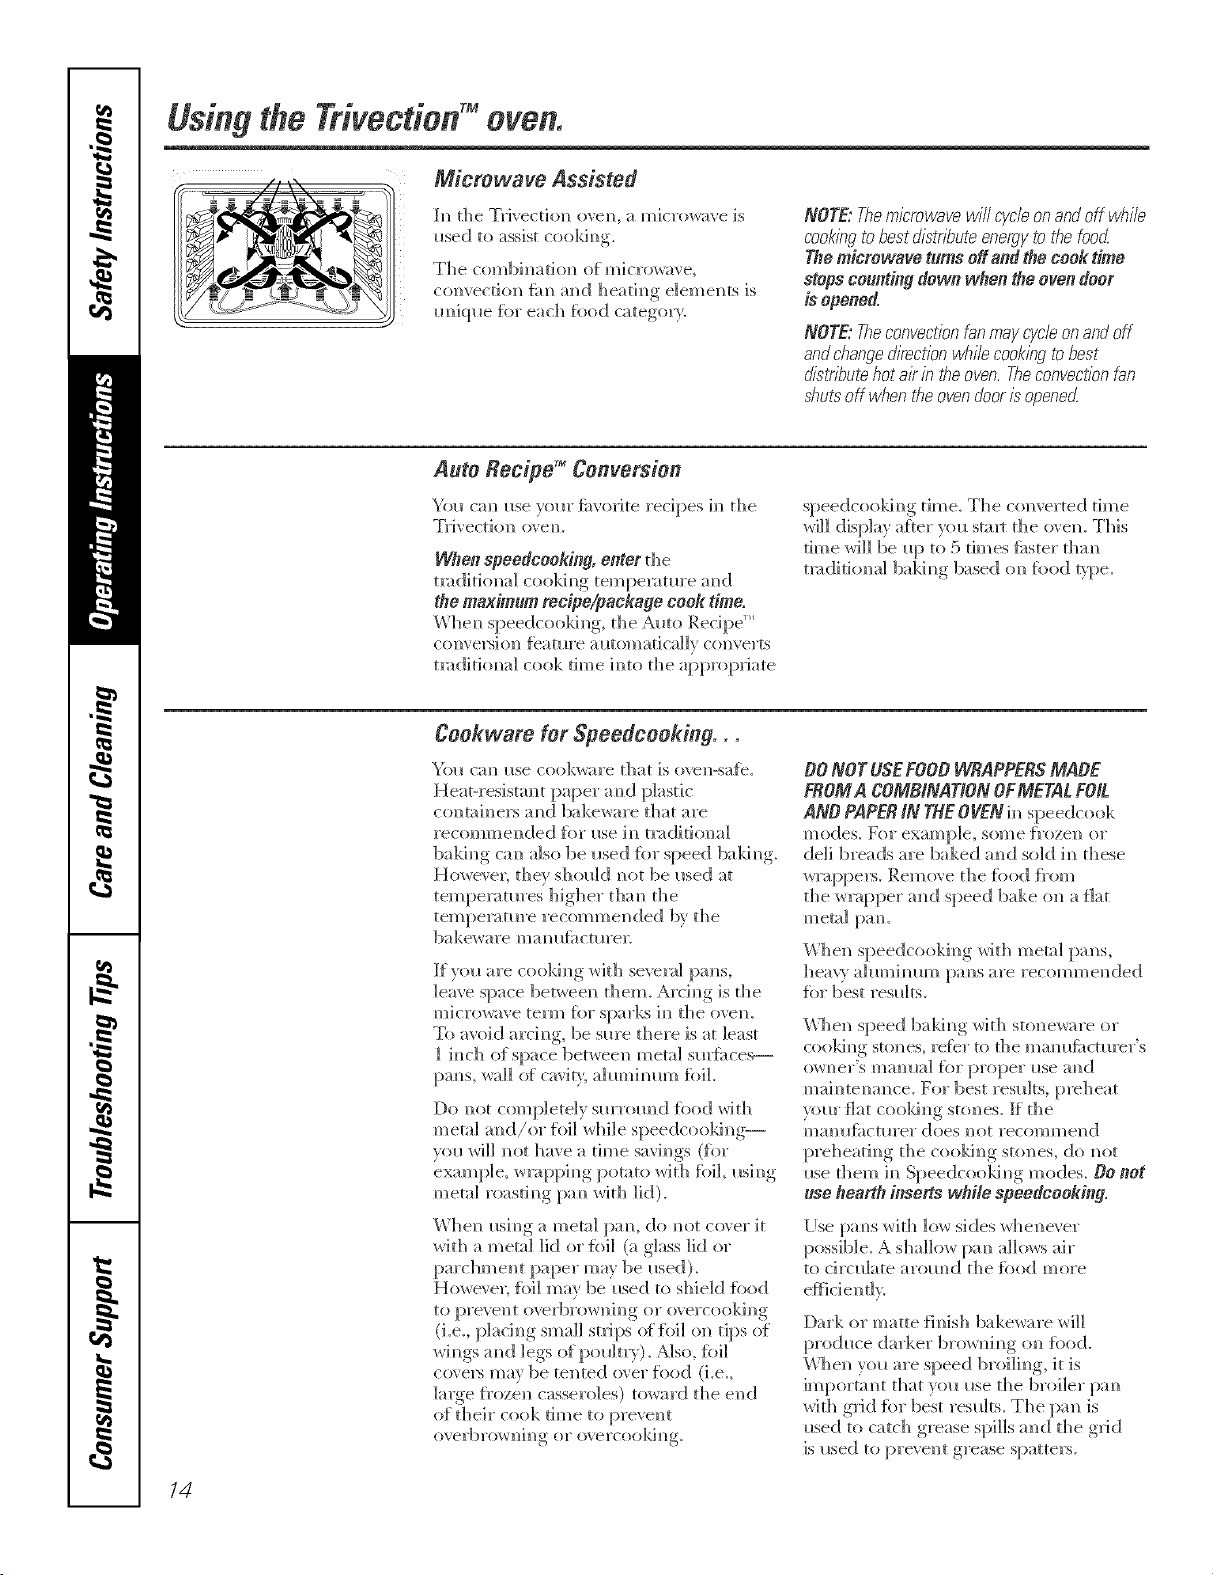
Microwave Assisted
b_ {he mFiyect]o]_ ovem_, a microwave is
used to assist cookim_g.
The combim_don of micr_t_ave,
convecdon fire amid heating elements is
m_]ql_e fbr each %od category.
NOTE:Themicrowavewill cycleenandoffwb#e
cookingtobestdistdbuteenergytothefood
Themicrowaveturnsoff andthecoo&-time
stopscountingdown whentheovendoor
isopened.
NOTE:Theconvectionfan may cycb en andoff
andcbangedirection bd}//ecookingtobest
distT/TJutehot air in the oven.Tbeconvectionfan
shutsoff when d_eevendooris opene_
Auto Recipe TM Conversion
You cm_ I_se yore" fi_vorite recipes im_the
Trivection o_ em
When speedcooking, enter the
tmd]tioi_a] cookim_g teilipen_ture mid
the maximum recipe/package cook time.
Wbem_speedcookim_g, the Auto Recipe '_'
coiwe_gi(m feature mltomadcallv com'erts
tm(Jithma] cook time h_to the appropriate
speedcookim_g time_ The converted time
wi]] display aiter you staKr die o_ em This
rime _rd]] be I_t) to 5 times tipster d_m_
tmditiomm] bakim_g based om_%od pipe.
Cookware for Speedcooking . .
Yol_ cm_ i_se cookware that is oven-sa{_.
HeaH'esistm_t paper amid plastic
c(mtah/elN mid bakeware that are
recommended fbr me im_t_ditiona]
bakim_g cm] also be _sed {or speed balding.
Howe\ el; they sho_id _]ot be reed at
tempemtm'es higher t]]m_ the
temperature recommended by the
bakeware ma_? Ilfi_ctlll'eE
If vo{_ are cooki_g wkh severn] }xms,
leave space between diem. Arci_g is tile
microwave term for sparks i_ die oven.
To amid arch_g, be sure there is at least
] i_]ch of space between metal surfi_ces--
pm_s, wall of cavit 5 ahm_imm_ fbil.
Do _mt completely smTom]d fi)od with
metal m_(;l/or foil _hile speedcookh]g--
V{)_/_rd]] _Ot have a dine savi_gs (tot
exam [)]e, wra 11))i_g, [_otato with fbi], usi_g
met;t] roasd_g pm_ *Arith lid).
When mi_g a metal pm_, do _ot co',er it
with a metal lid or {hi] (a glass lid or
parchment paper may be me(I).
Howe', e_; {bi] may be used to shield {ood
to preve]_t o_vrbrowni_g or o_ercooking
(i.e. p]aci_g small strips of {i)i] on tips of
wi_gs a_d legs of po_dtr)). Nso, tbil
c(}_ers may be tented {Bet fi)o(] (i.e.,
lalge {}'oze]l casseroles) toward the e]ld
of their cook time to prevent
overbroxH_h_ or o\ ercooki_
DONOT USEFOOB WRAPPERSMADE
FROMA COMBiNATiON OFMETAL FOiL
AND PAPERiN THEOVEN i_ speedcook
modes, Fbr example, some {_'ozen o1"
deli breads are baked a_]d sold i_ these
w_:q>pers. Rein <_\e the J_b{:<;l{i'om
the w_:q:)per :rod speed bake on a flat
metal pmL
When speedcooki_g with metal pans,
heav_ ahm_ilmm i)al_s are recommended
\'\lien speed baldn_g with stoneware or
CO(}killg StoIIes, l'et}F tO the []/i/l/llfi_ctul'el" S
(}_ I?er's real? Ila] f{ir proper iise all d
mai_]te_an_ce. For best rest_lts, p_>heat
your flat coold_g stones. [I the
mam_lhctm'er does _ot recommend
preheati_g the coo]d_g stones, do _ot
me them in Speedc(_okh]g modes. DO not
usehearthinserts whilespeedcooking.
[Ise pm_s with 1o_ skies whene\ er
possible. A shallow pa_ allo_s air
to circulate arom_d the %od more
Dark or matte fimsh bakeware will
produce darker bro_ni_g {m {hod.
When yo_ are speed brtd]i_g, it is
importm_t that you use the broiler pa_
_,%rl[hglf'](][ ti}l"best res_dts. The pan is
reed to catch grease spills an_d the g]Jd
is reed to pre_ ent grease spatters.
14
www.GEAppliances.com
Other Speedcooking Tips...
Youmustpreheat your oven.
Put tile tood in tile oven after the
preheat beep when tile oven control
displays "Put Food In Oven" and then
press START Youmustpress the START
key alter placing the foodin the oven to
Matt the speedcook mode.
_]/en choosing a speedcook tood
category, refer to tile chart on page 16.
All frozen foods should be speedcooked
using the FROZENFOODS category.
_]/en baking potatoes, tile
recommended cooking temperature
is 350°F and cooking time is 90 minutes
fin" mediunl sized potatoes. Add an
additional 15-30 minutes fin" lmge
potatoes or when baking more than
_( )/1I" potntoes.
In general, when cooking meats wrapped
in dough or reti_igerated dough product,
use the Biscuit/Roll or BakedGoods
camgory.
For redpes using a lmge quanfit)'
(ff cheese, milk and/or eggs, use the
gakedGoods categm}'.
imger amounts offiiod or multiple racks
ot flxid may require additional time.
Check tood doneness as ix'tnnlXed and
continue cooking as needed.
Items such as appetizei_, cookies, biscuits
and rolls can be speed baked on multiple
racks. Cooking time may increase slightly
fin" some toods, but since two or three
racks of tood are being cooked at tile
same time, tile overall result is substantial
time saved.
_]/en cooking multiple items or pans,
leave space between tl/em fin" nmxinmm
air circulation.
Cakes and quick breads (banana,
zucchini or pmni_kin bread) are not
reconm/ended tot m ulfiple rack speed
baking. Place cakes side-by-side on one
rack if speed baking. When using more
than one rack to cook these toods, use
CONVMULTImode. See Usingthe
convection modes section.
Meats/Poultry
Cooking times will \my depending on
tile cut of meat. Check fi)r doneness at
mininmnl finle. Note:Meats will continue
to cook and internal temi)eramres will
IJse atter they aI'e i'eilloved J[i'Oill tile oven
(standing time).
Use tile broiler pan and grid provided
with w)ur oven fin" best results.
_s in a conventional _wen, almninunl foil
may be used to shield food--to ix'event
overbrowning or overcooking (i.e., placing
small strips ot toil on tiI> of wings and legs
of poultIT). Mso, foil coveI_ may be ranted
over tood (i.e., large frozen casseroles)
toward tile end ot fl/eir cook time to
prevent ()x'erbIx)wning or ()x'ercooking.
Make sure that the toil is securely attached
to the tood. Howevei; lmge an/ounts of
foil or flllly enclosing tood in foil blocks
the microwave ener_:, which eliminates
time savings.
Do not use oventhermometers, meat
thermometers or wire twist-ties in the
oven while speedcooking.
Pop-u l) themlometei_ in your meat
may be inaccurate. Check file temi)emtme
of tile meat with a tlmmlometer after
removing tile meat flx)m tile oven.
For best results, speed bake turkeys
tmstufled.
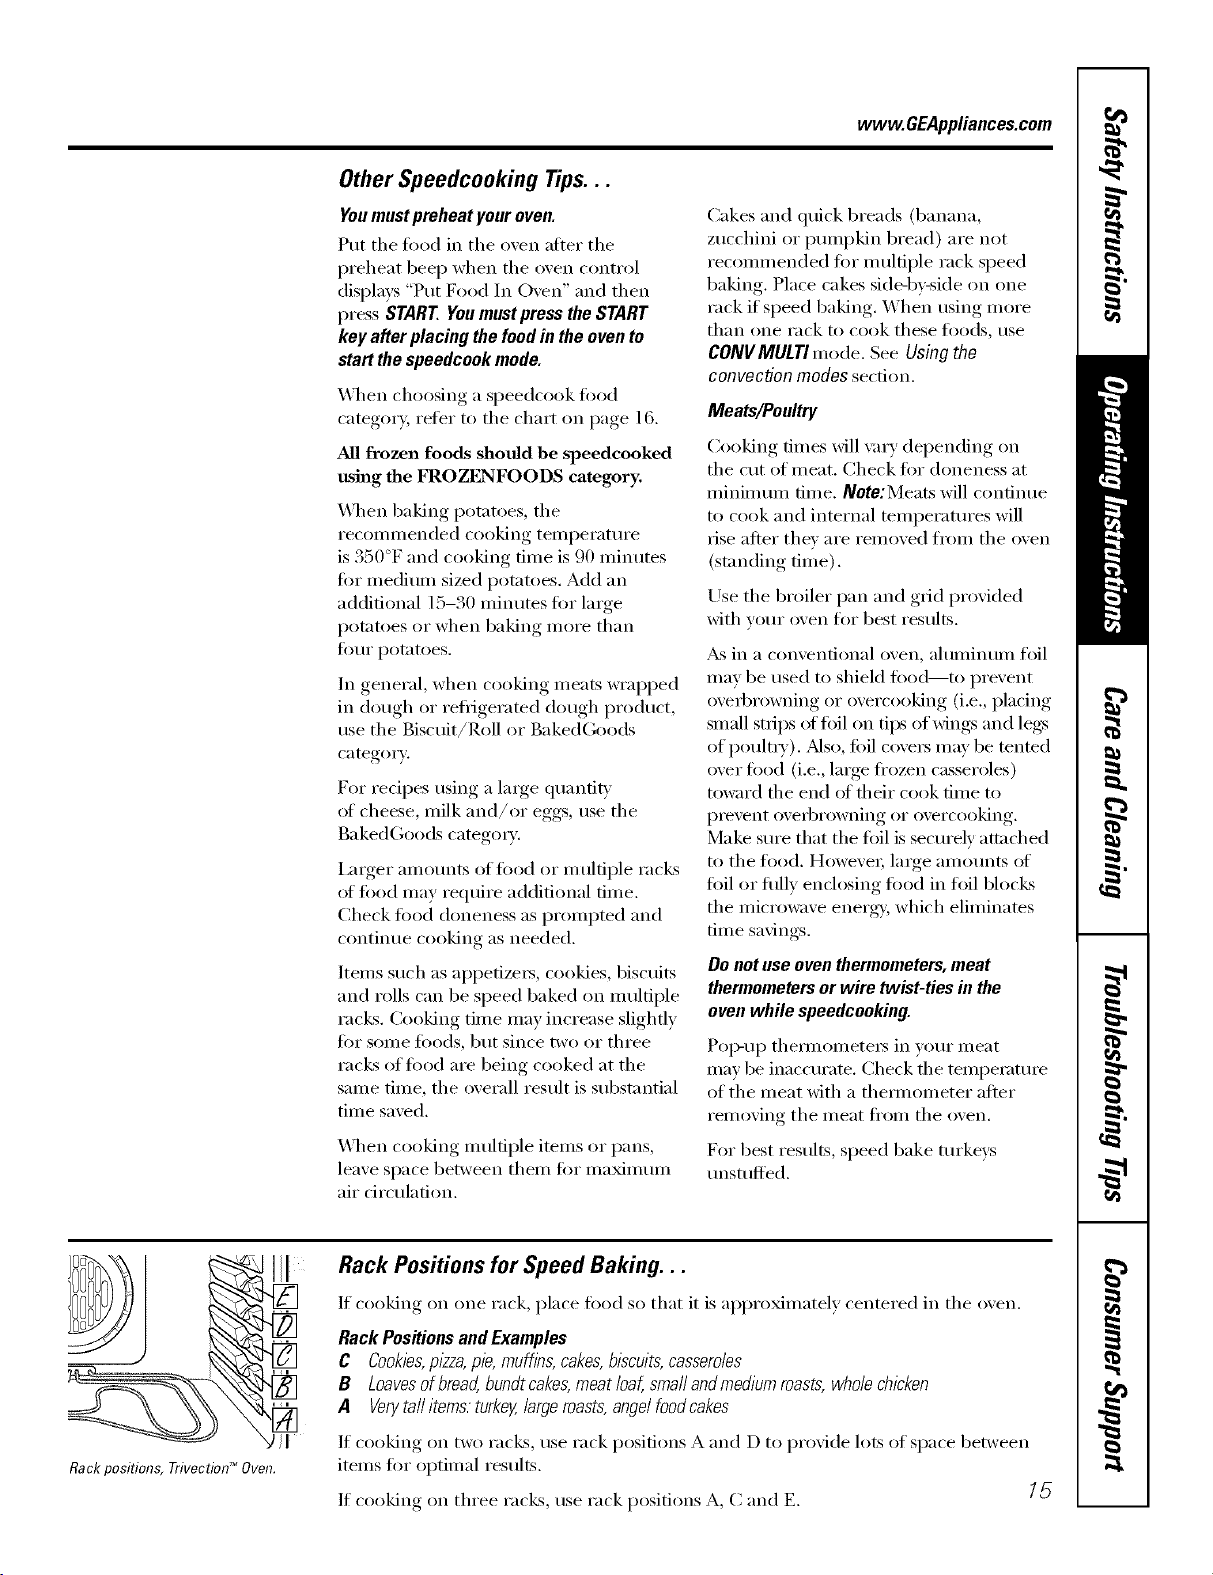
Rackpositions, rrivoctiod_Ovon.
Rack Positions for Speed Baking...
If cooking on one rack, place food so that it is al)l)roMnmtely centered in tile oven.
Rack Positionsand Examples
C Cookies,pizza,pie, muffins, cakes,biscuits,casseroles
B Loavesofbread,bundt cakes,meat loaf, smafl and medium roasts,whole chicken
A Verytaftitems.turkey,large roasts,angelfoodcakes
If cooking on two racks, use rack positions A and D to provide lots of space between
items fin" optimal results.
If cooking on three racks, use rack positions A, C and E. [_

Usingthe TrivectionTM oven.
How to Set the Ovenfor Speed Baking
[] Select SPEEDCOOKffom tile []
Illain I//entl,
[]
[]
Select SPEED BAKEwhen baking
or roasting.
Select fired _pe. You can select
FROZENFOODS,MEAT or VEG/CASS.
Select MORE to see additional
categories--POULTRY/FISH,
BAKEDGOODSand BREADS.
Reference tile table for food
category and time savings.
NOTE;Y)m will need to select a
subcategm T tot some toed _'pes.
For example, if you select VEG/CASS,
w_u will need to select between
BAKEDPOTATO, VEGETABLEor
CASSEROLE.
] Enter recipe cook temperature.
[] Enter maximum recipe orpackage
cook time.
[_] Select START Cook time will
atltOi//aticallv ('on_,ei't to shorter
time and displa)on control screen.
[] You must alwa}s ix'eheat tile oxen.
X_'ait tot I)reheat si,mal,_and message,
on displa_ to "PUT FOODIN OVEN"
before I_lacing, toed in oxen.
Select START Start will not appearon
controlscreenuntil dooris openedand
food isput inoven. Youmust select START
to startcooking Countdownof cook time
will begin.
Note:FoodmaybecheckedatanytlYne
byopeningthedoor Themicrowaveand
convectionfanwillturnoffandthecooking
timecountdownwillstopwhilethedooris
open.Aftthreewill resumewhenthedoor
isclosed
[] Check fi_od when promi)ted and
add inore tiine if desired.
After thecookingtimehasended,theoven
willprompttheusertoadd"MORETIME"
tofurthercookfoodifdesiredAdd
additionaltimebyselectingMORETIME
Entertraditionalcookingtimeinminutes
andse/ectSTARTOnceagain,theoven
automaticallyconvertsthetraditionaltlYne
totheappropr&tespeedcooktlYne(nearest
minute).PressCLEAR/OFFpadif food
hasflblshedcooking.
Food Type Food Subcategory Approximate Time Savings
FrozeoFood Desserts 1-1/2timesfaster
MainDishes 2 timeafaster
Snack/Sides 2 to3 timesfaster
Meat Ham 1-1/2timesfaster
Pork 2-1/2 to3 timesfaster
Beef 2-1/2 to3 timesfaster
Lamb 2-1/2 to3 timesfaster
Game/Wild 2-1/2 to3 timesfaster
Veg/Cass BakedPotato 5timeafaster
Vegetable 4 timeafaster
Casserole 4 timesfaster
Poultry/Fish 2 to3timesfaster
BakedGoods 2timesfaster
Breads QuickBread
DoughBread
Biscuit/Roll
Food Examples
Frozen:Pies,Cookbs,Cobblers
Frozen:Entrees,Lasagna,TVDinners,Pizzas
Frozen:Snacks,Appetizers,Vegetables,FrenchFries
Frozen:Rolls,Biscuits
Ham
PorkTenderloin,PorkRoast
Meatbaf, BeefRoast
LegofLamb
Veniean
BakedPotatoes
Unfrozen:Vegetables{carrots,squash,etc.)
Unfrozen:Meat Casserolesor Lasagna,
Unfrozen:VegetableCasseroles
Chicken,Fish,Turkey,Seafood,CornishHens
Cookies,Muffins,Cupcakes,Appetizers,BarCookies,Cakes,
FreshPies,Brownies,Souffles,Cobblers
QuickBreadssuchas CornBreadandBananaBread
YeastBread,Freshor DeftPizzas
Biscuits,SweatRolls,DinnerRolls,Breadstbks
2timesfaster
3timeafaster
3timeafaster
16
www. GEAppliances,cem
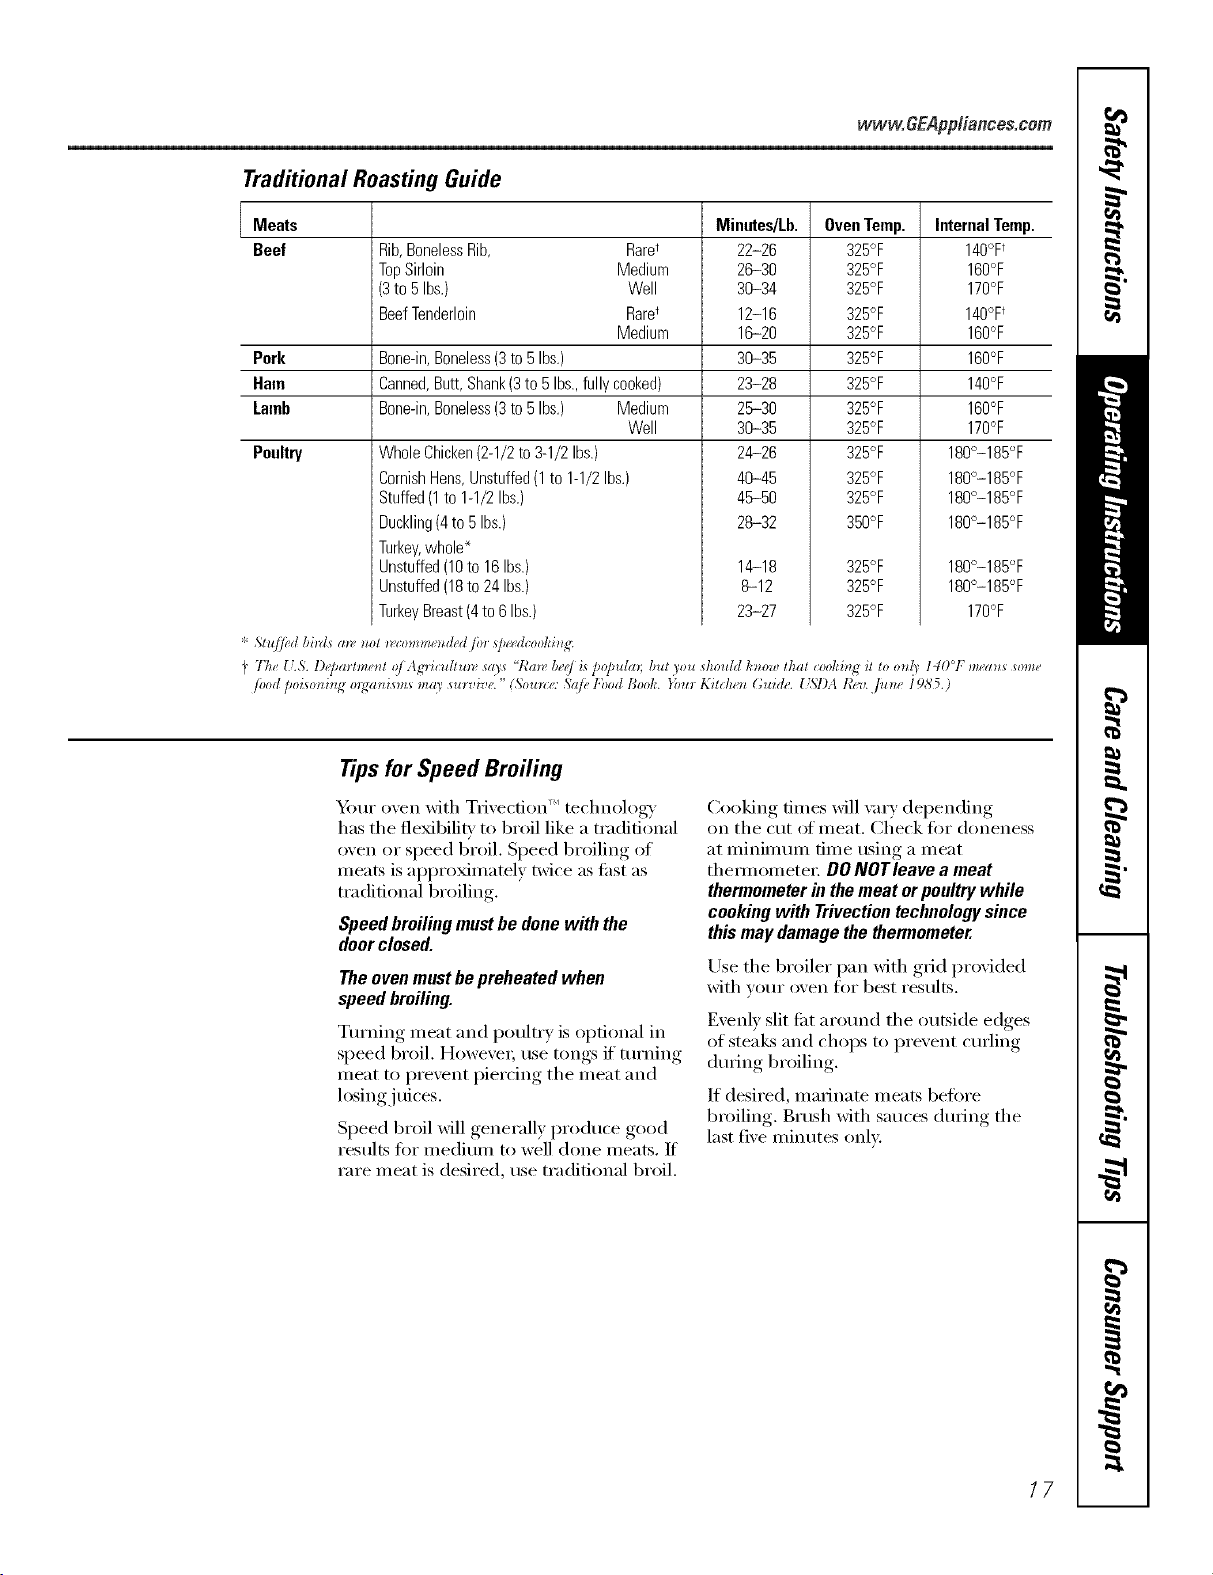
Traditional Roasting Guide
Meats
Beef Rib,BonelessRib, Rare_
TopSirloin Medium
(3to 5Ibs.) Well
BeefTenderloin Raret
Medium
Pork Bone-in,Boneless(3to5Ibs.)
Ham
Lamb
Banned,Butt,Shank(3to 5Ibs.,fullycooked)
Bone-in,Boneless(3to5Ibs.) Medium
Well
Poultry WholeChicken(2-1/2to3-1/2Ibs.)
CornishHens,Unstuffed(1to 1-1/2Ibs.)
Stuffed(1to1-1/2Ibs.)
Duckling(4to 5Ibs.)
Turkey,whole_
Unstuffed(18to 16Ibs.)
Unstuffed(18to24Ibs.)
TurkeyBreast(4to6 Ibs.)
* 5,lu//ed bm[s (m, m_l _co_mm_t_ded ib_ _peed_ookD/_:
Minutes/Lb.
22-26
26-30
36-34
12-16
16-20
36-35
23-28
26-30
36-35
24-26
46-45
46-50
28-32
OvenTemp.
325°F
325°F
325°F
325°F
325°F
325°F
325°F
325°F
325°F
325°F
325°F
325°F
350°F
14-18 325°F
8-12 325°F
23-27 325°F
InternalTemp.
140°F
160°F
170°F
140°F
160°F
160°F
140°F
160°F
170°F
180°-185°F
180°-185°F
180°-185°F
180°-185°F
180°-185°F
180°-185°F
170°F
I Th_ U.5. l)epmm._*tl oi ,_,g'Hcuflu__a',s"Ran b_d i_po/mlm; bur _ou _hotddh_,owlhal coohin_it lo o_d_140°F m_a_*s_ome
/ood [_oi_onhlg ol_an_m,s mm _ul_,De." (Soun:e: 5a/b 1;hodBool< }bul K_rciun Guide. _ _,/)AR_v..]Um_ 1985.)
Tips for Speed Broiling
"_mr oven with Tlivecfion ''_technology
has the flexibili F to broil like a traditional
oven or speed broil. Speed broiling of
meats is appro_mamly twice as thst as
traditional broiling.
Speed broiling must be done with the
doorclosed.
Theovenmustbepreheatedwhen
speedbroiling.
Turning ineat and poult_ T is optional in
speed broil. However; use tongs if turning
meat to prevent piercing the meat and
losing juices.
Speed broil _6ll ,generallx, I)roduce ,good
results fiw medium to well done meats. If
rare meat is desired, use tradidonal broil,
Cooking times will \m T depending
on the cut of meat. Check for aloneness
at minimum time using a meat
them_omete_: OO NOTleave a meat
thermometer in themeat or poultry while
cooking with Trivection technology since
this may damage the thermometer.
Use the broiler pan xdth grid provided
with _om" oxen for best results.
Evenl) slit fi_t around the outside edges
of stea]_s and chops to I)rexent curling
during broiling.
If desired, ruminate meats befiwe
broiling. Brush with sauces during the
last fixe ininutes only.
17
Usingthe TrivectionTMoven.
How to Set the Ovenfor Speed Broiling
Heat is provided by the upper element
and micro_\'e. _dr is circulated with the
revet_ing tim system. Oven door must be
closed. Ideal for broiling foodsto medium to
well done donenesslevels two times faster
than traditional broil.
[]
[] Select SPEEDCOOKFl'om the
Ill_lln I/1 entl,
[]
[]
Select SPEEDBROIL.
Enter traditional broil time fi)r fit_t
side (using maximum time if a range
is gixen). Reierence the chart below,
NOTE"If youdon'tp/an to turn the food
over,enter thetotal broil time.
[]
[] Select STARTto preheat o_,en. Cook
time will automatically comert to
shorter time and displa) on control
scl'een.
[] You must pvoheat the oven. X_fit
fin- the I)reheat sional_ and message,
on display to "PUT FOODIN OVEN"
before placing food in o_en.
Select START.Startwillnotappearon
controlscreenuntildoorisopenedand
foodisputinoven.Countdown oi cook
dine will begin.
NOTE:Foodmaybecheckedatanytime
byopeningthedoor Themicrowaveand
convectionfanwi//turnoffandthetl_ne
countdownwi//stopwhilethedoorisopen.
Theywi//resumewhenthedoor/sc/osecL
Check fi_od when prompted. Tm'n
fi)od as needed and add more dine
fin" the second side.
After thecookingtimehasended,theoven
willprompttheusertoadd"MORETIME"
tofurthercookfoodifdeskedAdd
additionaltimebyselectingMORETIME
Entertraditionalcookingtimeinminutes
andse/ectSTARTOnceagain,theoven
automaticallyconvertsthetraditionaltlYne
totheappropriatespeedcooktlYne{nearest
minute).PressCLEAR/OFFpadif food
hasfinishedcooking.
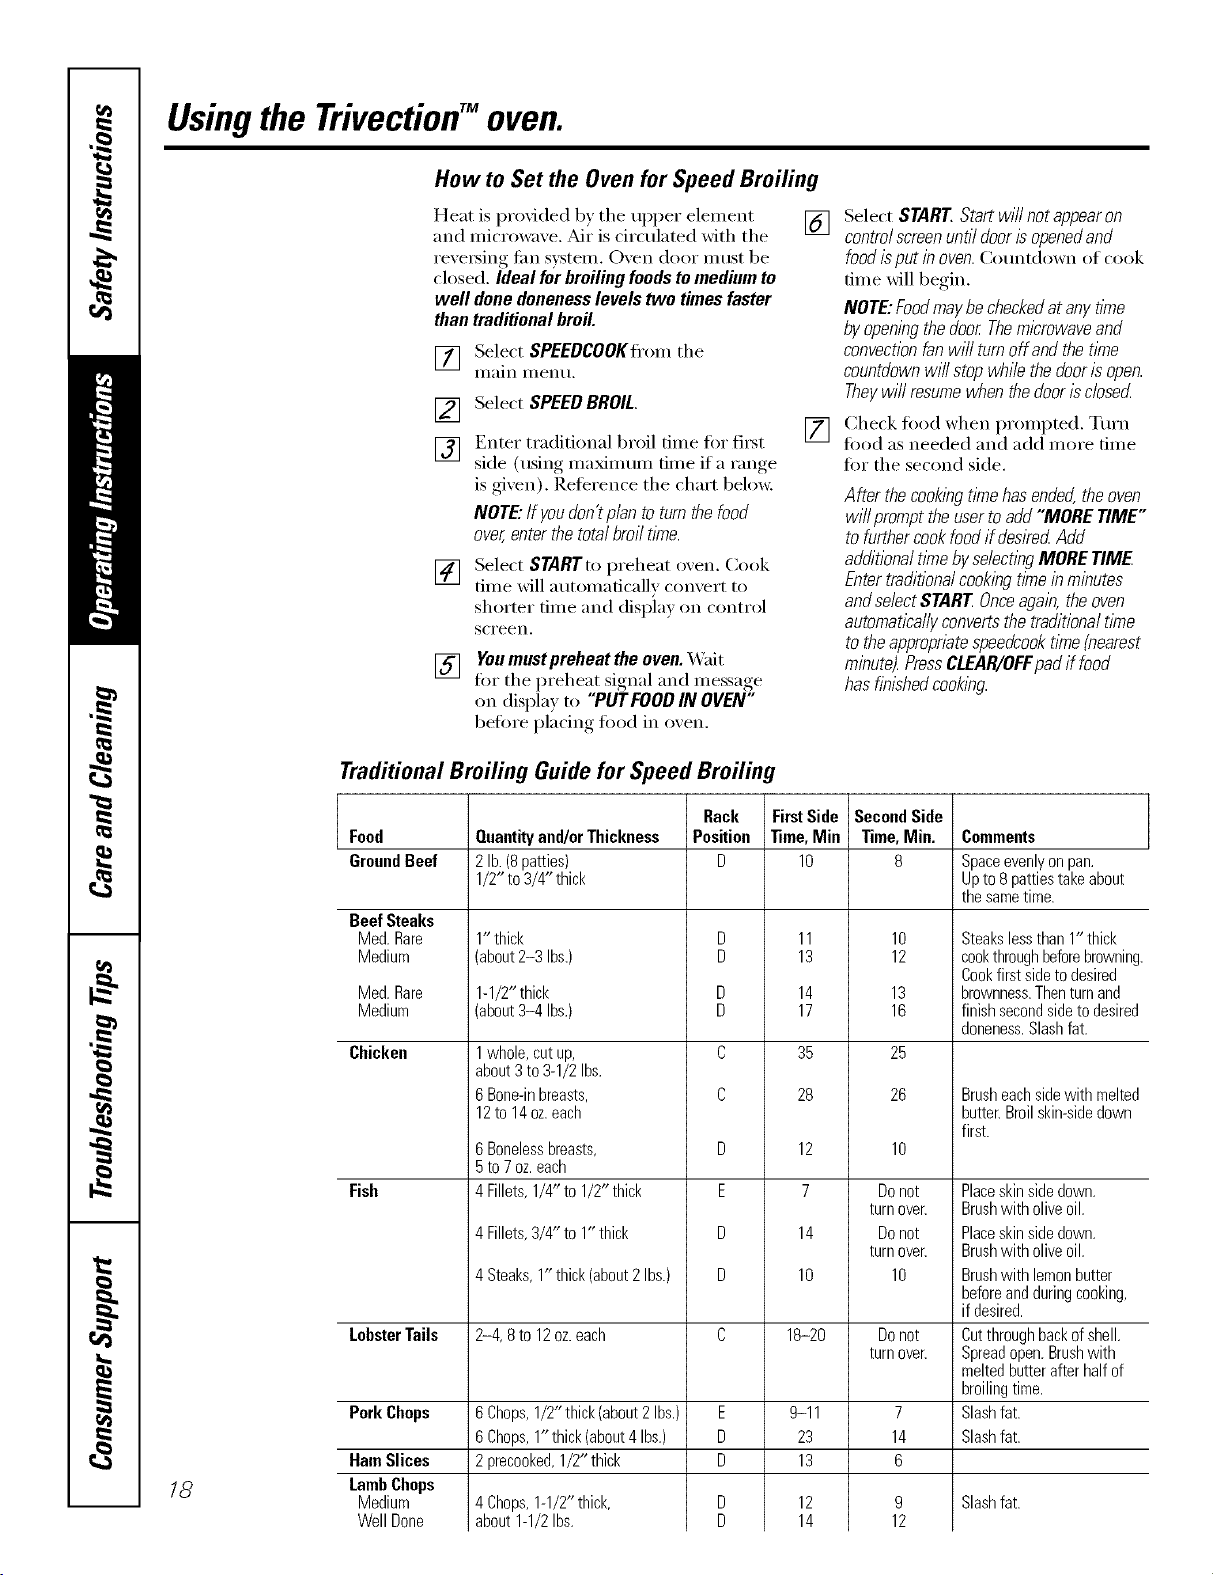
Traditional Broiling Guide for Speed Broiling
18
Food
GroundBeef
Beef Steaks
Med. Rare
Medium
Med.Rare
Medium
Chicken
Fish
LobsterTails
PorkChops
HamSlices
LambChops
Medium
WellDone
Quantityand/orThickness
2lb.(8patties)
1/2"to 3/4"thick
1" thick
(about2-3 Ibs.)
1-1/2"thick
(about3-4 Ibs.)
1whole, cut up,
about 3 to 3-1/2 Ibs.
6 Bone-in breasts,
12to 14oz.each
6 Boneless breasts,
5 to 7 oz. each
4 Fillets, 1/4" to 1/2" thick
4Fillets,3/4" to 1"thick
4Steaks,1" thick(about2Ibs.)
2-4, 8 to 12oz. each
6Chops,1/2"thick(about2Ibs.)
6Chops,1"thick(about4Ibs.)
2precooked,1/2" thick
4Chops,1-1/2"thick,
about1-1/2Ibs.
Rack
Position
D
D
E
D
D
E
D
D
FirstSide
Time,Mie
lO
11
13
14
17
35
28
12
7
14
10
18-20
9-11
23
13
12
14
SecondSide
Time,Min.
8
lO
12
13
16
25
26
10
Donot
turn oveE
Donot
turn oveE
10
Donot
turn over.
7
14
6
9
12
Comments
Spaceevenlyonpan.
Upto8pattiestakeabout
thesametime.
Steakslessthan1" thick
cookthroughbeforebrowning.
Cookfirstsidetodesired
brownness.Thenturnand
finishsecondsidetodesired
doneness.Slashfat.
Brusheachsidewith melted
butter.Broilskin-sidedown
first.
Placeskinsidedown.
Brushwith oliveoil.
Placeskinsidedown.
Brushwith oliveoil.
Brushwith lemonbutter
beforeandduringcooking,
if desired.
Cutthroughbackofshell.
Spreadopen.Brushwith
meltedbutterafterhalfof
broilingtime.
Slashfat.
Slashfat.
Slashfat.
Usingthedefrostfeature.
The defrost feature allows you to thaw food for a set amount of time.
www, GEAppliances.com
Cookware/Tips for Defrosting
For best results, relnove fi)od fl'om
packaging and place onbroil pan and grid,
If food is left in packaging, slit, pierce or
vent to prevent heat buildup,
Place fi)od in the oxen according to the
Defrosting Guide.
Yim can use all cookware/containei_ that
are oven safe or microwave-safe. Arcing is
the microwave teml for sparks in the
oven, Be sure there is at least 1 inch ot
space between metal surtilces--pans, wall
of ca\'i_:, ahuninun/foil--to I)revent
ardng. Dishes with metallic trim should not
be usedas arcing may occur.Remove metal
twist ties frompaper orplastic bags before
placing them in the oven.
Do not coml)letel ) surround fi)od with
metal and/or fi)il.
S S ) (
Pla _tic _t(rage contmnei_ should be
uncoxered befiwe defrosting.
Foods that spoil easily should not be
allowed to sit ()tit lot more than one hour
alter defrosting. ]_a)om temperature
i)ronlotes the gro_h of hamlflll bacteria.
Use caution when removing metal pans
and stoneware after defl'osting. They may
becoille very _V_lI]/l, and VOl.i Ill}IV need to
use a l)otholdeI:
For nlore even defrosting, turn fl_od
OV(_I_ Sel)[lI'ilte lind i'e[iYi'ilnge when
l)ronq)ted. Be sure large meats are
completely deti'osted betore cooking.
See the Defrosting Guido tot additional
COIllIl/ents.
_._]len (lefi'oste(1, fiIod should be cool but
softened in all areas. If still slightly icy,
return to the ()veil very briefly, or let it
stand a few minutes.
Hew to Set the Oven for Oefrost
[] [']ace fi_od im_ovem
[] Select FgaroREfrom mai,_mere,.
[] Select OEFROST.
] Enter the deh'ost time h_ ]]om's
am_d/or mim_I_tes.Reterel_ ce th e
[] Select STARE
NOTE:Foodmaybecheckedatanyz_Yne
byopeningthedoor.Theml_'rowaveand
convectionfanwill turnoffandthedefrost
timecountdownwillstopwhile#_edoor
isopen.Theywillresumewhenthedoor
isclose_
[] C]leckfi)odamldtm'ml overwhe_l
prompted. _(1(1 more time if"
desi red.
AMr thedefrosttimehasende4#_eoven
w/i/prompt#}eusertoadd"MORE
TIME,"Add additionaltimebyselecting
MORETIME.Entertimeinminutes.
PressCLEAR/OFFpadif foodhasflTushed
defrostfng.
19
Usingthe defrostfeature.
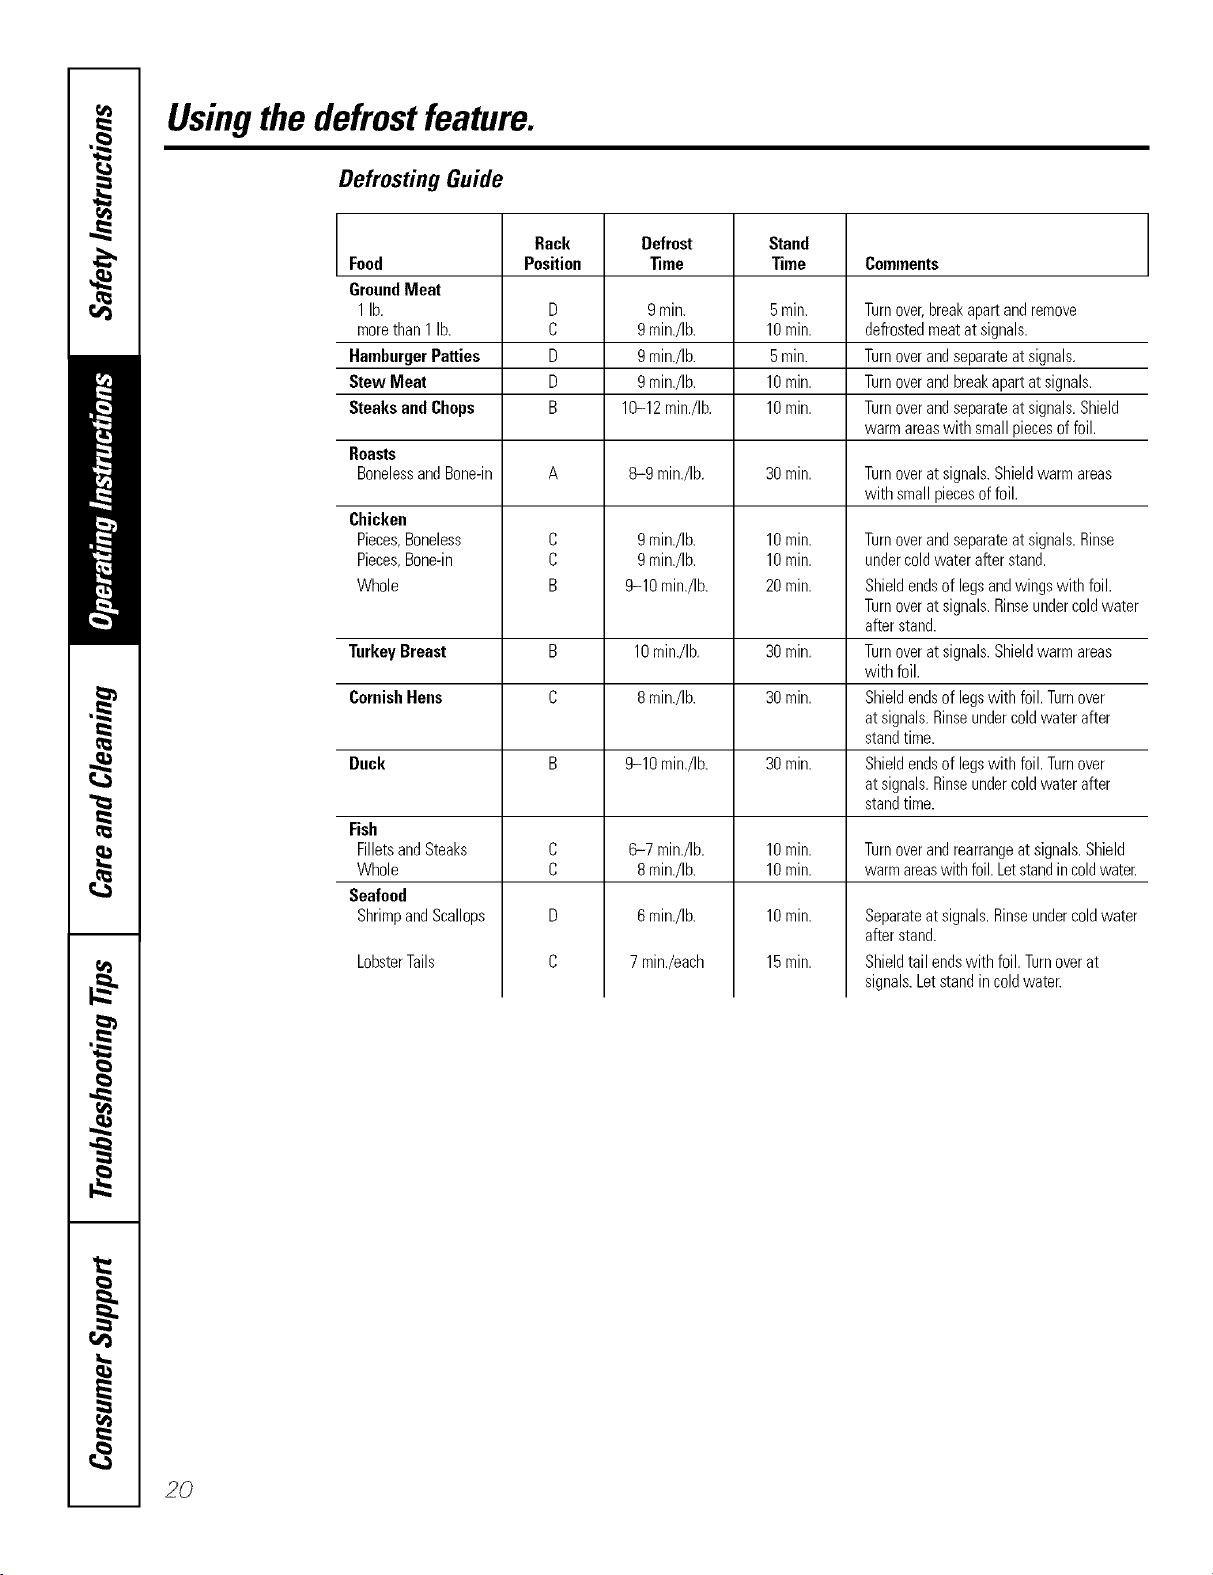
Defrosting Guide
Rack Defrost Stand
Food Position _me Time Comments
GroundMeat
1lb. D 9mitt. 5rain. Turnover,breakapartandremove
morethan1 lb. C 9min./Ib. 10rain. defrostedmeatatsignals.
HamburgerPatties D 9min./Ib. 5rain. Turnoverandseparateatsignals.
StewMeat D 9 min./Ib. 10rain. Turnoverandbreakapartatsignals.
SteaksandChops B 10-12min./Ib. 10rain. Turnoverandseparateatsignals.Shield
warmareaswith smallpiecesoffoil.
Roasts
BonelessandBone-in A 8-9 mirr./Ib. 30rain. Turnoveratsignals.Shieldwarmareas
with smallpiecesoffoil.
Chicken
Pieces,Boneless
Pieces,Bone-in
Whole
Turnoverandseparateatsignals.Rinse
undercoldwaterafterstand.
Shieldendsof legsandwingswith foil.
Turnoveratsignals.Rinseundercoldwater
afterstand.
Turnoveratsignals.Shieldwarmareas
with foil.
Shieldendsof legswith foil.Turnover
atsignals.Rinseundercoldwaterafter
standtime.
Shieldendsof legswith foil.Turnover
atsignals.Rinseundercoldwaterafter
standtime.
C
C
B
9min./Ib.
9min./Ib.
9-10 min./Ib.
10min.
10min.
20rain.
TurkeyBreast B 10min./Ib. 30rain.
CornishHens C 8min./Ib. 30min.
Duck B 9-10 min./Ib. 30min.
C
C
D
C
Fish
FilletsandSteaks
Whole
Seafood
ShrimpandScallops
6-7 min./Ib.
8min./Ib.
6min./Ib.
7min./each
LobsterTails
10rain.
10rain.
10rain.
15rain.
Turnover andrearrange at signals. Shield
warm areaswith foil. Letstand in coldwater.
Separateatsignals.Rinseundercoldwater
afterstand.
Shieldtail endswith foil. Turnoverat
signals.Letstandincoldwater.
20
Usingtraditionalbake and mast. coacom
Toavoid possible bums, place the racks in the desired position before you turn the oven on.
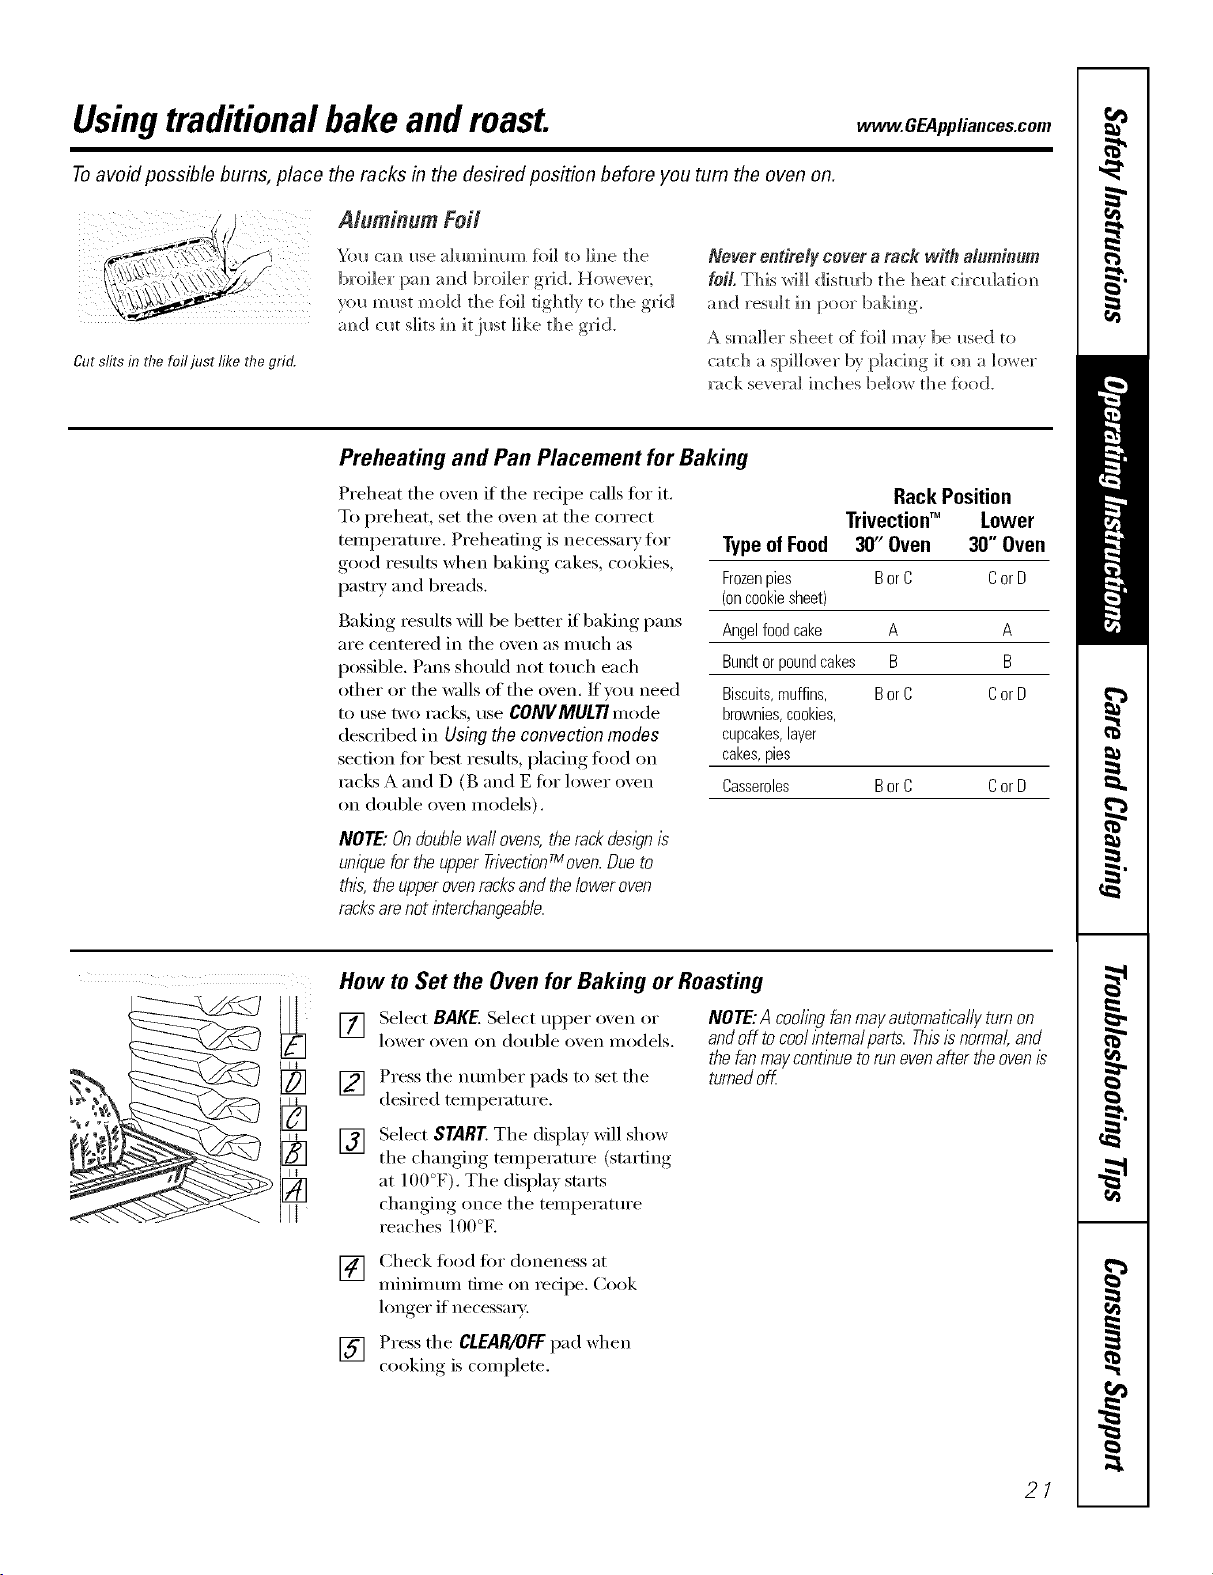
Cut slits in UTefo ust lille tRegrin.
Aluminum Foit
Yolx crux Ixse _dLmxhmm %]1 to ]hxe the
broiler I:xm mxd broiler grid, Ho_e_ ex;
vI]L/mlxst mold dxe {kx]]tighdy to the grid
amxd clxt s]ks imxit ilxst ]]ke dxe grid.
Never entirely cover a rack with alumin.m
foil, This wi]] disturb dxe heat circlx]_domx
amxd reslx]t ]mxpoor bakimxg
A smaller sheet of foil m_v be Ixsed to
catch a spi]]o_ er by p]achxg ]t o_] _ lower
_ck seve_] hxches below the %od.
Preheating and Pan Placement for Baking
Preheat the oven if the recipe calls fi>r it.
To preheat, set the oven at the correct
ten]perature. Preheating is necessary tk>r
good results when baking cakes, cookies,
pastxT and breads.
Baking results will be better if baking pans
aI'e cei]teFed ii] the ovei] as ii] rich as
possible. Pans should not touch each
other or the walls of the oven. If you need
tO Ixse tWO I'aCk% txse CONVMULTIII]ode
described ix] Usiag the coavoctioa modes
section ti)r best results, pladng food on
rocks A and D (B and E fi>r lower oven
on double oven models).
NOTE: Ondouble wall ovens,the rackdesl)n is
unique forthe upper TrivectionTmoven.Dueto
this, the upperovenracksandthe lower oven
racksarenot interchangeable.
Rack Position
Trivectioff" Lower
TypeofFood 30' Oven 30" Oven
Frozenpies BorC CorD
(oncookiesheet)
Angelfoodcake A A
Bundtorpoundcakes B B
Biscuits,muffins, BorC CorD
brownies,cookies,
cupcakes,layer
cakes,pies
Casseroles BorC CorD
How to Set the Oven for Baking or Roasting
[]
[]
[]
Select BAKE.Select upper o'_en or
lower o_ei] Oil double o_ei] models.
Press the number pads to set the
desired temperature.
NOTE:A coolingfanmayautomaticallyturnon
andoff tocoolintema/parts.Thisisnormal,and
thefanmaycontinuetorunevenaftertheovenis
turnedoff
Select START.The display will show
• tern )eratm'e (startingthe changing I
at 10f)°F). The displa} starts
changing once the temperature
reaches 100°E
[] Check fi:,od fiw doneness at
minimum time on recipe. Cook
longer if necessax).
[] Press the CLEAR/OFFpad when
cooking, is coml)lete.
21

Usingthetraditional timed baking androastingfeatures.
On double oven models, you can use timed baking in one oven while using serf=clean in the other; you can also use
timed baking in both ovens at the same time.
NOTE"Foods that spoil easily--such as mLIk,eggs, fish, stuffings, poultry and pork--should not be allowed to sit for
more than t hour before or after cooking, Room temperature promotes the growth of harmful bacteria. Be sure that
the oven light is off because heat from the bulb will speed harmful bacteria growth.
How to Set an Immediate Start and Automatic Stop
Theovenwill turnonimmediatelyandcookfora
selectedlengthoftime.At theendofthecookl?Tg
time,theovenwillturnoffautomatk'a//#
Make sm'e the clock shows the _effect
[] Select BAKE. Selec{ Iq)per o'_em_ or
lower ove]_ o]_ dol_ble o'_'e]_ models.
] [ ]sim__the mm_ber pads, e]_ter the
desired tern pe_ma'e.
[] Select OPTIONS.
[] Select TIMEO BAKE.
NOTE: The time com_tdown will not start until
after #Teoven is preheated
] [ ]sim_, the mm_ber pads, em_ter the
desired 1)akim_g time. The oven
tempex_tm'e amid the cookim_g time
that vol_ entered will be displa ed.
[] Select ENTER. This tells the ove]_ that
}ol_ have fim_ished settim_g it.
[] Select STARE
The dispk U will show the cham_gh_g
tempemtL_re (starti m_gat ] O0 °F) a m_d the
coo]dn_g time. The display starts cha_gi_g
o_ce the temper_m_re reaches ] O0°K
The o_en will con ti_ _e to cook %r the
[)ro_l}t_)l_)led _H))oll_)[ of time, []lei) shill
off ;mtomatica]] 5 m_]ess the WARM
featm'e _as set. See the Using the proof`
warmer and warm features sectiom
Afterti_ecookingtimehasendedti_eovenwill
prompttheusertoadd"MORET_ME"tofurther
cookfoodif desired.Addadditionaltimeby
selectingMORETIME.Entertraditionalcooking
timeinm/hut_sandselectSTAREPress
C_EAR/OFFpadif foodhasf/hishedcookLng.
22
How to Set a Delayed Start and Automatic Stop
Youcanset the oven control to delay-startthe [] Select ENTER.
oven,cookfora specihclength of t_meand then
turnoff automatical/g [] Select START.
Make sure the clock shows the correct
[Jill e of da_:
[] Select BAKE. Select upper oven or
lower o_,ei] on double o_,ei] models.
If _ou would like to check tile times _ou
ha_eset,select REVIEWTIMES.You irave
the option to see delta time, dock, bake
tillle or tiI/leI:
[]
Using tile number pads, enter tile
desired temperature.
Select OPTIONS.
Select TIMEDBAKE.
[]
[]
[] Using the number pads, enter the
desired baking time.
NOTE:Thetimecountdownwfflnotstartuntil
aftertheovenispreheated
[] Select ENTER.
[] Select OPTIONS.
[] Select DELAYBAKE.
[] Using the nmnber pads, enter tile
time of de))ou want the o_en to
turn oil and stnrt cooking.
_&hen the oven turns on at the time
of day you ha',e set, tile display will
show tile changing temperatm'e
(stniling at ] O0°F) and tile cookiilg
time. The display starts changing once
the temperatm'e reaches lO0°E
The oven will continue to cook for the
programmed amom]t of time. After the
cookingtknehasended,theovenwi//promptthe
usertoadd"MORETIME"tofurthercookfood
if desirecLAddadditionalt/knebyselecting
MORETIME Entertraditionalcookingt/knein
minutesandselectSTARTPressCLEAR/OFF
padif foodhasf_h/shedcooking.The o'_enwill
turn off automaficall), tmless tile WARM
f_'atm'e was set. See the Using the proof,
warmer and warm features section.
/
Hew to Set the Oven for Broiling
Leave the door open to the broil stop position.
Thedoor stays open by itself, yet tire proper
temperature is mabtabed in tire oven.
NOTE: Food can be broiled with the door open
or closed. However, if tire door is closed, tire
food may not brown as well because tire oven
heating element will cycle on and ofL
[] Select BROIL.
[] SeJect N/fbr high broil
or tO for low broil, tO is used to
broil thicker c uts o[m eat with out
(p,'eI_bI'ow]_i m_ [hem.
[] Select SNNT. We recommend
preheating for 5 minutes with the door
closed whed_er _oi_b``'``41_ ``````dwid_
[he door ``)[:``e]) ``)I"closed.
[] Place the meat or fish o_ the broiler
g``'id am_d pam
[] Follow suggested _ck position,s im_
tl_e Broilbg Guide.
The size, weight, thick_ess, startim_g
tempe_wt_*re mid yol_r [``re{b're_ce of
doggedness ',,,rillat}b'ct broili_g dines. This
g_*]de is based o_ meats at re{_Jge_wtor
temperat_re.
[] _'k_l]e]_1)roi]im_gis f]m_ished, press the
CLEAR/OFFpad.
NOTE: Theoven will automatically turn off
after 3 hours of continuous broil.
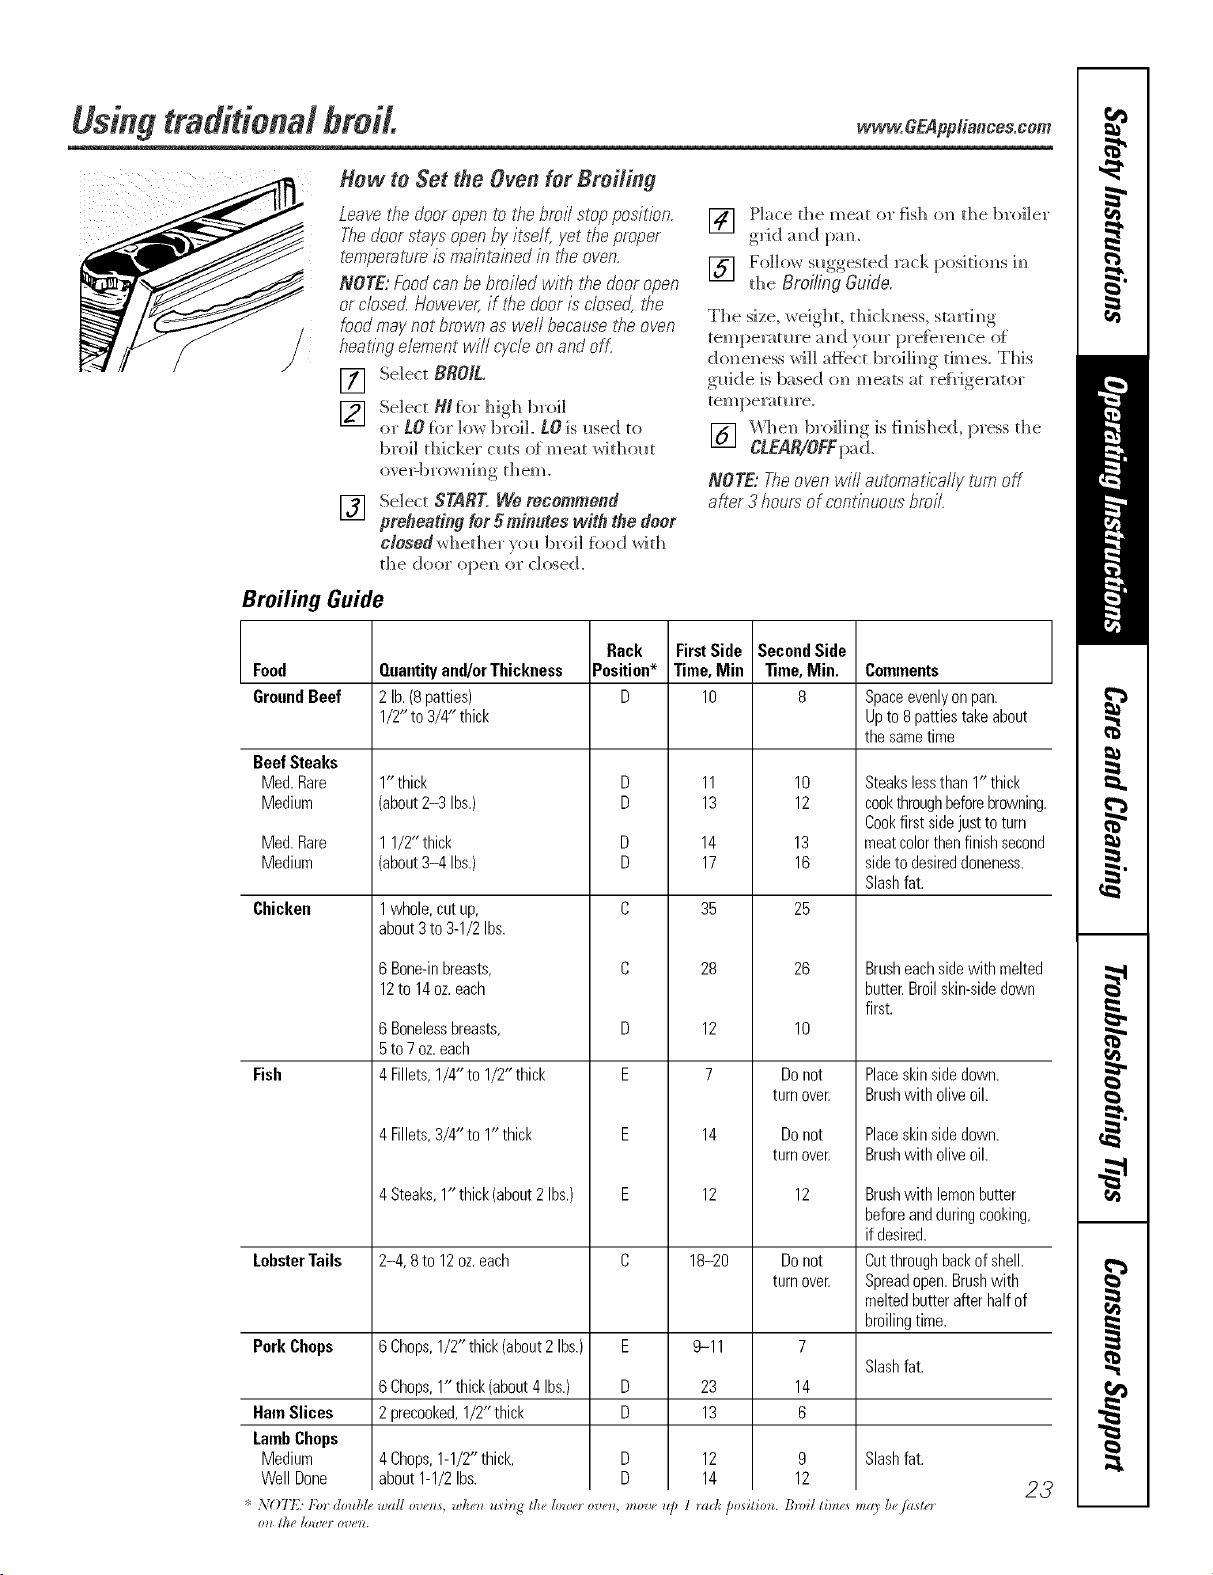
Broiling Guide
Food
GroundBeef
BeefSteaks
Med.Rare
Medium
Med.Rare
Medium
Chicken
Fish
LobsterTails
PorkChops
HamSlices
LambChops
Medium
WellDone
Quantityand/orThickness
2lb.(8patties)
1/2"to3/4" thick
1"thick
(about2-3 Ibs.)
11/2" thick
(about3-4 Ibs.)
1whole, cut up,
about 3to 3-1/2 Ibs.
6Bone-inbreasts,
12to14oz.each
6 Bonelessbreasts,
5 to 7 oz. each
4 Fillets, 1/4"to 1/2"thick
4 Fillets, 3/4" to 1"thick
4 Steaks, 1" thick (about 2 Ibs.)
2-4, 8to 12oz.each
6Chops,1/2" thick(about2 Ibs.)
6Chops,1" thick(about4Ibs.)
2precooked,1/2" thick
4Chops,1-1/2"thick,
about1-1/2Ibs.
Rack
Position*
D
D
D
D
D
C
C
D
E
E
E
C
E
U
U
* ",,O772Fordoubl_,_,,a/!ov_o_s,,,he_ usi_g thelowerove_, move_,
I?lt //tt /Oil'e} 07)e)L
FirstSide
Time,Min
lO
11
13
14
17
35
28
12
7
14
12
18-2o
9-11
23
13
12
14
Second Side
Time, Min.
8
10
12
13
16
25
26
10
Do not
turn over.
Do not
turn over.
12
Do not
turn over.
7
Slash fat.
14
6
9 Slash fat.
12
COlnlnents
1 _act_posilio_*. BmiI tim¢<smg9 be/aster
Spaceevenly on pan.
Up to 8 patties take about
the same time
Steakslessthan1" thick
cookthroughbeforebrowning.
Cookfirst sidejusttoturn
meatcolorthenfinishsecond
sidetodesireddoneness.
Slashfat.
Brusheachsidewith melted
butter.Broilskin-sidedown
first.
Placeskinsidedown.
Brushwith oliveoil.
Placeskinsidedown.
Brushwith oliveoil.
Brushwith lemonbutter
beforeandduringcooking,
if desired.
Cutthroughbackofshell.
Spreadopen.Brushwith
meltedbutterafterhalfof
broilingtime.
23
Usingtheconvection modes.
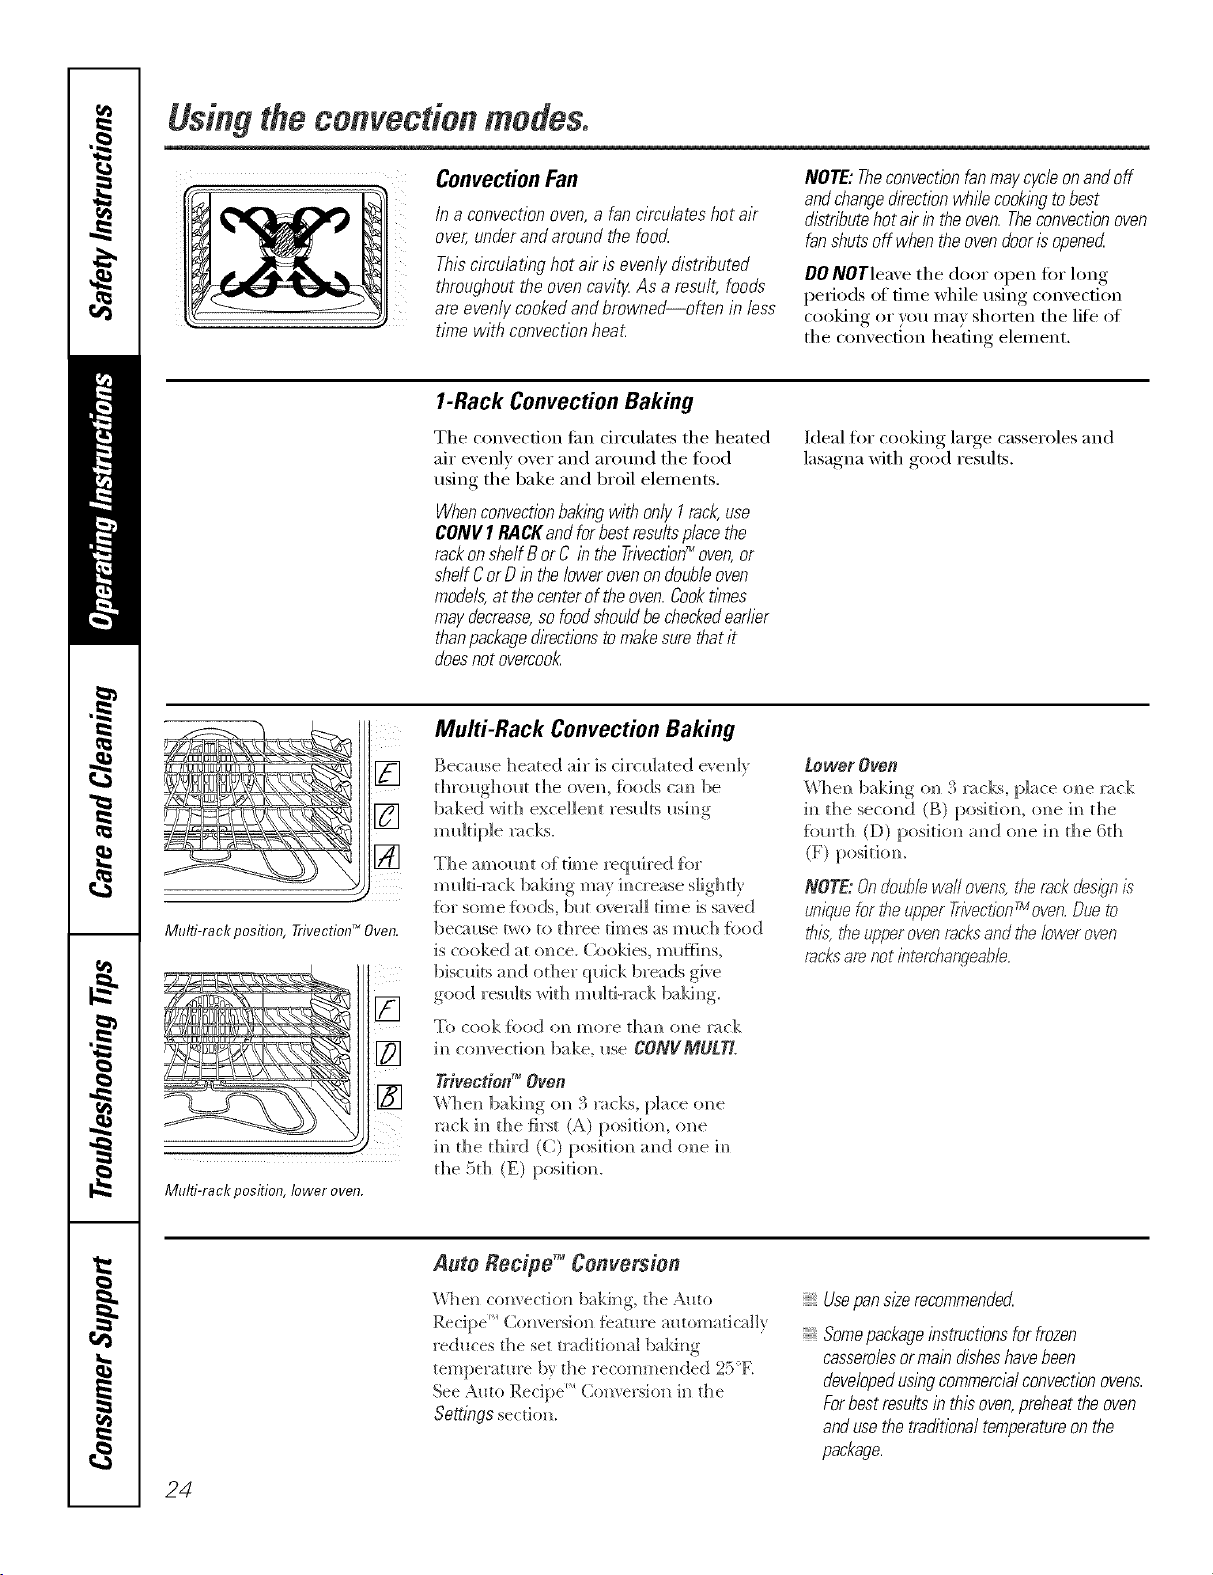
ConvectionFan
In a convection oven,a fan circulates hot air
over, under and around the food
This circulating hot ak is evenly distnT)uted
throughout the oven cavity.As a result, foods
are evenly cooked andbrowned--often in less
time with convection heat.
NOTE: Theconvection fanmay cycle onand off
andchangedirection while cookingto best
distributehot ak in the oven.Theconvectionoven
fan shuts off when the ovendoor is opened
DONOTleave the door open fi>r hmg
pefi(>ds of tilne while using convecfitm
cooking or you Inay shorten the life of
the COlwection headng elemelm
1-Rack Convection Baking
The convection tim circulates the heated
air evenly over and around the food
using the bake and broil elelnents.
WhenconvectionbakingwithonlyI rack,use
CONVI RACKandforbestresuitsp/acethe
rackonsheffBorC in theTrivection_oven,or
she/fCorDintheiowerovenondoubieoven
models,atthecenteroftheoven.Cooktimes
maydecrease,sofoodshouidbecheckedear/ier
thanpackagedkectionstomakesurethatit
doesnotovercook
Ideal for cooking lalge casseroles and
lasagna with good results,
[]
[]
[]
Multi-rack position, Trivecfion TM Oven.
ill
Multi-rack position, lower oven.
MuM-Rack Convection Baking
Becm_se heated air is circulated evenE
d_roughom d_e ovem fbods c:m be
baked wid] excellent results i_sim_g
multiple ]:_cks.
The a molto t of dine req Ifired [br
]mdti-mck bakh_g may im_crease s]ighd}
{br sore e {i)ods, bl*t o_emll tim e is saved
bec_ use two to three dmes as m _c]] {bed
iS cooked a[ elite. Cookies, ml_nh_s,
biscuits m_d od]er quick breads give
good resl_]ts wkh ml_]d-mck ba]dm_g.
To cook food oralmore dial? oNlelwck
h_ convectiom_ bake, I*se CONVMULTL
Yrivection _"Oven
When baki,_g on 3 _cks, place one
rack h_ the {irst (A) position, o_e
im_die d_ird (C) posidom_ amid one im_
t]_e 5t]_ (E) posidon.
_OWOr OVOB
Whe_ bakh_g o_ 3 x_cks, place o_e x_ck
i_] the seco]_d (B) posidom o]_e i_ the
fbm'd_ (D) position a_d one i_ d_e 6d_
(F) posidom
NOTE:Ondoublewallovens,Nereckdesignis"
uniquefor the u_qperTrivecfionrMoven.Dueto
this, t¢}eupperoven recksand the lower oven
racksare not bterchangeabb.
24
Auto Recipe TM Conversion
\_%e_ co_wectio_ baki_g, the Auto
Recipe _ (2o[wersio[] _eatu['e automatically
reduces the set traditiomfl baki[*g
temperatm'e b} the _'ecomme_ded 25°E
See Auto Recipe _ ( o*]versio*] i[] the
Seg[ngs section].
Usepan size recommended
Somepackageinstructions for frozen
casseroiesormain disheshavebeen
developedusing commercialconvection ovens.
Forbest resu/ts in this oven,preheat the oven
andusethe traditionai temperatureon the
package.
vvww.GEAppliances.com.
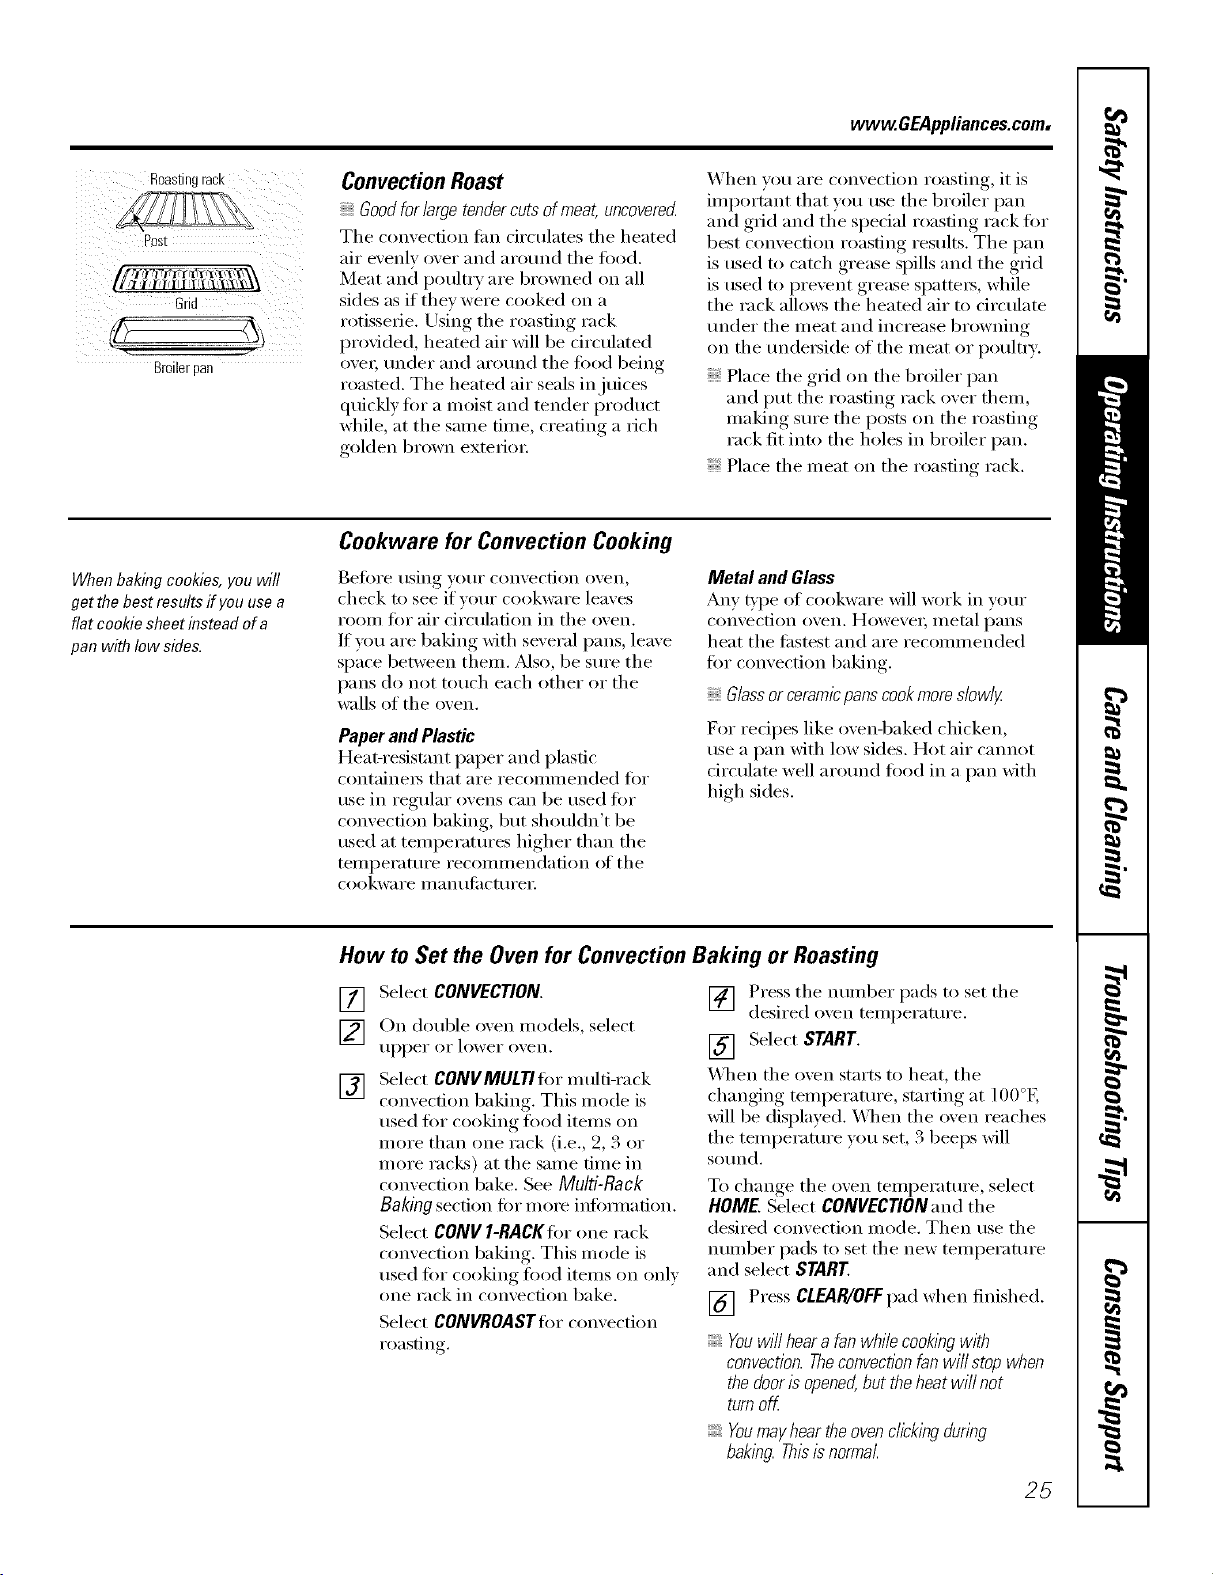
Past
Grid
Broilerpan
Convection Roast
Goodfor large tendercuts of meat, uncovered
Tile convection tim circulates tile heated
air evenly over and around tile fl)od.
Meat and poulti T are browned on all
sides as if they were cooked (m a
rotisserie. Using tile roasting rack
provided, heated air will be circulated
ovei; under and around tile fi)od being
roasted. Tile heated air seals in juices
quickly fin" a moist and tender product
while, at the Sallle fillle, creating a rich
golden brown extefioI:
When w)u are convection roasting, it is
important that you use tile broiler pan
and grid and tile special roasting rack fin.
best convection roasting results. Tile pan
is used to catch grease spills and tile gdd
is used to prevent grease spattei_, while
tile rack allo_vs tile heated air to circulate
under tile meat and increase browning
on tile undei_ide of tile meat or poultI]'.
Place tile grid on tile broiler pan
and put tile roasting rack over them,
lllaking S/li'e tile posts on tile roasting
rack fit into tile holes ill broiler pan.
Place tile meat on tile roasting rack.
When baking cookies, you will
get the best results if you use a
flat cookie sheet instead of a
pan with low side&
Cookware for Convection Cooking
Bet0re using your convection oven,
check to see if vour cookware leaves
room fin" air circulation ill tile oven.
If you are baking with several pans, leave
space between thenl. _Mso, be sure tile
pans do not touch each other or tile
wails of tile oven.
Paper and Plastic
Heat-resist;rot paper and plastic
containei_ that aI'e i'eCOllllllended _'i)i"
use in regular ovens can be used for
convection baking, but shouldn't be
used at temperatures higher than tile
telllpei'attli'e i'ecollllllendation (H' tile
cookware ill,in {llilCttlI'eI i
Metal and Glass
Ally type of cookware will work ill wmr
convection oven. Howevei; metal I)ans
heat tile fi_stest and are recommended
fin" convection baking.
Glassor ceramicpanscookmore slowlg
For recipes like ovenq)aked chicken,
use a pan with low sides. Hot air cannot
drculate well around food ill a pan with
high sides.
How to Set the Oven for Convection Baking or Roasting
[]
[]
[]
Select CONVECTION.
On double oven models, select
tlppeI" 0I" lower o_,ei1.
Select CONVMULTI fin" multi-rack
convection baking,. This mode is
used fi)r cooking fi)od items (m
more than one rack (i.e., 9, 3 or
more racks) at tile same time ill
convection bake. See Multi-Rack
Baking section for more infbmmtion.
Select CONVI-RACKIorone rack
convection baking. This mode is
used filr cooking fi)od items on only
(me rack ill convection bake.
Select CONVROASTfi)rconvection
roasting.
] Press tile munber pads to set tile
desired oxen temperature.
[] Select START.
_A]/en tile oven starts to heat, tile
changing mmperature, starting at 100°E
will be displayed. _,_]/en tile oven reaches
tile temperature you set, 3 beeps will
SO/lnd.
To change tile oven temperature, select
HOME. Select CONVECTION and the
desired convection mode. Then use the
mnnber pads to set tile new temperature
and select START.
[] Press CLEAR/OFF pad when finished.
Youwillhearafanwhilecookingwith
convection.Theconvectionfanwillstopwhen
thedooris opened,buttheheatwillnot
turnoff.
Youmayheartheovenclickingduring
baking.Thisb normal
25
Usingthe timed featuresforconvectioncooking.
On double oven models, you can use timed baking or roasting in one oven while using self-clean in the other; you can
also use timed baking or roasting in both ovens at the same time.
Youwill hear a fan while cooking with these features. Theconvection fan will stop when the door is opened, but the
heat will not turn off.
NOTE."Foods that spoil easily--such as milk, eggs, fish, stuffings, poultry and pork--should not be allowed to sit for
more than 1hour before or after cooking. Room temperature promotes the growth of harmful bacteria. Be sure
that the oven light is off because heat from the bulb will speed harmful bacteria growth.
How to Set an Immediate Start and Automatic Stop
Theovenwilfturnonimmediate/)/andcookfora
selectedlengthoftime.At theendofthecooking
time,theovenwillturnoffautomatically
Make sure the clock sho_,_:s the correct time
of da)
[] Select CONVECTION.
[] On double o',en models, select
tll)l)ei" oi" lower o_,eil.
[]
[]
[]
[]
[]
Select CONVMULTIfi_r multi-rack
convection baking, This mode is
used fi_r cooking fi_od items on
more than one rack (i.e., 2, 3 or
more racks) at the same time in
convection bake. See Multi-Rack
Baking section tiw more infi)mmfion.
Select gO/I/I/I-RACKIiw one rack
convection baking, This mode is
used fro" cooking load itelns on only
one rack ill convection bake.
Select CONVROASTtier convection
roasting.
Press the number pads to set the
desired o_en temperatm'e.
SelectOPTIONS.
Select TIMEDBAKE.
Using the number pads, enter the
desired comecfion cooking tilne.
The oven temperatm'e and the
cooking time that you entered will
be displayed.
NOTE: Thetime countdown will not start until
after theoven ispreheated
[] Select ENTER. This tells the oven
that you have finished setting it.
[] Select START
\_]_en the oven starts to heat, the
changing temperatm'e, starting at l O0°E
will be displayed. _]/ell the oven reaches
the temperatm'e you set, 3 beeps will
sotlnd,
Tile oven will continue to cook fl)r the
programmed amotmt of time, then shut
ott automaticall 5 tmless the WARM
featm'e was set. See the Settings section.
Aflerthe cookingtimehasended,theovenwi//
prompttheusertoadd"MORETIME" tofurther
cookfoodifdesiredAddadditionaltkneby
se/ectlbgMORETIME Entertraditiona/cooking
timeinminutesandselectSTARTPress
CLEAR/OFFpadif foodhashnishedcooking.
26
www.GEAppliances.com
"!' St_lf/*d bi_z]_ ,W_*e_all) _quin" 3045
mb _d*,_ addidomll _as/bt_, lime.
Sldeld k,_s a_d blz,a_t mith /uil to
plYl'('_! oze_fl_:,u)_i)l,_a_d (hyi)l,_
{' Tke (LS.i)@aHme_l ul kg'rD*tlht*l,
sho_t/dI,'_ow thai mol,'D*<il too_*13
140<7mem** some /uod #)i*o_*bg
llood Book. }b*l_Kiig:ke_(,l_igh'.{ SI)A
t&o. ]*t_**19H5.)
Hew to Set a Belayed Start and Automatic Step
Youcansettheovencontroltodelay-starttheoven,
cook for a specific/ength of time and then turn off
automatically
Make sm'e d3e clock shows the correct time
of da_
[] Se]ec_ CONVECTION.
[] ()N_double ovem_models, selec_
i_p])ev or ]ov,'er o','eH.
[] Select CONVMULTI}brmulti-rock
com'ecti(m 1)akh]g. This mode is
_*sed Jh)r coo]d_g }hod items o]_
more than one rock (i.e., 2, 3 or
F_o]'e 1"at ],is) at the S;;H'_e th'_e iH
c(mvecdon bake. See Mu/ti-Racl{
Baking section for more h_}bm_adon.
Select CONV _-RACKIbr one rack
co_vect]o]_ baking. This mode is
meal for cooki_g _bod items (m o_]y
o_]e rack h_ comecthm bake.
Select CONVROA$Tfl)rco_wecdon
] Press the mm]ber pads to set the
desired o_e_] tem})eratm'e.
[] Select OPTIONS.
[] Selec_ TIMEO BAKE.
] I[]siw, the mm_ber pads, e_ter the
desired com ection cooki_g time.
NOTE"Thetimecountdownwillnotstartuntil
afterbe ovenispreheateK
[] Select ENTER.
[] Selec_ OPTIONS.
[] Selec_ OELAYRAKE.
] []ai_g the mm_ber )ads e_ter the
[] Se]ec_ ENTER.
[] Select STARE
Jf_ou would like to check the times _ou
have set, select REVIEWTIME£ You have
the option to see de]a_ time, clock, cook
dine or dme]:
\Vhe_] the oven starts to ]]eat, the
changi_g temperature, starti_g at ]O0°K
will be disphu}e(L \_J_e_* the oven reaches
the temperature yo_*set, 3 beeps will
som_ d.
The ove_] Will co_]tim_e to cook %r the
prognmm]ed amom]t of rime. After tire
cookingtl?nehasendeg the ovenwill prompt the
userto aW "MORE TIME" to h_rthercookfood
if desire_ Add additional time byselecting
MORE TIME EntertTaditiona/cookingt/_e _?_
minuteeandselectSTARE PressCLEAR/OFF
padif foodhas f/7_ishedcook/ng.The oven *rill
mrn off automatic:d]), re]less the WARM
fbatm'e _as set, See the Settings section.
Press the CLEAR/OFFpad to dear
the disp]a):
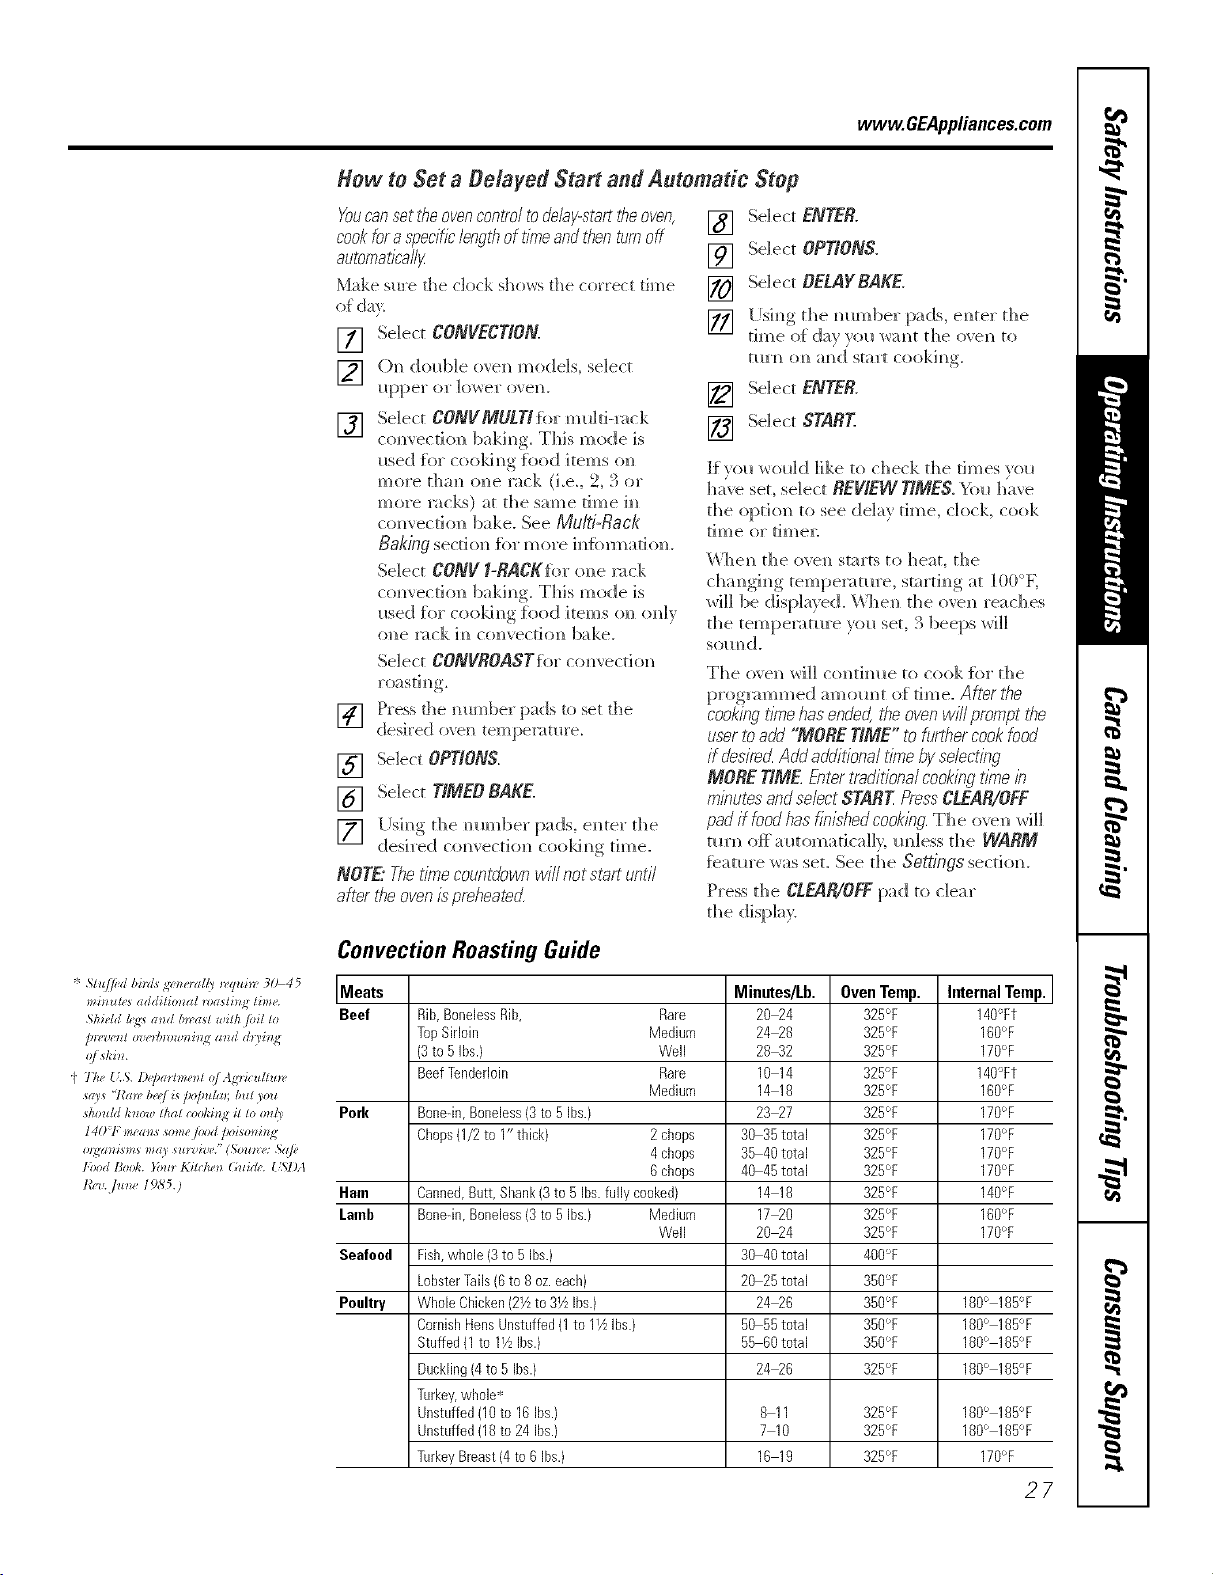
Cenvection Roasting Guide
Meats Minutes/Lb. Oven Temp. Internal Temp.
Beef Rib,BonelessRib, Rare 26_4 325°F 146°Ft
TopSirloin Medium 2406 325°F 160°F
(3to 5 ibs.} Well 28_2 325°F 176°F
BeefTenderloin Rare 16 14 325°F 140°Ft
Medium 14 16 325°F 166°F
Perk Bone-in,Boneless{3 to5 Ibs.} 23_7 325°F 176°F
Chops0/2 to I" tbick) 2cbops 36 35total 325°F 176°F
4cbops 35 46total 325°F 176°F
6cbops 46 45total 325°F 176°F
Ham Canned,Butt,Shank(3to 5 Ibs.fully cooked) 14 16 325°F 146°F
[aorb Bone-in,Boneless{3 to5 Ibs.} Medium 17_0 325°F 166°F
Well 2604 325°F 176°F
Seafood Fish,whole {3to 5 Ibs.) 36 46total 460°F
LobsterTails(6to 6oz.each) 20 25total 386°F
Poultry WholeChicken(2Yzto 3YzIbs.) 24_6 356°F 186° 185°F
CornishHensUnstuffed(1to 11/_Ibs.) 50 55total 356°F 160° 165°F
Stuffed(1 to lYz Ibs.) 55 66total 350°F 166° 165°F
Duckling(4to 5 Ibs.) 24_6 325°F 166° 185°F
Turkey,wbole*
Unstuffed06 to 16Ibs.) 6 11 325°F 160° 185°F
Unstuffed06 to 24 Ibs.) 7 10 325°F 166° 185°F
TurkeyBreast(4 to6 Ibs.) 16 19 325°F 176°F
27
Recipes.
Youcan preset up to six temperature/cooking time combinations with this function. Youcan then bake, convection
bake/roast or speed bake any of these six favorite recipes without choosing settings each time.
NOTES:
Youcannot program broil, defrost, dehydrate, warmer, proof, speed broil, Delay Bake or self-clean in RECIPES.
Youroven will remember FAVORITESthat have been programmed even after apower outage.
The cookingtime you enter does not include preheat time. The oven will begin to countdown the cooking time
after the oven hascompleted preheating. At the preheat tone, put yourfood in the oven.
FAVORITESare only available on the upper oven of a double wall oven.
ToProgram a New FAVORITE
[] Select RECIPES.
[_] Select an awdlable FAVORITE. An
axailable FAVORITEwill not haxe
a block before and afier it. A
FAVORITEthat has ah'ead_ been
programmed will ha_e a block
befiwe and after it. For example:
mFAVORITE ll
[] Select the desired cooking mode.
Tile a_¢filable options are BAKE,
CONVECTION(both convection bake
modes and convection roast) and
SPEEDBAKE(all speed bake
categories and sub-categories),
] Use tile nmnber pads to enter the
cooking temperature.
] Use tile number pads to enter the
cooking time. Select ENTERwhen
finished.
[] The control displa) will show tile
programmed cooking mode,
mmperatm'e and time ii)r tile
FAVORITE.Select SAVEifthe
infi)rmatkm displayed is correct.
[]
Select STARTto begin cooking Mth
the recipe that was just saved. If you
do not want to start the recipe now,
touch the CLEAR/OFFpad.
ToUse a FAVORITE
[] Select RECIPES.
1_7 Select an a_ailable FAVORITE. An
available FAVORITE will not ha_e
a block beflwe and after it. A
FAVORITE that has ah'eady been
programmed will have a block
before and after it. For example:
IIFAVORITE ll
[]
The control displa) will show
the programmed cooking mode,
temperatm'e and time for the
FAVORITEselected. Select START
to begin cooking with the selected
redpe.
28
ToChange or Replace a FAVORITE
[] Select RECIPES.
[] Select the desired FAVORITErecipe.
A FAVORITEthat has alread_ been
I_'__'"_,_"ammed, will ha_e a bllwk
before and after it. For example:
IIFAVORITE ll
[] The control displa) Mll show
the programmed cooking mode,
temperatm'e and time for the
FAVORITE.Select REPLACE.
[]
Select the desired cooking mode.
The ax filable options are BAKE,
CONVECTION(both convection bake
illo(les and convection roast) and
SPEEDBAKE(all speed bake
categories and sub-categories).
] Use tile number pads to enter the
cooking temperatm'e.
] Use tile number pads to enter the
cooking time, Select ENTERwhen
finished entering tile cooking" time.
[]
[]
The control display will show the
programmed cooking mode,
temperatm'e and time for the
FAVORITE, Select SAVEif the
infimnafion displayed is correct.
Select STARTto begin cooking with
the recipe that was just saved. If you
do not want to start the recipe now,
touch the CLEAR/OFFpad.
Usingtheproof,warmerand warm features, www.GEAppliances.com
The proofing feature maintains a warm environment useful for rising yeast-leavened products.
How to Set the Oven For Proof
NOTE:Forbestresults,coverthedoughwitha
clothorwithgreasedplastlcwrap(theplastic
mayneedtobeanchoredunderneaththe
containersotheovenfanwillnotblowit off).
[] Place the covered douoh_ in the oven
on rack B or (7.
Select FEATURES,then MORE,then
PROOFand then START.
Tile interior _wen lights turn on and
remain on during proofing.
Tile proofing timture automatically
provides tile optimum temperature for
the proofing process, and theretore does
not have a temperature a(!iusnnent.
[] Set !he KITCHENTIMERtot tile
IIllnllI/tllI/ [)I'OOJ[ tillle.
I
[] X_q/en )roofing is finished, press
tile CLEAR/OFFpad.
Toavoid loweringthe oventemperature
and lengtheningproofing tlYne,donot
openthe ovendoorunnecessaril/
Checkbreaflproducts early toavoid
over-proofing.
NOTE:
Donotusetheproofingmodeforwarming
foodorkeepingfoodhot Theproofingoven
temperatureisnothotenoughtoholdfoods
atsafetemperatures.UsetheWARMER
featuretokeephotfoodwarm.
Proofingwillnotoperatewhenovenisabove
125°E"OVENTOOHOT"willshowinthe
displa_
How to Set the Oven For Warmer
Tile wam_er feature can be acfi\:Ked
independently to kee I) hot, cooked
fi_ods warm. This ligature is not designed
to reheat cold food.
To use this feature, select FEATURES,then
WARMER,then START.
NOTE:Ondoubleovenmode/s,selectupperor
loweroven.ThenselectSTART
ToCrispStale Items
Place food in lo_sided dishes or pans.
For best results, place tile food items in
a single layer: Do not stack.
; i,eave theIll tlncovei'ed.
Check crispness after 20-30 minutes.
Add time as needed.
IMPORTANTNOTES:
Foodshouldbekepthotin itscooking
containeror transferredtoaheat-safe
servingdish.
Formolst foods,coverthem with an oven-safe
lid or aluminumfoil
Friedorcnspfoodsdonotneedtobecovered,
butcanbecometoodryif warmedfortoolong.
Repeatedopeningofthedoorallowsthehot
airtoescapeandthefoodtocool
Allowextratimeforthetemperatureinsidethe
oventostabih2eafteraddingitems.
With largeloadsit maybe necessarytocover
someof the cookedfood items.
Removeservingspoons,etc.,beforeplacing
containersin theoven.
Donotuseplasticcontainers,lidsorplastlc
wrap.
CAUTION:Plasticcontainers,lidsorplasticwrap
willmeltifplacedintheoven.Meltedplasticmay
notberemovableandisnotcoveredunderyour
warrant_z
How to Set the Oven For Warm
Tile wmm feature (cook and hold)
automatically keeps hot cooked tbods
warm for up to 3 houI_ alier a TIMED
BAKEis finished.
If tile bloc!<s before and after WARMare
lit, the featm'e is ON. If there are no
blocks lit before and alter WARM, tile
feature is OFF.
To mrn this feature ONor OFF,select
FEATURES,then MORE,then WARM. 2,9
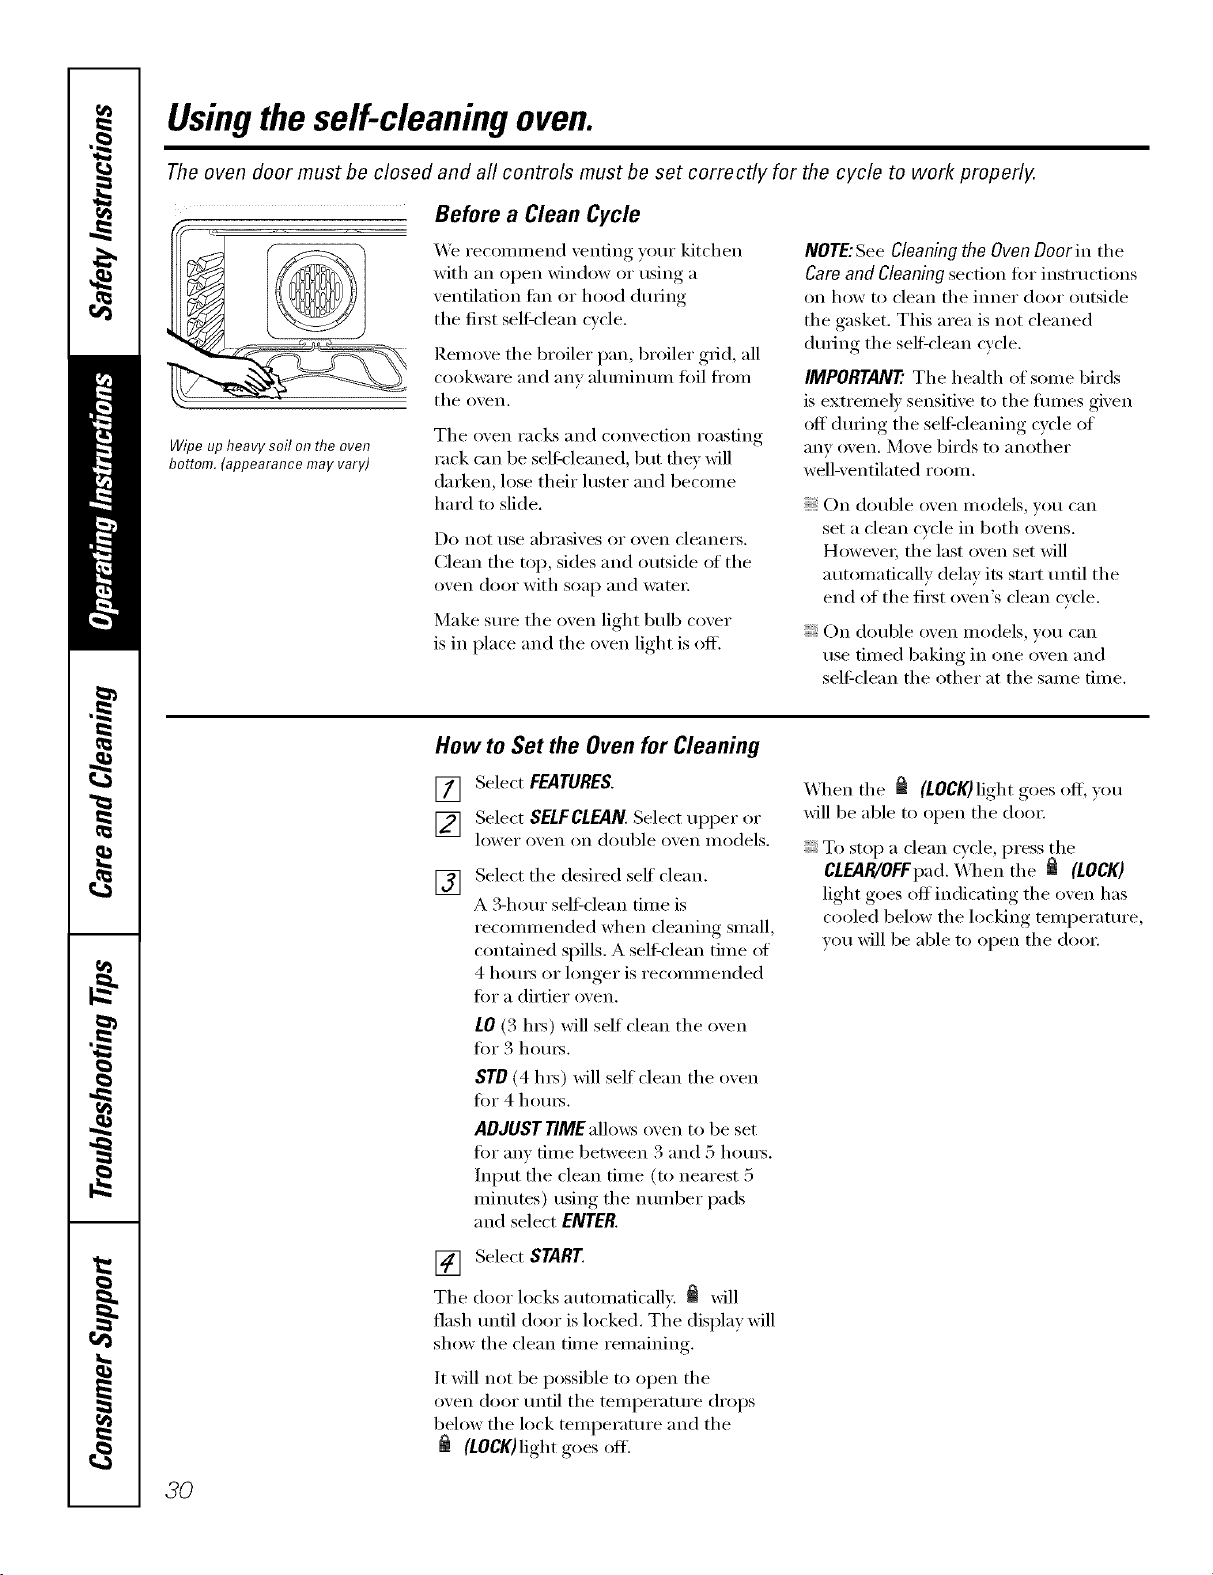
Usingthe self-cleaning oven.
The oven door must be closed and all controls must be set correctly for the cycle to work properly.
Wipe up heavy soil o17the oven
bottom. (appearance may vary)
Before a Clean Cycle
We recon/inend venting your kitchen
with an open window or using a
ventilation tim or hood during
the fiist sel6clean cvcle.
Reinoxe tile broiler pan, broiler grid, all
cookwai'e and [lliV ahllllintllll t0il ti'oin
tile oxen,
Tile oven racks and convection roasting
rack can be selfk'leaned, but file)" will
darken, lose their hIster and beconie
hard m slide.
Do not rise abrasives or ()veil cleanei_.
Clean the top, sides and outside of the
oven door with soap and wateI;
Make sure the oven light bulb cover
is in place and the oven light is ofl_
NOTE:See Cleaning the Oven Door in tile
Cam and Cleaning section for instructions
on how to ('lean tile innei" door Otltside
tile gasket. This area is not cleaned
during the sell=clean cycle.
IMPORTANT'.Tile health of seine birds
is extrenlelv sensitive to the fiunes given
off during tile self=cleaning cycle of
any oven. Move birds to another
well-ventilated roDin,
On double oven nlodels, you can
set a clean cycle in both ovens.
Howevei; tile last oven set will
autonlaficallv delay its stair until tile
end of the fiist oven's clean cycle.
On double oven models, )ou can
rise fin/ed baking in one o'_en and
self-clean tile other at tile sanie time.
How to Set the Oven for Cleaning
[] Select FEATURES.
[] Select SELFCLFJIN. Select tipper or
lower o'_en on double o_,en models.
[]
Select tile desired self"clean.
A 3-hour sel6clean fiine is
recon/nlended when cleaning snlall,
contained spills. A sell_lean tiine ot
4 houI_ or longer is recolnnlended
fin" a dirtier oven.
10 (3 hi_) will self clean tile oven
fin" 3 houI_.
ST0 (4 hI_) will self clean the oven
fin" 4 houi_.
ADJUSTTIMEallows oven to be set
fin" anv tiIne between 3 and 5 hotii_.
hlput tile clean tiine (to nearest 5
ininutes) using tile nuniber pads
and select ENTER.
[] Select START
Tile door locks autonlafically. _ will
flash until door is locked. The display will
show tile clean tinie reniaining.
It will not be possible to open tile
oven door until tile tenlperature drops
below the lock tenlperature and the
(tOCK)light goes ofl.
_4]leIl tile _ (LOCK)light goes off; you
will be able to open the dooi:
To stop a clean cycle, press the
CLEAR/OFFpad. \A]/eIl tile _ (LOCK)
light goes off indicating tile oven has
cooled below tile locking tenlperature,
wm will be able to open tile dooI:
3O
www, GEApp#ances.cem
The oven door must be closed and all controls must be set correctly for the cycle to work properly.
How to Belay the Start of Cleaning
[] Select FEATURES.
[] Select SELFCLEAN Selec_ upper or
lower ove]_ o]_ dol_ble o','e]_ v_odels.
[]
Select the desired self cleam
A B-hem" self_cleaN_ time is
recommended when cleaN_h_g small,
contaim_ed spills. A se]f-c]em_ time of
4 ]lores or longer is recommended
for a dirder oven.
LO (3 hrs) wi]] self cleaN) d)e oven
for 3 hems.
STO (4 his) _G]]serf c]eml dle o; ell
%r 4 hol_rs.
AOJUSTTIMEa]Io_s ovem] to be set
%r ai_v time betweem_ 3 am_(;[5 hem's.
h)pl_t the c]em) time (to m)eares/5
mhm/es) i_sim_gthe mm_ber pads
m_d select ENTER.
The door locks automatically whem_ vol*
select STARK The ovem_ _rH]] remah_
locked. The display _G]] show the start
6me. Once the se]f-c]em_ cycle starts, it
wi]] m_t be possible to open t]_e ovem_
Whem_ _ goes on. yol, wi]] be able to
opem_ the doolL
NOTE"Ondoubleovenmode/s,youcanseta
dehy clean b both ovens. However, the second
oven set will automaticallydelaytile start of
cleaning until the end of the first oven is"clean
cycle.
[] Select OELAYCLEAN.
[] [Jsim_g the mm_ber pads, e]_ter the
tim e of (]!ax }ou wa _ t th e c]ea _ c?c]e
to start.
[] Select ENTER.
[] Select STARE
After a Clean Cycle
You may notice some white ash in the
oven. _]pe it up with a damp cloth alter
tile oven COOLS.
If whitespotsremain,removethemwitha
soap-filledsteel-woolpadandrinsethorough/y
with a vinegar and water mixture.
These deposits are usually a salt residue
that cannot be removed by the dean
cycle.
If the oven is not clean alter one clean
cycle, repeat the cycle.
Y}>u cannot set the oven fi:,r cooking
tmtil the oxen is cool enough for the
door to tmlock.
If the mcl<s become hard to slide, wipe
the rock supports with cooking oil.
3/
Settings.
Yournew touch pad control has additional settings that you may choose to use. They remain in the control's
memory, even after a power failure.
NOTE: If a setting is selected, it will have blocks before and after. For example: []settingsrJ.
If the setting is not selected, it will not have a block before and after. For example: (settings).
Clock
The clock must be set to the correct time
of day fin" the automatic oven timing
flmctions to wink i_roperly. Note that the
time of day cmmot be changed dm_ing a
timed baking or self-cleaning cycle.
[] Select SETTINGS and then select
CLOCK.
] Press the number kexs to enter the
correct time of day.
[] Select ENTER.
Clock Options
Y)mr control uses a 12-hour clock. If you
prefer to have no clock displayed or a
24-hour milit;u 3' time clock, follow these
steps:
VT] Select SETTINGS and then select
it i
CLOCKOPTIONS.
[_] Select "12 horn"', "24 horn"' or
"no clock."
] _dter setfim, this option, select
HOME.
NOTE.° If you select the "no clock" option,
wm will not be able to use the Delay DaRe
or DelayCleanfimctions.
12 Hour Shut Off
Withthisoption,shouldyouforgetandleavethe
ovenon,thecontrolwillautomaticallyturnthe
ovenoffafter 12hours.
Toturnthis optionONorOFF:
[] Select SETTINGS and then select
MORE.
[] Select 12HOUROFFto tm'n the option
ONor OFF.
] _Miersetting this option, select
HOME.
NOTE."Ondoubleovenmodels,thisactivates
thisspecb/featureforbothovens.
Check FoodDoneness
TohelpyouadapttocooklbgwithTrivection_
technology,thisoptionpromptsyou3/4of the
waythroughaspeedbakemodesothatyoucan
checkyourfoodaloneness.
ToturnthisoptionONorOFF."
[_] Select SETTINGSand then select
it i
MORE.
[] Select CHECKFOODto tm'n the
option ONor OFF.
] _Mter setfim, this option, select
HOME.
32

www. GEAppliances,com
Auto Recipe TM Conversion
Whenusvngconvectionbake,tileAutoRecipe....
Conversionfeatureautomaticallychanges
enteredtraditions/bakingtemperaturesto
convectionbakingtemperatures.Forexample,if
youentera rage/atrecioetemperatureof35O°F
andselectSTAREtiledisphywillshowCon
andthentheconvertedtemperatureof325°£
NOTE:Thisfeaturedoesnotchangetrsditlbns/
bsklhgtb_es,onlytraditionalbaklTlgtemperatures.
Toturnthis option ONor OFF,"
[_] Select SETTINGSm_dd_en select
it i
MORE.
[] Select CONVTEMPu_mm d_e opdom_
ONor OFF.
] After settim_g this optio_, select
HOME.
Tonesat the Endof a Timed Cycle
Attheendofa tinnedcycle,3 shortbeepswill
soundfollowedbyonebeepeven/6secondsuntil
theCLEAR/OFFpadispressecLThiscontlbuous
&secondbeepmaybecancelecL
Toturnthecontinuous&second beep
ONorOFF,"
[_] Select SETTINGSand then select
ii i
MOREtwice.
[]
Select BEEPONCEto turn the
continuous 6-second beep OFF,
Select FULLBEEPto turn the
continuous 6-second beep ON.
] _Miersetting this opt.ion, select
HOME.
NOTE:Ondoubleovenmodels,thiscancelsthe
end-of-cycletoneforbothovens.
Fahrenheit or Celsius Temperature
Yourovencontroldisplaysthetemperaturein
Fahrenheit(°F),butyoumaychangethisto
displaythetemperatureinCelsius(°C).
Tochangethetemperaturedisplaybetween
Fahrenheitor Celsius:
[] Select SETTINGSand then select
MORE.
[]
Select TEMP°F to display tile
temperature in Fahrenheit (°F).
Select TEMP°C to display the
temperature in Celsius (°C).
] _Mtersetting this option, select
HOME.
NOTE:Ondoubleovenmodels,thenewsetflbg
will bedlspbyedforbothovens.
Tone Volume
Thisfeatureallowsyoutoadjustthetone
volumestoa moreacceptablelevel Thereare
threepossiblevolumelevels.
Tochangethevolumelevel:
[_] Select SETTINGSand then select
MOREtwice.
[_] Select BEEPVOLUME.Each time the
xolume level is changed, the tone
w_u hear is an audible indication of
the w)lmne level. Select 2BEEPfor
the middle w_lume level. Select
3 BEEPfor tile loudest vohune level.
Select I BEEPtot the quietest
w_lume level.
[] Alter choosing tile desired so/md
lexel ( 1BEEP,2 BEEP or 3 BEEP),
select HOME.
NOTE:Ondoubleovenmodels, thischangesthe
tone volumefor bothovens.
33
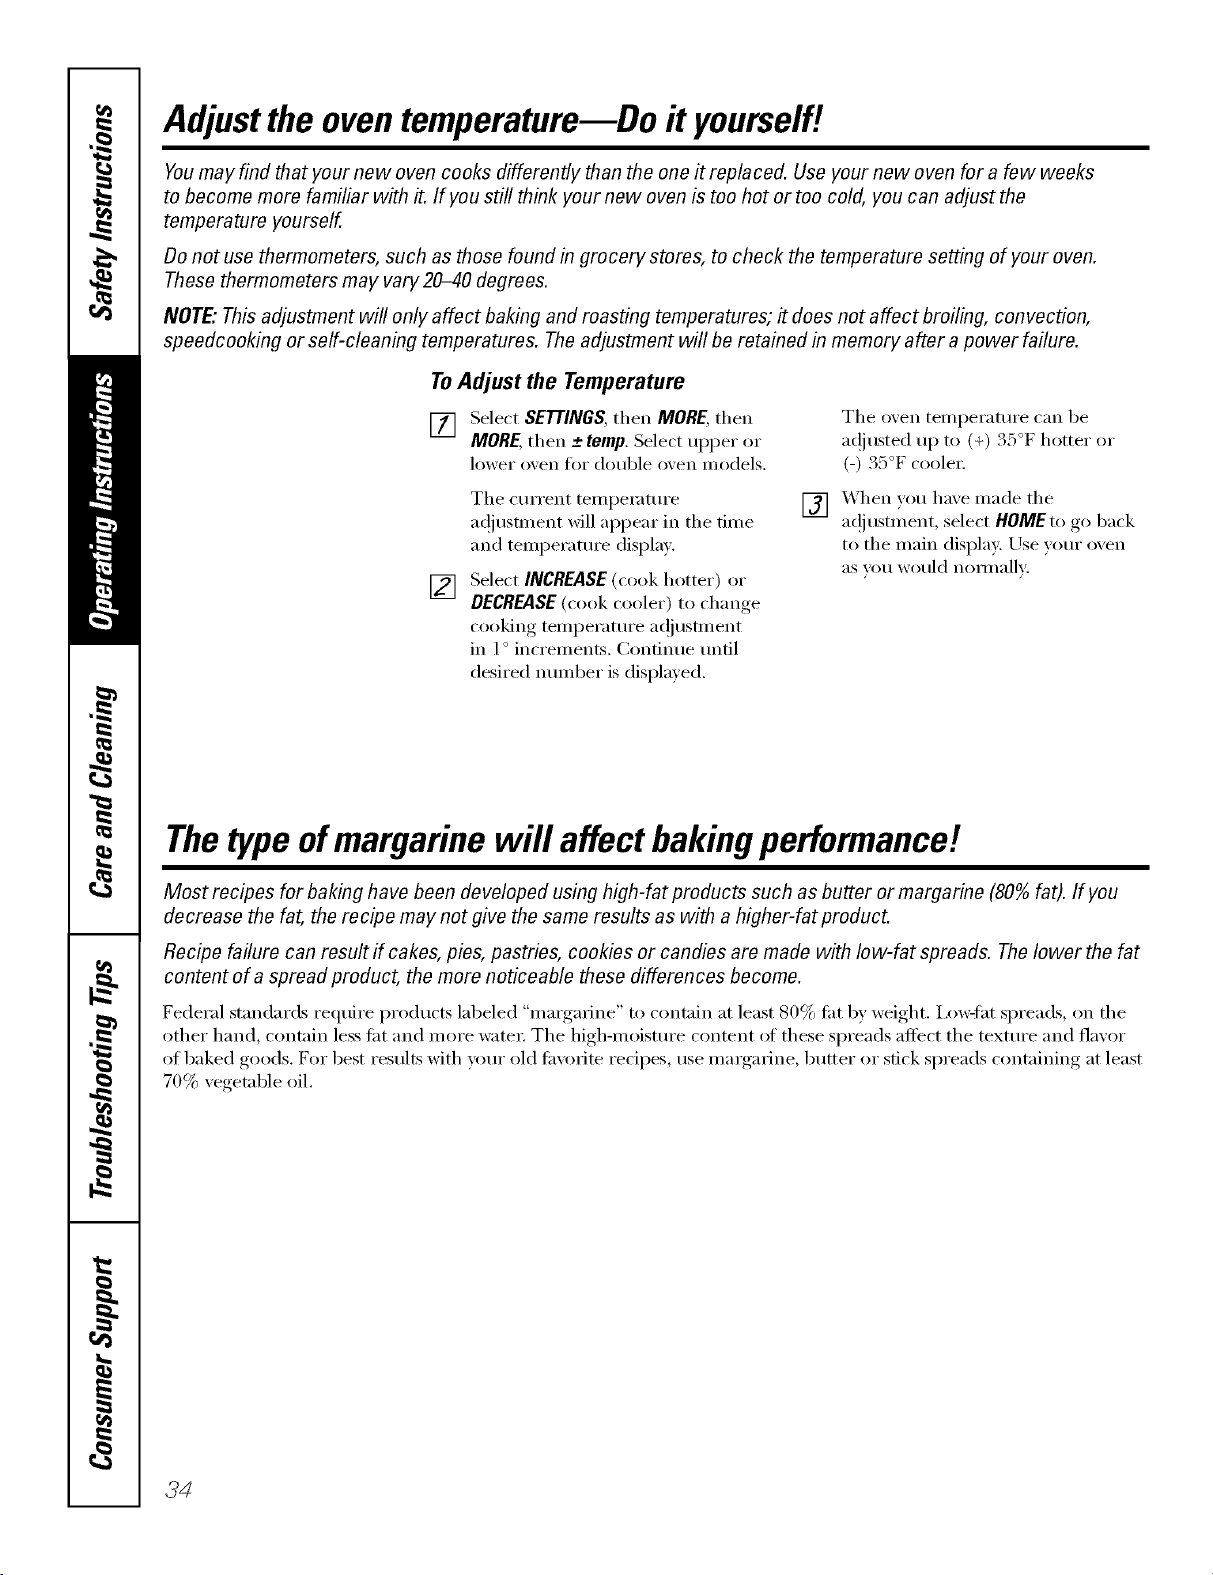
Adjustthe oventemperature--Do it yourself!
Youmay find that your new oven cooks differently than the one it replaced. Use your new oven for a few weeks
to become more familiar with it. If you still think your new oven is too hot or too cold, you can adjust the
temperature yourself.
Donot use thermometers, such as those found in grocery stores, to check the temperature setting of your oven.
These thermometers may vary20-40 degrees.
NOTE,"This adjustment will only affect baking and roasting temperatures; # does not affect broiling, convection,
speedcooking or self-cleaning temperatures. The adjustment will be retained in memory after a power failure.
To Adjust the Temperature
[] Select SETTINGS,then MORE,then
MORE,then -+ temp.Select upper or
lower o'_en t()r double o'_en inodels.
The o'_en temperature can be
a(!iusted up to (+) 35°F hotter or
(-) 35°F coole_:
[]
The current teml)emmre
a(!iusnnent will appear in the time
and temperature displa>
Select INCREASE (cook hotter) or
DECREASE(cook cooler) to change
cooking teilll)ei';ittli'e a(!itlst/llent
in 1° increments. Continue imfil
desired nmnber is displayed.
[] X._hen you haxe made the
a(!i ustm ent, select HOMEto go back
to the main displa); Use yam" oxen
aS VOII would nOlil/allv:
Thetypeofmargarine will affect bakingperformance!
Most recipes for baking have been developed using high-fat products such as butter or margarine (80% fat). If you
decrease the fat, the recipe may not give the same results as with ahigher-fat product.
Recipe failure can result if cakes, pies, pastries, cookies or candies are made with low-fat spreads. Thelower the fat
content of a spread product, the more noticeable these differences become.
Federal standards reqtlire prodtlctS labeled "margarine" to contain at least 80% tilt by weight. Ixm_lht spreads, on the
other hand, contain less tilt and more water The high-moisture content at these spreads affect the texture and flavor
of baked goods. For best results with your old tin:afire redpes, use mmgarine, butter or stick spreads containing at least
70% vegetable oil.
34Z
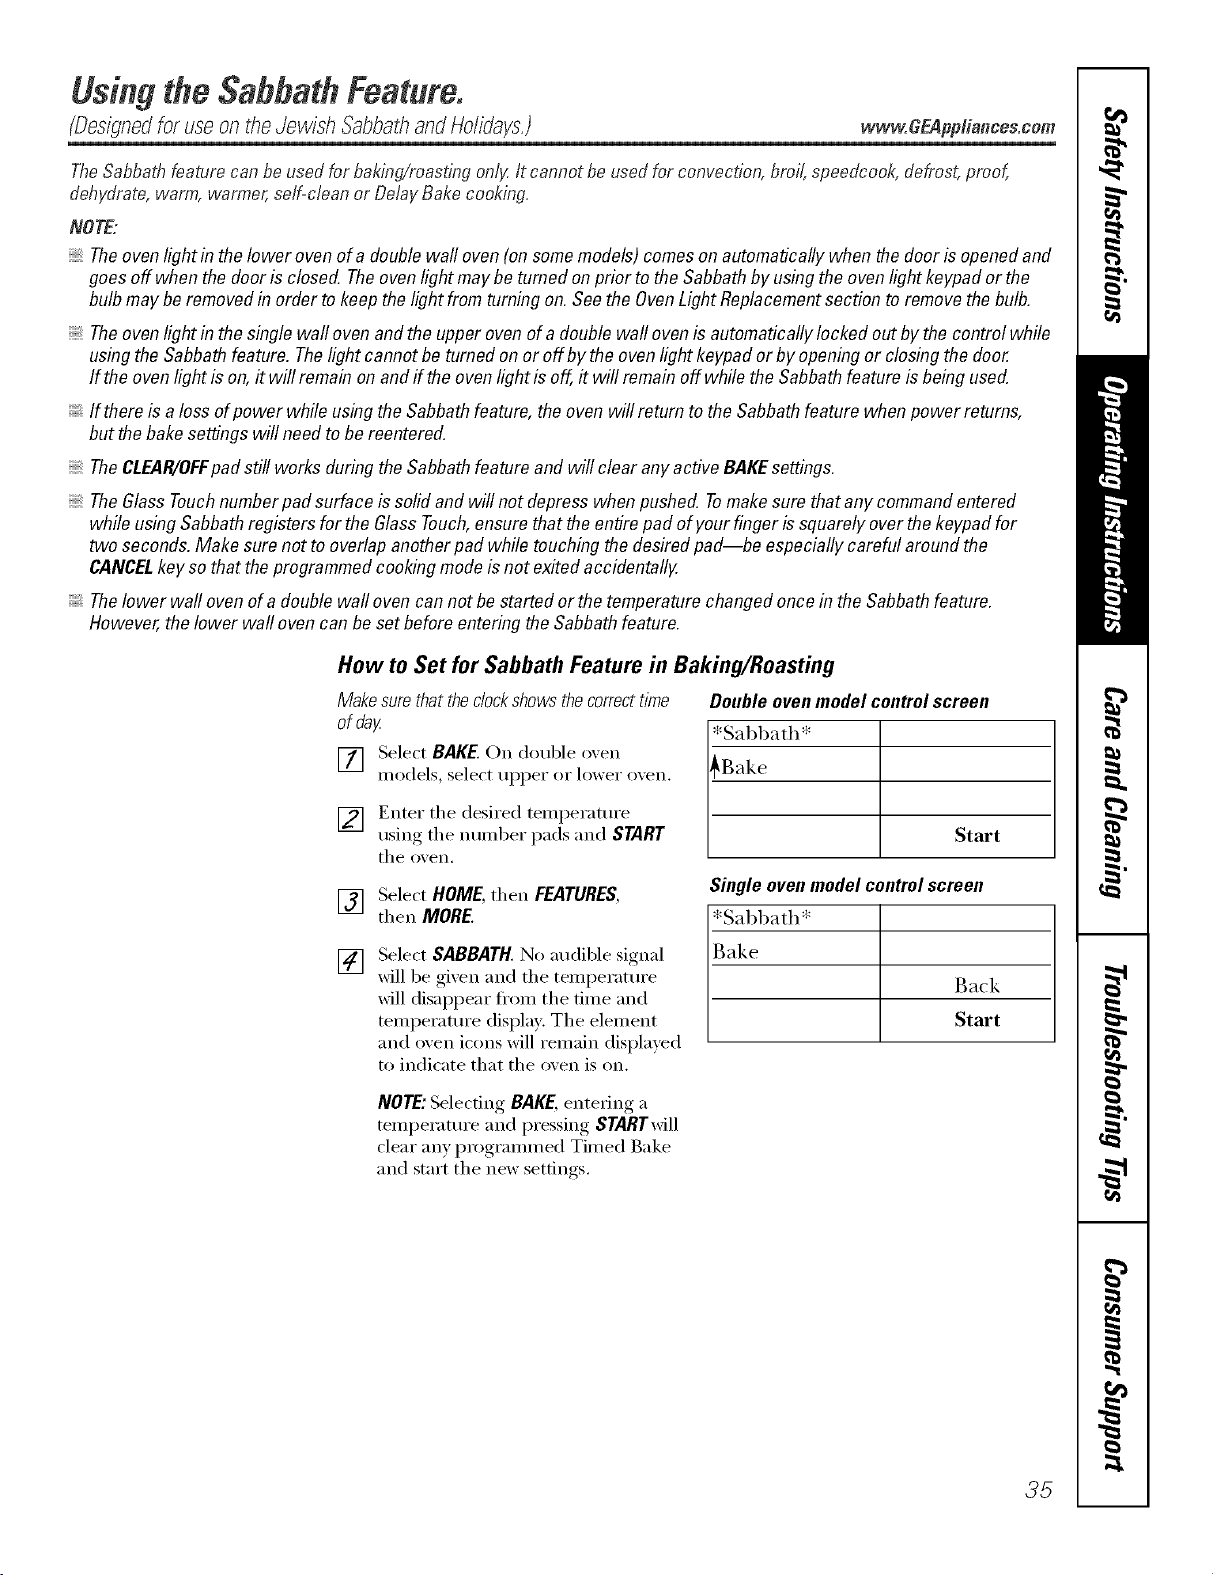
UsingtheSabbathFeature.
(Designedfor useontheJewish SabbathandHolidays.) _.w.GEAppliances.cem
TheSabbathfeature canbeusedforbaking/roastingonlg It cannot be usedforconvection,broil,speedcook,defrost,proof,
dehydrate,warm,warmer,self-cleanor DelayBakecooking.
NOTE:
Theovenlight in thelower ovenofadouble walloven(on somemodels)comesonautomaticallywhen thedoor is openedand
goesoff when thedoor isclosed.Theovenlightmaybe tumed on prior tothe Sabbathbyusingtheovenlightkeypador the
bulb maybe removedin order to keepthelightfrom turningon.Seethe OvenLightReplacementsectionto removethebulb.
Theovenlight in thesinglewall ovenandthe upperovenofadouble wall ovenis automaticallylocked outbythe controlwhile
usingtheSabbathfeature. Thelight cannotbe turnedonor off bythe ovenlight keypador by openingor closingthe door
If the ovenlight is on,it will remainonandff theovenlightis off,it will remainoff whilethe Sabbathfeatureis beingused.
If thereisaloss ofpower while usingthe Sabbathfeature,theoven willreturn tothe Sabbathfeaturewhen powerreturns,
but thebakesettings will needto be reentered.
TheCLEAR/OFFpad still worksduringtheSabbathfeatureand will clear anyactiveBAKEsettings.
TheGlassTouchnumberpad surfaceis solidand will notdepresswhenpushed. Tomakesure thatany commandentered
while usingSabbathregistersfor the GlassTouch,ensurethattheentirepad ofyourfinger issquarelyoverthekeypadfor
two seconds.Make surenot to overlapanotherpad while touching thedesiredpad--be especiallycareful aroundthe
CANCELkey sothat theprogrammedcookingmodeisnot exitedaccidentally.
Thelower wall ovenof a doublewall ovencannot bestartedorthe temperaturechangedoncein theSabbathfeature.
However,the lower wallovencan be setbeforeenteringtheSabbathfeature.
How to Set for Sabbath Feature in Baking/Roasting
Make surethat the dock shows the correct time
of day
[] Select BAKE.On double oxen
models, select tipper or lower oxen.
] Enter tile desired temperature
using tile number pads and START
tile o_en.
Doubleovenmodelcontrolscreen
[*Sabbath*
[_ Start
Single ovenmodelcontrolscreen
*Sabbath*
Back
Start
[]
[]
Select HOME, then FEATURES,
then MORE.
Select SABBATH. No audil)le signal
will be gixen and tile temperatm'e
will disappear fl'om tile time and
temperatm'e display: Tile element
and oven icons will remain displayed
to indicate that tile oven is on.
NOTE:Selecting BAKE,entering a
temperature and pressing STARTwill
clear any programmed Timed Bake
and start tile new settings.
35
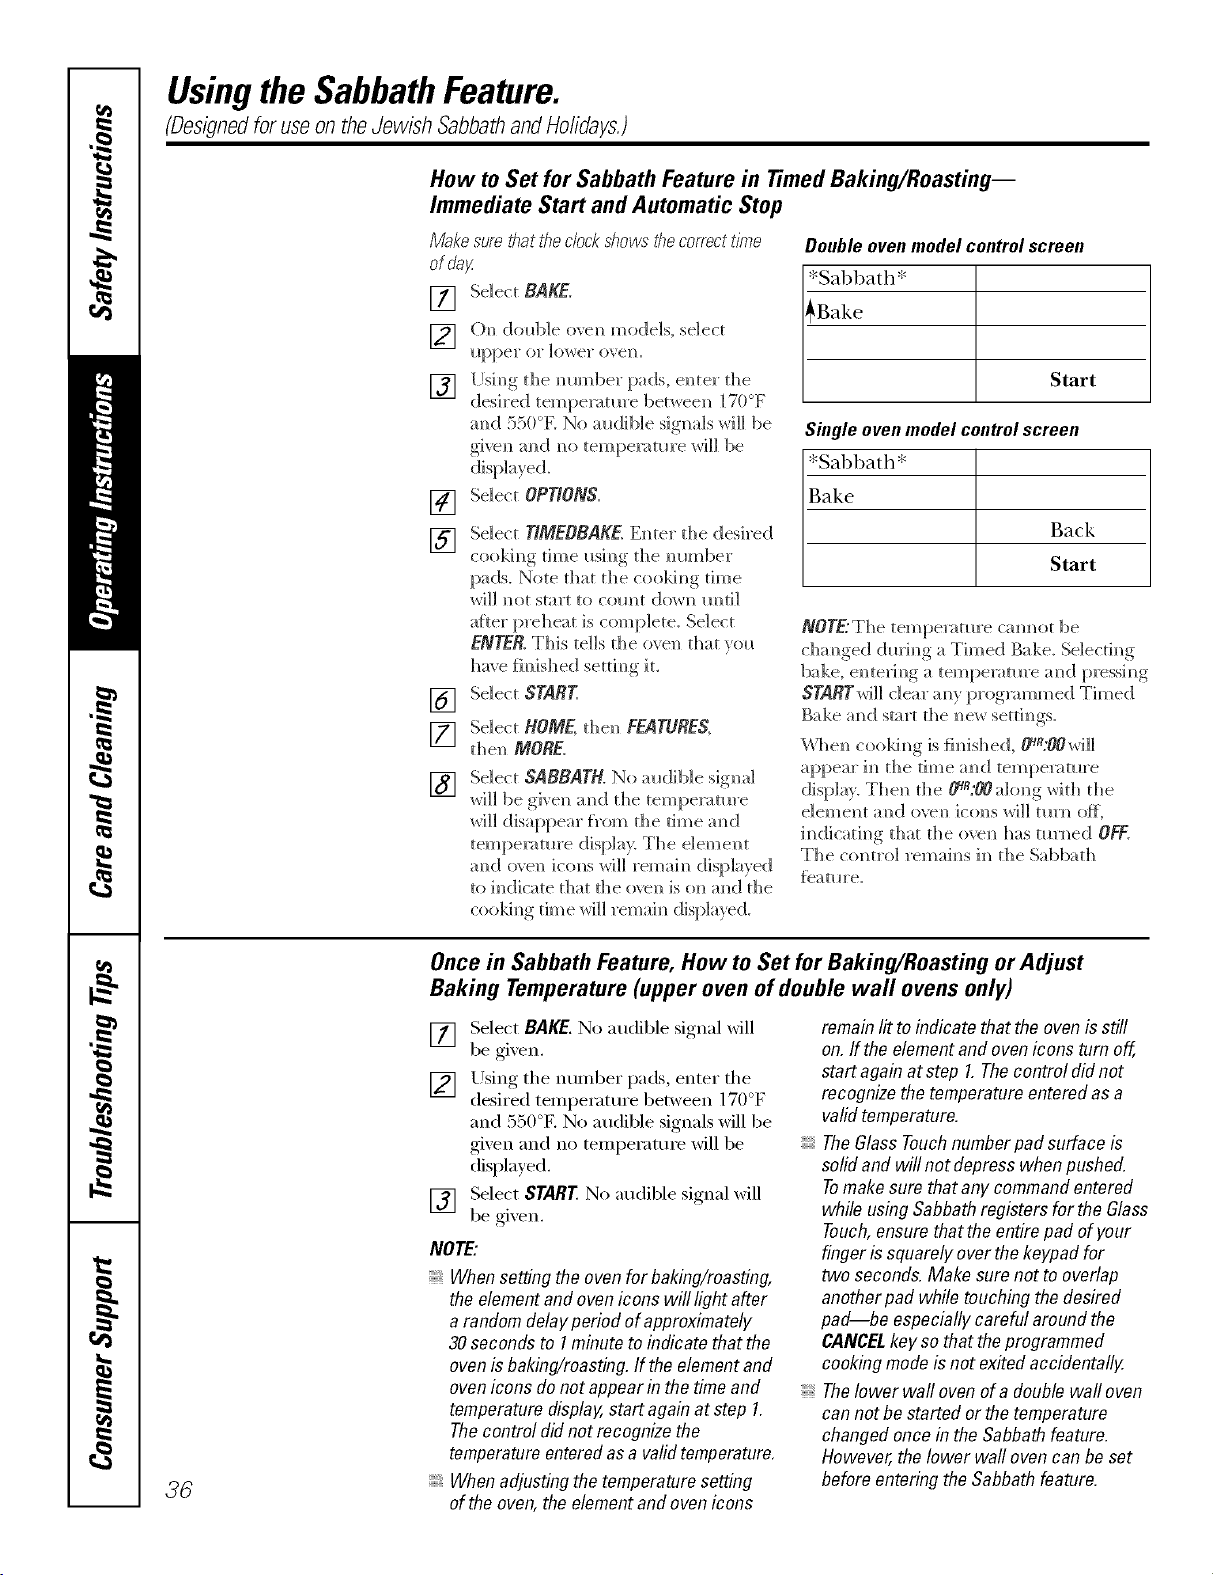
Usingthe SabbathFeature.
(DesignedforuseontheJewish SabbathandHolidays.)
How to Set for Sabbath Feature in Timed Baking/Roasting--
Immediate Start and Automatic Stop
Makesure.thattheclockshows"thecorrecttime
ofday:
[]
[]
[]
Select BAKE.
()N_ dol_b]e ovem_ models, select
Ilpper or ]ox_er ove]k
[Jsim_gthe m_im_ber pads, en ter d_e
desired tempe_m_re between 170°F
mM 550°K No audible signals will be
givem_and m_otemperature will be
[]
[]
[]
[]
[]
Select OPTIONS.
Select TIMEBBAKE.Em_ter die desired
CookiD_ tlD_e I_SiD_ the DlOH]ber
pads. Note d]at die coo]d_]g dine
_rH_l ]_Ot start to com/t (]<}_rl_ [l_ti]
aRer preheat is complete, Select
ENTER,This tells die oven that veil
have fimshed settim_g it.
Select START.
Select ROME, d_en FEATURES,
d]en MORE.
Select SABBATH. No audiNe signal
wi]] be _oiven m_d the temperature
_rH]] disappear f?om the time am_(;[
tempe_:mH'e display: The e]eme]_t
amid o'_e]] ictms _rH]] remah_ displayed
to indicate that the (we]_ is o_] mid the
cookim_g tim e _rH]] remai m_displayed.
Double oven model control screen
*Sabbath*
_Bake
Start
Singleovenmodelcontrolscreen
*Sal)bath*
Bake
Back
Start
NOTE:The tempe]vm*re cm]not be
cham_ged dm'im_g a Timed Bake_ Se]ectim_g
bake, em_terim_g a tempemtm'e a_]d pressi_g
STARTwiH dear a_y programmed Timed
Bake m_d start the _e_ setti_gs.
\\3]e_ coo]d_g is fimshed, _:OOwi]]
appear i_ the time a_d tempe_:m_re
display. Then the 0q_:00 along with the
i_Micati_]gthat the ove_ has tm3_ed OFF.
The control remai_s i_ the Sabbath
_eatm'e.
36
Once in Sabbath Feature, How to Set for Baking/Roasting or Adjust
Baking Temperature (upper oven of double wall ovens only)
[] Select BAKE.No audible signal xfill
be gi;en.
[] Using the number pads, enter tl_(o .
desired temperatm'e between 1t ) F
and 550°E No audible signals will be
gixen and no temperatm'e will be
displayed.
[] Select START No audil)le signal will
be gi;en.
NOTE:
Whensettingthe ovenfor baking/roasting,
the elementand ovenicons will lightafter
a randomdelayperiod ofapproximately
30secondsto 1minuteto indicatethat the
ovenisbaking/roasting,ff theelementand
ovenicons donot appearin thetime and
temperaturedisplay,startagainatstep 1.
Thecontrol didnot recognizethe
temperatureenteredasa validtemperature,
Whenadjustingthetemperaturesetting
of theoven,theelementandovenicons
remainlit toindicate that theovenisstiff
on.ff tbe elementand ovenicons turnoff,
startagain atstep 1.Thecontrol did not
recognizethetemperatureenteredasa
validtemperature.
TheGlassTouchnumberpad surfaceis
solidand will notdepresswhenpushed.
Tomakesurethat anycommandentered
while usingSabbathregistersforthe Glass
Touch,ensurethatthe entirepadof your
fingeris squarelyoverthekeypadfor
two seconds.Make surenot to overlap
anotherpad whiletouching thedesired
pad--be especiallycareful aroundthe
CANCELkey sothattheprogrammed
cookingmodeisnot exitedaccidentally.
Thelower wall ovenof a doublewall oven
can notbe startedor thetemperature
changedoncein the Sabbathfeature.
However,the lower wallovencan be set
beforeenteringtheSabbathfeature.
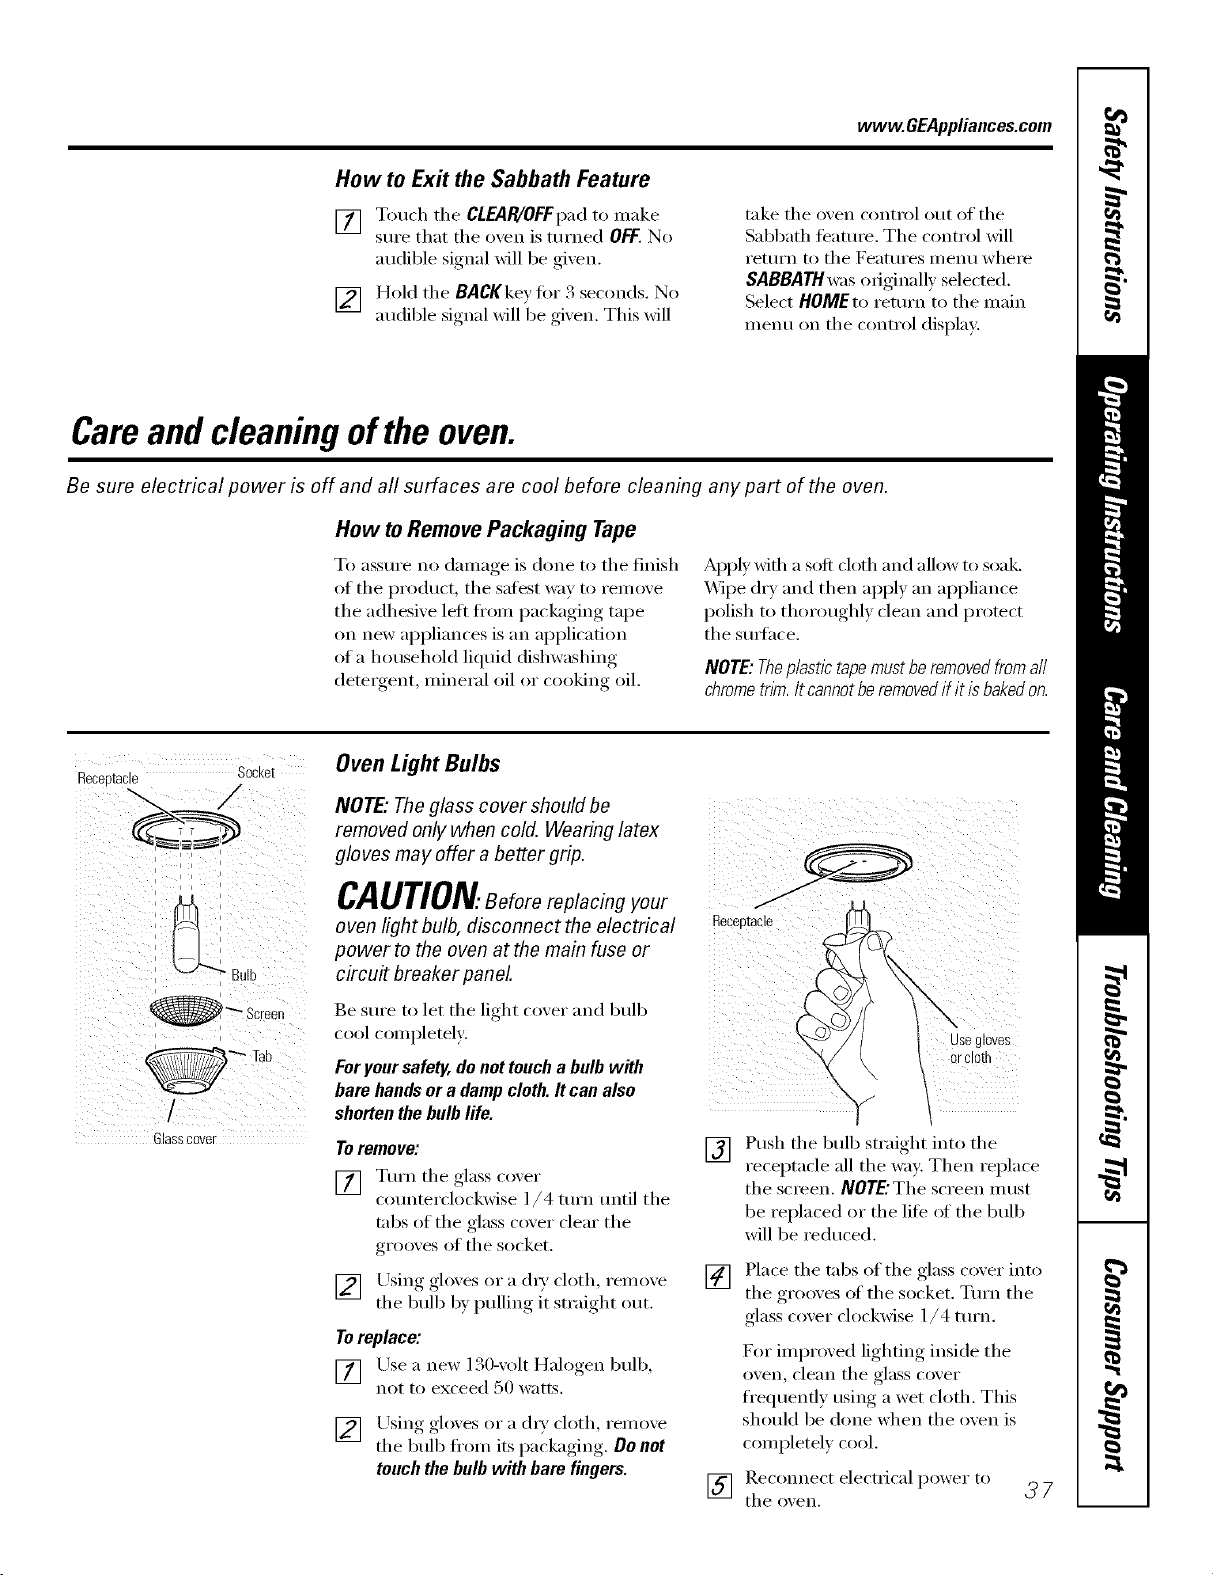
www.GEAppliances.com
How to Exit the Sabbath Feature
[] Touch the CLEAR/OFFpad to make
sure that the o'_en is turned OFF.No
audible signal will be given.
[] HoM the BACKkey fiw 3 seconds. No
audible signal will be gixen. This will
take the oven cx)ntml out of the
Sabbath teanu'e. The control will
I'etllI'n [0 the Featlli'es l//enll where
SABBATH was oIiginally selected.
Select HOMEto return to the main
menu on the control display.
Careand cleaning ofthe oven.
Be sure electrical power is off and all surfaces are cool before cleaning any part of the oven.
How to Remove Packaging Tape
To assure no damage is done to the finish
of the product, the satest way to remove
the adhesive lett fl'om packaging tape
on new appliances is an application
of a household liquid dishwashing
deteigent, mineral oil or cooking oil.
Apply Mflt a soft cloth and allow to soak.
Wipe dry and then apl)ly an appliance
polish to thoroughly clean and protect
the sun'hce.
NOTE:Theplastictapemustberemovedfromall
chrometnm.Itcannotberemovedif itisbakedon.
Receptacle Socket
i i i i
i
@_ Screen
,
Glasscover
Oven Light Bulbs
NOTE" The glass cover should be
removed only when cold. Wearing latex
gloves may offer a better grip.
CAUTION.Beforereplacingyour /
oven Iight bulb, disconnect the electrical ...........
power to the oven at the main fuse or
circu# breaker panel
Be sure to let the light cover and bulb
cool completely.
Foryour safety, donot toucha bulb with
bare handsor a damp cloth. It can also
shorten the bulb life.
Toremove:
[] Turn the glass taxer
counterclockwise l/4 turn until the
tabs of the glass cover clear the
grooves of the socket.
[] Using gloxes or a (h T cloth, remoxe
the bulb b} pulling it smfight out.
Toreplace:
[] Lrse a new 130-xolt Halogen bulb,
n(/t to exceed 50 watts.
[] Using_, _oloves or a (h_', cloth, renlove
the bulb ti'om its packaging, , . De net
touch the bulb with bare fingers.
\
use gloves
or ClOffl
[]
Push the bull) straight into the
receptacle all the way. Then replace
the screen. NOTE'The screen Ill ust
be replaced or the life (ff the bulb
will be reduced.
[] Place the tabs of the glass cover into
the grooxes of the socket. Turn the
glass cover clockwise 1/4 turn.
D)r improved lighting inside the
oven, clean the glass cover
fl'equenfly using a wet cloth. This
should be done when the oven is
completely cool.
[] theRec°m_ectoxen,electrical power to _ 7
Careand cleaning ofthe oven.
Stainless Steel Surfaces
Do not use a steel-wool pad; it will
scratch the surface.
[]
[]
Shake (2EILBd_<IABRYTE<'_bottle well.
Place a small amom]t of CEIL_4A
BRYTE _>Stainless Steel Appliance
Cleaner on a dampcloth or damp
paper t{}wel.
[] Clean a small area (appro_matel)
8" x 8"), rubbing with the grain ot
the stainless steel if applicable.
[] D_' and buffwith a clean, {hT paper
towel or soft cloth.
] Repeat as necessary;
NOTE."If a mineral oilq)ased stainless steel
appliance cleaner has been used before
to clean the appliance, wash the smthce
with dishwashing liquid and water prior
to using the CEIL_dMA BP.YTE <)Stainless
Steel Appliance (3eane_: _Mter washing
the smtace with dishwashing liquid
and ware E rise a genei'otls }llllO/lnt oJV
CE]_Bd_4A BRYTE <'_Stainless Steel
Appliance Cleaner to clean the ai)pliance.
To Order:
To order (_ERAMA BRYTE ': Stainless
Steel Appliance Cleaner, please call
our toll-free nmnber:
NationalPartsCenter 800.626.2002
www.GEAppliances.com
CERAMABRYTE®
StainlessSteelAppliance
Cleaner .................... #PMIOX311
->> I
Onthe lower oven only, the gasket is
designed with a gap at the bottom to
allow for proper air circulation. The
Trivectiod _Oven does not require this.
Do not rub or clean the door gasket--
it has an extremely low resistance to
abrasion.
If you notice the gasket becombTg worn,
frayed or damaged in any way or if it has
become displaced on the door, you should
have it replaced.
Cleaning the Oven Door
Toclean the inside of the door:
Because the area inside the gasket is
cleaned dining the sel6{'lean cycle, you
do not need to clean this by hand.
The area outside the gasket and
the door liner can be cleaned with a
soai}-filled steel-wool or plastic pad,
hot water and detergent. Rinse well
with a vinegar and water solution.
Toclean the outside of the door:
Use soap and water to thor{mghly
{lean the top, sides and fl'ont ot the
()veil (looE Pdnse well. Y)u Ill,IV _llso
use a glass {leaner to {lean tile glass
on the outside of the dora: Do not let
water drip into the vent openings.
If any stain on the door vent trim is
persistent, use a soli abrasive cleaner
and a sI){mge-scrubber for best results.
Spillage of marinades, fl'uitj uices,
tomato sauces and basting materials
containing acids may cause
discoloration and should be wiped
up immediately. _._]]en sm'ti_{'e is cool,
clean and rinse.
Do not rise oven cleanels_ cleaning
I){}wde_ or hm_h abrasives on the
outside oI the door.
When cleaning sm_i_ces of door and
oven that come together on closing
the do{m use only mild, non-abrasive
soaps or detergents applied with a
sponge or sott cloth.
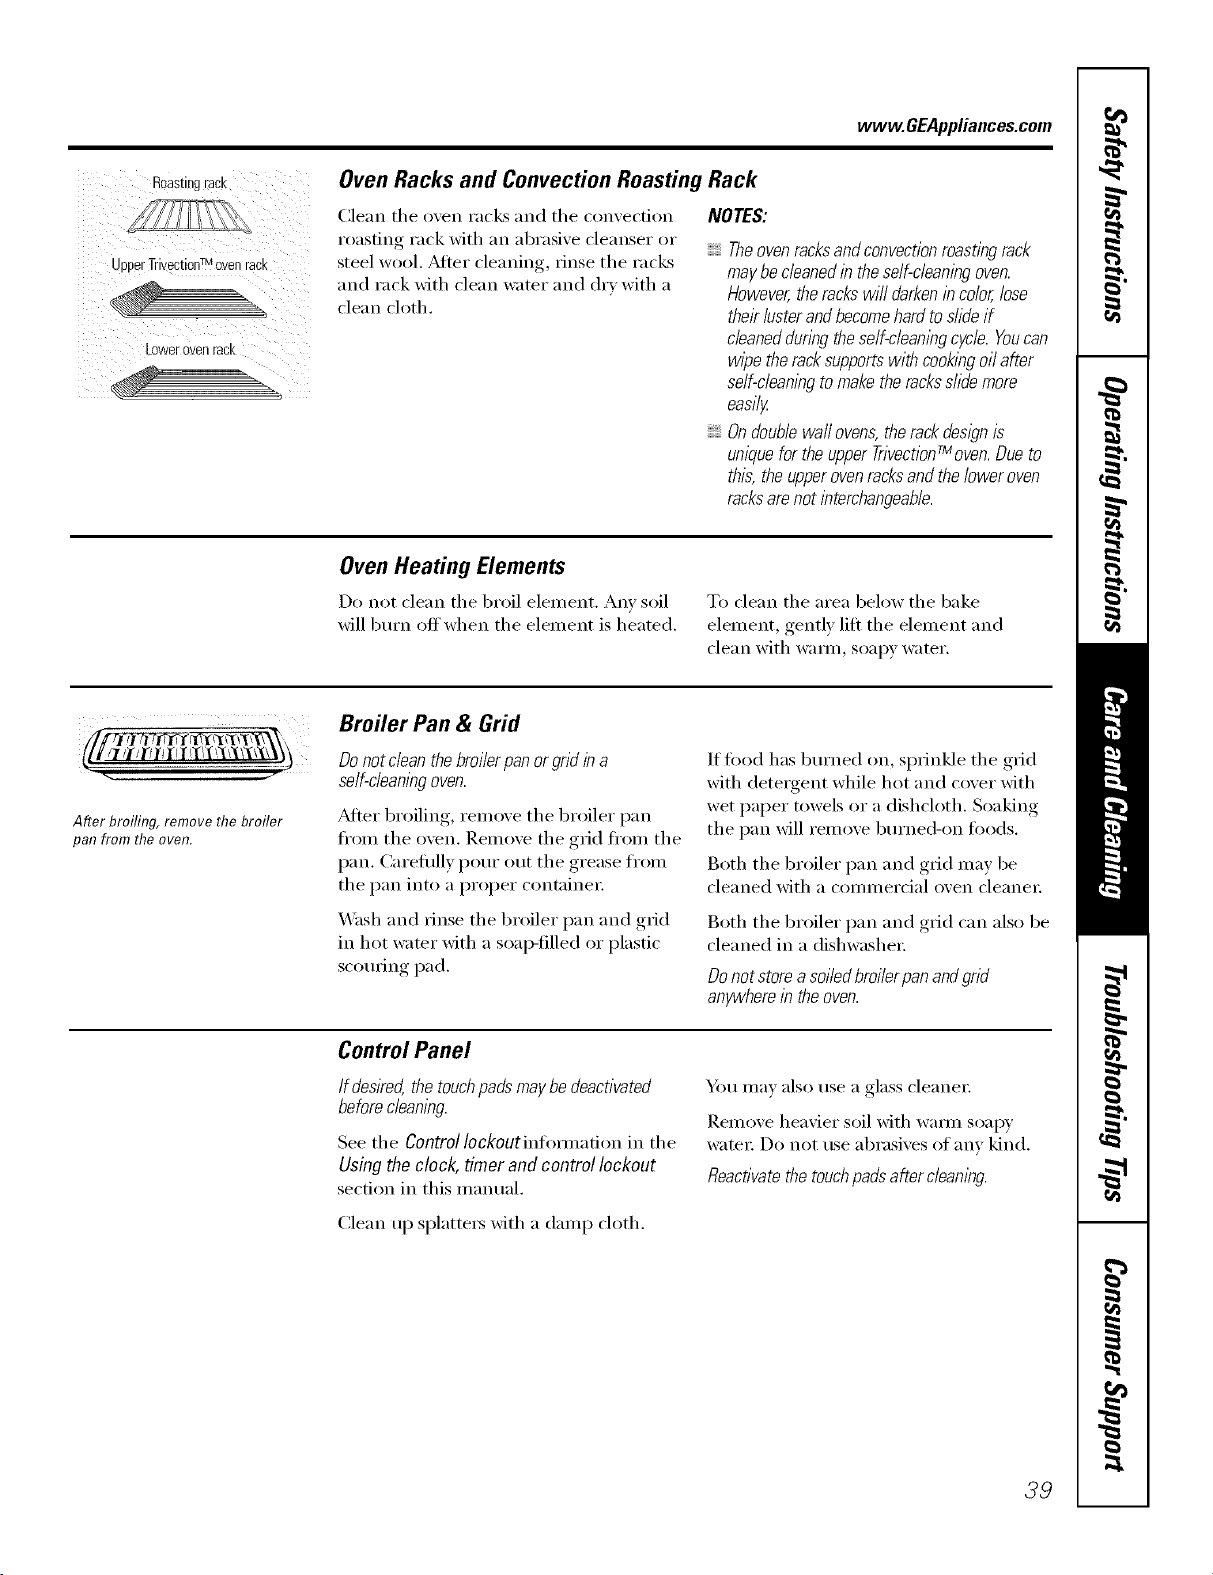
www.GEAppliances.com
Roasting rack
UDDerTrivectinnTMoven rad
Lower oveo raCK
Oven Racks and Convection Roasting Rack
Clean the oven racks and the convection
roasting rack with an abrasive cleanser or
steel wool. Mter cleaning, rinse the racks
and rack with clean water and dry with a
clean cloth.
NOTES:
Theovenracksandconvectionroastingrack
maybecleanedin theself-cleaningoven.
However,therackswilldarkenincolor,lose
theirlusterandbecomehardtoslideif
cleanedduringtheself-cleaningcycle.Youcan
wipetheracksupportswithcookingoilafter
self-cleaningtomaketheracksslidemore
easily
Ondoublewaftovens,therackdesignis
uniquefortheupperTrivectionfMoven.Dueto
this,theupperovenracksandtheloweroven
racksarenotinterchangeable.
Oven Heating Elements
Do not clean the broil element. Any soil
will burn off when the element is heated.
To clean the area below the bake
element, gently lilt the element and
clean with warn/, soapy water.
5 -I "
After broiling, remove the broiler
pan from the oven.
Broiler Pan & Grid
Do not clean the broilerpan or grid in a
self-cleaningoven.
_6dteI"broiling, remove the broiler pan
fl'om the oven. Remove the g_id fl'om the
pan. Careflflly pour out the grease fl'om
the pan into a proper containe_:
_M_sh and rinse the broiler pan and grid
in hot wamr with a soap-filled or plastic
scouting pad.
If fi_od has burned on, sprinkle the grid
with detergent while hot and cover with
wet paper towels or a dishcloth. Soaking
the pan will remove burned-on foods.
Both the broiler pan and grid may be
cleaned with a commercial oven cleane_:
Both the broiler pan and giid can also be
cleaned in a dishwasher:
Do not store asoiled broilerpanandgrid
anywherein the oven.
Control Panel
Ifdesked,thetouchpadsmaybedeactivated
beforecleaning
See the ControlIockoutinflmnadon in the
Usingtheclock, timer andcontrol lockout
section in this manual.
Ybu may also use a glass cleaner.
Remove heavier soil Mth wmm soapy
water: Do not use abrasives of any kind.
Reactivatethe touchpa& after cleaning.
Clean up splatters with a damp cloth.
39

Beforeyoucall forservice...
Troubleshooting -tips
Save time and money/. Review the charts on the following
pages first and you may not need to call for service.
Possible Causes What To Do
Fooddoes not
speed bake properly
Oven controls
improperly set.
Rack position is incorrect
or the rack is not level.
• See Using the Trivection TM Oven section.
• See Using the Trivection TM Oven section.
Incorrect use of cookware • See Using the Trivection'_ Oven section.
mad/or almnhamn foil.
Cookware of improper size
being used.
Door not closed. • Close door completely.
Very delicate item. • Use traditional bake.
Food not to desired • Cook times will vary due to recipe and pan variations.
doneness. Check food when prompted and add additional time
with More Time if needed.
Sauce on food gets too brown. • Apply smite later in cooking cycle.
Meat cooked too long. • Remove ti'om oven sooner and allow to st_md. Meat
teml)erature will continue to lJse.
Food put in too early. • Place food in the oven once the oven is preheated m_d
the display shows "PUTFOOD IN OVEN"
Temperature reading Don't use a meat • Take the temperature of the meat after removing it
on meat thermometer thermometer in oven fi'om th e ()yen.
seems inaccurate while speedcookhag.
Food does not Oven controls • See Using the TrivectionTM Oven section.
speed broil properly improperly set.
Improper rack position • See the Broiling Guide.
being used.
Cookware not suited to broiling. • Use the broiling, l)an and ,grid that crone with your oven.
Door not closed. • Close door completely.
Food overcooked. • Rell/OVe Ill'oil/ oxen soonel" ;lll(_lallow to st;ind. Food
temperatures will continue to lise.
Food madercooked, • Speed broil for additional time using MoreTime.
\vhel'e H l'Hl'e [0 H/edit/Ill I'Hl'e aloneness is desired.
Meat is too done ha center. • Lrse traditional broil tin" x'e_y thin steaEs or liar foods
Food put in too early. • Place food in the oven once the oven is preheated :rod
the display shows "PUTFOOD IN OVEN':
Cook time doesn't Oven controls improperly set. • See Using the TrivectionTM Ovensection.
countdown while
Door is not • Close door completely.
speedcooking closed completely.
STARTnot selected. • Press STARTonce food is placed in the oven.
4O
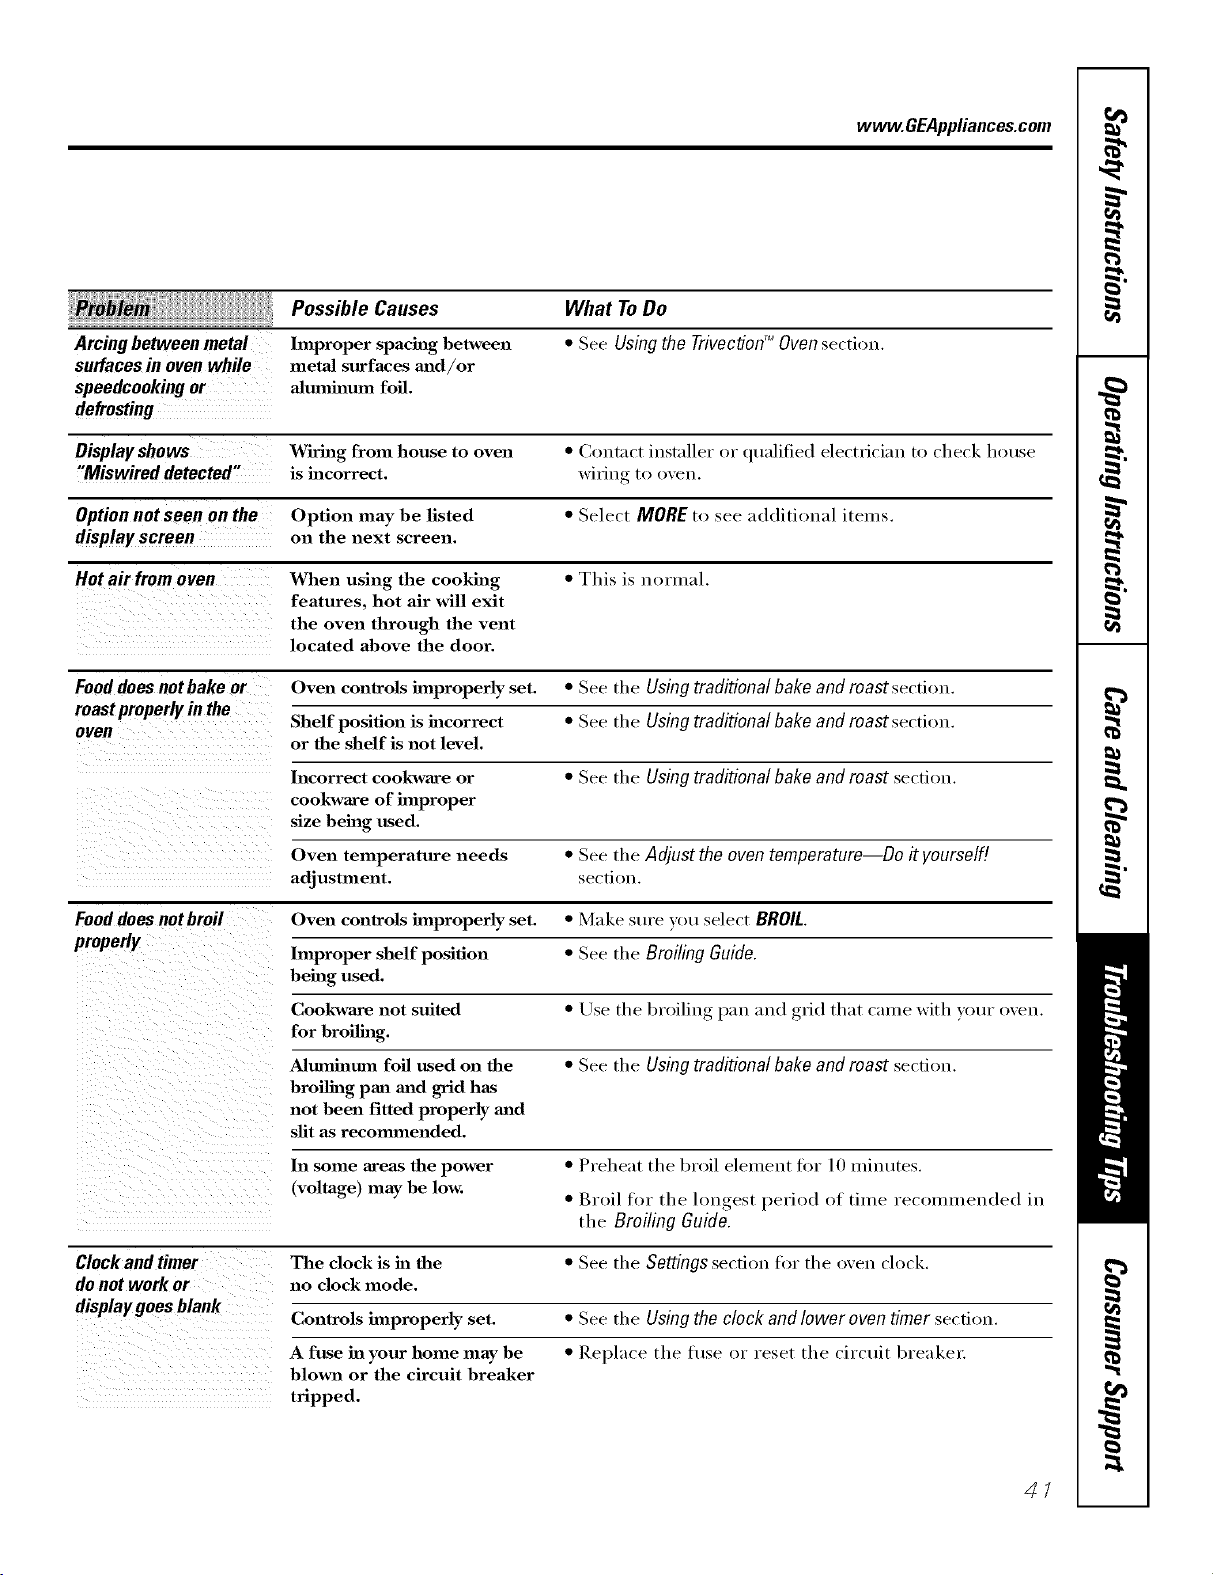
www.GEAppliances.com
ii ill!iili llllllllllllll
Arcing between metal
surfaces in oven while
speedcookingor
defrosting
Possible Causes
hnproper spacing hetween
metaJ surfaces m_d/or
a]mnh_mn foil.
What ToDo
• See Usingthe TrivectionTM Ovensection.
Display shows Wiring from house to oven • Coutnct installer or qualified electrician to check house
"Miswired detected" is incorrect, wiring to oven,
Option not seen on the Option may be listed • Select MOREto see additional items.
displayscreen on the next screen.
Hot air from oyen When using the cooking • This is normal.
features, hot air will exit
the oven through the vent
located above the door.
Fooddoes not bake or Oven controls improperly set. • See the Usingtraditionalbakeand roastsection,
roastproperlyin the Shelf position is incorrect • See the Usingtraditional bake and roast section,
oven
or the shelf is not level.
Incorrect cookware or • See the Using traditional bake and roast section,
cookware of hnproper
size being used.
Oven temperature needs • See the Adjust theoven temperature Do it yourself[
adjustment, se(-ti_)u,
Food does not broil Oven controls improperly set. • Make sure _ m select BROIL
properly
hnproper shelf position • See the Broiling Guide.
being used.
Cookware not suited • Use the broiling pan and grid that came with your oven,
for broiling.
Aluminum foil used on the • See the Using traditionalbakeand roast secdon,
broiling pan madgrid has
not been fitted properly mid
slit as recommended.
In some areas the power • Preheat the broil element fi_r 10 minutes,
(voltage) may be low. • Broil for the lon_rest_, period of time recolnmeuded in
the Broiling Guide.
Clock and timer The clock is in the • See the Settings secdou tbr the oven dock,
do not work or no clock mode.
display goes blank
Controls improperly set. • See the Usingthe clock and lower oven timer secfi_>n,
A fuse ha your home may be • Replace the tt/se or reset the circuit breakel:
hlown or the circuit breaker
tripped,
41

Beforeyoucall forservice...
Troubleshooting tips
Possible Causes
Oven Oven temperature
temperature too needs adjustment.
hot or too cold
What To Do
• See tile Adjust theoventemperature--Do it yourself!
section,
Oven will not work Oven controls improperly set. • See tile Using the oven section,
A fuse in your home may • Replace the fl/se or reset the circuit breaker.
be blown or the circuit
breaker tripped.
Ovenwillnot self-clean The oven temperature is too • Allow the oven to cool and reset the controls,
high to set a self-cleml operation.
Oven controls improperly set. • See tl/e Using the self-cleaning oven section.
"Crackling" or This is the sound of the • This is normal.
"popping" sound metal heating and cooling
in the oven during both the cooking and
clemfing fmactions.
Excessive smoking Excessive soil. • Press tile CLEAR/OFFpad. Open the windows to
in the ovenduring rid the room of smoke. Wait tmtil the _ (LOCK) light
a clean cycle goes oft. \,Vipe up the excess soil and reset the
cleau cycle.
Oven door will Oven too hot. • Allow tile oven to cool below locking, teI//l)eY_ltt/l'e,
not open after a
clean cycle
Oven not clean Oven controls improperly set. • See the Using the self-cleaning oven section.
after a clean cycle Oven was heavily soiled. • Clean up heavy spillovers before starting the clean
cycle. Heavily soiled ovens may need to sell=clean
again or for a hmger period of time.
(LOCK)light is on The oven door is locked • Press tile CLEAR/OFFpad.Allow tile oven to cool.
when you want to cook because the temperature
in the oven inside the oven has not
dropped below the
locking temperature.
Oisplayshows "ERR" A temperature was set • Set the temperature between 170°F-550°F.
outside the allowable range
of 170°F-550°E
42
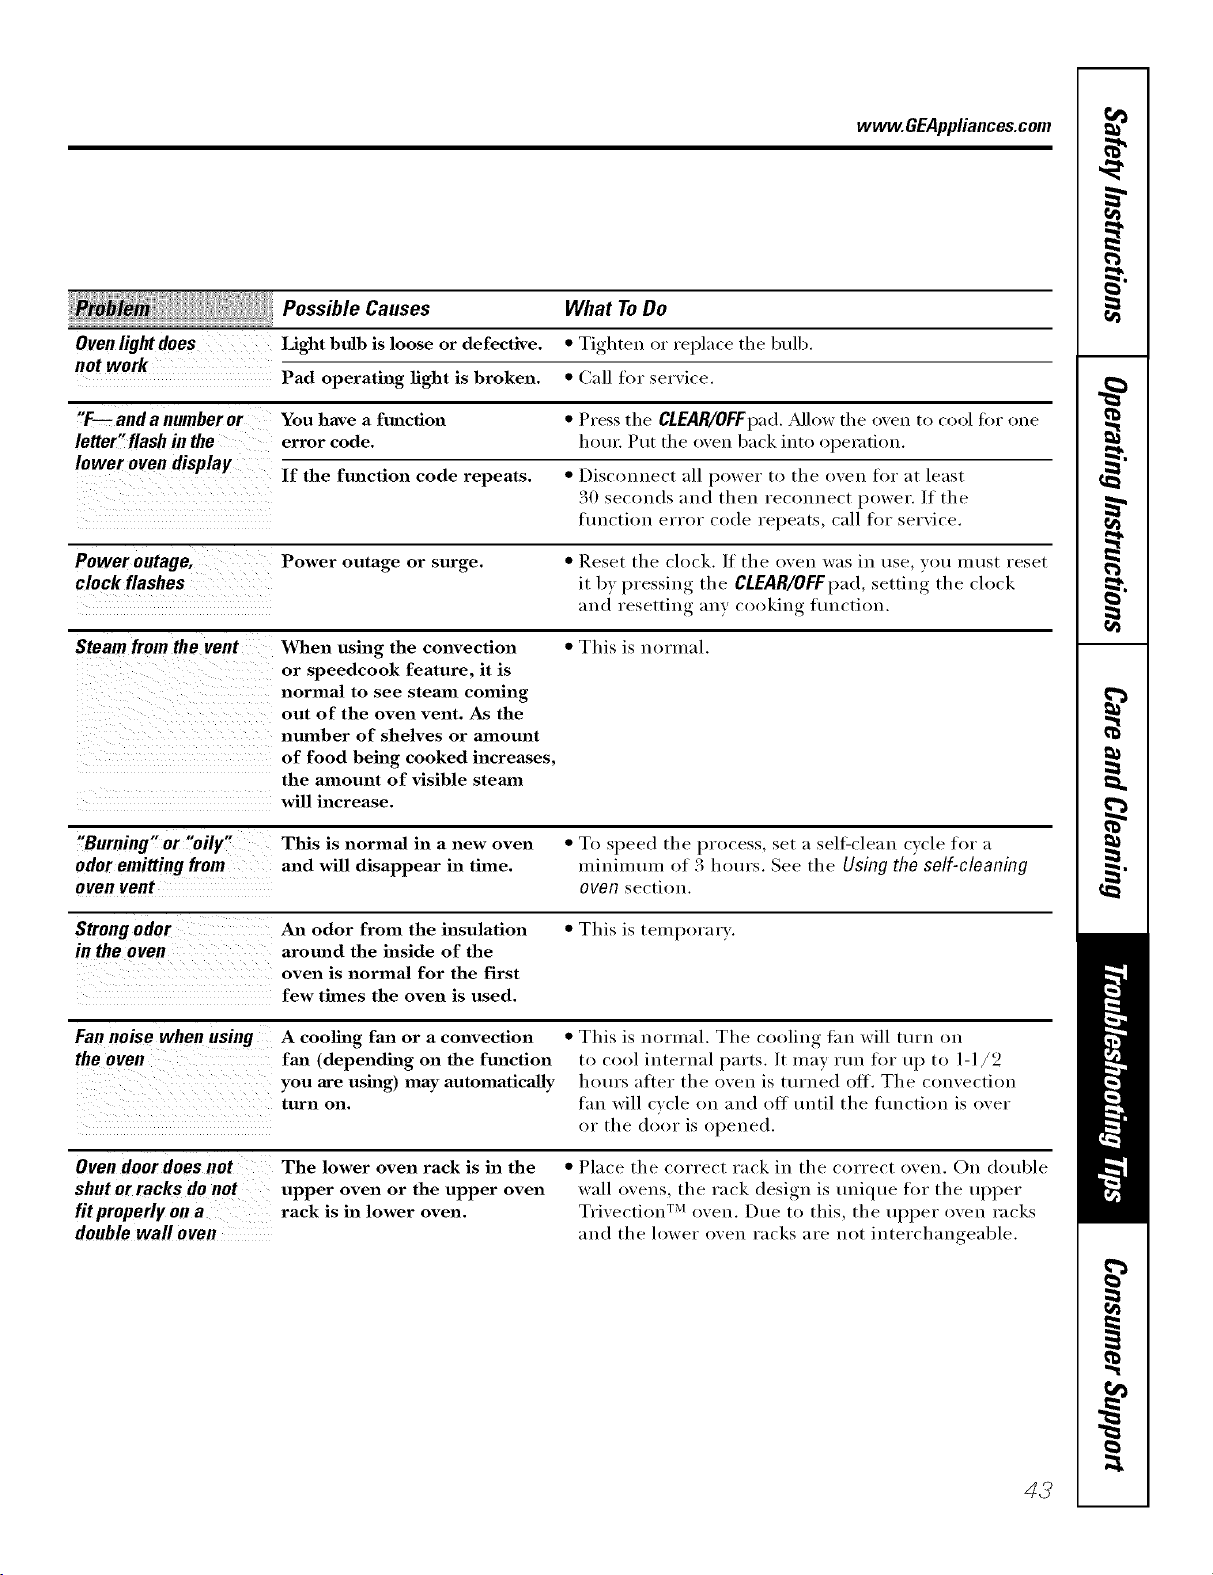
www.GEAppliances.com
,::::i:i_ Possible Causes What ToDo
Oven light does Light bulb is loose or defective. * Tighten or replace the bulb.
not work
Pad operating light is broken. * Call for service.
"F--and a number or You have a function * Press the CLEAR/OFFpad. Allow the oven to cool for one
letter"flash in the error code. hotn: Put the oven back into o[)e_zltiou.
lower oven display
If the function code repeats. * Disconnect all power to the oven for at least
30 seconds and then reconnect power. If the
flmctiou error code repeats, call for service.
Power outage, Power outage or surge. * Reset the clock. ]f the oven was in use vet! must reset
clock flashes it by pressing the CLEAR/OFFpad,setting the clock
and resetting any cooking fimctiou.
Steam from the vent When using the convection * This is normal.
or speedcook feature, it is
normal to see steam coming
out of the oven vent. As the
nmnber of shelves or amount
of food being cooked increases,
the amount of visible stemn
will increase.
"Burning" or "oily" This is normal in a new oven * To speed the process, set a sell:clean cycle for a
odor emitting from and will disappear in time. minimum of 3 hotu's. See the Using the self-cleaning
oven vent oven section.
Strong odor An odor from the insulation * This is tempora_ T.
in the oven around the inside of the
oven is normal for the first
few times the oven is used.
Fan noise when using A cooling fan or a convection * This is normal. The cooling Lm will turn on
the oven fan (depending on the function to cool internal parts. It may rtm for up to 1-1/2
you are using) may automatically hem's after the oven is tin'ned ott. The convection
turn on. tm_ will cycle on and ott tmtil the fimctiou is over
or the door is opened.
Ovendoordoesnot
shutorracks donot
fit properly on a
doublewall oven
The lower oven rack is in the
upper oven or the upper oven
rack is in lower oven.
• Place the correct rack in the correct oven. On clouble
wall ovens, the rack design is tmique tor the uI_per
Tri\'ection TM oven. Due to this, the uI)per oven racks
and the lower oven racks are not interchangeable.
43
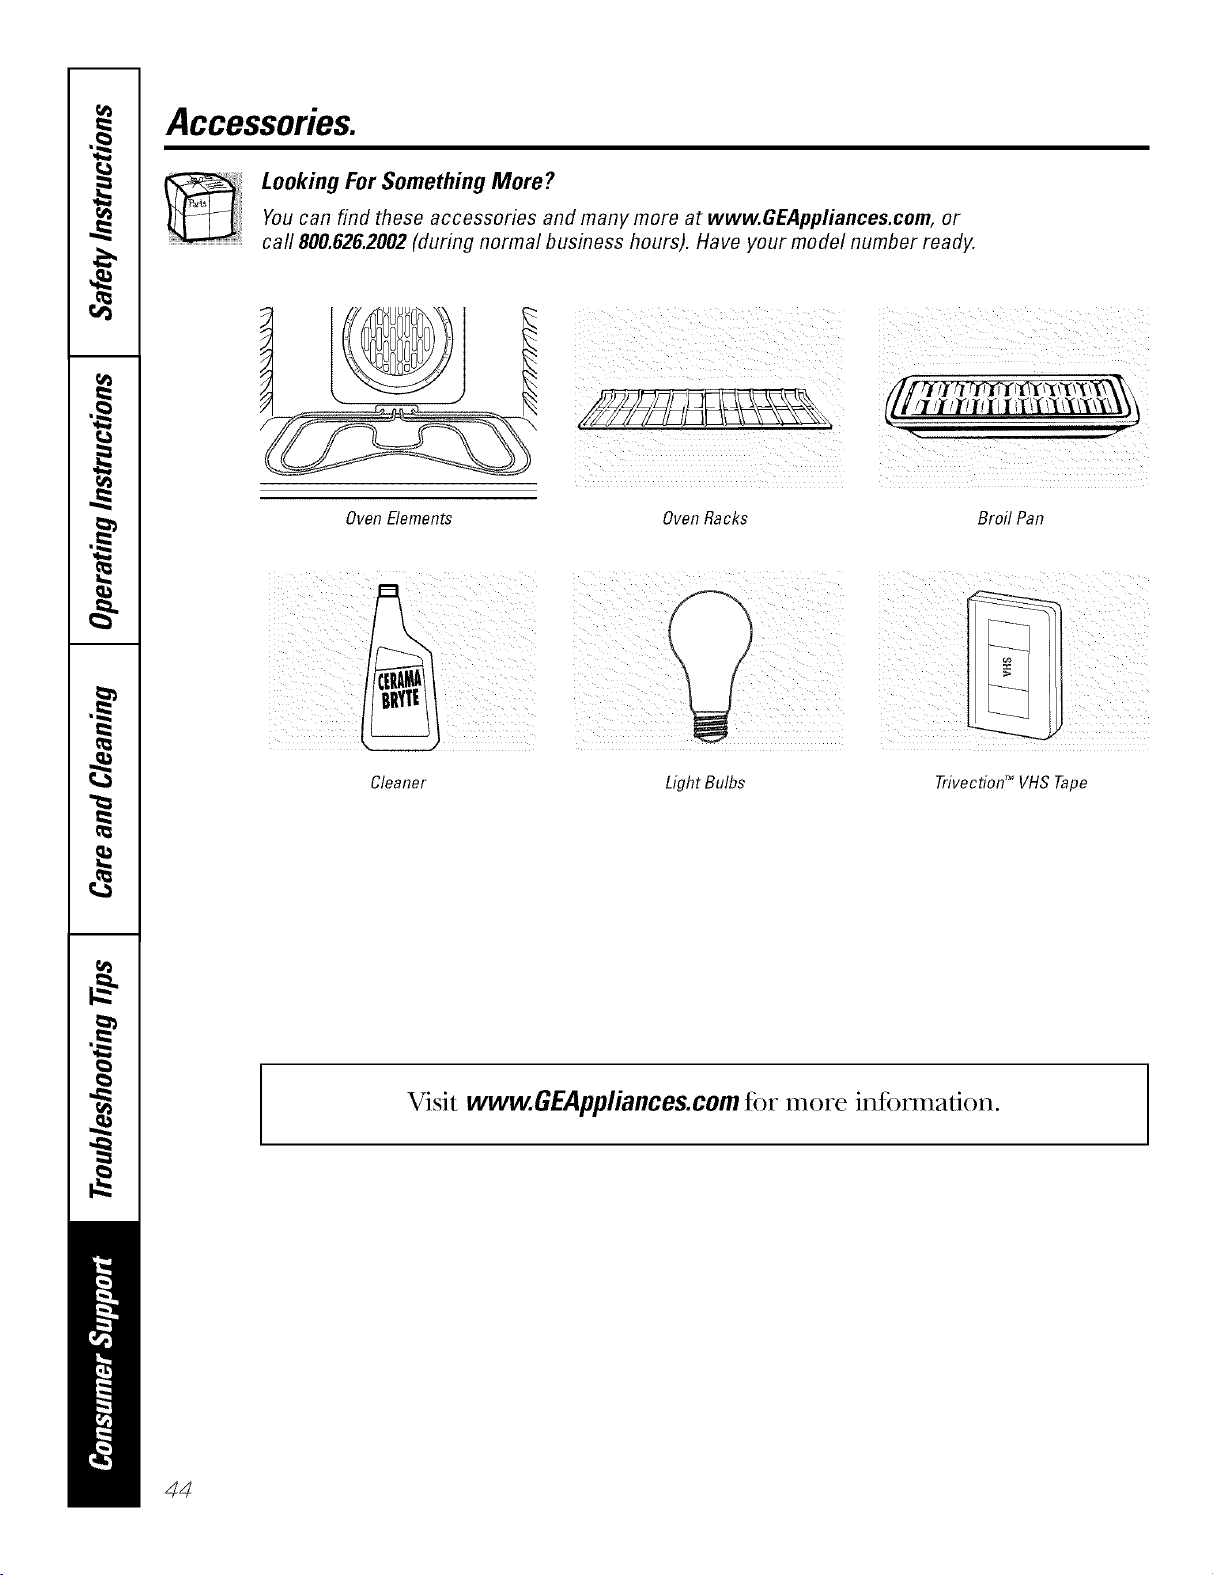
Accessories.
Looking For Something More?You can find these accessories and many more at www.GEAppliances.com, or
call 800.626.2002(during normal business hours). Have your model number ready.
Oven Elements OvenRacks BroH Pan
Cleaner
Light Bulbs Trivection TM VHS Tape
Visit www.GEAppliances.com fi)r more infi)nnafion.
44
GE Service Protection Plus '_'
GE, a _mme recognized _;orldwkle fbr q_mlity a_d depeildabHity; offers )ou
) it .
Service Protectio_ t h_s --comprehe_s_xe protecti(m o[] aH }ore appIim_ces--
No Matter What Brand[
Benefits Include:
o Backed by GE
o All brands covered
o Unlimited service calls
o All parts and labor costs h_cluded
o No out-of-pocket expenses
o No }ridden deductibles
o One 800 nt_fl_er to call
We ?i Cover Any Appliance.
Anywhere° Anytime.
Y<m wi]] be complete]} satisfied with our service protectio]_ or _c,u ma', request }ol_r moiler back
om_ the remaim_im_g vab0e of_om" co]_tract. No questiol_s asked. It's that simple.
Protect w)l_r refi'igera to_; dis]]wash e_; was]] era m_d (byes; ra m_ge, TVI VCR a m_d m i_ch m ore--any brand!
Plus there's m_<)extra charge {or emergei_cy service ai_d ]o_ moi_t]]]y fim_am_c]m_g is available. Eve]_ ]cemaker
coverage a_d tbod spoilage protectio]] is o_terecL Yi)_ ca_ rest eas). ki_owi_g that a]] vo_r wd_mb]e
ho_seho]d producers are protected agai_st expei_sive repairs.
for more
*\[1 ]l*al_ds (ox_.]l d, tip Io 90_ _<u'_ old, ill ib< < }l}[]//{ 1}[a] [J._.
Please place in envelope and mail to:
General Etectric Company
Warranty Registration Department
P.O. Box 3215(}
Louis,dUe, KY 40232-2150
45
Consumer Product Ownership Registration
Dear Customer:
Thank you for purchasing our product and thank you for placing your confidence in us.
_A/eare proud to ha_e you as a customer!
Follow these three steps to protect your new appliance investment:
Complete and mail
your Consumer
Product Ownership
Registration today.
tlaw' tim peace of
mind of knowing wc
call colltact VOl/ ill
tile tmlikely event of a
satiAy modification.
Atter mailing tile
registration below,
store this docmnent
ill a sati' place. It
contains inlormation
you will need should
you require service.
Our selwice number is
800.GE.CARES
(800.432.2737).
Read your Owner's
Manual carefllllv.
It will help you
operate yol/r lle',_
appliance properly.
Model Number Serial Number
, , , , , I I , , , , , , , I
Important: If you did not get a registration card with your
product, detach and return the form below to
ensure that your product is registered, or register
online at www.GEAppliances.com.
.................................................................................................... _,,.,_ (MI h_r_
Consumer Product Ownership Registration
Model Number
Serial Number
I I I I I I I
M_ Ms. M*>,. Mix_,
Fi,-_ti I Lasll
Nmm I I I I I I I I I Name I I I I I I I I I I I I
_11-( (!1 I
Addr(ss I I I I I I I I I I I I I I I I I I I I I I I I
Apt.#l, , , , , , , I E-lnailAddress*
Zip I
1)tie Pla( ed
Month
46
0
GEAppliances
6E Cousumer Prodtlc_s
GeuerM E]ectric Compgnf
Louisville, gentuct:x
ww_GEAppt_ce_com
* Please provide your e-mail address to receive, via e-mail, discounts, special ottk,p, and other important
communications fi-om GE Appliances (GEA).
Check here if you do not want to receixe COlnmunications ti-om GEA's careihlly selected partners.
FAILI JRE T() COMPIA_TI'E AND RE'F[ RN Tt tIS CARD DOES NOT DIMINISII YOI JR
WARRAN'IY RIGIITS.
For intbrmation about GEA's privacy and data usage polic?; go to _a_v.GEAppliances.com and click
on "Pri_acv Policy" or call 800.626.2224.
GESelf-CleaningOvenwith TrivectiodMWarranty.
All warranty service provided by our Factory Service Centers, or
an authorized Customer Care® technician. Toschedule service,
on-line, 24 hours a day, vis# us at www.GEAppliances.com, or
call 800.GE.CARES(800.432.2737).
Staple your receipt here.
Proof of the orig&al purchase
dateis needed to obtain service
under the warrantg
GE Will Replace:
Any part of the speedcook electric convection oven which fifils due to a (lefect in materials
Fromthe dateof the or workmanship. Dm_ing this fullone-yearwarranty,GE will also provide, freeof charge,
originalpurchase all labor and in-home service to replace the detective part.
LimitedAdditional
Four-Year
Forthesecond through
the fifthyearfromdate
of theoriginalpurchase
A replacement magnetron tube if the maguetron tube fifils because of a manuli_cttu-ing def_'ct.
Dtu_ng this limited additional four-year warranty, )ou will be responsible fi_r am' labor or
in-boule serxice.
Service trips to your home to teach you how to use
the product.
hnproper h_staJlation, delivery or maintenance.
Failure of the product if it is abused, misused, or
used for other thaal the intended purpose or used
commercially.
Replacement of house fuses or resetting of
circuit breakers.
Damage to the product caused by accident, fire,
floods or acts of God.
h_cidentaJ or consequential damage caused by
possible defects with this appliance.
Damage caused after delivery.
This warranty is extended to the original purchaser and any succeeding owner for products purchased for
home use within the USA. In Alaska, the warranty excludes the cost of shipping or service calls to your home.
Some states do not allow the exclusion or limitation of incidental or consequential damages. This warranty
gives you specific legal rights, and you may also have other rights which vary from state to state. Toknow
what your legal rights are, consult your local or state consumer affairs office or your state's Attorney General
Warrantor: General Electric Company.Louisville, KY40225
47

ConsumerSupport.
GEAppliancesWebsite www.GEAppliances.com
Have a question or need assistance with your appliance? Try the GE Appliances Website 24 hotu_ a day,
any day of the year! For greater convenience and faster selMce, you can now download Owner's Manuals,
order parts, catalogs, or even schedule service ondine. You can also "_sk Our Team of EN)erts ......
yotlr qtlestions, and so II/rich II/ore...
ScheduleService
www.GEAppliances.com
Expert (;E repair seis:ice is onlx one step away fl'om your dooi: Get on-line and schedule vc,ur service at
your conxenience 24 hom_ am (lm of the _ear! Or call 800.GE.(_AI_ES (800.432.2737) during n{mnal
business hom_.
RealLifeDesignStudio www.GEAppliances.com
GE supports the/!nivei_al Design concept--products, services and environments that can be used by
people of all ages, sizes and capabilities. _,\'e recognize the need to design fi)r a wide range of ph):sical and
mental abilities and impaim_ents. For details of GE's Univei_al Design applications, including kitchen
design ideas fin" people with disabilities, check out our _,Vebsim today. For the hearing impaired, please call
800.TDD.GEAC (800.833.4322).
ExtendedWarranties www.GEAppliances.com
Purchase a (;E extended warrant_ and learn about special discounts that are a_ailable while )our warranty
is still in effect. YOtl can purchase it on-line an)time, or call 800.626.2224 during natural business horus.
(;E (_onsumer Home Serxices will still be there after }our warrant}, expires.
PartsandAccessories www.GEAppliances.com
Individuals qualified to seI_'ice their own appliances can have parts or accessories sent directly to their
homes (VISA, MasterCard and Discover cards are accepted). Order on-line today, 24 hom_ eveia' day or
by phone at 800.626.2002 during natural business hom_.
Instructions contained in this manual coverprocedures tobeperformed by any user. Otherservicing generally
should be referred to qualified service personnel Cautionmust be exercised, since improper servicing may cause
unsafe operation.
ContactUs www.GEAppliances.com
If you are not satisfied with the service you receive from (;E, contact us on our _.Vebsite with all the details
including your phone ntlIllbeI; oI" write to: General Managei; Customer Relations
GE Appliances, Appliance Park
I,ouisville, KY 40225
RegisterYourAppliance www.GEAppliances.com
Register your new applim_ce on-line---at your convenience! Timelx, l_r°(luct registration, will allow fin"
enhanced communication and prompt service under the temps of your warranty, should the need arise.
You mm also mail in the pre-printed registration card included in the I)ackin'"_ material.
Printed in the United States

