
©
¢J
ge.com
Safety Instructions .................. 2-4
Operating Instnwtions
]gakJ n g ..................................... 7
Broiling ................................ 12, 13
Control I,ockom ............................ ,21
Controls ................................... 5
Convection ............................. 14-17
Cook and Itold ()ption ....................... ,29
Dehydrate ()ptioll ........................... 99
Delay Option ............................... 30
Fa* orite Recipes ............................ 90
Itelp ..................................... 31
Kitchen Timer .............................. 91
()ption Settings .......................... 3,2-36
Auto Recipe _" Comersion .................... 34
Clock .................................... 39
Clock Blackout ............................ 33
Detault .................................. 36
l)isplay Color .............................. 34
Fahrenheit or Celsius Temperature Selection .... 33
Kitchen Timer Signal ....................... 36
I,anguage ................................ 34
Somld On/Off ............................ 35
Solmd \i)hune ............................ 35
Thermostat ............................... 3,2
Timer Signal .............................. 36
12-t ]our Shut-()ff .......................... 33
Oven .................................... 6, 7
Probe ............................... 10, 11, 17
Prooting .................................. 95
Roasting ................................... 7
Sabbath Option ............................. 31
SeltLCleaifing Oven ....................... 2,2-24
Timed Baking and Roasting .................. 8, 9
Timed Comectioll Baking and Roasting ....... 18-19
"IX*roTemps Option .......................... 98
Warming ............................... 26-27
Care and Cleaning
Comrol Panel .............................. 239
I ,ight Pmlb ................................. 237
()yen Door ................................ 38
Probe ..................................... 38
P.a( ks ..................................... 39
Removing Packaging "Ihpe .................... 37
Stainless Steel Surthces ....................... 39
Troubleshooting Tips ............... 4o-42
Consumer Support
Coilsmner Support ................... back cover
Product RegJst ration
/or Canadiall Customers ................... 45, 46
Product Reg%t ration
/or LI.S. Customers ....................... 43, 44
\Varrantv .................................. 47
U1_920- 30 " Sirzgle Wall Overz
U1_960- 30 " Double Wall Oven
Four
encastrd
_'_com_ection _lectrique
PT920-bbur ?ze?was#zSde 30 po
PT%O-bbur ?ze?was#zSde 30 po
La section frangaise commence a la page 49
Horno
empotrado
a com_eccidn el_ctrico
c
(leo
PT920-Hor_zo si_@le de pared 3 "
PT960-Hor_zo doble de pared (b 30"
to secci6n on espa#ol empieza
en la pagina 93
Write themodel andserial
numbershere:
Model #
Serial #
You can find thenl on a label
on the fl'ont of the oven behind
the oven door Oil single oven nlodels,
or the front of the lower oven behind
the ()veil door on double ()veil inodels.
49-80431 11-07JR
iMPORTANTSAFETYiNFORMATiON.
READALLiNSTRUCTiONSBEFOREUSING
WARNING!
For your safety;, the information in this manual must be followed to minimize the risk of fire or
explosion, electric shock, or to prevent property damage, personal injury, or loss of life.
IMPORTANTSAFETYNOTICE
The California Safe Drinking Water and Toxic Enforcement Act requires the Governor of California
to publish a list of substances known to the state to cause cancer, birth defects or other reproductive
harm, and requires businesses to warn customers of potential exposure to such substances.
The fiberglass insulation in self-clean ovens gives off a very small amount of carbon monoxide during
the cleaning cycle. Exposure can be minimized by venting with an open window or using a ventilation
fan or hood.
2
SAFETYPRECAUTIONS
When using electrical appliances, basic safety precautions should be followed, including the
folio wing:
_:; Use this appliance only fbr its intended
purpose as described in this )whet s
Manual.
_i_Be sure your appliance is properly
installed and grounded by a qualified
mchnician in accordance with the
provided installation insnucfions.
Ji:,:Do not attempt to repair or replace any
part of your oven unless it is specifically
recommended in this manual. All other
servicing should be refeiTed to a qualified
mchnician.
_{_Have the installer show you the location
of the cfivuit breaker or fl_se. Mark it for
easy' reference.
_{_Before performing any service, disconnect
the oxen power supply at the household
distribution panel by _emoving the fllse or
switching off the circuit breaken
ji:,iDo not leaxe children alone----_'hildren
should not be left alone or unatmnded in
an area where an appliance is in use. They
should never be allowed to sit or stand on
any part of the appliance.
_{_iDo not allow anyone to climb, stand or
hang on the door They could damage the
oven, or cause sexere personal i,_u U.
_?{:_Be sure d_e oven is securely installed in
a cabinet that is fllanly attached to the
house structme. Ne_er allow anyone to
climb, sit, stand or hang on the ox>n door
ji:,iNe_er leave the o_en door open when you
are not watching the oxen.
_:;Always kee I) combustible wall cox_ring,
curtains or drapes a sad distance flom
yO/lI" oxen.
_?{:_Alwws kee I) dish towels, dishcloths, pot
holders and oilier linens a sad distance
fl'OIll VO/lI" OX_II.
_{:_Always kee I) wooden and plastic umnsils
and canned food a safe distance away
flom your oven.
J?:':Teach children not m pl W with the
controls or any other part of file ox>n.
_::i,arge scratches or impacts m glass doors
can lead to broken or shatm_ed glass.
Ji:,:Do not store flammable mamfials in
arl o\_n.
CAUTION: ,emsofi.te,estto
children should not be stored in cabinets
above an oven; children climbing on the
oven m reach imms could be seriously
injured.
ge.com
WARNING!
SAFETYPRECAUTIONS
{_:Never wear loose-fitting or hanging
gaI_nents while using file appliance. Be
careflll when reaching for ite.ms stored in
cabinets over file ox.en. Flamnlal)le mamrial
could be ignited if brought in contact wifl/
hot surfaces or heating elements and mac
cause sex.ere BHF/Is,
_fi:,iUse only d U pot llolders--moist or damp
pot holders on hot snil_aces iI/_ I.esult in
bnills fiom steam. Do not let pot holders
touch hot heating elements. Do not use a
towel or other bulkv cloth.
_{;:For your safew, nex.er use your appliance
for wal_ning or heating the room.
_{;_Do not let cooking grease or other
flamnlable mamrials accmnulam in or
near tile oven.
_7{;_Do not use water on grease fires.
Never pick/l I) a flaming pan. Turn tile
controls off'.
Flame in tile oven can be smothered
completely by closing tile oven door
and turning tile oven off or by using a
multi-purpose d U chemical or fbam-type
fire extinguisher.
_{;_Do not touch tlle heating elements or tlle
interior surPace of the oven. These surPaces
may be hot enouOl m bum even though
they are dark in colon Duiing and after
use, do not milch, or let cloflling or oilier
flammable mamrials contact any inmrior
aI.ea of tile ox.en; allow sufficient time tbr
cooling first.
Pomnfially hot snifi_ces inchlde ox.en
x.ent openings, surfaces near tile openings,
crevices around the ox.en dooi, die edg.es
of file window and metal u-ira parts above
tile door.
REMEMBER: The inside surthce of the ox.en
may be hot when die door is opened.
_f;Never place cooking umnsils or aW odler
items on tile oven floon There is a heating
element beneath die ox.en floon Placing
imms on tile ox.en floor may cause tile
ox.en to ox.erheat, resnlfing in damag.e
to tile oven and risk of damag.e or fii.e
m cabinets.
_;:Nex.er lem.ejars or cans of l_atdiippings in
or Ileal vonr ox.en,
_{;:Do not store or use combustible mamrials,
gasoline or other flammable vapors and
liquids in the vicinity of tills or anv other
appliance.
_{;_Stand away from tile ox.en when opening
file ox.en door Hot air or steanl which
escapes can cause bums to hands, face
and/or eyes.
;f; Do not heat unopened food containers.
Pressure could build/l I) and die container
could burst, causing an irljul-y.
;_?Kee I) tile oven x.ent unobstructed.
'_!{i;Kee I) tile ox.en free from grease buildup.
_;:Place tim ox.en rack in tile desired position
while tile oven is cool. If racks must be
handled when hot, do not let pot holder
contact tile heating elements.
;_;When using cooking or roasting bags in die
ox.en, follow tile manu£tcturer's directions.
;f; Pulling out die rack to die stop-lock is a
convenience in lifting heaxy foods. It is also
a pi.ecaufion against bums flom touching
hot surfaces of tile door or ox.en walls.
_{;_Do not use tile oven to di T newspapers.
If overheamd, ti/ev can catch on fire.
_{;_Do not use the ox.en for a storage area.
Imlns stored in an ox.en can ignim.
;_i:,:Do not leax.e paper products, cooking
utensils or fbod in tile ox.en when not
in rise.
_{;_After broiling, always take any broiler
pan out of tim ox.en and clean it. Leftox.er
grease in a broiler pan can catch fire next
time yon use the pan.
_{;_Clean only parts lismd in this Owner's
Manual.
_{:_Do not use almninum foil to line
ox.en bottoms, hnproper installation
of ahmlinunl foil nl W result in a risk
of elecuic shock or fire.
3
IMPORTANTSAFETYINFORMATION.
READALLINSTRUCTIONSBEFOREUSING
COOKMEATANDPOULTRYTHOROUGHLY.,.
Cookmeatand poultry thoroughly--meat to at least anINTERNALtemperatureof 160°Fandpoultry
to at least an INTERNALtemperatureof 180°ECookingto these temperaturesusuallyprotectsagainst
foodbomeillness.
SELF-CLEANINGOVEN
Do not clean the door g_asket. Tile door
gasket is essential tbr a good seal. Care
should be token not to rub, damag_ or
mo_ tile gasket.
Do not use o\'en cleaners. No comme_via]
ox>n cleaner or oven liner promctive
coating of aW kind should be used in or
around any part of the oven. Residue flom
oxen cleaners will damage the inside of the
oxen when tile self-clean cycle is used.
;_i:,:Before self-cleaning the o_en, remove the
probe and any broiler pan, grid and other
cookwa re.
;_; Be sure to wipe up excess spillage before
starting tile selt¥leaning operation.
_:; If the sell:cleaning mode malflmcfions,
turn file oxen off and disconnect file power
supply. Have it serviced 1)va qualified
mchnician.
READANDFOLLOWTHISSAFETYINFORMAtiONCAREFULLY.
SAVETHESEINSTRUCTIONS
4
Introductionto the OvenControls
(Throughout this manual, features and appearance may vary from your model.)
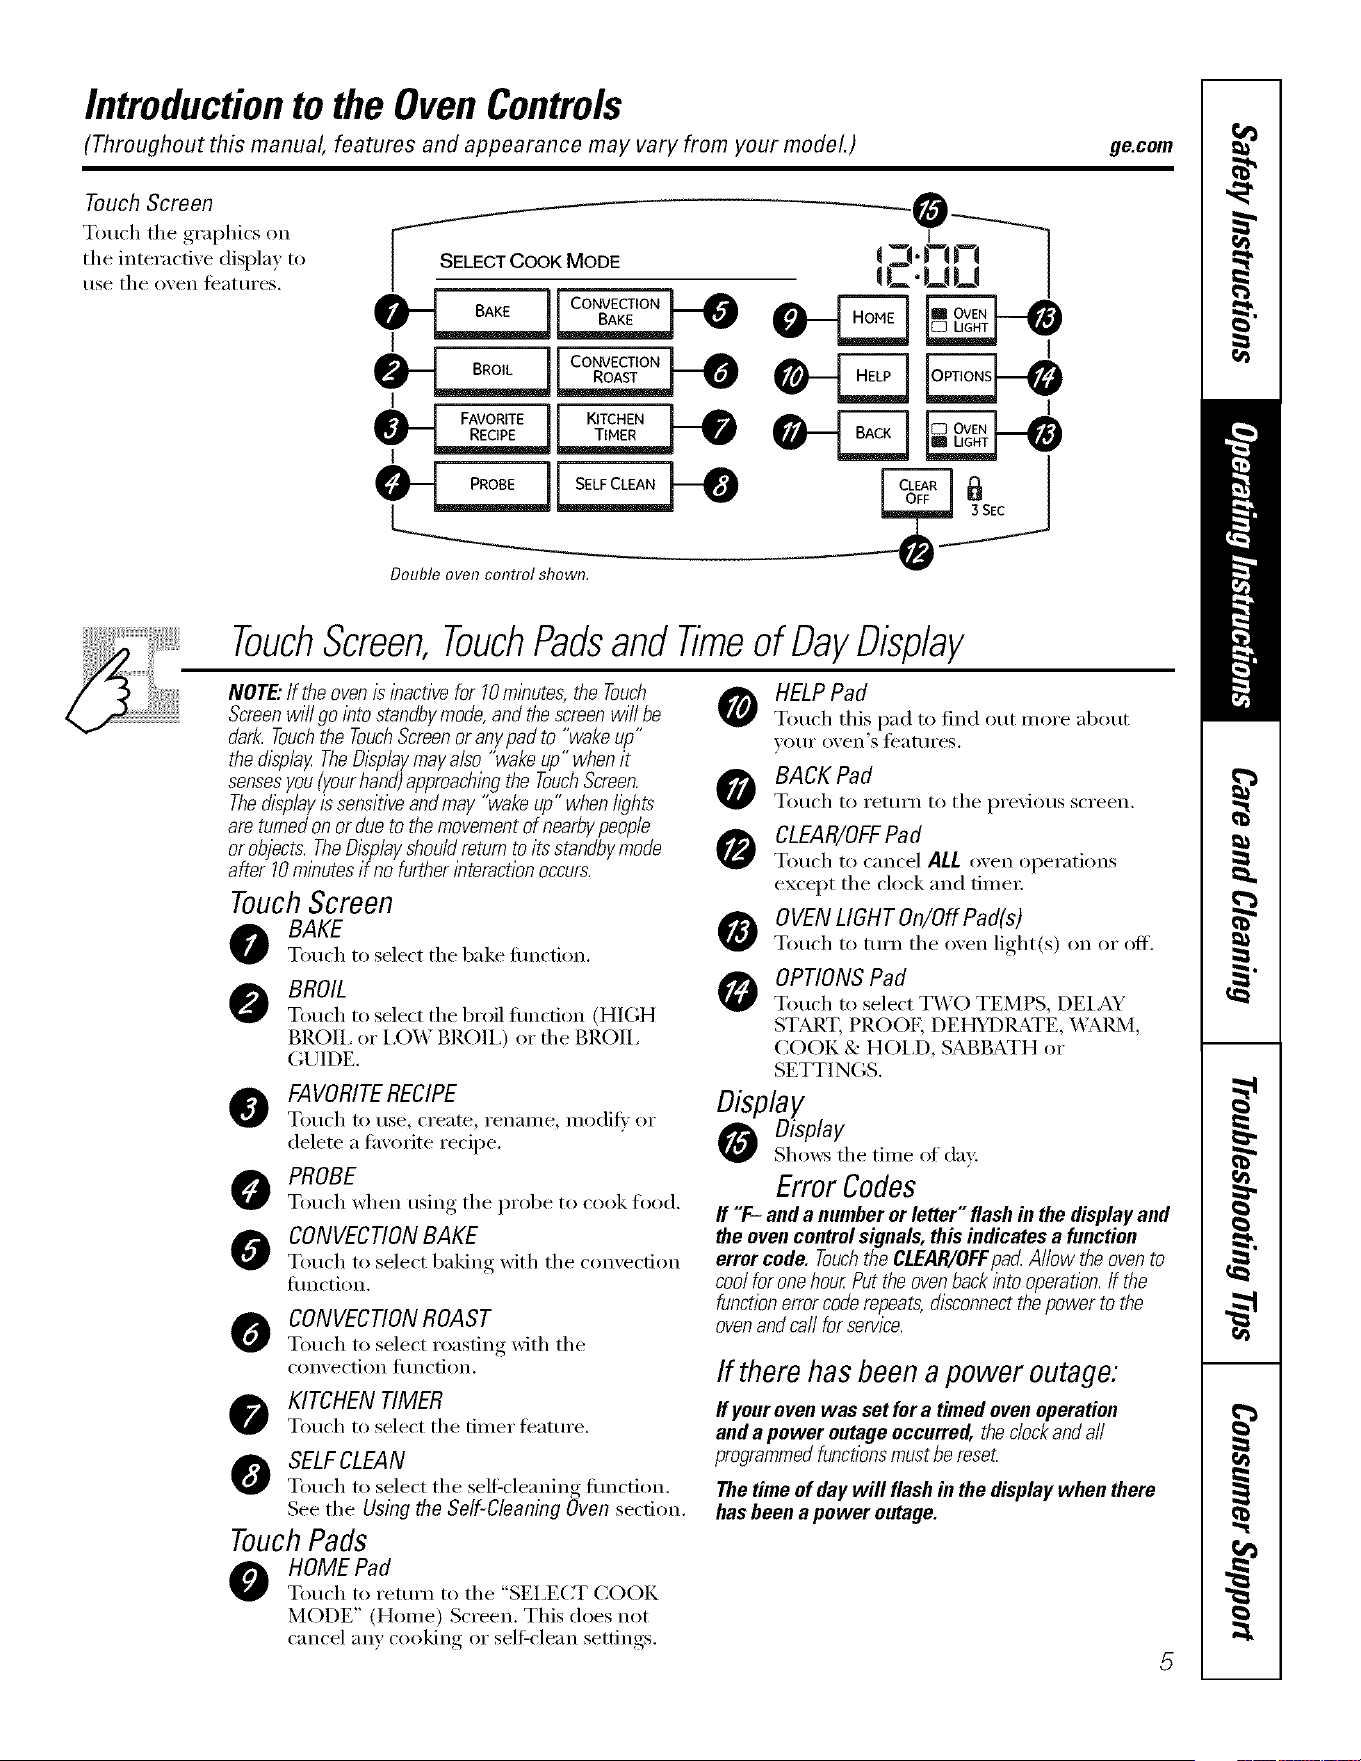
Touch Screen
Touch the graphics on
tile interactive display to
rise tile oven features.
SELECTCOOK MODE
o4...zmJ
I
F,,VOR.TEI I K.TC.E,[
Double oven control shown.
-e
.2-uu J
ge.com
TouchScreen,TouchPadsand Timeof DayDisplay
NOTE."If the oven is inactive for lO mlbutes, the Touch
Screen will go into standbymode, and the screenwill be
dark. Touchthe TouchScreenor anypad to "wake up"
the &splay TheDisplay may a/so "wake up" when it
sensesyou (yourhand)approaching the TouchScreen.
Thedisplay is sensitive andmay "wake up" when hghts
are turned onor due to themovement of nearbypeople
or objects. TheDisplayshould return to its standbymode
after 10minutes if no further interaction occurs.
TouchScreen
BAKE
Touch to select tile bake fimction.
O
BROIL
Touch to select tile broil timction (HIGH
BROIl, or I,O_,V BROIl,) or tile BROIl,
GLrlDE.
FAVORITERECIPE
Totlch to rise, {Teate, i'eilaille, ilia(Ill,, or
delete a tmorite recipe.
PROBE
Touch when using tile probe to cook ti}od.
CONVECTIONBAKE
Touch t{}select baking with tile c{m_ecfion
fllIlCtioIl.
CONVECTIONROAST
Touch to select roasting with tile
COlB ectioll tilIlctioIl.
KITCHEN TIMER
Touch to select tile timer feature.
SELFCLEAN
Touch to select tile self k leaning fimction.
See tile Using the Self-Cleaning Oven secdon.
TouchPads
HOME Pad
Touch to return to the "SEI,ECT COOK
MODE" (Home) Screen. This does not
cancel any cooking or sell2clean settin ,s
HELP Pad
T{}u{'h this pad to lind o/it I//{)I'e about
X O/lI" {}_,eIl'S t_attlI'es.
BACKPad
Touch to I'ett/rIl to tile previous scI'eeIl.
CLEAR/OFFPad
Touch to cancel ALL oven operations
except tile clock and timer
OVENLIGHT On/Off Pad(s)
Touch to turn tile o_en light(s) on or off.
OPTIONS Pad
Touch to select T\_O TEMPS, [)EIAY
STMIT, PROOK DEHYDI_tTE, X_;4,RM,
COOK & HOI,D, SABBATH or
SETTINGS.
Display
Display
Shows tile time of day.
Error Codes
If "F- and a number or letter" flash in the display and
the oven control signals, this indicates a function
error code. Touchthe CLEAR/OFFpa_ Allow the oven to
cool for one hour Put the ovenback into operation. If the
functionerror code repeats, disconnectthe power to the
oven and carl for service.
If there has been a power outage:
fly our oven was set for a timed oven operation
and a power outage occurred, thedock and a//
programmedfunctions must be reseL
The time of day will flash in the display when there
has been a power outage.
Using the Oven
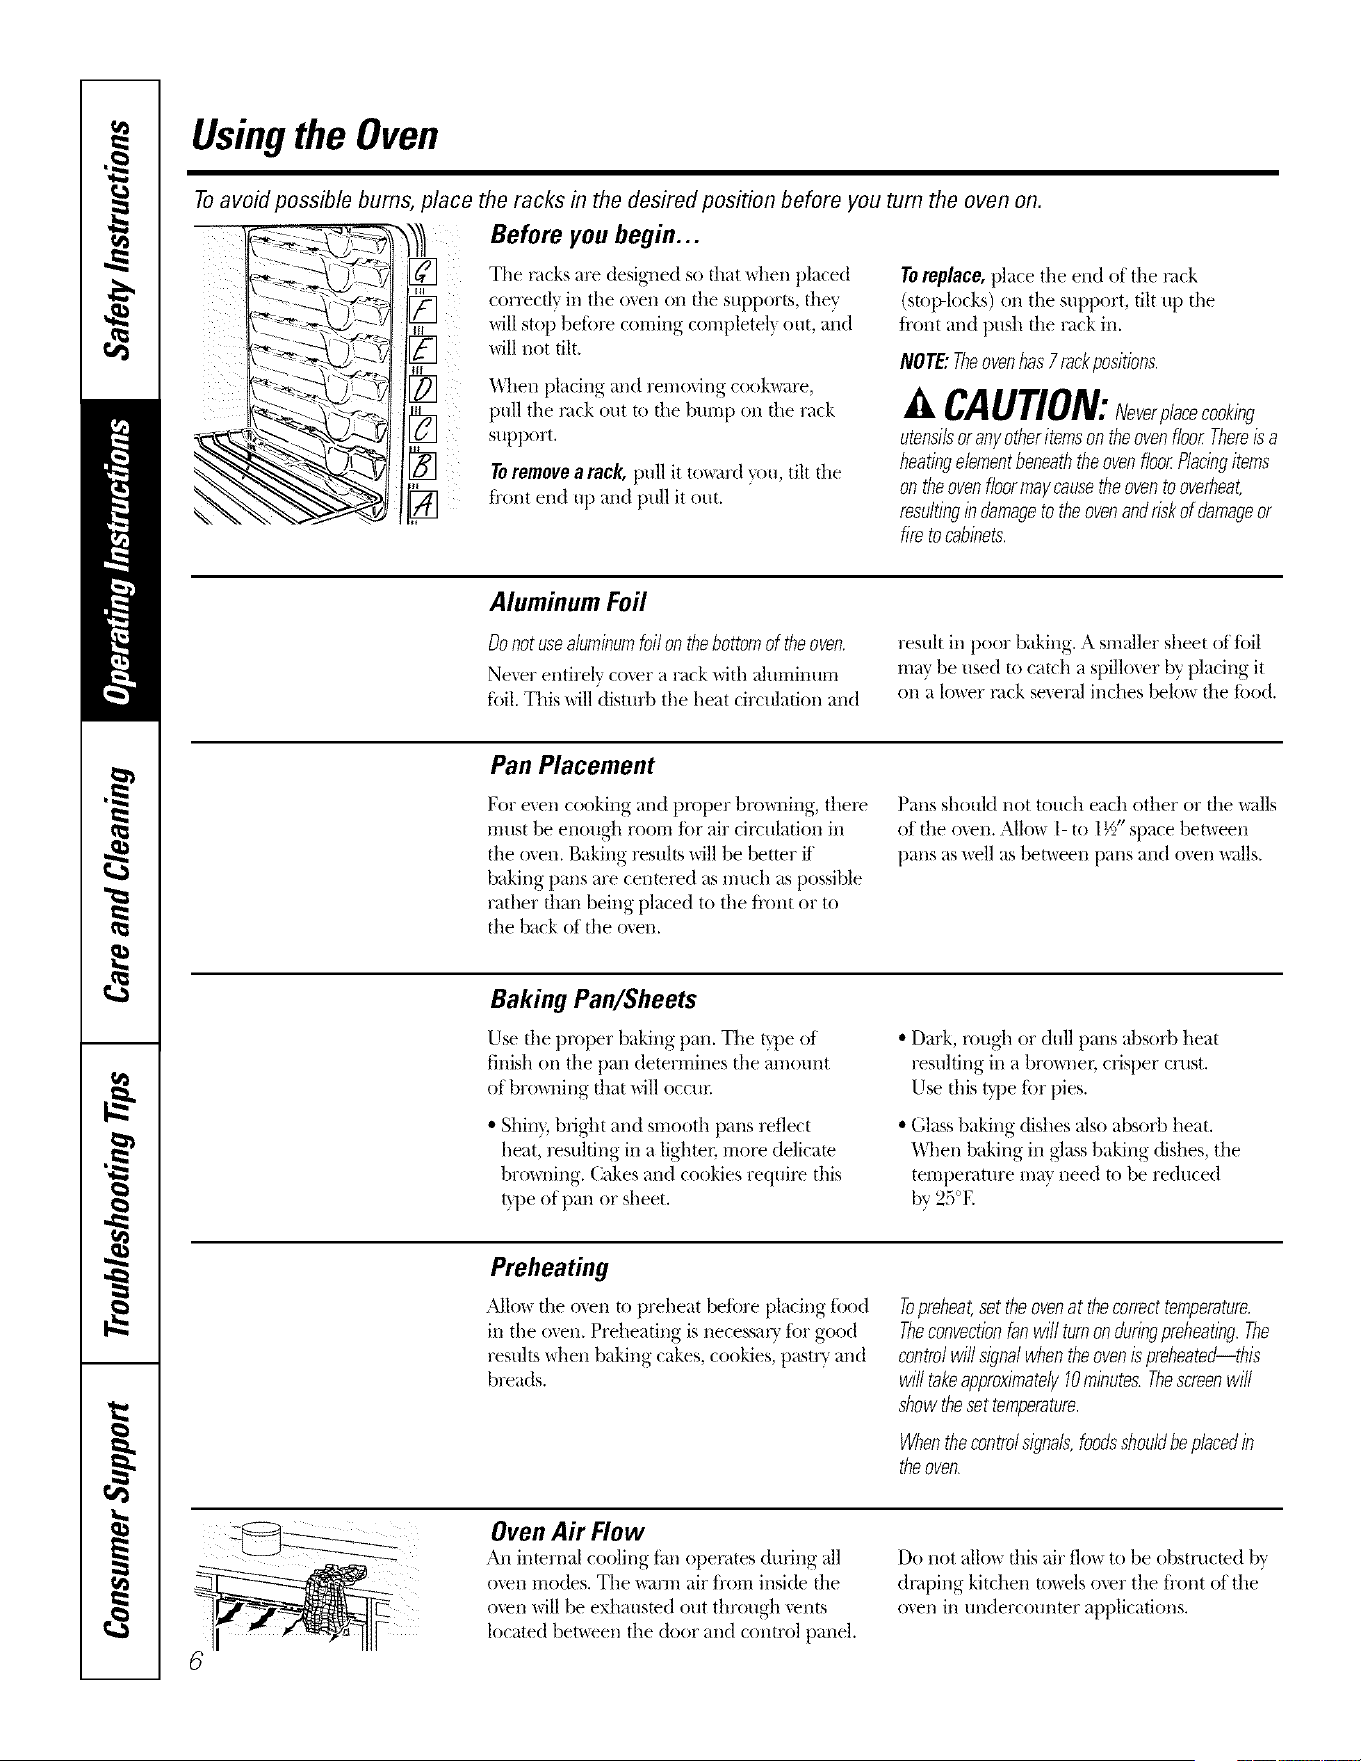
Toavoid possible bums, place the racks in the desired position before you turn the oven on.
ii
Before you begin...
Tile rocks are designed so fllat \d_en placed
correcdv ill tile <well on fl_e supports, fl_ev.
Mll stop betore corrlill_, cornt)letelx, out, and
will not tilt.
_Allen placing and rem_Mng cookware,
pull tile rock out to file bump on file rack
support.
To removea rack, pull it toxx_tMyou, tilt fl_e
front end i/l) and pull it out.
Toreplace, place the end of the rock
(stol>locks) on the support, tilt up the
fi'ont and push tim rack ill.
NOTE:Theovenhas7rackpositiom.
CAUTION:Neverp/aeeeook/ng
utensilsoranyotheriternsontheovenfloorThereisa
heatingelementbeneaththeovenfloorPlacingitems
ontheovenfloormaycausetheoventooverheat,
resultingindamagetotheovenandriskofdamageor
firetocabinets.
Aluminum Foil
Donotusealuminumfoil on thebottomof theoven.
Never entirely co\er a rack with _fluminum
toil. Tiffs will disturb tile heat circulation and
result ill poor baking. A sm_fller sheet of foil
may be used to catch a spillo_er b_ placing it
on _Jlo_r rock se_,era] inches belo_ tim toed.
Pan Placement
For e_en cooking and proper brooming, thel_
rritlst be enough roorri for air circulation ill
tile o\en. Baking results will be better if
baking pans are cenwred as much as possible
rather than being placed to the Ji'ont or to
tile back of tile oven.
Palls should not toucll each other or fl_e x_adls
of file o_en. Allure l- to 1V2"space bet\_een
pans as _>ll as ber\_een pans and oven _llls.
Baking Pan/Sheets
Use tile proper baking pan. Tile type of
finish on tile pan determines tile amount
of bro_dng that will occm:
• Sbin}, bright and srnooth pans reflect
heat, resulting ill a lighter, more delicate
browning. Cakes and cookies requil> this
t}pe of pan or sheet.
• Dark, rough or dull pans absorb heat
resulting ill a broad, mr, crisper crust.
[lse this type tor pies.
*Glassbaking (fishesalso absorb beat.
"_\]/enbaking ill glassbaking (fishes, the
temperature mat need to be reduced
by 25°E
Preheating
Mlo_ file o_en to preheat before placing filed
ill tile oven. Preheating is necessarx, for good
results when bakino_ cakes, cookies, [)astrv,and
breads.
Topreheat,set theovenat thecorrecttemperature.
Theconvectionfanwill turnon duringpreheating.The
controlwill signalwhentheovenis preheated--this
will takeapproximately10minutes.Thescreenwill
showtheset temperature.
Whenthecontrolsigna&foodsshouldbeplacedin
theoven.
Oven A# Flow
An internal cooling tim openltes during all
o\en rhodes. Tile warm air ti'orri inside the
o\'en will be exhausted out through \ents
located bet\_ een the door and control panel.
Do not allo_ tiffs air flo_ to be obstructed by
draping kitchen towels o\er the ti'ont of the
o_en ill undercounter applications.
Baking and Roasting ge.com
On double oven models only.
kJUUN1N1
DDDN1N1
NOTE:A cooling fan na_
auromarlcam nm7 on and off to
cool internal Jar_s. Thisis norma
and the fan ma_ connnue to run
even after the oven is turned off
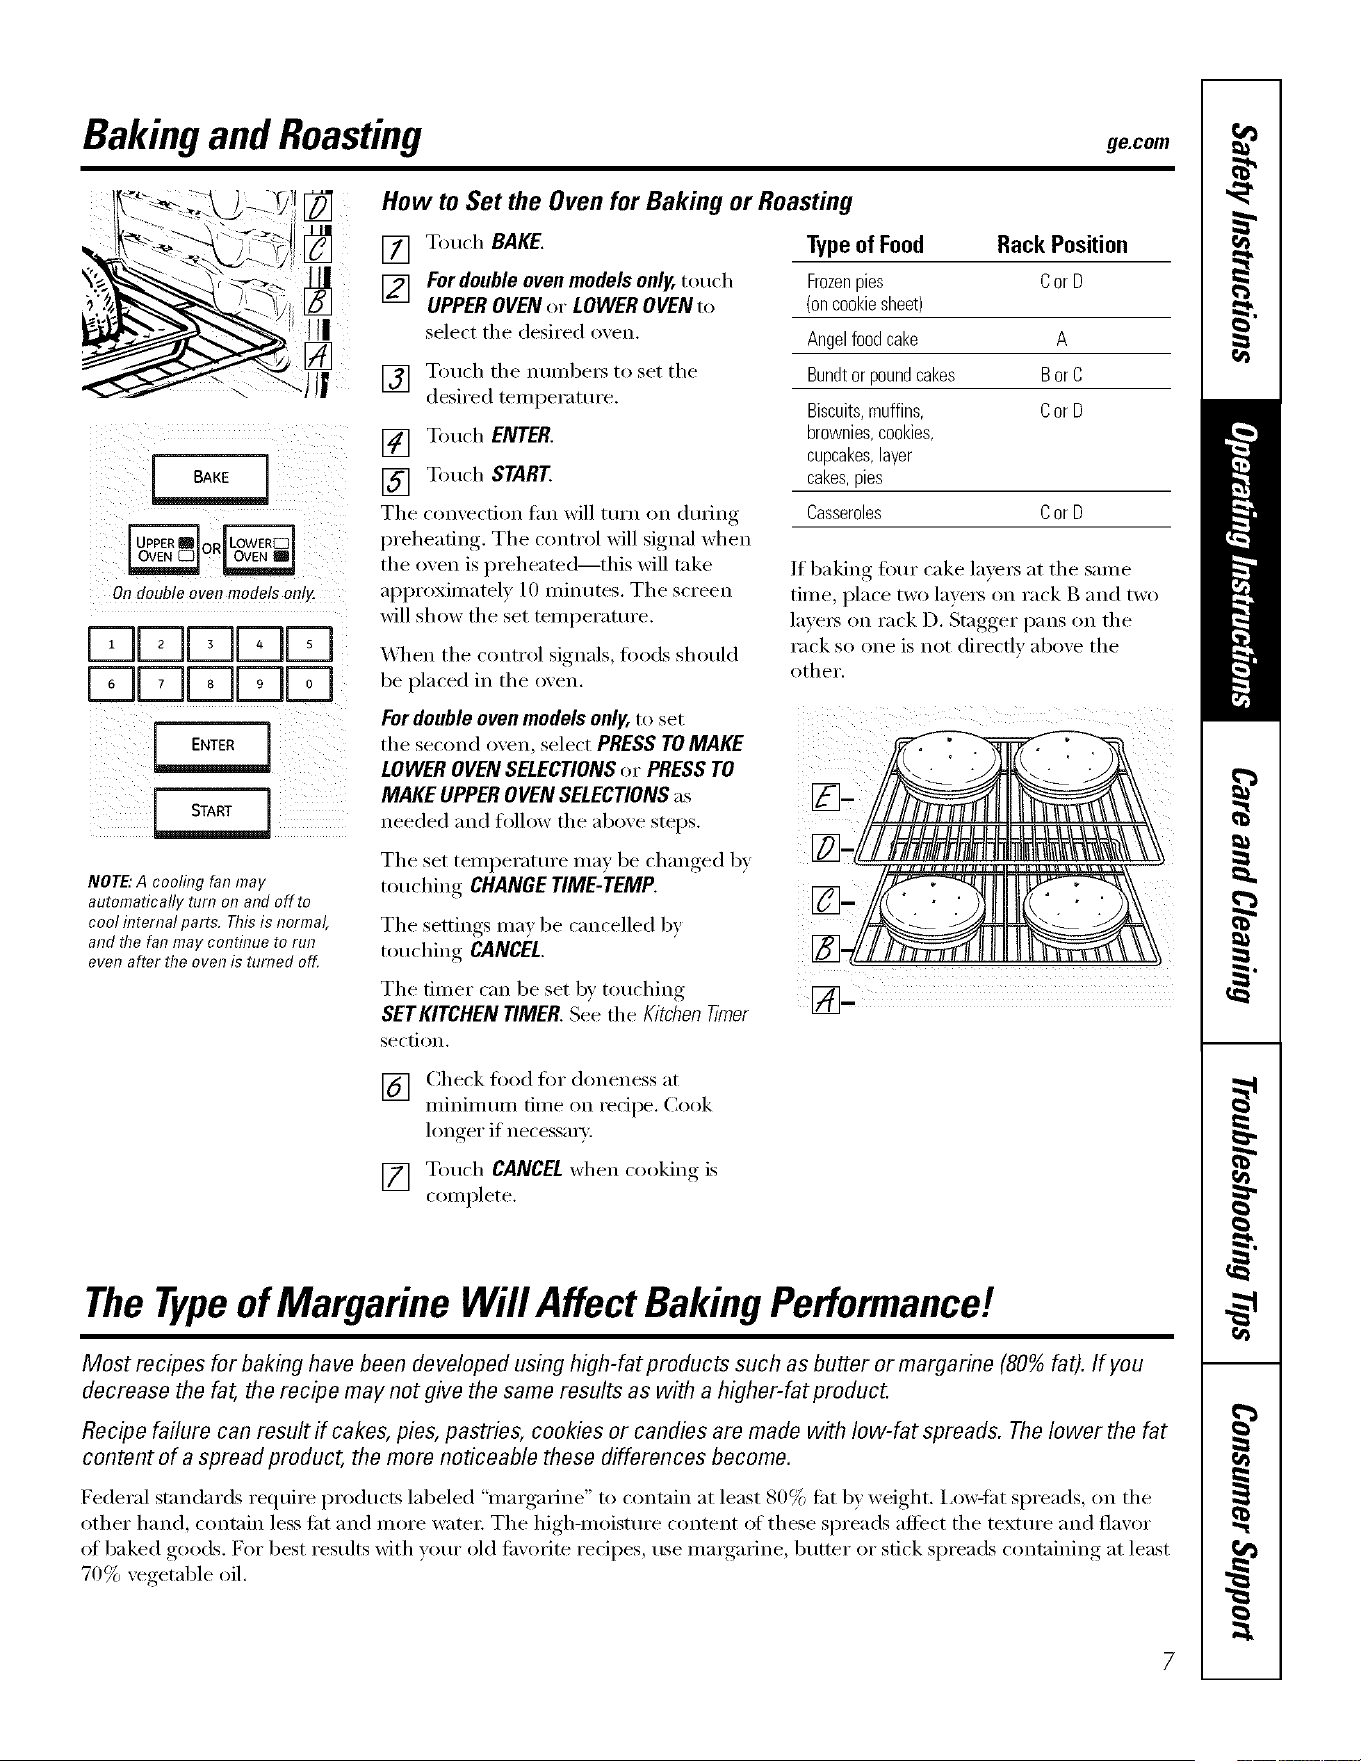
How to Set the Oven for Baking or Roasting
[] Touch BAKE.
F2] For double oven models only, touch
UPPER OVEN or LOWER OVEN to
select the desired o_,en.
] Touch the numbers to set the
desired temperatm'e.
[] Touch ENTER.
[] Touch START
The convection tim will turn on dtlring
preheating. The control will signal when
the oven is I)reheated--this will tnke
approximately l0 minutes. Tile screen
will show the set teml)erature.
\4lien the control signals, fi)ods should
be placed in the oven.
For double oven models only, to set
Typeof Food Rack Position
Frozenpies C or D
(on cookie sheet)
Angel food cake A
Bundt or pound cakes B or C
Biscuits, muffins, C or D
brownies, cookies,
cupcakes,layer
cakes,pies
Casseroles C or D
If baking four cake layer3 at tile same
time, place two laver3 on rack B and two
lave_ on rack D. Stagger pans on tile
rack so one is not directly above tile
other.
tile second o_,en, select PRESS TO MAKE
LOWER OVEN SELECTIONS or PRESS TO
MAKE UPPEROVEN SELECTIONSas
needed and follow tile above steps.
Tile set teml)eratm'e may be changed b}
touching CHANGE TIME-TEMP.
Tile settings ma_ be cancelled by
touching CANCEL,
Tile timer can be set by touching
SET KITCHEN TIMER. See the K/tchen Timer
section,
[] Check fi)od fi_r aloneness at
minimum time on recipe. Cook
longer if necessm_.
[] T(mch CANCEL when cooking is
complete.
The Typeof Margarine Will Affect Baking Performance!
Most recipes for bak#Tghave been developed US#Tghigh-fat products such as butter or margarine (80% fat). If you
decrease the fat, the recipe may not give the same results as with a higher-fat product.
Recipe failure can result if cakes, pies, pastries, cookies or candies are made with low-fat spreads. The lower the fat
content of a spread product, the more noticeable these differences become.
Federal standards require [)roducts labeled "margarine" to contnin at least 80% flit by weight, i,ow-iilt spreads, on tile
other hand, contain less ti_t and more water: Tile high-moisttn'e content of these spreads affect tile texture and flavor
oI baked goods. For best results with your old ti_\'orite recipes, use margarine, butter or stick spreads containing at least
70% vegetable oil.
7TmedBaking and Roasting
On double oven models, you can use timed baking in one oven while using self-clean in the other; you can also use
timed baking in both ovens at the same time.
NOTE."Foods that spoil easily--such as milk, eggs, fish, stuffings, poultry and pork--should not be allowed to sit for
more than 1hour before or after cooking. Room temperature promotes the growth of harmful bacteria.
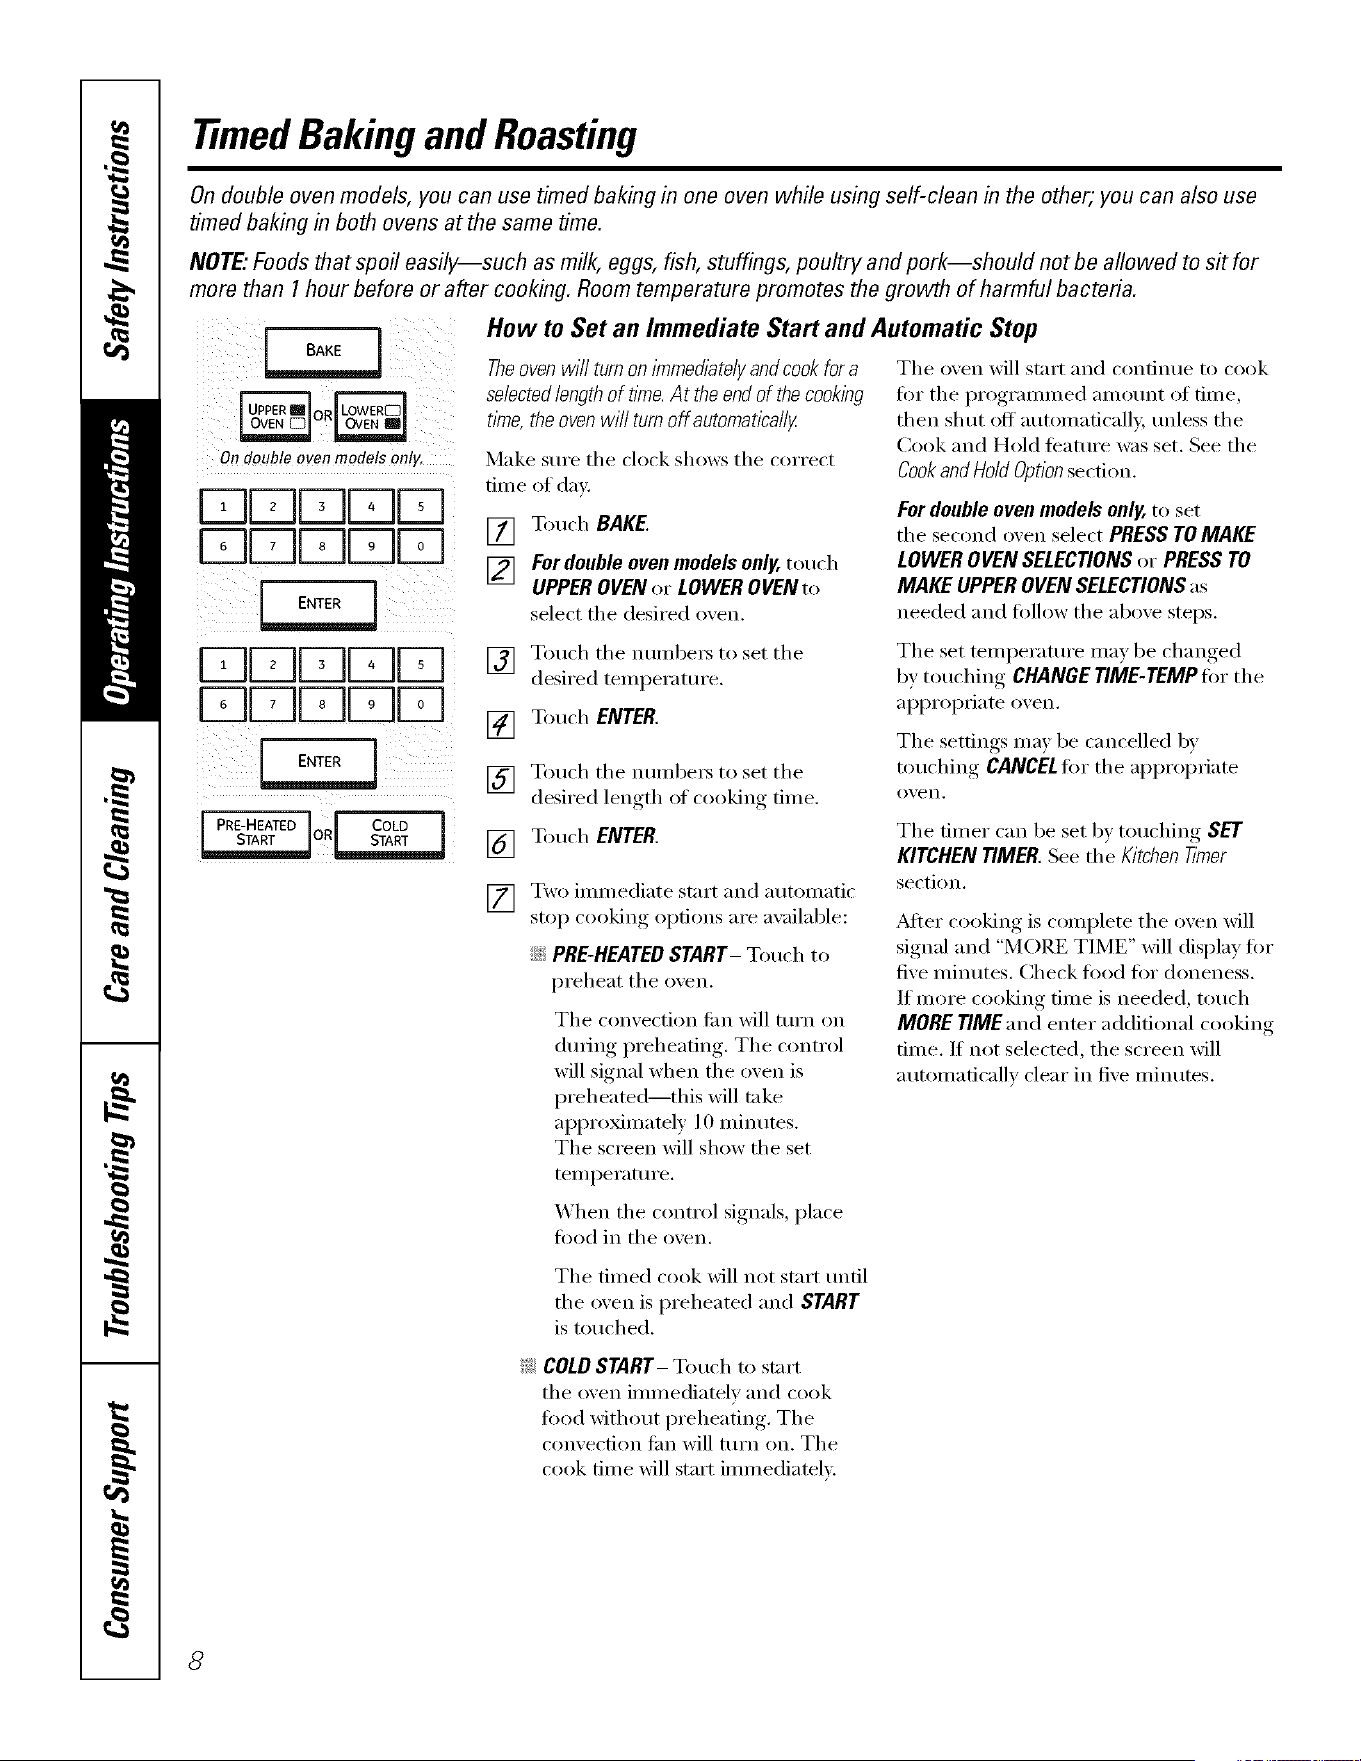
BAKE
1
Ondouble oven models only.
r-qr-ql,, 0li, i
FqFqLdL U
ENTER_
[Z]FqDU][
FqFqUUU
{ PRE-HEATED J J COLD
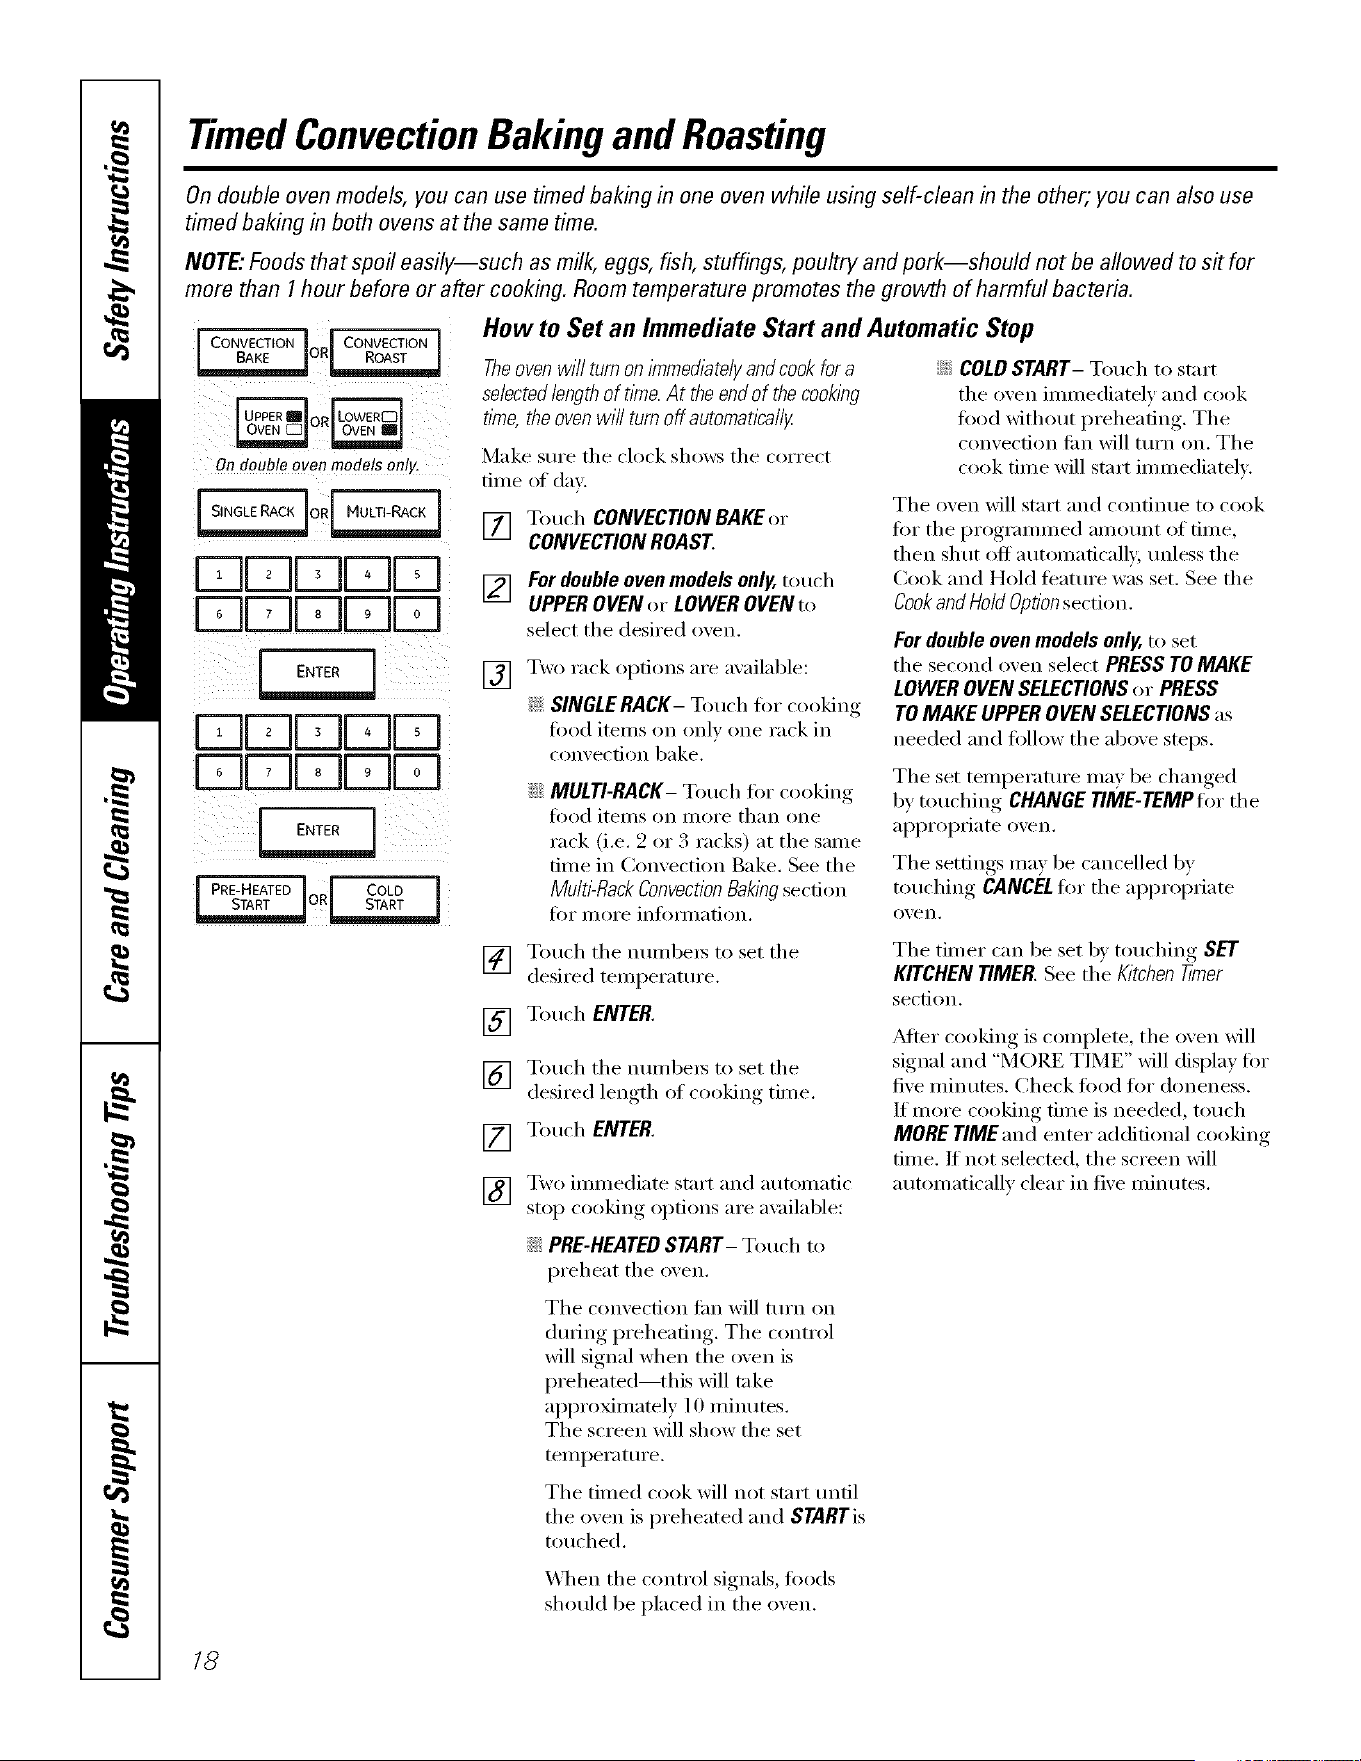
How to Set an Immediate Start and Automatic Stop
Theoven will turn on immediately andcook for a
selected length of time. At the end of the cooking
time, the oven will turn off autornatica//y
Make sure the clock shows the correct
time of din:
[] Touch BAKE.
_] Fordoub/eovenmodelsonly,touch
UPPEROVENor LOWEROVENto
select the desired o',en.
The oven will start and continue to cook
for the i)rogramm ed amount of tim e,
then shut off automaticall 5 mfless the
Cook and Hold teatm'e was set. See the
Cookand Hold Optionsection.
For double oven models only, to set
the second oven select PRESS TO MAKE
LOWER OVEN SELECTIONS or PRESS TO
MAKE UPPER OVEN SELECTIONSas
needed and fi)lh)w the above steps.
[]
[]
[]
[]
[]
Touch the numbers to set the
desired temperatm'e.
Touch ENTER.
Touch the numbe[s to set the
desired length of cooking time.
Touch ENTER.
Two immediate start and automatic
stop cooking options are available:
::Ji:_PRE-HEATEDSTART- Touch to
preheat the oven.
The convection tim will turn on
during preheating. The control
will signal when the oven is
preheated--this will take
approximately l 0 Ininutes.
The screen will show the set
The set temperatm'e may be changed
by, t()uchin_<* CHANGE TIME-TEMP for" the
ai)i_ropfiate o_en.
The settings ma) be cancelled b}
touching CANCELfi)r the ai)i)ropriate
o_,en.
The timer can be set b) touching SET
KITCHENTIMER.See the Kitchen_mer
section.
_Mter cooking is complete the oven will
signal and "MORE TIME" will display fi)r
five minutes. Check t0od fi)r doneness.
If more cooking time is needed, touch
MORETIME.ridenter additional cooking
time. If not selected, the screen will
automatically clear in five minutes.
teil/pei'att ii'e.
X_hen the control signals, place
food in the o',en.
The timed cook will not start tmtil
the oven is preheated and START
is touched.
_: COLDSTART- Touch to start
the oven immediately and cook
t0od without preheating. The
convection tim will turn on. The
cook time will start immediately
8
Ondoubleovenmodelsonly.
DDuuu
DDUUu
DDUUL
D[-r-IDDb---j
[ ADDBAKE
[ DELAY
J STARTCOOK ] I FNSHCOOK
T,,E
uuuDD
uuul--qD
[ PRE-HEATED J f COLD ]
I STARTI
Re.corn
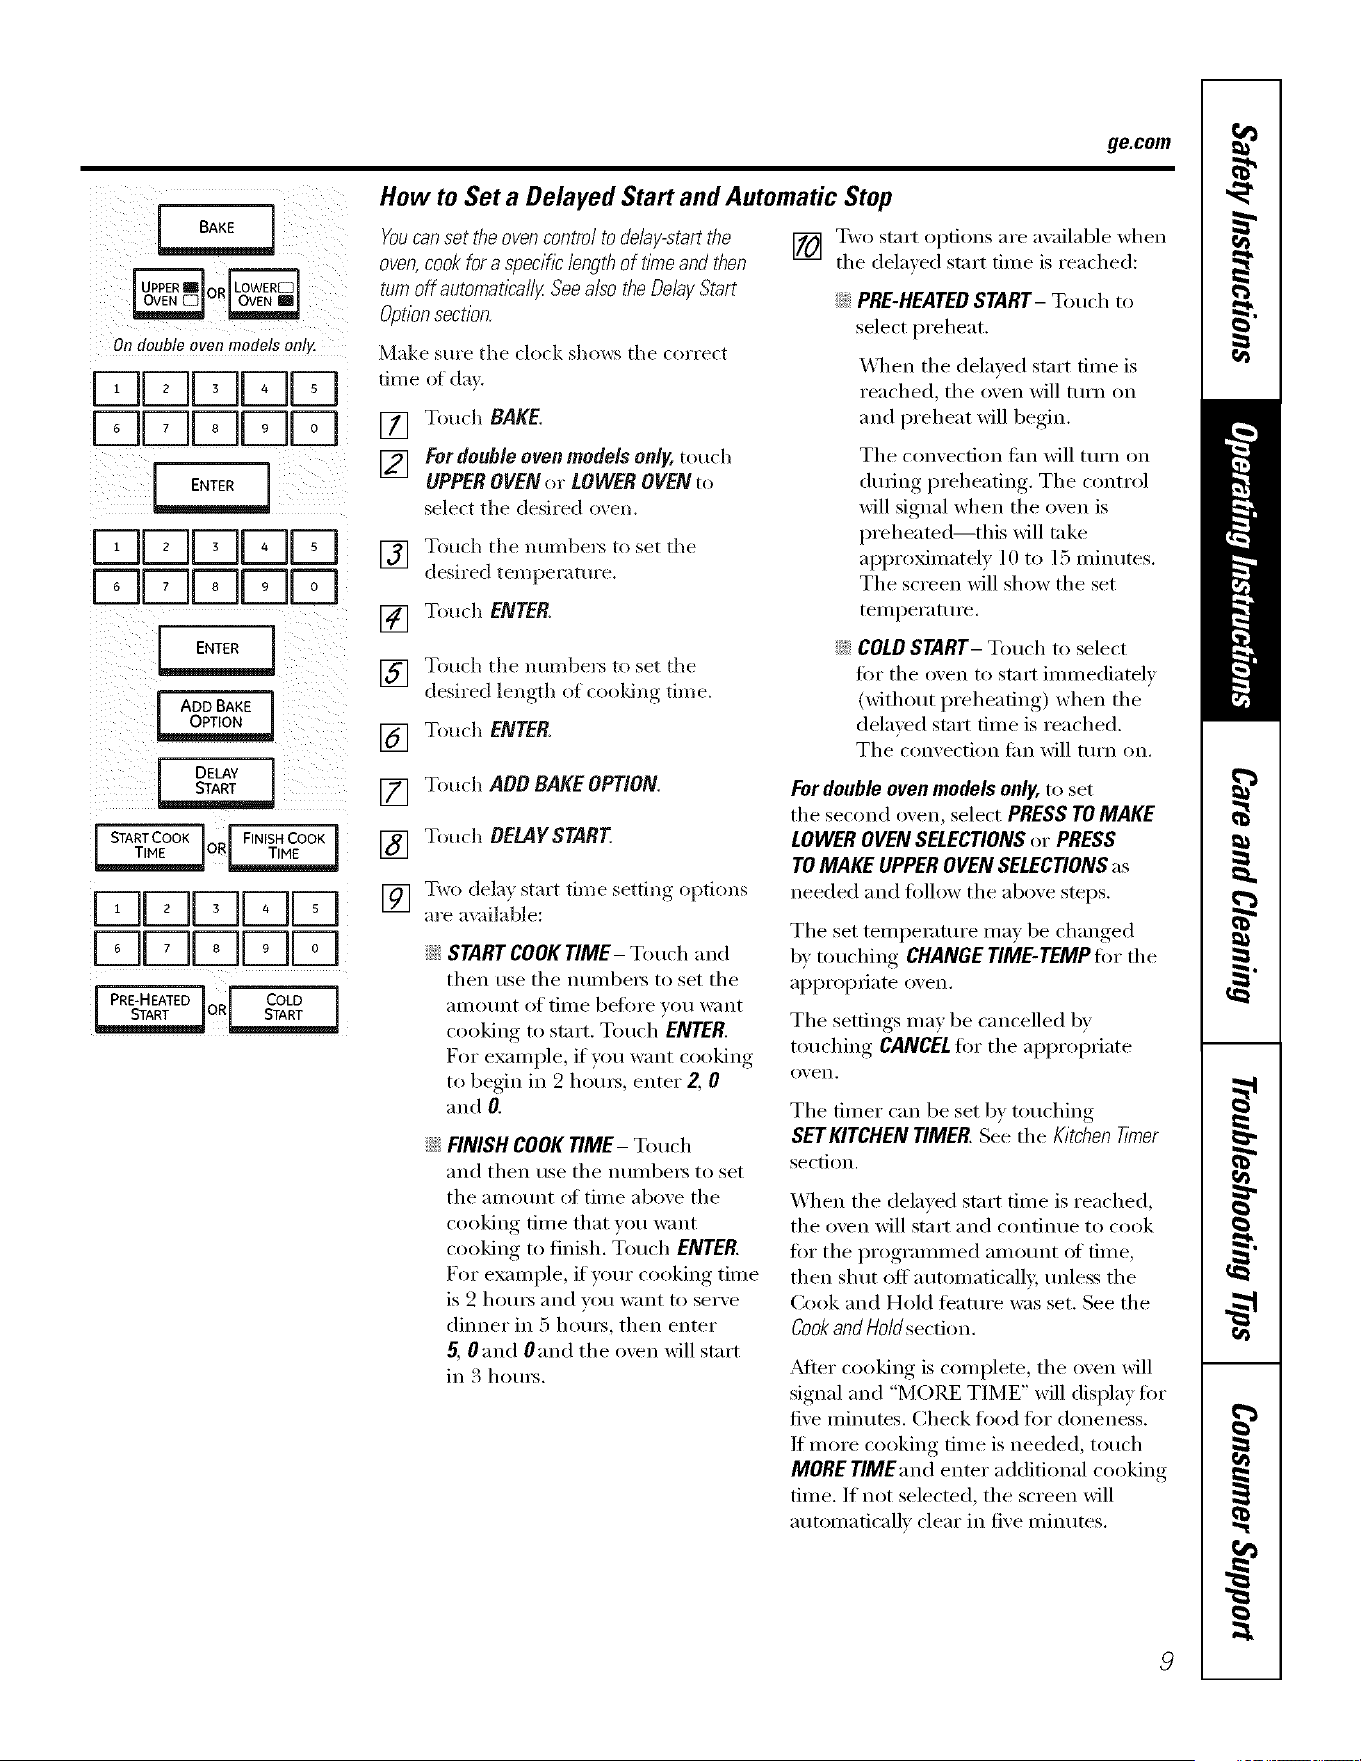
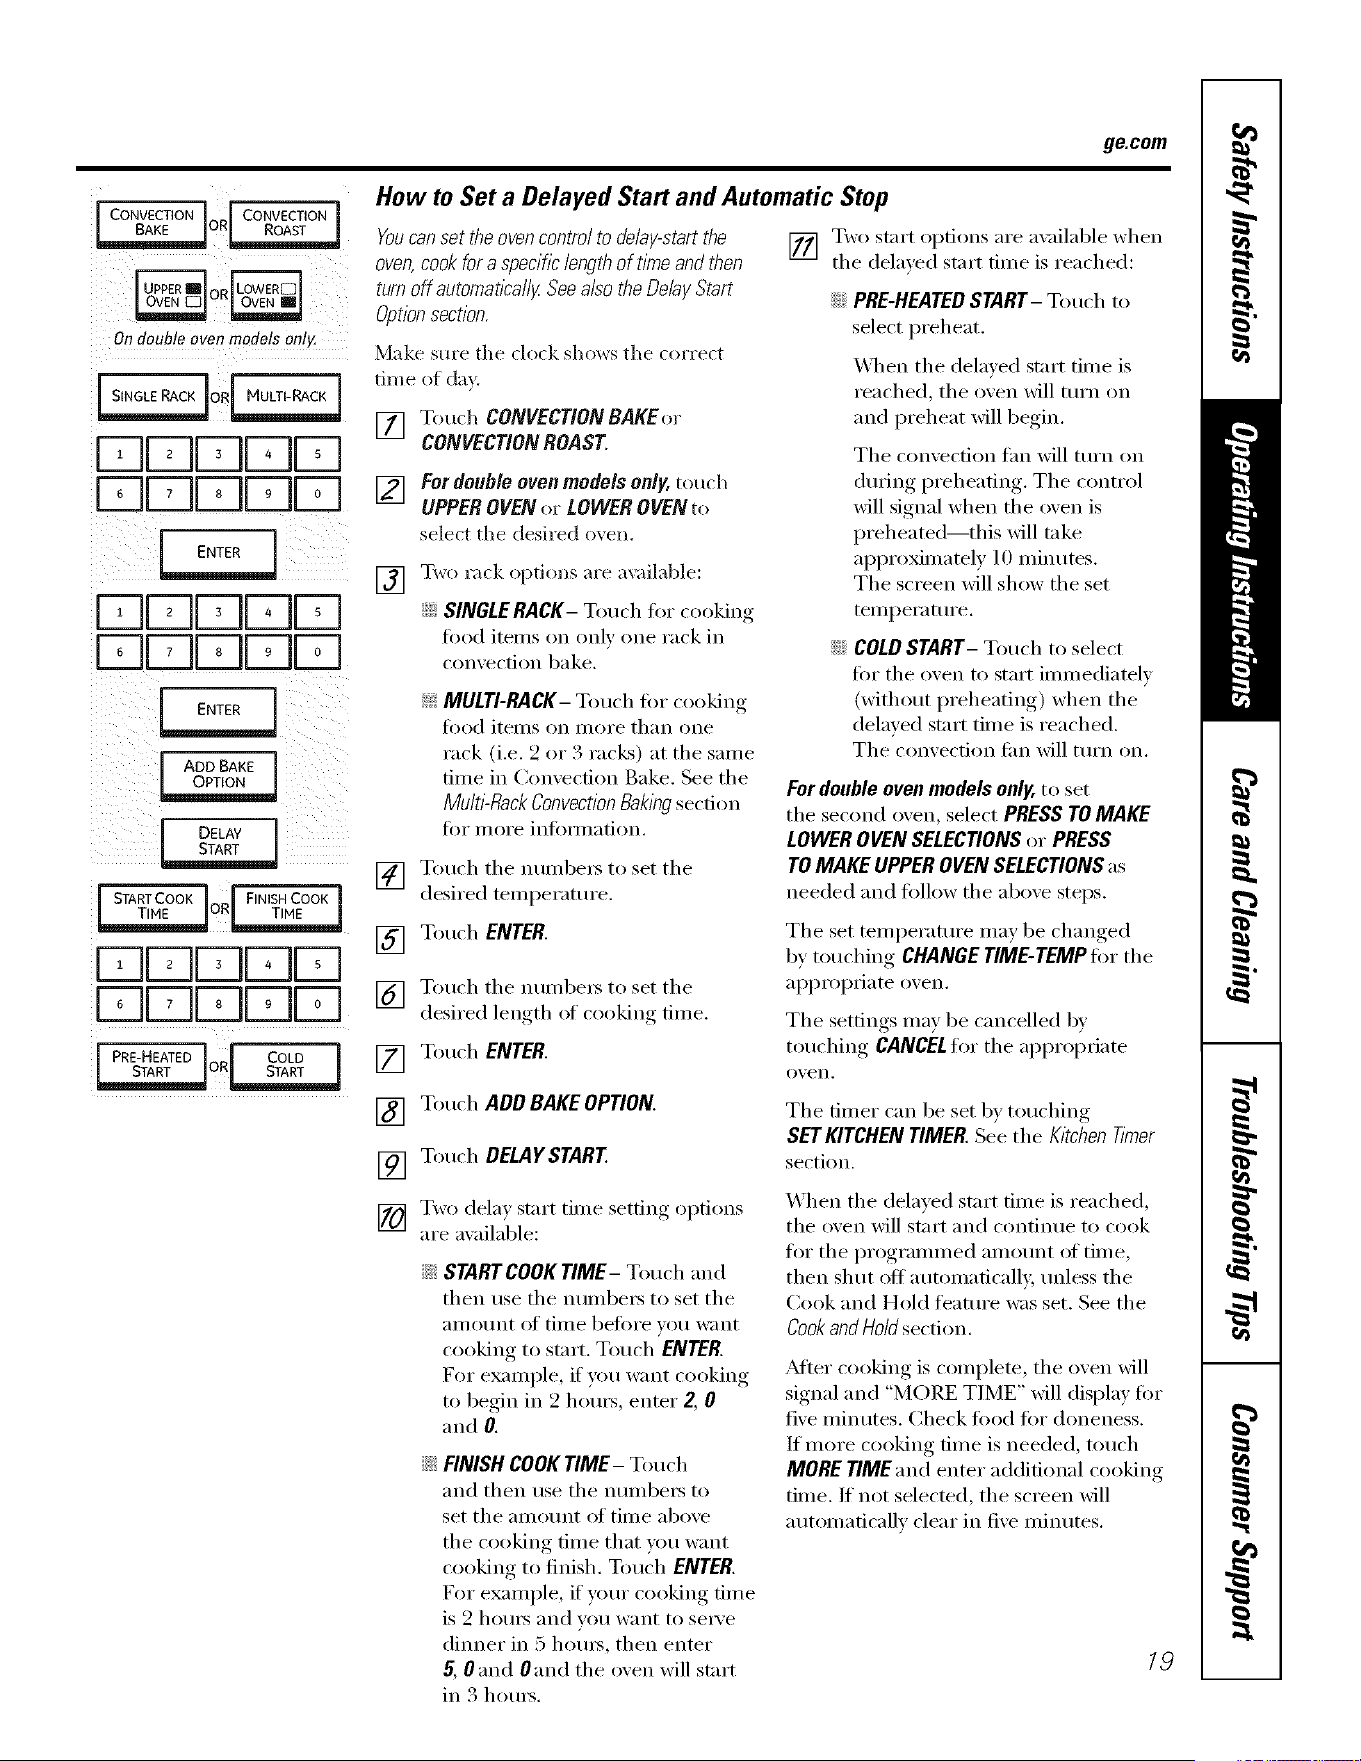
How to Set a Delayed Start and Automatic Stop
Youcanset the oven contro/ to de/a/-start the
oven,cook for a specific length of flnTeand then
turn off automat/_a//ZSeea/so the Delay Start
Option sectlon.
Make sm'e the clock shows the correct
time (ff dm.
[] Touch RAKE.
[_] Fordoubleovenmodelsonly,touch
UPPEROVENor LOWEROVENto
select the desired oven.
] Touch the numbe_5 to set the
desired temperature.
[] Touch ENTER.
] Touch the mmd)e_s to set the
desired length of cooldng time.
[] Touch ENTER.
[] Two start options are available when
the delayed start time is reached:
::Ji::PRE-HEATEDSTART- Touch to
select preheat.
\&]mn the delayed start time is
reached, the oven will tm'n on
and preheat will begin.
The convection tim will mrn on
dining preheating. The control
will signal when the oven is
i)reheated--this will take
approximately l 0 to 15 minutes.
The screen will show the set
teml)erature.
::Ji::COLD START- Touch to select
fi)r the oven to start immediately
(without preheating) when the
delayed start time is reached.
The convection tim will turn on.
[]
[]
[]
Touch ADDBAKEOPTION.
Touch BELAYSTART
Two dela} start time setting, Ol)tions
are available:
a START COOK TIME- Touch and
then use the numbe_ to set the
}lIllO/Int of tiine beii)re VO/I I%;lIlt
cooking to start. Touch ENTER.
I?or example, if you want cooking
to begin in 2 hems, enter Z 0
and R
N FINISH COOK TIME- Touch
and then use the numbe_ to set
the am Bunt (ff tim e above the
cooking time that you want
cooking to finish. Touch ENTER.
For example, if yore" cooking time
is 2 hOlIES and veil w;Int to serve
dinner in 5 hours, then enter
5, 0 and 0 and the oven will start
in 3 hom_.
For double oven models only, to set
the second oven, select PRESS TO MAKE
LOWER OVEN SELECTIONS or PRESS
TOMAKE UPPER OVEN SELECTIONSas
needed and follow the above steps.
The set temperature may be changed
by touching CHANGE TIME-TEMP for the
api)ropfiate oven.
The settings may be cancelled bv
touching CANCELfor the al)l)ropriate
()ven.
The timer can be set b} touching
SET KITCHEN TIMER. See the Klrchen Timer
section.
X4q_en the delayed start time is reached,
the oven will start and continue to cook
for the programmed amotmt of time,
then shut off automaticall 5 tmless the
Cook and Hold teatm'e was set. See the
Cook and Hold section.
_Mter cooking is complete, the oven will
signal and "MORE TIME" will display tot
five minutes. Check food for doneness.
If more cooking time is needed, touch
MORE TlMEand enter additional cooking
time. If not selected, the screen will
automatically clear in five minums.
Using the Probe
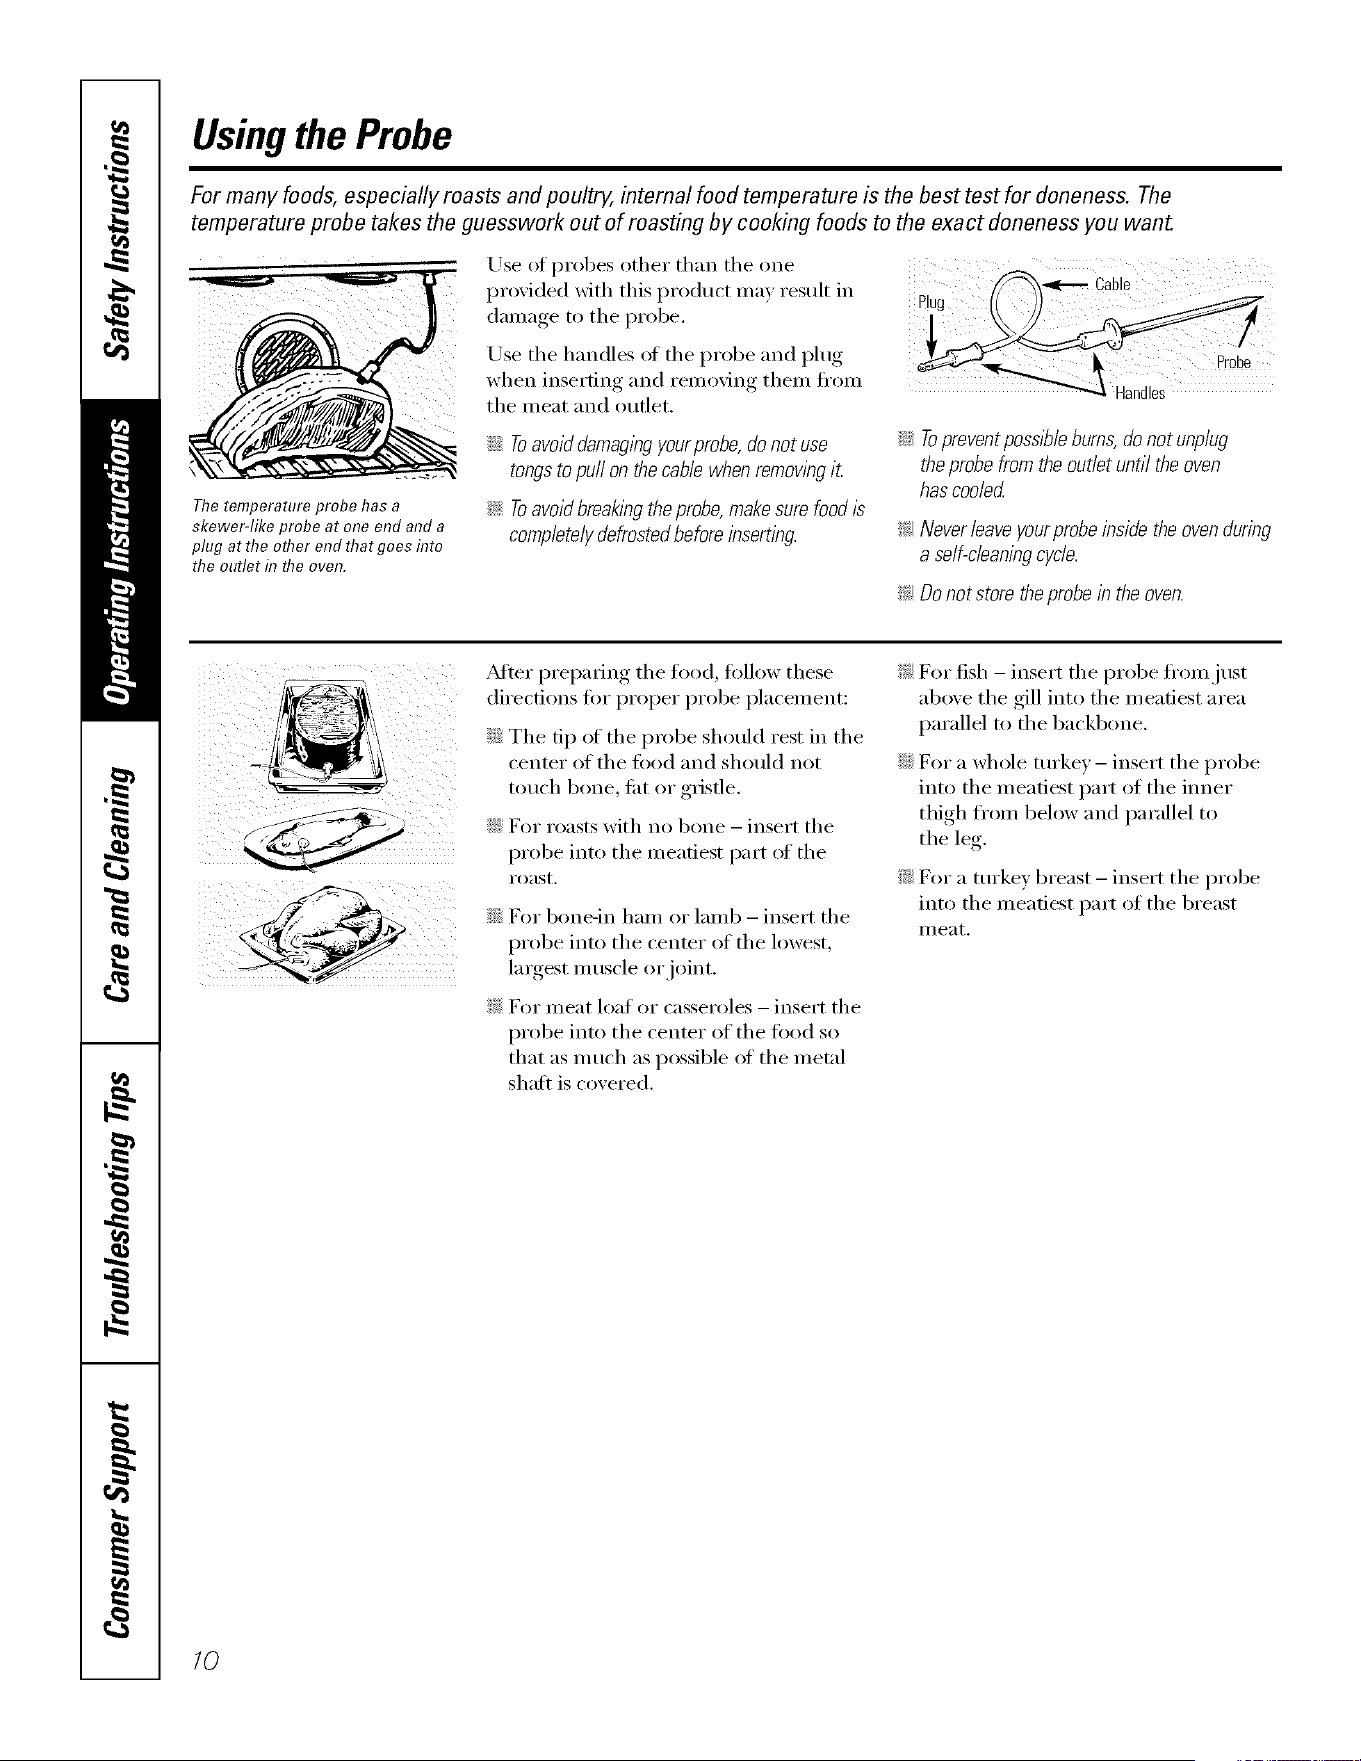
For many foods, especially roasts and poultry, internal food temperature is the best test for aloneness. The
temperature probe takes the guesswork out of roasting by cooking foods to the exact doneness you wan_
Use ot l)robes other than the one
l)ro_ided with this product ma) result in
P!ug
(lamage to the probe,
Use the handles of the probe and plug
when inserting and removing them fl'om
the meat and outlet.
The temperature probe has a
skewer-like probe at one end and a
plug at the other end that goes hTto
the outlet f17the oven.
;;Ji::Toavoiddamaglbgyourprobe,donot use
tongstopuff onthecablewhenremowbgit
_ Toavoidbreakingtheprobe,makesurefood/s
completelydefrostedbeforeinserting.
iJi::Topreventpossl#leburns,donot unplug
theprobefrom theoutletuntil theoven
hascooled
!i>Never leave yourprobe inside the oven during
a self-cleaningcycle.
!i>Do not store theprobe in the oven.
_Mier preparing the tood, follow these
directions fin" proper probe placement:
_;;_:The tip ot the probe should rest in the
center of the fi)od and should not
touch b(me, tilt or gristle.
_ For roasts with no bone - insert the
probe into the meatiest part of the
roast,
_'_For bone-in ham or lamb - insert the
probe into the center of the lowest,
lmgest muscle or joint.
_ For meat loat or casseroles - insert the
probe into the center of the tood so
that as much as possible of the metal
shaft is covered.
_: For fish - insert the probe from just
above the gill into the meatiest area
parallel to the backbone.
::Ji::For a whole mrkev- insert the probe
into the meatiest part of the inner
thigh fl'om below and parallel to
the leg.
i':'::For a tin'key breast - insert the probe
into the meadest part of the breast
II/eat.
/0
Ondoubleovenmodelsonly.
f-r][Z]bJLJbJ
[BALdLdU
DULdUU
ge.com
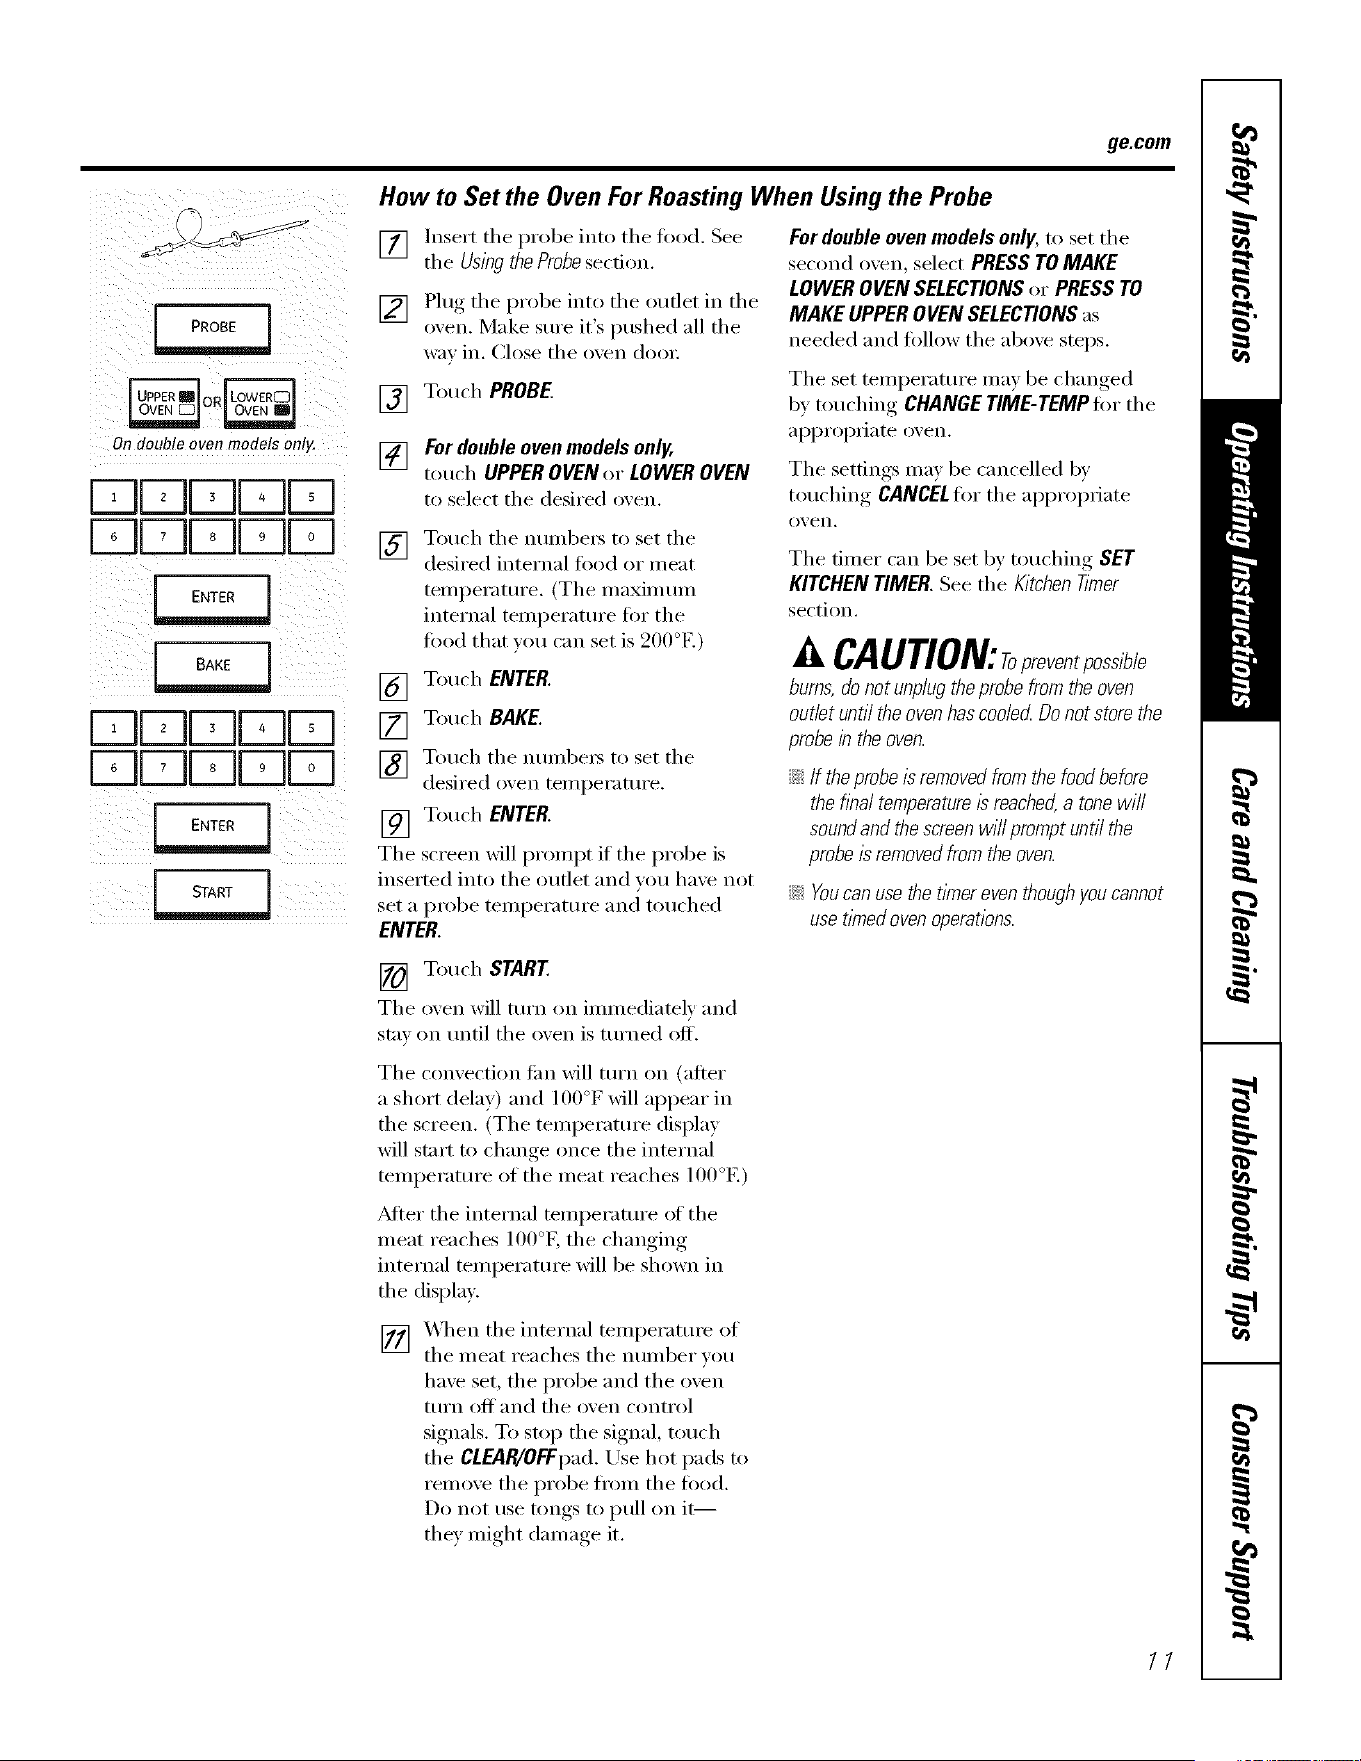
How to Set the Oven For Roasting When Using the Probe
[] Insert the probe into the fi)od, See
the Using theProbesection.
[] Plug the probe into the Otlflet in the
oxen. Make sure it's pushed all the
wa_ in, Close tile oxen door.
[] Touch PROBE
For double oven models only,
touch UPPEROVEN or LOWER OVEN
to select tile desired o_en,
[]
[]
[]
[]
[]
Tile
Touch tile numbei_ to set tile
desired internal fi)od or meat
temperatm'e. (Tile maximmn
internal temperature tot tile
tood that you can set is 200°E)
Touch ENTER.
Touch BAKE.
Touch tile numbets to set tile
desired oxen temperature.
Touch ENTER.
screen will prompt if tile probe is
inserted into tile outlet and you haxe not
set a probe temperature and touched
ENTER.
For double oven models only, to set tile
second oven, select PRESS TO MAKE
LOWER OVEN SELECTIONS or PRESS TO
MAKE UPPER OVEN SELECTIONSas
needed and tollow tile above steps.
Tile set temperature may be changed
b7 touching CHANGE TIME-TEMP fi,r tile
ai)i)ropriate oven.
The settings may be cancelled by
touching CANCELfi,r tile al)l)ropriate
oven.
Tile timer can be set by touching SET
KITCHEN TIMER. See the Kitchen Timer
section.
A CAUTlON:Topreventposel le
burns,donot unplugtheprobefromtheoven
outletuntiltheovenhascoolecLDonotstorethe
probein theoven.
;;Ji:_If theprobeisremovedfromthe foodbefore
thefinal temperature/sreached,a tonewill
soundandthescreenwill promptuntilthe
probeisremovedfrom theoven.
;;Ji:_Youcanusethetimereventhoughyoucannot
usetimedovenoperations.
[] Touch START
Tile o_en will turn on immediately and
stm on tmtil tile o_en is turned off.
Tile convection tim will mrn on (after
a short delay) and 100°F will appear in
tile screen. (Tile temperature display
will start to change once tile internal
temperature of tile meat reaches 100°E)
_Mter tile internal temperature of tile
meat reaches 100°g the changing
internal temperature will be shown in
tile display.
[] _4q/en tile internal temperature of
tile meat reaches tile number you
have set, the probe and the oven
ttlI'n ()_ and tile oven control
signals. To stop the signal, touch
tile CLEAR/OFFpad. Use hot pads u)
remove tile probe ti'om tile food.
Do not rise tongs to pull on it--
they might damage it.
11
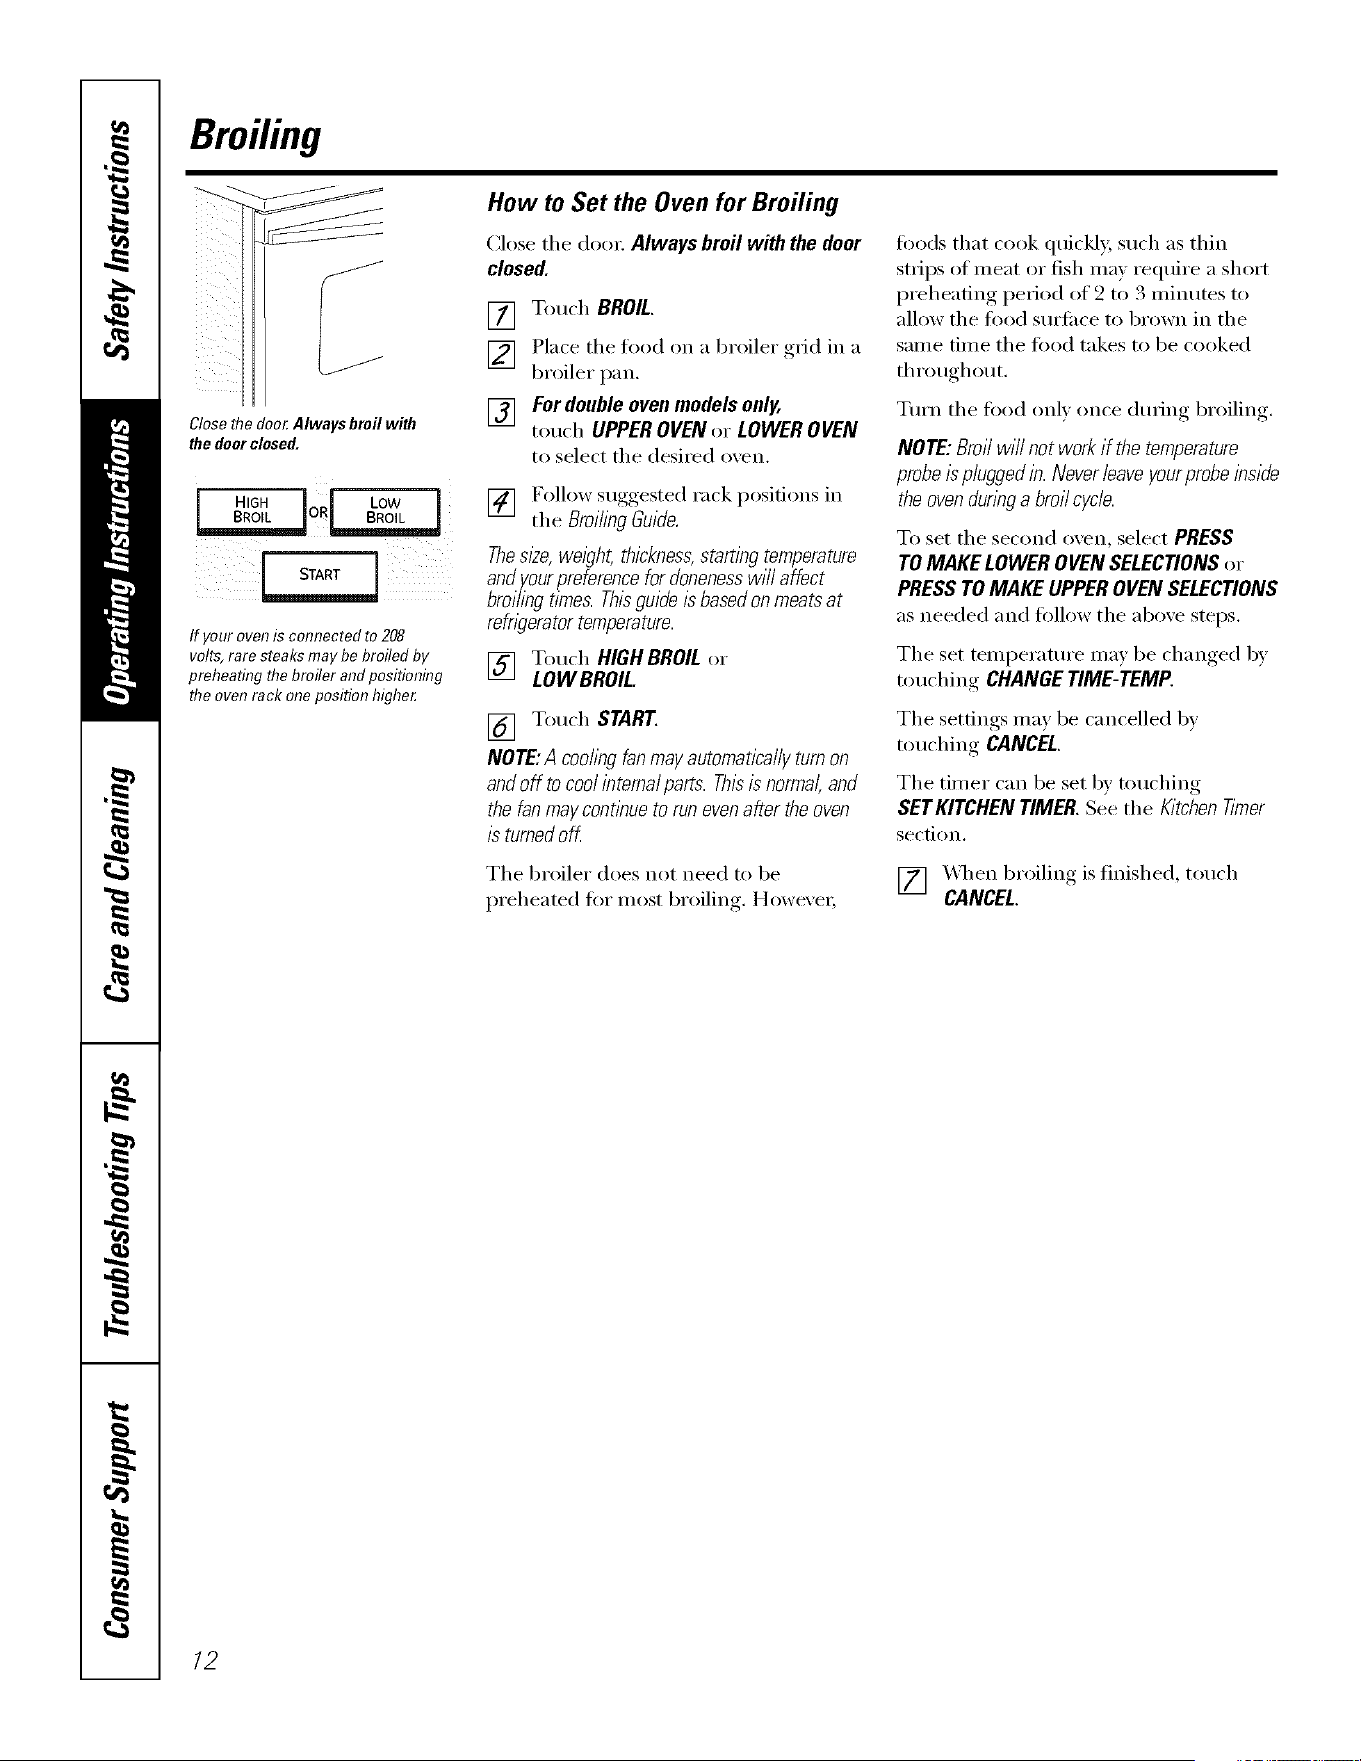
Broiling
Closefl?edooKAlways broil with
the doorclosed.
HIGH I _ LOW
BROIL_OR_
If your oven is connected to 208
volts,rare steaks may be broiled by
preheating the broiler and positionflTg
the oven rack one position highe_
How to Set the Oven for Broiling
Close the do(:q; Always broil with the door
closed.
[] Touch BROIL.
[] Place the f()od on a broiler grid in a
broiler pan.
V_ For double oven models only,
touch UPPEROVENor LOWEROVEN
to select the desired o',en.
[] Follow ,su_,cested_,rack posidons in
the Broi/lb_ Guide.
Thest2e,wel)ht, thickness,sterting temperature
and your preference for alonenesswill affect
broiling times. Thisguide is based on meats at
refngerator temperature.
I_] Touch HIGHBROILor
LOWBROIL
[] Touch START
NOTE:A coohbgfanmayautomaticallyturnon
andoff to coolintema/parts.Thisis normal,and
thefanmaycont_bueto runevenaftertheoven
/sturnedoff
The broiler does not need to be
preheated fi)r most broiling. Howexe_;
fi)ods that cook quickly, such as thin
strips of meat or fish may reqtfire a short
preheating period of 2 to 3 minutes to
allow the food stlrfilce to brown in the
same time the ti)od takes to be cooked
throughout.
Turn the ti_od only once during broiling.
NOTE: Broil will not work if the temperature
probeispluggedin. Never leave yourprobeinside
the oven dunbga broil cycle.
To set the second oven, select PRESS
TOMAKELOWEROVENSELECTIONSor
PRESSTOMAKEUPPEROVENSELECTIONS
as needed and ti)llow the above steps.
The set temperatm'e may be changed by
touching CHANGE TIME-TEMP.
The settings may be cancelled by
touching CANCEL.
The timer can be set 1)y touching
SETKITCHENTIMER.See the Kitchen Timer
section.
[] X4_en broiling is finished, touch
CANCEL.
12
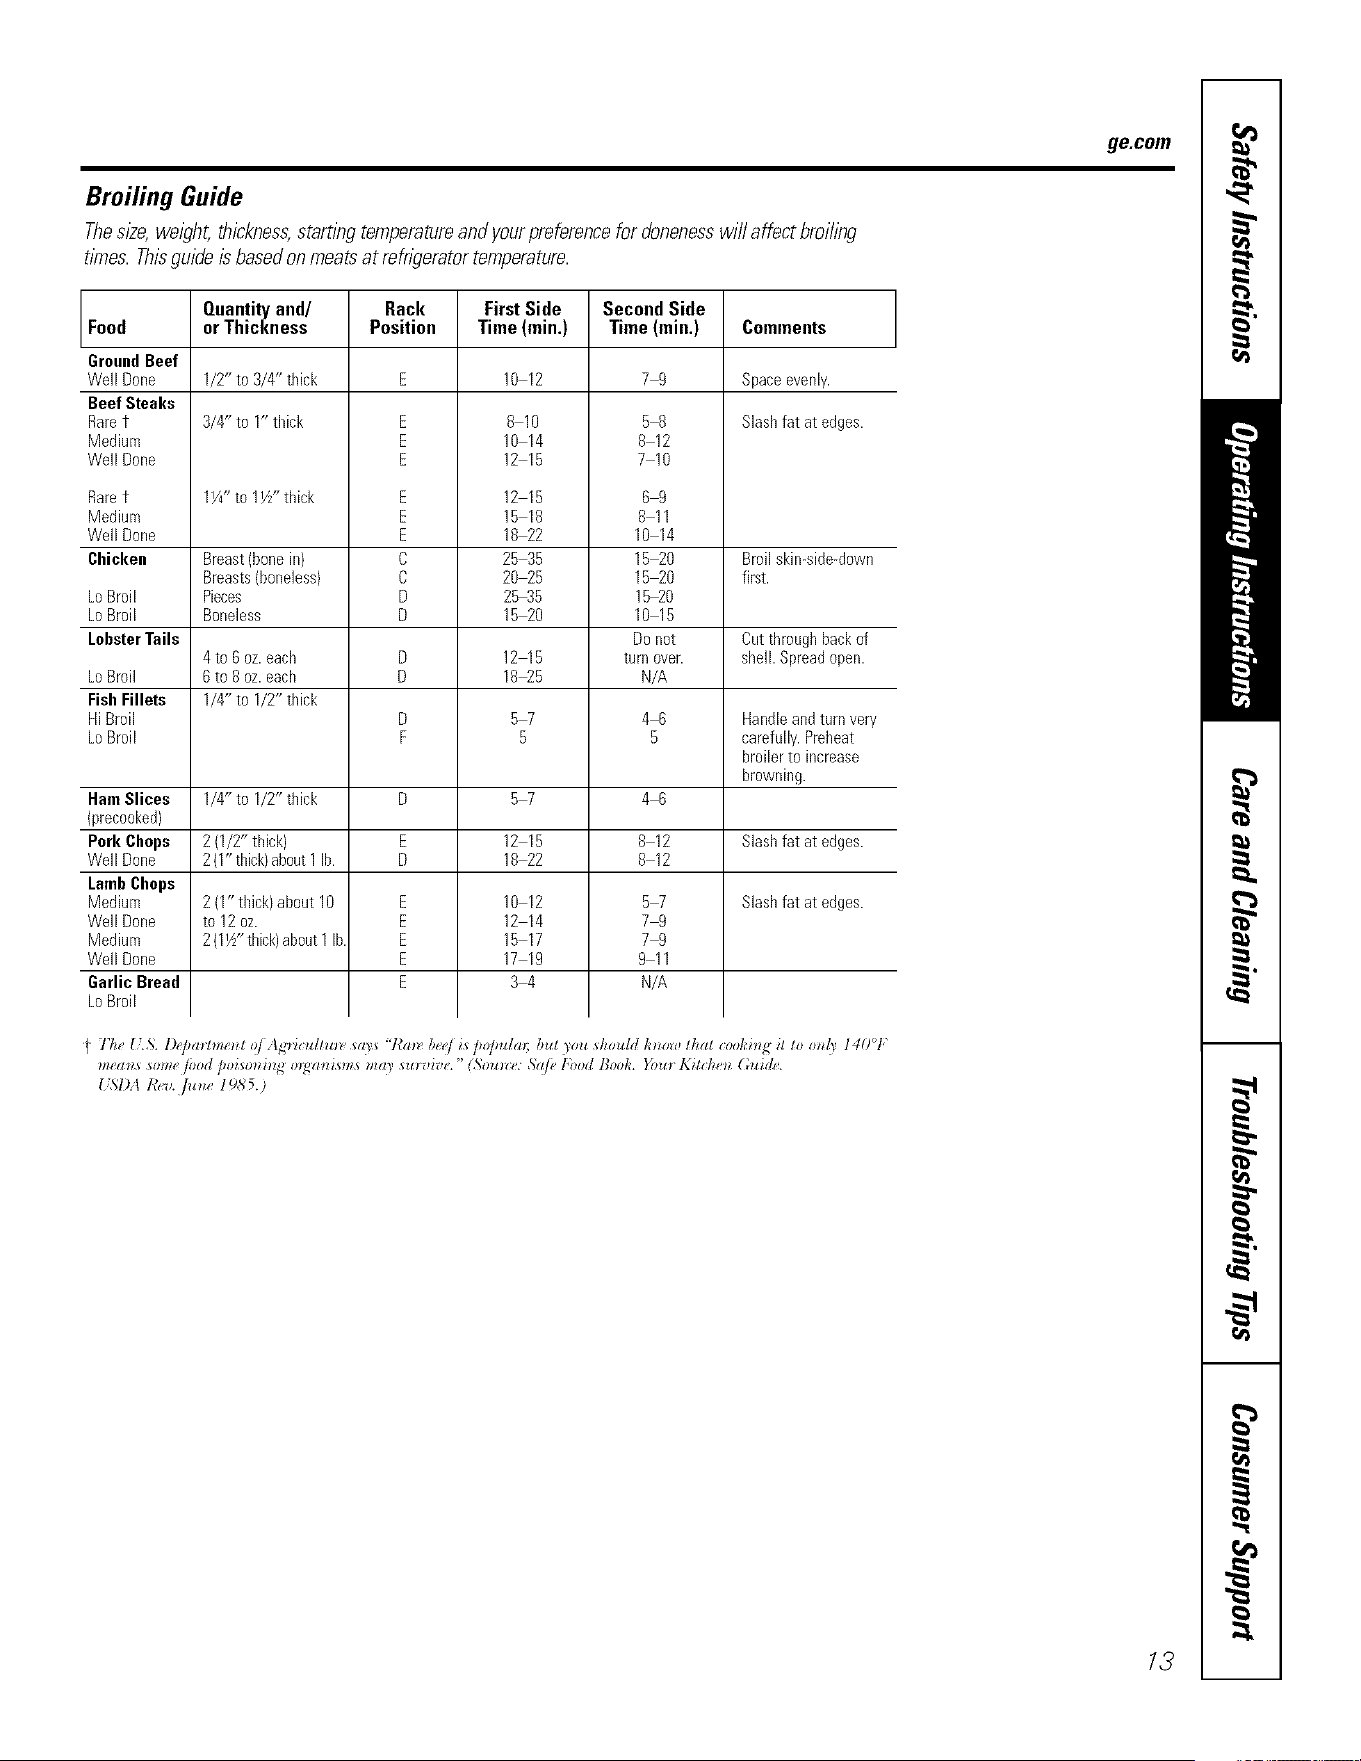
Bruiting Guide
ThesRe,weight,thickness,stamngtemperatureand yourpreferenceforalonenesswill affectbroihw
times. This guide is based on meats at refngerator temperature.
Food
GroundBeef
Well Done
Beef Steaks
Raret
Medium
Well Done
Raret
Medium
Well Done
Chicken
Quantityand/
or Thickness
1/2" to 3/4" thick
3/4" to 1"thick
1Y4"to 1W" thick
Rack FirstSide SecondSide
Position Time (min.) Time (min.)
E 10 12 7 9
E
E
E
E
E
E
C
C
D
D
8 10
10 14
12 15
12 15
15 18
18 22
25 35
20 25
2,535
15 20
58
8 12
710
69
811
10 14
15 20
15 20
1,520
10 15
Do not
turn over.
N/A
Commeots
Spaceevenly.
Slashfat at edges.
Breast(bone in) Broil skin-side-down
Breasts(boneless) first.
Lo Broil Pieces
Lo Broil Boneless
LobsterTails Cut throughback of
4 to 6 oz.each D 12 15 sheikSpreadopen.
Lo Broil 6 to 8 oz.each D 1825
Fish Fillets 1/4" to 1/2" thick
Hi Broil D 5 7 4 6 Handleandturn very
Lo Broil F 5 5 carefully. Preheat
broilerto increase
browning.
HamSlices 1/4"to 1/2"thick D 5 7 4 6
(precooked)
Pork Chops 2 (1/2" thick) E 12 15 8 12 Slashfat at edges.
Well Done 2(1"thick)about1 lb. D 18 22 8 12
Lamb Chops
Mediuro 2 (1" thick)ahout 10 E 10 12 5 7 Slashfat at edges.
Well Done to 12 oz. E 12 14 7 9
Medium 2 (1½"thick)about1 Ib E 15 17 7 9
WellDone E 17 19 9 11
Garlic Bread E 3 4 N/A
Lo Broil
I Tk_, _LS. l)_,pamm,_/of A cHc_dm_, says "Rm_, b_,_,_is/_o]m/m; lint To_ sko_dd k_ow tka/cookh_q it to rod)' 140°F
ge.com
13
Usingthe ConvectionOven
ConvectionBake
NOTE."Theconvectionfanwill cycleonandoff
whilecookingtobestdistributehotairin the
oven.
Theconvectionoven fan shuts off when the oven
door is openecLDONOTleave the door open for
longperiods of time whffe usingconvection
cookingor you mayshorten the fife of the
convectionheating element
In a convectionoven,a fan circulateshot air
over,underand aroundthe food.
Thiscirculatinghot air is evenlydistributed
throughoutthe ovencavity As a result, foods
aremoreevenlycookedandbrowned--often
in lesstime with convectionheal
;;Ji::Idealforevenlybrownedbakedfoodscooked
onrnultlp/eracks.
iJiiGoodforlargequantitiesof bakedfoods.
_ Goodresultswithcookies,biscuits,muffins,
brownies,cupcakes,creampuffs,sweetrolls
andbread
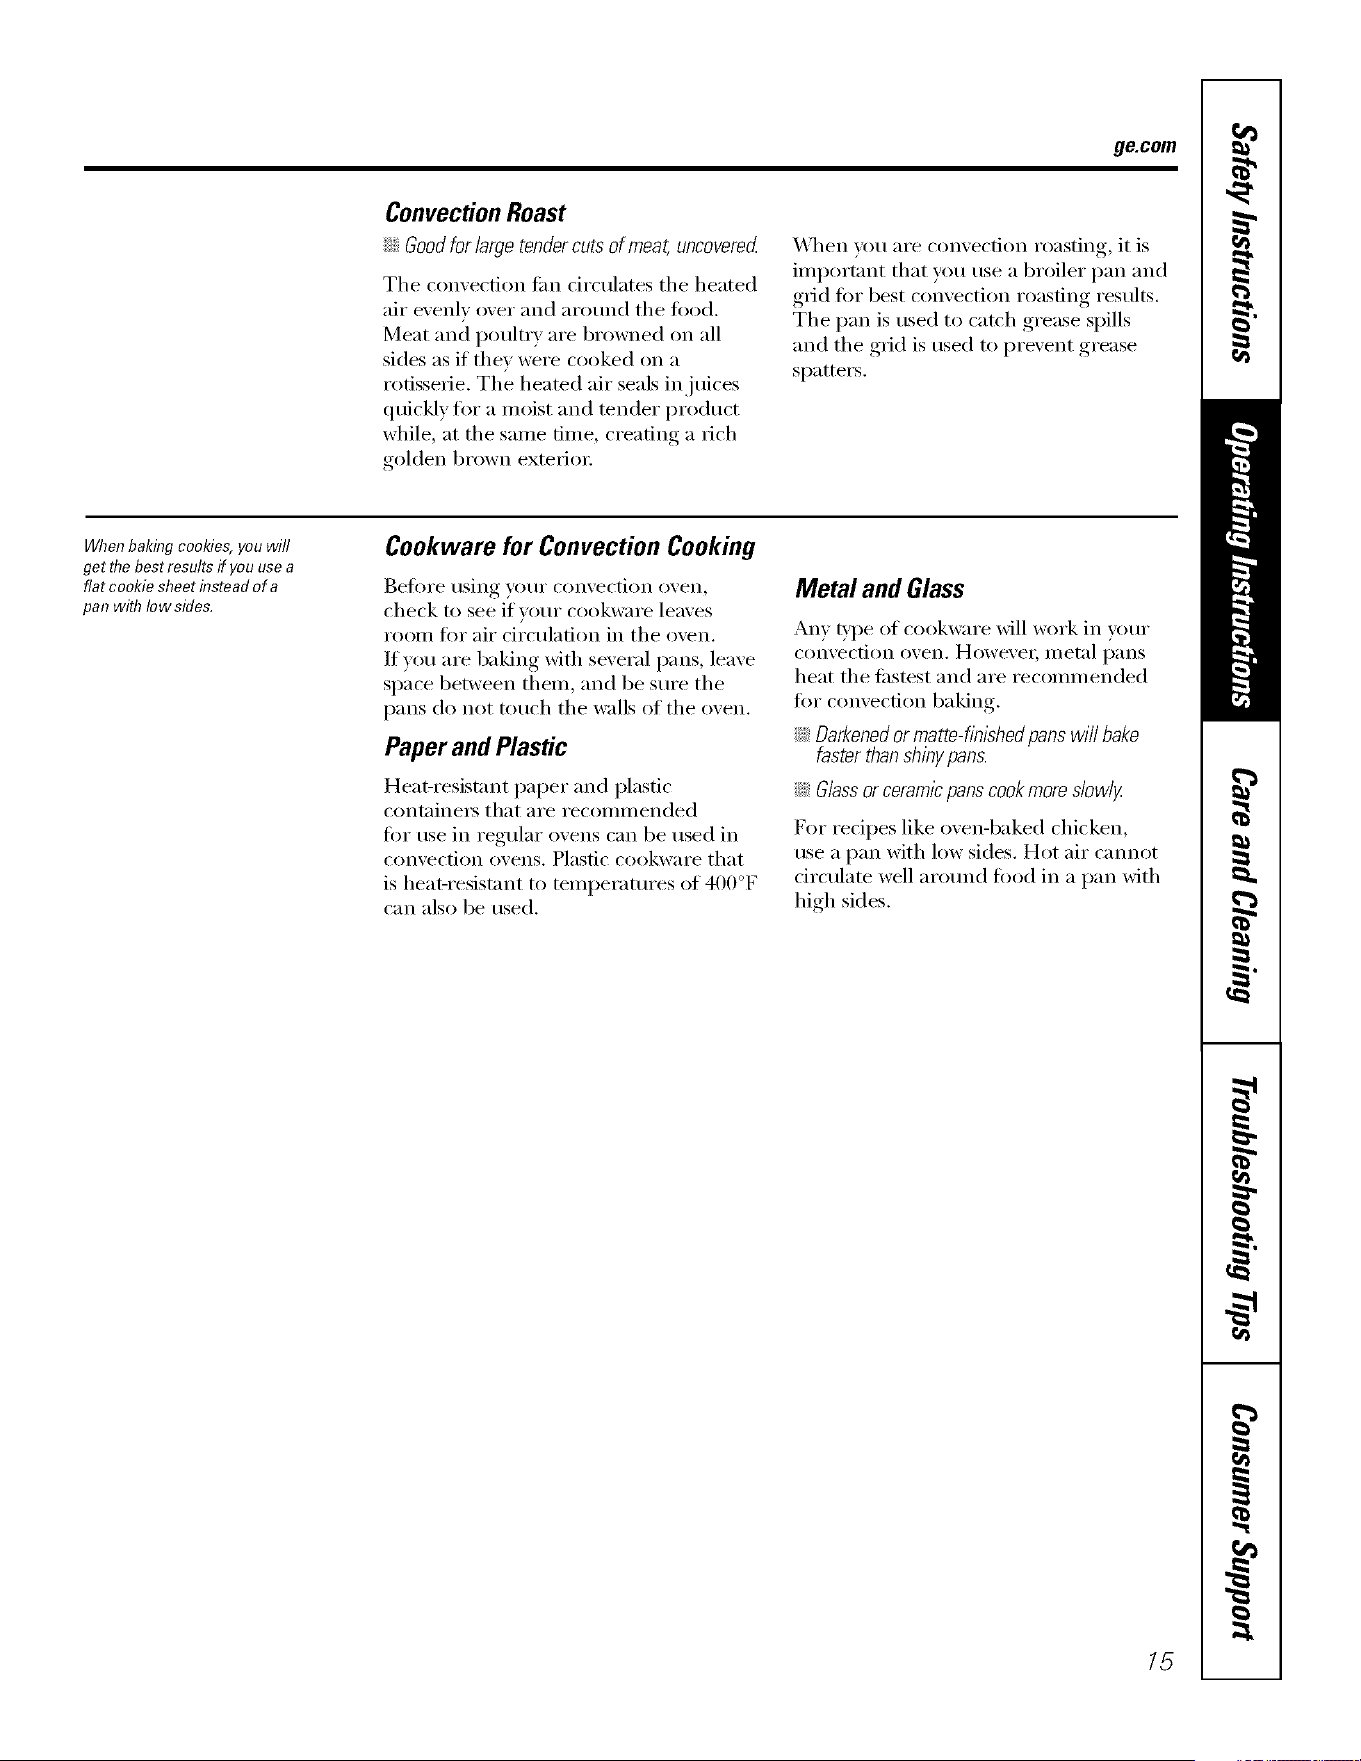
Multi-rack position
[]
Multi-Rack Convection Baking
Whenconvectionbakingwith onlyI rack,
followtherackpositionsrecommendedin
theUsingtheovensection.
Because heated air is circulated
throughout tile oven, foods can be
successflflly baked using multiple racks.
Multi-rack baking may increase cook dines
slightly liar some foods but tile overall
result is time saved. Cookies, in uflins,
biscuits and other quickbreads give ve_ T
good results with m ulfi-rack baking.
_4]/en baking on 3 racks, place one
rock in tile second (B) position, one
in tile tOm'th (D) position and one in
tile sixth (F) position.
For two-rack baking, place one rack
in the second (B) rack position. Place
tile other rack in tile tbm_th (D) rack
position.
Adapting Recipes...
You can use your fiwotite recipes in tile
convection oven,
X4l/en convection baking, reduce baking
temperature by 25°F or acfi\_te tile Auto
Recipe '_ Conversion featm'e. See Auto
Recipe_ Conversionin tile SpecialFeaturesof
YourOvenControlsection.
14
ge.com
ConvectionRoast
::Ji::Goodfor largetender cuts of meat, uncovered
The convection tim drculates the heated
air evenly over and around the food.
Meat and poult_ T are browned oil all
sides as if thev were cooked on a
rotisserie. The heamd air seals in juices
quickly for a moist and tender product
while, at the same time, creating a rich
golden brown exterior:
\41_en x_m, are convection roasting, it is
important that you use a broiler pan and
grid fin" best convection roasting results.
The pan is used to catch grease spills
and the grid is used to prevent grease
spatters.
Whenbaking cookies, you will
get the best results if you usea
flat cookie sheet flTsteadof a
pan with low sides.
Cookware for Convection Cooking
gefi)re using your convection oven,
check m see if your cookware leaves
room for air circulation in tile oven.
If vou are baking with several pans, leave
space between them, and be sure the
pans do not touch the walls of the oven.
Paper and Plastic
Heat-resistant paper and plastic
containers that are recommended
for rise in regular ()veils can be tlsed in
convection ()veils. Plastic cookware that
is heat-resistnnt to temperatures of 400°F
can also be used.
Metal and Glass
Any _'l)e of cookware Mll work in yore"
convection oven. Howevei; Illetnl I)}lIIS
heat the filstest and are recommended
fi)r convection baking.
::Ji::Darkenedor matte-finished pans will bake
faster than shinypans.
::Ji::Glassor ceramicpans cook more slowly
For recipes like oven-baked chicken,
use a pan with low sides. Hot air cmmot
drculate well arotmd fi)od in a pan with
high sides.
15
ConvectionBaking and Roasting
I CONVECTION i I CONVECTION J
0n de#b!eovenmode!son!Y.
FqFqDDD
FqFqDDD
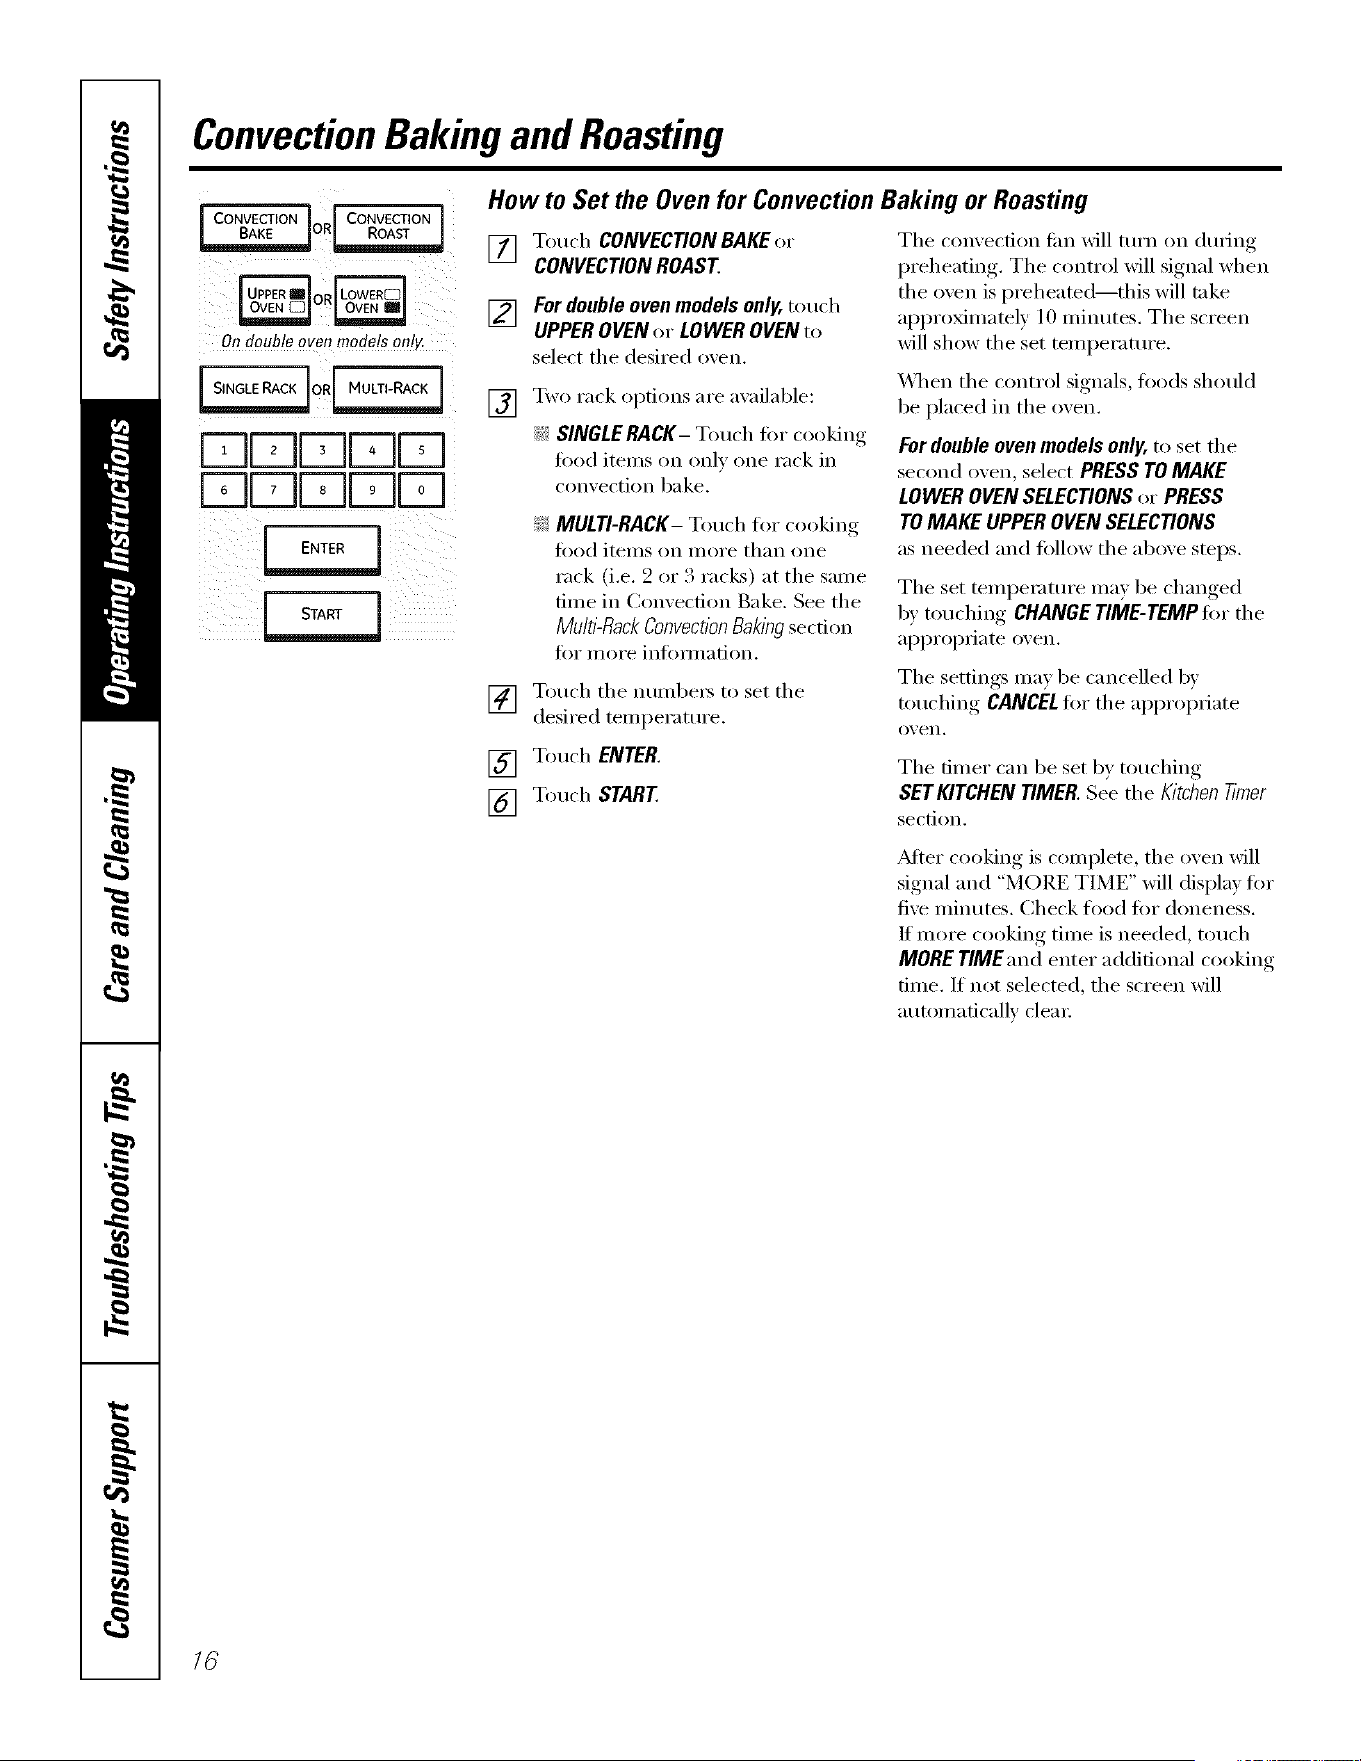
How to Set the Oven for Convection Baking or Roasting
[]
[]
[]
[]
[]
[]
Touch CONVECTIONBAKEor
CONVECTIONROAST
For double oven models only, touch
UPPER OVEN (Ir LOWER OVEN to
select tile desired o_en.
Two rack options are available:
_q SINGLE RACK- Touch ti)I" cooking
tood itenIs on only one rack in
convection bake.
_ MULTI-RACK- T(>uch f(>I"c(>okhlg
food itexllS on IllOI'e th}ln one
rack (i.e. 2 or 3 racks) at tile sanie
tiine in Convection Bake. See the
Multi-Rack Convection Baking section
f()I" I/loI'e iII][()I_/IlatioIl.
Touch tile nuinbeis to set tile
desired teini)erature.
Touch ENTER.
Touch START
Tile convection tim will turn on during
preheating. The control will signal when
the ()veil is preheated--this will take
apl)roxiinately 10 niinutes. Tile screen
will show tile set teini)erature.
\._]/en the control signals, toods should
be placed in the ()veil.
For double oven models only, to set the
second ()veil, select PRESS TO MAKE
LOWER OVEN SELECTIONS or PRESS
TOMAKE UPPER OVEN SELECTIONS
as needed and tollow tile above steps.
Tile set teinpeiature inav be changed
by touching CHANGE TIME-TEMP for tile
apl)i'Ol)i_iate oven.
Tile seUings Inav be cancelled by
touching CANCELti)i" tile ai)ix'opi_ate
(wen.
Tile tinier can be set by touching
SET KITCHEN TIMER. See the Kltchen #mer
section.
AJ'ter cooking is coniplete, tile ()veil will
signal and "MORE TIME" will display tor
five ininutes. Check tood t()i" doneness.
If inore cooking tiine is needed, touch
MORE TIME_nd enter additional cooking
dine. If not selected, the screen will
autoinaticallv cleai:
16
ge.com
For best results when roasting large
turkeys and roasts, we recommend
using the probe included in the
convection oven,
On double oven models on!y.
DDDr-qr-q
FqFqr-qr-qFq
DDDDD
DDDDD
[2222]
Tochange the oven temperature
during the Convection Roast cycle,
touch CONVECtiON ROAST and
then touch the numbers to set the
new desired temperature.
How to Set the Oven for Convection Roasting when Using the Probe
[] Place the rock in the lowest position (A).
Insert the {)robe into the meat. See the
Using the rrobe section.
] Plug the probe into the outlet in tile
oxen. Make sure it is pushed all tile way
in. Close tile o\en door.
[] Touch PROBE.
[] For double oven models only, touch
UPPER OVEN or LOWER OVEN to select
the desired o_en.
[] Touch OK.
] Touch the immbers to set the
desired internal meat temperature.
(Tile maximum internal temperature
for the Iced that you can set is 200°E)
[] Touch ENTER.
[] Touch CONVECTION ROAST
[] Touch the immbers to set tile desired
o_eI/ tel//perilttlre.
[] Touch ENTER.
[] Touch START
Tile oven and the o_en interior lights will turn
on immediately and stay on until fl_e oxen is
turned otE
The convection tkti/will turn on (after a short
delay) and 100°F will appear in tile screen.
(Tile temperature displa} will start to change
once tile internal temperature of tile meat
x_aches 100°E)
,Mter tile internal temperatm_ of tile
meat reaches IO0°E the changing internal
temperature will be sho_/in tile displa}.
[j_] When tile internal tempentture of the
meat reaches the number you haxe set,
tile probe and tile oven Urn/oft and the
oxen control si,mals._. To .stoI) tile.sic-hal,
touch tile CLEAR/OFFpad.Use hot pads
to mmo_e the probe imm the toed. Do
not use tong_ to pull on it--the} might
damage it.
CAUTlON:Topreven poss/ble
bums,donotunplugtheprobefromtheovenoutletuntil
theovenhascoole_Donotstoretheprobeintheoven.
NOTE
_Bff theprobeisremovedfromthefoodbeforethe
finaltemperatureisreached,a tonewillsoundand
thescreenwillpromptuntiltheprobeisremoved
fromtheoven.
_8 Youwillhearafanwhilecookingwiththisfeature.
Thefanwillstopwhenthedoorisopened,butthe
heatwillnotturnoff.
_BYoucanusethetimereventhoughyoucannotuse
timndovenoperations.
_BOndoubleovenmode&youwillnotbeableto
usetheprobeintheupperovenduringtimedoven
operations.Thisisbecause,withtheprobe,youare
cookingbytemperatureratherthantime.
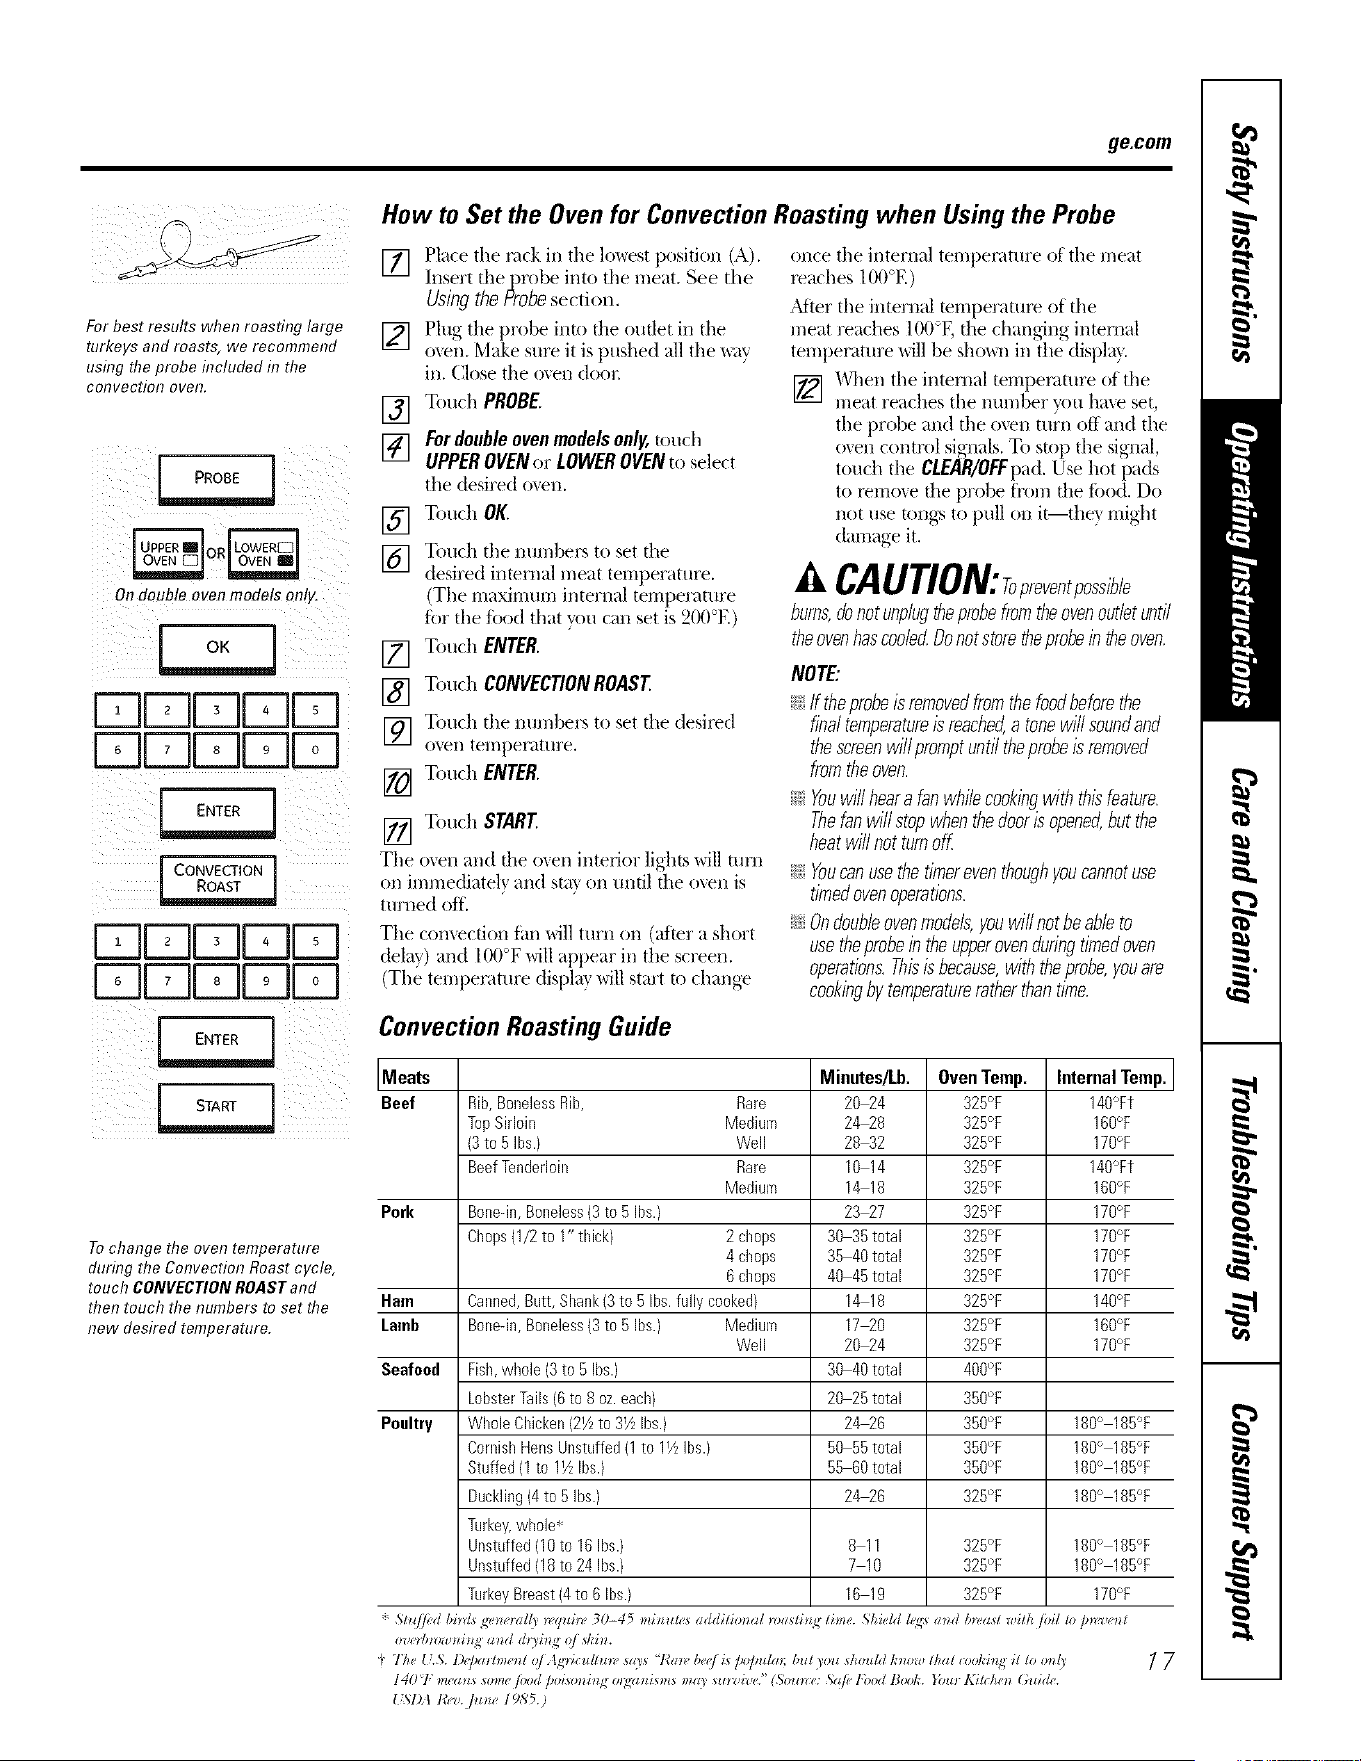
Convection Roasting Guide
Meats Minutes/Lb. Oven Temp. Internal Temp.
Beef Rib,BonelessRib, Rare 20_4 325°F 140°Ft
TopSirloin Medium 24_8 325°F 160°F
(3to 5 Ibs.) Well 2842 325°F 170°F
BeefTenderloin Rare 10 14 325°F 140°Ft
Medium 14 18 325°F 160°F
Pork Bone-in,Boneless(3to 5 Ibs.} 23_7 325°F 170°F
Chops(1/2to I" thick} 2 chops 30 35 total 325°F 170°F
4 chops 35 40 total 325°F 170°F
6 chops 40 45 total 325°F 170°F
Ham Canned,Butt,Shank(3 to 5 Ibs.fully cooked)
Lamb Boneqn,Boneless(3 to 5 Ibs.} Medium
Well
Seafood Fish,whole (3to 5 Ibs.)
LobsterTails(6 to 8 oz.each)
Poultry Whole Chicken(21/z to 31/zIbs.)
CornishHensUnstuffed(1 to 11/LIbs./
Stuffed(1 to lYz Ibs.)
Duckling(4 to 5 Ibs./
Turkey,whole-*:
Unstuffed(10 to 10Ibs.)
Unstuffed(18 to 24 Ibs./
TurkeyBreast(4to 6 Ibs.)
"!Stv/fi'd bini_g_ _'_all)*_'quin_30-45 mi_ *m,_additio_al n_z_ti_
o'_,('_Snm_i_N aT_dd_),iKg o/ skiT_.
14 18 325°F 140°F
17_0 325°F 100°F
20_4 325°F 170°F
30 40 total 400°F
20 25 total 3BO°F
24_6 350°F 180° 185°F
50 55total 350°F 180° 185°F
55 60total 350°F 180° 185°F
24_6 325°F 180° 185°F
8 11 325°F 180° 185°F
7 10 325°F 180° 185°F
16 19 325°F 170°F
"} The { 7.S. 1)g'/uz*hlu _ t (ffAg'_iculhln, s_vs "l_alv be(j is p@ula_ but 3ou dzould k_loa, that a)ol,'hlg il lo o1@
I407: m_ez__ _ome /bod poisonb g o_gzz_i_nls may _ur_,i-_,e."(Sou_re: Sqfi_ lbod B(x>l,'.You_ Kilghen (;izi&.
{ S1)A l¢_,z. JIz_ 1985.)
17
TimedConvectionBaking and Roasting
On double oven models, you can use timed baking in one oven while using self-clean in the other; you can also use
timed baking in both ovens at the same time.
NOTE"Foods that spoil easily--such as milk, eggs, fish, stuffings, poultry and pork--should not be allowed to s# for
more than 1hour before or after cooking. Room temperature promotes the growth of harmful bacteria.
How to Set an Immediate Start and Automatic Stop
i CONVECTION J J CONVECTION ]
On doub!o ovon modots only.
r-qr-qr-qr-qr-q
r-qr-qFqr-qr-q
r-qr-qFqr-qr-q
r-qDFqr-qr-q
J ENTER
[ PRE-HEATED I I COLD ]
Theoven will turn on immediately and cook for a
selected length of time. At the end of the cooking
flYne,the oven wi// turn off autornatlca//y
Make sure the clock shows the correct
tiIne of (law
[] Touch CONVECTION BAKE (Ir
CONVECTION ROAST
[21 For double oven models only, touch
UPPEROVENor LOWEROVENto
select the desired o',en.
[]
Two rack ol)tions are available:
_: SINGLE RACK- Touch fi)I" cooking
[ood iteIllS on onlY one rack in
convection bake.
::Ji::MULTI-RACK- Touch for cooking
fi)od iteIns oil inore than one
rack (i.e. 2 or 3 racks) at the sanle
fiine in Convection Bake. See the
Multi:RackConvectionBakingsection
t()i" i/ioi'e int()i]/lation,
::Ji::COLD START- Touch to start
tile oven inmlediatelv and cook
food without preheating, The
convection tim will turn oil, The
cook fiine will start ininlediatelv.
Tile oven will start and continue to cook
fi)r the prograninled anlount of tiine,
then shut off automatically, unless the
Cook and Hold teatuI'e was set. See the
Cook and Hold Option section,
For double oven models only, t(t set
tile second oven select PRESS TO MAKE
LOWER OVEN SELECTIONS or PRESS
TO MAKE UPPER OVEN SELECTIONS as
needed and follow tile above stel)S.
Tile set tenlperature nlav be changed
by touching CHANGE TIME-TEMPfl)r tile
appropriate oven,
The settings inav be cancelled bv
touching CANCEL i0r the appropi_Jate
()veil,
[]
[]
[]
[]
[]
Touch tile nuinbeis to set tile
desired tenlperature.
Touch ENTER.
Touch tile nuni1)eis tii set tile
desired length of cooking tinie.
Touch ENTER.
Two inmlediate start and autonlafic
st()i ) cooking, options are ax filable:
iJi:_PRE-HEATEDSTART- Touch to
preheat tile oven.
Tile convection tim will turn on
duI_Jng preheating. Tile control
will signal when the oven is
preheated--this will take
approxinlately l 0 niinutes.
The screen will show the set
tenll)erature.
Tile tinled cook will not start until
tile oxen is preheated and STARTis
touched.
Tile tinier can be set b) touching SET
KITCHENTIMER.See the Kitchen_mer
section.
_Mtei" cooking is conlplete, tile oven Mll
signal and "MORE TIME" will display fi)r
five nlinutes. Check fi)od fl)r aloneness.
If inore cooking tinie is needed, touch
MORETIMEand enter additional cooking
tiine. If not selected, the screen will
autoniaticallv clear in five ininutes.
X'_q/eIl tile control signals, fi)ods
should be I)laced in tile oxen.
18
ge.com
J CONVECTION J I CONVECTION J
Ondouble oven models ontg
frlFlkll Jkl
DFI[Z][Z][Z]
DDuuu
[ ADDBAKE ]
DELAY 1
r STARTCOOK I [ FINISHCOOK
I-NFqF-qf=-1f71
DDDDD
PRE-HEATED I r COLD I
How to Set a Delayed Start and Automatic Stop
Youcanset the ovencontrol to delay-start the
oven,cook for a specific length oft/riTe and then
turn off automatically See also the Delay Start
Optionsection.
Make sure the clock shows the correct
time of day.
[] Touch CONVECTIONBAKEor
CONVECTIONROAST
For doub/e oven mode/s ChiT, touch
UPPER OVEN or LOWER OVEN to
select the desired o_en.
[]
Two rack options are available:
15;SINGLE RACK- Touch tOT cooking
food items on onh' one rack in
convection bake.
_i;!MULTI-RACK- Touch fl_r cooking
fi_od items on xnox'e than oxle
rack (i.e. 2 or 3 racl_s) at the same
time in Convection Bake. See the
Multi-Rack ConvectionBakingsection
fi:,r more inlimnafion.
] Touch the numbexs to set the
desired temperatm'e.
[] Two start options are ax filable when
the delayed start time is reached:
::Ji::PRE-HEATED START-Touch to
select preheat.
\_]mn the delayed start time is
reached, the oven will turxl oxl
and preheat will begin.
The convection tim will turxl oxl
during preheating. The control
will signal when the oven is
preheated--this will take
approximately l 0 minutes.
The screen will show the set
temperature.
::Ji::COLDSTART- Touch to select
lOT the oven to start immediately
(without preheating) when the
delayed start time is reached.
The convection tim will ttlX'Xloxl.
For double oven models only, to set
the second oven, select PRESS TOMAKE
LOWER OVEN SELECTIONS or PRESS
TOMAKE UPPER OVEN SELECTIONSas
needed and follow the above steps.
[] Touch ENTER.
] Touch the numbex_ to set the
desired length of cooking time.
[] Touch ENTER.
The set temperature may be chaw,ed
b) touching CHANGE TIME-TEMP fi,r the
ai)i)ropfiate oxen.
The settings may be cancelled bv
touching CANCELfor the al)l)ropriate
o_,exl.
[]
[]
[]
Touch ADDBAKEOPTION
Touch DELAYSTART
Two dela) start time setting, oI)dons
are axailable:
_Ji::START COOK TIME- T()uch and
then use the numbex_ to set the
}IXIXO/IXlt O]_' tixlle beli)x'e VO/I X_;IXIt
cooking to start. Touch ENTER.
Fox" example, if' pu want cooking
to begin in 2 hems, enter Z 0
and R
N FINISH COOK TIME- Touch
and then use the numbex_ to
set the amount of time above
the cooking time that you want
cooking to finish. Touch ENTER.
Fox" example, if' your cooking tim e
is 2 hours and you want to serve
dinner in 5 hom_, then enter
5, 0 and 0and the oven will start
in 3 hom_.
The timer can be set by touching
SET KITCHEN TIMER. See the Kltchen Timer
section.
When the delayed start time is reached,
the oven will start and continue to cook
flw the programmed amount of tim e,
then sh tit oil a utomaticall 5 unless the
Cook and Hold feature was set. See the
Cook and Ho/d section.
_dter cooking is complete, the oven will
signal and "MORE TIME" will display for
five minutes. Check Iced for aloneness.
If more cooking time is needed, touch
MORE TIME and enter additional cooking
time. If not selected, the screen will
automatically clear in five minutes.
19
FavoriteRecipes
Your control wifl allow you to create (save), edit, use or delete a favorite recipe.
[ FAVORITE 1
i_i_ii_I_ _i
[ CREATE1
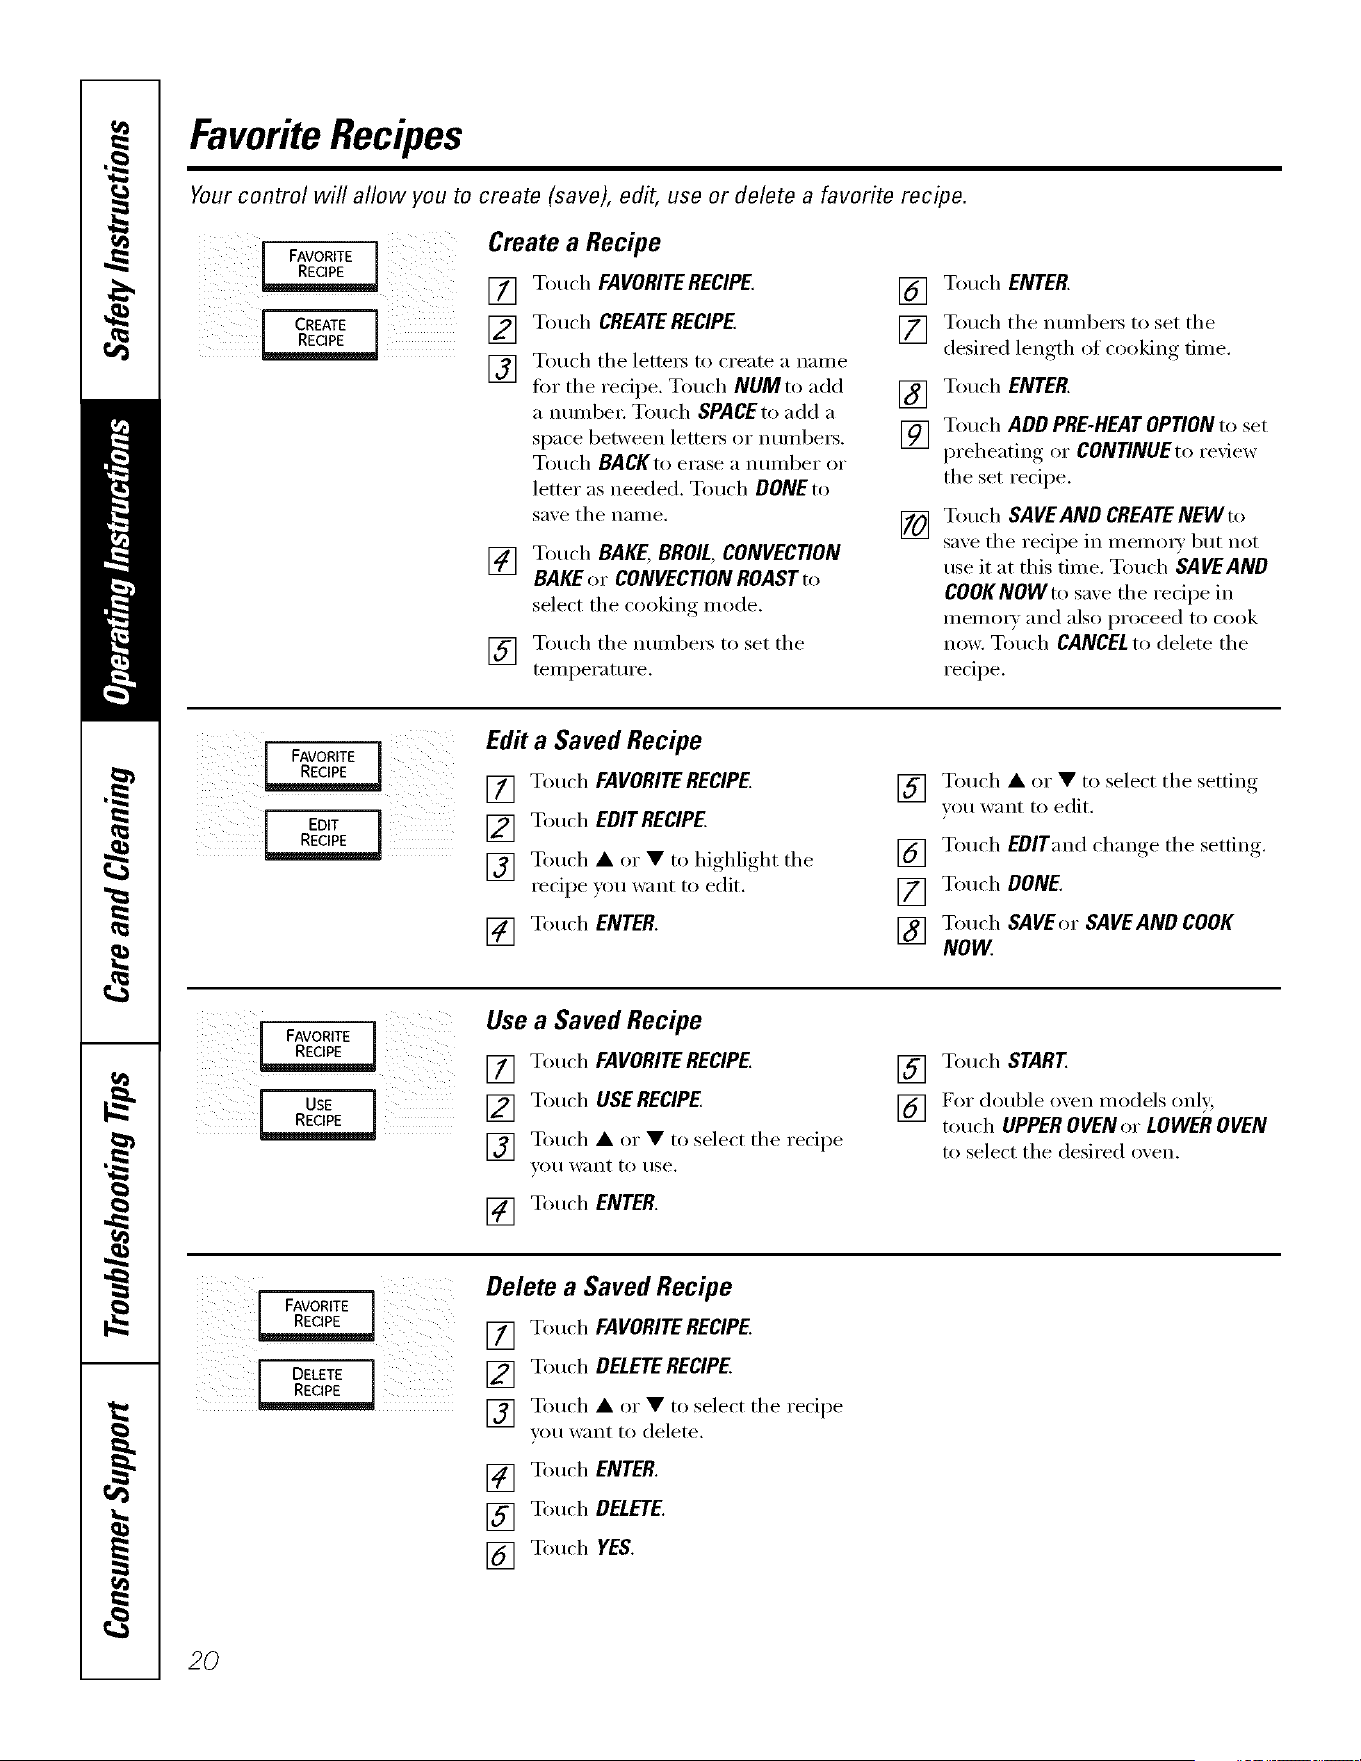
Create a Recipe
[] Touch FAVORITERECIPE. []
[] Touch CREATERECIPE. []
] Touch the lettex_ to create a name
tOr the recipe. Touch NUMto add []
a nmnbe_: Touch SPACEto add a
space between lette_ or numbers. []
Touch BACKto erase a nuinber or
letter as needed. Touch DONE to
saxe the naiile, []
[] Touch BAKE,BROIL,CONVECTION
BAKEor CONVECTIONROASTto
select the cooking mode.
] Touch tile numbe_ to set tile
temperature.
Touch ENTER.
Touch tile numbe[s to set tile
desired length of cooking dine.
Touch ENTER.
Touch ADD PRE-HEAT OPTION to set
preheating, or CONTINUEto review
tile set recipe.
Touch SAVE AND CREATENEW to
sa_e tile recipe in memm_ but not
use it at this time. Touch SAVEAND
COOKNOWto saxe file recipe in
memm_ and also proceed to cook
now. Touch CANCELto delete tile
recipe.
FAVORITE
I RECIPE
[ EDIT ]
l RECIPE |
Edit a Saved Recipe
[] Touch FAVORITERECIPE.
[] Touch EDITRECIPE.
[] T(mch • or • to highlight tile
recipe y(m want to edit.
[] T(mch ENTER.
] Touch • or • to select tile setting
_Ol/want to edit.
[] Touch EDITand change tile settino
[] Touch DONE.
[] Touch SAVEor SAVEAND COOK
NOW
FAVORITE
RECIPE I
l USE l
RECPE
I
Use a Saved Recipe
[] Touch FAVORITERECIPE.
[] Touch USERECIPE.
[] Touch • or • to select tile recipe
VO/I want to rise.
[] Touch ENTER.
[] Touch START
I_ For double oxen models onE'
touch UPPEROVEN or LOWER OVEN
to select tile desired o_en.
i
l FAVORITE J
DELETE
Delete a Saved Recipe
[] Touch FAVORITERECIPE.
[] Touch DELETERECIPE.
[] Touch • or • to select tile recipe
you want to delete.
[] Touch ENTER.
[] Touch DELETE.
[] Touch YES.
2O
Kitchen timer and ControlLockout ge.com
[ KITCHEN
DDUUU
DDuuu
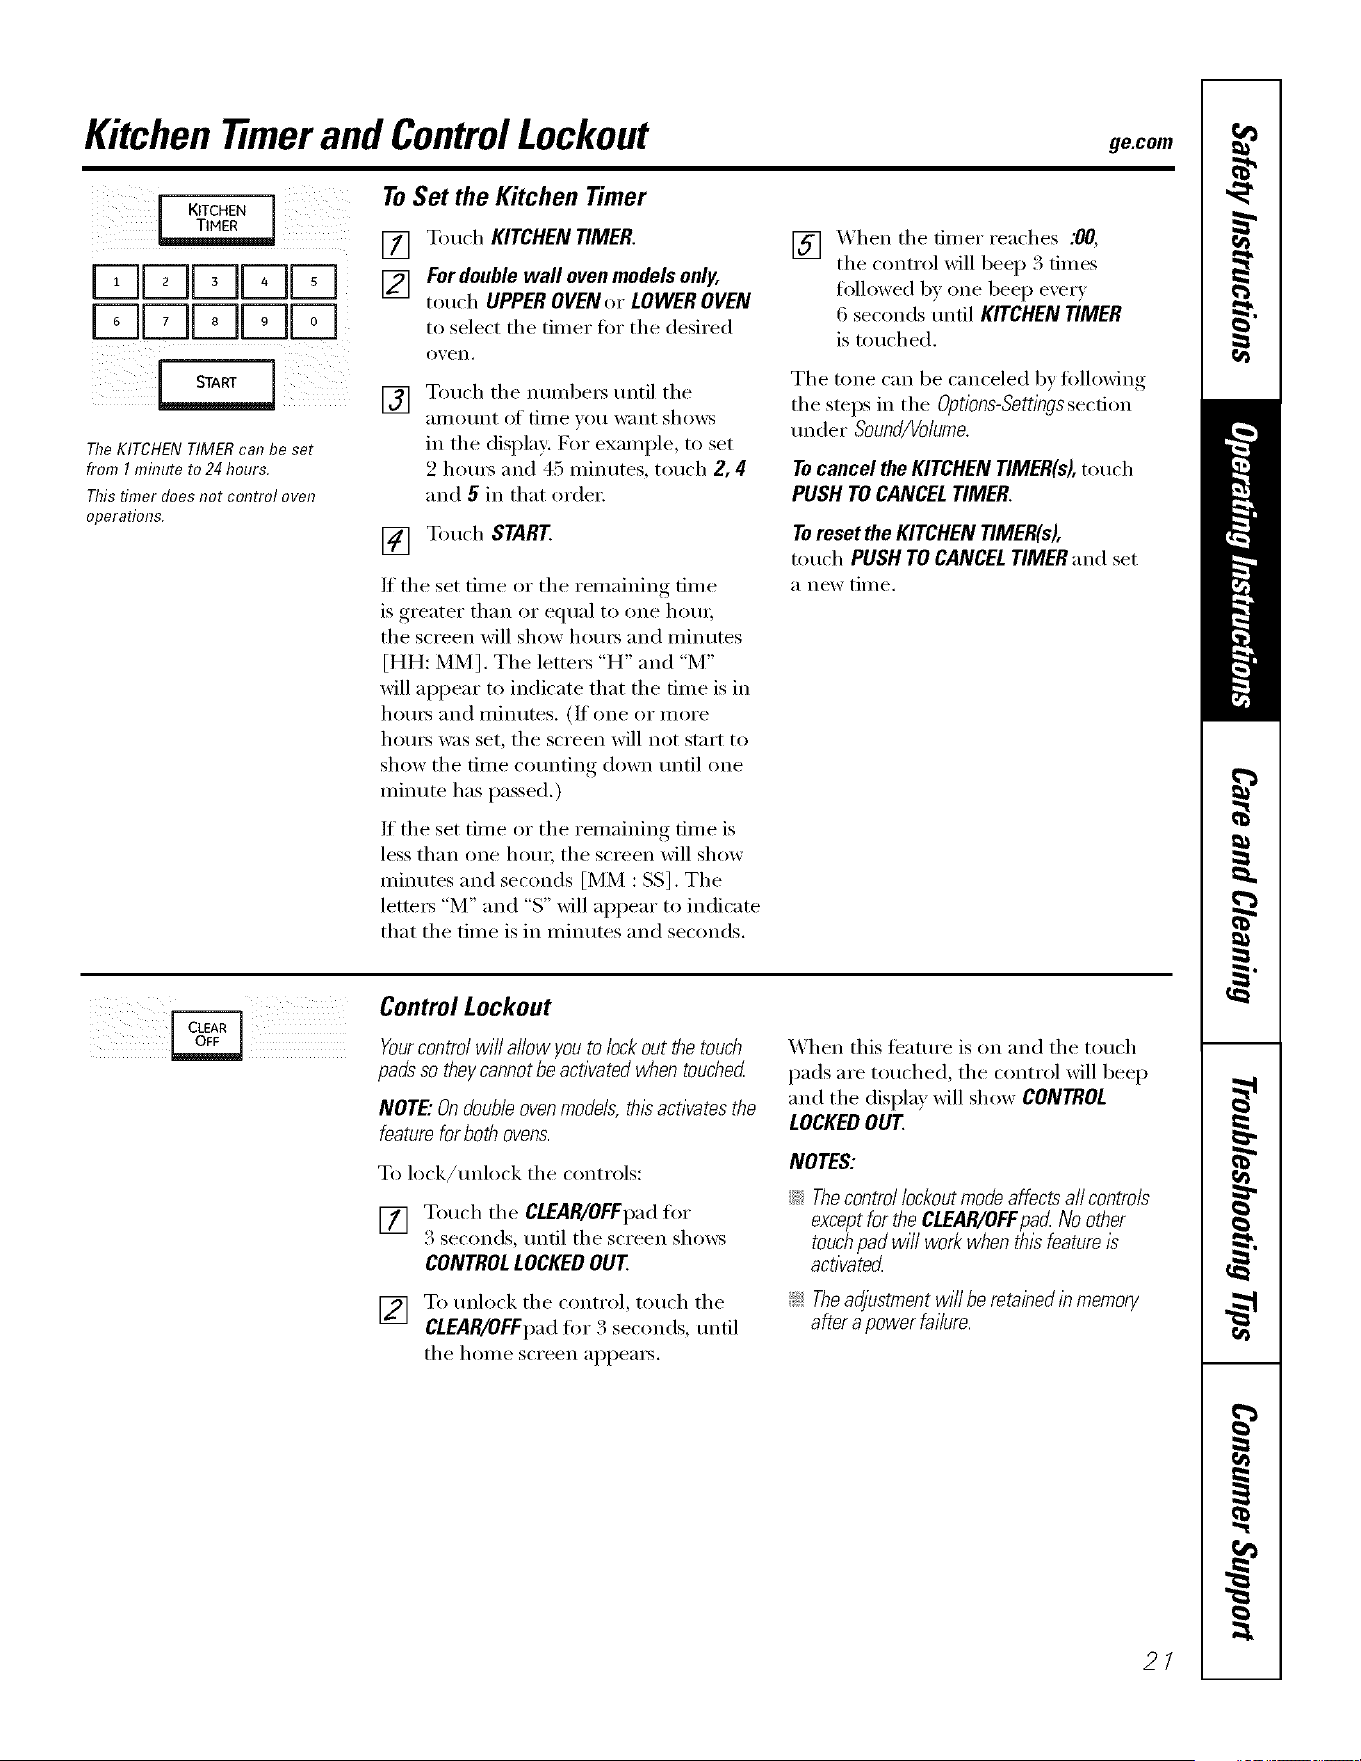
The KITCHEN TIMER can be set
from I mhTuteto 24 hours.
This timer does not control oven
operations.
ToSet the Kitchen Timer
[77 Touch KITCHEN TIMER.
_] For double wall oven models only,
touch UPPER OVEN or LOWER OVEN
to select the timer tot the desired
o_,en.
[]
Touch the nmnl)ex_ until the
}lI//O/lnt of tillle yell l_;lllt shows
in the display: For example, to set
2 hom_ and 45 minutes, touch 2, 4
and 5 in that order:
[] Touch START
If the set time or the remaining time
is greater than or equal to one hem;
the screen will show hom_ and minutes
[HH: MM]. The lettex_ "H" and "M"
will appear to indicate that the time is in
hom_ and minutes. (It one or nlore
hom_ was set, the screen will not start to
show the time cotmting down tmtil one
minute has passed.)
If the set time or the remaining time is
less than one hem; the screen will show
minutes and seconds [MM : SS]. The
lette_ "M" and "S" will appear to indicate
that the time is in minutes and seconds.
[7_ XAhen the timer reaches .'0(7,
tile control will beep 3 times
folh_wed by one beep exer)
6 seconds until KITCHEN TIMER
is touched.
The tone can be canceled by fi_llowing
the steps in tile Options-Settingssecfi(m
trader Sound/Volume.
TocanceltheKITCHENTIMER(s),touch
PUSHTOCANCELTIMER.
Toreset the KITCHEN TIMER(s),
touch PUSH TO CANCEL TIMER and set
a new til//e.
Control Lockout
Yourcontrol will allow you to lock out the touch
pads so theycannot be activated when touched
NOTE: On doubleovenmode& this activates the
feature for both ovens.
To lock/tmlock the controls:
[] Touch the CLEAR/OFFpad for
3 seconds, until the screen shows
CONTROLLOCKEDOUT
[] To tmhx'k the control, touch the
CLEAR/OFFpad fb_ 3 seconds, tmtil
the home screen appea_.
When this teatm'e is (m and the touch
pads are touched, the control will beep
and the display will show CONTROL
LOCKEDOUT.
NOTES:
;;Ji::Thecontrollockoutmodeaffectsafl controls
exceptfor theCLEAR/OFFpacLNoother
touchpad wi/lworkwhenthisfeatureis
activate_
!;> Theadjustment will be retained in memory
after a power faiiure.
21
Usingthe Self-Cleaning Oven
The oven door must be closed and aft controls must be set correctly for the cycle to work properly.
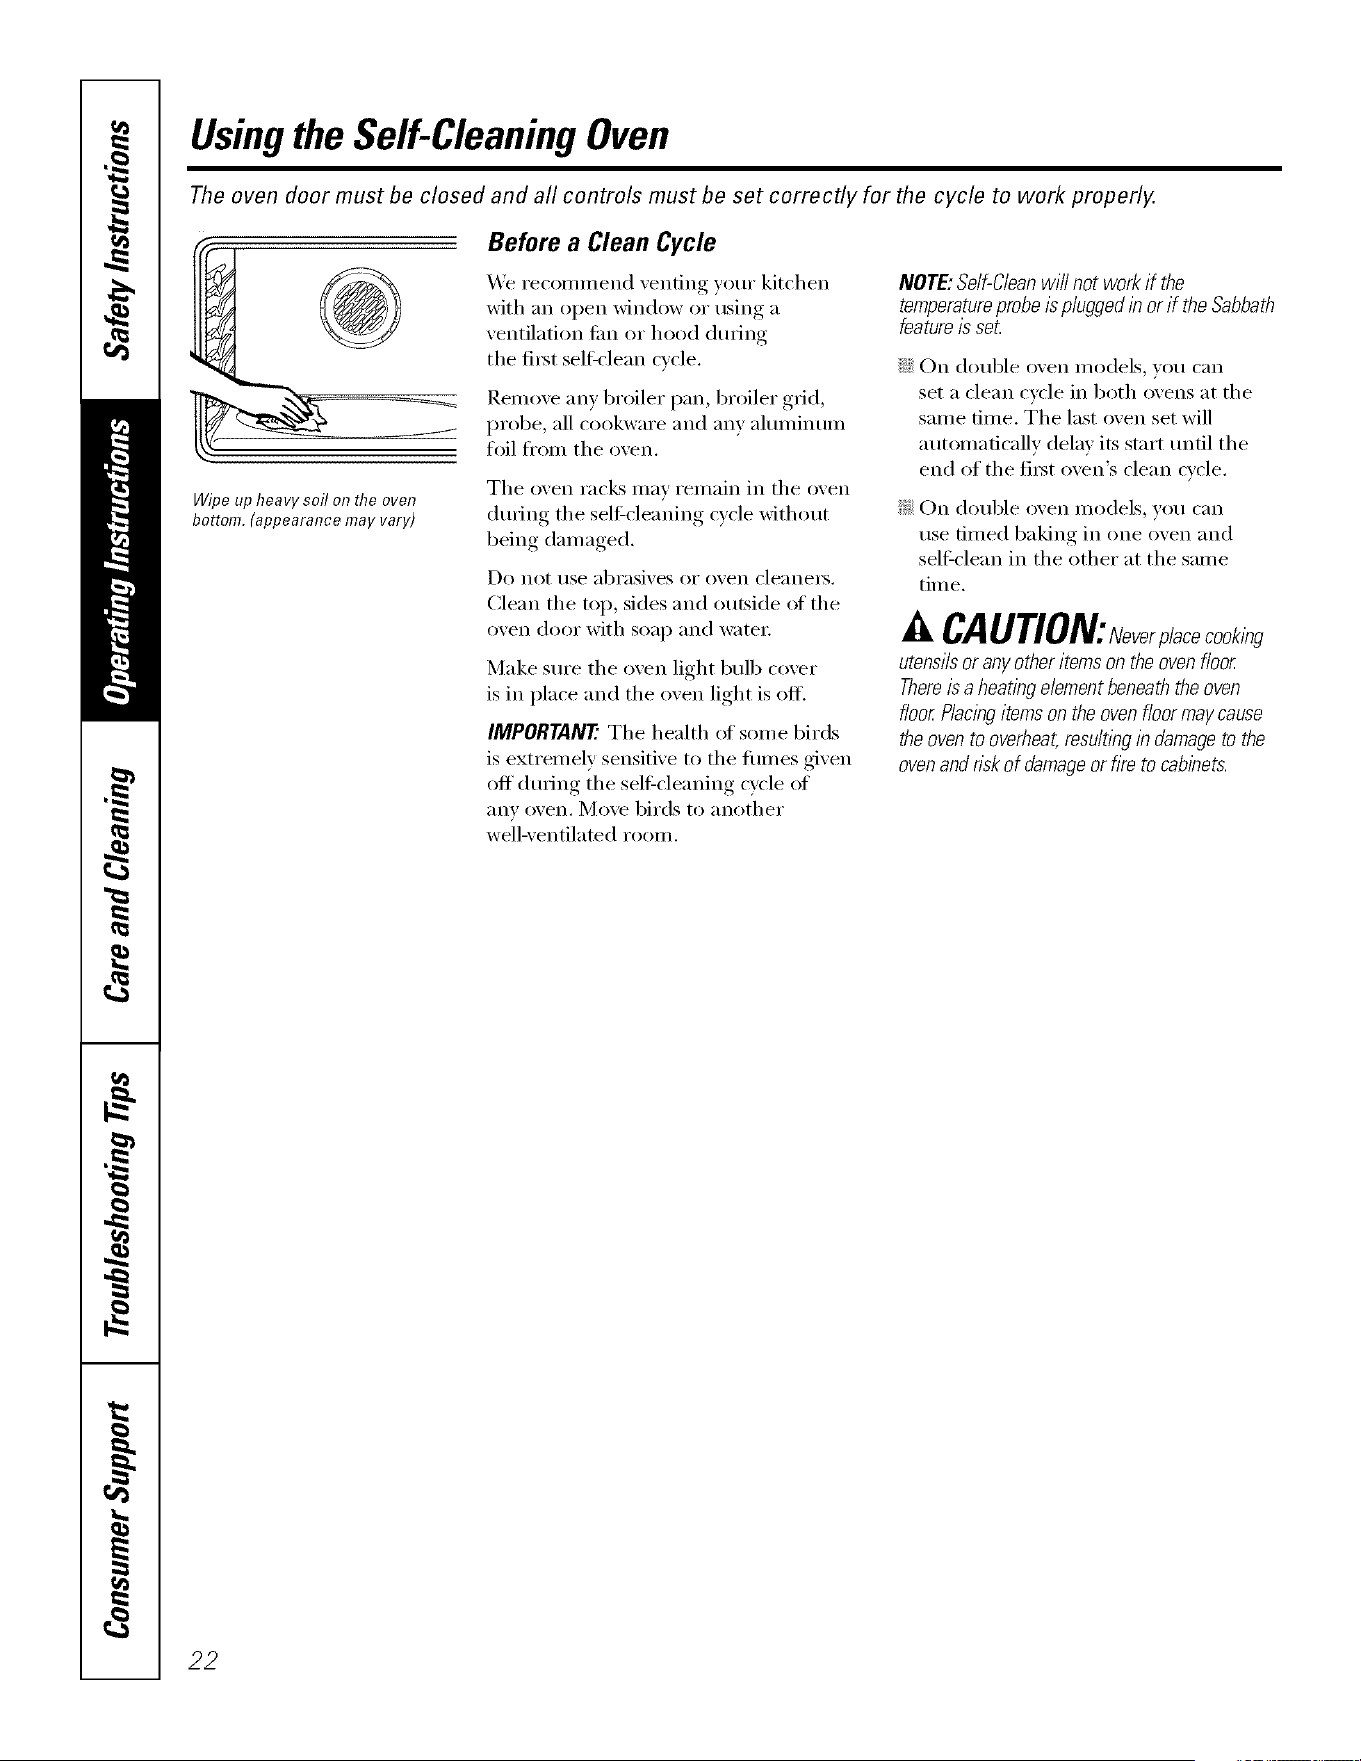
Wipe up heavy soil o17the oven
bottom.(appearancemayvary)
Before a Clean Cycle
We recommend venting your kitchen
with an open window or using a
ventilation tim or hood dm_ing
tile fi_st sell:clean cycle.
Remove any broiler pan, broiler grid,
probe, all cookware and anv ahmfinum
flfil fl'om tile oven.
Tile oven i';ic](s Ill}IV i'ei//ain ii1 tile oven
(hwing tile sell:cleaning cycle without
being damaged.
Do not/lse abrasives or ()veil cleanei's.
Clean tile top, sides and outside of tile
oven door with soap and water:
Make sure tile oven light bulb cover
is in place and tile oven light is off.
IMPORTANT'. Tile health _ff some birds
is extremely sensitive to tile fimms given
off during tile sel6cleaning cycle ot
}lily oven. Move birds to another
well-ventilated room.
NOTE:Self-Cleanwi//not workif the
temperatureprobe/spluggedin orif theSabbath
featureis seL
::Ji::On double oven models, you can
set a clean cycle in both ovens at tile
same time. Tile last oven set will
automatically delay its start tmtil tile
end of tile fi_st oven's clean cycle.
_: On double oven models, you can
rise timed baking in one oven and
sell:clean in tile other at tile same
time,
CAUTION:Neverplacecook,bg
utensilsor any other items on the oven floor
Thereis a heating element beneath the oven
floor Placingitems on the ovenfloor may cause
the oven to overheat,resu/tlbg in damage to the
ovenand nsk of damage or fire to cablhets.
22
On double oven models omy.
r-qDDE r-q
r-qDD[ r-q
(Numbers will only be used when
setting a CUSTOM clean time.)
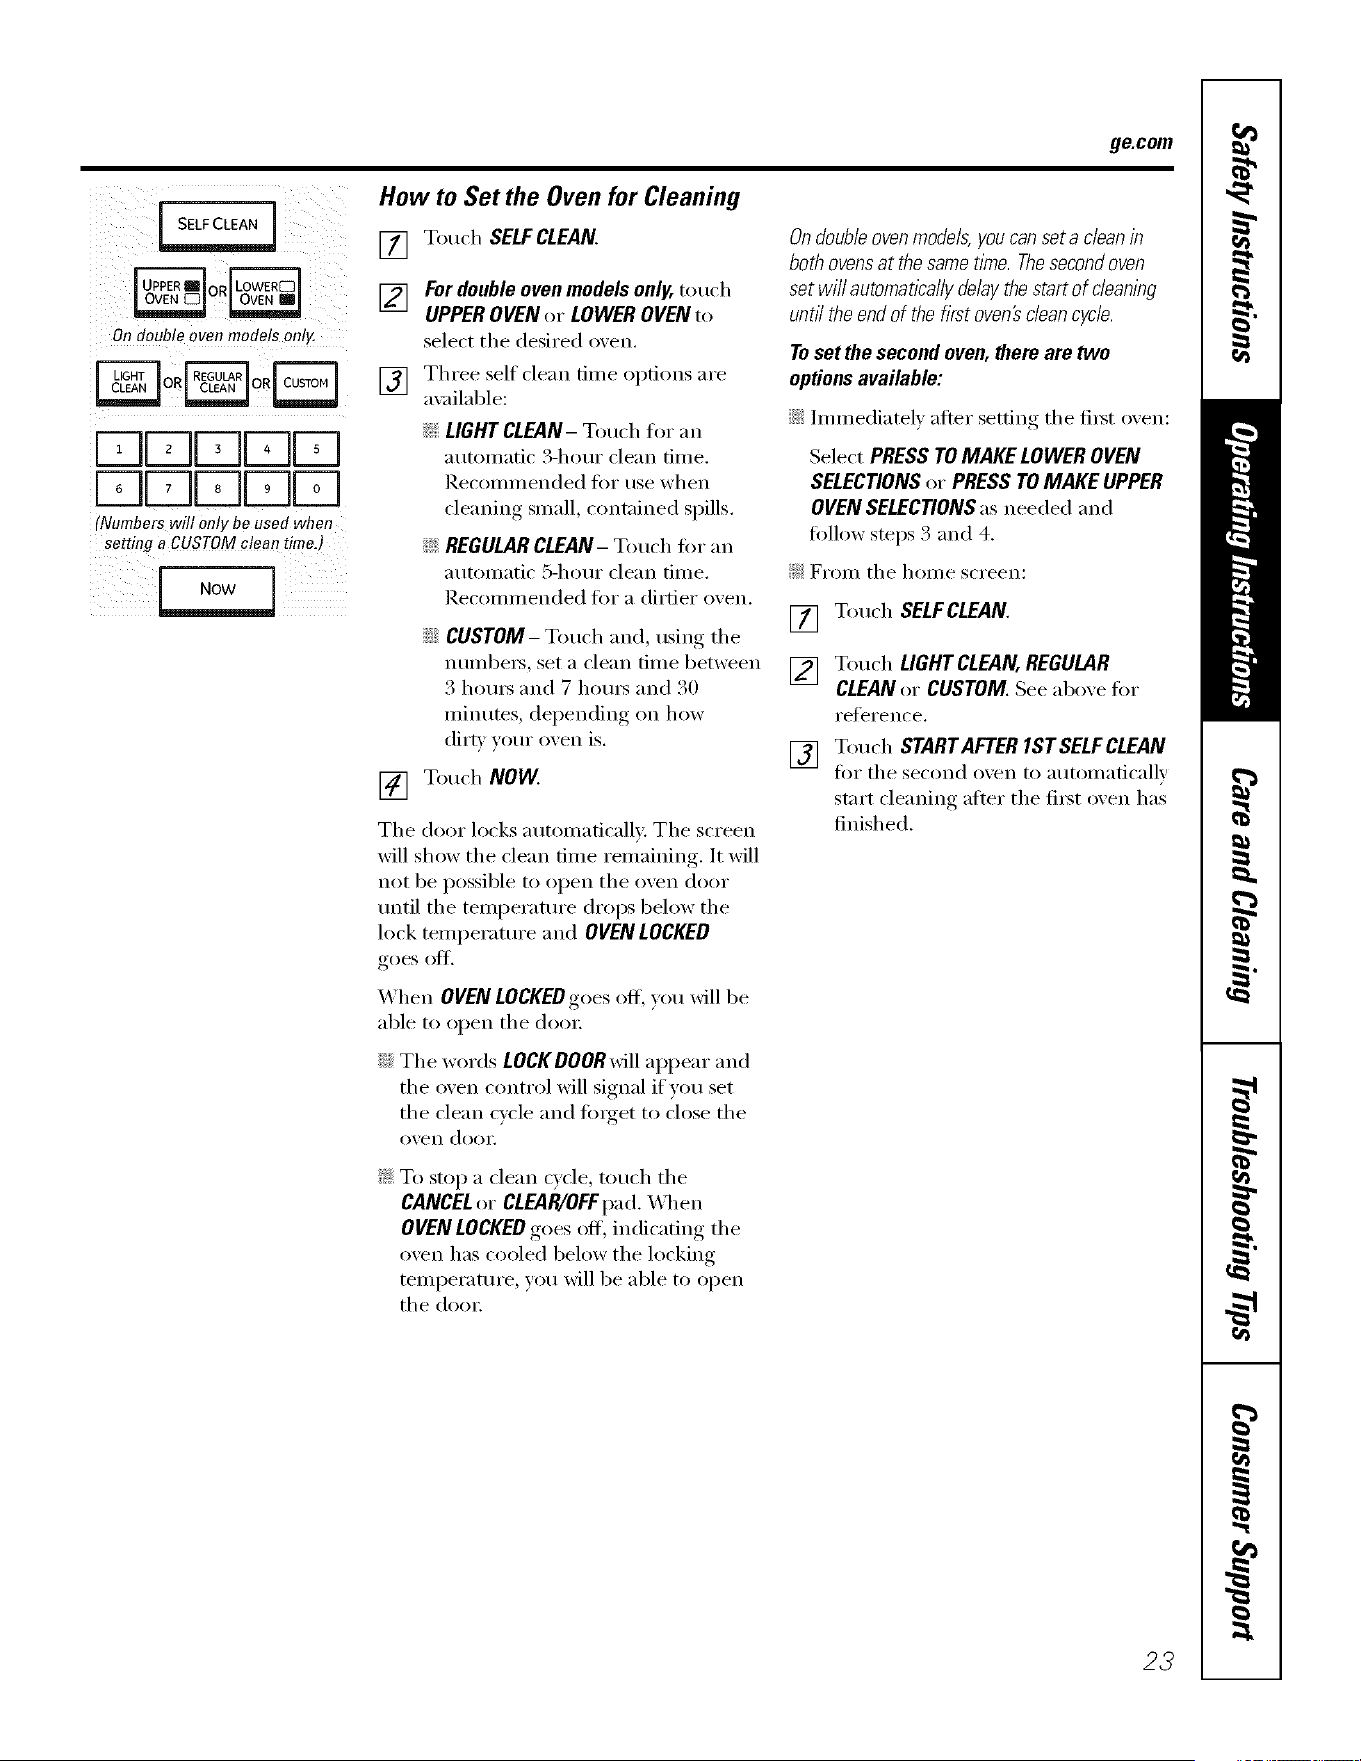
How to Set the Oven for Cleaning
[] Touch SELFCLEAN.
[_] For double oven models only, touch
UPPEROVENor LOWEROVENto
select the desired oven.
[] Three self clean fin/e °I)fi°ns are
a\_filable:
_!i_LIGHTCLEAN- Touch fin" an
automatic 3-hour clean time.
]?.econlinended tor use when
cleaning small, contained spills.
_: REGULAR CLEAN- Touch fin" an
automatic 5-hour clean time.
Recommended fin" a dirtier oven.
::Ji::CUSTOM- Touch and, using tile
numbex_, set a clean time between
3 horns and 7 horns and 30
ininutes, del)ending on how
dirty vour oven is.
[] Touch NOW
Tile door locks automatically: Tile screen
will show the clean time remaining. It will
not be possible to open tile oven door
tmtil tile temperatm'e drops below tile
lock temperature and OVEN LOCKED
goes off.
When OVEN LOCKEOgoes off',you will be
able to open tile (loo_:
_Ji::Tile words LOCKDOORwill appear and
tile oven control will signal if you set
the clean cycle and finget to close the
oven dool;
_: To stop a clean Q'cle, touch tile
CANCELor CLEAPdOFFpad.\,_l/en
OVEN LOCKED goes off, indicating the
oven has cooled below tile locking
temperature, you will be able to open
tile (loo_:
ge.com
On double oven models, you can set a dean in
both ovens at the same time. The second oven
set will automatically delay the start of c/eanlbg
until the end of the first oven# dean cyc/e.
To set the second oven, there are two
optionsavailable:
::Ji::hmnediatelv after setting tile ti_t oven:
Select PRESSTOMAKELOWEROVEN
SELECTIONSor PRESSTOMAKEUPPER
OVENSELECTIONSas needed and
fi>lh>wsteps 3 and 4.
_: From tile h(>me screen:
[] Touch SELFCLEAN.
1_] Touch LIGHTCLEAN,REGULAR
CLEANor CUSTOMSee aboxe lot
reference.
J_] Touch STARTAFTERIST SELFCLEAN
fi)r tile second oven to atltOi//aticallv
start cleaning alier tile fi_t oven has
finished.
23
Usingthe Self-Cleaning Oven
The oven door must be closed and all controls must be set correctly for the cycle to work properly.
ii%)
Ondoubleovenmodelsonly.
oR oRFTq
DDDDFq
DDDDFq
(Numberswit! onlybeusedwhen
setting a CUSTOMcleontime.)
DDDFqFq
DDDr-qD
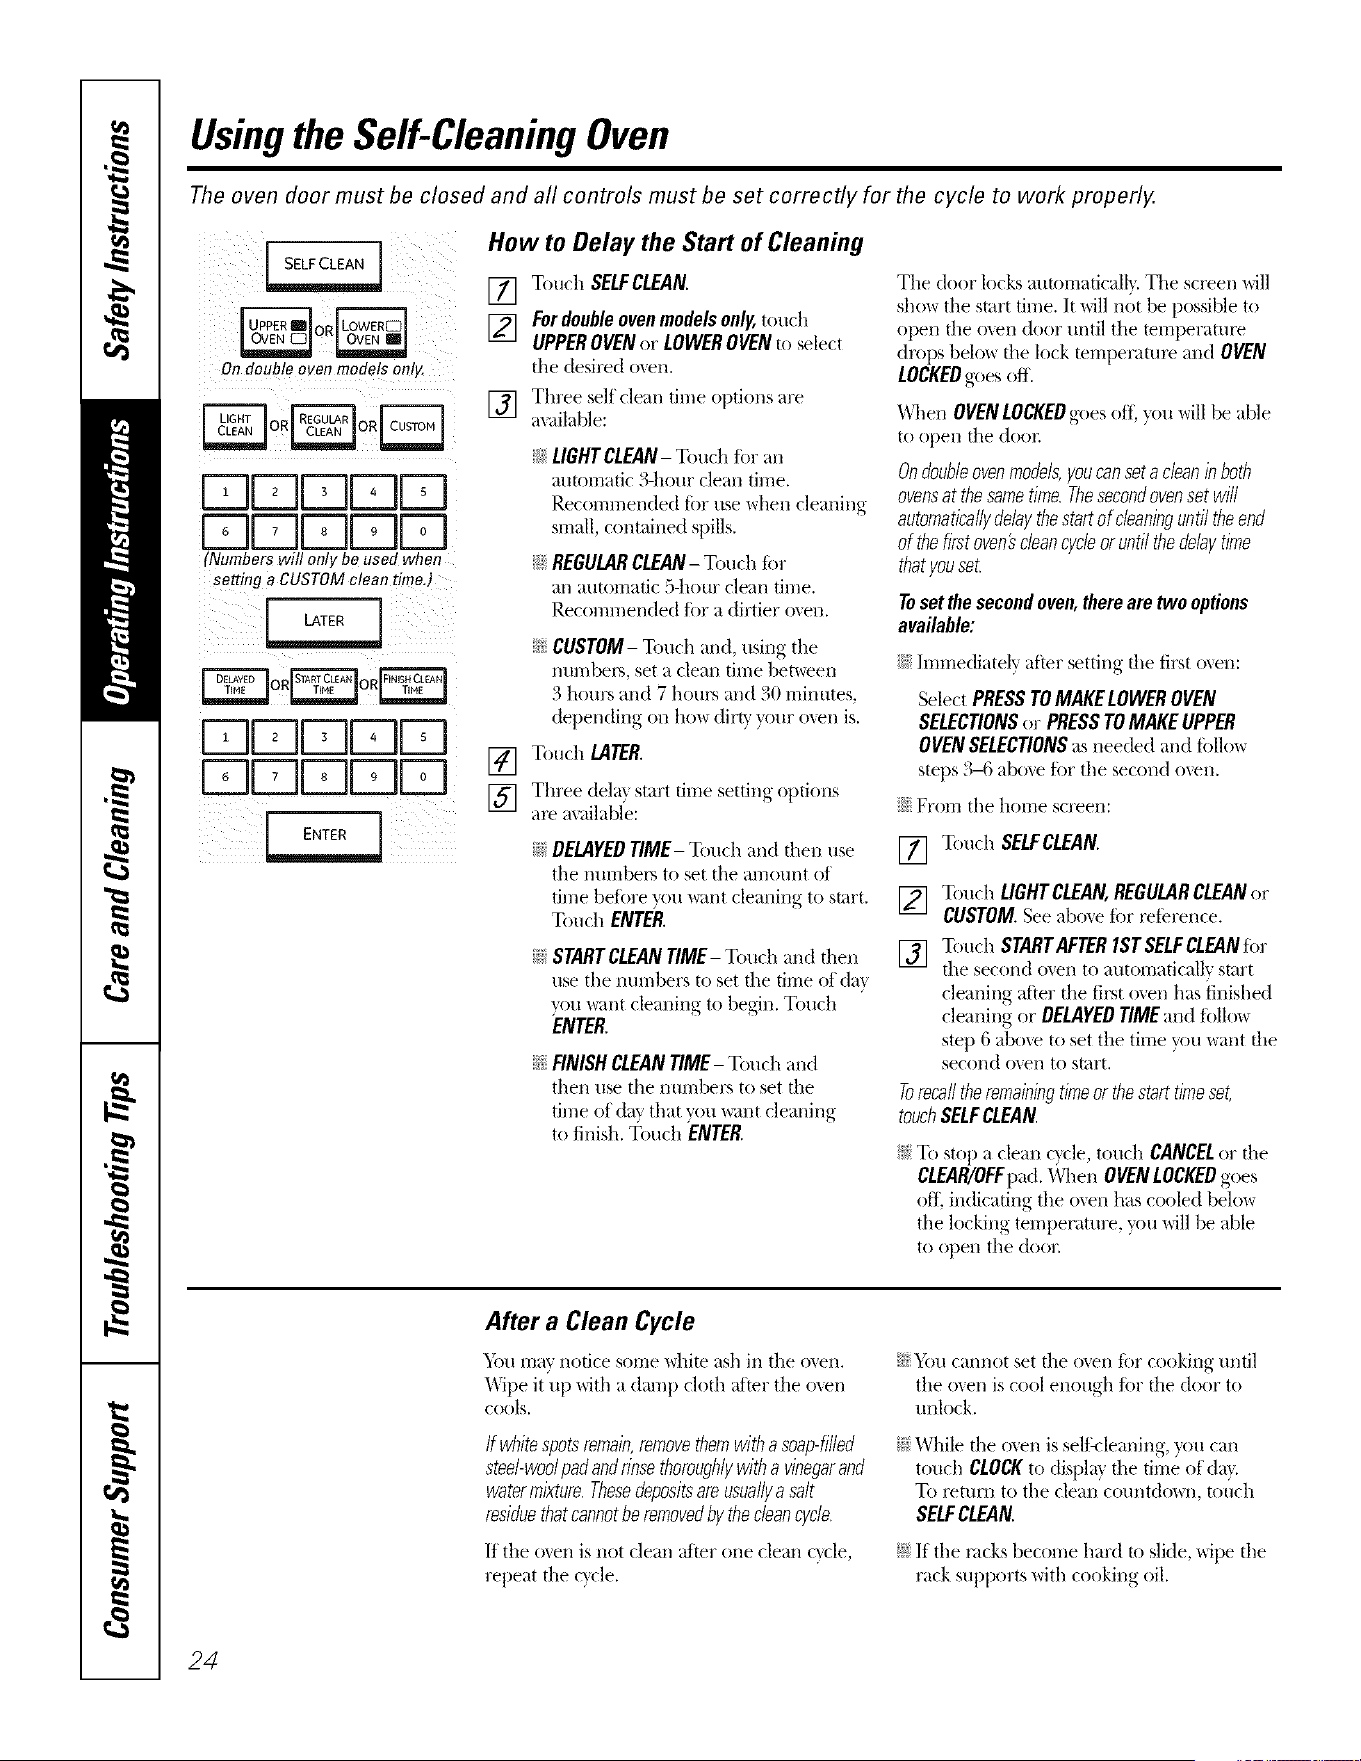
How to Delay the Start of Cleaning
[] Touch SELFCLEAN.
[_] Fordoubleovenmodelsonly,touch
UPPEROVENor LOWEROVENto select
the desired o_en.
[] Three self clean time options are
a_dlable:
14_LIGHTCLEAN-Touch fi)r an
ram)marie 3-bout clean time.
Recommended for use when cleaning
small, contained spills.
14_REGULARCLEAN- Touch iin"
an automatic 5-]*our clean time.
Recommended for a dirtier o_en.
% CUSTOM- Touch and, using tile
nmnbex% set a clean time bet\_een
3 hours and 7 hours and 30 minutes,
depending on how dim' pUT o_en is.
[] Touch LATER.
] Three delta start time setting o )dons
are axailabl'e: ' t "
_} DELAYEDTIME- Touch and flleIl use
the nmnbex_ to set the amount of
time befbre mu _m/t cleaning to start.
Touch ENTER.
__}STARTCLEANTIME-Touch and fllen
use the numbers to set die time of din
mu _mt cleaning to begin. Touch
ENTER.
% FINISHCLEANTIME- Touch and
then use the mnnbel\_ to set file
time of day that you _mt cleaning
to finish. Touch ENTER.
Tile door locks automaficalh. The screen will
show the start time. It will n_t be possible to
open file o_en door until tile temperaml_
drops belo_ the lock wmperatm_ and OVEN
LOCKEDgoes off.
"q]mn OVENLOCKEDgoes off}pu will be aNe
to open file dora:
Ondoubleovenmodels,youcanseta cleaninboth
ovensat thesametime.Thesecondovenset will
automaticallydelay thestartof cleaninguntil theend
of thefirst oven5cleancycleor untilthe delaytime
thatyouset.
Tosetthesecondoven,therearetwooptions
available:
i£:Immediately after setting tim first oven:
Select PRESSTOMAKELOWEROVEN
SELECTIONSor PRESSTOMAKEUPPER
OVENSELECTIONSasneeded and fbllo_
steps 34; abo_e for the second o\en.
i£:From the home screen:
[] Touch SELFCLEAN.
[] Touch LIGHTCLEAN,REGULARCLEANor
CUSTOM.See aboxe tor reterence.
[_] Touch SraRTAFTERISrSELFCL mz,r
the second oven to automatically start
cleaning after the tirst oven has }inished
cleaning or DELAYEDTIMEand ibllo_
step 6 above to set tile time you want the
second o_en to start.
Torecallthe remainingtimeor thestart timeset,
touchSELFCLEAN.
}i:}To stop a clean c}cle, touch CANCELor die
CLEAR/OFFpad. When OVEN LOCKEDgoes
off. indicating the o\en has cooled belo_
the locking temperature, you will be able
to open the dooc
After a Clean Cycle
"_bu may notice some white ash in the oven.
it"up x@h a damp cloth after tile
_ASpe
oxei/
COOLS.
ff whitespoa remain,removethemwitha soap-filled
steel-woolpadandrinsethoroughlywitha vinegarand
watermixture.Thesedepositsare,usual/ya salt
residuethatcannotberemovedby thecleancycle.
If"tile oxen is not clean _ff'terone clean Qcle,
repeat the cxcle.
% }i)u cannot set the oven fi,r cooking until
the o'_en is cool enough for tile door to
mdock.
_}}While tim o_en is seltk-leaning, pu can
touch CLOCKto displa} the time of dat.
To l>turn to the clean countdown, touch
SELFCLEAN.
_}}If the racks become hard to slide, xqpe the
rack supports with cooking oil.
24
Option-Proof ge.com
L
i_ii_ii_i)_!ii_ __i_i_i_iiii_!i_I
i_i_i__)i_ii_ _i_ii;(;!!__
[- KITCHEN
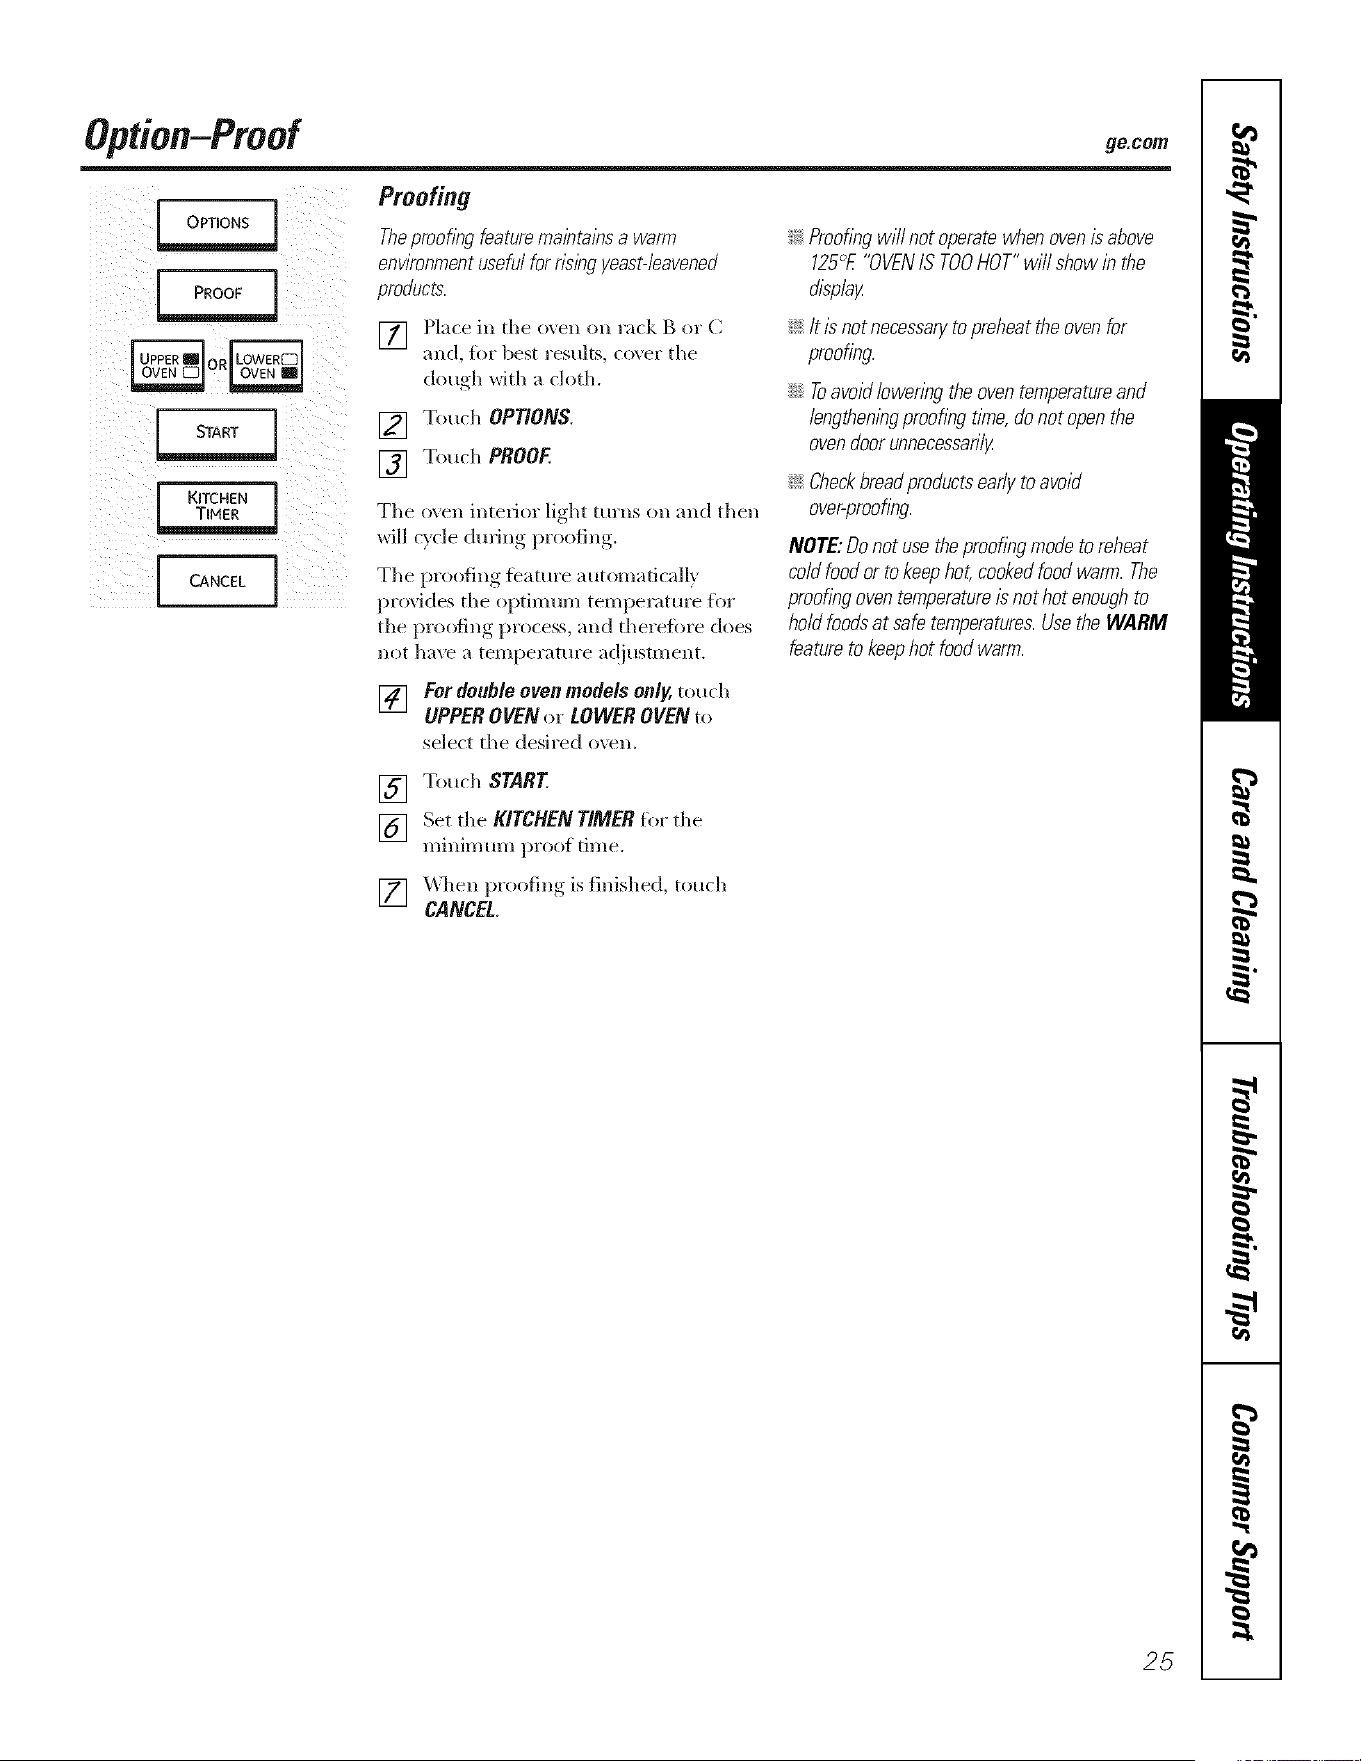
Proofing
Theproofingfeaturemaintainsa warm
env/?onmentusefolforr/singyeast-leavened
prodocts.
[] Place in the oxen ,:m rack B or (]
and, ior best results, coxer the
dough with a ch_th.
[] Touch OPTIONS.
[] Touch PROOF.
The ()Vellinterior light turns ,'mand then
will cxcle_ dining, })reefing,.
The proofing/batm'e automatically
pro',rides the optimum temperature flw
the proofing process, and therefiwe does
not ha\v a temperature ac!iustment.
[] For double oven models only, touch
UPPER OVEN or LOWER OVEN to
select the desired o',vn.
_ Proofingwill not operatewhenovenb above
125°E"OVENIS TOOHOT"will showin the
display
_: Itis notnecessarytopreheattheovenfor
proofing.
;;Ji::Toavoid/oweringtheoventemperatureand
lengtheningproofingtlYne,donot openthe
ovendoorunnecessari/y
_ Checkbreadproductsear/ytoavoid
over-proofing.
NOTE:Donotusetheproofingmodetoreheat
coldfoodorto keephot, cookedfoodwarm.The
proofingoventemperatureis nothot enoughto
holdfoodsat safetemperatures.UsetheWARM
featureto keephot foodwarm.
[] Touch START
[] Set the MTCHENTIMERfor the
minimum proof time.
[] \_q_en proofing is finished, touch
CANCEL.
25
Option-Warm
OPTIONS 1
On double oven models only.
o. 0¢
OR
START 1
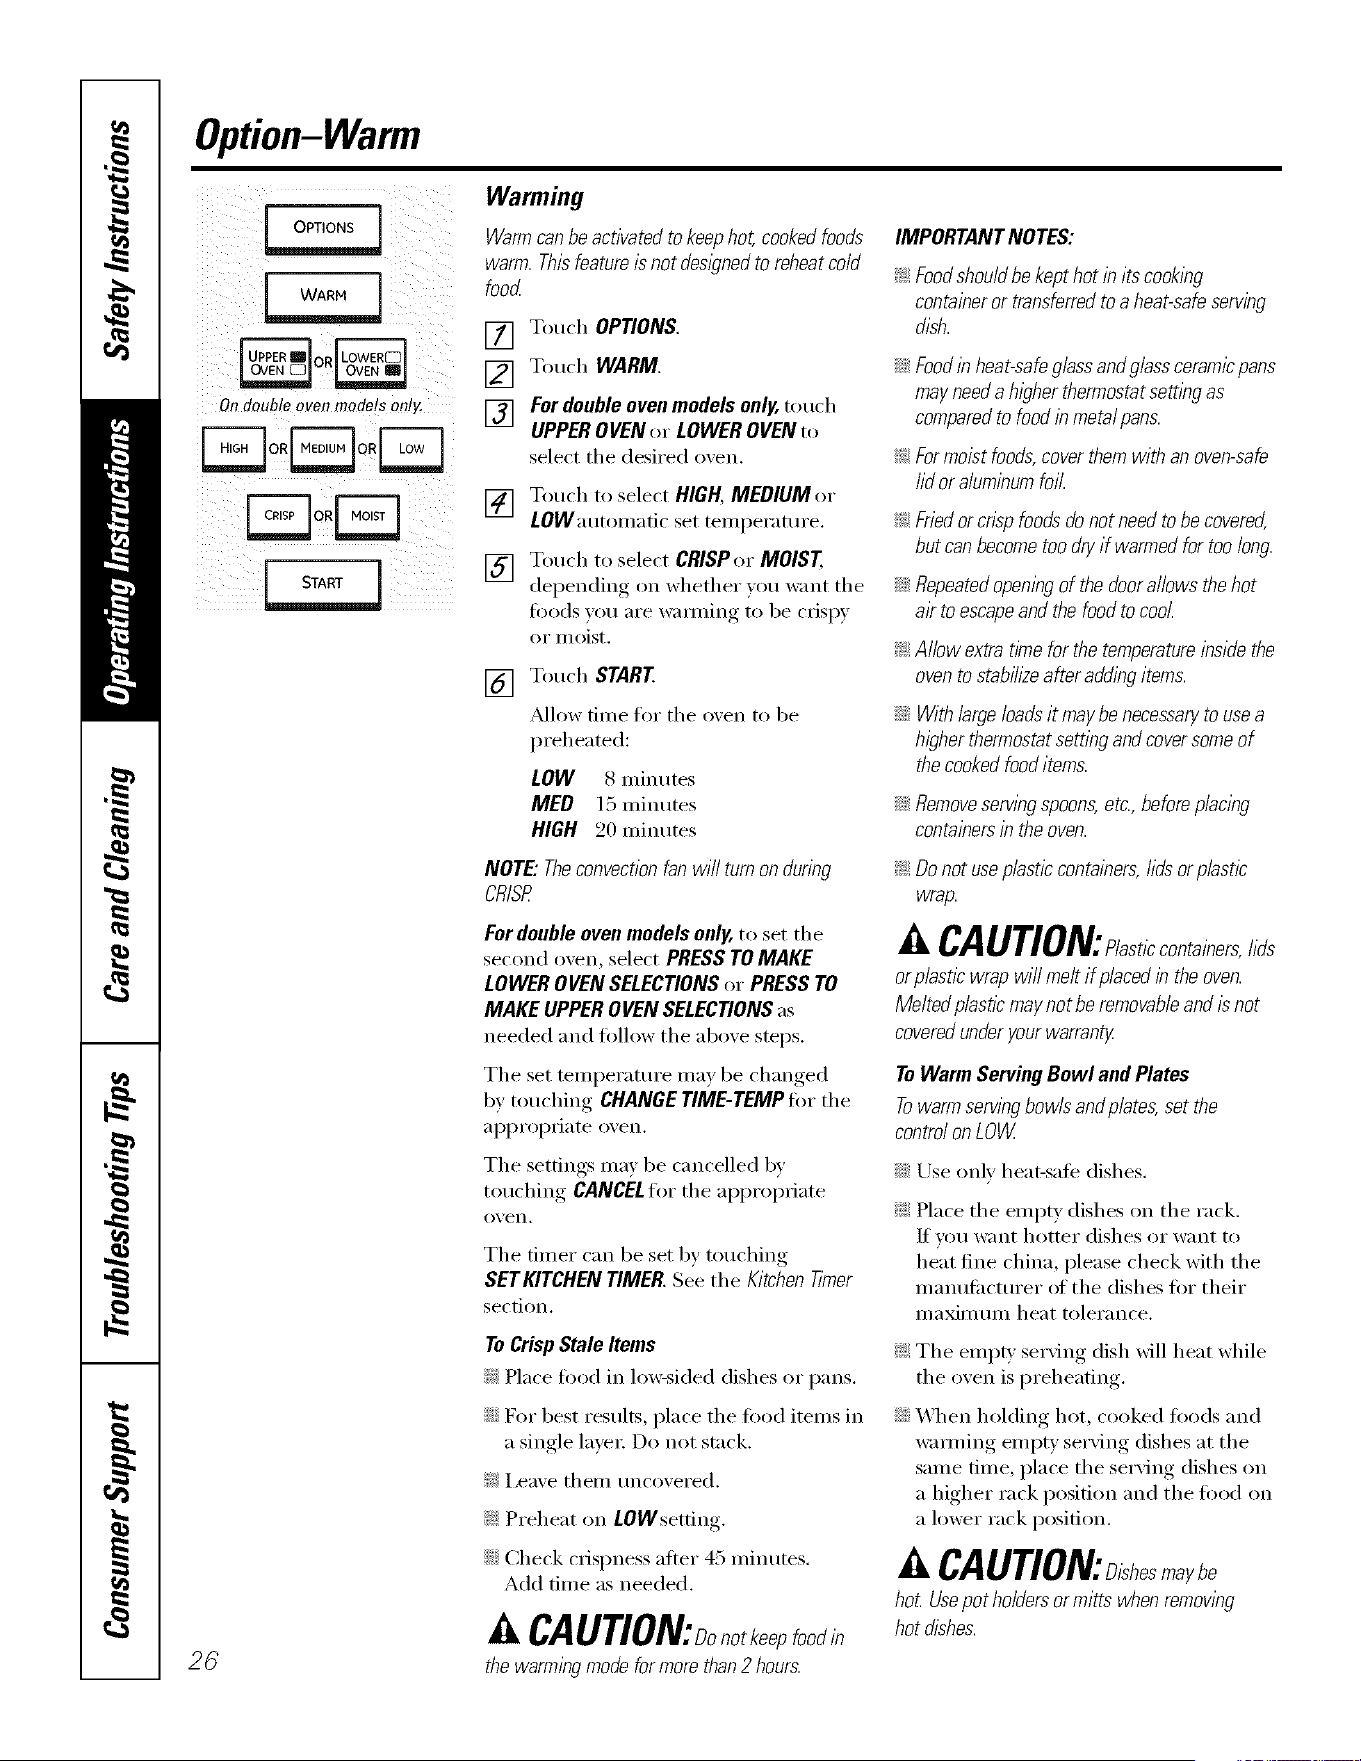
Warming
Warmcanbe activatedtokeephot,cookedfoods
warm.Thisfeatureisnot designedto reheatcold
food
[] Touch OPTIONS.
[] Touch WARM.
[] Fordoubleovenmodelsonly,touch
UPPEROVENor LOWEROVENto
select the desired o',en.
[_ Touch to select HIGH,MEDIUM or
ii i
LOW'autolnatic set telni)erature.
[7_] Touch to select CRISPor MOIST
del)ending, on whether _ou want the
foods you are wai_ning to be crispy
or illoist.
[]
Touch START
Mlow finIe for the oven to be
i)reheated:
LOW 8 ininutes
MED 15 ininutes
HIGH 20 ininutes
IMPORTANTNOTES:
!i>Foodshouldbe kepthotin itscooking
containeror transferredtoaheat-safeserving
dish.
;;Ji::Foodinheat-safeglassandglassceramicpans
mayneeda higherthermostatsettingas
comparedto foodinmetalpans.
_ Formoistfoods,coverthemwithanoven-safe
lid oraluminumfoil.
_ Friedor crispfoodsdonotneedtobe covered,
butcanbecometoodryif warmedfor toolong.
;;Ji::Repeatedopeningof thedoorallowsthehot
ak toescapeand thefoodto cool.
_ Allow extratimeforthetemperatureinsidethe
ovento stabih2eafteraddingitems.
;;Ji::Withlargeloadsit maybenecessaryto usea
higherthermostatsettingandcoversomeof
thecookedfooditems.
iJi::Removeservingspoons, etc., before placing
containers in the oven.
26
NOTE"Theconvectionfanwill turnonduring
CRISP.
Fordouble oven models only, to set the
second ()veil, select PRESS TOMAKE
LOWEROVENSELECTIONSor PRESSTO
MAKEUPPEROVENSELECTIONSas
needed and follow the above steps.
The set teini)erature inav be changed
by touching CHANGETIME-TEMPfor the
ai)i)ropiiate oven.
The settings inay be cancelled by
touching CANCELtor the al)l)ropiiate
()veil.
The tiiner can be set by touching
SET KITCHEN TIMER. See the Kitchen Timer
section.
To Crisp Stale Items
_: Place fi)od in lo_sided dishes or pans.
::Ji::For best results, place the ti)od itenIs in
a single laveI: Do not stack.
}_'_i,eave theIn uncovered.
!;?:Preheat on LOWsetdng.
iJi::Check ciispness after 45 niinutes.
Add dine as needed.
A CAUtiON:Donotkeepfoodin
thewarmingmodeformorethan2hours.
!;>Donotuseplasticcontainers,lidsorplastic
wrap.
A CAUtiON: last,ccontainers,lids
orplastlcwrapwill meltif placedin theoven.
Meltedplastic,maynotberemovabfeandisnot
coveredunderyourwarranty
ToWarmServingBowl andPlates
Towarmservingbowlsandplates,setthe
controlonLOW
iJi::Use only heat-sale dishes.
_: Place the eInpty dishes on the rack.
If w)u want hotter dishes or want to
heat fine china, please check with the
nianufi_cturer ot the dishes fi)r their
IlI}lXil/ltlIll heat tolerance.
_: The einpty serving dish will heat while
the ()veil is i)reheating.
::Ji::_A]/en holding hot, cooked foods and
w:mning einpty serving dishes at the
saine tiine, place the serving dishes on
a higher rack position and the fi)od oil
a lower rack position.
A CAUtiON:Dishesmaybe
hoLUsepot ho/dersormitts whenremowng
hotdishes.
ge.com
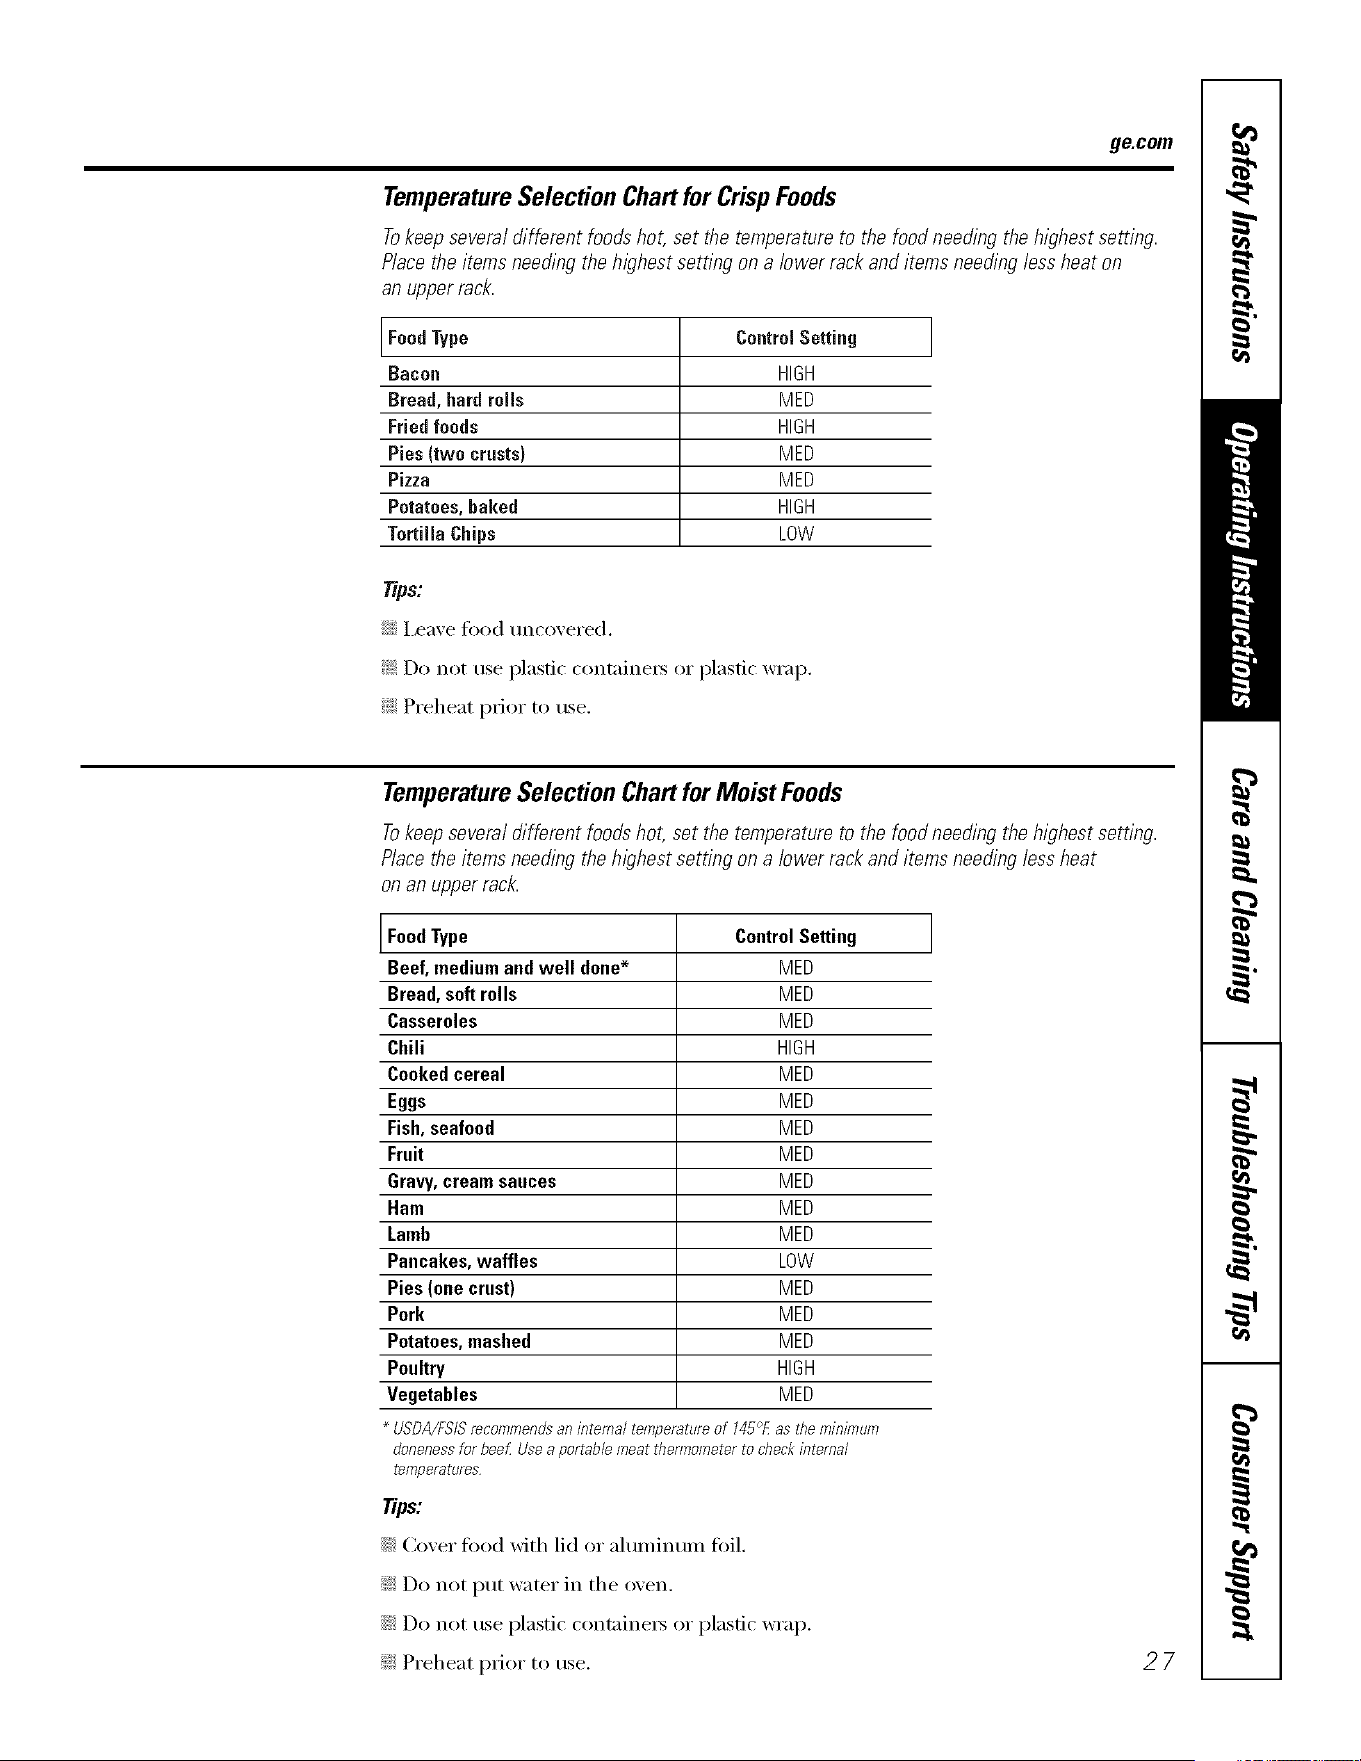
TemperatureSelection Chart for CrispFoods
Tokeep several different foods hot, set the temperature to the food needing the highest setting.
Place the items needing the highest setting on a lower rack and items needing less heat on
an upper rack.
FoodType
Bacon
Bread, hard roils
Friedfoods
Pies (two crusts)
Pizza
Potatoes,baked
Tortilla Chips
ControlSetting ]
HIGH
MED
HIGH
MED
MED
HIGH
LOW
Tip s.'
::Ji::I,eave fi_od uncovered.
!_,2Do not use plastic containet_ or plastic wrap.
_: Preheat prior to rise.
TemperatureSelection Chartfor Moist Foods
Tokeep several different foods hot, set the temperature to the food needing the highest setting.
Place the items needing the highest setting on a lower rack and items needing less heat
on an upper rac/_
FoodType
Beef, mediumand well done*
Bread, soft rolls
Casseroles
Chili
Cookedcereal
Eggs
Fish,seafood
Fruit
Gravy,cream sauces
Ham
Lamb
Pancakes,waffles
Pies (one crust)
Pork
Potatoes,mashed
Poultry
Vegetables
ControlSetting ]
MED
MED
MED
HIGH
MED
MED
MED
MED
MED
MED
MED
LOW
MED
MED
MED
HIGH
MED
* USDA/FSISrecommendsaninternaltemperatareof 145°Eastheminimum
alonenessforbeefUsea portable meatthenrlometertocheckinternal
temperatares
Tips:
::Ji::Cover fi_od with lid or aluminum foil.
_: Do not put water in the oven.
::_i::Do not tlse plastic containers or plastic wrap.
_: Preheat prior to use.
27
Option-Two Temps
I OPTIONS ]
I two ]
[ -rE,Ps!
On goubto ovon modols omg.
VNVNF1uqFq
DDDDD
VNDD_]D
DD[_DD
0R[ "ULT,-RACKI
FqF-NU-IEZ]K-I
FqFqEZ]U]EZ]
FTIFTIFTlrT1EZ]
F-qFqDDD¸
PRE-HEATED ] J COLD ]
START /OR_
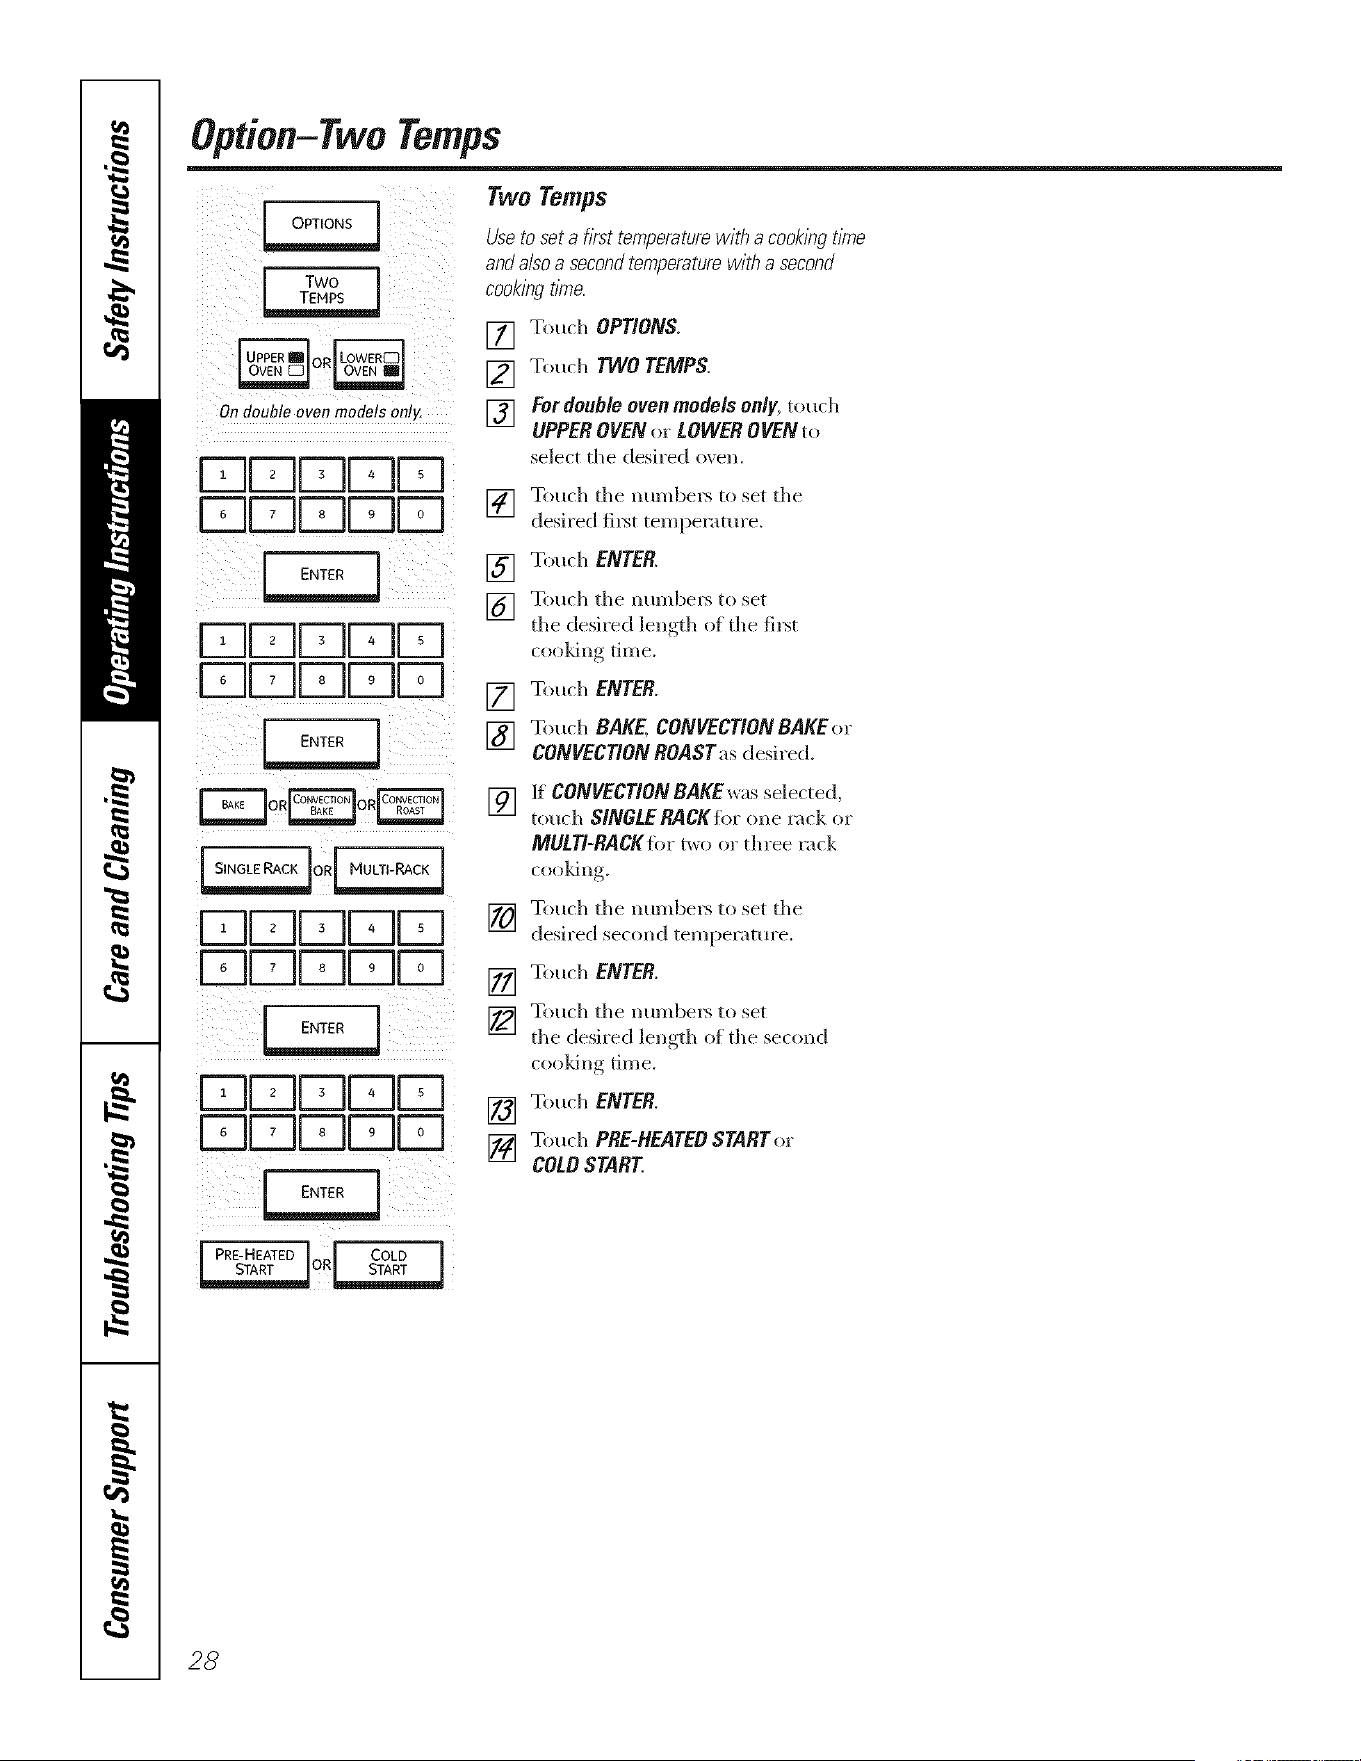
Two Temps
Usetoseta firsttemperaturewith a cookingt/riTe
andalsoa secondtemperaturewitha second
cooking tlnTe.
[] Touch OPTIONS.
[] Touch TWOTEMPS.
[] Fordonb/eovenmodelson/y,touch
UPPEROVENo_.LOWEROVENto
select tile desired oven.
] Touch tile numbers to set tile
desil'ed fil>t temperatm'e.
[] Touch ENTER.
] Touch tile numbers to set
tile desired length of tile fi_t
cooldng tim e.
[] Touch ENTER.
[] Touch BAKE, CONVECtiON BAKE or
CONVECTION ROAST as desil'ed.
[] ]f CONVECTlON BAKEwas selected,
touch SINGLE RACKfiw one rack ox"
MULTI-RACKfi_rtwo or tln'ee rack
cooJdng.
] Touch tile numbers to set tile
desired second temperature.
[] Touch ENTER.
] Touch the numbex_ to set
the desh'ed length o_ the second
cooldng time.
[] Touch ENTER.
II_ Touch PRE-HEATEO START o_"
COLDSTART.
28
Options-Cook& Hold and Dehydrate ge.om
Cook and Hold
Yourcontrolhasa cookandhold featurethat
keepscookedfoodswarmforupto 3 hoursafter
timedBakingor timedRoastingis hbL_hed
NOTE:ThL_featurecanonlybeprogrammedto
workwith timedBakingor tinnedRoasting.(See
the Usingthe tt_nedbaklbgortlmedroastlbg
featuressection.)After TimedBakingor tinned
Roastinghasautomaticallystoppedandthe
MORETIMEoptionends,theprogrammedcook
andholdwill automaticallystarL
There are two wa_:s to activate this feature
lot use alier Timed Baking or Timed
Roasting:
_: Aftersetting a TimedBakeor Timed
Roast:
[]
[]
Touch ADDBAKEOPTION,ADD
CONVBAKEOPTIONor ADD ROAST
OPTIONdepending on the c()()king
i/lode x/oil aI'e settin ,
Touch COOK& HOLD.
[] Touch OK.
I_l Touch PRE-HEATEDSTARTor
iii
COLDSTART
!i>Set using OPTIONS:
[] Touch OPTIONS.
[] Touch COOK&HOLD.
[] For double oxen models only, touch
UPPEROVENor LOWEROVENto
select tile desired o',en.
[] Touch OK.
[] Touch BAKE,CONVECTIONBAKE,
CONVECTIONROASTor TWOTEMPS.
] Touch tile numbers to enter tile
temperature(s) and tile time(s).
[] Touch ENTER.
[] Toud/PRE-HEATEDSTARTor
COLDSTART
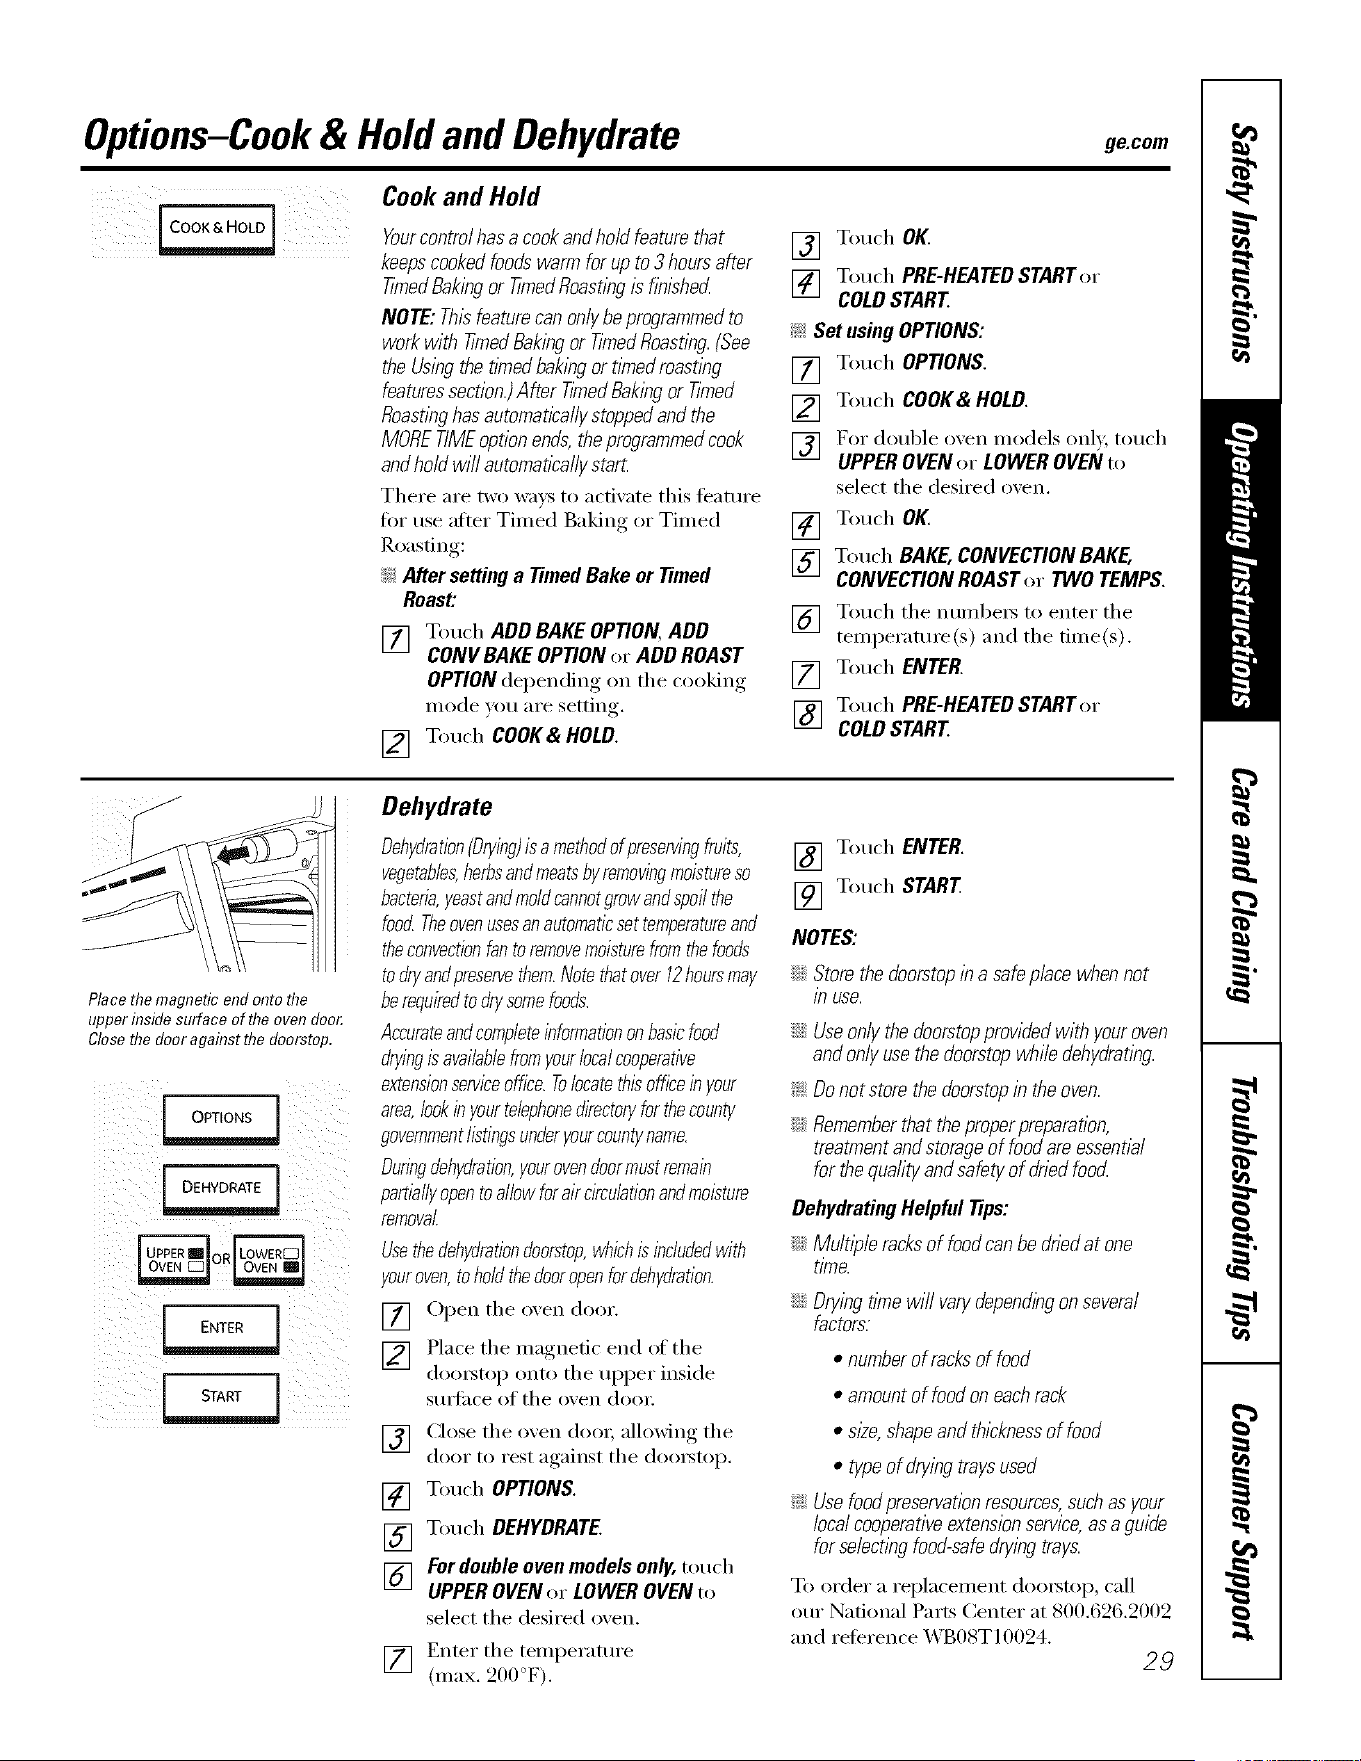
Place the magnetic end onto flTe
upper inside surface of flTe oven doo_
Close flTe door against fl}e doorstop.
!iliii
Dehydrate
Dehydration(Drying)isamethodofpreservingfruits,
vegetables,herbsandmeatsbyremovingmoistureso
bacteria,yeastandmoldcannotgrowandspoilthe
foodTheovenusesanautomaticsettemperatureand
theconvectionfantoremovemoisturefromthefoods
todryandpreservethem.Notethatover12hoursmay
berequiredtodrysomefoods.
Accurateandcompleteinformationonbasicfood
dryingisavailablefromyourlocalcooperative
extensionserviceoffice.Tolocatethbofficeinyour
area,lookin yourtelephonedirectoryforthecounty
governmentlistingsunderyourcountyname.
Duringdehydration,yourovendoormustremain
partiallyopentoallowforaircirculationandmoisture
removal.
Usethedehydrationdoorstop,whichis includedwith
youroven,toholdthedooropenfordehydration.
[] Open tile oven door.
[] Place tile magnetic end of tile
dom_top onto tile upI)er inside
S/lll'ilce of tile oxen dooi:
[] Close tile oxen do(m allowing tile
door to rest against tile doolNtop.
[] Touch OPTIONS.
[] Touch DEHYDRATE.
[] Fordoubleovenmodelsonly,touch
UPPEROVENor LOWEROVENto
select tile desired o',en.
] Enter tile temperatm'e
(max. 200°F).
[] Touch ENTER.
[] Touch START
NOTES:
_Ji::Storethedoorstopina safeplacewhennot
JR use.
;;Ji::Useonlythedoorstopprovidedwithyouroven
andon/yusethedoorstopwhiledehydrating.
_ Donotstorathedoorstopin theoven.
;;Ji::Rememberthattheproperpreparation,
treatmentandstorageof foodareessential
forthequafityandsafetyof driedfood.
DehydratingHelpfulTips:
_Ji:_Multipleracksof foodcanbe driedat one
time.
;;Ji:_Dryingtimewill van/dependingonseveral
factors.
• numberof racksof food
• amountof foodoneachrack
• size,shapeandthleknessof food
• typeof dryingtraysused
_ Usefoodpreservationresources,suchasyour
localcooperativeextensionservice,asaguide
forselectlbgfood-safedryingtrays.
To order a replacement doorstop, call
ore" National Parts Center at 800.626.2002
and reference X,\B08T10094.
29
Option-Delay Start
NOTE"Foods that spoil easily--such as milk, eggs, fish, stuffings, poultry and pork--should not be allowed to s# for
more than 1 hour before or after cooking. Room temperature promotes the growth of harmful bacteria.
J DELAY J
On double OVOn modo!s on!g
i STARTCOOK J J FINISHCOOK I
r-qrqDDD
r-qr-qrv-ID[
DDDDD
DDDDD
ENTER
FTIU-Ib:JUU
r-qFqDDU
ENTER
! PRE-HEATED [ COLD I
[ START OR_
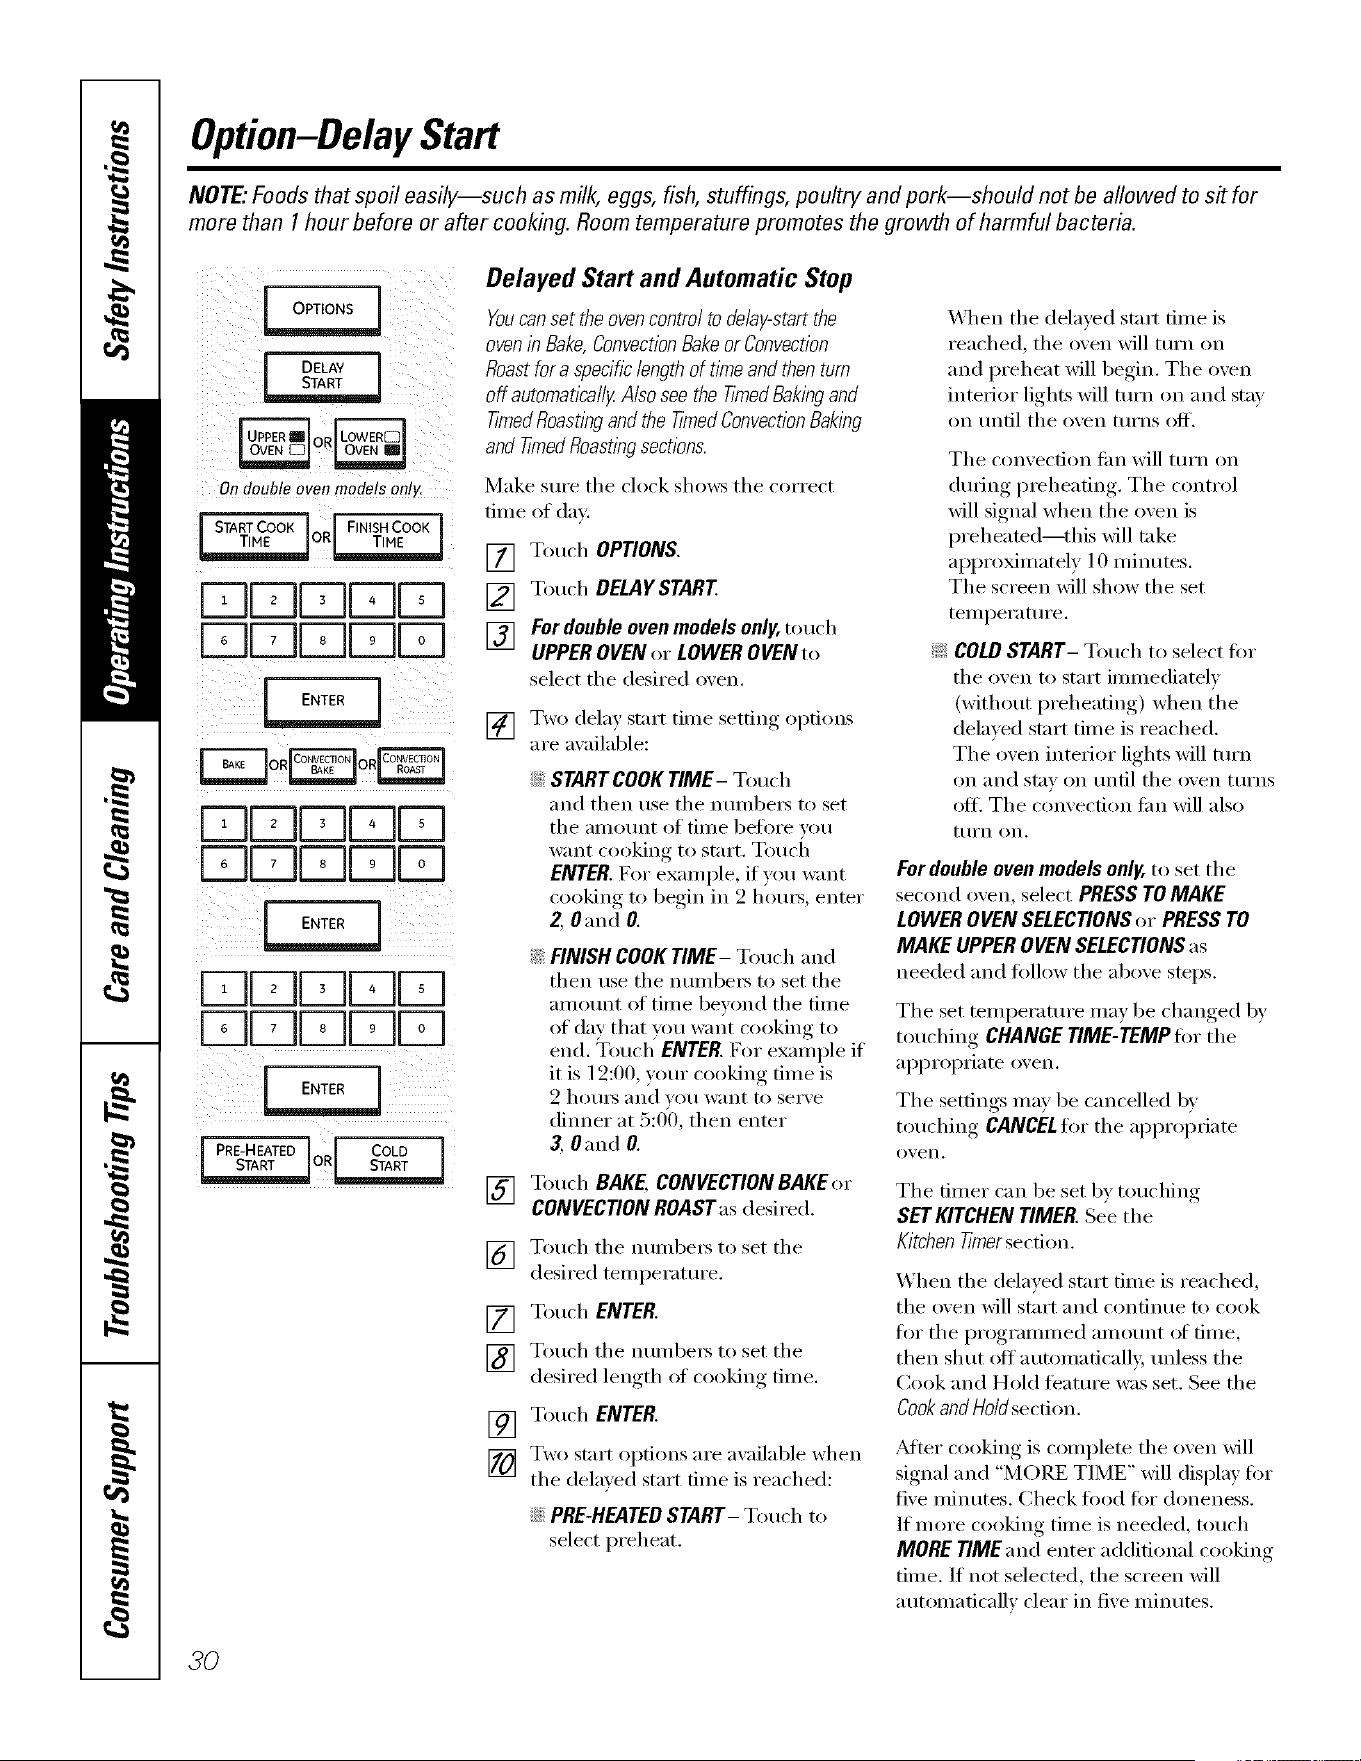
Delayed Start and Automatic Stop
Youcan set the oven control to delay-startthe
oveninBake,ConvectionBakeorConvection
Roastfora specihclengthof timeandthenturn
offautomaticallyAlsoseethe tithedBakingand
tithedRoastlhgandthe tithedConvectionBaklhg
andtimedRoastingsections.
Make sure tile cl(x'k shows tile correct
fiIne of daz
[] Touch OPTIONS.
[] Touch DELAYSTART
[] For double oven models only, touch
UPPER OVEN or LOWER OVEN to
select the desired o_,en.
] Two delay start tiIne settino options
are axailable:
[]
ij::STARTCOOKTIME- Touch
and then use the nuinbeis to set
the amount of tiIne before you
want cooking to start. Touch
ENTER. For exaInple, if you want
cookhlg to begin in 2 hours, enter
Z Oand O.
i:i FINISHCOOKTIME- Touch and
then use the nuinbei_ to set the
ainount of tinIe bevond tile tiIne
of day that you want cooking to
end. Touch ENTER. For exainple if
it is 1'2:00, your cooking dine is
2 ho/IIN _lll(l VO/l want to serve
dinner at 5:0'0, then enter
3, 0and 0.
Touch BAKE,CONVECTIONBAKEor
CONVECTIONROASTasdesired.
] Touch tile nuinbeis to set tile
desired teini)erature.
[] Touch ENTER.
] Touch tile nuinbei_ to set tile
desired length of cooking tiIne.
[] Touch ENTER.
[] Two start oI)tions are axailable when
tile delayed start dine is reached:
ij::PRE-HEATEDSTART- Touch to
select i)reheat.
_4]/eIl tile delayed stair tiine is
reached, tile oven will turn oil
and i)reheat will begin. Tile o;'en
inteiior lights will turn on and stay
on until tile oven turns off.
Tile convection tim will turn on
duiing i)reheadng. The control
will signal when the ()veil is
i)reheated--this will take
al)l)roxiniately l 0 niinutes.
The screen will show the set
teini)erature.
COLDSTART- Touch to select for
tile ()veil to start iininediatelv
(without i)reheating) when the
delayed start tinIe is reached.
Tile ()veil interior lights will turn
on and stay on tlntil tile oven ttlI'ns
oflL Tile convection tim will also
tIlI'n oil,
For double oven models only, to set tile
second ()veil, select PRESS TOMAKE
LOWEROVENSELECTIONSor PRESSTO
MAKEUPPEROVENSELECTIONSas
needed and tollow tile al)ove steps.
Tile set teinl)erature inay be changed by
touching CHANGETIME-TEMPfor tile
ai)i)ropiiate oven.
Tile settings Inay be cancelled bv
touching CANCELfortile apl)ropiiate
()veil,
Tile tiiner can be set by touching
SET KITCHEN TIMER. See tile
Kitchen tither section.
When tile delayed start fiIne is reached,
tile oven will start and continue m cook
fi)I" tile l)rogi'anmled ainount of dine,
then shtIt off autoinafically, unless the
Cook and Hold teatuI'e was set. See tile
Cook and Hold sect.ion.
_MteI" cooking is coinplete tile ()veil will
signal and "MORE TIME" will display for
five ininutes. Check food for aloneness.
If niore cooking tiine is needed, touch
MORE TIME and enter additional cooking
tinie. If not selecmd, the screen will
autoinaticallv clear in five ininutes.
3O
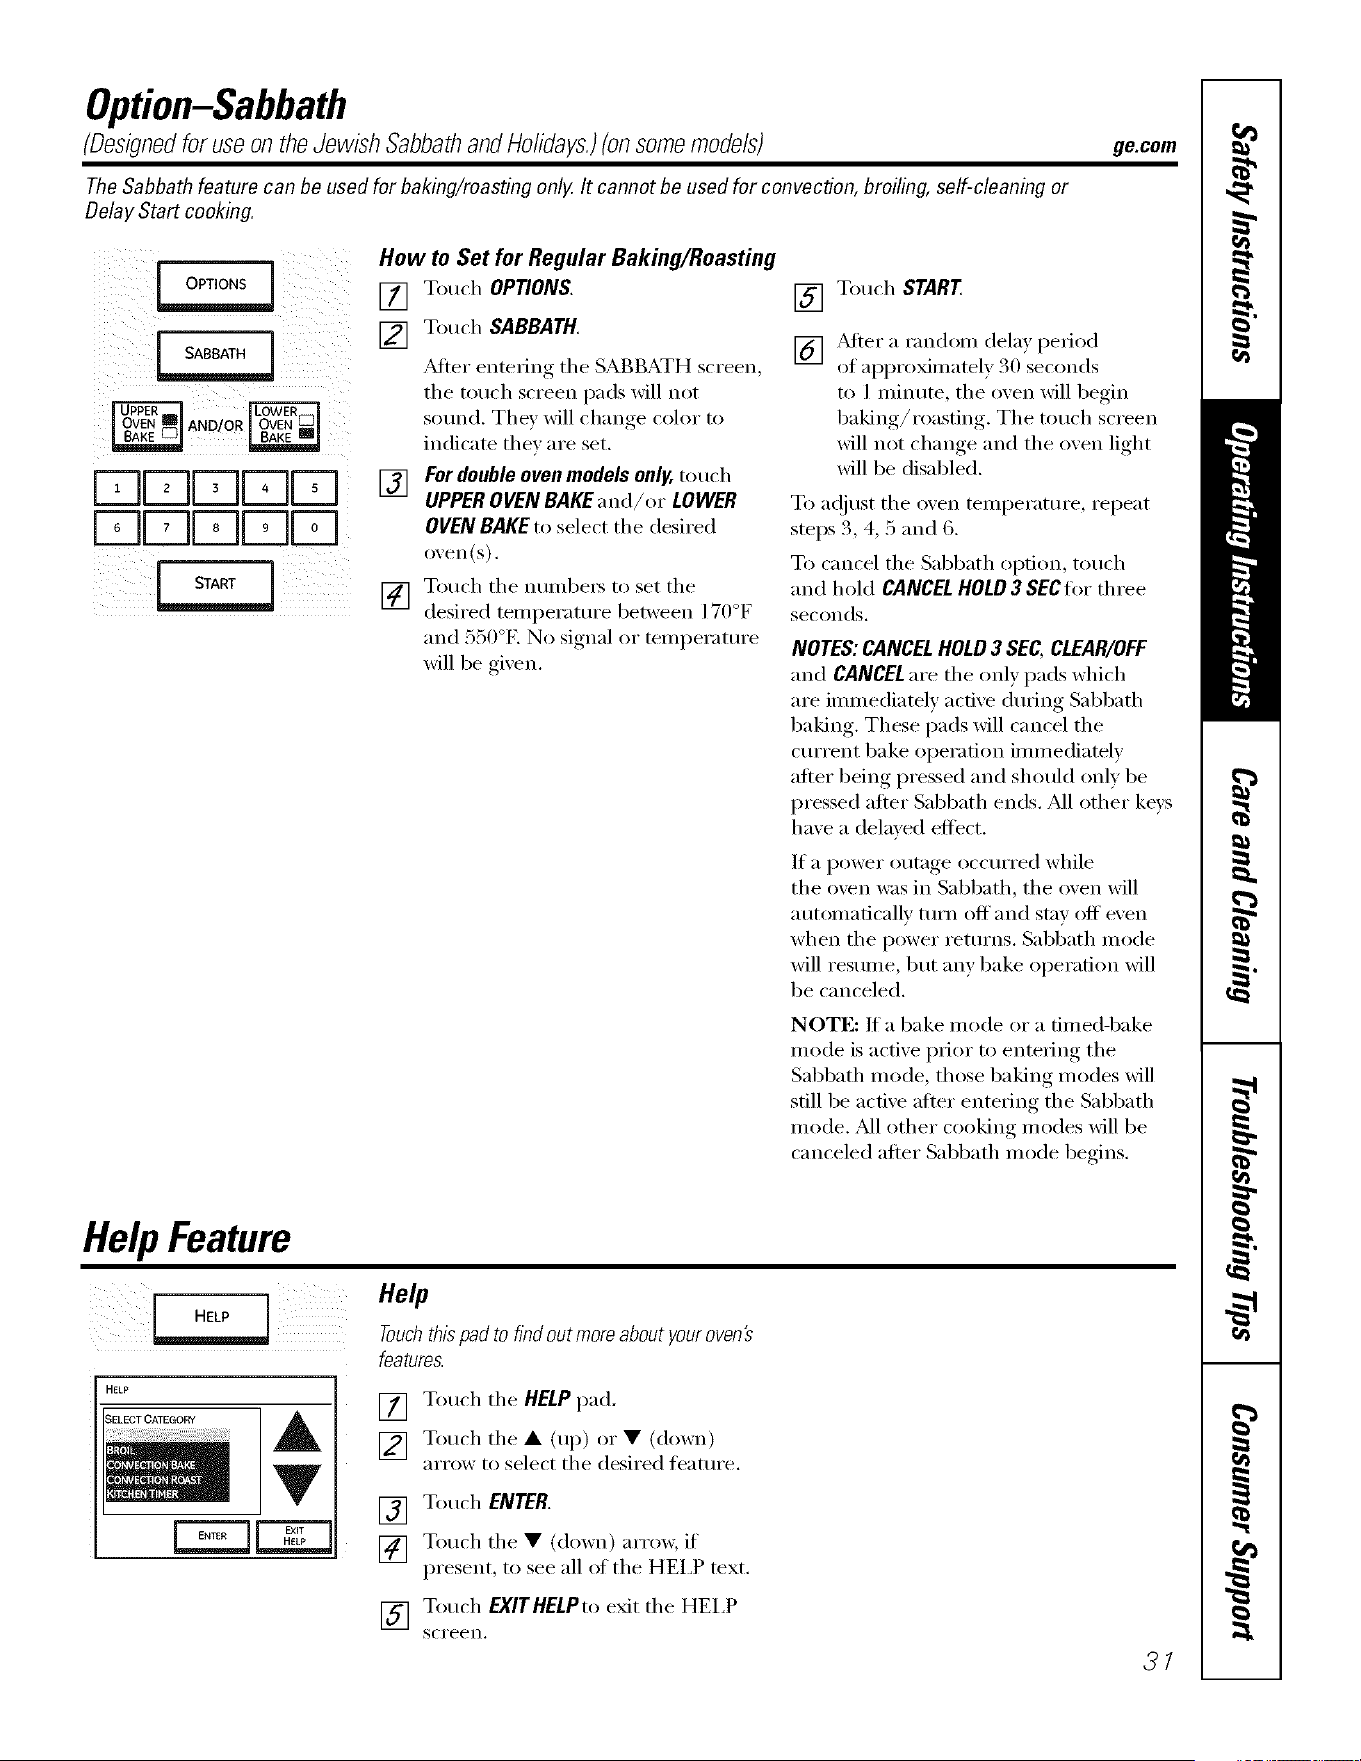
Option-Sabbath
(Designedforuseon the Jewish Sabbathand Holidays.)(onsomemodels)
de.corn
TheSabbathfeature can beused for baking/roastingenid It cannot be usedfor convection,broiling, self-cleaningor
DelayStart cooking,
_ AND/OR
DG3GT-qFq
!
How to Set for Regular Baking/Roasting
[] Touch OPTIONS.
Touch SABBATH.
[]
[]
_dter entering the SABBATH screen,
the touch screen pads will not
sound. They will change color to
indicate they are set.
For double oven models only, touch
UPPER OVEN BAKE and/or LOWER
OVEN BAKE to select the desired
oven(s).
Touch the numbet_ to set the
desired temperature between 170°F
and 550°E No signal or mmperamre
will be given.
[] Touch START
[] _Mter a random delay period
of approximately 30 seconds
to 1 minum, the oven will begin
baking/roasting. The touch screen
will not change and the oven light
will be disabled.
To a(!iust the oven temperatm'e, repeat
steps 3, 4, 5 and 6.
To cancel the Sabbath option, touch
and hold CANCELHOLD 3 SECfl_r three
seconds.
NOTES:CANCELHOLD 3 SEC, CLEAR/OFF
and CANCELare the only pads which
are immediately active during Sabbath
baking. These pads will cancel the
cmTent bake operation immediately
after being pressed and should only be
pressed after Sabbath ends. M1 other keys
have a delayed effect.
If a power outage occmTed while
the oven was in Sabbath, the oven will
automatically tm'n off and stay off even
when the power retm'ns. Sabbath mode
will restlllle, but any bake operation will
be canceled.
NOTE: If a bake mode or a timed-bake
mode is active prior to entering the
Sabbath mode, those baking modes will
still be active alter entering the Sabbath
mode. M1 other cooking modes will be
canceled after Sabbath mode begins.
HelpFeature
HELP
Help
Touchthis pad to fhd out more about your oven
features.
[] Touch the HELPpad.
[] Touch the • (up) or • (down)
arrow to select the desired featm'e.
[] Touch ENTER.
[] Touch the • (down) arrow, it
present, to see all of the HEI,P text.
[] Touch EXITHELPto exit the HEI,P
scl'een.
31
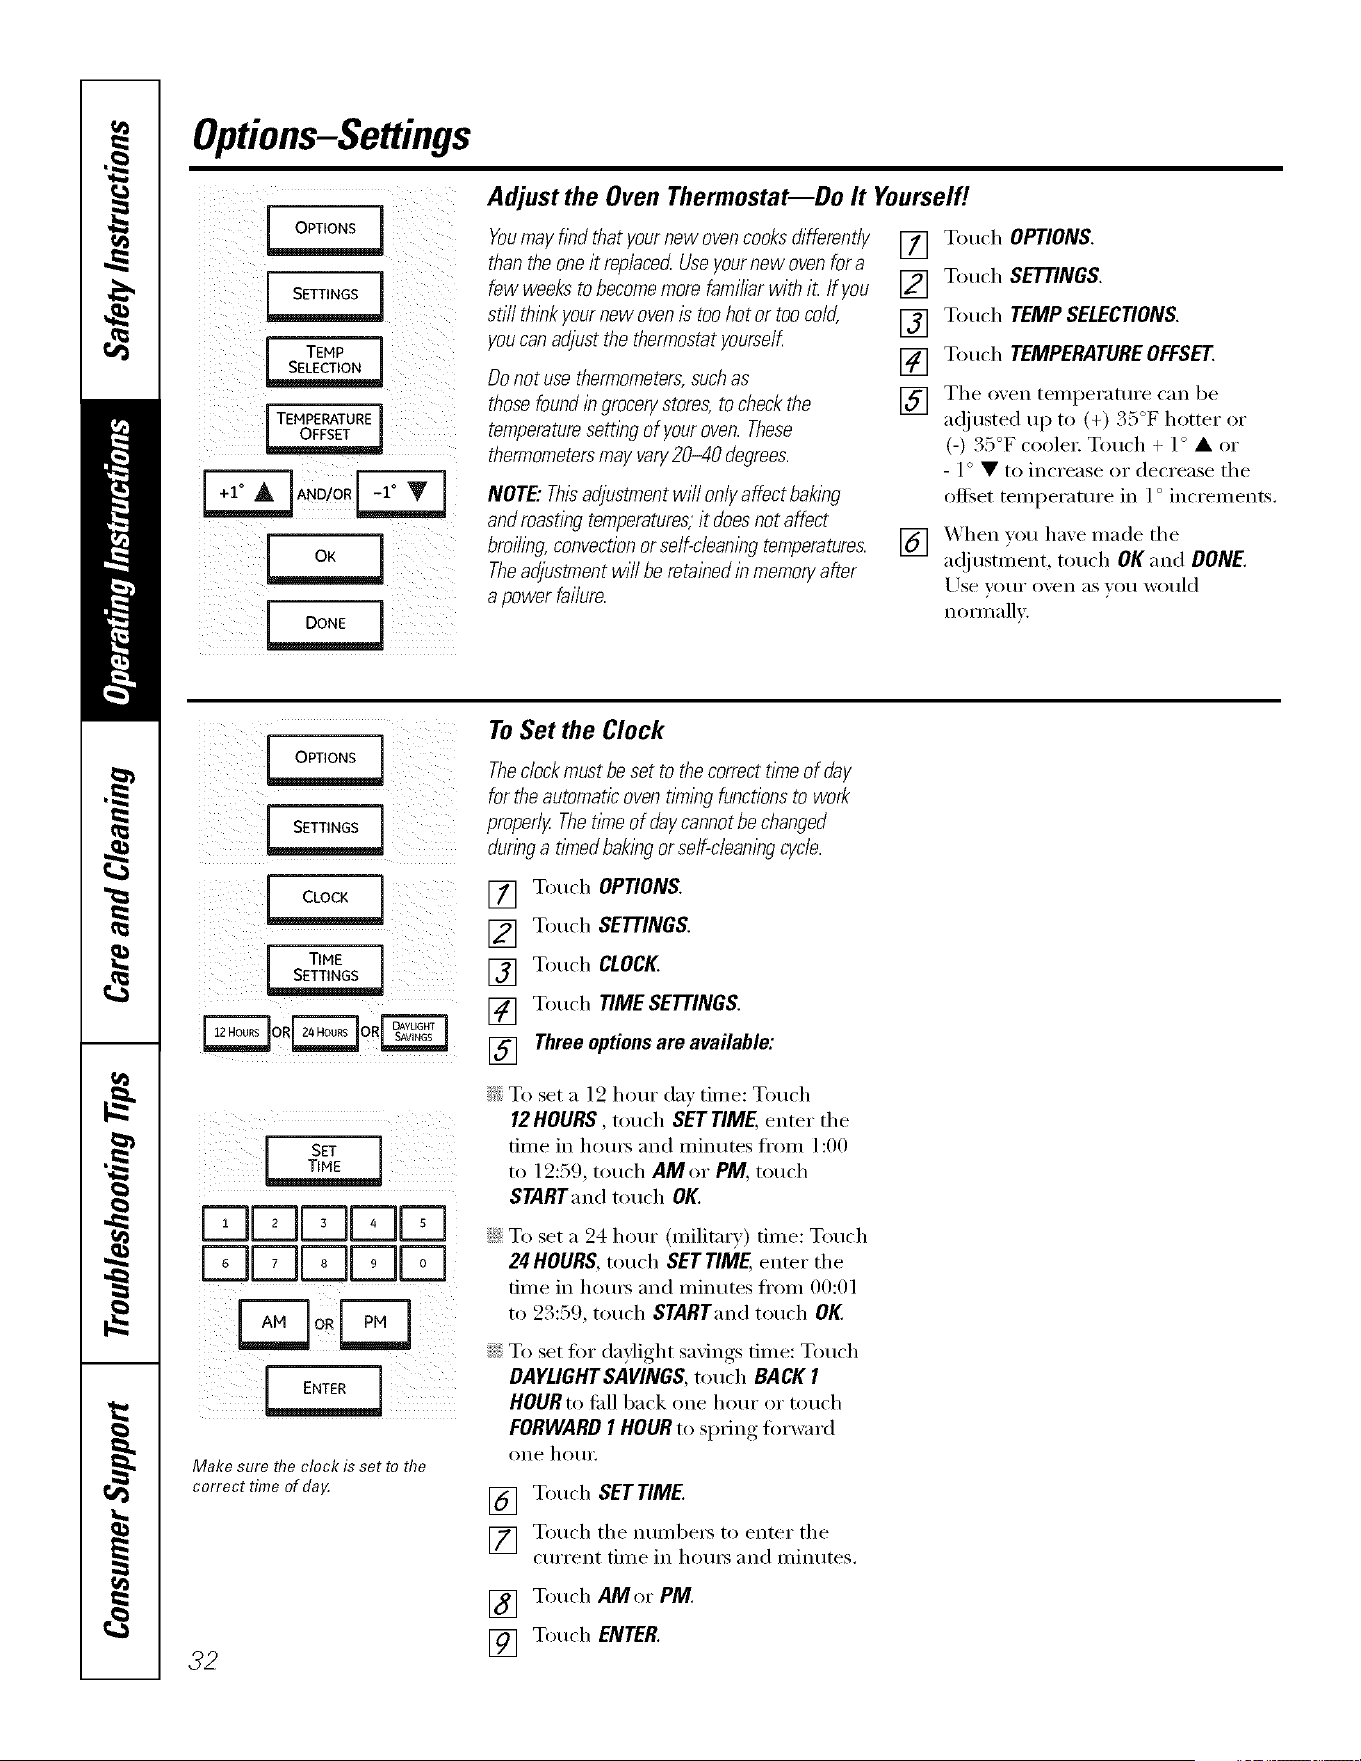
Options-Settings
!i¸!i
SETT,.OSl!i iii i/ i
TEHP I
Adjust the Oven Thermostat--Do It Yourselfi
Youmayhbdthatyournewovencooksdifferently
thantheoneit rep/acec_Useyournewovenfora
few weeksto becomemorefamiliarwith iL If you
still thinkyournewovenis toohotor toocold,
youcanadjustthethermostatyourself
Donot usethermometers,suchas
thosefoundingrocerystores,tocheckthe
temperaturesettingof youroven.These
thermometersmayvary20-40 degrees.
NOTE"Thisadjustmentwill onlyaffectbaking
androastingtemperatures,it doesnotaffect
broiling,convectionorself-cleaningtemperatures.
Theadjustmentwill beretainedinmemoryafter
apowerfailure.
[] Touch OPTIONS.
[] Touch SETTINGS.
13] Touch TEMPSELECtiONS.
14] Touch TEMPERATUREOFFSET.
[] The oxen temperature can be
a(!justed up to (+) 35°F hotter or
(-) 35°F coole_: Touch + I o • or
- 1o • to increase or decrease the
offset temperamre in 1o increments.
[] _'_hen you hme made tile
a(!iustment, touch OKand DONE.
Use yore" oven as you would
nommllv.
i i i
[ TIHE l
SET
E DE r-qr-q
ECIE Eo-ql-q
iii
Make sure flTeclock is set to the
correct time of da_
32
To Set the Clock
Thedock must be set to the correct tlYneof day
for the automatic oven timing functionsto work
properly The t/me of day cannotbe changed
dunnga timed baking or seff-cieaningcycle.
[] Touch OPTIONS.
[] Touch SETTINGS.
[] Touch CLOCK.
[] Touch TIME SETTINGS.
[] Three options are available:
To set a 12 hour day time: Touch
12HOURS, touch SET TIME, enter tile
time in hours and minutes fl'om 1:00
to 12:59, touch AM or PM, touch
STARTand touch OK.
To set a 24 hour (milit;uy) time: Touch
24 HOURS, touch SET TIME, enter tile
time in hours and minutes ti'om 00:01
to 23:59, touch START, rod touch OK.
To set for daylight savings time: Touch
DAYLIGHTSAVINGS,touch BACK1
HOURto fill back one hour or touch
FORWARDI HOURto spring forward
oIle hOtlI:
[] Touch SETTIME.
] Touch tile numbers to enter tile
('tuTent time in horus and minutes.
[] Touch AMor PM.
[] Touch ENTER.
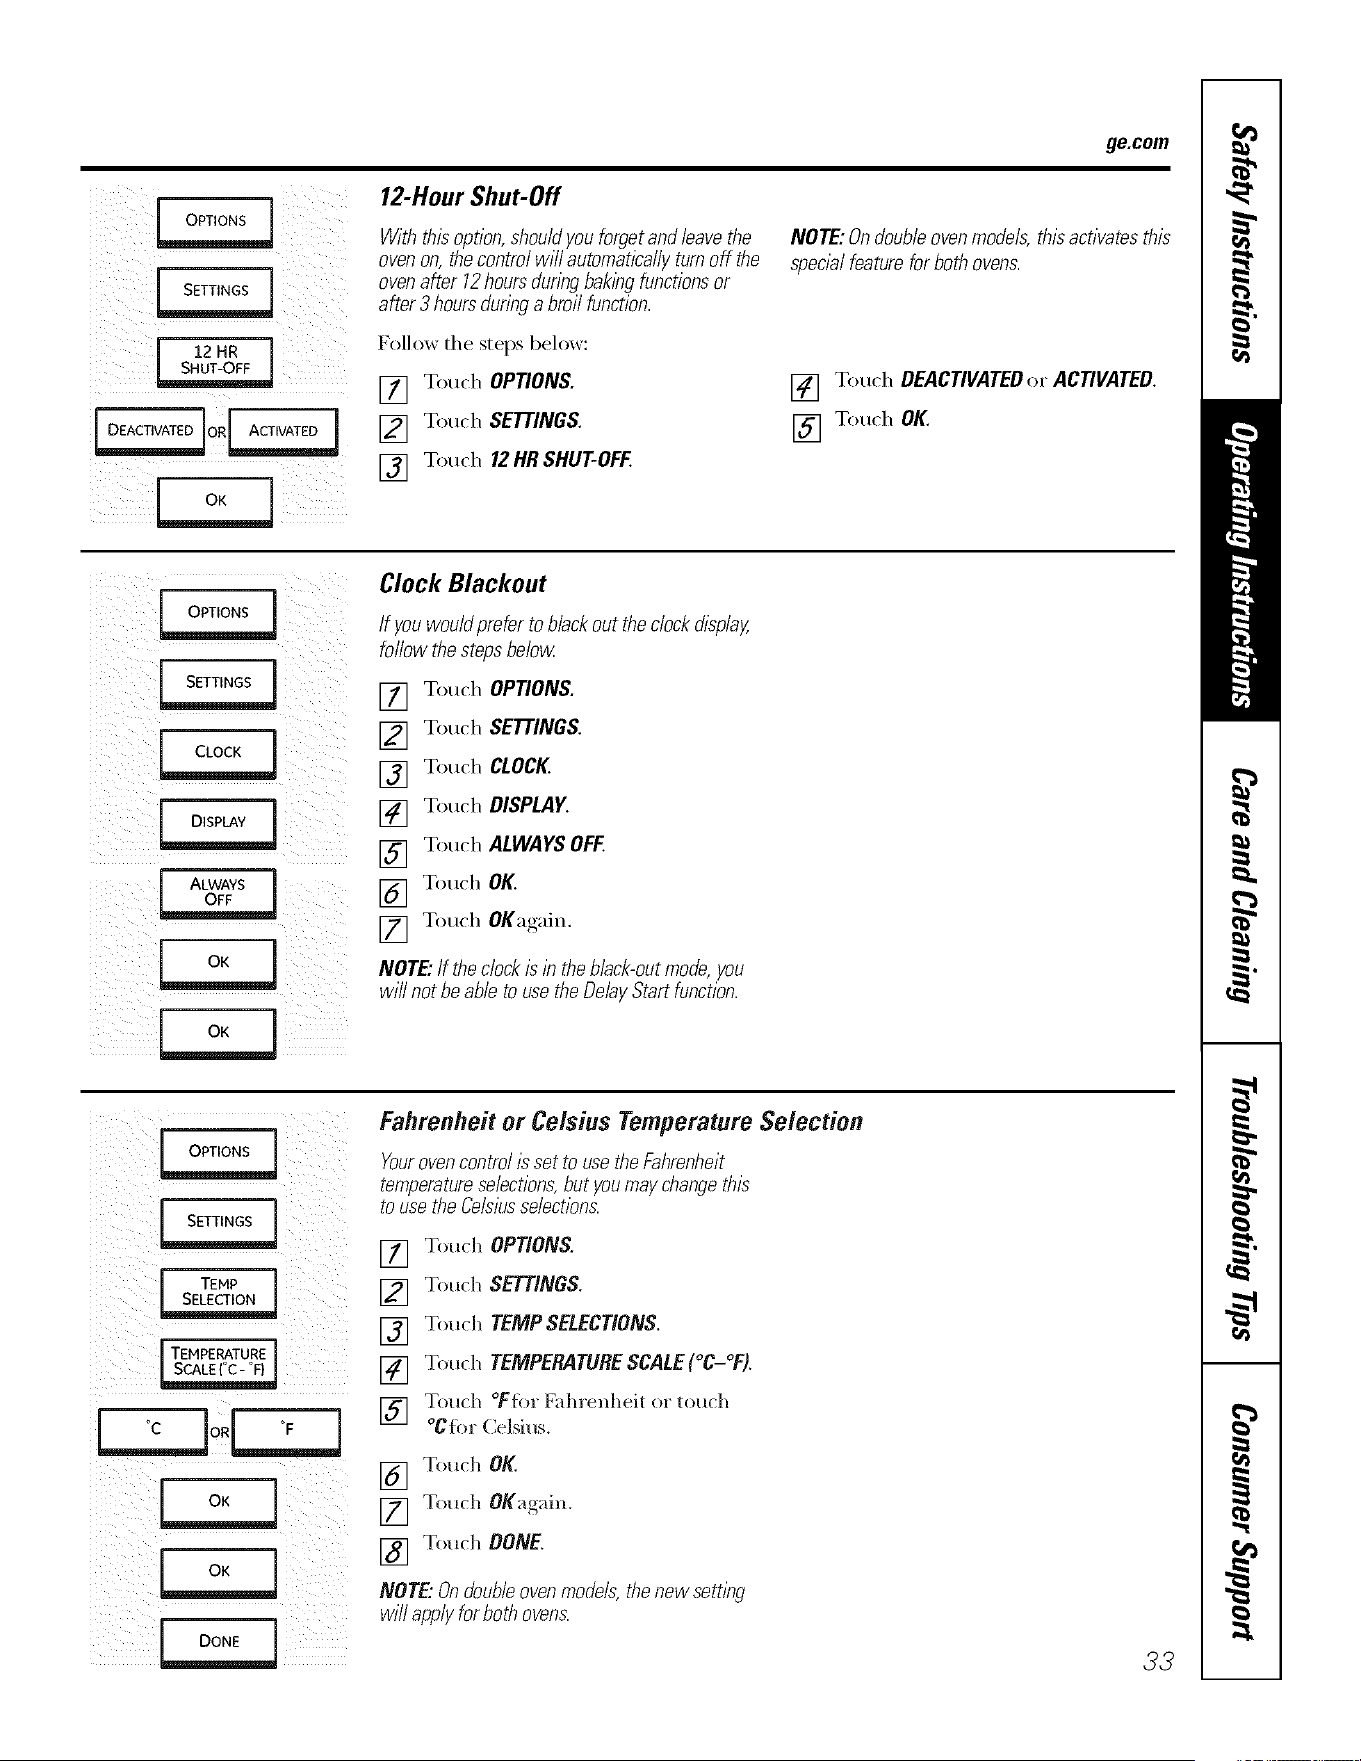
ge.com
_!_i;!(__ '!i_i_)I__I_;
ii i i
[ 12HR ]
12-Hour Shut-Off
Withthisoption,shouldyouforgetandleavethe
ovenon,thecontrolwill automaticallyturnoff the
ovenafter 12hoursdunbgbakingfunctionsor
after3hoursduringa broil function.
Follow the steps below:
[] Touch OPTIONS.
[] Touch SETTINGS.
[] Touch 12HR SHUT-OFF.
NOTE:Ondoubleovenmodels,thlaactivatesthis
specblfeatureforbothovens.
[] Touch DEACTIVATEDor ACTIVATED.
[] Touch OK.
;;iii _ ill;if!i!(!!!
ii i i
i)i;i:i c_[__!: :i_
iiI _ iI i i
!!i _ii__i__iii_ iIilli _iiii
[ ALWAYS ]
O_
Clock Blackout
If youwouldpreferto blackouttheclockdisplay,
followthestagsbelow
[] Touch OPTIONS.
[] Touch SETTINGS.
[] Touch CLOCK
[] Touch DISPLAY.
[] Touch ALWAYSOFF.
[] Touch OK.
[] Touch OKagain.
NOTE"If theclockislb theblack-outmode,you
will not beableto usetheDelayStartfunction.
i,_i_!_(_!i!_ii_ !ii_i_:_i__
TEMP
TEMPERATURE
Fahrenheit er Celsius Temperature Selection
Yourovencontrollaset to usetheFahrenheit
temperatureselections,butyoumaychangethla
tousetheCelsiusselections.
[] Touch OPTIONS.
[] Touch SETTINGS.
[] Touch TEMPSELECTIONS.
[] Touch TEMPERATURESCALE(°C-%.
[]
Touch °Flbr bSd_renheit or touch
°Clbr Celsius.
[] Touch OK.
[] Touch OK'_,"dn
[] Touch DONE.
NOTE."& doubleovenmodels,thenewsettlbg
will applyforbothovens.
33
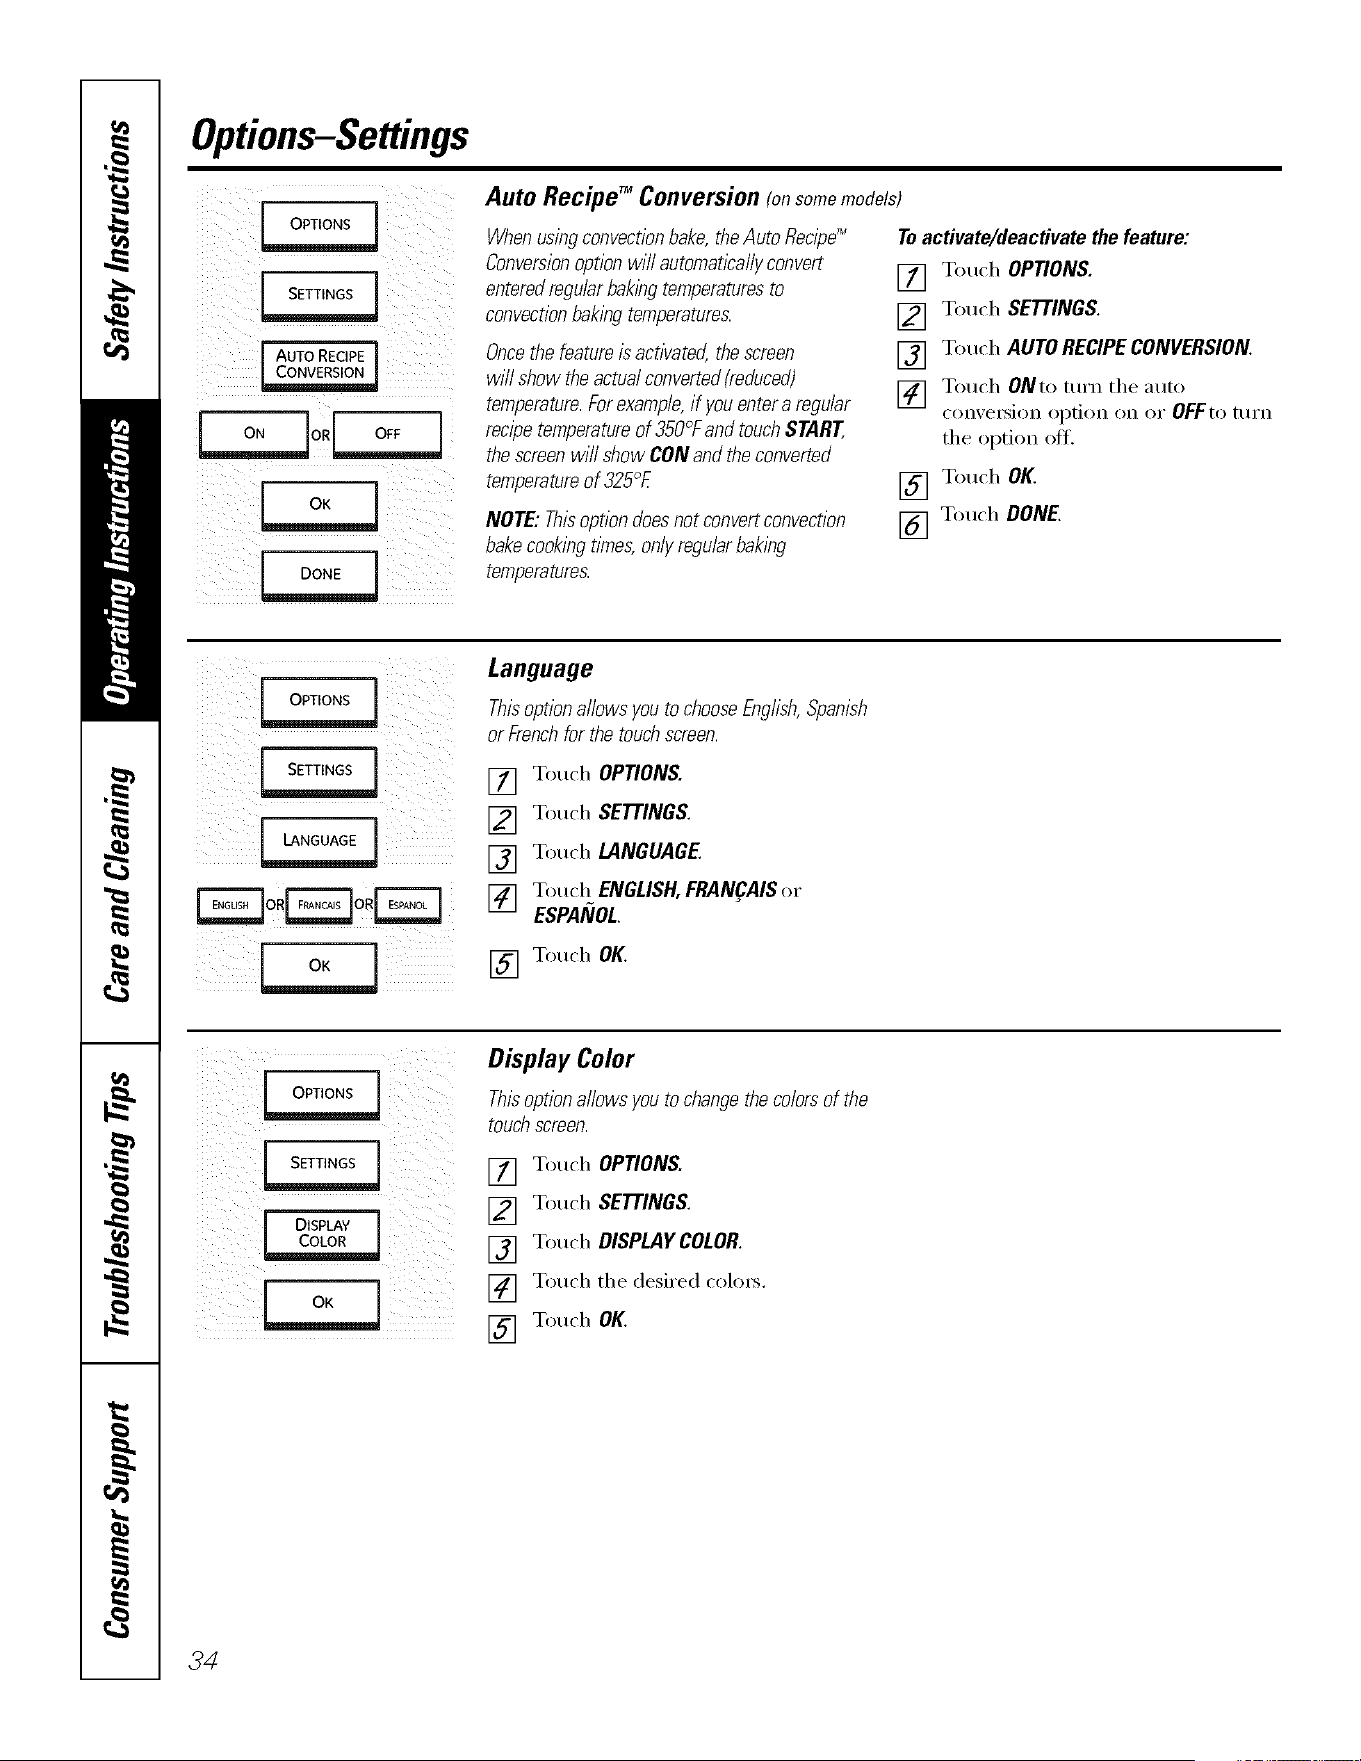
Options-Settings
ii / IIi i;iiii
[ AUTORECIPE I
_J
j o,<
Auto Recipe TM Conversion (onsomemodels)
When usingconvectionbake, the Auto Recipe_
Conversionoption will automatically convert
enteredregular baklhg temperatures to
convectionbaklbg temperatures.
Oncethe feature is activated, the screen
will show theactual converted(reduced)
temperature.For example,if you enter a regular
recipe temperatureof 350°Fand touch START,
the screen will show CON and the converted
temperatureof 325C_E
NOTE: Thisoption doesnot convertconvection
bakecooklbg times, only regular baklbg
temperatures.
Toactivate/deactivatethefeature:
[] Touch OPTIONS.
[] Touch SETTINGS.
[] Touch AUTORECIPECONVERSION.
] Touch ONto mrn the auto
con',ersion option on or OFFto [tlI'n
the option off.
[] Touch OK.
[] Touch DONE.
_ii_!ii_iiiii__ il iiiiiiiiI_i
iiili_iii__i iii)iii_ii!
iiii_!I_!_ ii _;ii_
_o._oi_
i i i
_ii_i_i_!_I__!_ i:_ii_i_i_i_i_ii!
Language
Thisoptionallowsyouto chooseEnglish,Spanish
orFrenchfor thetouchscreen.
[] Touch OPTIONS.
[] Touch SETTINGS.
[] Touch LANGUAGE.
[] Torah ENGLISH,FRAN_AISor
ESPAIIIOL
[] Touch OK.
DISPLAY ]
c0kco_ !
0[0_
Display Color
Thisoptionallowsyouto changethecolorsof the
touchscreen.
[] Touch OPTIONS.
[] Touch SETTINGS.
[] Touch DISPLAYCOLOR.
[] Touch the desired colo_.
[] Touch OK.
34
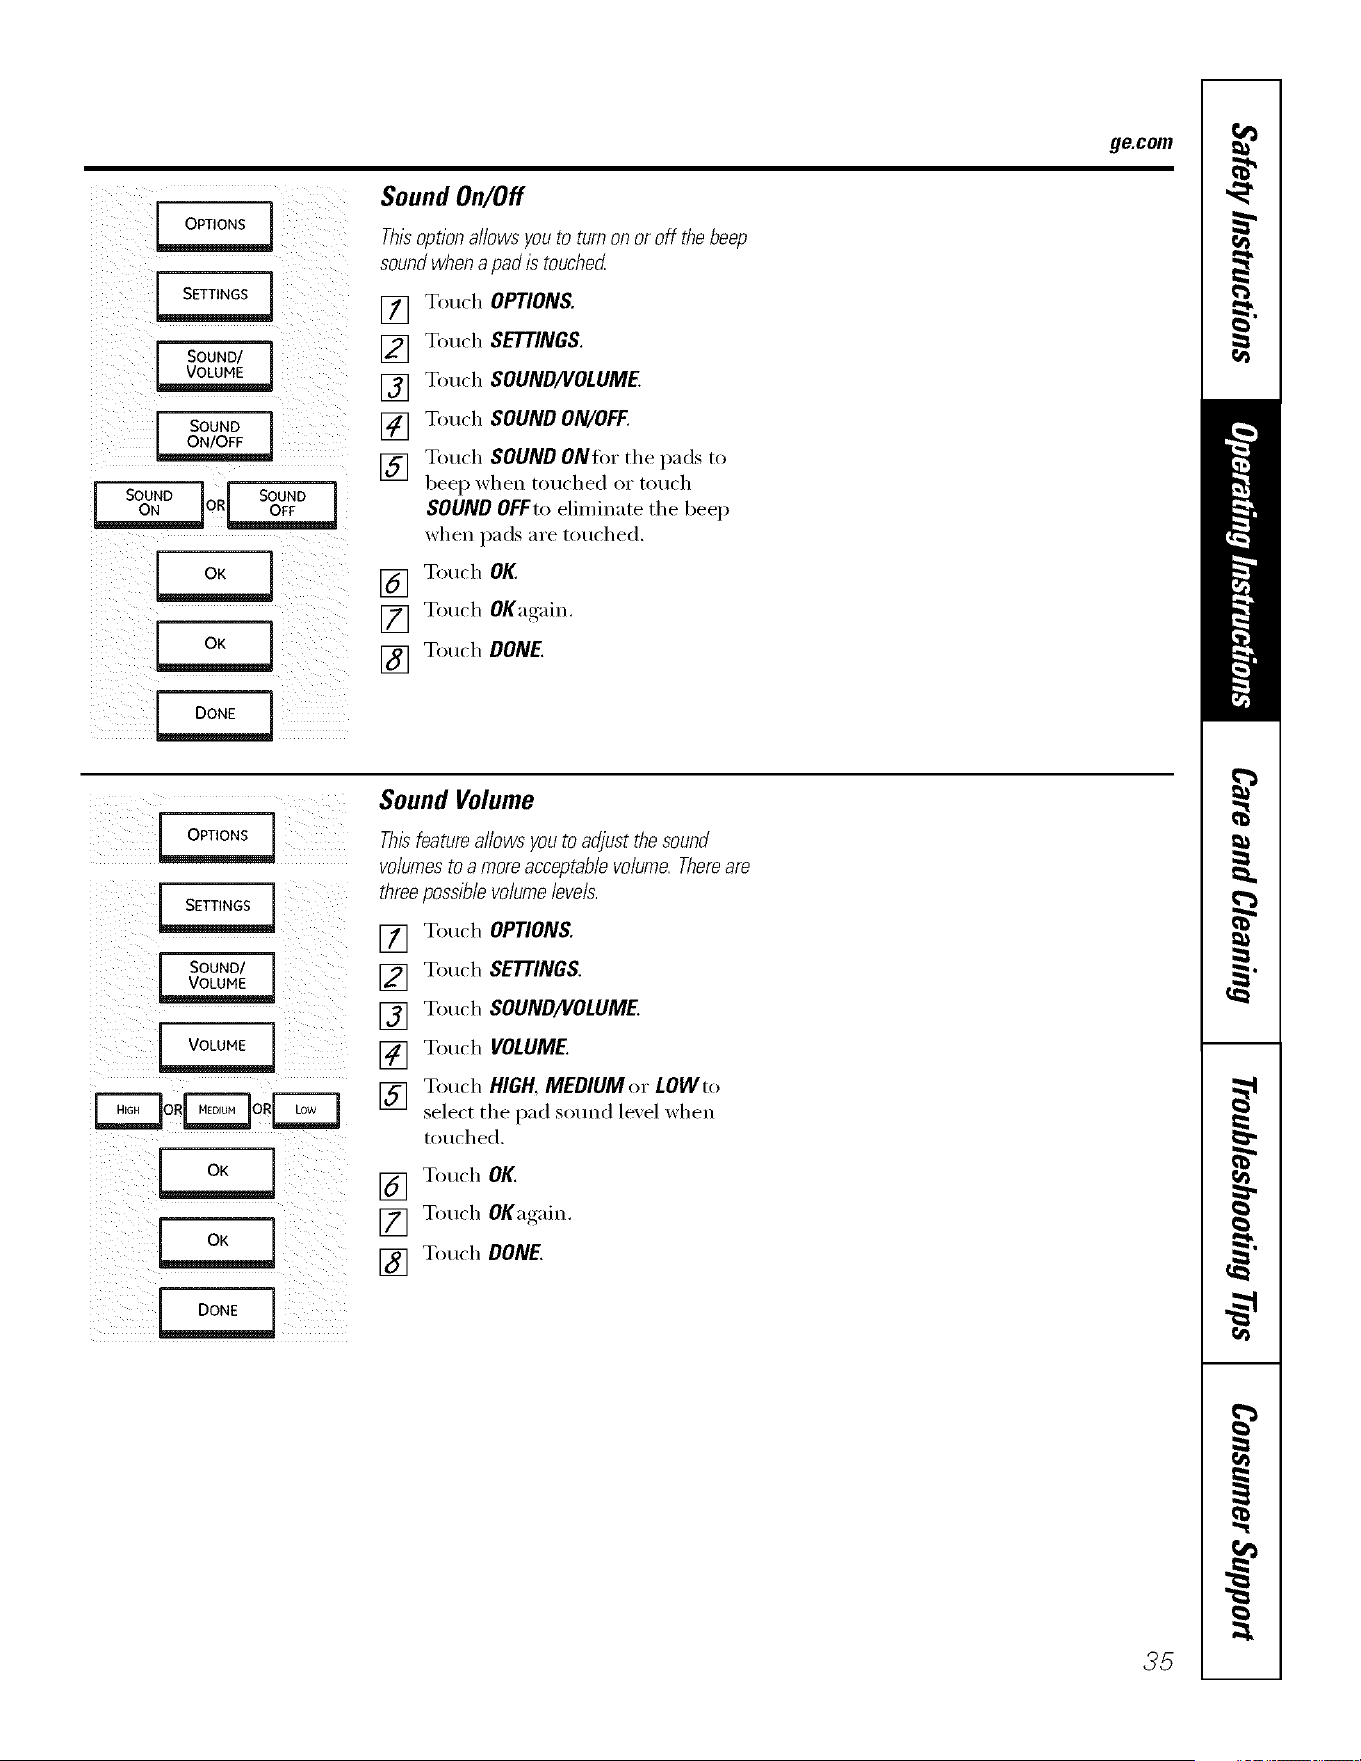
Sound On/Off
Thisoptionallowsyouto turnonoroff thebeep
soundwhena padb touched
[] Touch OPTIONS.
[] Touch SETTINGS.
[] Touch SOUND/VOLUME.
[] Touch SOUNDON/OFF.
[] Touch SOUNDONfin" the pads to
beep when touched or touch
SOUNDOFFto eliminate the beep
when pads are touched.
[] Touch OK.
[] Touch OKag'ain.
[] Touch DONE.
ge.com
[ SOUND/
r-=qoir=zlQir--
Sound Volume
Thisfeature allows youto adjust the sound
volumes to a more acceptable volume. Thereare
three possible volumelevels.
[] Touch OPTIONS.
[] Touch SETTINGS.
[] Touch SOUND/VOLUME.
[] Touch VOLUME.
[] Touch HIGH,MEDIUMor LOWto
select the pad sound lexel when
touched.
[] Touch OK.
[] Touch OK'ag'ain.
[] Touch DONE.
35

Options-Settings
i I i
iiiil))i!i_ i)_Lil
[ SOUND/
i TIMER J
Timer Signal
Thisoptionallowsyouto setthetypeofsignal
usedat theendofa timedcycle.
[] Touch OPTIONS.
[] Touch SETTINGS.
[] Touch SOUND/VOLUME.
[] Touch TIMERSIGNAL.
[] Touch CONtiNUE,I DEEP,2 BEEPor
3 DEEP.
[] Touch OK.
[] Touch OKagain.
[] Touch DONE.
[ KITCHEN i
_oR oR on
_r=n r=n
o
Kitchen Timer Signal
Thisoptionallowsyouto setthetypeof signal
usedforthekitchentimer
[] Touch OPTIONS.
[] Toud_ SETTINGS.
[] Touch SOUND/VOLUME.
[] Touch KITCHENTIMERSIGNAL.
[] Touch CONTINUE,I DEEP,2 DEEPor
3 DEEP.
[] Touch OK.
[] Touch OKagain.
[] Touch DONE.
iiiii_j ii_ _iii_iii_I:
iii_d __ iiiiill_iiii
i i i
SOUND/
VOLUME
DEFAULT
I OON_'
36 '-_
Sound/Volume Default
Thisoption allows you to automatically set aft
signals to thedefault settings.
[] Touch OPtiONS.
[] Touch SETTINGS.
[] Touch SOUND/VOLUME.
[] Touch DEFAULT.
[] Touch OK.
[] Totwh DONE.
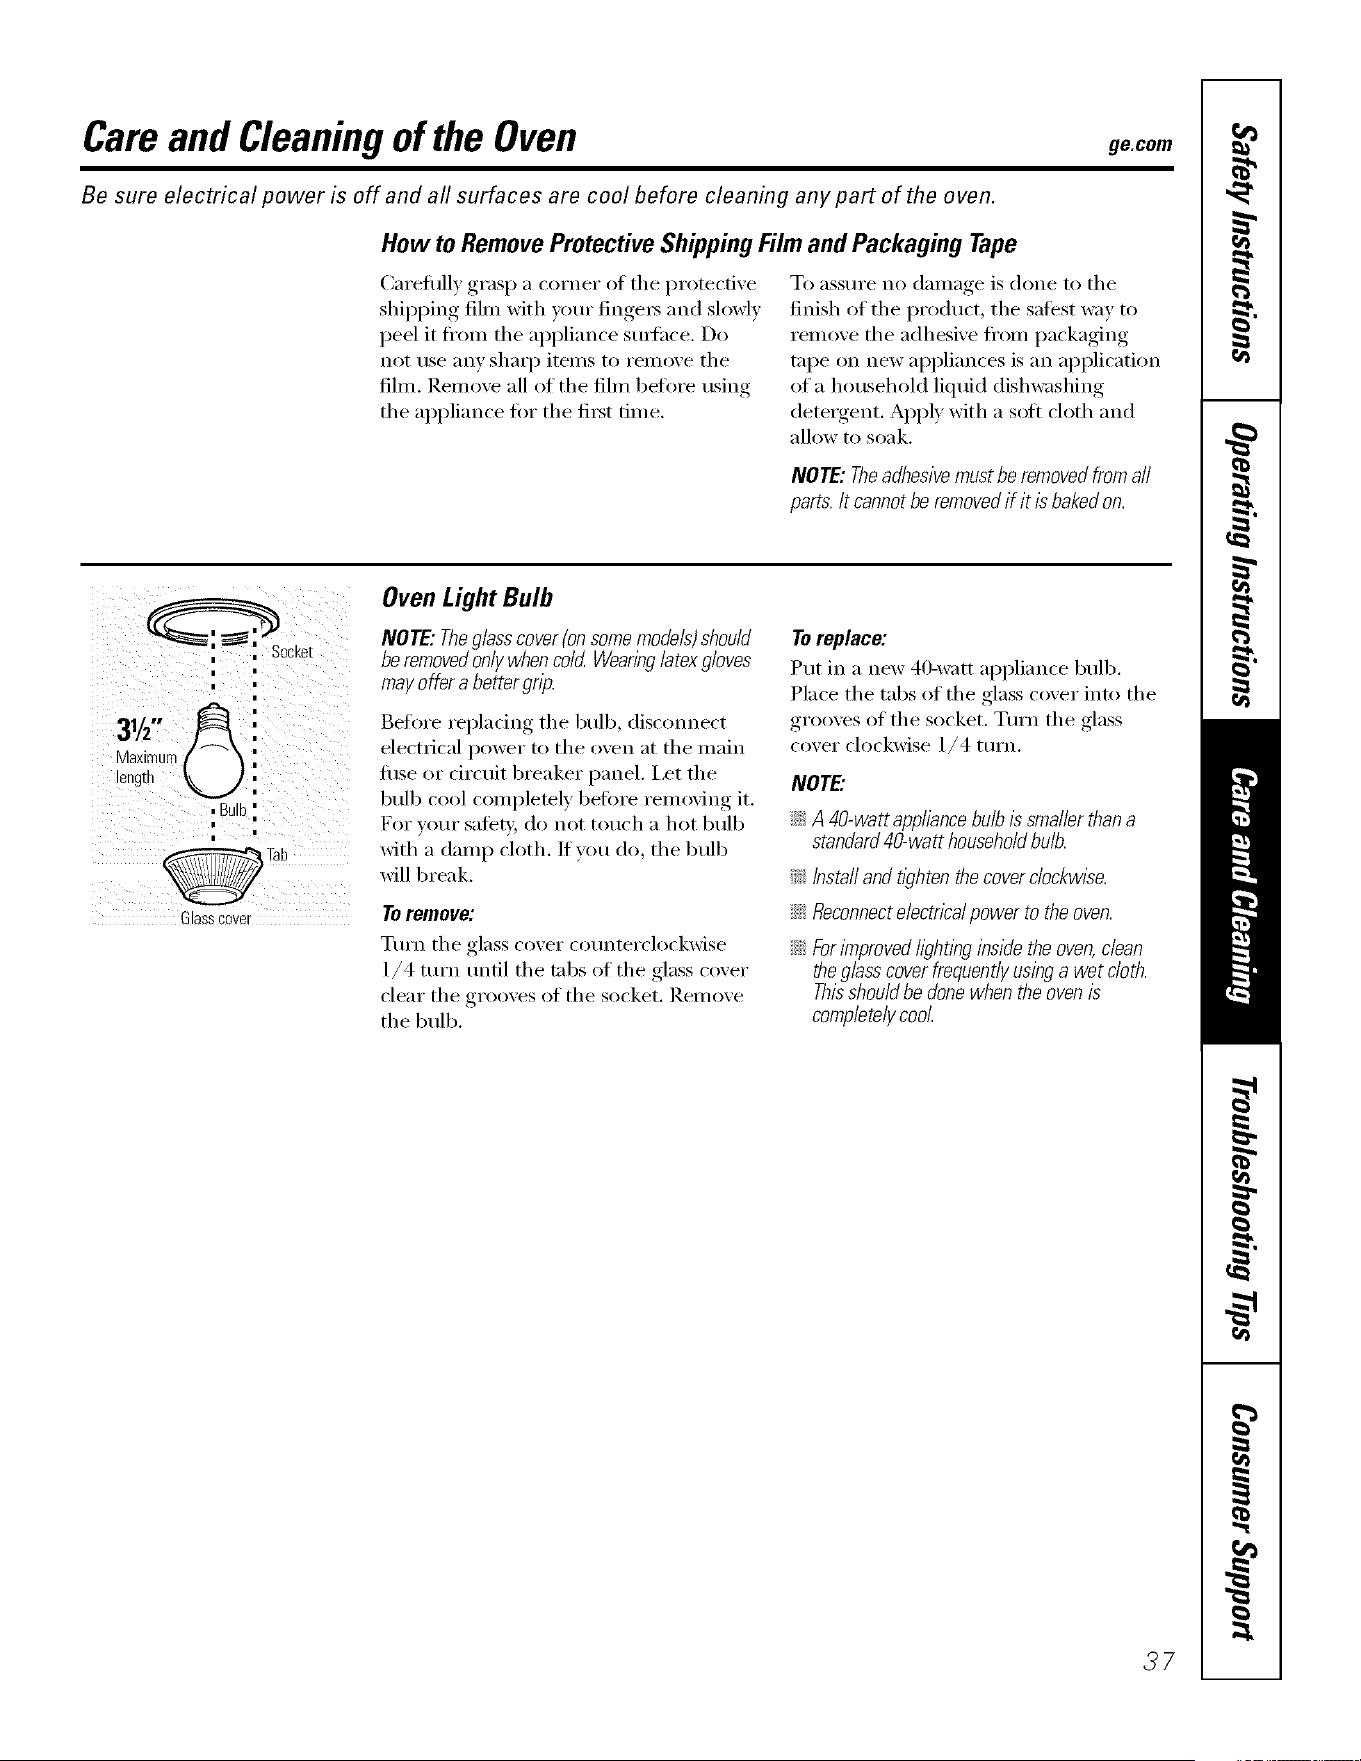
Care and Cleaningof the Oven ge.com
Be sure electrical power is off and aft surfaces are cool before cleaning any part of the oven.
How to Remove Protective Shipping Film and Packaging Tape
Careflllly grasp a corner of the protective
shipping fihn with your finge_ and slowly
peel it from the appliance surlhce. Do
not use any shaI I) itelns to relnove tile
fihn. Remove all of the fihn befln'e using
tile appliance fin" tile fii_t dine.
To assure no damage is done to tile
finish of the product, the satest way to
remove the adhesive fl'om packaging
tape on new appliances is an application
of a household liquid dishwashing
detergent. Apply with a sott cloth and
allow to soak.
NOTE:Theadhesivemustberemovedfromaft
parts.Itcannotberemovedif it isbakedon.
, , Socket
|
|
,/.,, ¢2 i
/2 .
Maximum/' '_ ',
engtl _ ,,
, Bulb',
Glasscover
Oven Light Bulb
NOTE: Theglass cover(on some models)should
be removedonly whencold. Wearinglatex gloves
may offer a better gn)
Bed)re repladng tile bulb, disconnect
electrical power to the oven at the main
tuse or circuit breaker panel. I,et the
bulb cool completely bed)re removing it.
For your satbQ:, do not touch a hot bulb
with a damp cloth. If you do, tile bulb
will break.
Toremove:
Tm'n tile glass cover counterclockwise
1/4 turn tmtil tile tabs of tile glass cover
clear the grooves of the socket. Remove
tile bulb.
Toreplace:
Put in a new 40-watt appliance bulb.
Place the tabs of the glass cover into the
grooves of tile socket. Tm'n tile glass
cover clockwise 1/4 turn.
NOTE."
iJGA 40-watt appliancebulb is smallerthan a
standard40-watt householdbulb.
i':'::Instafland tighten the coverclockwise.
iJGReconnectelectrical power to the oven.
iJGForiknprovedflghtlbg inside the oven,clean
theglass cover frequent/)/using a wet cloth.
Thisshou/dbe done when the oven is
completelycool.
37
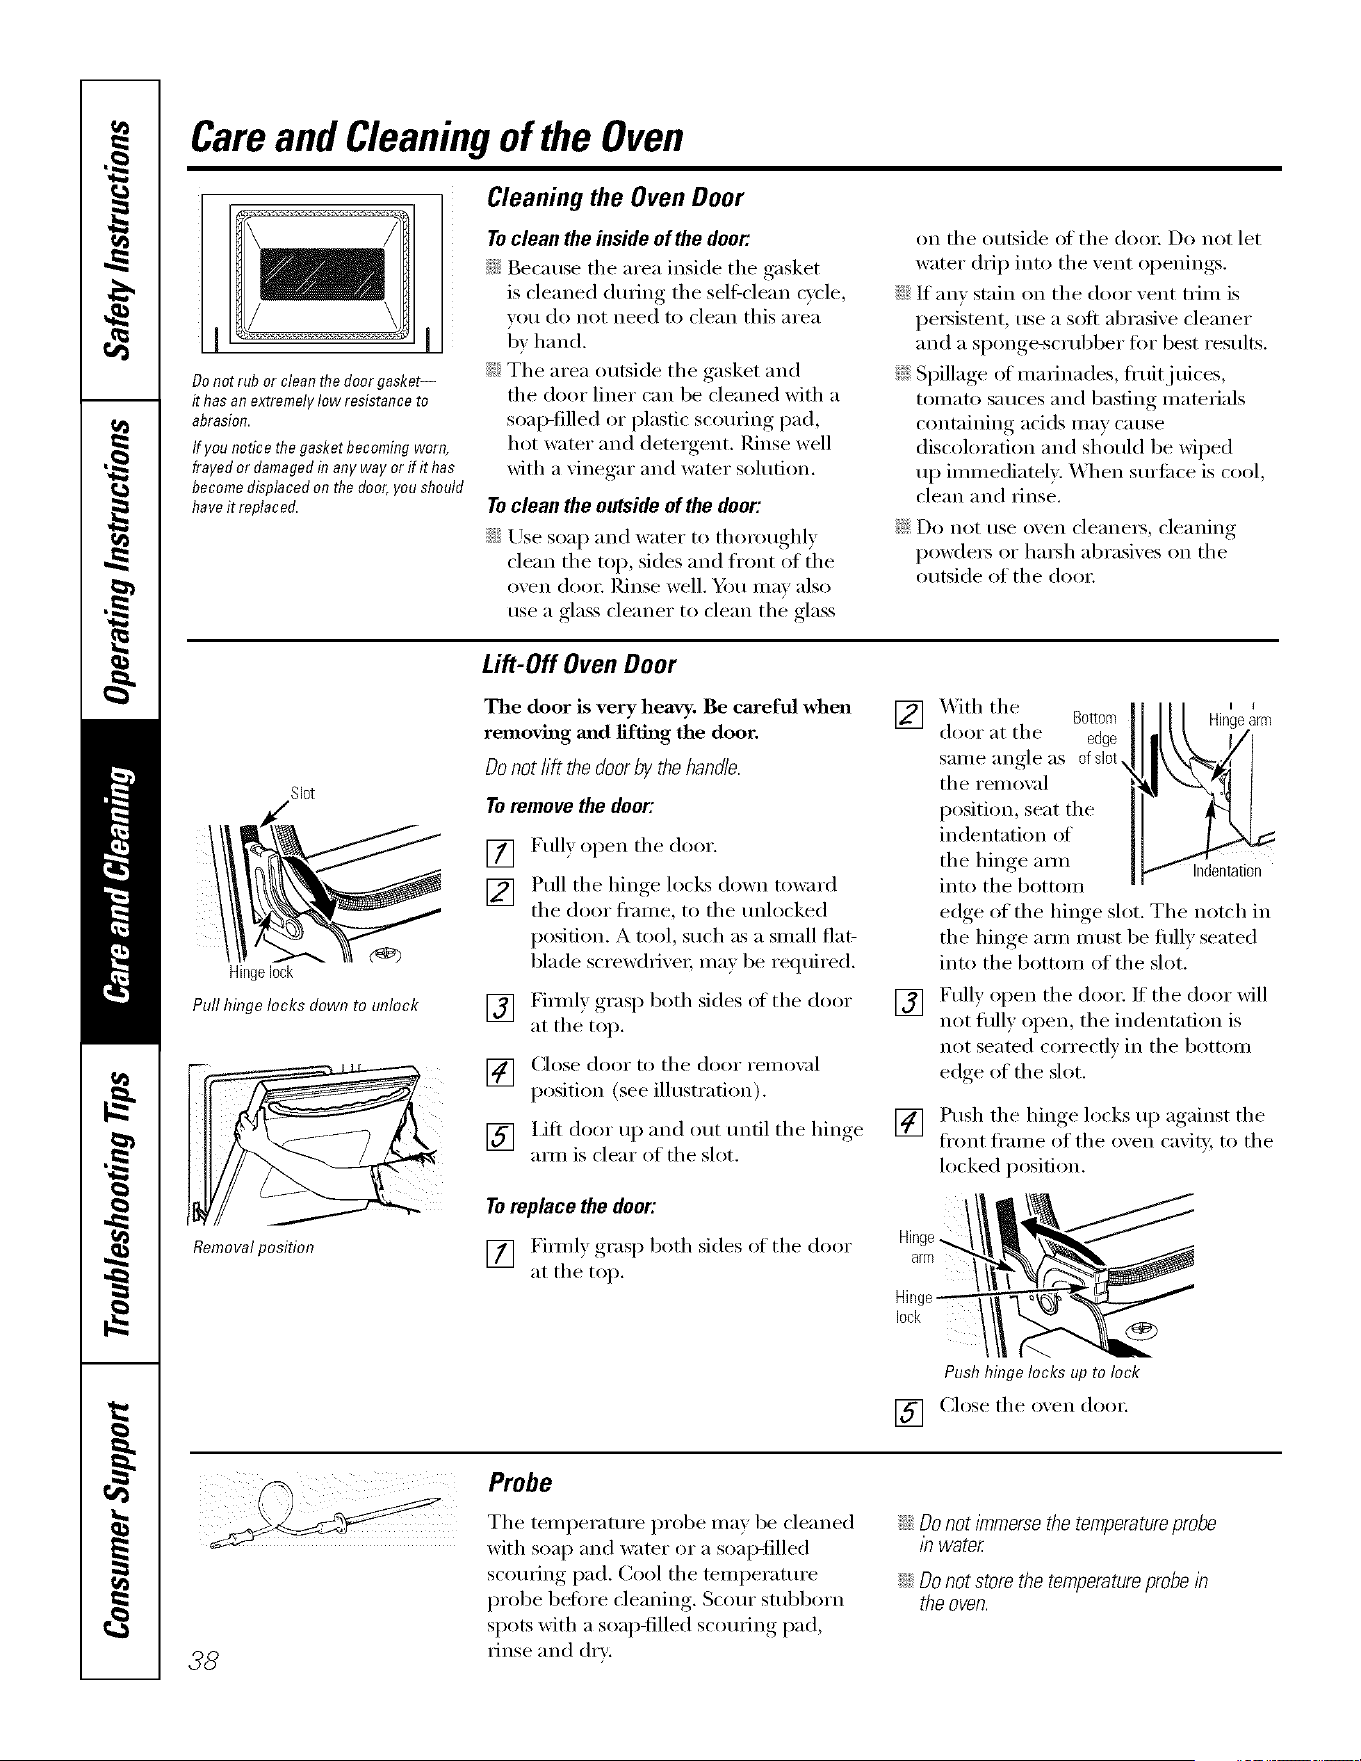
Careand Cleaningof the Oven
Donot rub or cleanthe door gasket--
it hasan extremelylow resistance to
abrasion.
ff you notice the gasketbecomingworn,
frayedor damagedin any wayor if it has
becomedisplacedon thedoor, you should
haveit replaced.
Cleaning the Oven Door
Toclean the inside of the door:
}t:i:Because the area inside tile gasket
is cleaned during the sel6clean cycle,
wiu do not need to clean this area
bv hand.
iJi::The area outside the gasket and
the door liner can be cleaned with a
soap-filled or plastic scouting pad,
hot water and detergent. Rinse well
with a vinegar and water solution.
Toclean the outside of the door:
ij)::Use soap and water to thoroughly
clean the top, sides and fl'ont of the
()veil dooI: ])dnse well. Ybu Ill,IV _llso
use a glass cleaner to clean the glass
on the outside ot the dooi; Do not let
water (1iiI) into the vent oi)enings.
iJi::If any stain oil the door vent trinl is
pei_istent, use a soft abrasive cleaner
and a Sl)onge-scrubber tor best results.
_: SI)illage el inai_inades, fl'uitj uices,
tonlato sauces and basting inaterials
cinlt;fining acids nlav cause
discoloration and should be wiped
up ininlediately. _A]teIl surti_ce is cool,
clean and rinse.
!;>Do not use oxen cleanei_, cleaning
l)ow(lei_ or haI_h abi'asixes on the
outside of the d(IoI:
SI0t
c_
Hingelock
Pull hinge locks down to unlock
Removal position
Lift-Off Oven Door
The door is very heavy. Be cm'eful when
removh_g m_d lifting the door.
Donot lift the door by the handle.
To remove the door'.
[] Fully open the door.
[] Pull the hinge locks down toward
the door fl'anle, to the unh)cked
position. A tool, such as a snlall flat-
blade scI'ewdIixeI; Ilia) be required.
[] Fimlly gI'asp both sides of the door
at the top.
[] Close door to the door renlox fl
l)ositi(in (see illustration).
[] Lift door tlI) and ()tit tlntil the hinge
aim is clear of the slot.
To replace the door:
[] Fimily gi'asp both sides of the door
at the top.
[]
[]
[]
XAith the Bottom
door at the edge
sanle angle as ofslot.
the reniox_fl
position, seat tile
indentation ot
the hinge aml
into the bottoIn
I I
Hingearm
<
Indentation
edge of the hinge slot. The notch in
the hinge aim nI ust be fiIllv seated
into the bottonl of the slot.
Fully open the dooI: If the door will
not fiI1E open the indentation is
not seated correctly in the bottoin
edge of the slot.
Push the hinge, locks Ul) aoainst_ the
fl'ont fl'anle of the oxen caxitv, to the
locked l)osifion.
Hinge.
arm
Hint
lock
Push hinge locks up to lock
[] Close the oxen dooI:
38
Probe
The tenil)erature l)i'obe nIay be cleaned
with soap and water or a soap-filled
scouring pad, Cool the teinl)erature
probe befi)re cleaning. Scour stubborn
spots with a soap-filled scouting pad,
rinse and dry:
ij_::Donot/?nmeraethetemperatureprobe
/hwater
iJi::Do not store the temperatureprobe in
the oven.
ge.com
Ovenrack
Oven Racks
_M1 oven racks may be cleaned by hand
with an abrasive cleaner or steel wool.
_Mter cleaning, rinse the racks with clean
water and (h_' with a clean cloth,
Tile oven racks may remain in tile oven
during sel6cleaning cycle without being
damaged.
If the racks become hard to slide, wipe
their side edges with a light coating oI
vegetable oil atier cleaning them by hand
or in the oven. This will help maintain
tile ease ot sliding tile rocks in and out
ot tile ()veil.
Control Panel
It's a good idea to wipe the control
panel after each use. Clean with mild
soap and water or vinegar and watei;
rinse with clean water and polish (h_'
with a soft cloth. _]/en cleaning, tile
control panel should be at room
temperature and not in direct sunlight.
Use ot other liquid cleane_ is not
recommended--the residue thev
leave behind may affect tile control.
Do not rise abrasive cleansei_, strong
liquid cleanse_, plastic scorning pads or
oven cleaners on the control panel--they
will damage tile finish. A 50/50 solution
of vinegar and hot water works best.
Stainless Steel Surfaces (onsomemodels)
Donotusea steel wool pad; it will scratch
thesurface.
To clean tile stainless steel sm_hce,
use wam_ sudsy water or a stainless steel
cleaner or polish. _Mwa):s wipe tile sm'fiwe
in the direction of the grain. Follow the
cleaner instructions tot cleaning tile
stainless steel s/mfhce.
To inquire about i)m'chasing stainless
steel appliance cleaner or polish, or to
find tile location of a dealer nearest you,
please call ore" toll-free nmnber:
National Parts Center
1.800.626.2002
ge.com
39
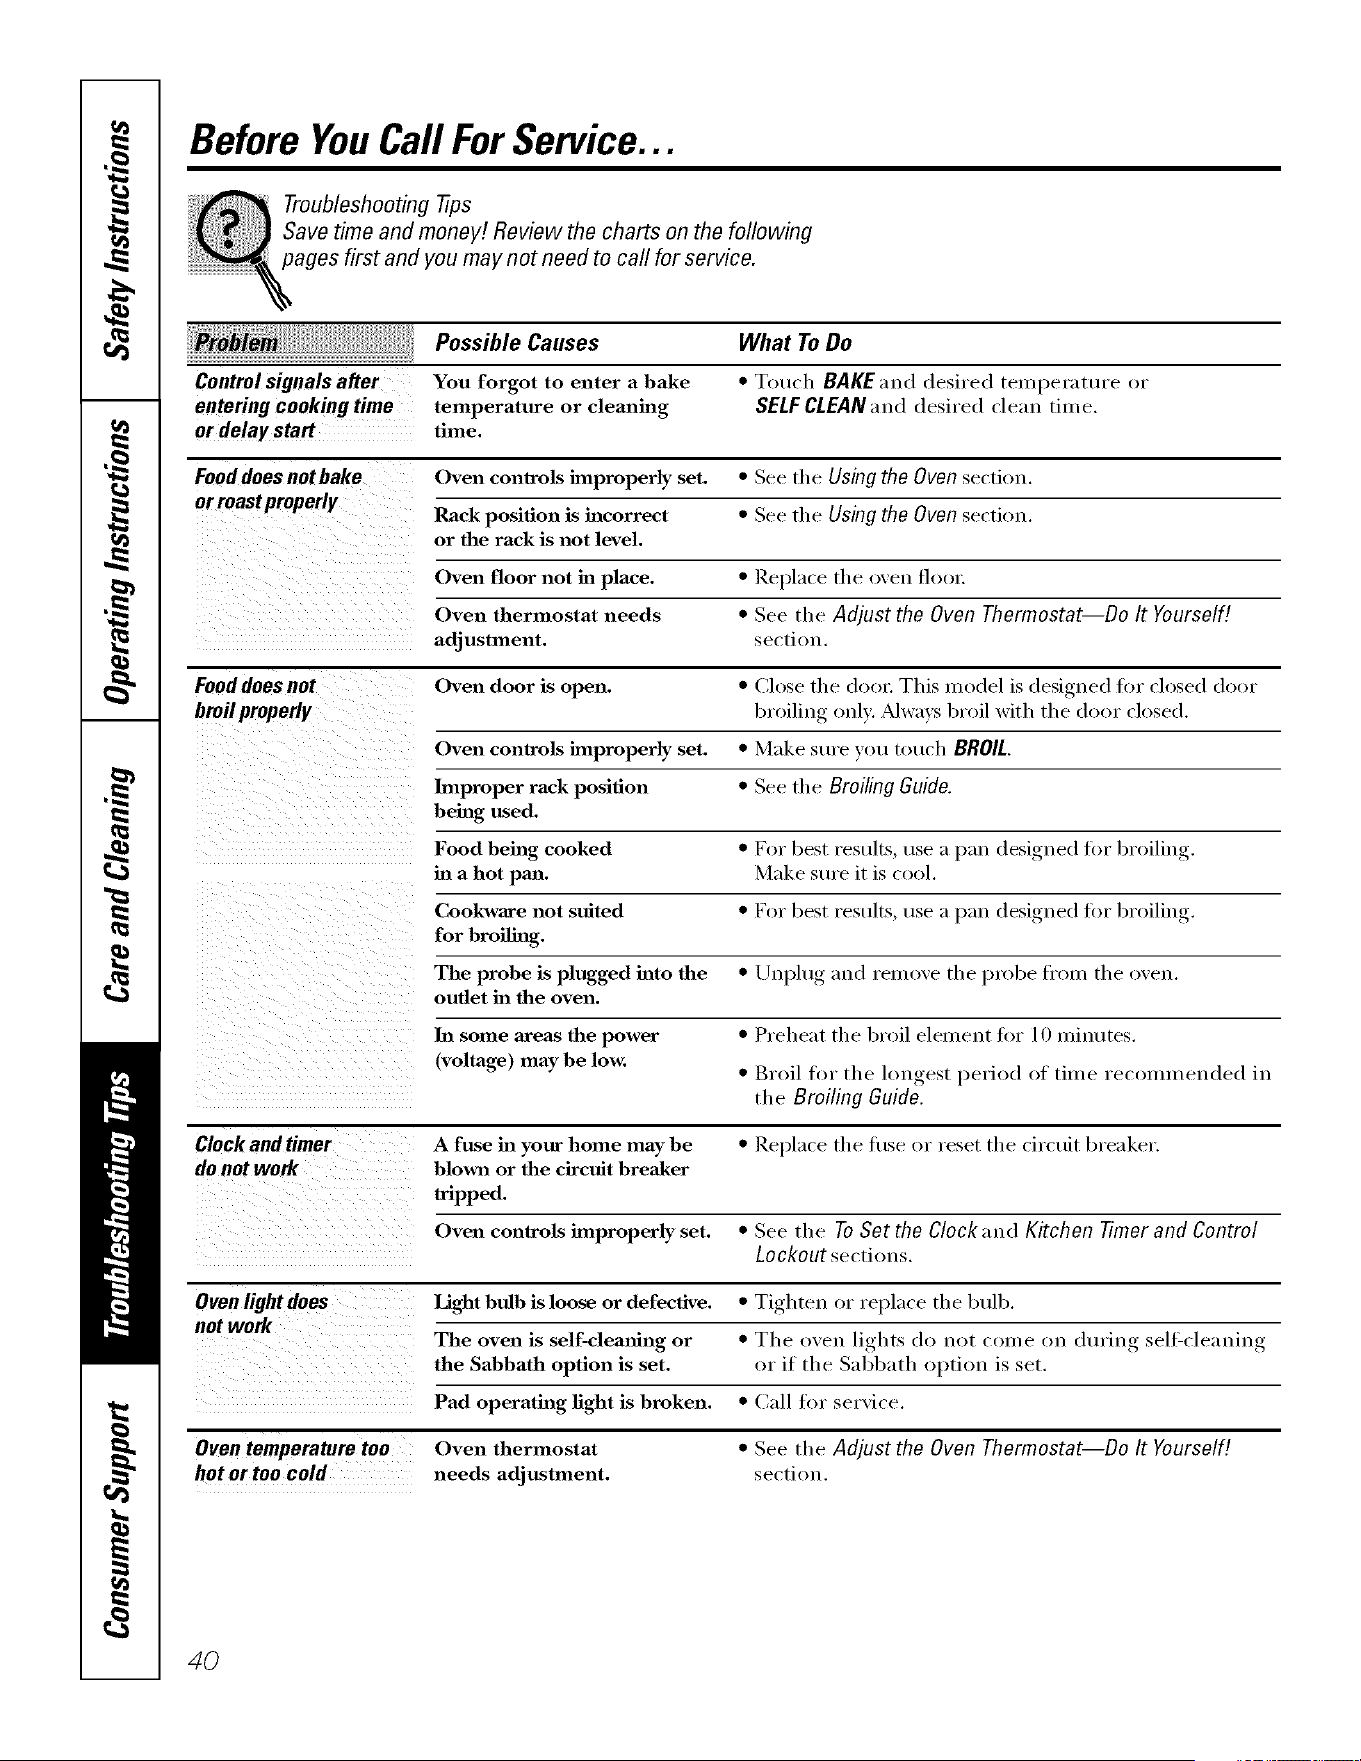
Before YouCall ForService...
Troubleshooting tips
Save time and money! Review the charts on the following
pages first and you may not need to call for service.
Controlsignalsafter
entering cookingtime
or de!aystart
Possible Causes
You forgot to enter a bake
temperature or cleaning
time.
What To Do
• Touch BAKE and desired teinperature or
SELFCLEANand desired clean time.
Fooddoes notbake Oven controls improperly set. • See tile Using the Oven section.
orroastproperly
Rack position is incorrect • See tile Using the Oven section.
or the rack is not level.
Oven floor not in place. • Replace tile (>yen fl(>ln:
Oven thermostat needs • See the Adjust the Oven Thermostat--Do It Yourself!
adjustment, section.
Fooddoes not Oven door is open. • (',lose tile doo_: This model is designed fin" closed door
hmilproperly broiling oul): Mwa):s broil with tile door closed.
Oven controls improperly set. • Make sure you touch BROIL.
Improper rack position • See tile Broiling Guide.
being used.
Food being cooked • For best results, use a pau designed fin" broiling.
in a hot pan. Make sure it is cool.
Cookware not suited • For best results, use a pan designed fin" broiling.
for broilhag.
The probe is plugged hate the • Unplug and l'elllOVe tile probe _'FOlH tile oveu.
outlet ha the oven.
ha some areas the power • Preheat the broil element fin" 10 minutes.
(voltage) maybe low. • Broil for tile longest period of time recommended in
tile Broiling Guide.
Clock and timer A fuse ha your home may be • Replace tile t/so or reset tile circuit breaker.
donot work blown or the circuit breaker
tripped.
Oven consols improperly set. • See the To Set the Clock and Kitchen Timer and Control
Lockout sections.
Oven lightdoes Light bulb is loose or defective. • Tighten or replace tile btdb.
not work
The oven is self-clemting or • Tile oven lights do not (l)me im din'lug sell:(leauiug
the Sabbath option is set. (:,r it tile Sabbath (>ptiou is set.
Pad operating light is broken. • Call for sel'vice.
Oven thermostat
needs adjustment.
Oventemperaturetoo
hot ortoo cold
• See the Adjust the Oven Thermostat--Do It Yourself!
section.
4O
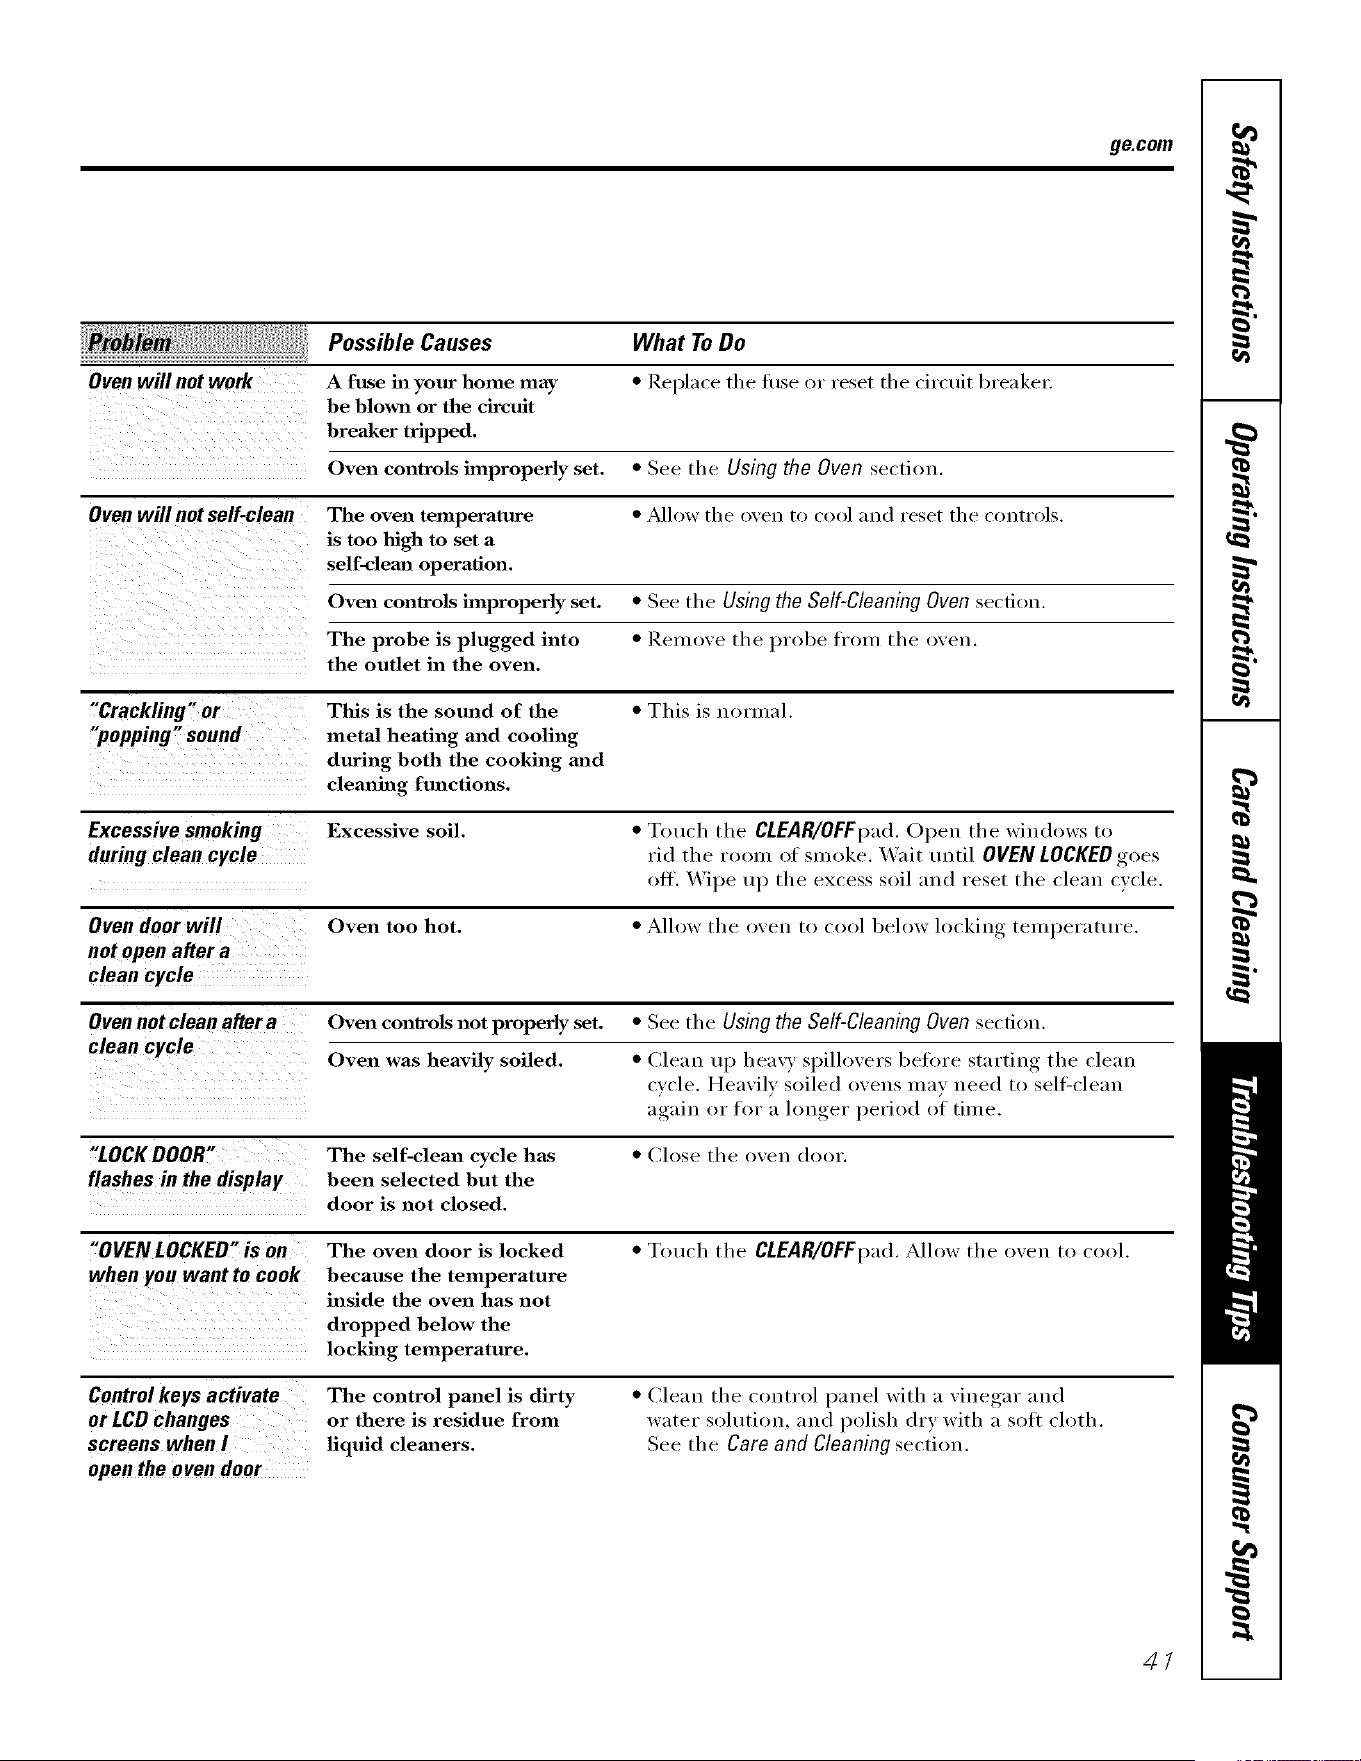
ge.com
Possible Causes What To Do
Oven will not work A fuse ha your home may * Replace tile tuse or reset tile circuit breaker:
be blown or the drcuh
breaker tripped.
Oven controls improperly set. * See tile Using the Oven section.
Oven will notself-clean The oven temperature * _Mh)w the oven to cool and reset the controls.
is too high to set a
self-clema operation.
Oven con_cols improperly set. * See tile Using the Self-Cleaning Oven section.
The probe is plugged into * Reulove the probe fl'ou] the oven.
the outlet in the oven.
"Crackling" or This is the sound of the • This is normal.
"popping" sound metal heating and cooling
during both the cooking mzd
cleaning functions.
Excessive smoking Excessive soil. * Touch the CLEAR/OFFpad. Open tire windows to
during clean cycle rid the room of smoke. Wait tn]til OVEN LOCKED goes
<:,ft. _'Vipe up tire excess soil and reset the clean cycle.
Oven door will Oven too hot. * Allow the oven to cool below locking temperature.
not open after a
clean cycle
Oven not clean after a Oven controls not properly set. * See the Using the Self-Cleaning Oven secti_:,u.
clean cycle Oven was heavily soiled. * (]lean up heavy spilh>vers heft>re starting the clean
cycle. Heavily soiled ovens u_ay need t{> sell:clean
again or for a h)u,_er_ period of time.
"LOCK DOOR" The self-clean cycle has * Close tire oven door.
flashes in the display been selected but the
door is not closed.
"OVEN LOCKED"is on The oven door is locked * Touch tire CLEAR/OFFpad. Allow tire oven to cool.
when you want to cook because the temperature
inside the oven has not
dropped below the
locking temperature.
Control keys activate
or LCD changes
screens when I
open the oven door
The control panel is dirty
or there is residue from
liquid clem_ers.
• Clean the control panel with a xinegar and
water solution, and polish dry with a soit cloth.
See the Care and Cleaning section,
4/
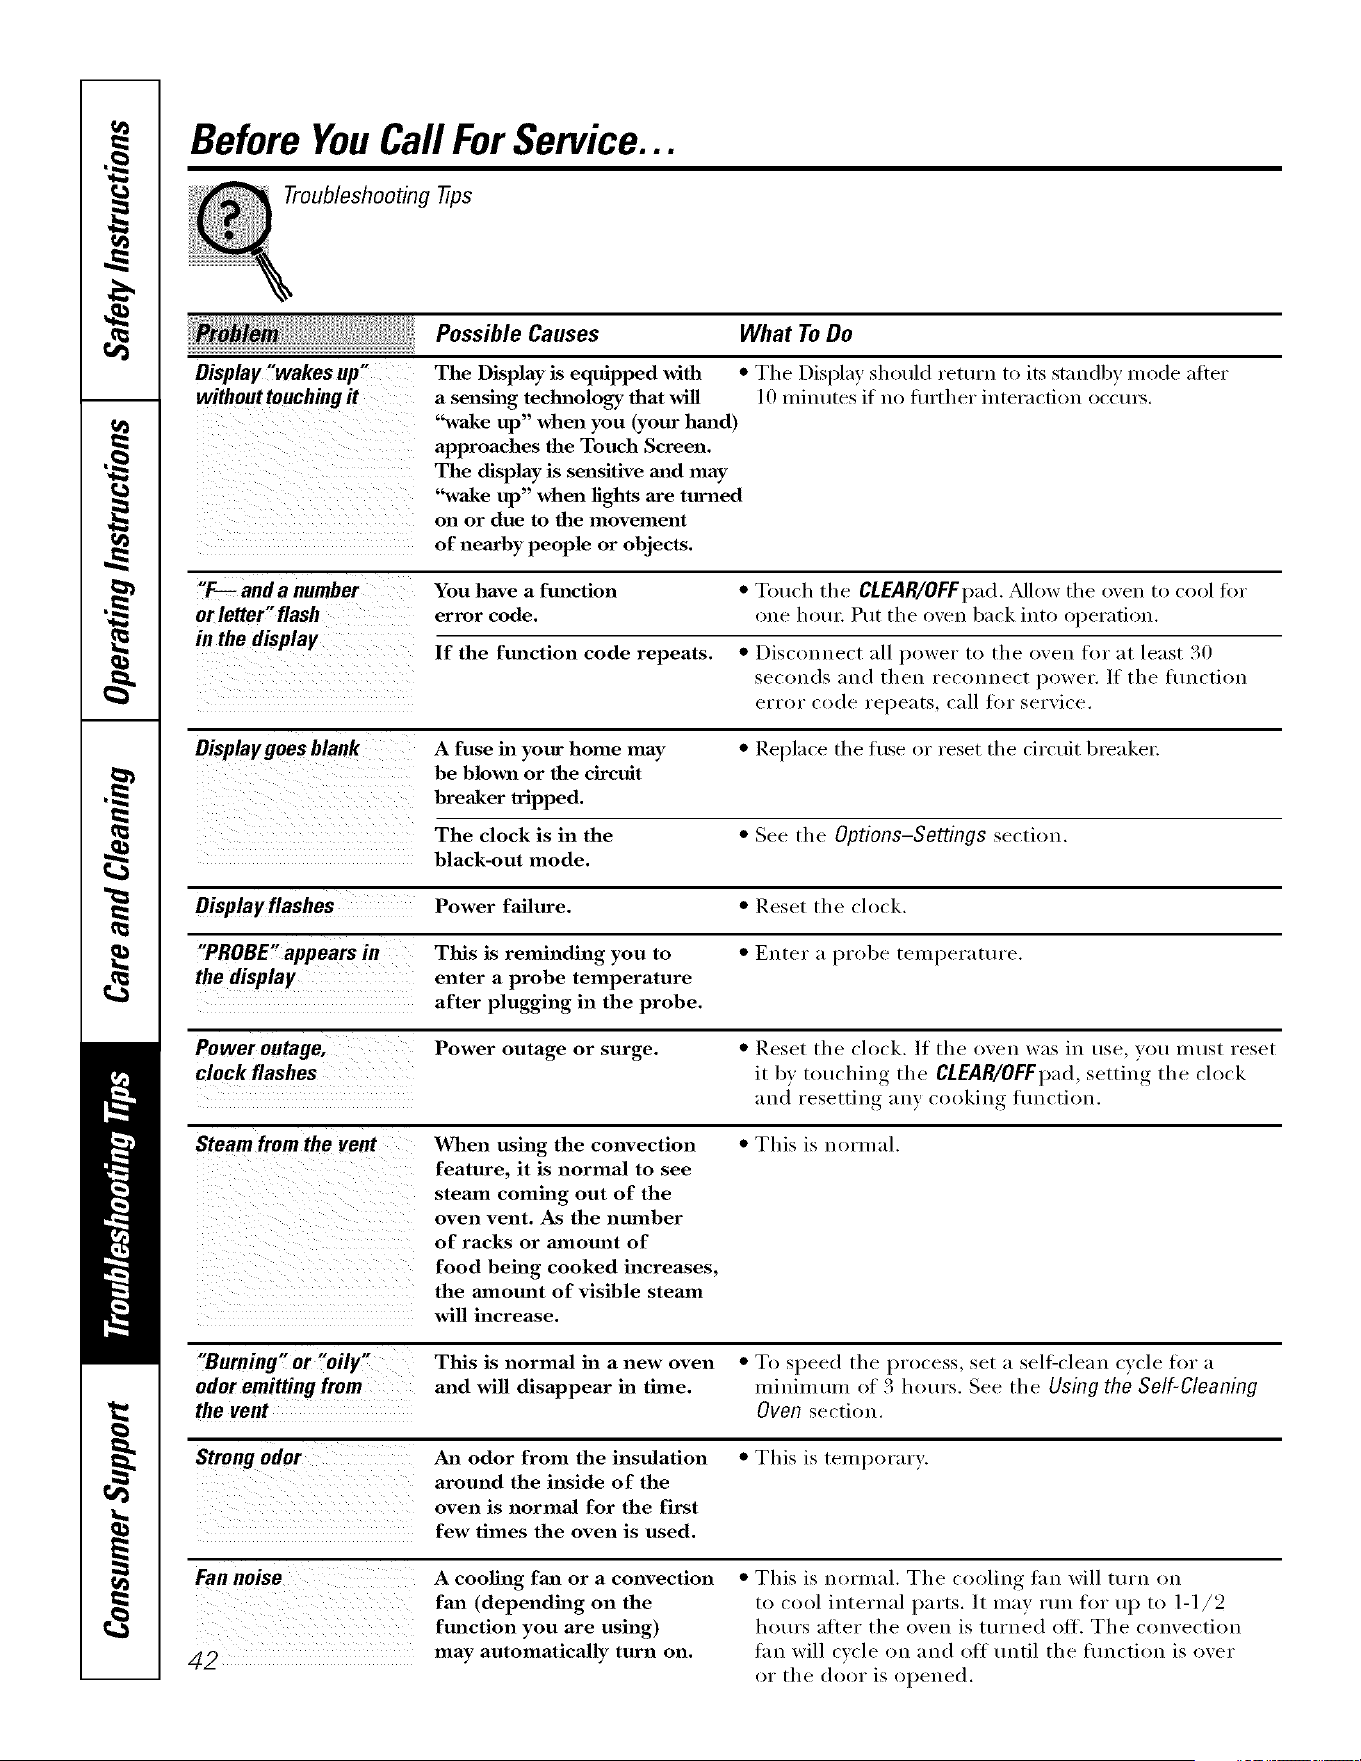
Before YouCall ForService...
Troubleshooting tips
Possible Causes What ToDo
Display,wakes up"
without touchingit
The Display is equipped with
a sensing teclu_ology that _611
%va_ke up" when you (your hm_d)
approaches the Touch Screen.
The display is sensitive mad may
'%va_ke up" when fights axe turned
on or due to the movement
of nearby people or objects.
• The Display should return to its standby mode after
10 Ilfintltes if no fiH'ther interaction oc('m_.
"F-- anda number You have a function • Touch the CLEAR/OFFI)ad. ,_dlow the oxen to cool fin.
orletter"flash error code. one hour. Put the oxen 1)ack into ol)erafion.
in the display If the function code repeats. • Disc()i_nect all power to the oxen for at least 30
seconds and then reconnect i)ower. ]f the flulction
error code repeats, call fi)i" serxice.
A fuse h_ your home may • Rei)lace the ti,se or reset the circuit breakeI;
be blown or the circuit
breaker tripped.
The clock is in the • See the Options-Settings section.
black-out mode.
Oisplayflashes Power failure. • Reset the clock.
"PROBE"appears in This is reminding you to • Enter a [M'obe ten_l)ei'attu'e.
the display enter a probe temperature
after plugging in the probe.
Power outage, Power outage or surge. • Reset the clock. If the oxen was in use, you InUSt reset
it b) totlching the CLEAR/OFFpad,,settino_ the clock
and resetting any cooking flmction.
Steamfrom the vent When using the convection • Tiffs is normal.
feature, it is normal to see
steam coming out of the
oven vent. As the number
of racks or aa_aom_t of
food being cooked increases,
the amount of visible steam
will increase.
iiii!iiiii( iiiiii [iii!iilii!iiiilli!i
_ii ii i
i/ iiiiii ii! ! ! ! ! ! ! ! ! !_I
"Burning" or "oily. This is normal in a new oven • To speed the process, set a self-clean cxcle for a
odor emitting from and wiU disappear in time. nfilfilluHla of 3 hours. See the Using the Self-Cleaning
the vent Oven section,
StrongOdor An odor from the insulation • This is teml)orary.
around the inside of the
oven is normM for the first
few times the oven is used.
A cooling fm_ or a convection
fan (depending on the
function you are using)
may automatically turn on.
• This is normal. The cooling tim will turn on
to cool ii_ternal parts. It may rtm for u l) to 1-1/2
hem's after the oven is turned off. The convection
tan will cycle on and off until the fimction is over
or the door is oi)ened.

GE Service Protection Plus rM
GE, a name recognized worldwide fbr quality and dependability, of{krs you
Service Protection Plus '"--comprehensive protection on all your appliances--
No Matter What Brand!
Benefits Include:
• Backed by GE
• All brands covered
• Unlimited service calls
• All parts and labor costs included
• No out-of-pocket expenses
• No bidden deductibles
• One 800 nmnber to call
We TI Cover Any Appliance.
Anywhere. Anytime.
YOu xdll be completel) satisfied with tun" service protection or you ma) request )our mone} back
on the remaining value of )our contract. No questions asked. It's that simple.
Protect wmr refi'igerator, dishwasher, washer and d*yer, range, TV, VCP. and m uch more--any brand!
Plus there's no extra charge fbr emergency service and low monthly financing is available. Even icemaker
coxerage and fbod spoilage protection is offered. You can rest easy, knowing that all your valuable
household products are protected against expensive repairs.
Place ,ore" confidence in GE and call us in the U.S. toll-free at _UU.t)Z_).ZZZ_
for n/ore illforn/_ltiOll.
*-MIlmulds (:o_<led, up Io 20 y<al_, old, in Ih< continental U.S.
,_ (_/ll here
Please place in envelope and mail to:
General Electric Company
Warranty Registration Department
P.O. Box 32150
Louisville, KY 40232-2150
42
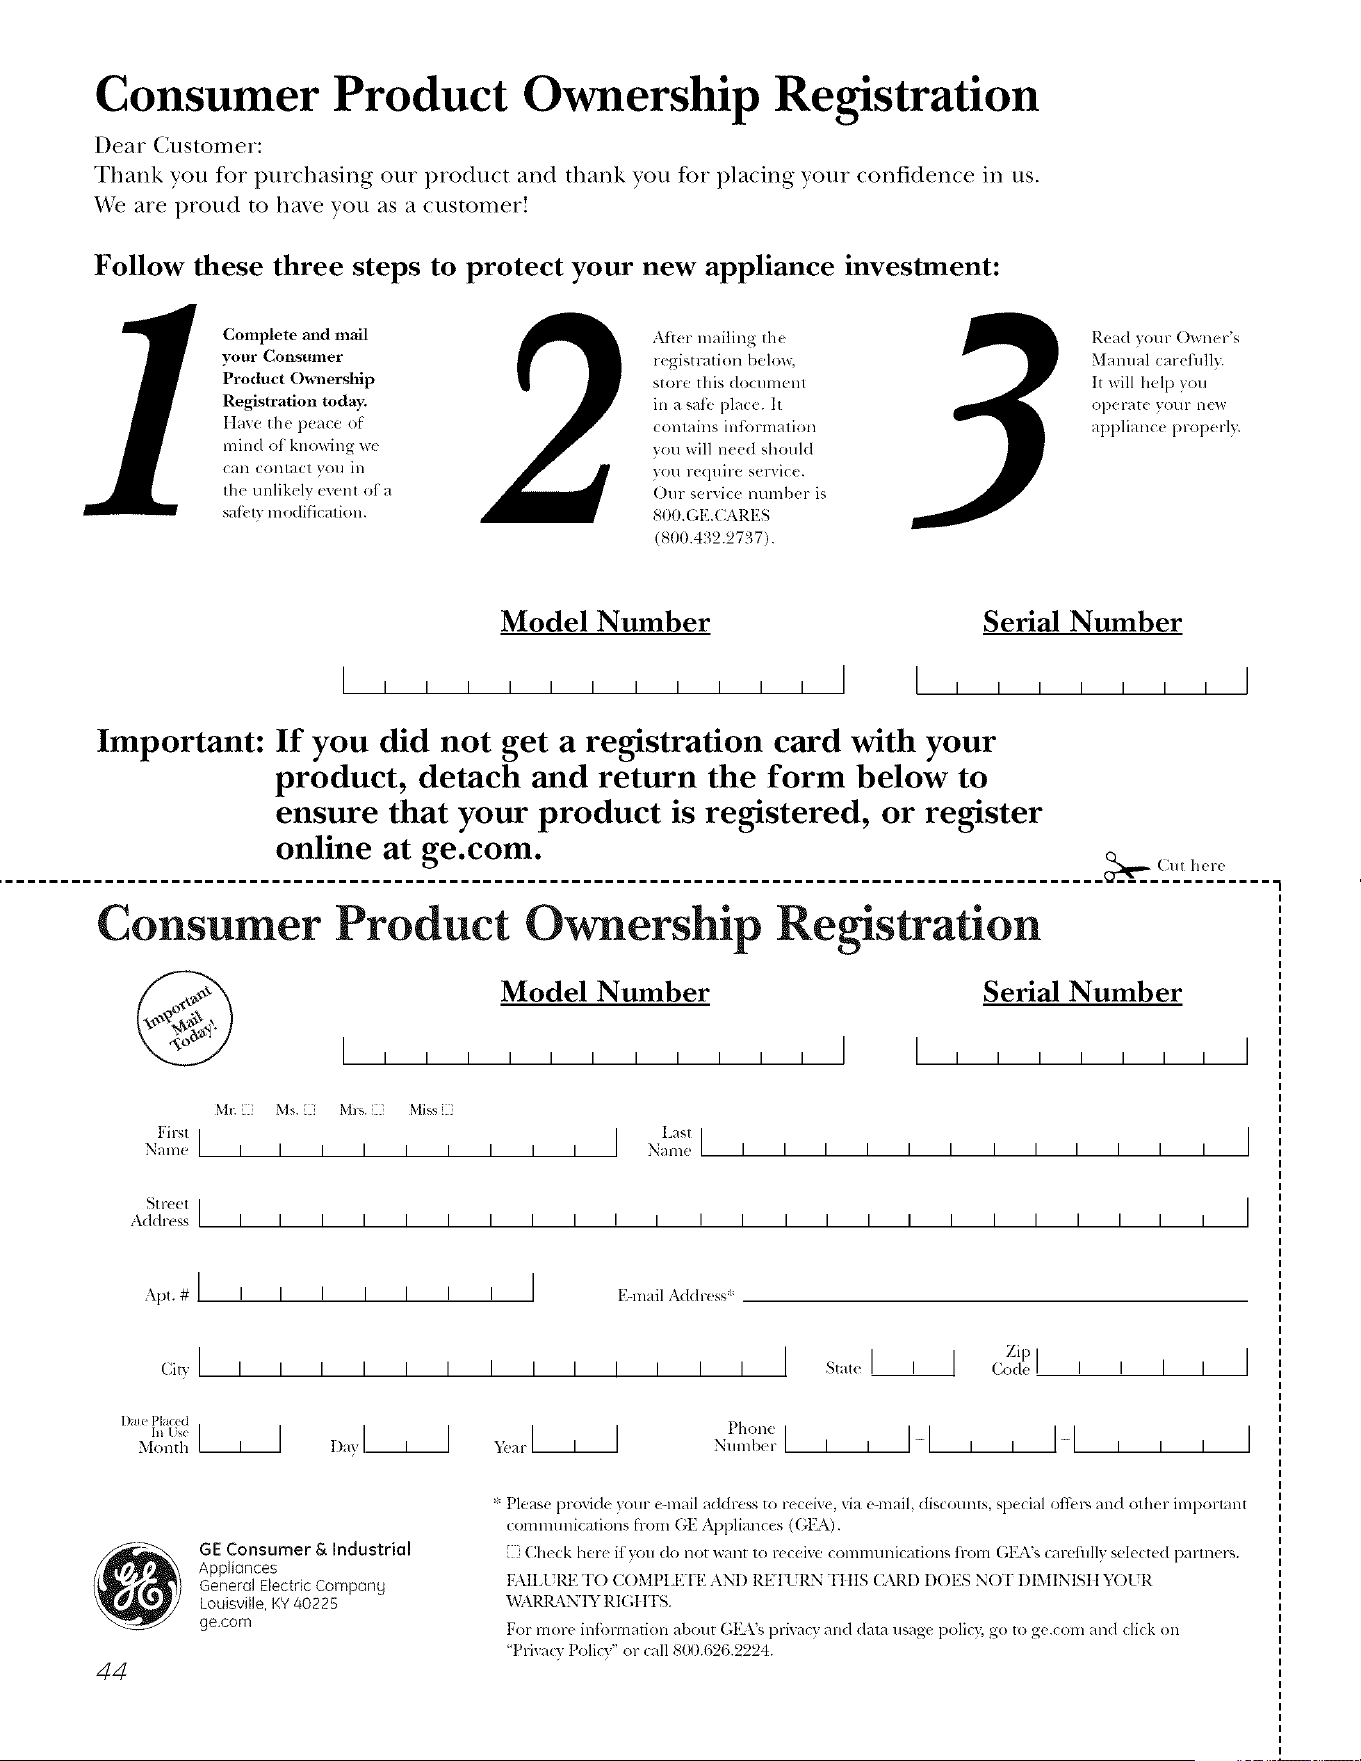
Consumer Product Ownership Registration
Dear Customer:
Thank you for purchasing our product and thank you for placing your confidence in us.
_:e are proud to haxe you as a customer'.
Follow these three steps to protect your new appliance investment:
Complete mid mail
your Consumer
Product Ownership
Registration today.
ttAve the pUACe of
mind of knowing wc
Call colltacl VOll ill
the tmlikelx event of a
saii ly modificaIion.
Attar mailing the
registration below,
store this document
in a sail, place. It
contains inlormation
you will need should
you require service.
Our serxice number is
8t)0A;1LCARES
(800.432.2737).
Read VOIlF ()Wller's
Mamlal carefully.
It will help you
operate VOllr llew
appliance properly.
Model Number Serial Number
Important: If you did not get a registration card with your
product, detach and return the form below to
ensure that your product is registered, or register
online at ge.com.
,_ (]111 h<r<
Consumer Product Ownership Registration
Model Number Serial Number
MI: Ms. M_s. Mi_s
Firsl I I Lasll
Name I I I I I I I I I Name I I I I I I I I I I I I
Sl r(!(!l I
Address I I I I I I I I I I I I I I I I I I I I I I I I
, I
I
I
Apt. # ]
Ciw ] I I
lIalePlaced
In Use III
Month
I I I I I I I I E-mail Address:
I I I I I I I I
1)atI_ _,ar _
Zip
I I [ State [ I I (;ode
Pll(m_
N..,b<,rl I I I-I I I
GE Consumer& Industrial
Appliances
General Electric Company
Louisville, KY40225
ge.com
44
* Please provide your e-mail address to receive, via e-mail, discounts, special ottbl', and other important
communications from (;E Appliances (GI_\).
Check here if you do not want to receive communications ti-om GEA's carcfillly selected partners.
FAIL[ RI{TO COMPI_ETE AND RETI 5RN TIIIS C_\RD D()ES NOT DIMINISII 5_)1 R
W.\1_ \N'IY RI(;t fFS.
For more information about G1LVsprivacy and dala usage polic3; go to ge.com and <:lickon
"Pri_a_y Policy" or call 81_).626.2224.
Please place in envelope and mail to:
Veuillez mettre dans une enveloppe et envoyez _ :
OWNERSHIPREGiSTRATiON
P.O. BOX1780
MISSISSAUGA,ONTARIO
L4Y 4G1
(FORCANADIANCONSUMERSONLY)
45
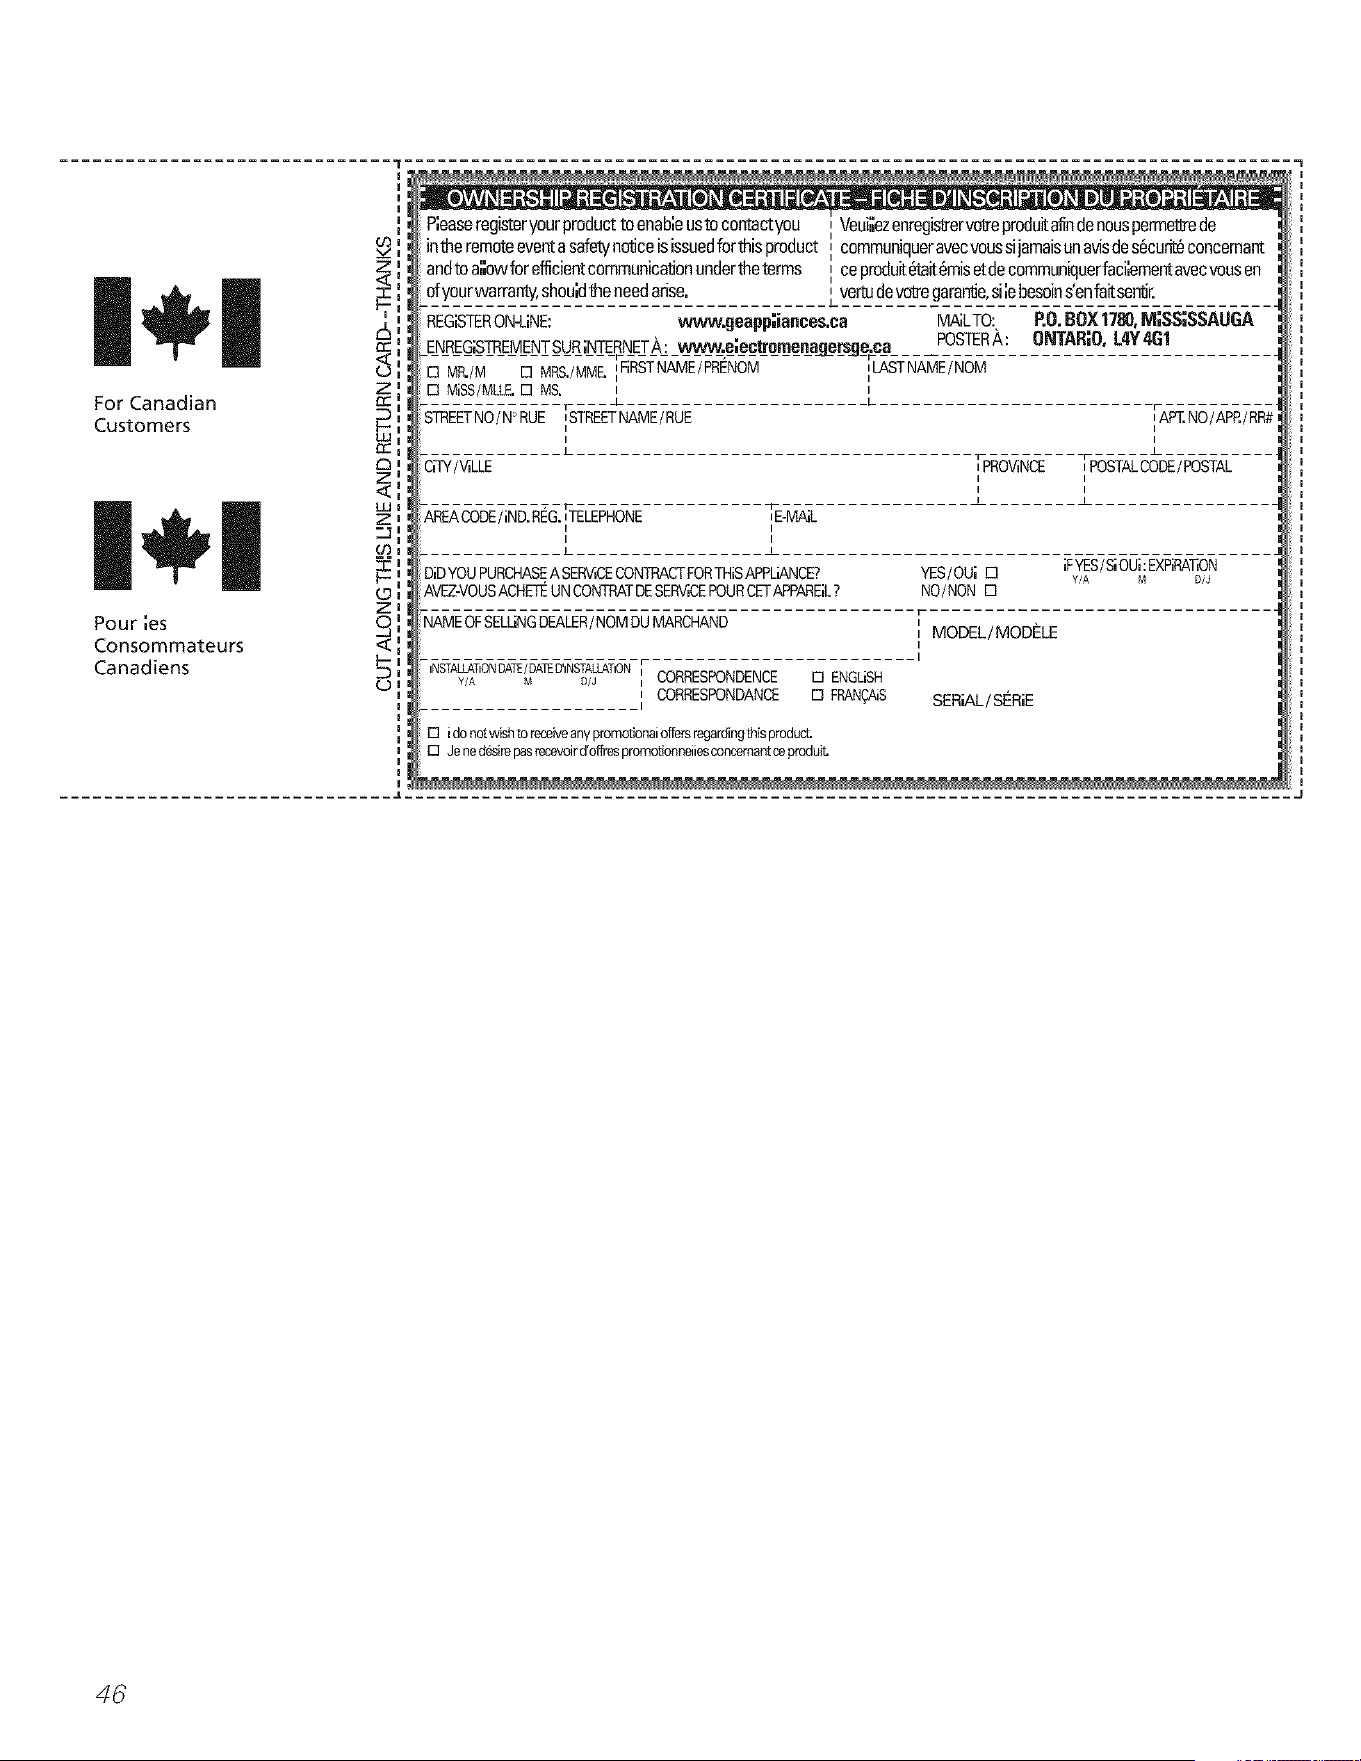
For Canadian
Customers
Pour ',es
Consommateurs
Canadiens
Z I
_g
klAI
ZI
.T.jI
g
Zl
P;easeregisteryourproductto enableustocontactyou ,,Veui[_ezenregistrervotreproduitaflndenouspermet_ede
intheremoteeventa safetynoticeisissuedforthisproduct ,,communiqueravecvoussijamaisunavisdes_cudt6concemant
andtoa',',owforefficientcommunicationundertheterms, ceprodui[6tait6misetdecommuniquerfaci',ementavecvousen
ofyourwarranty,shouldthe needarise. Lver_devof_egaran_e,s ,ebe.sonsenfar_senbr.
REGISTERON-LINE: www.geapp;iances.ca MA_LTO: P.O. BOX 1780, M;SS[SSAUGA
ENREG;STREMENTSURINTERrNET,&,: www:e;ectromenag_e_rs__e;ca POSTER/_,: ONTAR;O, L4Y4G1
[] MR./M [] MRS./MME. IIFIRSTNAME/PRENOM llU_STNAME/NOM
[] MiSS/MLLE.[] MS. I I
L L
T r
STREET NO/N° RUE _STREETNAME/RUE _AN'. NO/APR/RP_
I I
Qq_Y/¼LLE ] PROVINCE /POSTAL
I
I I
J 1
• _ -¢ ,
AREACODE/iND. REG, _TELEPHONE _E-MNL
I I
I I
J_ ±
DiDYOU PURCHASEASEFMCECONTRACTPORTHiSAPPLiANCE? YES/OUI [] IFYES/SIOUkEXPIRA'IION
Y/A M DiJ
AVE-VOUS ACHEIt_UN CONTSATDE SEFMCEPOUR Ckq-APPAREIL? NO/NON []
NAME OFSELLINGDEALER/ NOM DU MARCHAND r
I MODEL/MODEI_
I
I
,NSTALLAT,ONDATE/DATED',NSTALLATiON[ CORRESPONDENCE [] ENGLISH
Y/A M D/J I
CORRESPONDANCE [] FRANCAiS SERIAL/SCRiE
I
[] ido notwishto receiveanypromotionaloffersregardingfllis product.
[] Jened_sirepasrecevoird'offre_promotionneiie_concemantce produib
46
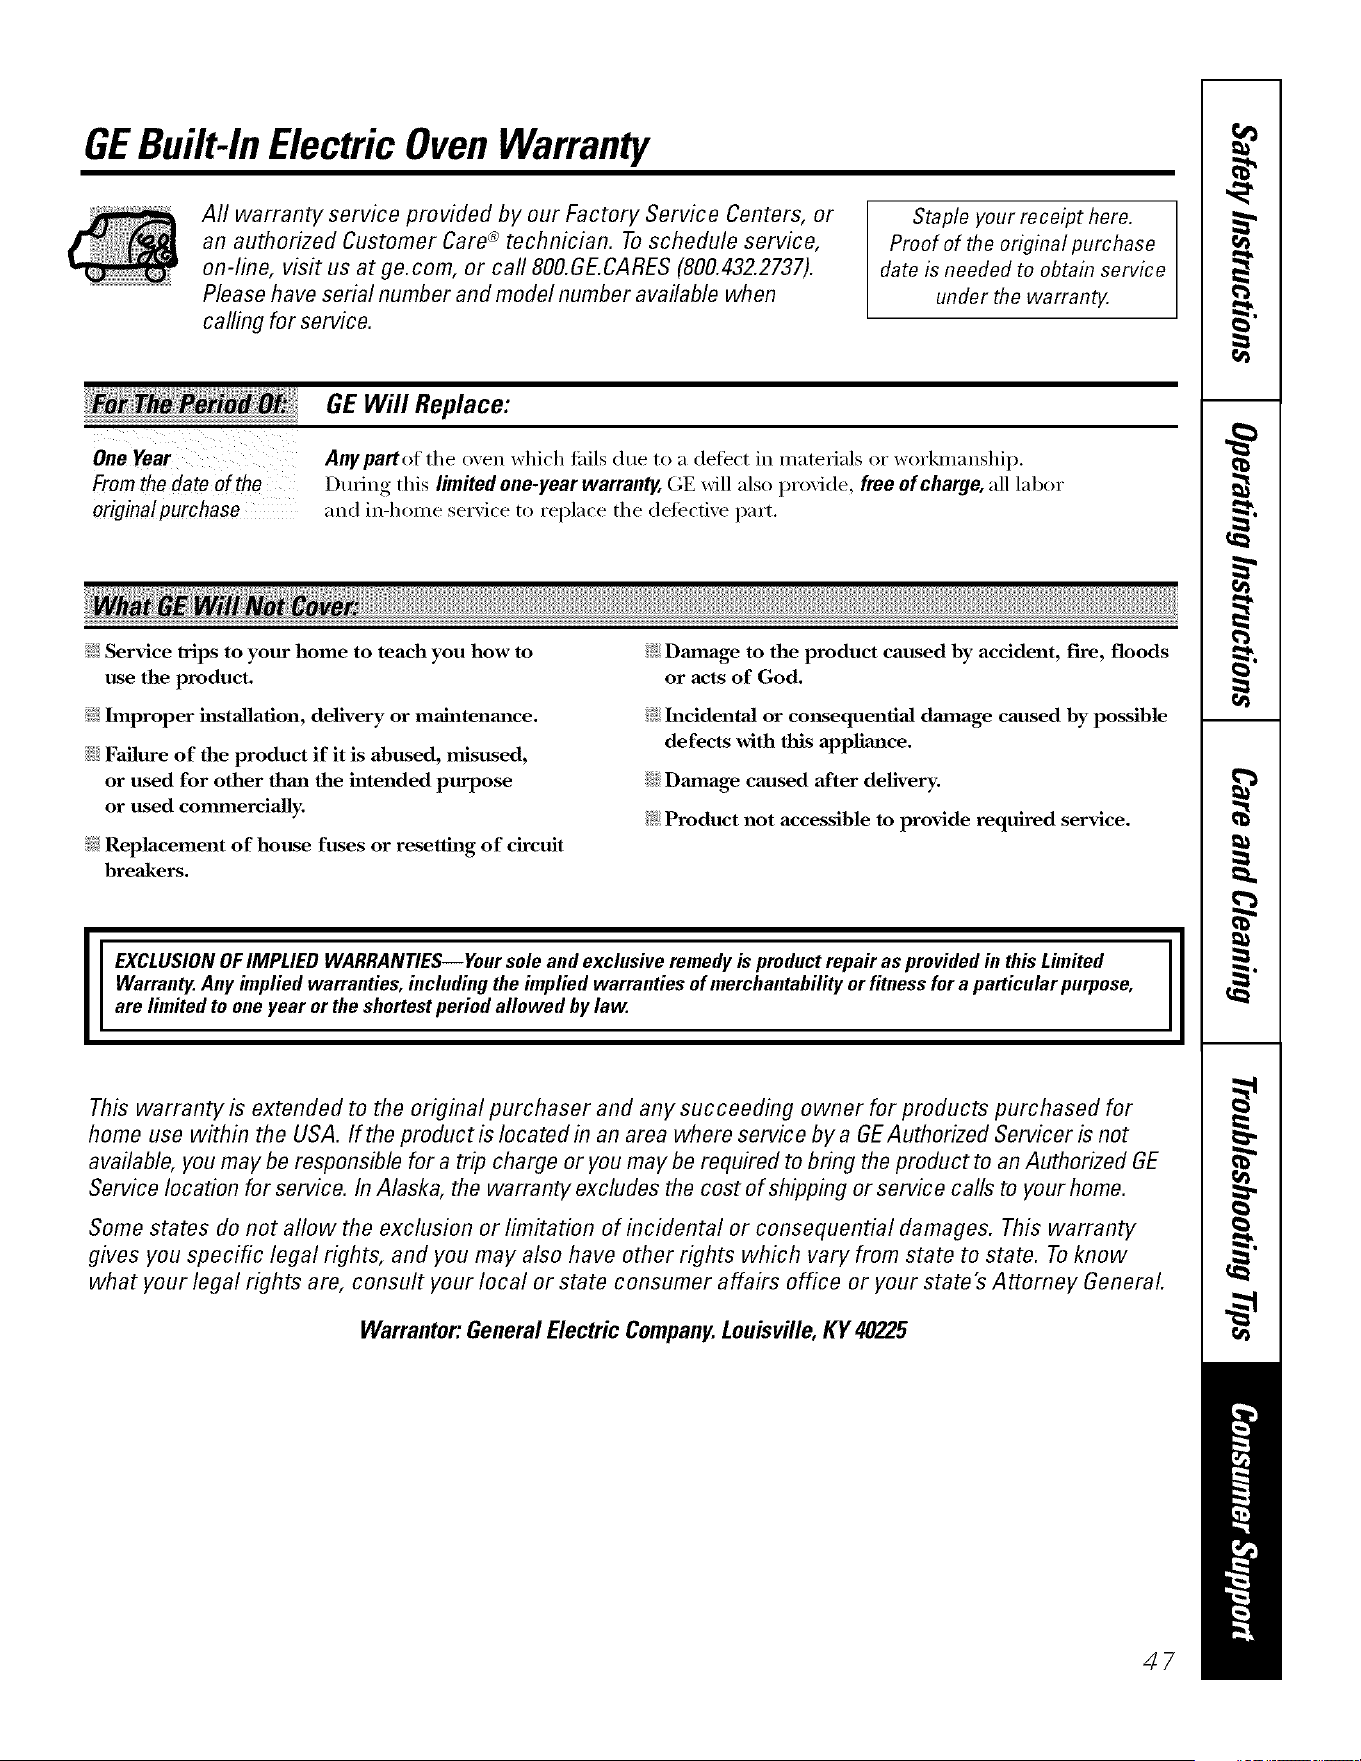
GEBuilt-In Electric OvenWarranty
All warranty service provided by our Factory Service Centers, or
an authorized Customer Care® technician. To schedule service,
on-line, visit us at ge.com, or call 800.GE.CARES(800.432.2737).
Please have serial number and model number available when
calling for service.
Staple your receipt here.
Proof of the original purchase
date is needed to obtain service
under the warran_
Fromthe dateof the
origina!purchase
GE Will Replace:
Any pattof the oven which fifils due to a (lefect in materials or w(n'kmanshii_.
During this limited one-year warranty, GE will also provide, free of charge, all labor
and in-home service to replace the (lefecti\'e part,
_: Service trips to your home to teach you how to
use the product.
!i/:Improper hlstallation, delivery or mah_tenm_ce.
::Ji::Failure of the product if it is abused, misused,
or used for other thml the intended purpose
or used commercially.
_: Replacement of house fuses or resetting of circuit
breakers.
!i/:Dmnage to the product caused by accident, fire, floods
or acts of God.
_: h_cidentaJ or consequential dmnage caused by possible
defects with this applimlce.
::Ji::Dmnage caused after delivery.
!i?:Product not accessible to provide required service.
EXCLUSION OFIMPLIED WARRANTIES--Your sole and exclusive remedy is product repa# as provided in thisLimited
Warranty. Any implied warranties, iucluding the implied warranties of merchantability orfitness for a particular purpose,
are limited to one year or the shortestperiod allowed by law.
This warranty is extended to the original purchaser and any succeeding owner for products purchased for
home use within the USA. If the product is located in an area where service by a GEAuthorized Servicer is not
available, you may be responsible for a trip charge or you may be required to bring the product to an Authorized GE
Service location for service. In Alaska, the warranty excludes the cost of shipping or service calls to your home.
Some states do not allow the exclusion or limitation of incidental or consequential damages. This warranty
gives you specific legal rights, and you may also have other rights which vary from state to state. Toknow
what your legal rights are, consult your local or state consumer affairs office or your state's Attorney General
Warrantor." General Electric Company.Louisville,KY 40225
47
m
Notes.
,0
m
__
r _
m
1=.
m
48
Mesures de s&urit_ ........................... _,o-_,2
Directives de fonctionnemem
Aide .............................................. 79
Commandes ....................................... 53
Conserver les aliments chauds ....................... 74-75
Convection ...................................... 62-65
Cuisson ........................................... 55
Cuisson et r6tissage minutes ........................ 56, 57
Cuisson et r&tissage par convection minutg_s ............ 66-67
Fermentation ....................................... 73
Four ........................................... 54, 55
Four autonettoylmt ............................... 70-72
Gril ........................................... 60, 61
Grilles du flmr ...................................... 87
Minuterie de cuisine ................................. 69
Option de c/usson et de maintien de la tempg_rature ........ 77
(-)priori de d_part difl_r_ .............................. 78
(-)priori de d_shydratation ............................. 77
Option de r_glage de deux temperatures ................. 76
Option Sabbat ...................................... 79
Rerettes pr_i_r_es ................................... 68
R_glage des options ............................... 80-84
Acti_;_tion/d_sactivation du signal sonore des touches ..... 83
Arr_t imtomatique ] 2 heures ......................... 81
Conversion automatique de recettes .................... 82
Couleur de l'affichage ............................... 82
Dissimulation de l'horloge ........................... 81
Horloge .......................................... 80
Langue .......................................... 82
R_glages par d_fimt ................................. 84
S(_lection des degrg_s Fahrenheit ou Celsius .............. 8 ]
Signal de la minuterie ............................... 84
Signal de la minuterie de cnisine ...................... 84
Tllelmostat ....................................... 80
Vol um e .......................................... 83
P.&tissage .......................................... 55
Sonde ....................................... 58, 59, 65
Verrouilliige des commlmdes .......................... 69
Entretien et nettoyage
Ampoules du flmr . .................................. 85
Enlever le ruban gomn/_
d'emballage ........................................ 85
Grilles du fl)tlr . ..................................... 87
Porte du four ....................................... 86
Sonde ............................................ 86
Snrfaces en acier inoxydable ........................... 87
Tableau de commande ............................... 87
Conseils de d4pannage .............................. 88-90
Soutien au consommateur
Garantie .......................................... 91
Sotlt]en iltl collsoi/H/_iltetlr ............................ 92
Transcrivez ici les num_ros de modMe et de s6rie :
ModMe N °
S_rie N °
fimr derriere la pro're, sin" les modules 5 fimr simple ; sur les modules
5 fimr double, l'6tiquette se tl'otl'_v stir ]e cadre a',mlt du fl)ur
inf>Yieul; derYJbre la poise.
49

MESURESBE SECUR/T/ /MPORTANTES.
VEIJ/LLEZB'ABORDURELESMESURESBESECUR/TE
AVERTISSEMENTI
Pour votre s_curit_, veuillez suivre les directives donn_es dans le pr_sent manuel afin de r_duire
au minimum les risques d'incendie et de chocs #lectriques, et pr#venir tous dommages et blessures
graves ou mortelles.
5O
MESURESDESECURITE
Lorsque vous utilisez un #lectrom#nager, observez toujours les mesures de s#curit# de base,
notamment les suivantes :
_i::N'ufilisez cet appareil que pour l'usage
auquel il est destin_, comme expliqu&
dans le pr#sent manuel.
N Assurez-xous que xotre appareil est biera
install& et mis _ la terre par un installateur
qualN_, confonn_ment aux directix_s
d'insmllation fournies.
N Ne mntez pas de r#parer ni de remplacer
aucune piece du four, fi moins que cela ne
soit recommand& dans le present manuel.
Tout autre selwice d'entretien dolt &tre
assurt_ par un r#paramur qualifi&.
_:; Demandez _ l'installamur de xous montrer
l'emplacement du disjoncmur ou du
fltsible. Identifiez-le pour pom_ir le
tromer fi_cilement.
N Avant d'efibctuer une r_paration, coupez
mujoms l'alimenmtion du four air
panneau de disuJbution era enlevant le
fltsible ou era d&clenchant le disjoncmur.
N Ne laissez pas les ent=ants sans
surveillance--I1 tie l_autjamais laisser les
enfants seuls ou sans sur\_illance pr&s
de l'appareil, lorsque celui-<i foncfionne.
On dolt &galement leur intexdire de
grimper ou de s'asseoir sur l'appateil.
;_?:':L'isolant era fibre de xene des fours
aumnettoyants produit une tr&s petim
quantit_ de monoxvde de catgone
pendant l'autoneuoyag_. Pour r_duire
l'exposition fi ce gaz, assurez une
x_ntilation eta OtlViarat tlale fbn&tte ou
eta t=aisant fonctionner un xentilamur
ou la hotte de cuisine.
N Ne laissez personne gfimper ou monmr
sur la porte du four; ou s'y agripper.
Cela pounait endommag>r l'appareil
ou causer de graves blessures.
_::Assurez_\ous que le four est biera install6
darts une amaoire solidement fix6e fi la
chaq)ente de ]a r&idence. Ne laissez
personne gTimpet; s'asseoir ou monter
sur la porto du Ibm, ou s'y agripper
E:,:Ne laissezjamais la porto du four omerte
lorsque x_us ne sur\>illez pas l'appareil.
_:: Gardez totljottr's les rev&mments taluraltx
combustibles, les rideaux et les mnmres
une distance s6curimire de xotre four
_]_::Gardez toujours les ling_s 5 vaisselle, les
mitaines de four et autres articles era tissu
5 une distance s6cm-itaire de x_tre Ibm.
E:,:Gardez toujours les ustensiles en plastique
et en bois, de re&me que les aliments era
conser\>, _ une distance s6curitaire de
\otre foam
E:.:Apprenez aux en£mts g ne pasjouer
aXPC ]es cota/taaarldes Oil to/lie aIIWe
piOce du fo/li:
N De gTandes _gratignures ou des impacts
sur la surt_ace vitr_e des portes peux>nt
entrainer le bfis du x>ne.
N Ne rang_z pas de mat_fiaux inflammables
dans le tbur.
s MISE EN GARDE: Fa.gez
pas des articles qui pr_sentent un int_r_t
pour les enfants, dans les annoires se
trouvant au<tessus du four car ceux-ci
pomTaient gtimper sur l'appareil pour
les atteindre et risqueraient de se blessen
_::Ne pormzjamais de v&mments amples
lorsque x_us udlisez cet appareil. Faims
attention lorsque x_us prenez des articles
ranges dans les armoites au<tessus du
four. Les fissus inflammables peux_nt
prendre feu an contact des surPaces
chaudes et causer de grm>s brH]/li'es.
electromenagersge.ca
AVERTISSEMENT!
MESURESDESECURITE
_ N'ufilisez que des poign_es oil des mitaines
de four s_.ches les poig_r_es oil mitaines
de four humides oil mouill_es peuxent
causer des brfihues de vapeur. Ne laissez
pas les poign_es venir eta corrtact ax>c les
_l_ments chauflhnts. N'ufilisez pas de
serviette oil autte objet encombrant err
fissu au lieu de mimines de foun
;_;Pour votre s_cmJt_, n'ufilisez pas cet
appareil pour rt4chauftbr la pi&ce.
_i:,iNe laissez pas de graisse ou autres mafi&res
inflammables s'accumuler dans le fbur ou
fi proximit_ de ce demien
_]{;_Ne tenmz pas d'_min&e des feux de graisse
axec de l'eau. Ne prenezjamais une
casserole enflamm_e darts vos mains.
Ramenez les commandes fi OFF.
Vous pom_z _teindre compl&tement les
flammes err fennant la porto du four et err
_mig_rant l'appareil, ou err ufilisant un
exfincmur chimique _ poud_e ou _ mousse.
_{;_Ne muchez pas aux _l_ments chauflhnts, ni
aux parois d/l four Ces S/lilCdcespement &Ue
suffisamment ch audes pour causer des
brfilures, re&me si elles ne sont pas roug>s.
Pendant et apr&s l'ufilisafion, Prims err soKte
que x_s v&tements et autres ma/6tiaux
inflammables ne xiennent pas err corrtact mec
les patois du fore: i,aissez-les d'abord refioidit:
I,es surthces susceptibles de devenir chaudes
comprennent nommment l'_x>nt du four et
les surthces qui l'entourent, les asp_tit_s
autour de la porte du fbm, la surt_ace
p_tiph_tique du hublot et les moulures
m_mlliques au<tessus de la porto.
N'OUBLIEZPAS: i es parois du four pement
&tte chaudes lorsque xous ouvrez la porte.
_;;Ne metmzjamais d'ustensile de cuisine ou
tout auue article era bas du fo/li- I1 y aun
_l_ment de chauffhg_ sous le plancher du
four. Err plaqant des articles err bas du fore,
xous lisquez d'entrainer une su_vhauft_
du fore; qui peut causer des dommag_s
au four et endommager ou brfiler les
annoites de voue cuisine.
_t{;_Ne laissezjamais de pots _ graisse ou de
boites de conserve contenant des mati&res
grasses fi proximit_ de x_tre four
_t{:_Ne rang>zjamais ou n'utilisezjamais de
mati&res combustibles, d'essence ou mmes
liquides inflammables fi proximit_! de cet
appareil ou de rout auue _lecuom_nag_r.
;_i:,:Ne xous tenez pas trop pr_s du %ur lorsque
xous ouvtez la porte. I,'air chaud et la
vapeur q ui s'en _chappent peux>nt xous
brfiler les mains, le visage et les yeux.
;_i:,:Ne faims pas chauflbr de r6cipient fetm£
I,'accumulation de presoon darts le r6cipient
peut le faite 6claret; causant ain0 des NessuleS.
q_{::Assulez-xous que ]'_x>nt du four n'est
jamais obstru_.
_t{;:Ne laissez pas s'accumuler de d_p6ts
graisseux dans le four.
;_i:,:Placez les gailles _ la hauteur d_sir6e
lorsque le four est fioid. Si xous devez
les manipuler lorsque le four est chaud,
_vitez que xos mitaines de Ibm entrent
eta contact axe( les 616ments du fbur.
_t_;i _tsque xous utilisez des sachets pour la c/fisson
ou le r6tJssage, suivez les directives du fabticant.
_{;_Titez la grillejusqu'_ la butte si x_us dex>z
soulexer des casseroles lourdes. Vous
&imrez ainsi de x_us brfiler err muchant
aux patois de la porto ou du four.
_{;_Ne Paites pas sScher dejoumaux darts le tbur
S'ils smvhauflbnt, ils tisquent de i)ten&e Du.
_{;_N'entreposez pas d'arficles clans x_tre fore:
Ils pomTaient prendre feu.
_; Ne laissez pas de produits eta papiet;
d'ustensiles de cuisson ou d'aliments
clans le fbur lorsq u'il n'est pas utilisd.
_{;_Apr&s le grillage, sortez toujours aucune
l&hefiite du tbur et nettovez-la. La gxaisse
qui s'est accumulde dans une l&hefdte
pounait prendre Du la prochaine lois
q ue x_us ufiliserez le four
;_;Ne neuoyez que les pi&ces irrdiqu6es dans
le pi6sent manuel d'ufilisation.
_{;_N'ufilisez pas de papier d'aluminium
pour couvrir la sole du fO/lI" Fire ufilisafion
inad6quam du papier d'aluminium peut
pr6senmr des risques de chocs 6lectriques
ou d'incendie.
51
MESURESDESECUR/TeL/MPORTANTES.
VEU/LLEZD'ABORD/_IRELESMESURESDESECUR/TE
FAITESCUIflE/A VIANOEET/A VOIAIUE]IFONt?...
Faitescuire la dame et /a volaille Dfond--la temperatureINTERNEde la viandedoit _tre d'au moins
160°F(71 °C),et celle de la volatiled'aumoins 180°F(82 °C).la cuissonaces temperaturesinternesassure
g_n_ralementunebonneprotection centre les intoxicationsalimentaires.
FOURAUTONETTOYANT
_{;_Ne nettoyez pas lejoint de la porto.
Cejoint est essentiel _ une bonne
_mnch_it_. II J_aut _vimr de le r_curel;
de ]'endommager ou de le d_placer
;f; N'udlisez pas de produits nettoyants
commerciaux pour le four ll ne J_a/lt
jamais udliser des produits nettoyants
commerciaux ou des enduits promcteurs
dans ]e four ou pr&s des pi&ces du fo/m
Ies r_sidus de ces produits nettoyants
endommag_ront ]'int_rieur du four
lorsque x_us eflbctuerez un autonettoyag_.
_{;_A\ant de proc_der _ ] autonettoyage
du fO/li_ retirez ]a sonde et toutes les
l&cheflites, g_illes et autres ustensiles
de cuisine.
;_i:,iA\ant de commencer I autonettoyage,
essuvez les aliments remers_s.
;_i:,iSi le programme d'autonettoyage
fbncfionne real, _mignez ]e four et coupez
l'alimentation _]ecuique. Faims r_parer
l'appareil par un mchnicien qualifi_.
VEUILLEZLIREETSUIVRE,4LALETTRECESMESURESDESE-CURITE.
CONSERVEZCESDIRECTIVES
52
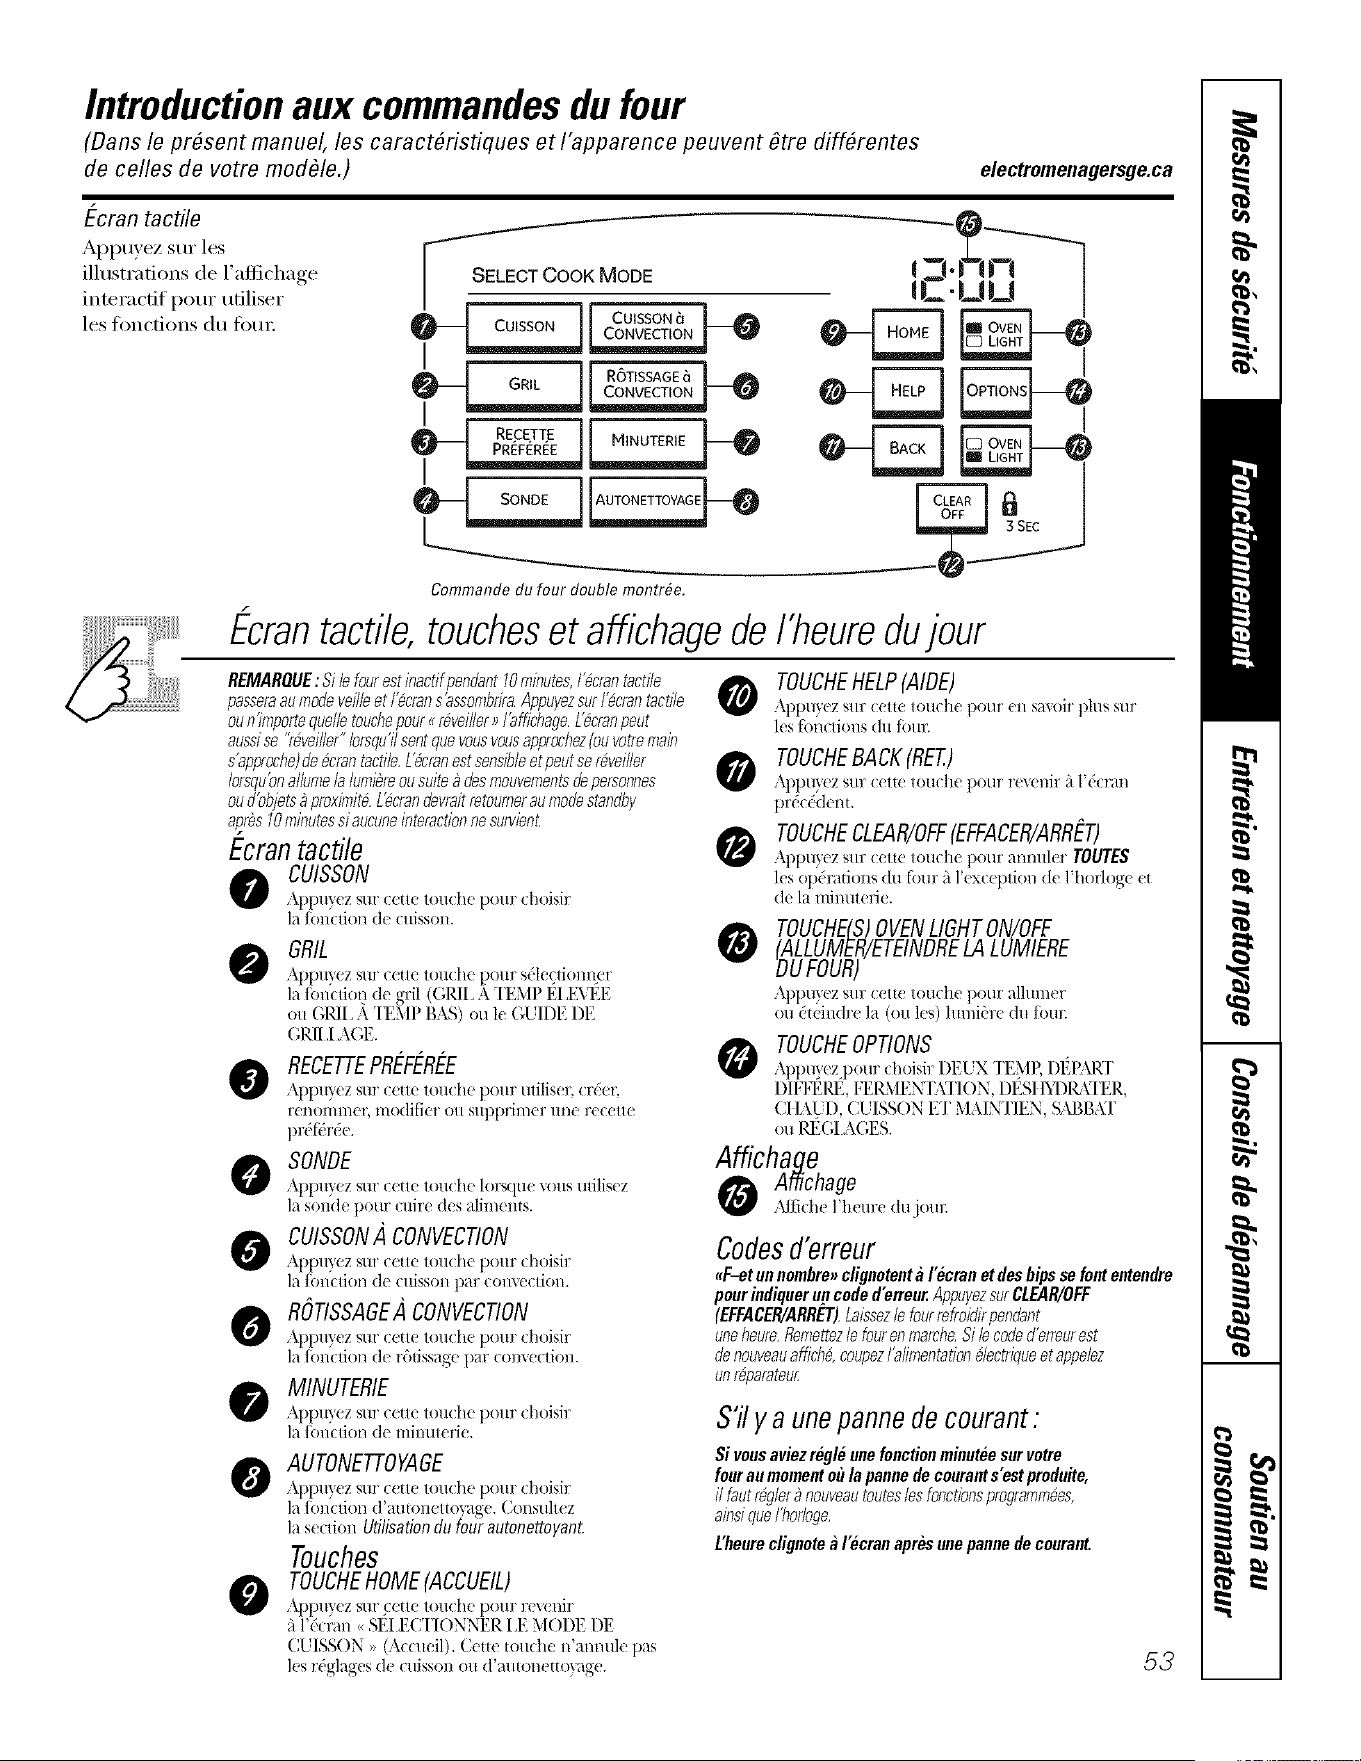
Introductionaux commandesdu four
(Dans le present manuel, les caract_ristiques et I'apparence peuvent Otre diff_rentes
de celles de votre modble.)
electromenagersge.ca
Ecran tactile
Appuyez sur Âes
illustrations de l'aflichage
interacfif pour ufiliser
les fimcfions du fi)ur.
SE__LEOTCOOK MODE
o-t G0, If"6T'ssA°"l
__a_J RECETTEI
Commande du four double montr#e.
£crontactile,toucheset aff/chagede I'heureclujour
REMARQUE: Si le fourest inactifpendant10minutes,I_cran tactile
passeraau modevei/leet I_crans'assombdraAppuyezsur I_crantactile
ou n'importequellotouchepour _ r#veiller_ f affict_ago,L_cranpout
aussiso "r&ei/ler" Iorsqu'i/sentquevousvousapprochez(ou votremain
s'approcho)de #crantactile,L'_'ranestsensibleot peutsor#veiller
iorsqu'onallumelalumbre ou suite_ dosmouvementsdopersonnes
ou dbbjets_ proxblit#, L#crandovraitretourneraumodestandby
apr_s10minutessi aucuneinteractionno survienL
Ecrantactile
CUISSON
AI)I)/I} ez SllI" Ceil( lOlt(}le poll1" (hoisir
la limctiot'_ de cuisson.
GRIL
ApI)/t} (z stlI"c(tle lOlL(he Do/tr s('le£1iol/lls_r
la ibm tioL_dc gril ((;RI[. A TE\IP El 1_7\1_E
ou GRIL A "IEMP BAS) ou le GUIDE DE
GRII .I AGE.
0 RECETTEPRE-FE-RE-E
Appu',ez sur c(tle louche pour utiliser, crder,
l'( noIIlllltT, ll/O(]J fiCl" Oil S/t])pl'il/ltT/[I'I(' I'ecette
pr('f_:rde.
SONDE
Appu}(z stli"c(tl( loll(he lol'Sqtl( "_o/ts tllJlis( z
la sonde pour cuire des aliments.
CUISSON/_CONVECTION
ApI)/tx( z stir t_etl(! l()/t(]l(! pO/t£ ( hoisi17
]a Jon(tion dr' (:/lissoI/par (:oi[\('cliol/.
0 ROTISSAGE/_CONVECTION
Appuyez sur ceu( lo/t(h_ l)O/u" d_oisir
la fon(tion de r6dssagc par t Driver tion.
MINUTERIE
Appu} (z S[lI" C(?I|(? tOIL(he l)O/tl" (hoisir
la fonction de milmterie.
O AUTONETTOYAGE
Appu?ez sur c{u( 1,.roche p,.)/u" choisir
la fort(lion d'autoneltow_ge. Consuh(z
la secdon Utilisation du four autonettoyanL
Touches
TOUCHEHOME(ACCUEIL)
Appu} (z StlI" (etl( lOll(h(? pO/ll" 17(_,eniI"
fi l'&:ran <<SEI,ECI'IONNER I 1_ MOI)E DE
CUISSON >>(,.kit ueil). Cette to/tch( l]'alll'ltl](! [){as
](iS t'€;gl_Ttg(?S d(! C/tiSSOI/ (lit (['_'t/tton(!'.tO}_'t_(L
TOUCHEHELP(AIDE)
,\pptly(z S/tl7 ((?lie |otlcl/e pOlll" (?1/ saxoir phls Sill"
les fimclions (lit Ibm:.
TOUCHEBACK(RET.)
'\pptl}{'Z S/117(ettc' touche pour rm_'_fir _'{I'd(ran
prdc('dent.
TOUCHECLEAR/OFF(EFFACER/ARRET)
,\ppu}ez sin: cette touch_ pour mmul(r TOUTES
h's op('rations (h:_four fi l',._\(eplion (h' l'horl,.)g,.' _t
de la mimltefie.
TOUCHE(S)OVENLIGHTON/OFE
NDRELUg,ERE
Appu}ez sin: cett_ touche pour alhtmer
Oil dtdl/d£e la (ou les) htmi{'re du Ji)m:
TOUCHEOPTIONS
\ppuy( z pour d_oisir DEUX TE}IP, DI{I_kRT
DIFIq{Pd{, FER,\IEN E,\TION, DESI/_I)E,\TER,
CI tA[D, CU ISSON H' MAINTIEN, S,\I_,BXI'
ou REGI AGES.
Afficha.qe
Affichage
)dl-ichc l'hcm°c du jouc
Codes d'erreur
.F-et ue eombre_ digeoteet a I'#.craeet des hipsse feet eeteedre
pouriediquer _) coded'erreur.Appuyezsur CLEAR/OFF
(EFFACER/ARRET),Laissezle four reffoidirpendant
uneheure,Romdtezle fourenmarcho,Si Iocoded'e_reurest
de nouveauaffict_#,coupezI'a/imentationdec_riqueot appeloz
unr@aratour
S'ily a unepannede courant:
Si vous aviezregle uee foectioemieuteesur votre
fourau momentou/a paeee de couraet s'est produite,
il but r_glor_ nouveautouteslos fonctionsprogramm_es,
ainsiqueI'horloge,
L'heurecligeete a I_cran apresm)epaeee de ceuraet
53
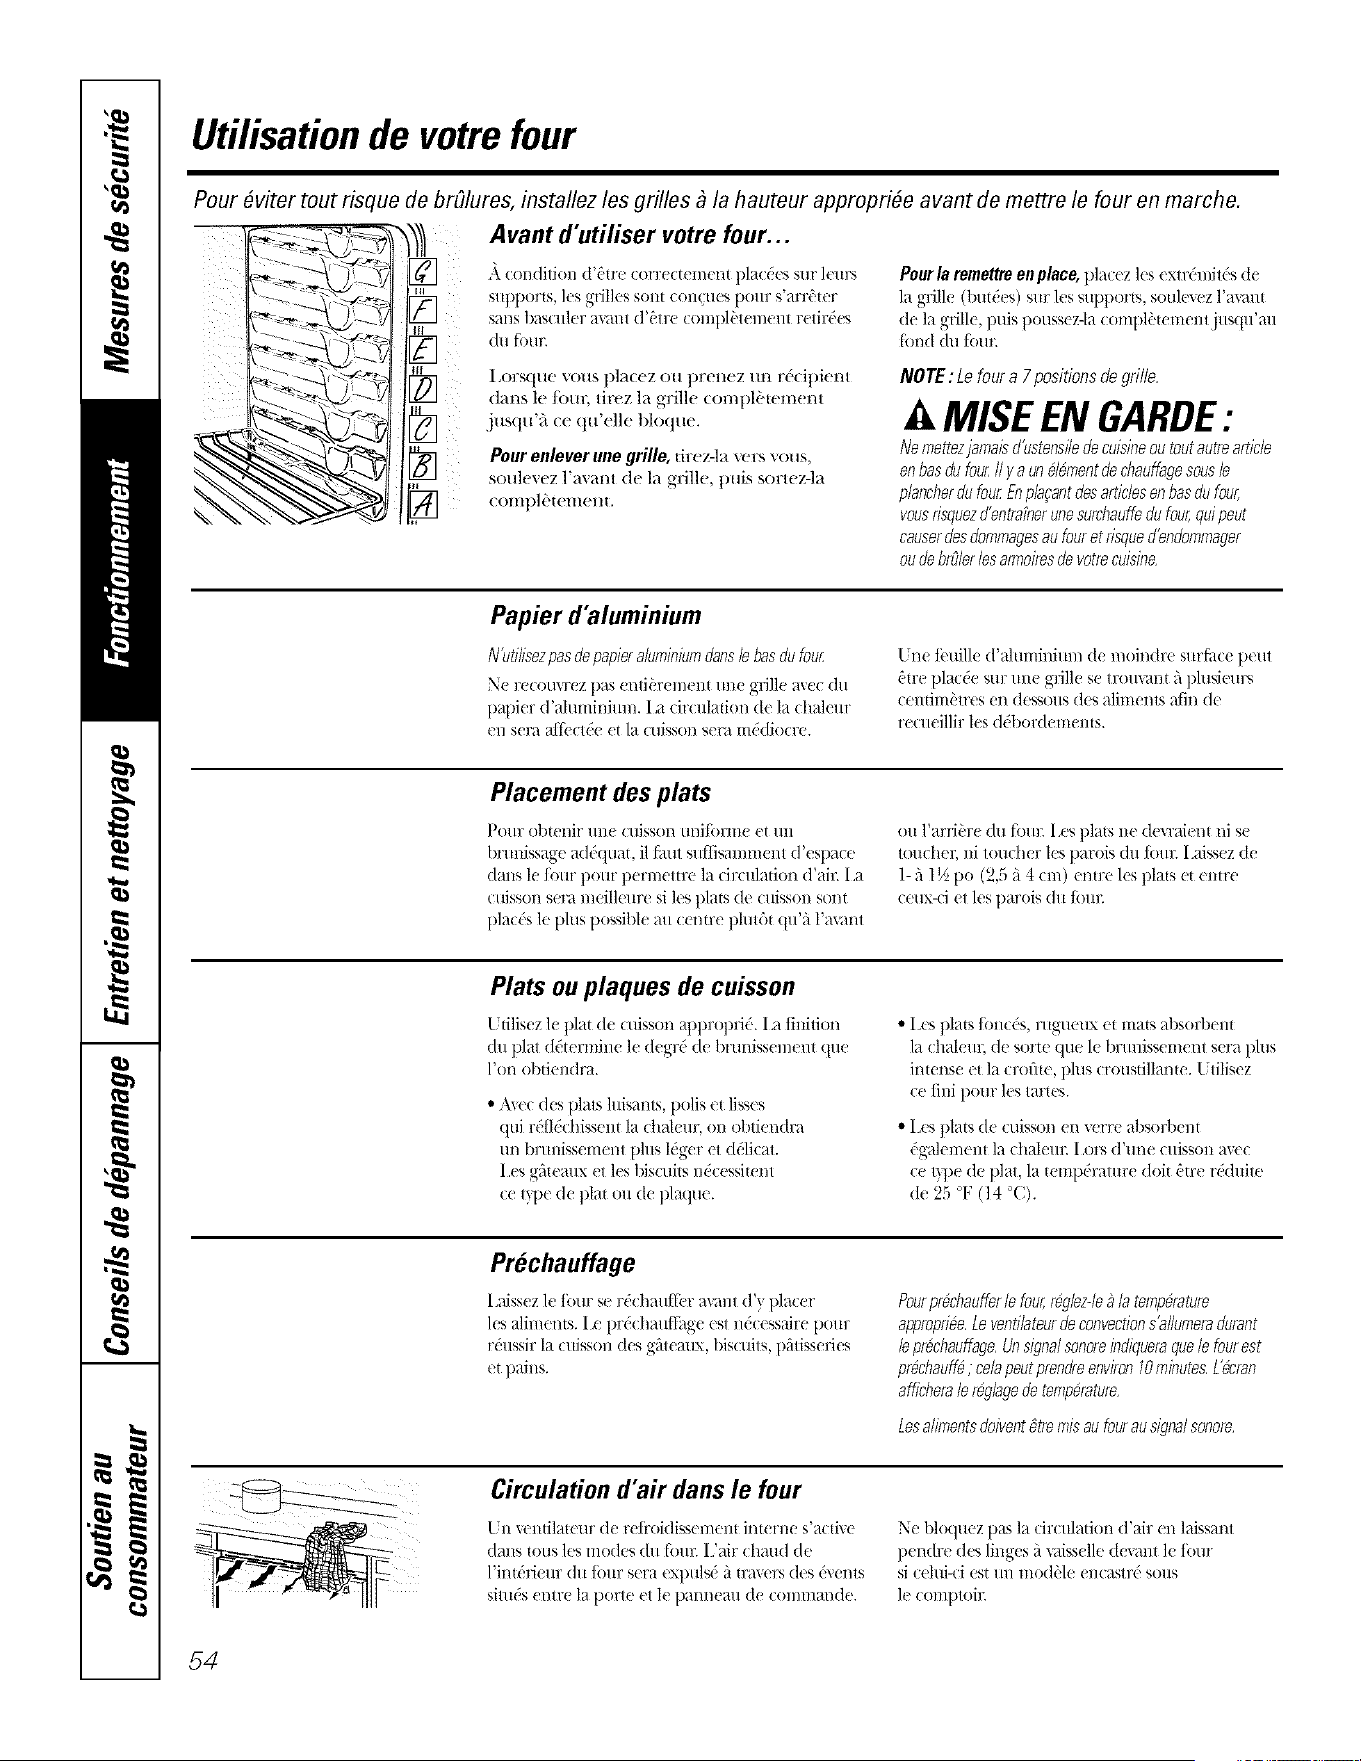
Utilisationde votrefour
Pour #viter tout risque de brOlures, installez les grilles _ la hauteur appropri#e avant de mettre le four en marche.
ii
Avant d'utiliser votre four...
J_. condJlion tl'_?we (x)YIX t t( lll(?n| plat dis Silt" ]clws
supports, les grilles sont contues pour s'arrOter
sans bascttler re'am d'_'tre (ompl_'temen_ retirdes
dil fi)tll\
I ,O1)Sq[ie VOHS })lac(}z OH ])l'eileZ /ln rdcil)ient
darts le Ibm; tirez la grille comt/l('tement
jusqu'fi ce qu'elle bloque.
Pour eMever une grille, drez-la vers vous,
soulevez l'a\ ant de la gdlle, tmis sorteMa
coml/lOWmem.
Poorla remettreenplace,placez les extrdmitds (k
la grille (buttes) sur les suppom, soulcwz l'avant
de la gtSlle,puis poussez-la c,.m/t)lbtementjttsqtt'a/t
hind du fi_tm
NOTE: Le four a 7 positions de grille.
MISE EN GARDE:
Nemdtezjamaisd'ustensiledecuisineoutoutau_rearticle
enhasdufaz_IIyaund#fflentdechauffagesousb
plancherdufourEnplat'antdesarticlesenhasdufour,
vousrisquezd'en_rainerunesurchauffedufour,quipeut
causerdesdomrnagesaufouretrisqued'endornmager
oudebrS/er/esarmoiresdevotrecuisina
Papier d'aluminium
N'utilisezpasdepapieraluminiumclansb has& four
Ne recouwez pas entihrement une gdlle avec du
palfitr d'aluminittm. I,a circttladon tie la chaleur
el/sera a/fi'ctde et la (liisson sera ii/(ttlio(i'(,.
[ne tbuille d'ahmdnium tle moindre surface peut
£'treplat& stilt/the grille se tlTO/t\at)[_'1plusieurs
cendmhtres en dessous des alimenl_ afin de
recueillir les ddbordemems.
Placement des plats
Po/w obR'nJr/tilt t/llsson tit)ifi)lTii/t ('t/tll
brtmissage addquat, il faut sttflisamnmt_t d'espace
darts le four pour permettre la circulation d'air. I.a
cuisson seta meilleure si les plats de cttisson sont
plat:& le plus possible art centre plutgt qu'fi I'm'ant
ou l'arric)rt tin four. I .cs plats tie dcwaient ill se
touchec ni toucher les parois (lit tb/m I.aissez tle
1- _'J1½ po (9,5 _'_4 (m) entre les pla{s el emre
ceux-d et les patois du Ibm;
Plats ou plaques de cuisson
[ filisez k plat tie cuisson appropn('. I.a tinidon
tht plat ddtermine le degrd tie btunissemem q/te
]_t)I/obtJ('l/(lFa.
• A_cc des plals Msants, polls et lisses
qui r('fl&;hissen_ la chalt ttr, tm obtiendra
un brtmissement plus Kgtr et ddicat.
I .es gfiteattx et les biscuits i_&essiwnt
ce 1}pc de pla_ ou tie plaque.
• I .es pla{s fimcds, mgueux el tna{s absorbenl
la thalett]; tie st}rte que le br/missenlent set'a plus
intenst et la croft{e, plus croustillante. [ tilisez
ce JiM pour les tartes.
• I .espla{s tie cuisson en wrre absorbem
('galemem la chalem: I sn's d'une c/tJsson aW.'c
ce 1}pcde plat, la temp('rature doi{ &re r&hdte
de 25 °F (14 °C).
Prechauffage
I,aissez le four se r&:hauffcr a_ant d'y placer
les aliments. I,e pr& hauffiNe est ndcessaire pour
rd/tssir la (ttisson des gfiteanx, his(uils, ])fitisserils
el pains.
Pourpr_chaufferie four,r_glez-le_ ia tetrlp_rature
appropri_e,Leventi/ateurde convections'allurTleradurant
iepr_chauffagaUnsignalsonoreindiqueraquele fourest
pr_ct?auff_; celapeutprendreenviron10minutes,L'_cran
affichera/e r_glagede tetrlperatura
Lesalimentsdoiventgtre mis au fourau sigml sonore,
Circulation d'a# dans le four
[511_cntilatcur de rt ti'oidissemem intt rne s'acti_c
datis tOllSles triodes tilt f{l/tr. I ,'air chaud tie
l'intdfit ttr (lit Ibm: sera (_\puls_ ,/ml_vrs des &enls
sJtlRis ent/'c la porte et le pannea/t tie t ol//ii/ai/(le.
Ne 1)loquez p_t_la circulation d'air en laissant
pendre des lit_ges it v;dsst lle ttex_m_ le four
si cehfi-ci est tm mod_'le cncastr(' st)us
le comptoil:
54
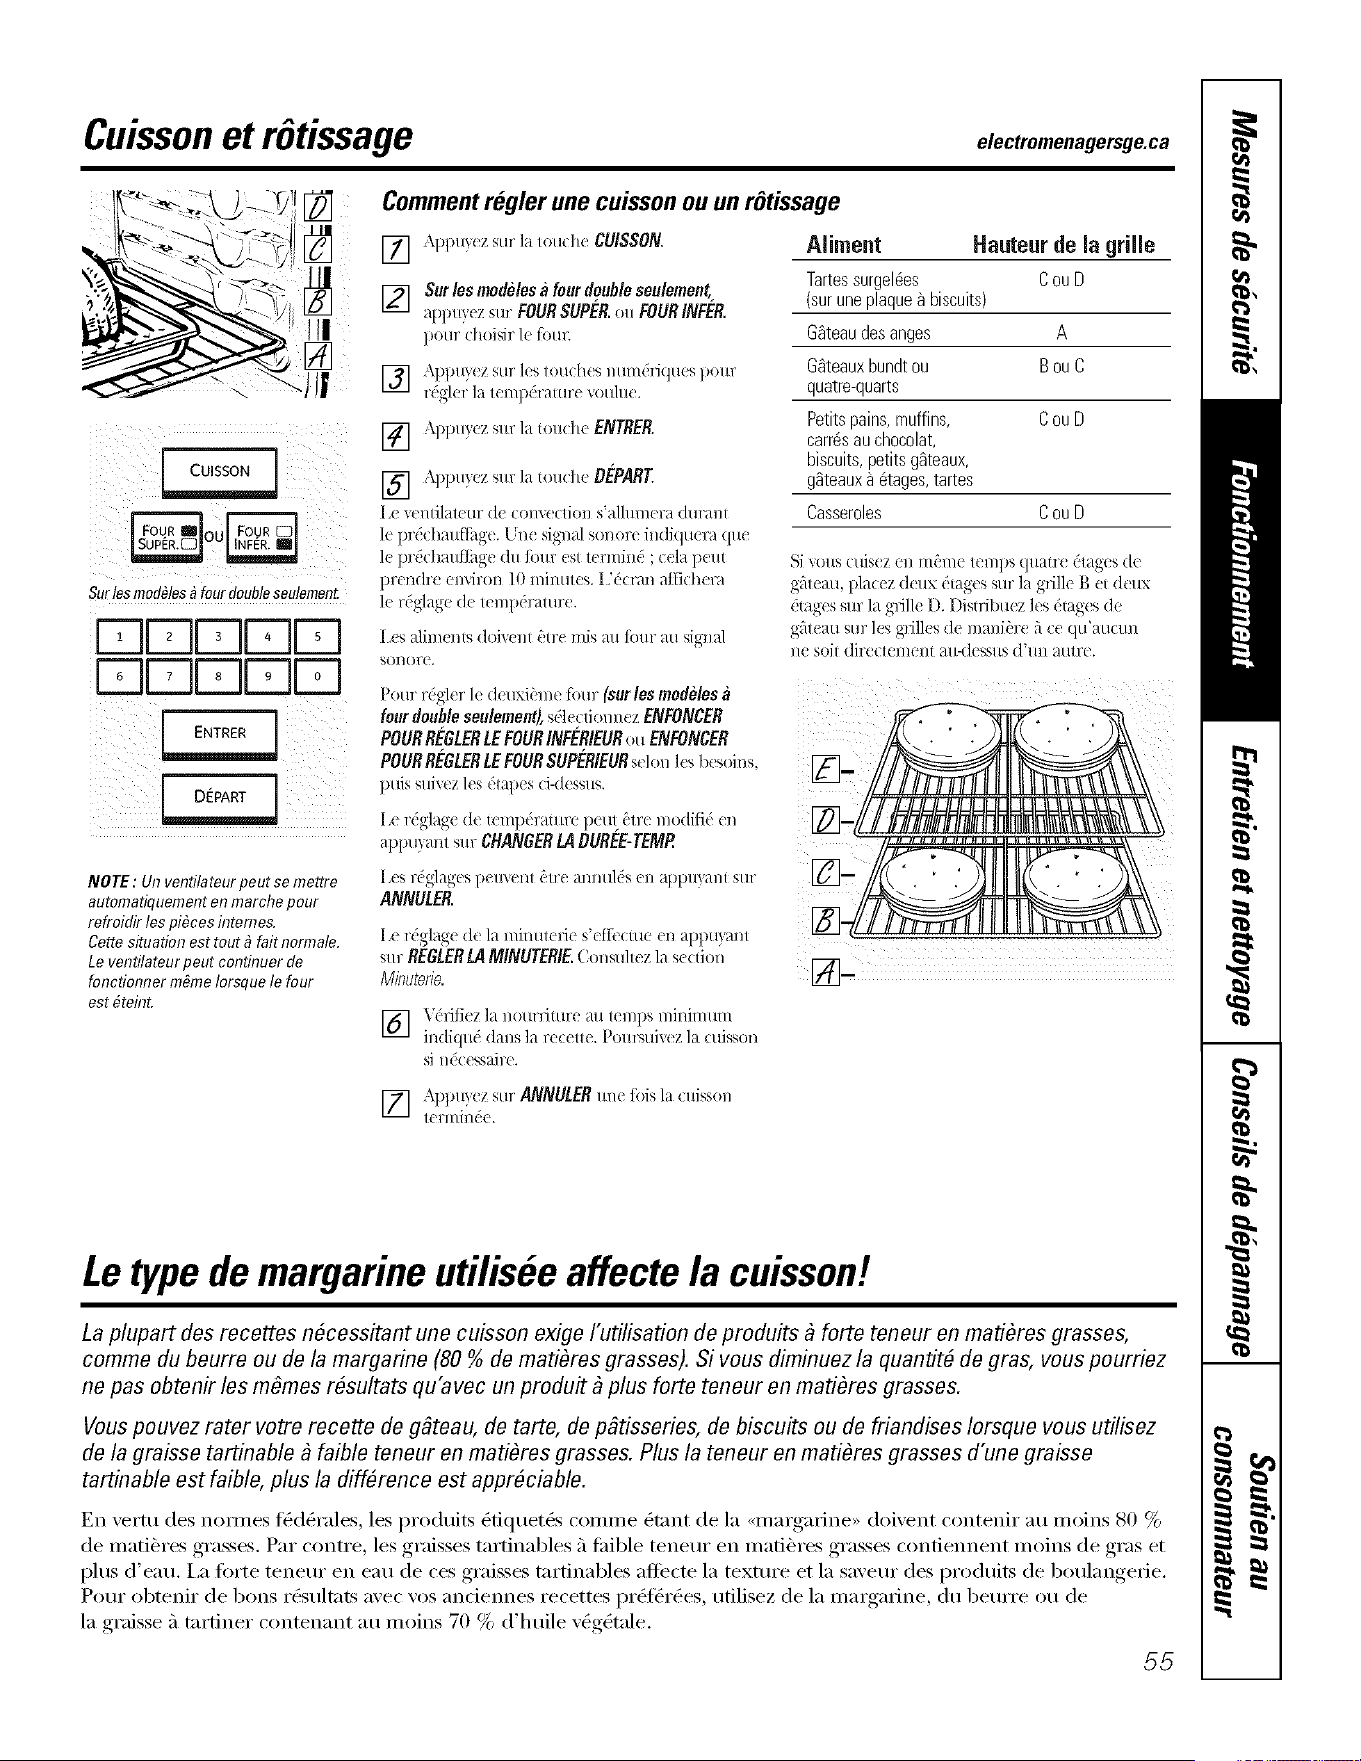
Cuissonet rGtissage e,ec,,ome,age,sge.c,
CUISSON_
Surfesmodules_ fourdoubleseulement
N1DkNDLN
N1N1DDD
iill i !
ii/i i _ ii i_iiiii
NOTE: Un venti/ateur peut se mettre
automatiquement el7 marche pour
refroidir les pi&ces hTtemes.
Cette situation est tout _ fait normale.
Le ventilateur peut continuer de
fonctionner re#me Iorsque le four
est 6teint.
Comment regler une cuisson ou un rOtissage
] Appu)ez sin"la lou(he CUISSON.
[] SurlesmodMesafourdoubleseMement,
app.}_ z sin"FOURSUPER.ou FOURINFER.
])Oll]" ( ]/oisir ](_ _i)llr,
] .\I)])/I_(_Z Sill" ]t!S lOIIt h(_S I/llI//(!]'l(]/l(!S pOllY
1"{_](!1" ]_l 1( I]1]1{_1"3H11"( x,O/l]tl(.
] ,\ppu}ez sin"la t(m(:h,._ENTRER
[] ,\ppu)ez sin" ]a tou(h,. DEPART
1,( R'l/t]l_ltt HI" d( / OI/\_xtiOll s'_*]]/llll_ I'_I (/[ll'tll/r
lc |)r& lm/fflilg(. _r_( signal sonorc indi(lu(r,i (l/w
1( prdchauflilge du Ibm" (st termind ; cela p(/tt
prcndre emiron 10 mimltes. IX'cran alfi(:hera
le r('glage de temp('ramre.
Aliment Hauteur de la grille
Tartessurgel_es C ou D
(surune phque _ bis@its)
G_teau des anges A
GSteauxbundt ou B ou C
quatre-quarts
Petits pains, muffins, C ou D
car@sau chocolat,
biscuits, petits gSteaux,
g_teaux _ 6tages, tartes
Casseroles C ou D
l,(s alim(nrs doixcnr 0rre mis au fimr an signal
sor_or(.
Pour r_ gl(r 1( (1_uxi_'me fbur (sur los modeles
fourdoubleseulement), sdlectiolmez ENFONCER .....
POURREGLERLEFOURINFERIEURou ENFONCER
POURREGLERLEFOURSUPk'RIEURse]onl(s b(soins,
puis sub(z les ('lap( s (:i-c/(ss/Ls.
I,_ rdglag( de telnpdraun'e peut itr( too(lift(' (n
appuyam sin- CHANGERLA #UREE-TEMP
f ,(S /'t_]_l,'t_S, g ] )('/['V('I/1..... _'11"( ' 31/1/tl1£'S (1/ _I_)_)tl}31/[ SIll"
ANNULER.
I._ rdglag_ d,. la mhmlcrie s'(ffi cme en apl)uyanl
SIll"REGLERLA MINUTERIE.Co]lsultez la se(do]l
Minuterie.
Si xous cuis(z en m_m_ temps quati'( ('rages d,.
grit(am pla((z d(ux ('rages sur la g_ilk Ber (/_ux
('rages sin: la grill( D. Disrribuez les d'rag(s de
gfitean sur les g]ilk s de ma/fibr( _'tc( qu'aucun
ne soit directement au-dessus dhm aurre.
] X('riiiez la uottrlitm'e at_1(ml)s mirdmt:un
il@iqud darts la rc(ell_. P,,mrsui_,ez la ( uisso_'t
si I/('( (?ss3J/'(L
] Apl)u}(!z sin" ANNULERm_( lois la cuisson
1(!H//J I/e (!.
Le typede margarine utilis#e affecte la cuisson!
La plupart des recettes n#cessitant une cubson exige I'utilisation de pmduits _ forte teneur on matibras grasses,
comme du beurra ou de la margarine (80 % de matibras grasses). Si vous diminuez la quantit# de gras, vous pourriez
ne pas obtenir los mOmes r#sultats qu'avec un pmduit _ plus forte teneur en matibras grasses.
Vouspouvez rater votra recette de ggteau, de tarte, de pgtisseries, de biscuits ou de friandises Iorsque vous utilisez
de la grabse tartinable _ faible teneur en matibras grasses. Plus la teneur en matibras grasses d'une grabse
tartinable est faible, plus la diff#rance est appr#cbble.
Ell velttl des ilOlilles t_d_I'ales, les produits _tiquet_s COlllllle (_t;lllt de la <_inargalii_e,, doivellt COlltellir ;:ltl illOills S0 %
de mati_)res grasses. Par contre, les graisses tartinables fi fifible tenem" en matib_res grasses coi_tielment moii_s de gras et
plt_s d'eau, i,a ti)rte teneur ell eau de ces graisses tartilmbles aflecte la texture et la saveur des prodtfits de botflangerie.
Pour olxenir de boris r&stfltats avec vos andelmes recettes pr(_f_i'(_es, utilisez de la ilmlgaline, clu beurre ou de
la graisse fi tnrtiner contenant au moins 70 % d'htfile v(_g_tale.
55

Cuissonetr6tissageminut6s
Sur los mod#les _ four double, vous pouvez utiliser la cuisson minut6e clans un four tout en proc6dant
I'autonettoyage clans I'autre, ou encore la cuisson minut6e clans los deux fours simultan6ment.
NOTE: Ale laissez jamais des aliments comme des produits laitiers, du poisson, de la farce, de la volatile et du porc
reposer pendant plus d'une heure avant ou apr#s la cuisson. Lorsque cos aliments sont laiss6s _ la temp6rature de
la pi#ce, cola favorise la prolif6ration de bact6ries nocives.
Z
i /7/_]/¸¸
Surlos modules_ fourdoubleseulement.
I-ql UUI-q
DIZZ]IZZ]IZZ]D
DDDDD
DDDDD
DEPART APRES] [ DEPART
Comment r#gler uneraise en marche immediate et un arrOt autematique
Le four se met en marche/rnm#d/atemel;t et foflct/onfle ] e four "_ ddn/arrer et poursuixre ]a ( uissoli
pendant/a durfie r#g/fie.A/a fin de/a durfie de cuisson, pendant ]a pdriode progl"ammde, puis
/e four s_teint automatiquement
_%S/llT(?Z4()IIS q/t(! l'horloge at[Rile
l_'t bol/l/(! hi!Ill'(!+
] Appu}ez Sill" la touche CUISSON.
[] Sur les modMes a four double seulement,
appuyez sur FOUR SUPER. ou FOUR INFER.
pour dloisir le Ibm:.
] \pl/uycz Sill" I(s io/l/hes num('liques
|)llllrr('_ler la 1ell/l/('17_/11IF(! %0/lille.
] App/l}(!z Sill" I:/ I//IllIK: ENTRER.
] Appuyez s/liT los io/l(:hes nllin('lJttll(?S
pl>ur rdgl( r la durde de ¢ uisson ddsirde.
] Appuxez sill" la loudle ENTRER.
[]
Deux options lie ddpart ilnn/ddial cl
/I_llTl'£'I _t/lt()l//_lli/l/l(! d(! l_t (:lliSSOl/ SOlll
disponibles :
N OEPARTAPRES PRECHAUFFAGE -
_])plt}_ez Sill" lelll' tOll/]l_' poll])
prddl_udl;ur lc Ibm:
I ,e ventilateur de convcctioll
s%lhm/em durant le prdchmdti_ge.
Une signM sonore indiquera que
le pr('chatdli_gc du/bur est tennind;
(ela peut prelldr(' emil:on lO minutes.
I '('cl_ul a/lichera le r('giage de
teIilp('ratllre.
Au sigllal sonore, placez los alin/ents
darts le Ibm:.
il s'arff'tcm _t/ltOlllatiqllelIlellI, Sallf si
la/onction Cuisson et nlaintien a did
sdlecti(mnde. Consultez la section
Option cuisson et maintien.
Pour r('gler le/teuxi_'me/our (sur/es modMes
fourdoubleseulement),sdlccuonncz
ENFONCERPOURREGLERLEFOURINFERIEUR
ou ENFONCERPOURREGLERLEFOUR
SUPERIEURsolon los besoins, puis suixez
los ('tapes d-dessus.
I,e rdglage de tcmpdnmu:e pout £'ire
mo(tilil_ en _q)ptty'ant sur la toul he
CHANGER LA DUREE-TEMP du Ibm: appropd('.
1,es rdglagcs t/euvent £'tre annulds en
applr_ mt sur la touche ANNULER du t))ur
at)t)rot)dd.
1,e rdglage de la ndnuterie s'efli_/rue
eu at/pu)_ant sur REGLER LA MINUTERIE.
(',onsuliez la sol don Minutede.
Une Ibis la cuisson teru/in('e, le tbur ('nlettra
till signal son(re' et le message <<TEMPS
SUPP. >>s'attichera pendam cinq n/inmes.
Vdritiez le degrd lie cuisson de la nourlit ure.
Si (hi temps lie / uisson suppldmeniaire est
reqtds, appu)_'z sur la touche TEMPS SUPPet
entrez du temps de cuisson suppldnlentaire.
Si cette/onction n'est p+,s s('lectionn('e,
l'('€]7_tll S't'[tilC('l'_t _tlltOlIl_ltkllll'lIll'llt _t/l bo/lt
de cinq n/inutes.
1 a (/liSSOl/l//il//lt('€? I/l? /tl_l//_tl'l'(!l'_t
qu'une Ibis le pr('/hattiihge tern/ind
etla toulhe OEPARYenfonlde+
J? DEPARTa FROID - Appu}vz sur
el'It(.' tOil(hi' pOllF (|('l//}tl'l'{'17 ]e J()/lr
illllIl('diatelI/ell[ et Cllire 1}t llO/ll)lJttll)e
sans pr('chauttilgc. I e ventilaleur
de COl/Vt'ctioll se ii/ettl_l ell lnal'(lle+
I e ddcompte de la dur('e lie cuisson
commence aussi imnl('diaiemenl.
56
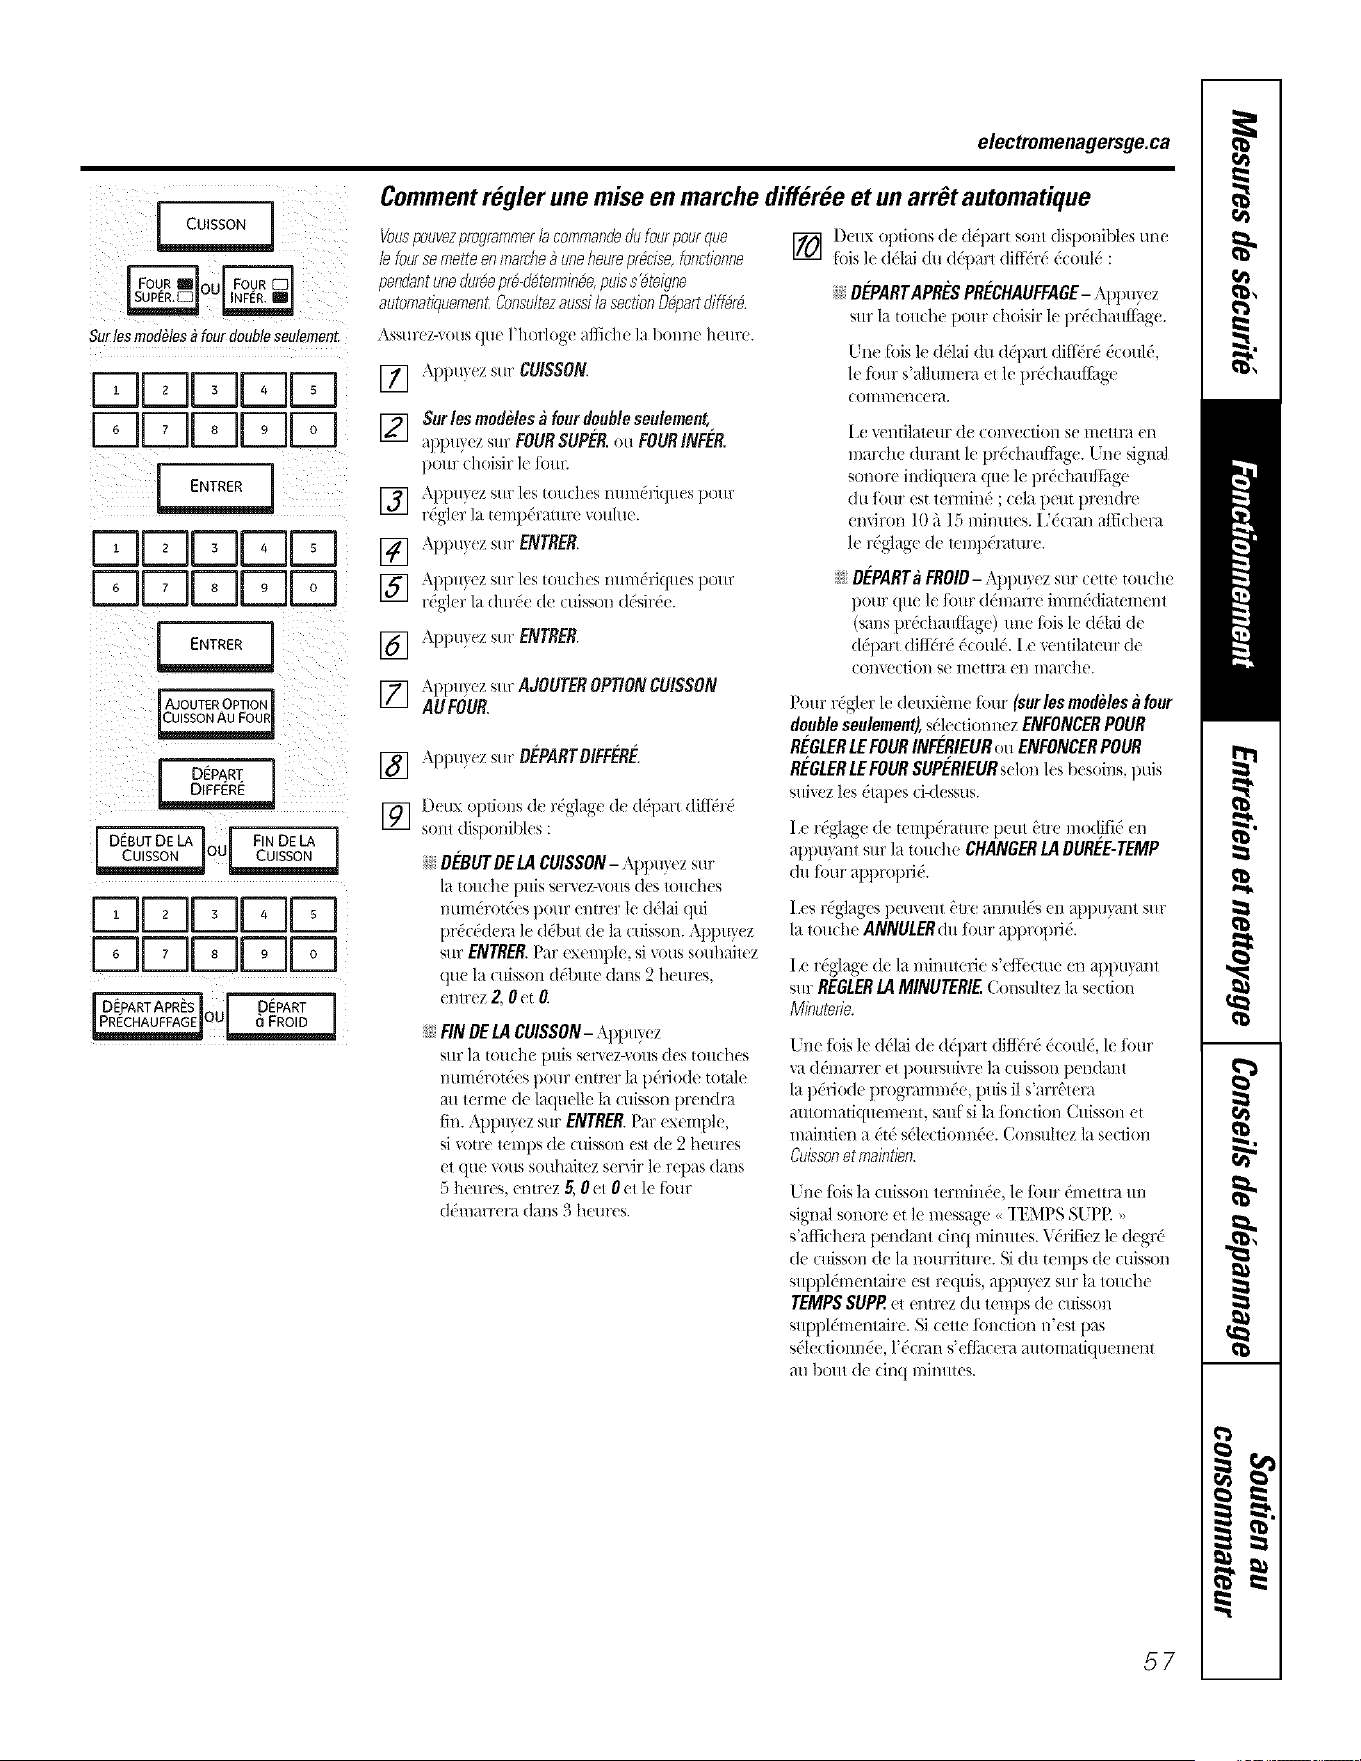
electromenagersge.ca
iilii ib};i
%/¸¸¸
Surles modules&fourdoubleseulemenL
DDDDD
DDDDD
DrqDDD
DrqDDD
J'AJoUrER0P_0N]
[ D PARTI
[D_BUTDELAIoUI FINDELA J
I I
FTIFqDDD
DDDDD
J D_PARTAPR_SIU[ D_PART J
Commentregler une mise en marche differee et un arr_t automatique
Vouspouvezprogrammerb commandedu fourpourque
b four semetteenmamhe_ uneheureprecise,fonctionne
pendantunedur_epr&@te,77i@e,puis s_teigne
automatiquemenLConsultezaussila sectionD@artdi@r_.
Asstlroz-_,o/Is (]tu. ]'hor]og( 31"[1cl/o ]a ])ol/n(_ h(/lr(L
[] .\ppu) ez sur CUISSON
r_3 Surles modelesa four doubleseulemen_
al@/tyez Sill"FOURSUPC_R.ou FOURINFER.
po/n- / hoisir k Ibm'.
] ,\]tI)/lyoz Sill" l(?S (Otl(]/(?S I)/tl///iriq/l_ S Dour
l'@_r la (_!I//pdrlt/ll x. voHhu.!.
[_] .\ppuyez sur ENTRER.
] ,\])ptly(Z Sill" ]IS tO{lil/I.!S II/ll)// rJ(J/t(S pour
l'_gk r la d/w& (k cuissiin dd'sir¢'_.
[] .\ppuyez sur ENTRER.
1_7 AllPU) ez s/u"AJOUTEROPTIONCU!SSON
ill
AU FOUR.
[] ,\ppuyez sur DEPARTD/FFERE.
] D(ux opdons de rEglage de ddpart ditli;l'¢;
som disponibl¢ s :
N OEBUTDELACUISSON- ,\ppuyez sur
/a [O/IC]/(' p/liS Sel'\ltZ-\_.l/tS (]('S t_.l/lCheS
l/umdrot_es pour emrer le ddlai qui
pr&c&lera le ddbut de la cuisson. Api:l/t} ez
s/n: ENTRER.Par cxeml!le, si \ous souhaitez
quela (/dsson ddbute dons 2 heures,
entrez 2, 0 et 0.
_!iFINDE LACUISSON- Appu} ez
Sill7 la tOil( ]/( p/liS SeI'VeZ-\()/ls des t_,//t( hes
num&ot_es pour emrer la p&iode totale
au terme de laquelle la cuisson pr(ndra
tin. AllpW_ z sur ENTRER Par exemple,
si votre temps de cuisson est (k 2 heures
et que \ous souhaimz servir le repas dons
5 he/re's, entrez 5, 0 et 0 et le fbur
d('marrera dons 3 heures.
] [)I/IX ,./]/@.mSde d@art sonl disll,.Inibles uI;e
lois le d61ai du (l(']tarl diff_Td d( o/th; :
_: DEPARTAPRESPRECHAUFFAGE-\I:lpt l?(z
sur la mudle pour d/oisir k llrdd/;udf_g<.
Une fbis 1_ d('lai du dd]/arl diff_Td dco/tl_,
1¢ fotlr s'allumera et le ]tr&l/auffage
( OlI/l//(!n( (?r_/.
I_e "r(I/til_te/lr lie COlWix;tioll se ii/ettra en
n/ard/e d/u:ant k pr&;ha/tfl-age. Lne signal
sonore indiquera que le ]tr&:l/autl-itgc
du four est termind ;cela peut prendr_
envir,./n ] 0 _'l] 5 nlin utes. I ;&ran aNchera
le rdglage de ten/pdramre.
i:iDEPARTaFROID-Npu}ez surCettctom:lie
pour q/re le ti//tr d&narre immddiatemem
(sans pr&;ha/t[Jilge) une lois le d(.l_d de
(l@m't (liJli_i'd &:oul& I .c _cntilateur de
c()n\/:(|iOl/ S_' ii/ettra en l//arc]/e.
Pour r('gler le deuxibme [-our/_ur/es modelesa four
doubleseulemenO,sdlc(tiOnl_ z ENEONCERPOUR
REGLERLEFOURINEERIEUHou ENFONCERPOUR
REGLERLEFOURSUPERIEUHselon les bl soins, lluis
s/d\cz les 6t;_pes(i-dessus.
I.e rdglag_ (le t( npdramlx pIul £:tre modifid _n
apll/lyanl stir la to/till(! CHANGERLADUREE-TEMP
(lit four apl/ri/l/fid.
I.es rdglages l)emenl are annult_s ,.n ai)puya:al s/tr
la l(t/t(he ANNULERdlt [Ollr allllrOplJd.
I.¢ rdglage (kla n/hl/tl(!lg.!S'( [_[-(C1U(?(n _l])])uylI'd
s/trREGLER1.4MINUTERIE.Consuhezla s¢/@m
Minuterie.
Une fbis le ddlai de (Idpart diJ]i;rd ('could, le Ibm"
va (]el//arr(T e[ pours/ti\ re la CUJsson i:lendant
la ]!&1ode programm_e, puis il s'arr£'tera
aummatiquement, sa/ff sila Jimction C/dsson et
nlaintien a dr(*sdle(:dOl/l_&e. COl/S/dtez la section
Cuissonet maintien.
Une fi_/isla c/tissol_ termind'e, le Jbur dmettra/m
signal sonore et le message <<TEMPS S[PE _,
s'aM(:l/era pendant dnq rain/ties. _d_iifiez le degrd
(]e c/tisson de la i/otlrlitllre. Ni d/t [Pl//ps de (:tlisson
s/tppl@nentaire est requis, al/pu}ez s/tr la touche
TEMPSSUPPet ent/x'z d u temps de c/dsson
s/tppl(.m(nt@re. Si (:ette ti/I/Cti(lI/ n'est pas
sdle(:tionnde, l'dcran s'eflscera a/tt_m_afiquen/ent
all t)o/tt de dnq I_/Jn/tlcs.
57
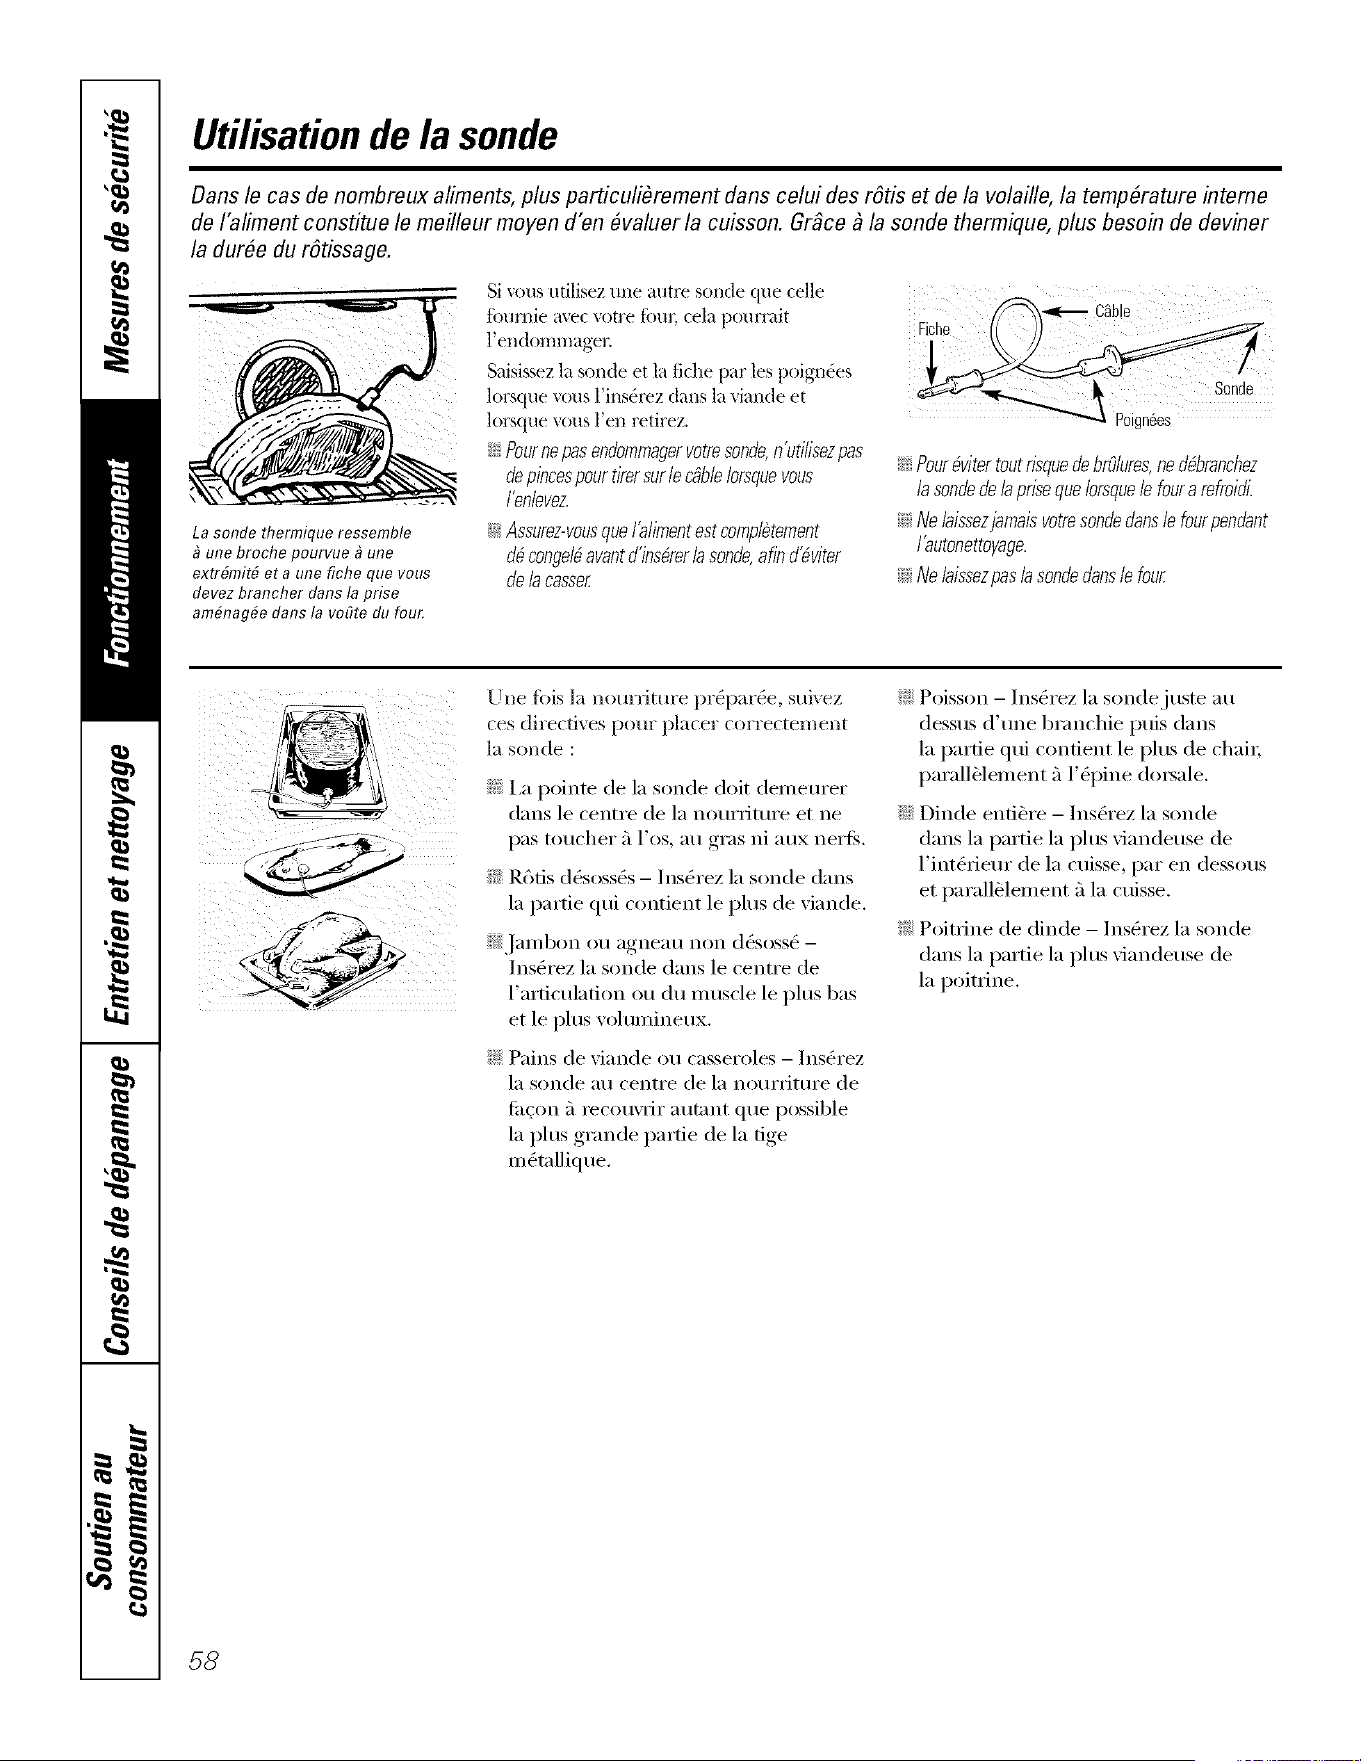
Utilisation de la sonde
Dans le cas de nombreux aliments, plus particuliOrement dans celui des r6tis et de la volatile, la temperature interne
de I'aliment consfitue le meilleur moyen d'en #valuer la cuisson. Grgce _ la sonde thermique, plus besoin de deviner
la dur#e du r6tissage.
La sonde thermique ressemble
une broche pourvue _ une
extr#mit# eta une fiche que vous
devez brancher clans la prise
am#nag#e darts la veOte du fou_
Si \ous udlisez une autm sonde que celle
toumie avec votre Ibm; cela poumdt
]'endon/n/ager
SaisKsez la sonde et la fiche par les poign_es
lorsque vous l'ins_rez dans la viande et
lorsque vous Fen retirez.
N Pournepasendommagervotresonde,n'utilisezpas
depineespour tirersurle cgbleIorsquevous
I'en/evez.
__ Assurez-vousqueI'alimentest comp/#ternent
d#,eongel#,avantd'ins#rer/asonde,afind_viter
de la easser
Poign#es
_: Pour#vitertoutrisquedebrOlures,ned&ranchez
lasondede b prisequeIorsqueb foura refroidi.
__ Ne /aissezjamais votresondedans/efourpendant
I'autonettoyage.
__ Ne laissezpas /asondedans/e four
Line Ibis la nourfiture prg_parg_e, suix ez
ces directix es pour placer correctement
_a Sollde :
I,a pointe de la sonde doit demem'er
dans le centre de la nomTiture et ne
pas toucher _'ll'os, au gras ni aux neris.
;!!:R6tis d&oss_s - lns&'ez la sonde dans
la pattie qui contient le plus de viande.
N,lambon Ot:lagneau non d&ossO -
Ins_rez la sonde darts le centre de
l'articulation ou du muscle le plus bas
et le plus volumineux.
_: Pains de viande ou casseroles - Insg_rez
la sonde au centre de la notlFiJttlre de
tilgOll _'lrecou;'iJr autnnt que possible
la plus grande pattie de la tige
mg_tallique.
_: Poisson - Insg_rez la sondejuste au
dessus d'tme branchie puis dans
la pattie qui contient le plus de chai_;
parall_lement _'ll'(_pine dmsale.
::Ji::Dinde enti_re - Insg_rez la sonde
dans la pattie la plus viandeuse de
l'int&_iem" de la cuisse, par en dessous
et parallblement _'lla cuisse.
_: Poitrine de dinde - lnsg_rez la sonde
dans la pattie la plus viandeuse de
la poitfine.
58
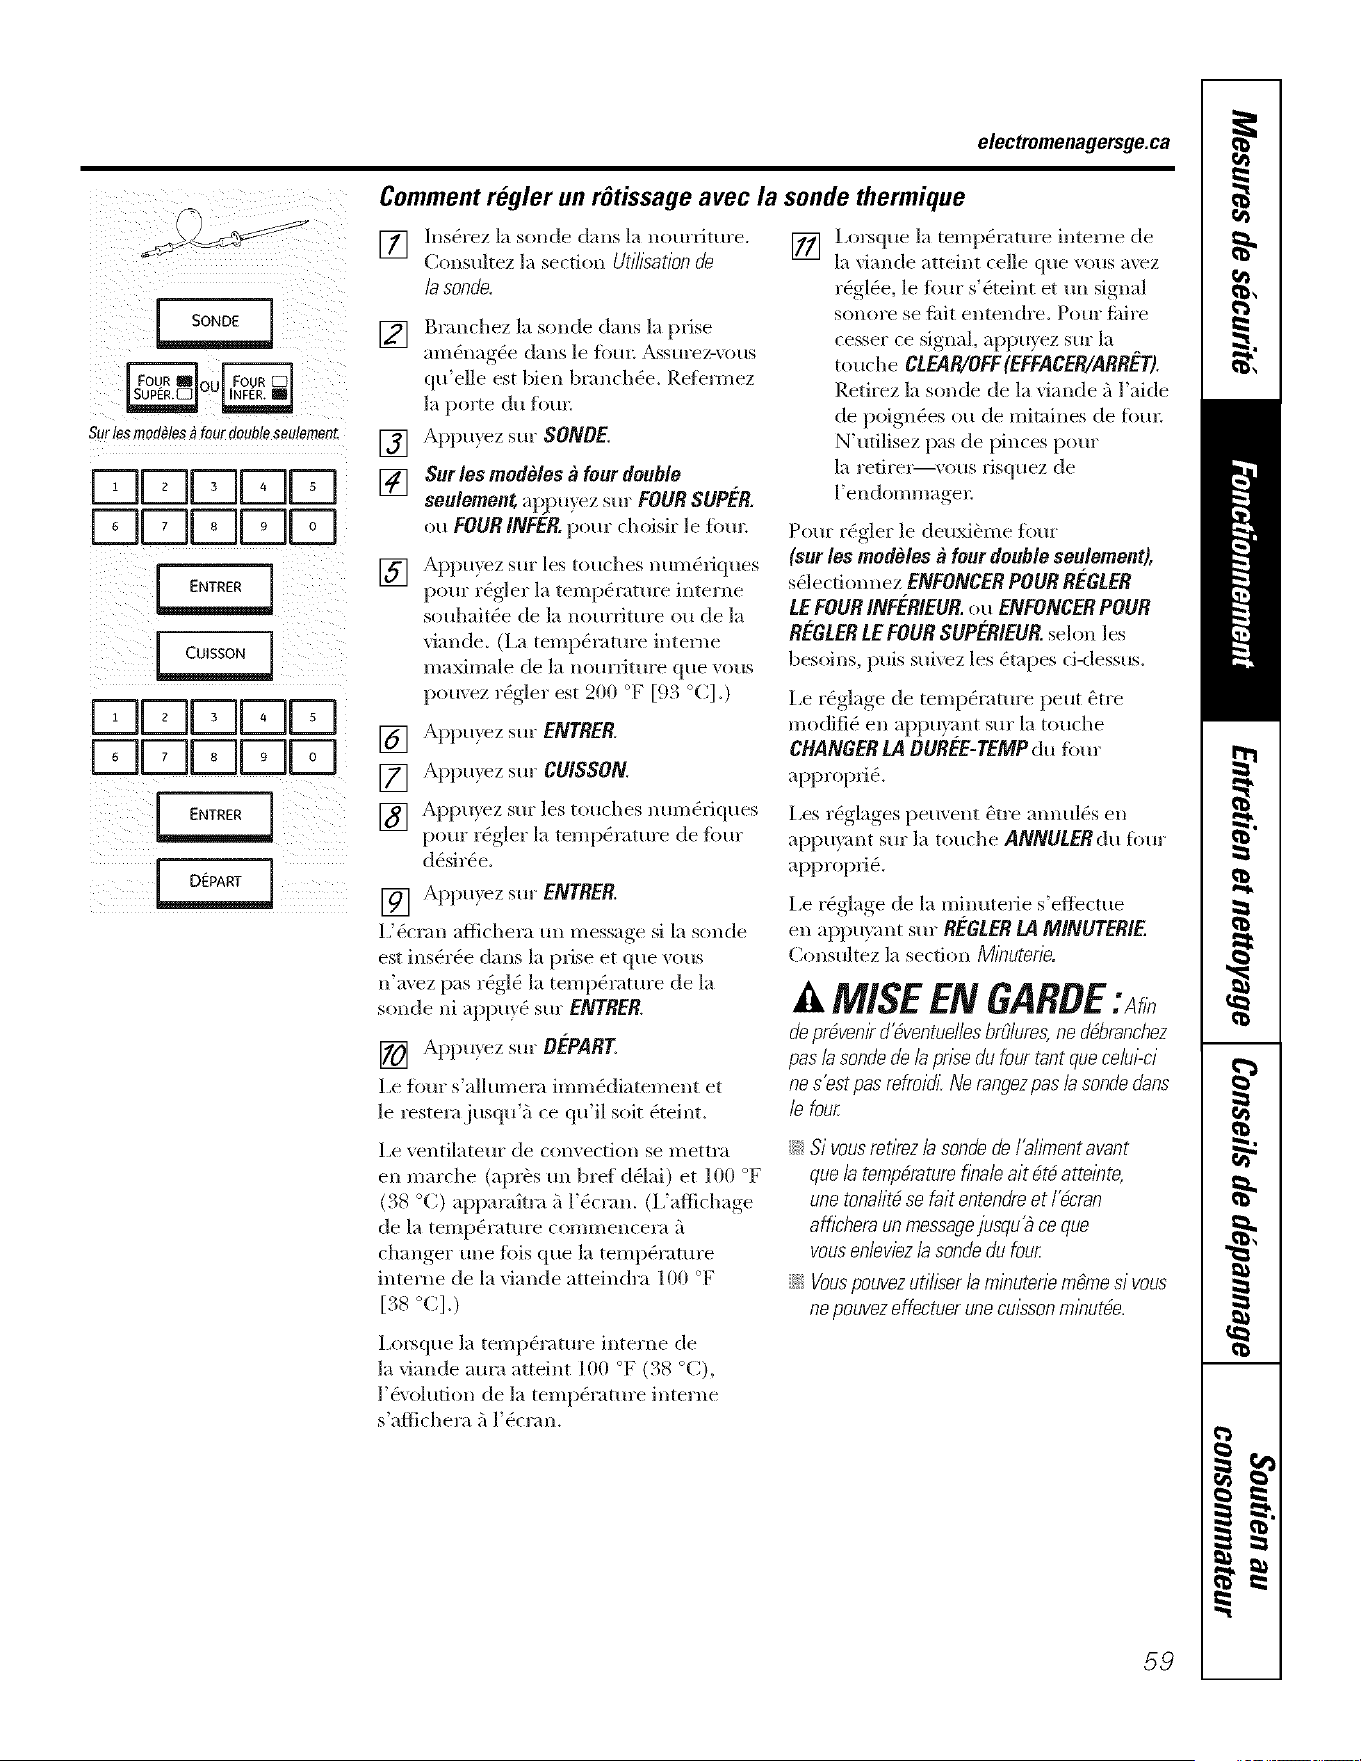
electromenagersge.ca
Surlosmod_les_fourdoubleseulement
DEZ]FqFqE]
FqEZ]EZ]EZ]K]
i ENTRER i
r-qF-qr-qr-qr-q
FqF-qFqK]Fq
Comment regler un rOtissage avec la sonde thermique
[_ ]nst4rez la sonde dons la nourfiture.
it i
(]onsuhez la section Ut///sat/onde
/a sonde.
[] Branchez la sonde dmls la prise
"Ul/(_ll'/O(_e d_lllS le _kltll_ _ssuYez-vous
qu'elle est lien branchg_e. Refelmez
la porte du fotlL
[] Appu}ez sill" SONDE.
[] Sur les mode/es a four double
seu/ement aipuyez sur FOUR SUPER.
ou FOUR INFER.pour choisir le fbtn:
[] Appuyez sur les touches num_fiques
pour rg_gler la tempg_rature interne
souhait_e de la nourfiture on de la
viande. (I,a temp(_rature interne
I/laxin/ale de la IIOtllTittll'e que xous
})°mez- rg_gler, est 200 °F [{)24°C] .)
[] Apptl}ez sill" ENTRER
[] Appuyez Sill" CUISSON
[] Appuyez sur les touches num(qiques
})°ur rg_gler,la tempg_rature de ibm"
d6sir6e.
[] Appuyez Sill" ENTRER
Ii6cr:m aflichera un messq_.e sila sonde
est ins(_rOe dons la prise et que vous
n'avez pas rOgl6 la temp(_rature de la
sonde ni appu}6 sur eNTRER.
[] Appu}ez sur OEPARE
Le four s'allumera imm(_diatement et
le resterajusqu'a ce qu'il soit &eint.
Le xentilateur de comection se mettra
en marche (api_s tm bref d_lai) et 100 °F
(38 °C) apparaitra ;til'_cran. (I,'aflichage
de la tempg_rature commencera ;'l
changer tree fbis que la tempg_rature
interne de la viande atteindra lO0 °F
[38 o1:].)
Ixn_que la tempg_rature interne de
] la xi;mde atteint celle que vous oyez
r_gl_e, le Ibm" s'_teint et tm signal
sonol'e se iilit elltendFe. Potu" fidl'e
cesser ce signal, appu}ez sur la
touche CLEAR/OFF(EFFACER/ARRET).
Retirez la sonde de la x4ande 5 l'aide
de poigng_es ou de mitaines de Ibm;
N'utilisez pas de pinces pour
la I'efil'eI_votls IJsqtlez de
l'elldoI//n/agel;
Pour rg_gler le deuxibme four
(sur los meddles & four double seulement),
s(qecthmnez ENFONCER POURREGLER
LE FOURINFERIEUR.ou ENFONCER POUR
REGLERLE FOUR SUPERIEUR sehm les
besoins, puis suivez les _tapes ci-dessus.
I,e r(_glage de temp(_rature peut 6tre
modifi_ en appu}_}nt Sill"la touche
CHANGER ta OUREE-TEMPdu fi,ur
appropii&
I,es r_glages,, })euvent...... &Ire amull_s en
appuyant Sill"la touche ANNULERdu fi)ur
al)propd(£
I,e I_glage de la minutede s'eflectue
ell appu}ant sur REGLERLA MINUTERIE.
Constdtez la section M/)Tutene.
,ikM/SE EN GARBE:
de pNven/?dVventue//esbrdures, ne d_branchez
pas /a sonde de/a pnse du four rant que ce/u/-c/
ne s'est pas mfro/d/. Ne rangezpas /a sonde dans
le four
::_i::S/vousretkez/asondede/'ahYnentavant
quelatempfiraturefk_aleait btbatteinte,
unetonafitbsefait entendreet lYcran
aff_cheraunmessagejusqu'_ce que
vousenleviezla sondedufour
_:_Vouspouvezutiliserla minuteriemOmesi vous
nepouvezeffectuerunecu_ssonm_nutde.
I,oisque la tempg_rature interne de
la viande aura atteint 100 °F (38 °C),
l'&olution de la temperature interne
s'aflichera a l'6cran.
59
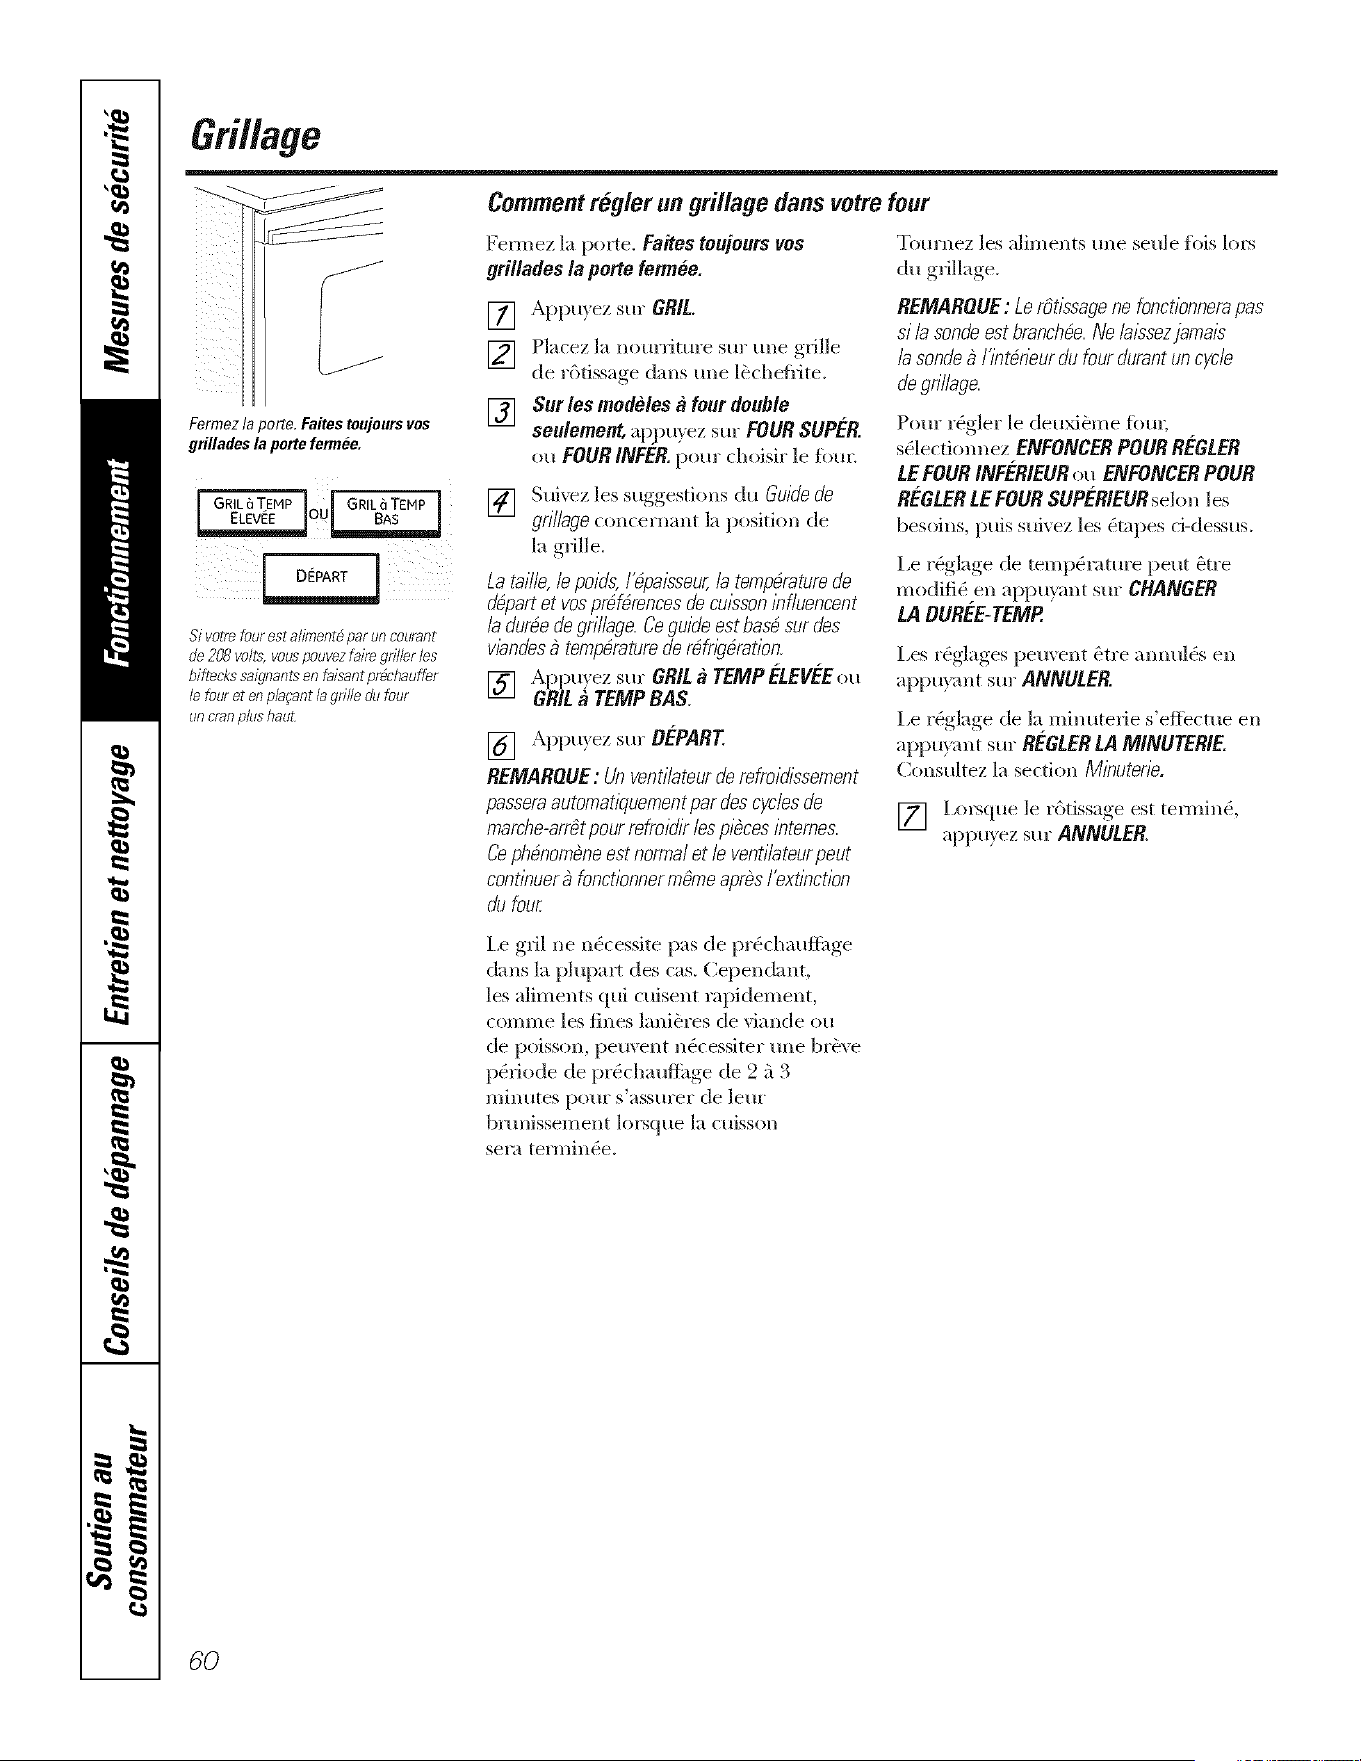
Grillage
Fermezla porte. FaRestoujoursvos
grillades la portefemlee.
I G.,L r..PloUIG.,LarE.PI
Si votre four est a/Lmentbpar un murant
do 208 volts, VOUSpouve7 fake griller los
biftecks saignants en faisant prbchauffbr
le four et eRp/a}'ant la grille du four
un cran plus hau£
Comment regler un grillage dans votre four
Fermez la porte, Faite$ toujour$ yes
gri//ades /a porte fennOe.
Tournez les aliments une seule fois 1o_5
du grillage.
[] Appu}ez sin" GRIt.
[] Pla(ez la nom'fitm'e sin" role grille
de r6tissage darts m_e l_cheflite.
[] Sur les medeles a four double
seulement,ap.pu} ez sur FOUR SUPER.
ou FOUR INFER. pore" choisir le fi_tm
[] Snivez les suggesti(ms du GUlde de
gn/lege concermmt la position de
la grille.
Lataille,lepoids,I'@aL_seur,le temperaturede
d@artet vospreferencesdecut,sonlefluencent
le dur_e de gr/I/age. Ce guide est ham sur des
v/andes _ temperature de r_fr/g_rat/on.
[] Appu}ez sur GRIta TEMPELEVEEou
GRIt a TEMPBAS.
[] Appu}ez sur DEPART
REMARQUE: Unventileteurdereffo/d/ssement
passera automat/quement par des cycles de
marche-arrgt pour refro/dk les piecesbtemes.
Ce pMnombneest normal et le vent/lateurpeut
contleuer _ fonct/onner mgme aprbsI_xtlect/on
du four
REMARQUE: Ler3t/ssagene fonct/onnerapas
si lasondeest brancMe.Nela/ssezjama/s
lasonde_ I'let_rleurdufourdurantuncycle
degnllage.
Pore" r_gler le deu_me fi)m;
s_lectiomlez ENFONCERPOURREGLER
LEFOUR/NFER/EURou ENFONCERPOUR
REGtERLEFOURSUPERIEURsekm les
besohls, puis snh'ez les _tapesd-dessns.
I,e r_glage de temp(_ramre peut _tre
modifi(_ en appl_ymlt sur CHANGER
LAOUREE-TEMP.
I,es r_glages pement _tre amml_s en
appu}ant sin" ANNULER.
Le r_glage de la minuterie s'eflectue en
appu}ant sin" REGLERLA MINUTERI£
Constdtez la section Mleutene.
[] I,(n_que le r6tissage est termin_,
appu}ez sur ANNULER
I,e gril ne n_cessite pas de pr_chaufli_ge
darts la plupart des cas. Cependant,
les aliments qui cuisent rapidement,
comme les fines lani_res de viande ou
de poisson, peuvent n6cessiter m_e brb;e
p6fiode de pr6chaufli_ge de 2 a 3
minutes pour s'assurer de leur
bmnissement lorsque la cuisson
se_a teuninOe.
60
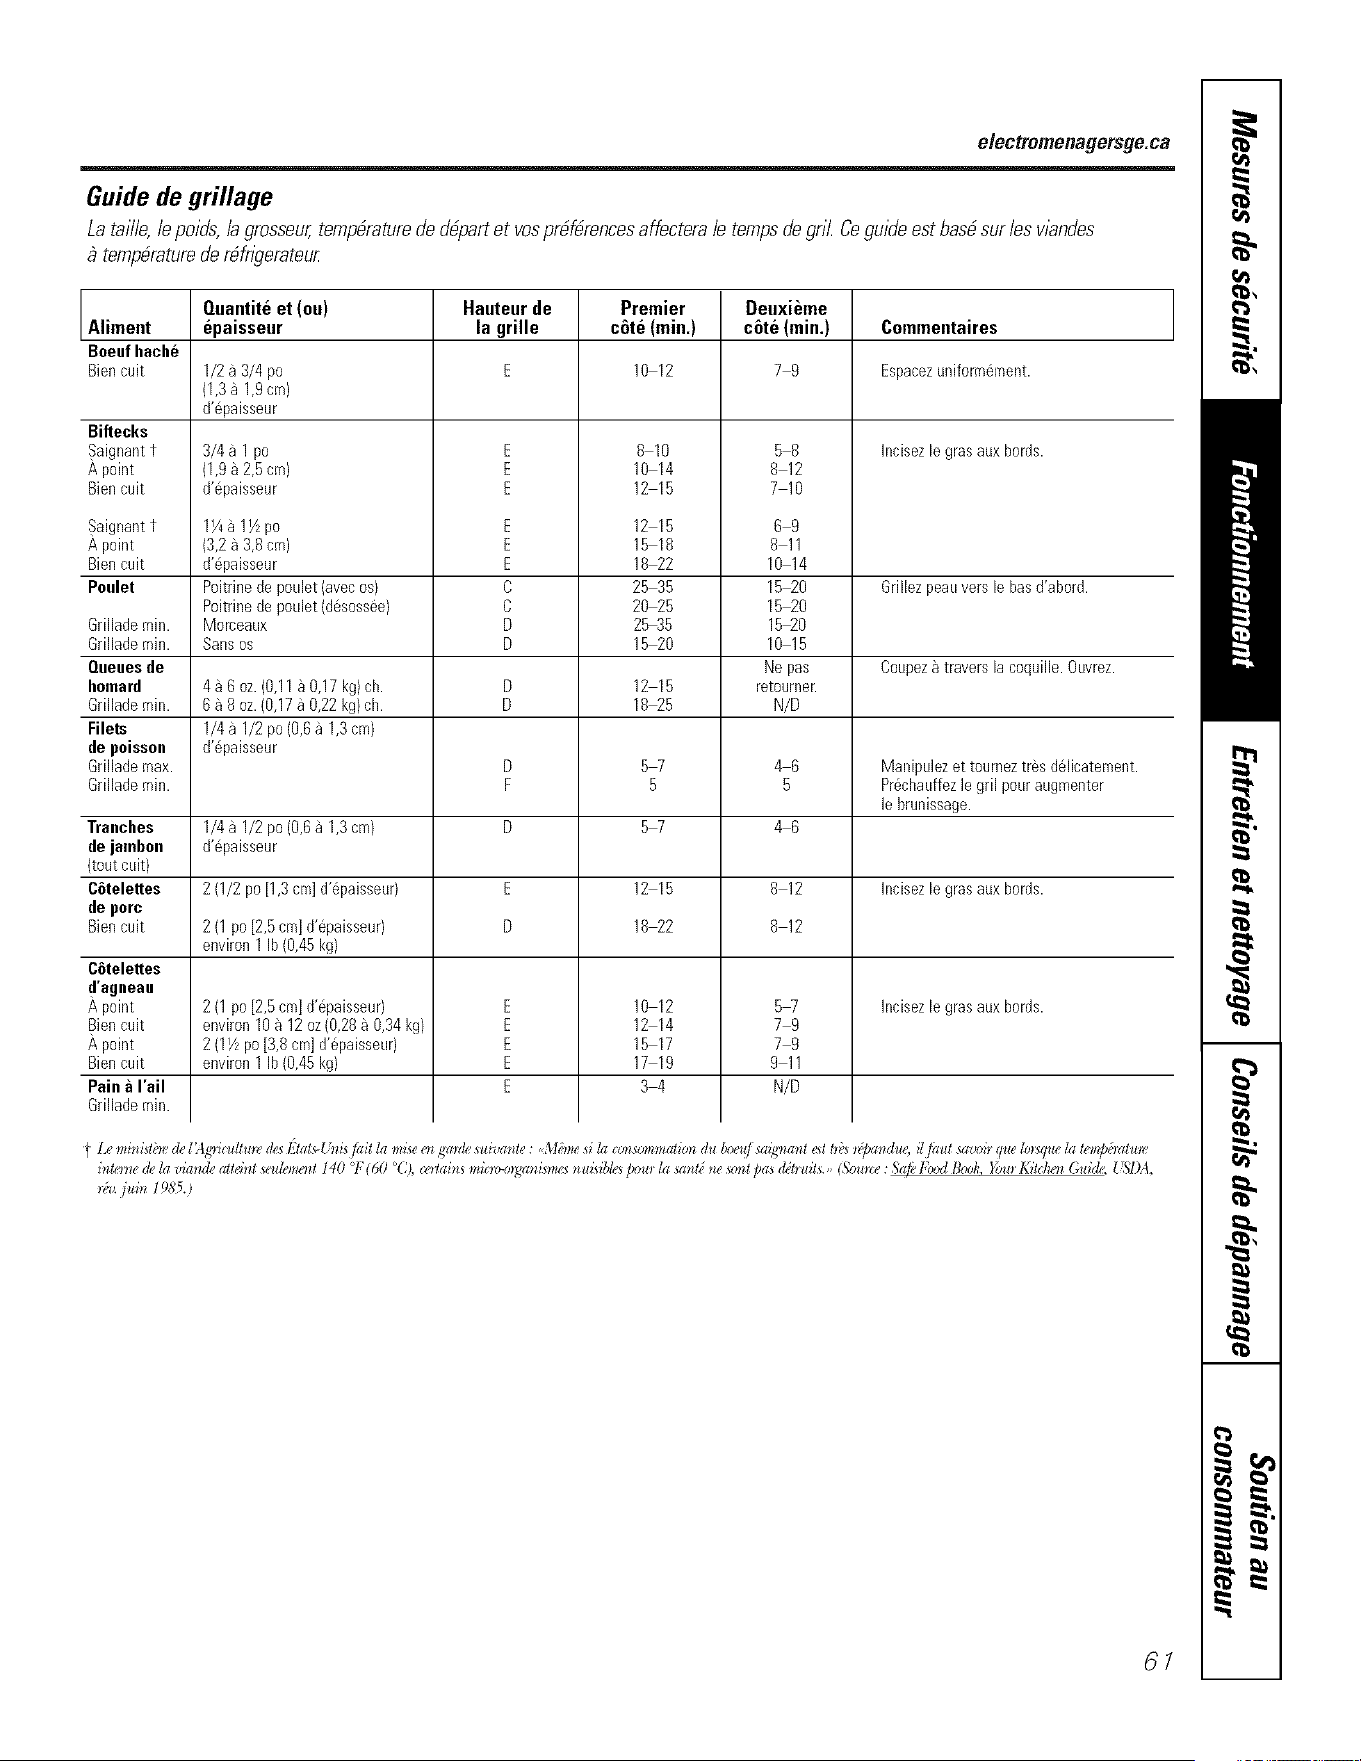
electromenagersge.ca
Guide de grillage
Lataiiie,iepoids,iagrosseur,temperaturededbpartet vosprbf_rencesaffecteraie tempsdegrii. Ceguideestbashsuries vbndes
tempbraturederdfngerateur
Quantite el (ou) Hauteur de Premier Deuxi6me
Aliment epaisseur la grille c_te (rain.) c6te (rain.) Cemmentaires
Boeuf hache
Bien cuit 1/2 a 3/4 po E 10 12 7 9 Espacezuniform_ment.
(1,3a 1,9cm)
d'@aisseur
Incisezle grasaux bords.
Biftecks
,Saignantt
A point
Bien cult
,Saignantt
A point
Bien cult
Poulet
3/4 a 1 po
(1,9a 2,5 cm)
d'@aisseur
1¼a lYz po
(3,2h 3,8 cm)
d'@aisseur
Poitrinede poulet (avecos)
Poitrinede poulet (d6soss6e/
Morceaux
Sansos
E
E
E
E
E
E
C
C
D
D
8 10
10 14
12 15
12 15
15 18
18 22
25 35
20 25
2,535
15 20
58
8 12
710
09
811
10 14
1520
1520
1520
10 15
Ne pas
retourneut
N/D
Grillezpeauvers le hasd'abord.
Grillade rain.
Grillade rain.
Queuesde Coupezh traversla coquille. Ouvrez.
bernard 4a 6 oz.(O,11a 0,17 kg)ch. D 12 15
Grillade rain. 6 h 8 oz.{0,17a 0,22kg)ch. D 1825
Filets 1/4 a 1/2 po (0,6a 1,3cro)
de poissen d'@aisseur
Grillade max. D 5 7 4 6 Manipulezet toumeztres d_licatement.
Grillade rain. F 5 5 Pr6chauffezle gril pouraugmenter
le brunissage.
Tranehes 1/431/2po(O,6a 1,3cro) D 5 7 4 6
de jambon d'@aisseur
[tout cult/
C6telettes 2 (1/2 po [1,3ore]d'@aisseur) E 12 15 8 12 Incisezle grasauxbords.
de pore
Bien cuit 2 (1 po [2,5cm]d'@aisseur/ D 18 22 8 12
environ 1 Ib (0,45kg)
C6telettes
d'agneau
A point 2 (1 po [2,5cm]d'@aisseur) E 10 12 5W Incisezle grasaux bords.
Bien cult environ 10h 12 oz(0,28h 0,34kg) E 12 14 7 9
point 2 (11/z po[3,8 cm]d'@aisseur) E 15 17 7 9
Bien cuit environ 1 Ib (0,45kg) E 17 19 9 11
Pain _lrail E 3 4 N/D
Grillade rain.
61
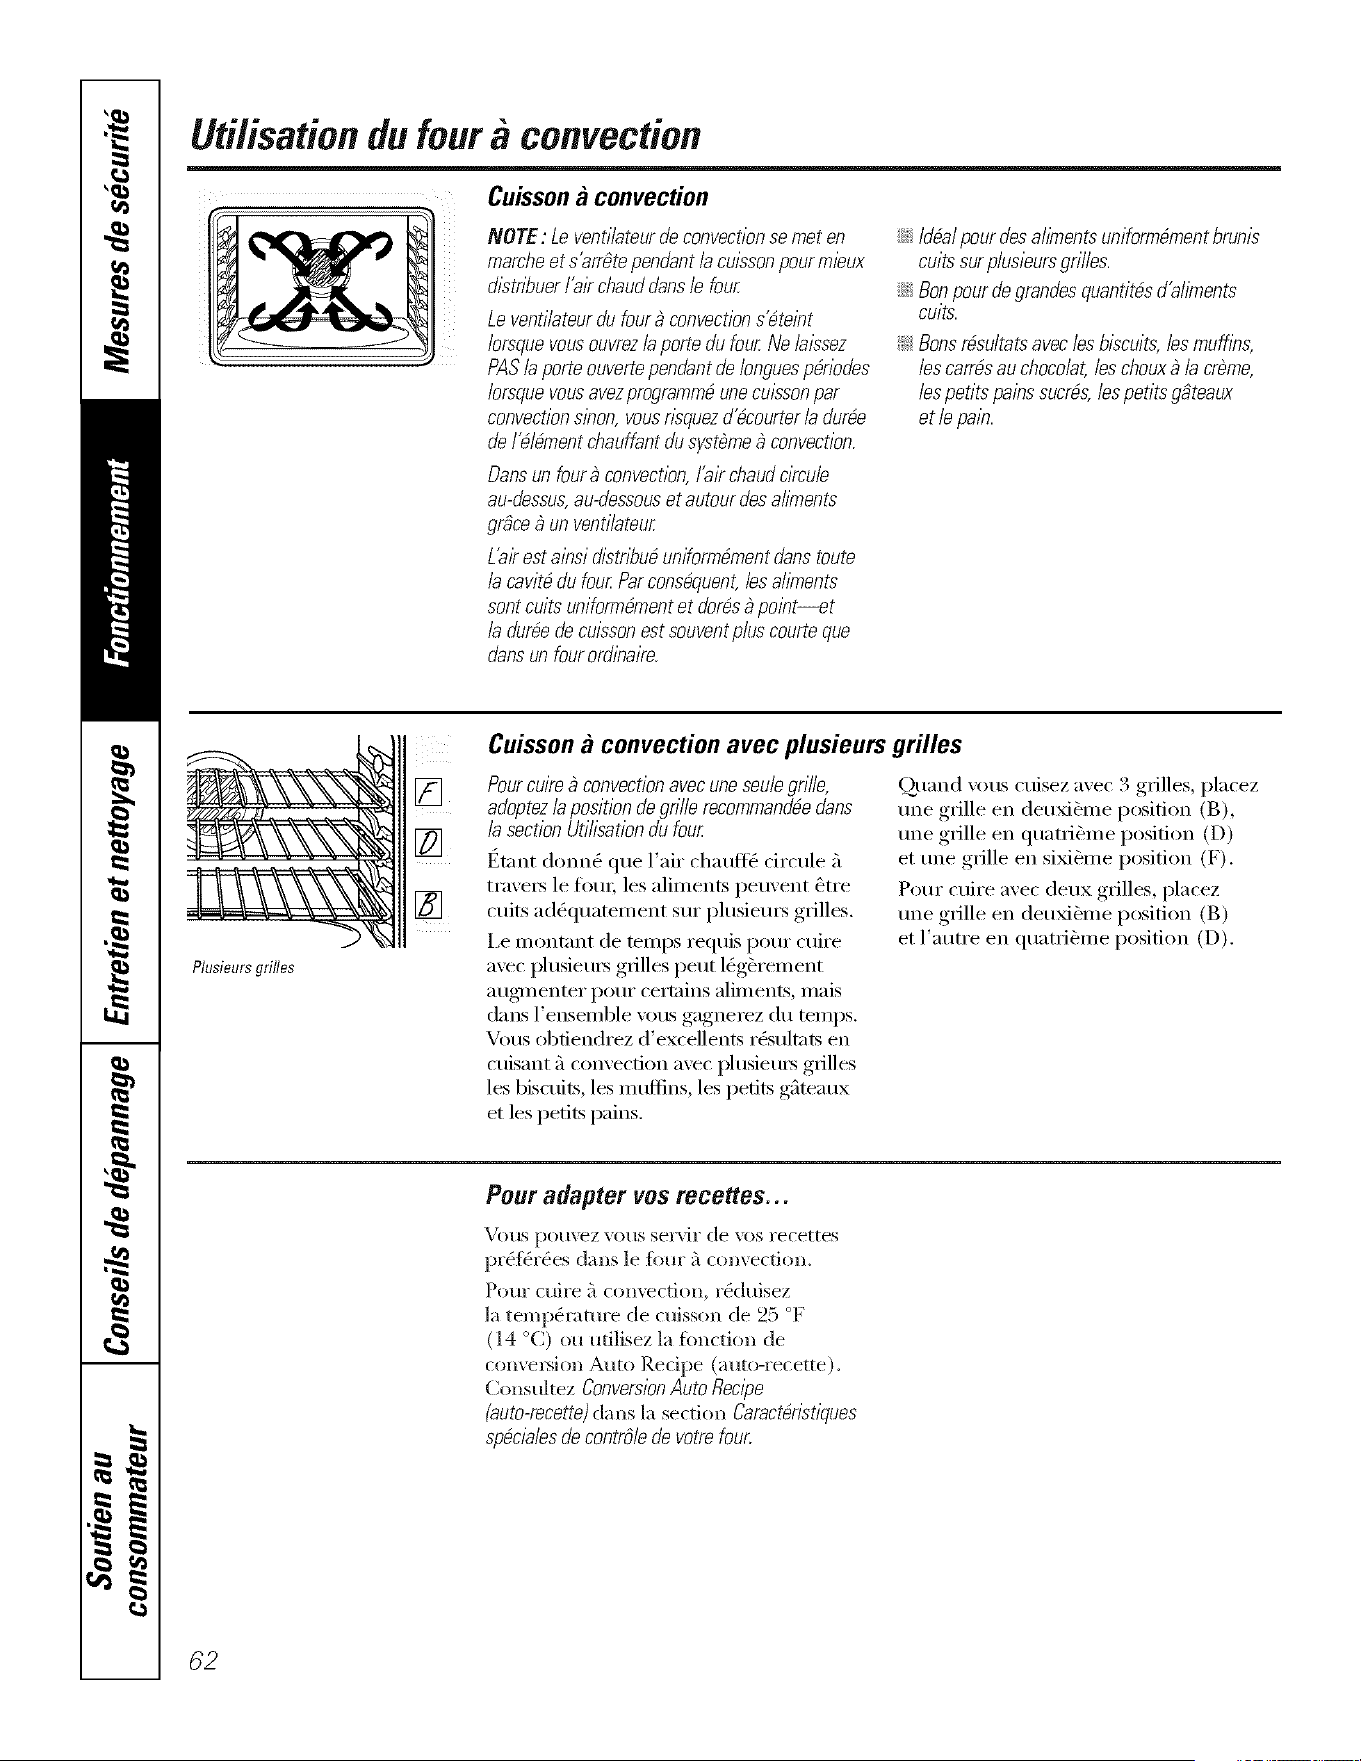
Uti/isationdu four a convection
Cuisson a convection
NOTE:Leventilateurde convectionsemeten
marcheets'arrgtependant/aculssonpourmleux
d/str/_uerfak chauddans/e four
Leventi/ateurdu four_ convections_tebt
Iorsquevousouvrezlaportedufour Nelaissez
PASla porteouvertependantdeIonguesp&iodes
/orsquevousavezprogramm_unecu/ssonpar
convectionsbon,vousr/squezd'_courterla dur_e
deI_l_mentchauffantdu systbme_ convection.
Oansunfour9 convection,fak chaudcircule
au-dessus,au-dessouset autourdesa//Ynents
grgce_ un ventilateur
L'a/?esta/nsid/str/_u_uniform_mentdanstoute
/acavit_dufourParconsequent,/esa/inTents
sontcdts unifomT_mentet dor_s_pobt--et
la dur_ede cu/ssonestsouventpluscourteque
dansunfourord/naire.
::Ji::Idgalpourdesahknentsuniformdmentbrunis
cuitssurplusieursgrilles.
::Ji::Bonpourdegrandesquanfitbsd'ahments
cuits.
_ Bonsrbsultatsavec/esbiscuits,lesmuffins,
lescarrbsauchocolat,/eschoux_ la crbme,
/espefitspainssucrgs,/espefitsggteaux
et /epain.
Ptusieursgrilles
[]
[]
[]
Cuisson a convection avec plusieurs grilles
Pourcuire _ convectionavec uneseu/egrille,
adoptez/a position de grille recommandbedans
la section Utilisation du four
Etant (lonn_ que l'air chauftc: circule _'_
tra\'e_ le fl)m; les aliments peuvent _tre
cuits ad&luatement sur plusiem's grilles.
I,e montant de temps requis pour cuire
avec plusieurs grilles peut l_g_rement
augmenter pour certains aliments, mais
darts l'ensemble vous gagnerez du temps.
Vous obfiendrez d'excellents rOsultats en
cuisant _'lconvection avec plusieu_ grilles
los bisofits, los inuflins, los petits gfiteaux
et los petits pains.
Quand \'ous cuisez avec 3 grilles, placez
une grille en deuxi&ine position (B),
tlile grille en qtlatYi(_II/e position (D)
et une grille en sixi&me position (F).
Pour cuire avec deux grilles, placez
une grille en deuxi&ine position (B)
et l'autre en quatri&me position (D).
Pour adapter yes recettes...
VO/IS pOtI_,_Z VO//S servil" de _x)srecettes
pr_f_r_es darts le fore" a convection.
Pour cuire 5 comvction, _&|uisez
la temperature de cuisson de 25 °F
(14 °(2) ou ufilisez la fimction de
com_ersion Auto Recipe (auto-recette).
Consultez ConversionAuto Recipe
(auto-recette)darts la section Oaract&lS.tlques
sp_cialesde contrOlede votre four.
62
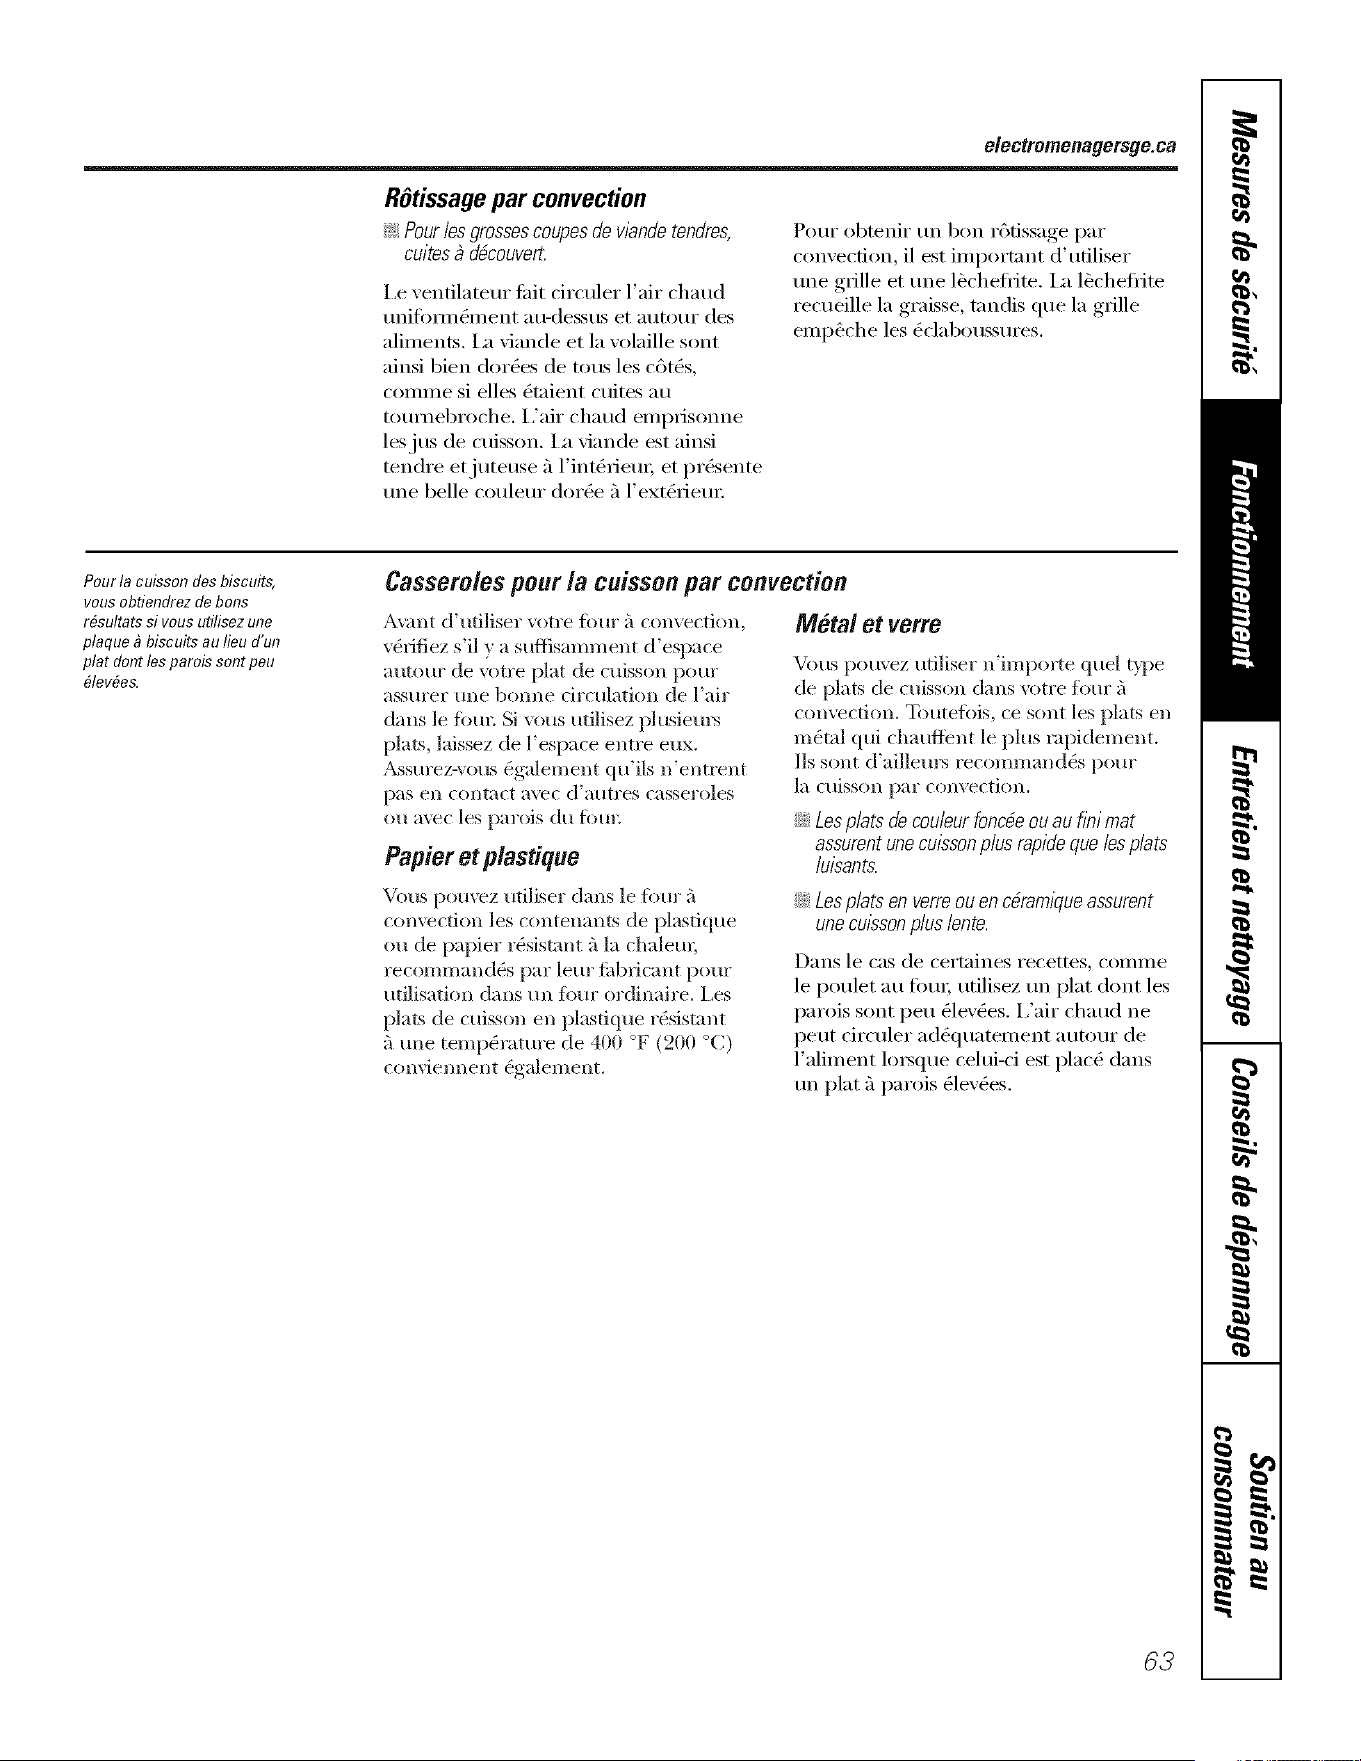
electromenagersge.ca
ROtissage par convection
_: Pour les grossescoupes de v/andetendres,
cuites _ d_couvert.
i,e ventilateur tifit circuler l'air chaud
tlni_OY/llei/lent au-dessus et _ltltO/lI" des
aliments. I_ viande et la volaille sont
ainsi bien dories de tousles c6t_s,
c(nmne si elles _taient cuites au
tournebroche. I,'air chaud emprisonne
lesjus de cuisson. I_ viande est ainsi
tendre etjuteuse 5 l'int_iJeui, et pr_sente
une belle couleur dor_e 5 l'extbriem:
Pour obtenir un bon r6fissage par
convection, il est important d'ufiliser
une grille et une lbcheflJte, i_ l_chefl_ite
recueille la graisse, tandis que la grille
emp_che les _claboussures.
Pour la cuisson des biscuits,
vous obfiendrez de boris
r#sultats si vous ufilisez une
plaque _Jbiscuits au lieu d'un
plat dont les parois sontpeu
#lev#es.
Casseroles pour la cuisson par convection
a_\r_|iltd'ufiliser w)tre fimr _rtconvection,
v(4fifiez s'il y a suflisamment d'espace
atKotlF de \_tre plat de cuisson pour
assm'er une bonne drculation de l'air
darts le time Si wnls ufilisez ph/siem_
plats, laissez de l'espace entre eux.
_&ssurez-\ ous (4galement qu'ils n'entrent
pas ell COlltact avec d'atltl'es casseroles
ou a\vc les patois du ibm:
Papier et plastique
Metal et verre
Vous pouvez utiliser n'importe quel t}])e
de plats de cuisson darts \_tre fl_ur 5
con\vction. Toutefbis, ce sont les plats en
m_ml qui chauflent le plus rapidement.
Ils sont (Faillem_ recommand& pour
la cuisson par convection.
::Ji::Los plats de couleur fonc_eou au hni mat
assurent unecuissonplus rapide que /esplats
luisants.
Vous pouvez utiliser darts le fimr 5
con\vction les contenants de plastique
ou de papier r(4sistant 5 la chalem;
recommand& par lem" flibricant pour
utilisation darts un fi)m" ordinaire. I,es
plats de cuisson en plastique r(4sist:mt
5 tree temp(_rature de 400 °F (200 °(2)
con\'iemlent (_galem ent.
::Ji::Lesp/atsen verreouoncbram/queassurent
uneculssonpluslente.
Dans le cas de cei'taines recettes, coi//ille
le poulet au fi)u_; utilisez un plat dont les
patois sont peu _le\'_es. i,'air chaud ne
peut circuler ad&luatement atlto/ir de
l'aliment lo_sque cehfi-ci est plac_ darts
un plat 5 patois (devg_es.
63
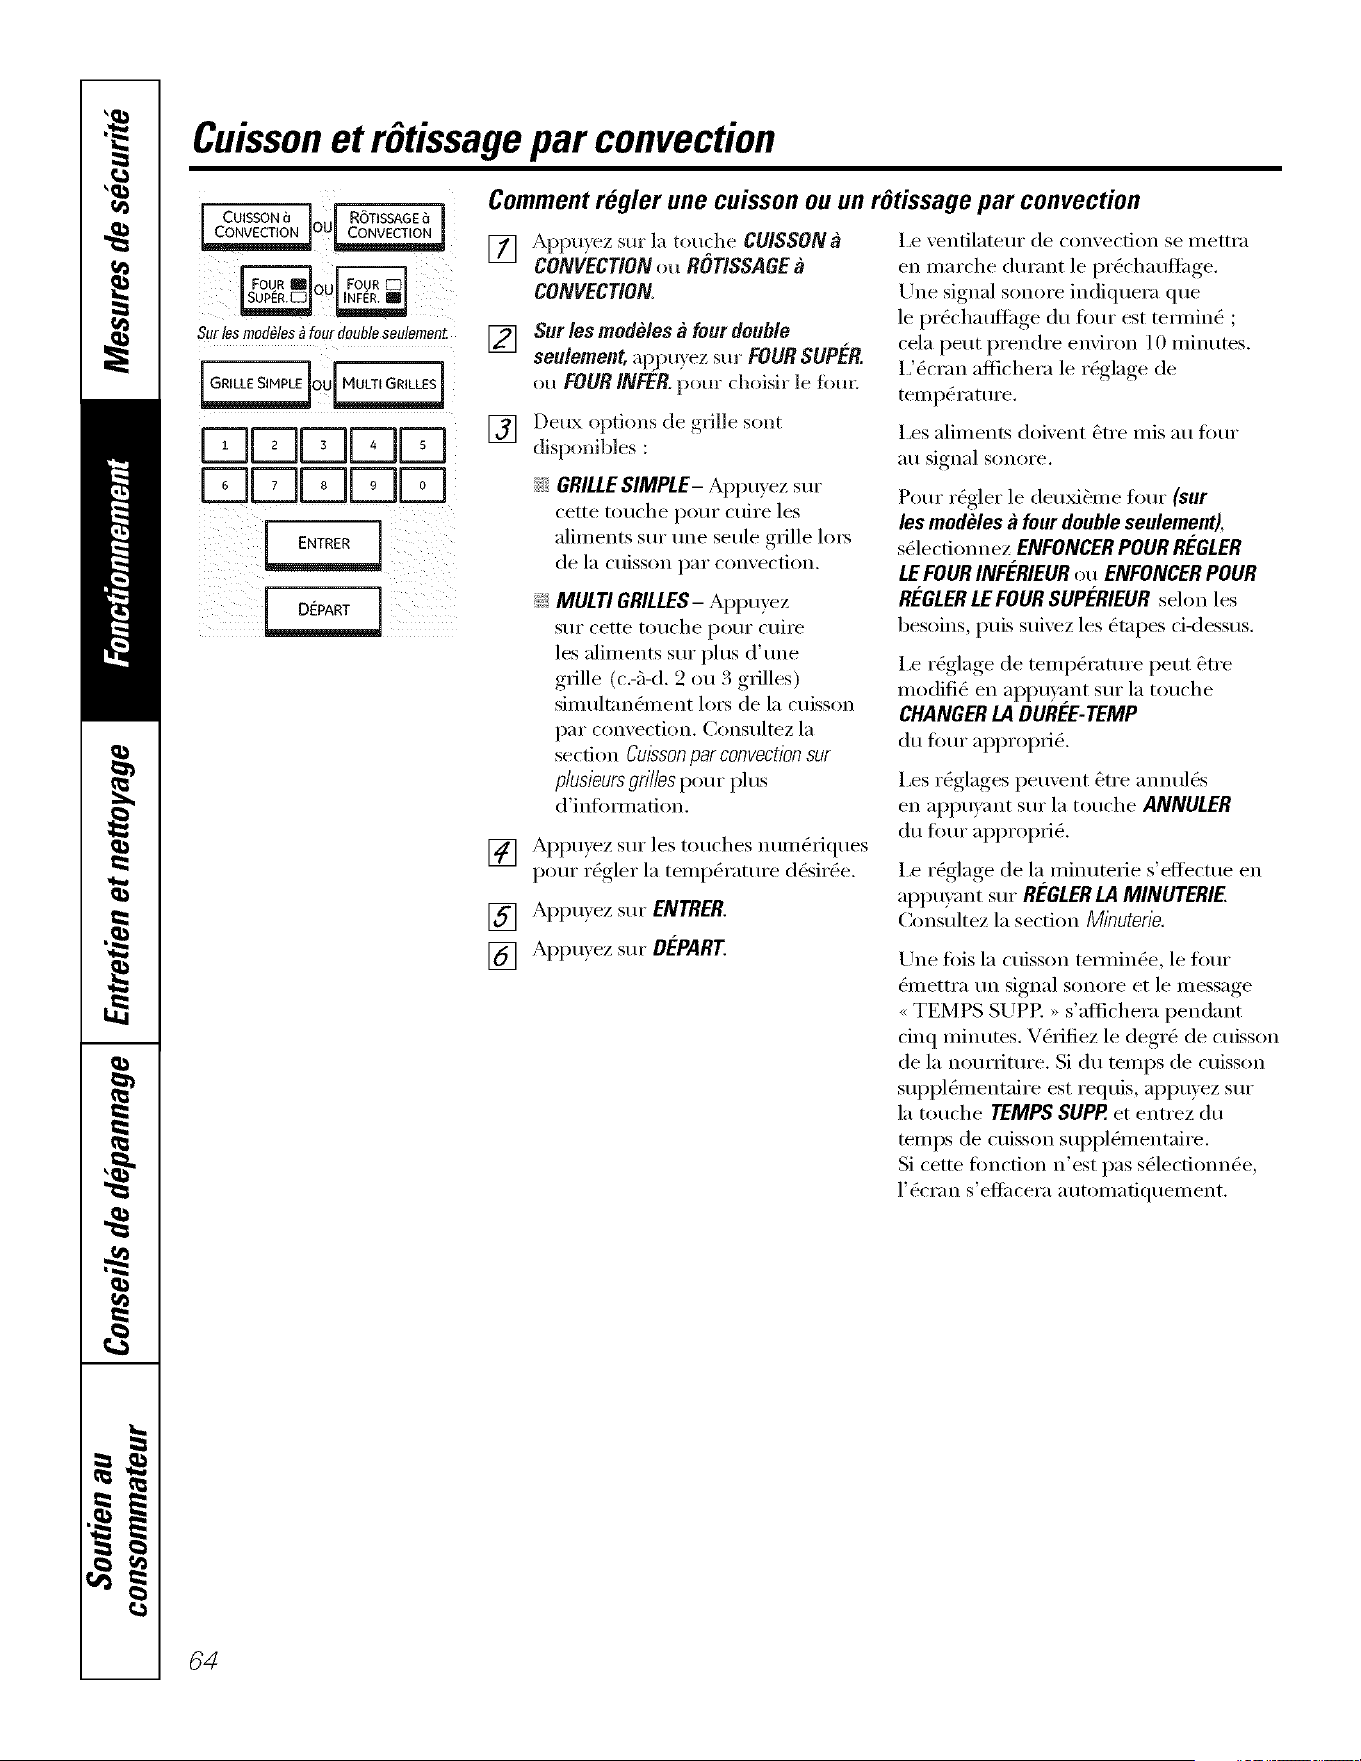
Cuissonet r6tissagepar convection
[ CuissoN_i I R_TISSAGE_i
Surles mod_les_ fourdoubleseulement.
DDDDD
DDDF;ID
ENTRER
Comment regler une cuisson ou un rOtissage par convection
[] Appu}ez sur }a touche CUISSON
CONVECtiON ou ROTISSAGE
CONVECtiON
[]
[]
Sur/esmodeles a fourdoub/e
seu/ement, apjxl) ez sur FOUR SUPER.
ou FOUR INFER. pour choisir le fi_m:
Deux options de grille sont
disponibles :
IX:GRILLESIMPLE- Appuyez sur
cette touche pour cuire les
aliments sur une seule grille lo_5
de la cuisson par convection.
_: MULTIGRILLES-Appuyez
S/lI" cette [o/iche po/lI" c/liI'e
les aliments sur plus d'une
grille (c.-fi-d. 2 ou 3 grilles)
simultang_ment [o_ de la cuisson
par convection. Consultez la
section Caisson par convection sur
plusieursgri//es pom phls
d'infimnation.
[] Appuyez sur [es touches num&'iques
pour r_gler la temp&'ature d&ir_e.
[] Appuyez sin" ENTRER.
[] Appuyez sur DEPART
I,e ventilateur de convection se mettra
en marche durant le prg_chaufti_ge.
/Jne signal sonore indiquera que
[e prg_chattfti_ge du four est mmfin(_ ;
cela peut prendre environ 10 minums.
I,'(mran aflichera le rg_glage de
tempg_rature.
I,es aliments doivent 6tre mis au fimr
_ltl signal sonoi'e.
Pour rg_gler le deu_me four (sur
les modules a four double seulement),
s_lectionnez ENFONCER POUR REGLER
LE FOUR INFERIEURou ENFONCER POUR
REGLERLE FOUR SUPERIEURselon [es
besoins, puis suivez les (_tapes ci<}essus.
i,e r6glage de temperature peut _tre
mo(lifi_ en appu)_}nt sur la touche
CHANGERLADUREE-TEMP
du fimr approprigt
I,es r_glages peuvent _tre annulus
en appuyant sur la touche ANNULER
du fimr approprigt
I,e rg_glage de [a minuterie s'effecme en
appu) ant sur Rk'GLERLAMINUTERIE.
Consultez la section Minutene.
Une tiffs [a cuisson temfing_e, le fl)ur
(_inettra un signal sonore et le nlessage
<_TEMPS SUPP. ,, s'altichera pendant
cinq minutes. Vg_rifiez le degr(_ de cuisson
de la nourfiture. Si du romps de cuisson
supplg_mentaire est requis, appuyez sur
la touche TEMPS SUPP. et entrez du
temps de cuisson suppl&nentaire.
Si cette foncdon n'est pas s_lectionn_e,
['&'ran s'eflilcera autolnafiquement.
84
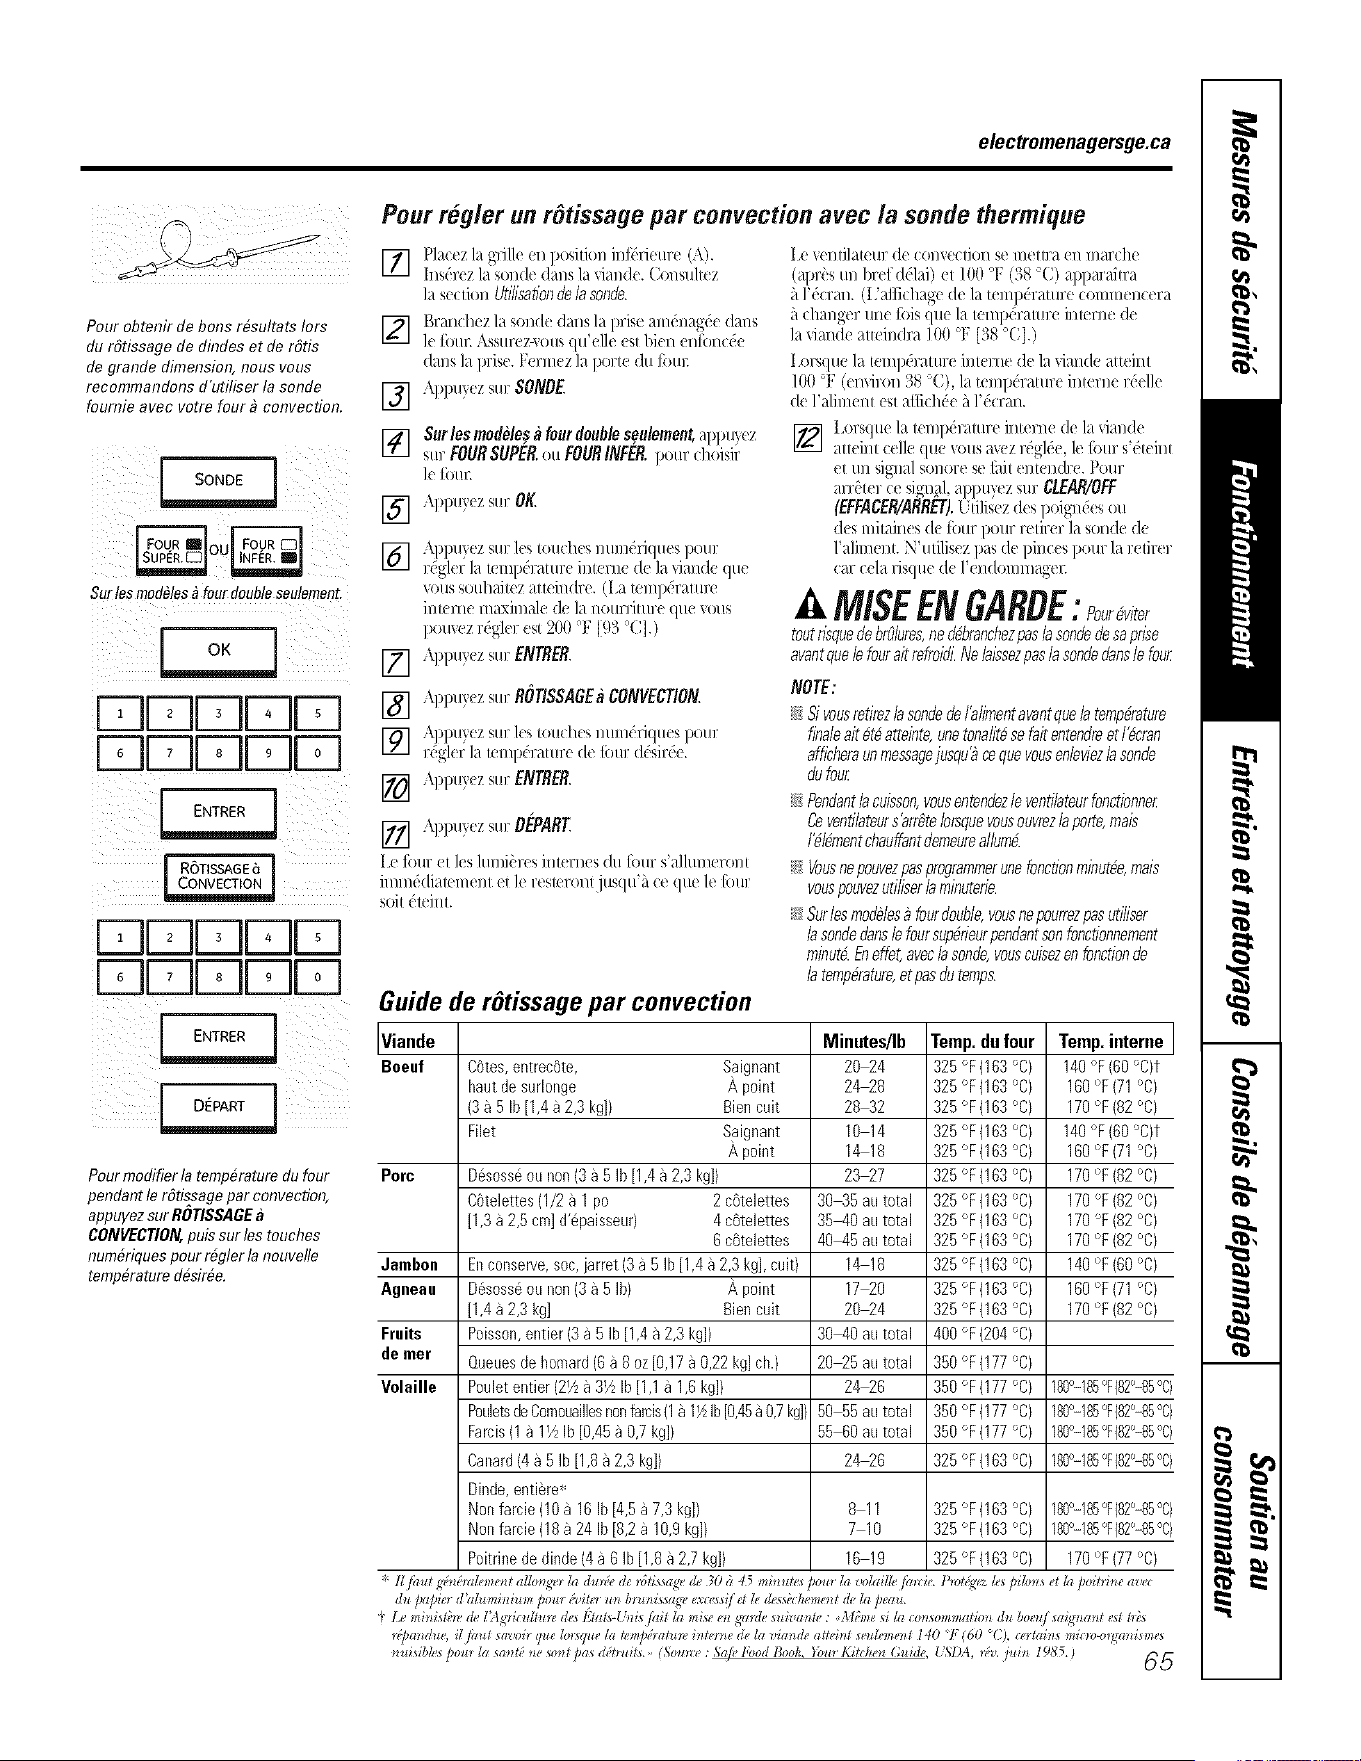
electromenagersge.ca
Pour obtenir de bons r#sultats Iors
du rStissage de dindes et de rStis
de grande dimension, nous vous
recommandons d'utiliser la sonde
foumie avec votre four _ convection.
Surlos mod#les_ fourdoubleseulement.
FqFqFqFqFq
FqFqFqFqFq
ii !iiiii(i
J ROTISSAGE6 j
DD[Z][Z][i]
DEi][Z][Z]D
Pour modifier la temp&ature du four
pendantle rStissagepar convection,
appuyezsur ROTISSAGE
CONVECTION,puis sur los touches
num&iques pour r@ler la nouvelle
temp&ature dfisir#e.
Pour r#gler un r6tissage par convection avec la sonde thermique
[]
[]
[]
[]
[]
[]
[]
[]
[]
P/acezla grille en l)Odd(m inff'riem e (A).
hls(_rez/a sonde dam ]a viand(. (2msuhez
]a se_lion UtlT[sationdela sonde.
[_raH([/ez ]I $(t]/(/(_ (]arts ]a ]!rise a/lit na_t o darts
]( f()tll_ ASS/II_t?Z-VO/IS (]/l'(!]]t? (Sl /)i(!H (Hf()H(_(!
(/a/Is ]a ])riso. Fm'/l/(tz ]a Ix)rio (It[ [iHt/i
\ppu)ez sur SONDE
Surlesmodelesa fourdoublesedement,appu_(z
surFOURSUPER.ou FOURINFER.]×mr_]loisir
l( fbtu:
,:\]!puy(zsill:OK
:_])])t!_OZ stir ](ts [ot!(]/os///l///(Ti(]/!os ]_)tlr
re_/( ]7/a lelll]!(Tal/w(: iHR?I']]( dr?/a _iande que
vous souhait(z att('indre. (][,at('///pdr_lttll&!
i//t(Tl/(' l//aXil//ale (]e ]a//O/lrrit/lr{, (]/1(' Vt)t!S
pOUVeZ17e_1_ ]7 est 200 'F 193 'C].)
,\])])uy( z s/lr ENTRER.
Appuy(zsurROTISSAGEaCONVECTION
A,])])t!}OZ s/Ir/(!s [ot!(]/(!s///ll//(Tiq/IOS ]_)tlr
r_gl(r/a Imnp('ramre de tbur (/&Jr&.
[] AI)puy(z sill: ENTRER.
[] \])pt!}eZ stir DEPART:
][,t_ ](HIr ol les ]/li//i(ti'(!s i//l(!rl/oS (It! f(>tlr s'a]ha//m'o//(
il/llll( (/i311 11/(1/I (l ]( I'(Sl(r(a/l i/ls(]/l'?l C( (]/R ]( [_)/ll'
SOil('lei//I.
Guide de r6tissage par convection
][_(' veilti]ateur de co/iv('( ti()l / st'/llottra ei//liar( he
(altrbs un blef(/_:/ai) et ]00 °F (38 °C) apltm'aitra
11l'&rm/. (i.'aflichag(' de/a temp&ature commencera
h changer une lois qu( 1:/temp&'atule inlerne de
1:/vim/de atteindra ]00 °F [38 'CI.)
i.orsque la tempdrattn (' interne de la dan(le atteint
]00 °F (emiron 38 °C),/a mmp('ratur( interne 1Oelle
d( l'alin/ent (st afli(h('e ;'_l'&crm/.
] i,ors(ltlO ]a I(ll/])(Taltlle inlerne (1(? ]a _,3an(l(!
alleint ce//e que vous wez rdgk?e,/e t)}tl/"s'("l(!i]/I
et un signal sonore st, fhit enmndre. Pour
arrg'tm" ce siouid, al)ltUS'ezsur CLEAIgOff
(EFFACER/ARR#).t li/isez des 1xfign&s ou
des mitaines d( tour pour/vtirer/a sonde de
/'aliment. N'utilisez pas de pinces pour la retil er
car cela risqu( d( ]'e//do///I//_lgtq2
MISEENGARDE:Poe.v,ter
toutrisquedebrOlures,ne fi&ranchezpaslasondedesaprl_e
avantquelefouraft r@eq_i.Ne laissezpasla sondedansle four
NOTE:
_!!g vousretirezla sondede/'alimentavantque/a temp#rature
finaleait#t# atteinte,unetonalit#sebit entendreet I'#cran
afficheraunmessagejusqu'_cequevousenleviezlasonde
&four
_!!Pendantb cuisson,vousentendezle venti/ateurfonctionner
Ceventilateurs'arr_tebrsquevousouvrezb porte,mais
l_16ment chauffant demeureallum#.
_!!Vousnepouvezpasprogrammerunefonctionminut#e,mais
vouspouvezutiliserlaminutede.
_!!Surlestamalesa fourdouble,vousnepourrezpasutiliser
la sondeclans/efoursup#fieurpendantsonfonctionnement
minut#.Eneffet,avec/asonde,vouscuisezen fonctionde
la tempdrature,et pasdutemps.
Viande Minutes/Ib Temp. du four Temp. interne
Boeuf C0tes,entrec0te, Saignant 20_4 325 °F (103'_C) 140_F(00'_C)t
haut de surl0nge A point 24_8 325 '_F(163 '_C) 160°F(71 '_C)
(3a 5 Ib [1,4a 2,3 kgD Bien cult 28_2 325 '_F(163 '_C) 170°F(82 °C)
Filet Saignant 10 14 325 °F (163°C) 140°F (60 '_C)t
A point 14 18 325 °F(103 °C/ 160°F(71 °C}
Pore D6soss6ou non(3a 5 Ib [1,4a 2,3 kg]) 23_7 325 °F (163 °C} 170°F(82°C}
Cftelettes (1/2 a 1 pe 2 c0telettes 30_5 au total 325 °F (103 °C) 170°F(82 °C)
[1,3a 2,5 cm]d'@aisseur) 4 c0telettes 35-40 au total 325 °F (103 °C) 170°F(82 °C)
0 c_telettes 40q5 au total 325 °F (103 °C) 170°F (82 °C}
dam6on Enconserve,soc,jarret {3 a 5 Ib [1,4 a 2,3 kg],cult) 14 18 325 °F (103 °C} 140°F(00 °C}
Agneau D_sess6eu non(3 a 5 Ib} A point 17_0 325 °F (103 °C) 100°F(71 °C)
[1,4a 2,3 kg] Bien cult 20_4 325 °F (103 °C} 170°F (82 °C}
Fruits Poissen,entier (3 a 5 Ib [1,4 a 2,3 kg]) 30q0 au total 400 °F (204°C}
de mer Queuesde homard(6 a 8 oz[0,17a 0,22kg]ch.} 20_5 au total 350 °F (177 °C)
Volaille Pouiet@tier {21/z a 31/zIb [1,1a 1,6 kg]) 24_6 350 °F (177 °C) 180°-185°F(82°-85°C)
PouletsdeComouaillesnontarcis(1a1½1b[0,45a0,7kg])50 55autotal 350°F(177°C) 180°-185°F{82°-85°0}
Farcis(1a 1YzIb [0,45a 0,7 kg]} 55 60au total 350 °F (177 °C) 180°-185°F(82°-85°C}
Canard(4 a 5 Ib [1,8 a 2,3 kg]) 24_6 325 °F (163 °C) 180°-185°F(82°-85°C}
Dinde,enti6re*
Non farcie(10 a 10 Ib [4,5 a 7,3 kg]) 8 11 325 °F (103 °C) 180°-185°F(82°-85°C}
Non farcie(18 a 24 Ib [0,2 a 10,9kg]) 7 10 325 °F (163 °C) 180°-185°F(82°-85°C}
Poitrinede diode (4a 6 Ib [1,8a 2,7 kg]) 16 19 325 °F(163 °C) 170°F(77 °C)
# !I/azd _;*lozdenl_l¢ alloll_el Ia d*o_;_d_ nSfissage & 30 h 45 mil_l&_ boz_rIa volailbflnrk. PIo@'ez les pibns eg & poihim' avec
"}1._ mir*islbn,& l'Ag_ gldhzn (&_l'2als-Ullis /ail la nl se ol grmle s*zvar*le : _M_III*si la co*_sommalol_ dl_ bo_l{/ _a{¢l_a*_¢_s¢hbs
I@anghu, il /h_¢gsawoir qm Iol:sqlzela t_mpg;lahoe illZe***lde la vimlde afl_ **¢_elzknze**¢140 <1:(60 °C), (e*Za ?ls m g*v_)lyal_ _nles
_6sibk, s po*o la sa_g(;m' so_g pas d(;h _zi¢_.,,(So,me : S@, food Book, }b_zrKiggko_ ( h&h, { SDA, n;_,.fid** 1985. ) _ 5
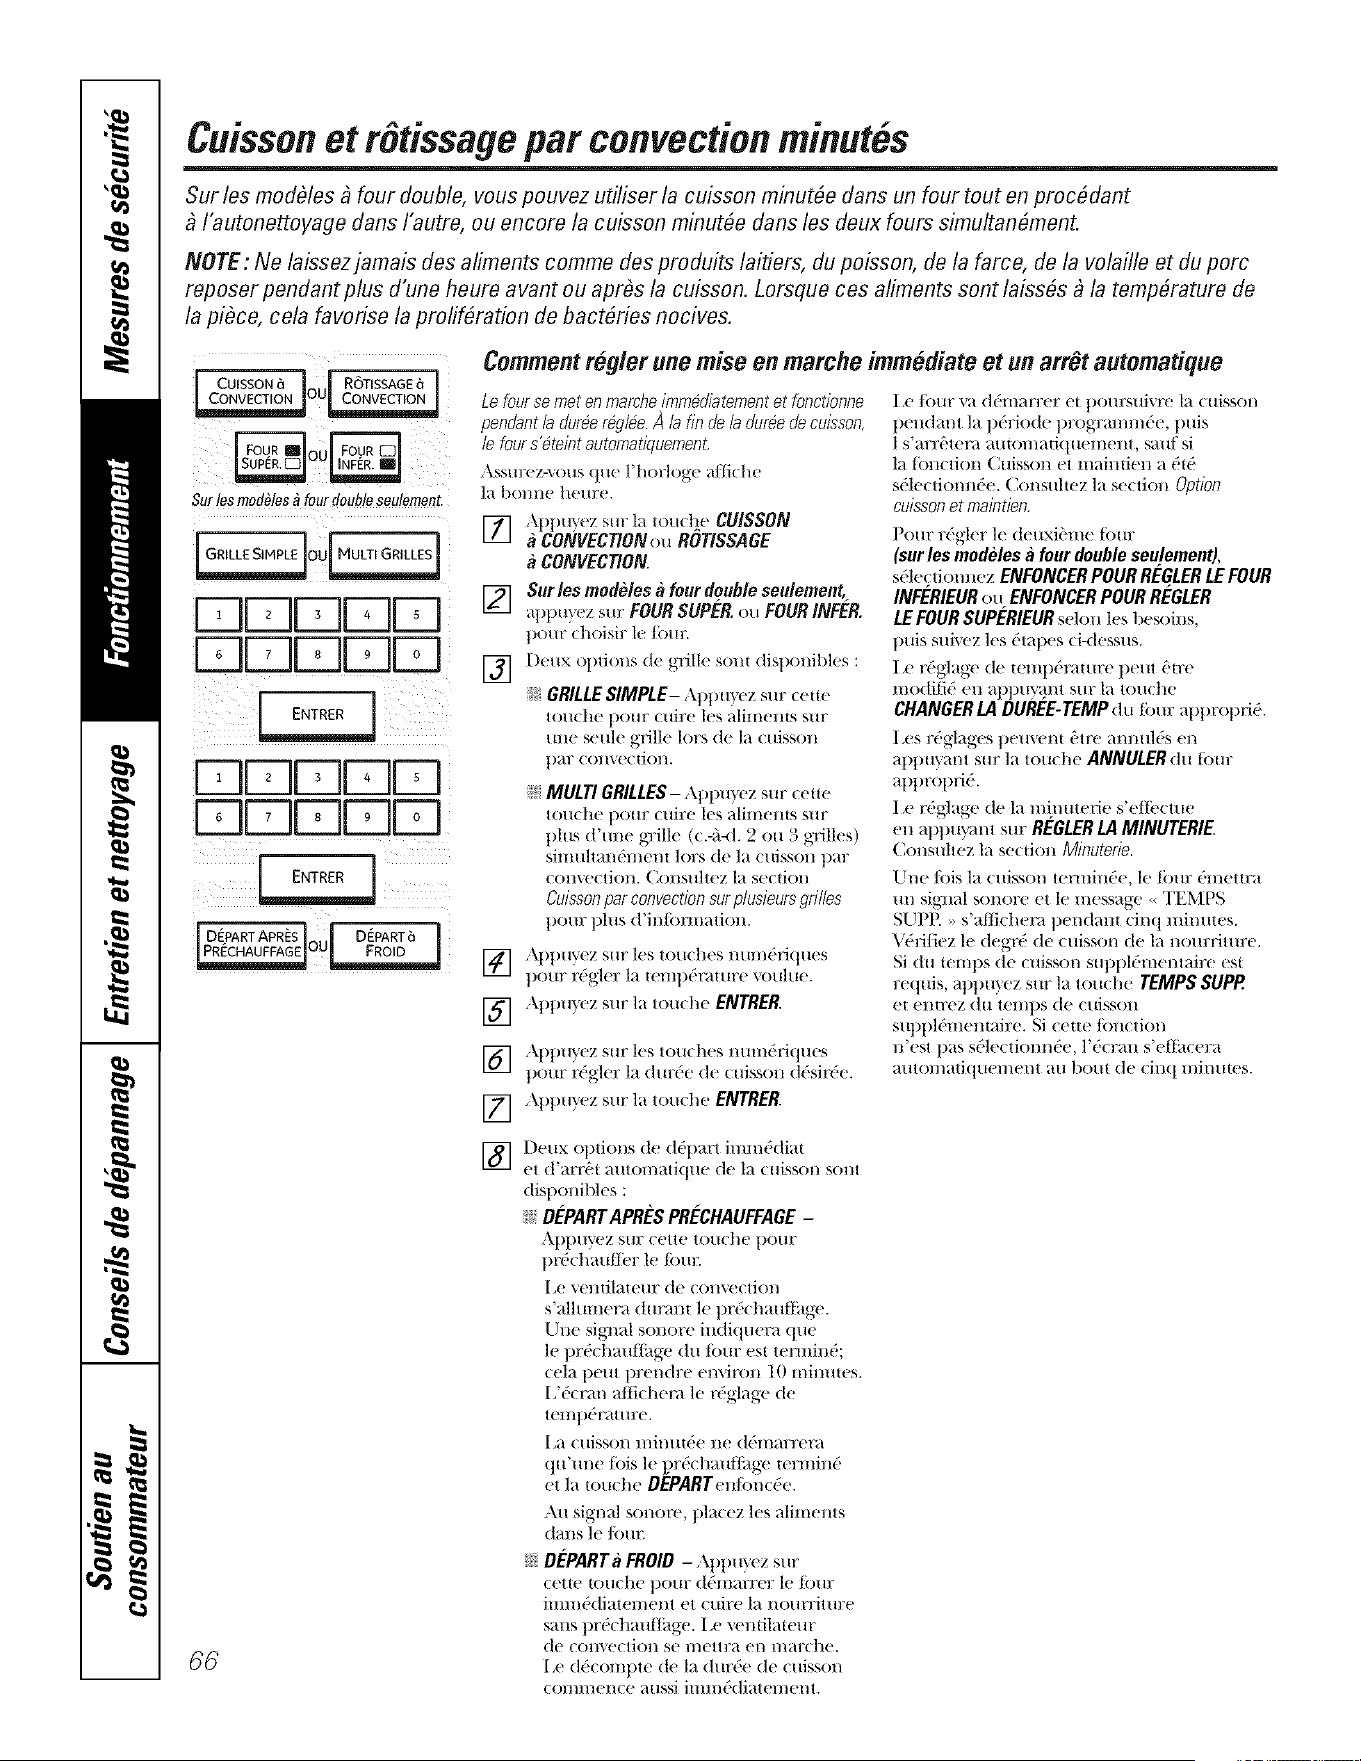
Cuissonet rStissagepar convectionminut#s
Sur les modbles _ four double, vous pouvez utiliser la cuisson minutGe clans un four tout en procGdant
I'autonettoyage darts I'autre, ou encore la cuisson minutGe darts les deux fours simultanGment.
NOTE: Ne laissez jamais des aliments comme des produits laitiers, du poisson, de la farce, de la volatile et du porc
reposer pendant plus d'une heure avant ou aprbs la cuisson. Lorsque ces aliments sent laissGs _ la tempGrature de
la pifice, cela favorise la prolifGration de bactGries nocives.
[ CU_SSON,_Jo I RST_SSAGEaI
Surlesmod#les_ fourdoubleseulement.
FqFqDDD
DDFqFqFq
]
FqFqDDD
Fqfqrqr-qrq
_ DEPARTAPRE$] J DEPART6
66
Comment r#gler une raise en marche imm#diate et un arr_t automatique
Le four se met en marche imm6diatementet fonctionne
pendant la dur6e r6gl6e A la fin de la dur6e de cuisson,
le four s'6tebt automatiquement
Assm:ez4 ous (lue l'horloge ai_iche
1Ft b()lltle he/lre.
] ,\[)pu}(z sur la lotl([xe CUISSON
CONVEC770N ou ROTISSAGE
CONVECTION.
[] Sur les modeles a four double seulement,
apl)U? ez stu" FOUR SUPPER.ou FOUR INFt:R.
pore: t hoisir [e four.
] Deux o[)dons de gri[le stml dJsponil)les :
_1_!GRILLE SIMPLE-,\ppu_ez sur ceue
tOil( he potlr ( Ilire [es a[itilelltS SliT
tree seu[e gri[[e [ors de [at uisson
[ );-ir ( elF',e( |iOl/,
J?MULti GRILLES-Appu}vz sur cette
touthe pore" cuire les alimems sur
plus d'mte gTille (c.-fi-d. ,2 ou 3 grilles)
simu[tm/('ntent [ors de [a ctfisson pro:
COlt\'ectio/l. ( '.OltStl[tez tel sectiOlt
Cuissonpar convection sur plusieurs grilles
it(mr p[us d'in[brltmdon.
] Appuyez sur les touches nun/(,riques
po/lr r('g]er tel {t!lIIp('l'_li/lre "_,o/l]/le.
] Appu_ez sur [a touthe ENTRER.
] Ai)[myez sur [es touches num(,riques
pour r('g[er [a durde de ( uisson d('sir('e.
] Appuyez sur [a touche ENTRER
I e [()tlr v;t d('tilarrer et po/lrstlivl'e [a ¢lliSSOl/
[)ent[m/t [a pdriode progranm/de, [)uis
[ S'Elrr£'[t'I'_l Et/lIOl/l;clIi(tlleIIlell[ , SEtlI[' si
[a [bnctJon Cuisson et maintien a ('t('
sd[ectionn('e. Consu[lez [a set ti(m Option
cuissoe et maietiee.
Pore" rd'gler [e tteuxi_'me [bur
(sur les modeles a four double seulement),
s(qecdonnez ENFONCER POUR REGLERLE FOUR
INFERIEUR ou ENFONCER POUR REGLER
LE FOUR SUPERIEUR se[on [es besoil Is,
[)uis suivez [es ('ta[x's t i-dessus.
I e rd'g[age tit' t('ml)('nmm' [)cut _'tre
modifi(' en appuyant sur [a touche
CHANGER LA DUREE-TEMP du Ibm: approprid.
Les r('glages peuvem ?'tre mmu[('s el/
appuym/t sur [a touche ANNULER flu Ibm:
El[)propri('.
I ,e r('g[age (te [a minuterie s'e[li.,ctue
en ai)puyant sur REGLER LA MINUTERIE.
(k)ltsu[tez [E_set tioll Mieuterie.
UI/e Ibis [a cuisson temfin('e, [e Ibm: dntettra
m/siglta[ sonore et [e message <<TEMPS
SUPR , s'a[tiehem pendant einq niinutes.
\'dri[iez [e degr(' de euisson de [a nourriture.
Si t[u tem[)s de cuisson supp[6mentaire est
requis, appuyez stir [a touche TEMPS SUPP
et emrez du temps de cuisson
stq)[)[('mem;fire. Si (etw foiwtion
n'est [)as s('[ectionn('e, ['&ran s'e[Ei(era
alltOt/tEttJq/lel/teltt Etll bo/ii de ciit( t t/til//lles.
[]
I)eux o[)tions de (tdi)art imniddiai
et (t'Etrr£'i _l/ltOl//Etti(l/le de [a( IliSSOl/ SOIII
ttisponibles :
ii::D£PART APRES PR£CHAUFFAGE -
A[)pu_z sin: eerie touche [)our
[)r('c[tmdtbr [e Ibm'.
I ,e venti[ateur de convection
s'a[[umera ([m'mlt [e pr& hau[[iige.
Une sigl/a[ sonore in(tiquera (tue
le [)rdchau[[iige ([tt [Dtn: est tel'mill6;
ce[a [)eut prendre envi_rm 10 minutes.
I,'dcran a[tichem [e r('glage de
tellt[)(wEtt Itre.
I ,a clliSSOl/l//il//lI£'e lie (t('lnarren_
(lU'm/e Ibis [e pr('chaufl_ige termilff'
et [a louche DfPARTenlbnc('e.
Au signal sonore, p[acez [es a[iments
darts [e [bmt
N DEPART a FROID - A[)pItyez stir
cette tOlIche po/lr ([('lilarrer [e [[)1117
immdttiatentent et cuire [a nourrimre
sans prdchau[[kige. I,e vemi[ateur
([e COll'_ectiOll St' l//ettrEt el/ l//ar( tie.
I ,e d('eompte de [a durde de cuisson
¢ol//l//el/ce aussi ilIll//('(/JEttel//el/t.
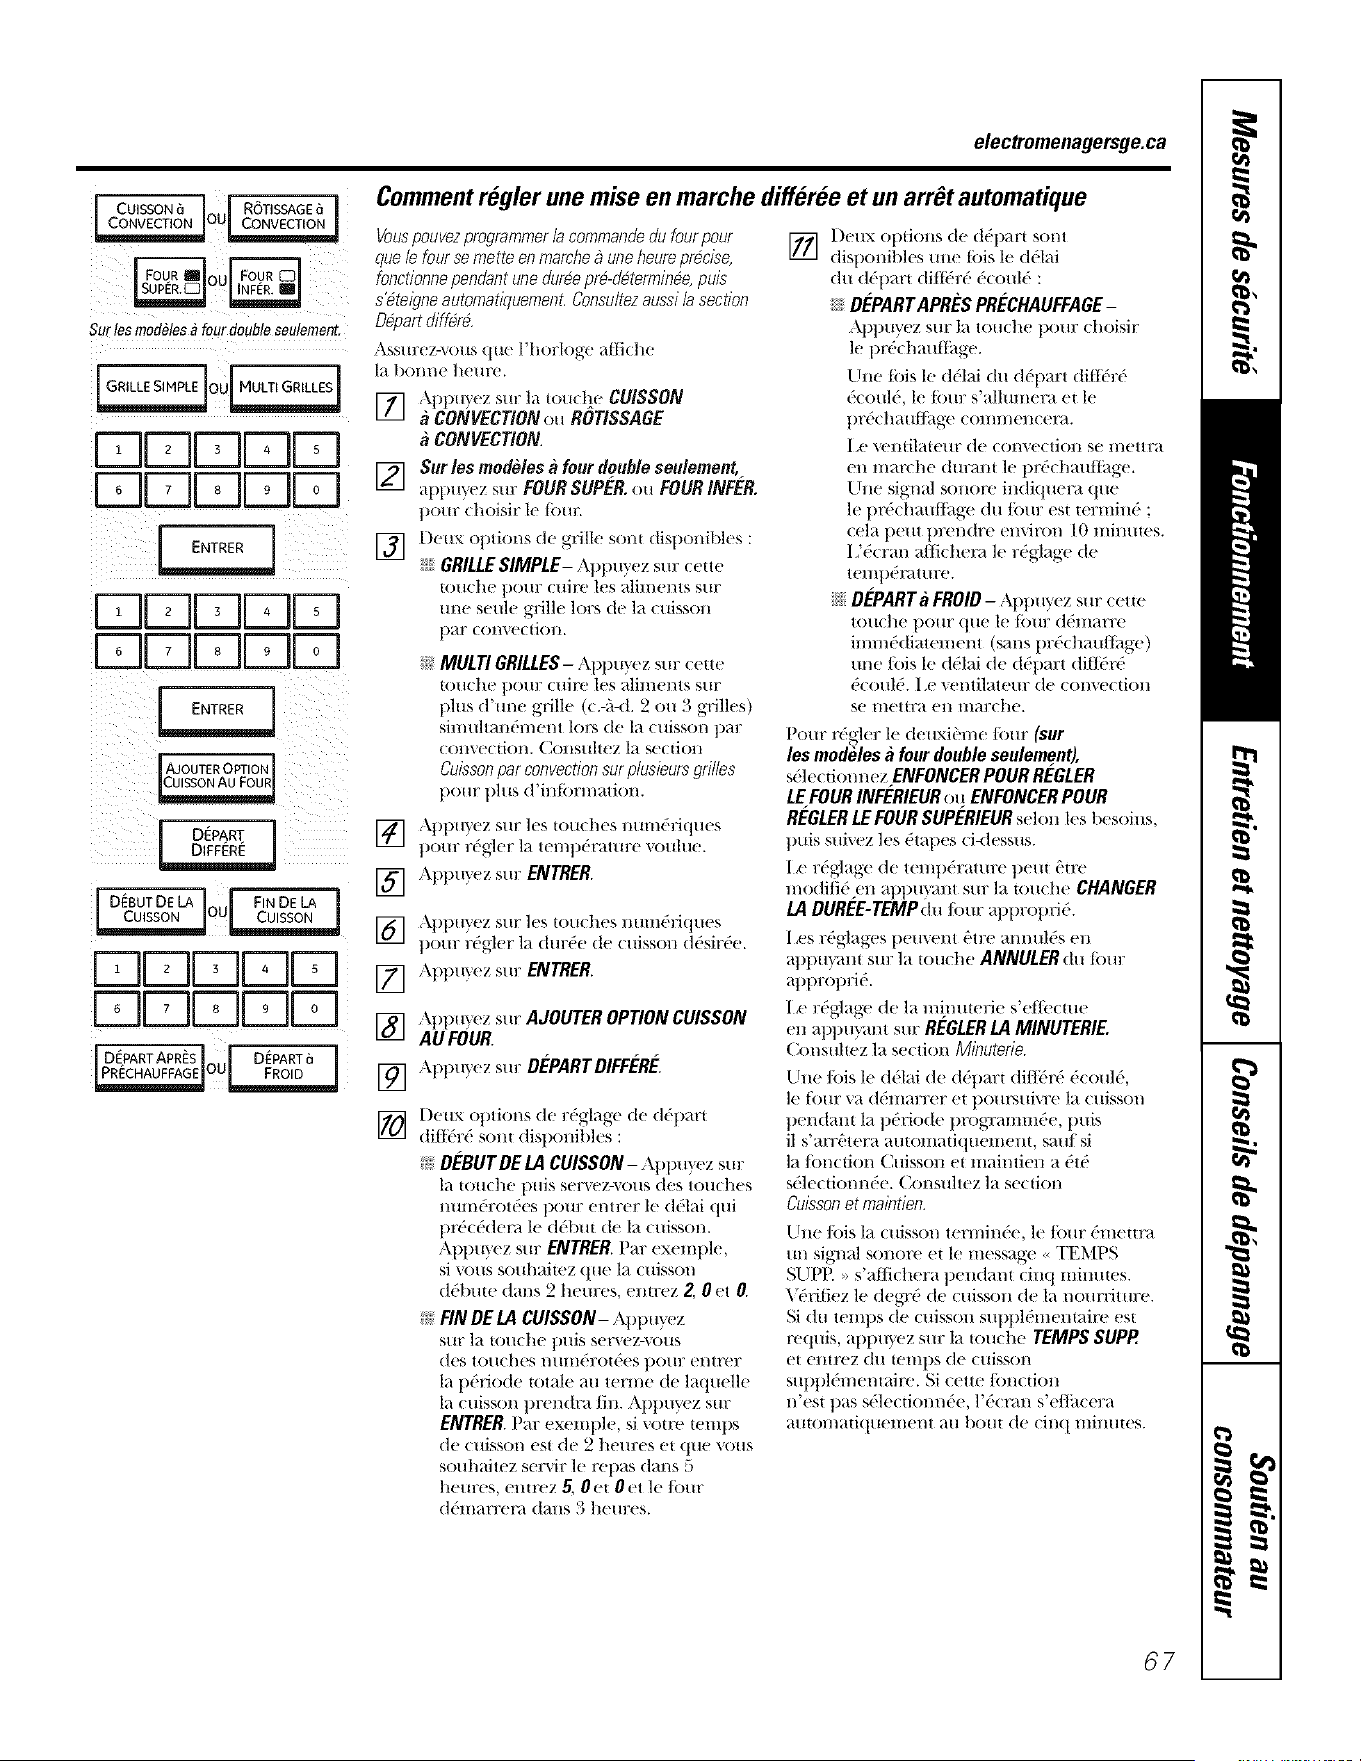
I CUISSONb ] J R6TISSAGE6 1
Surlos mod_les_ four doubleseulement.
FqrqrqFqFq
Fqr-qFqFqD
D[Z]DDD
Dr-:-IDDD
[AJOUTER OPTION I
J D_BUTDELA i [ FINDELA
U]U]U][Z]Fq
fqDr rqrq
I O_PARTAPR_Slou[DEPARTfi ]
l FRo,D1
electromenagersge.ca
CommentreEler une mise en marche differee et un arr_t automatique
Vouspouvezprogrammer la cornmande du four pour
que le four se mette en mamhe _ une heure pr#cise,
fonctionnependant une durfie pr&determinbe, puis
sVteigne automatiquement. Consultezaussi la section
Depart differfi.
Ass/m,z-_ ous que l'horlogc al/iche
1_/bOltlt( h(fHlT(f.
[_q ,_ppuyez sin: la tou(lF CUISSON
i,, i
CONVECTION ou ROTISSAOE
CONVECTION.
FP] Sur les modeles a four double seulement,
h¢- I
appuyez sur FOUR SUPER. ou FOUR INFER.
pour dtoisir h' lbur.
] Deux Ol)li(ms de grille sent disp(mibles :
N GRILLESIMPLE-Al)t)u}'ez sur (:cue
lolt(h(' ])Ottt" (llJI'{' I('S aliltt('l/tS stir
m_e settle gJille lors de la cuisson
par comx'ction.
;!_iMULTI GRILLES- Appu}'ez sin: cette
touche pour cuirc les _diments sur
plus d'une grille (c.-a-d. 2 ou 3 grilles)
simuhandment lots de la cuisson par
coltvecliOll. Coltstlhez la secliolt
Cuissonpar convection sur plusieurs grilles
pour plus d'intbrmation.
] ,\ppuyez sur les touches nmndriques
pore: r('gler la tentp('rattu:e xouhm.
[] Appu'_ez sur ENTRER
] ,\ppuyez sur les touches nmndriques
pour r('gler la dur('e de cuisson d('sir('e.
[] Appuy(!z sur ENTRER
[] Appu) ez sur AJOUTEROPTIONCUISSON
AU FOUR.
[] Appuyez sur D£'PARTDIFK'R£'.
] I)eux options (le r('glage de (t6pan
(titt_r( ' sonl disponibles :
>:DEBUT DE LA CUISSON - Alpu) ez st u:
la lOll(h(' plliS S(TV('Z-VOtIS d('s tOll(]l('S
numdrot&'s pour cntrcr h" ddlai qui
pr&ddcn_ le ddbut de la cuisson.
Appm'cz sur ENTRER. Par cxemph',
si vous souhaimz que la cuisson
d('bute darts 2 heures, entrez 2, 0 et 0.
N FIN DE LA CUISSON- Npu}_'z
SitE" 1_t tOtl('h( + pttis set'\ (,E-veils
des tO/lches I//llIl('l?Ol('eS ])()Ill? el/H'('l?
la p&'iode totale au terme de laquelle
la cuisson prendra/in. Appuyez sin:
ENTRER Par exemple, si votre temps
de cuisson est de 2 heures et que vous
souhaitez servir le repas darts 5
hem:es, enu'ez 5, 0 et 0 et le/bur
d(,marrenl darts 3 heures.
] Deux opdons (te d('pari sent
disponibles m:e Ibis le ddlai
du d('parl (tilt_r6 ('(oul(' :
_xDEPARTAPRES PRECHAUFFAGE-
AplmyCz sur la tomhc pour choisir
le pr('chaulthge.
l_lne {[)is le (tdlai du (Idpart (tilti_'r6
dcoul6, le Ibm: s'allumera et le
pr('chaul]i_gc commencenl.
I ,e Velliilateur de COl/VeCtiOll se l//ettlTa
en marche (hn:ani le pr('chautthg('.
Une signal sonore indi(luera que
le pr('chauttagc du/bur esl terrain(' ;
cela peut prendre environ 10 minutes.
I :('cran a/tichem le r('glage de
teitll)(,t_,Htlre.
N DEPARTaFROID- N)lmyez sur €etie
touche pour (tue le Ibm: ddman:e
imm('diatement (sans pr(,chau/tilge)
une lois le d('lai de ddpart dit]('r('
('Cotll('. I ,e _(!l/tJlate/ll? (]e COl/Vt'ctioll
se meura en marche.
Pour r('gler le deuxibme four (sur
los modeles a four double seulement),
s(,h,c tionnez ENFONCER POUR REGLER
LE FOUR INFERIEUR ou ENFONCER POUR
REGLERLE FOUR SUPERIEUR solon los besoins,
])uis suiw'z h's ('tapes (i-dcssus.
I _e r('glage de temp('rattn:e peut 8m'
modifi(' en al)l)U\;mt sur la touche CHANGER
LA DUREE-TEMP du four appropri(,.
I ,es r('glages t)cment 8trc annul('s en
al)pu};mi sur la louche ANNULER du Ibm:
al)prol)ri(,.
I _e r('glagc de la mi)miefie s'efli'(me
en appuyant sur REGLER LA MINUTERIE.
Consultcz ]a s('(tJon Minutede.
Line Ibis le d('lai de d('pari (li/]('r(' ('could,
le [bur va d('marrer el poursuivre la cuisson
pendant la p(,riode progTamm('e, puis
il s'arrOera auu)madquemem, sauf si
la/bn(tion Cuisson et maintien a ('t('
s('lectionn('e. Consuhcz la section
Cuissonet fnaintien.
[_:he Ibis la (uisson termin('c, h' Ibm" ('mettn_
un sigmd sonore et le message <_TEMPS
SUPR, s'afl]chera pendant cinq mimtms.
Vdrifiez le degT(' de cuisson de la nourfiture.
Si du temps de cuisson suppl(,meniaire est
re(luis, appuyez sur la touche TEMPS SUPP
('t cmrez du temps de cuisson
SUpl)ldmcnlaire. Si eerie/bn(iioH
n'esi pas s('le(iiom_de, l'('(nm s'eflh(era
atltOlt/atiqtl('lll('l/t HII botlt (|(' Cil/q lllilltltCS.
67
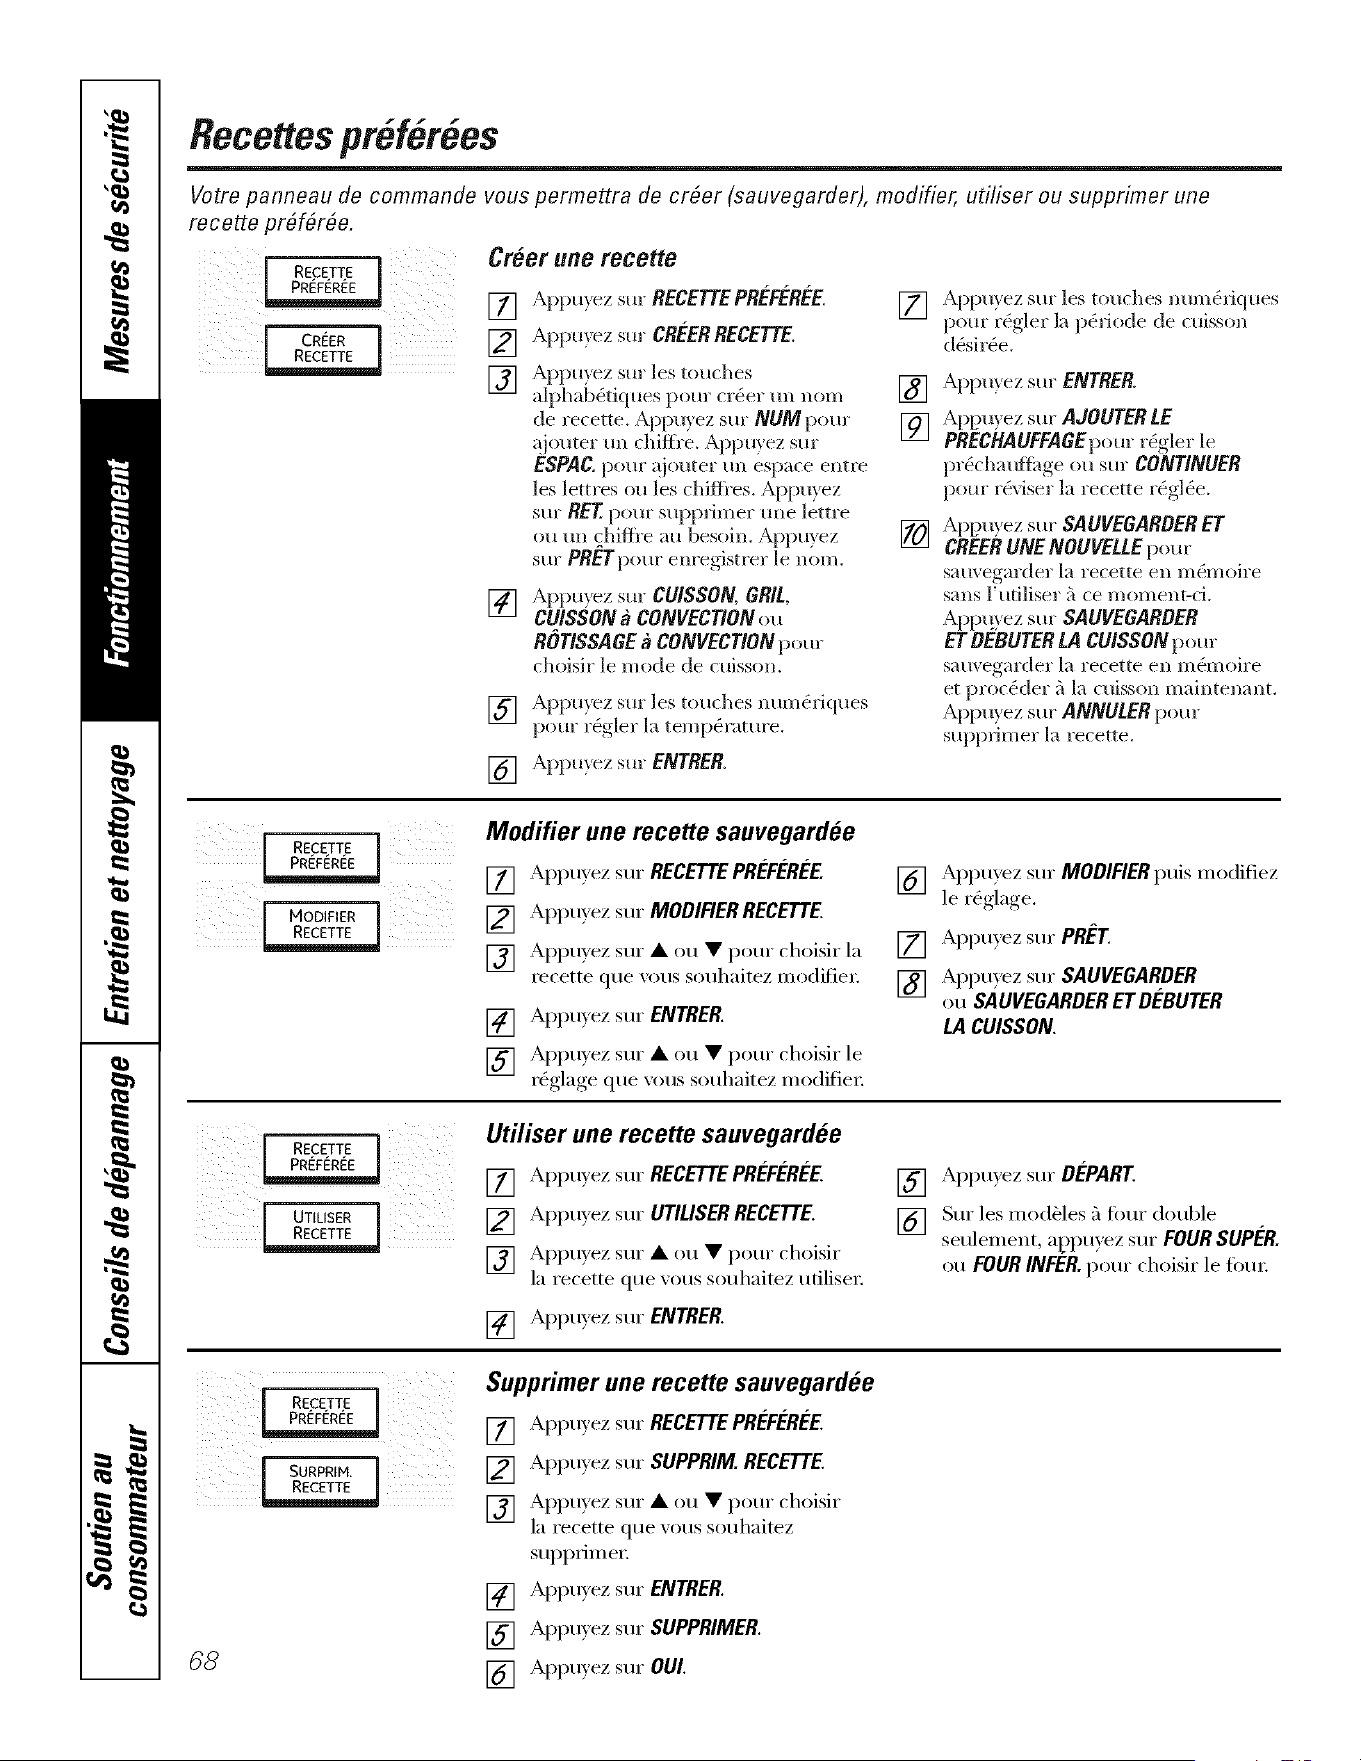
Recettespr .f&6es
Votre panneau de commande vous permettra de cr6er (sauvegarder), modifier, utiliser ou supprimer une
recette pr#f#r#e.
RECETTE
[ PREFEREE [
[ CREER j
Croer une recette
[] Appu_ez sur RECETTEPREFk'Rk'E. []
[] AppuyezsurCRk'ERRECETTE.
[] Appu}ez sur les tI/uches
alphab&iques pour crier un nora []
de recette. Appu) ez sill" NUMpour []
a iouter un (hiffre. Appu) ez sur
ESPACo poIIF a.)o/lter Sill espace elltre
les lettres ou les chiflles. Appu} ez
sur RET pour suppfimer une lettre
ou till chiflk'e^ au besoin. Appu} ez []
sur PRET [)our enregistrer, le nora.
[] Appu}ez sill" CUISSON, GRIt,
CU/SSONa CONVECTIONou
ROTISSAGEa CONVECTIONpour
dloisir le mode de cuisson.
[] Appu}ez sur les touches num6fiques
pour rg_gler la tempg_ramre.
[] Appu)ez sur ENTRER
Appu}ez sur ]es touches numg_fiques
pour r(4gler la p(4fiode de cuiss(m
d6sir6e.
Appu) ez sur ENTRER
Appu) ez sill" AJOUTER LE
PRECHAUFFAGEpour r_gler le
prg_chauftitge ou sill" CONTINUER
pour r&iser la recette r(4gl(%.
ApL/u} ez sill" SAUVEGARDERET
CREERUNENOUVELLEpour
sauvegm'der la recette ell m(4moire
sans l'utiliser a ce moment-d.
Appu} ez Sill" SAUVEGARDER
El"DEBUTER LA CUISSON pour
samregarder la recetteellm&noire
et proc&ier _'ila cuisson maintenant.
Appuyez Sill"ANNULERpour
suppfimel" la recette.
[ RECETTE j
[ HODJFIER|
Modifier une recette sauvegardee
[] Appuyez sur RECETTEPREFEREE.
[] Appuyez sur MODIFIERRECETTE
[] Appuyez sur • ou • pour choisir la
recette que xo/is souhaitez i/lodifiei:
[] Appu) ez sur ENTRER
[] Appu) ez sur • ou • pour choisir le
r_glage,, (]ue.....xous souhaitez modifier
[] Appuyez sur MODIFIER puis modifiez
le rg_glage.
[] Appuyez sur PR_-T.
[] Appu)ez sur SAUVEGARDER
ou SAUVEGARDERET DEBUTER
LA CUISSON.
_ =
RECETTE
_J
UTILISER |
Utiliser une recette sauvegardee
[] Appu) ez sur RECETTEPREFEREE.
[] Appuyez sur UTILISERRECETTE.
[] Appuyez sur • (ill • pour choisir
la recette que xous souhaitez ufilisei;
[] Appuyez sur ENTRER
[] Appu_ez sill" DEPART
[] Sill" les modules fi fimr double
seulement appu_ez sur FOURSUPER.
ou FOURINFER.pour choisir le Ibm:
[ RECETTE ]
[ SURPRIH. ]
68
Supprimer une recette sauvegardee
[] Appu) ez sur RECETTEPREFEREE.
[] Appuyez sur SUPPRIM. RECETTE
[] Appuyez sur • (ill • pour choisir
la recette que xous souhaitez
suppfim el:
[] Appuyez sur ENTRER.
[] Appuyez sur SUPPRIMER
[] Appuyez sur OUI.
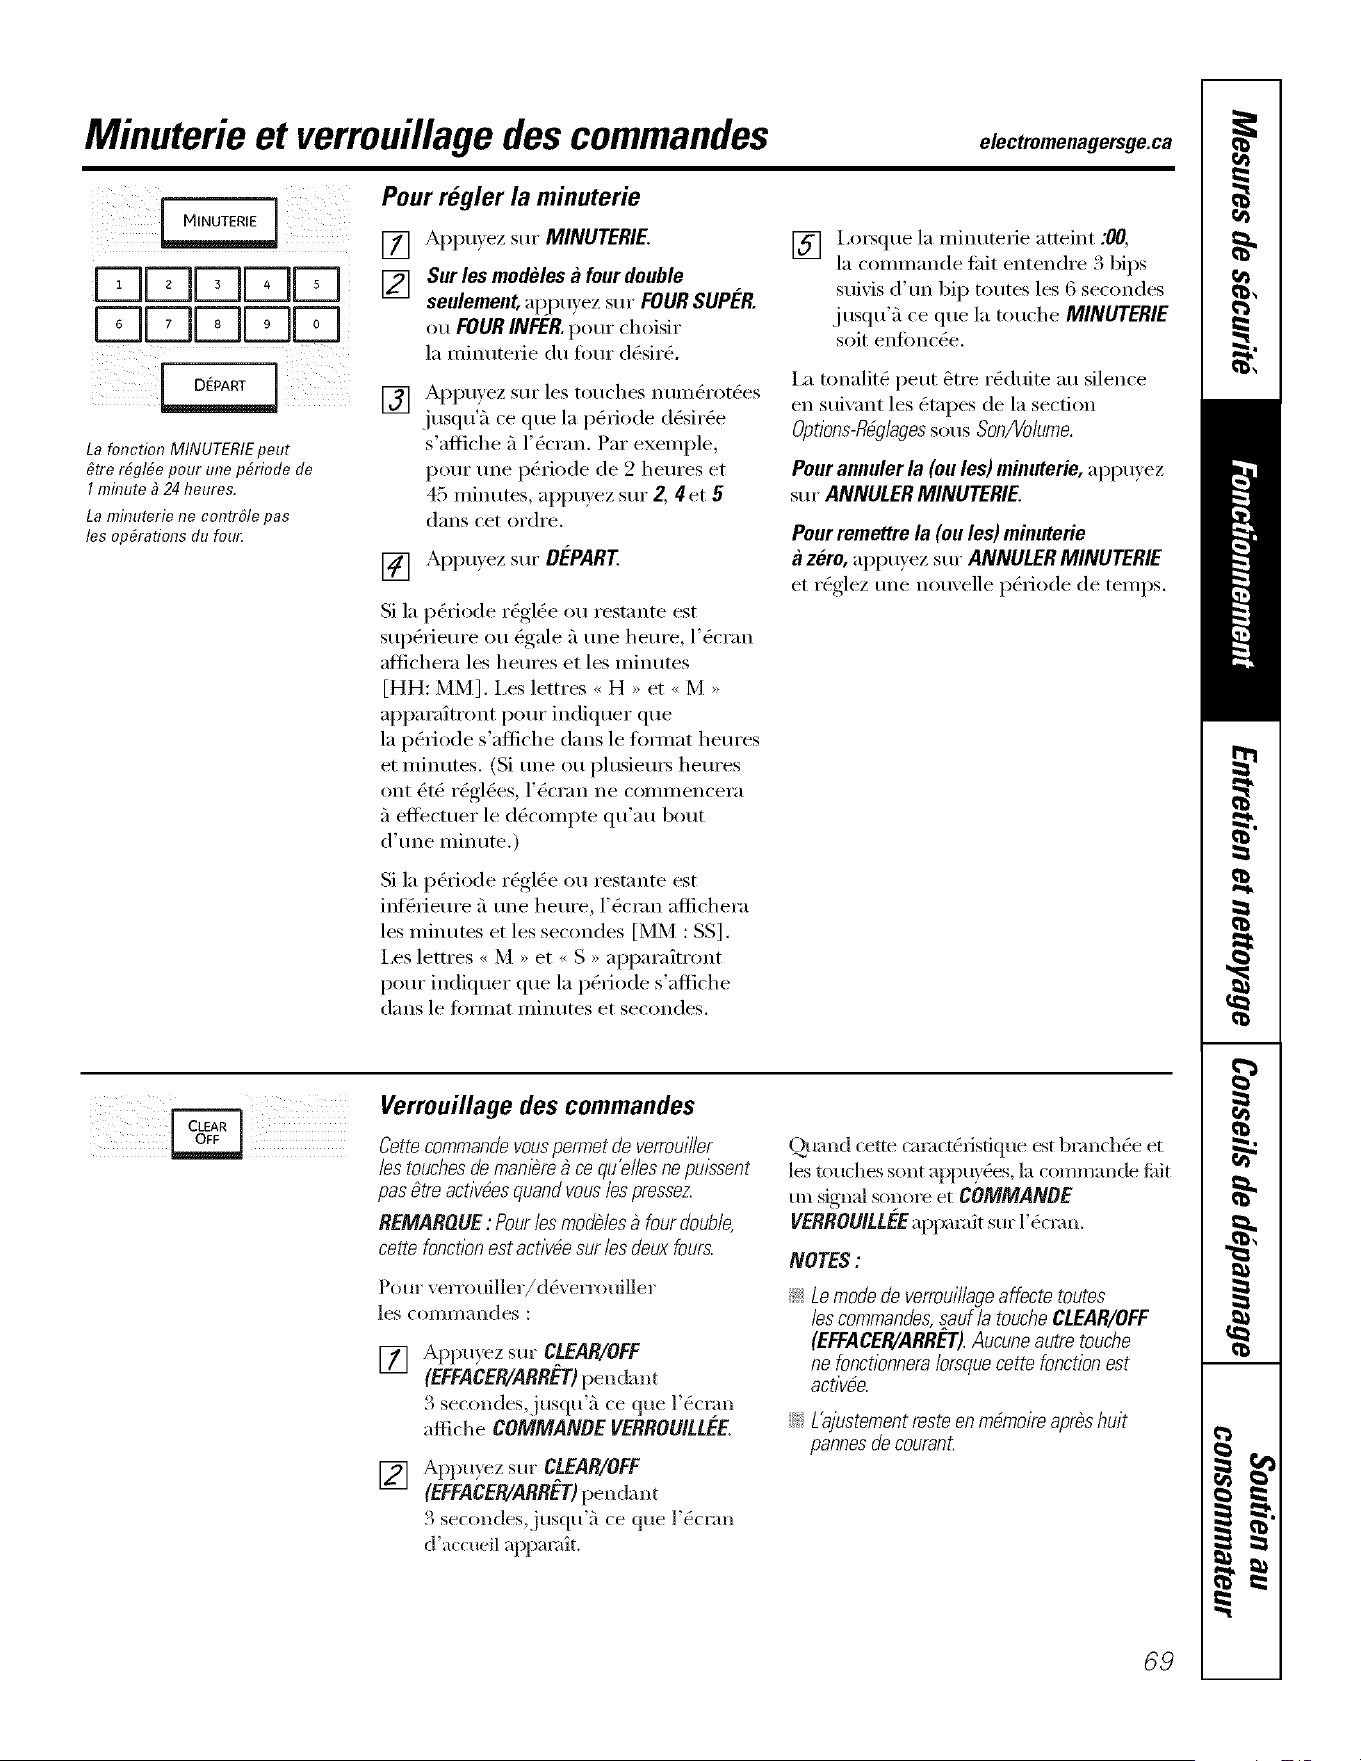
Minuterie et verrouillage des commandes eleo,ro.,e..ger ge..
IIIIII
DmmmD
DDDDD
!iii ili
La foncfion MINUTERIEpeut
fitre r#gl#e pour une pfiriode de
mflTute_ 24 heures.
La mflTuterie ne contrSle pas
les op&afions du four.
Pour regler la minuterie
[] Appu_ez sur MINUTERIE.
[] Sur les modeles a four double
seulement, ap.pu_ez sur FOURSUPER.
ou FOURINFER.pour choisir
la minuterie du four dg_sir(_.
[]
[]
Appuyez sur les touches numg_rotg_es
.jusqu'_'_ ce que la pg_riode d0sir_e
s'afliche _'ll'(_cran. Par exemple,
po/lr line pg_riode de 2 heures et
45 minutes, appuyez sur 2, 4[et 5
darts cet ordre.
Appuyez sur DEPART
Si la p&_iode r_gl_e ou restante est
sup&_ieure ou _gale _'ltree hem'e, l'_cran
aitichera les heures et les minutes
[HH: MM]. i.es lem'es <_H ,, et <_M ,,
apparaitront pour indiquer que
la pg_riode s'afliche darts le fimnat heures
et minutes. (Si tlne o/i plusietu_ heures
ont _t_ r_gl_es, l'_cran ne commencera
_'1eflectuer le d_compte qtl'atl bout
d'une I/lintlte.)
] I.o_que la minuterie atteint :00,
3 "
la commande tidt entendre, blps
suixis d'un hip routes les 6 secondes
j usqu'_'l ce que la touche MINUrER/E
soit enlbnc_e.
I_ tonalit(_ peut _tre rg_duite au silence
en stfivant les _tapes de la section
Optlons-R@lagessous Son/Volume.
Pourannulerla (oules) minuterie,appu_ez
sur ANNULERMINUTERIE.
Pour remettre la (ou les) minuterie
,_z6ro, appu_ez sur ANNULER MINUTERIE
et r0glez une nomelle p0riode de temps.
Si la p&_iode r_gl_e ou restante est
inf6fiem'e _'lune heure, l'_cmn aflichera
les minutes et les secondes [MM : SS].
I.es lettres <_M ,, et <_S ,, apparaitront
pour indiquer que la i%fiode s'afliche
darts le timnat minutes et secondes.
Verrouillage des commandes
Cettecommande vouspermet de verroui//er
/es touches de manl_re_ ce qu'e//es ne pulssent
/)as gtre acfiv#esquand vous /espressez.
REMAR_UE : Pour/es mod#/es_ four doub/e,
cette fonction est acfiv#esur /es deux fours.
Pour verrouiller/d& erro uill er
]es coi//n/_llldes ;
[] Appu) ez sur CLEAR/OFF
(EFFACER/ARRET)pendant
3 secondes, iusqu'_r_ ce que l'(_crml
afliche COMMANOE VERROU/LLEE.
[] Appu) ez sur CLEAR/OFF
(EFFACER/ARRET)pendant
3 secondes,jusqu'f_ ce que l'(_cran
d'a< cueil appamit.
Quand cette cnmct_fisfique est bnmch(_e et
]es touches sont appuy_es, la commande fair
un signal sonore et COMMANOE
VERROUILLEEappm;dtsur l'&mn.
NOTES:
_: Le mode de verroui//ageaffecte toutes
/es commandes,saul/a touche CLEAR/OFF
(EFFACER/ARRET).Aucune autre touche
ne fonctionneralorsquecette fonction est
acfivde.
i_i::L'ajustement reste en mdmoireaprbs huit
pannesde courant
69
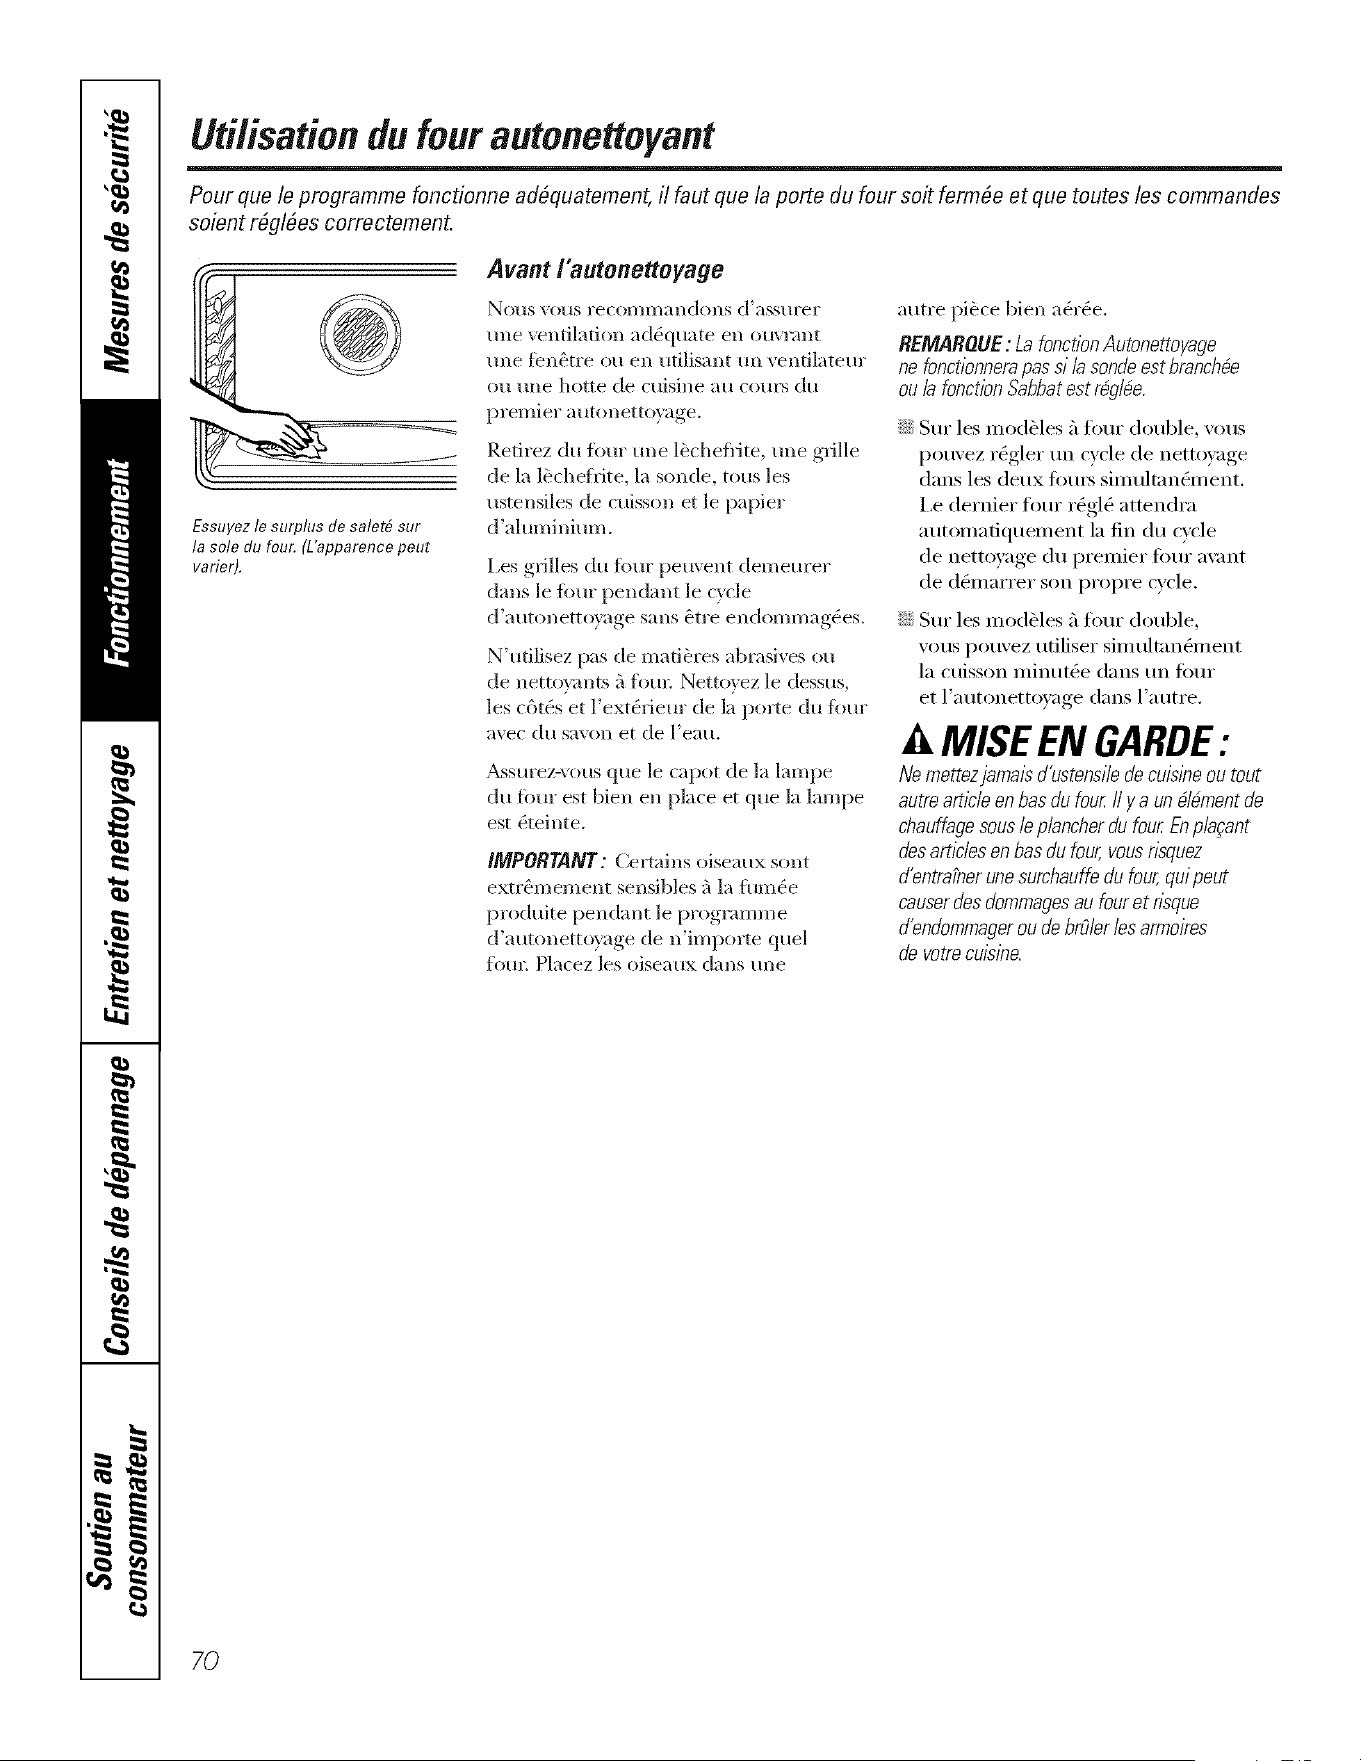
Uti/isationdu four autonettoyant
Pour que le programme fonctionne ad_quatement, il faut que la porte du four soit ferm_e et que toutes les commandes
soient r@l_es correctement.
Essuyez le surplus de saletfi sur
la sole du four. (L'apparence peut
varier).
Avant l'autonettoyage
Nous vous I'e(oi//II/illldolls d'ilssHl'el"
une ventilation ad(_quate en ouvmnt
une fbn&tre ou en utilisant un ventilateur
Oil tllle hotte de ctlisille atl CO[llN Oil
premier autonetto}:tge.
Refirez du fl_ur une lbchefl{te, une grille
de ]a lbchefl_ite, la sonde, tous les
ustensiles de cuisson et]e papier
d'aluminium.
Les grilles du fimr peru ent demeurer
darts le fimr pendant le cycle
d'autonettoyage sans &tre endommagOes.
N'ufilisez pas de matiieres abrasives ou
de nettovlmts 5 fore: Nettoyez le dessus,
les cgtg_s et ]'extg_fiem" de la porte du Ibm"
avec du savon et de l'eau.
_&ssm'ez-vous que le capot de la lampe
du Ibm" est bien en place et que la lampe
est &einte.
IMPORTANT: Certains oiseaux sont
extr&mement sensibles i?_la flm_g_e
produite pendant le programme
d'autonettoyage de n'importe quel
ibm: Hacez les oiseaux darts tree
autre pi&ce bien ag_rg_e.
REMARQUE : La fonctionAutonettoyage
ne fonct/onnera/)as s/ /a sonde est branch#e
ou /a fonct/on Sabbatest r@l#e.
;;Ji::Sur les modieles fi fl,ur double, wins
pouvez I'(_gler tm cycle de netto)_ge
dons les deux t0ui_ sinmltai_&nent.
i,e derlfier fl_ur r_gl_ attendra
autonmfiquenmi_t la fin du cycle
de nettoyage du prenfier Ibm" a\m_t
de d&narrer son propre cycle.
N Sur les modieles fi fl)ur double,
\'ous pouvez utiliser simulmn&nent
la cuisson minut_e dons un Ibm"
et l'autoi_etto_ge dons l'autre.
MISEEN GARDE".
Ne mettezjamals d'ustensile de cuisine ou tout
autrearticle en has du four fly a un bldment de
chauffagesous /e p/ancher du four Enp/a;ant
des articles en has du four,vous nsquez
d'entraPnerunesurchauffe du four, qui peut
causerdes dommagesau four et nsque
d'endommagerou debrO/er/es armoires
de votre cuisine.
70
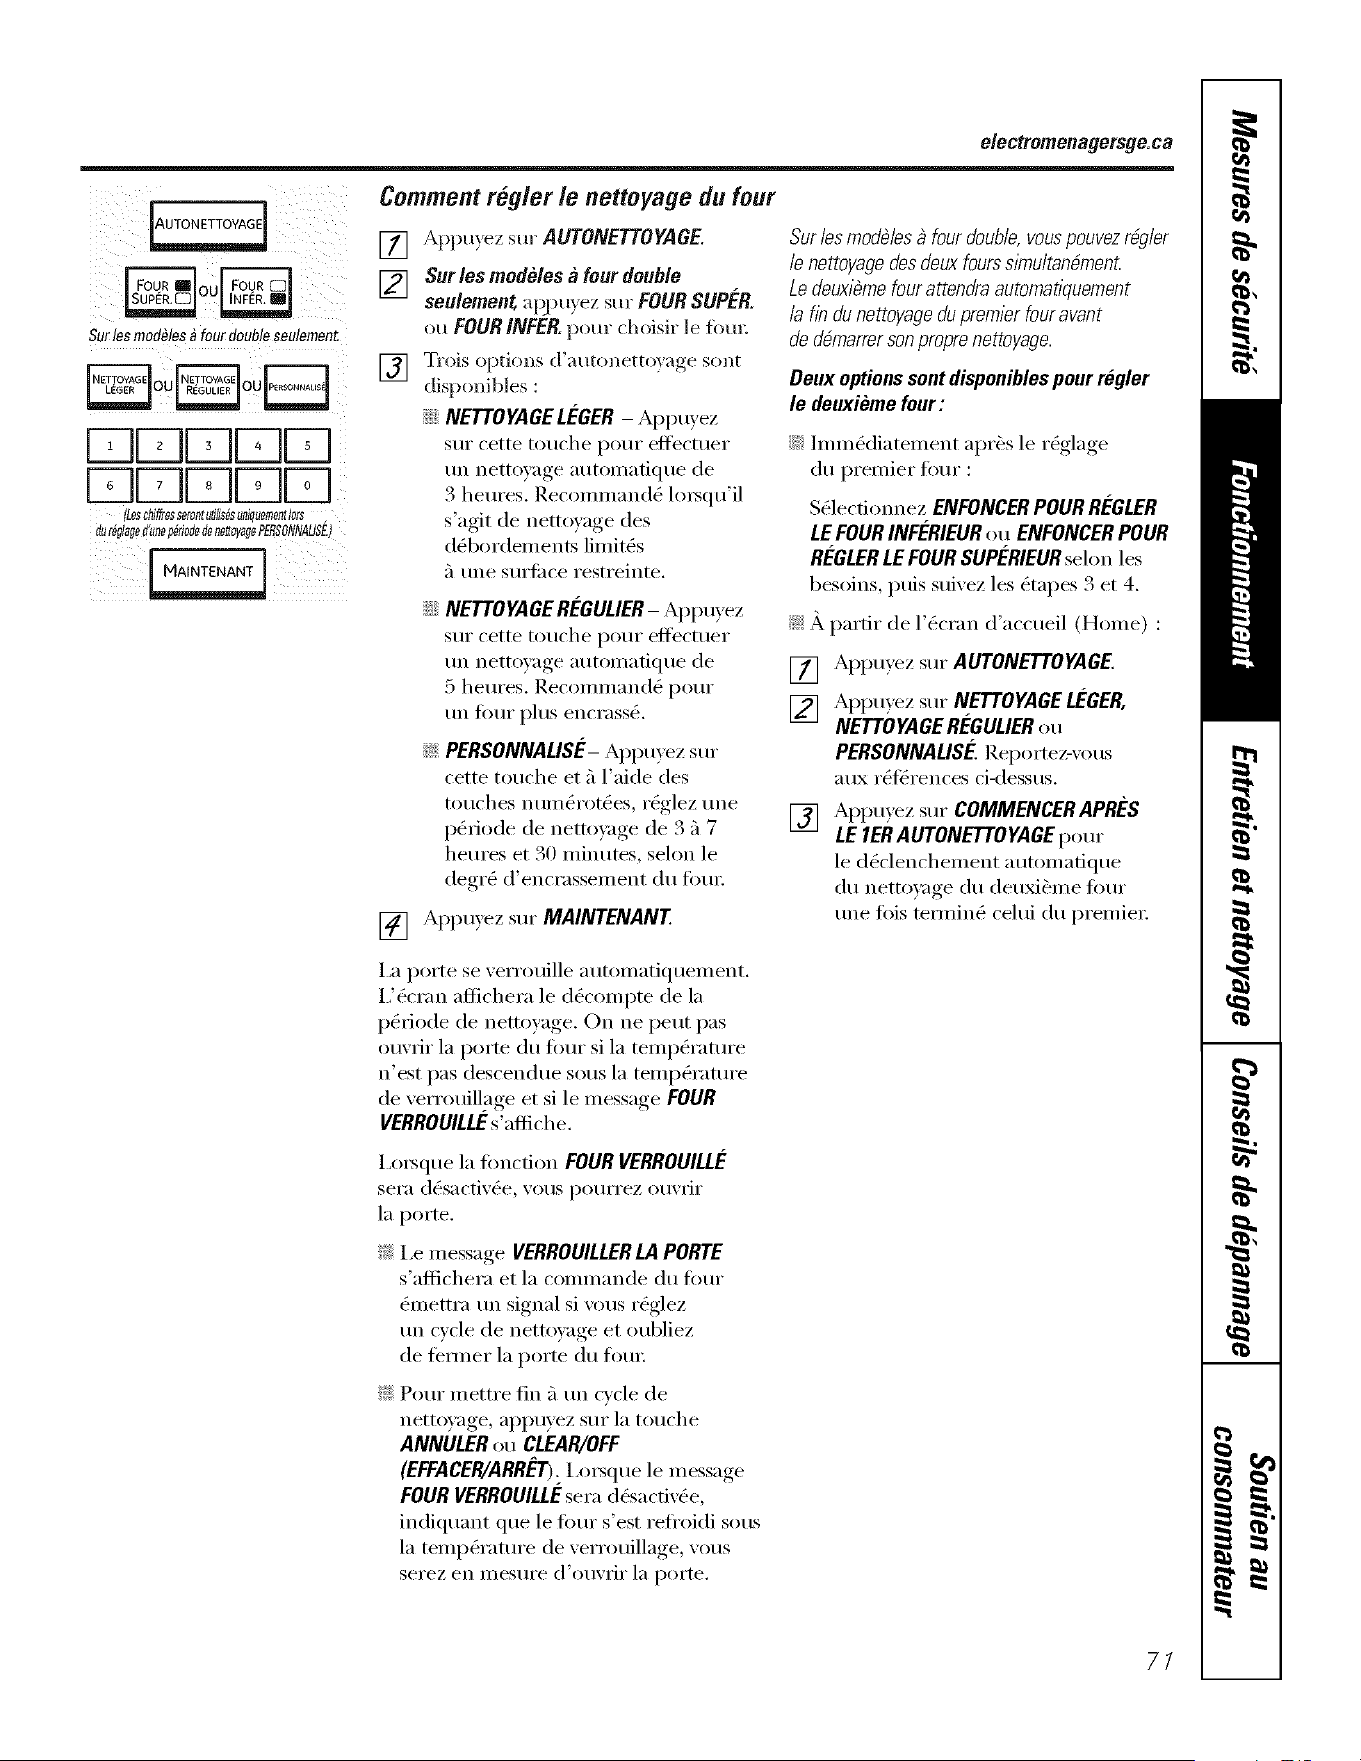
electromenagersge.ca
.
Surlesmodules_fourdoubleseulemenL
DDDDD
DDDDD
,LeschJflresserontut_tlsesunJauememors
aur@laged'uneNfiodedendtoyagePERSONNAUS£
Comment regler le nettoFage du four
[] Appuyez sur AUTONETTOYAGE.
[] Sur les modeles a four double
seulement aipu}ez sur FOUR SUPER.
ou FOUR INFER.pour (hoisir le fbm:
] Trois options d'autonetto}age sont
disponibles :
_!i NETTOYAGELEGER - Apptuez
sur cette touche pour eflecmer
un nettoyage automatique de
3 heures. Recommand_ lo_squ'il
s'agit de nettoyage des
d_bordements limit,s
5 une surli_ce restreinte.
_Ji::NETTOYAGEREGULIER- Appuyez
sur cette touche pour efli_('tuer
un nettoyage automatique de
5 heures. Recommand_ pour
un fimr plus encrass(t
_ PERSONNALISE- Appuyez sur
cette touche et 5 l'aide des
touches numg_rotg_es, rg_glez une
p&_io(le de nem)yage de 3 5 7
heures et 30 minutes, selon le
(legr_ d'encrassement du Ibm:
[] N)puyez sur MAINTENANT
Surles mod_les _ four double, vous pouvezr@ler
/e nettoyage desdeux foursslYnultan_menL
Le deuxi_mefour attendra automatiquement
/a fin du nettoyagedu premier four avant
de d_marrerson propre nettoyage.
Oeux options sent dispouibles pour regler
le deuxi_me four:
::Ji::]mm&liatement apr(_s le rOglage
du premier Ibm" :
S(qectionnez ENFONCERPOUR REGLER
LEFOUR INFERIEUR ou ENFONCERPOUR
REGLERLE FOURSUPERIEURsehm les
besoins, puis suivez les _tapes 3 et 4.
_%:A partir de l'_cran d'accueil (Home) :
[] Appuyez sur AUTONETTOYAGE.
[] Appu_ez sur NETTOYAGELE:GER,
NETTOYAGEREGULIERou
PERSONNALISE:.Reportez-vous
aux rg_litrences ci-dessus.
[] Appu,_ez sur COMMENCERAPRL:S
LE IER AUTONETTOYAGE pour
le d&'lenchement automatique
du nettoyage du deuxi_me four
une Ibis temfin_ cehfi du premier:
i,a porte se verrouille automatiquement.
i,'_cran aflichera le d_compte de la
pg_riode de nettoyage. On ne peut pas
ouvrir la porte du Ibm" si la temp(q'amre
n'est pas descendue sous la tempg_ramre
de verrouillage et si le message FOUR
VERROUILLEs'afliche.
i,o_sque la tonction FOUR VERROUILLE
sera (l(_sactiv(_e, vous pourrez ouvrir
la porte,
_%:I,e message VERROUILLERLAPORTE
s'aflichera etla commande du four
&nettra un signal si w)us r_glez
un cycle de netto}_ge et oubliez
de tbm_er la porte du ti)tm
_%:Pour mettre fin 5 un cycle de
netto)_ge, appuyez sin" la touche
ANNULER ou CLEAR/OFF
(EFFACER/ARR_7).I,ox_que le....messaoe
FOUR VERROUILLEsera d&acti%e,
indiquant que le four s'est refi'oidi sous
la mmpg_ramre de verrouillage, vous
serez ei1 illeS/li'e d'o/iviJr la porte.
71
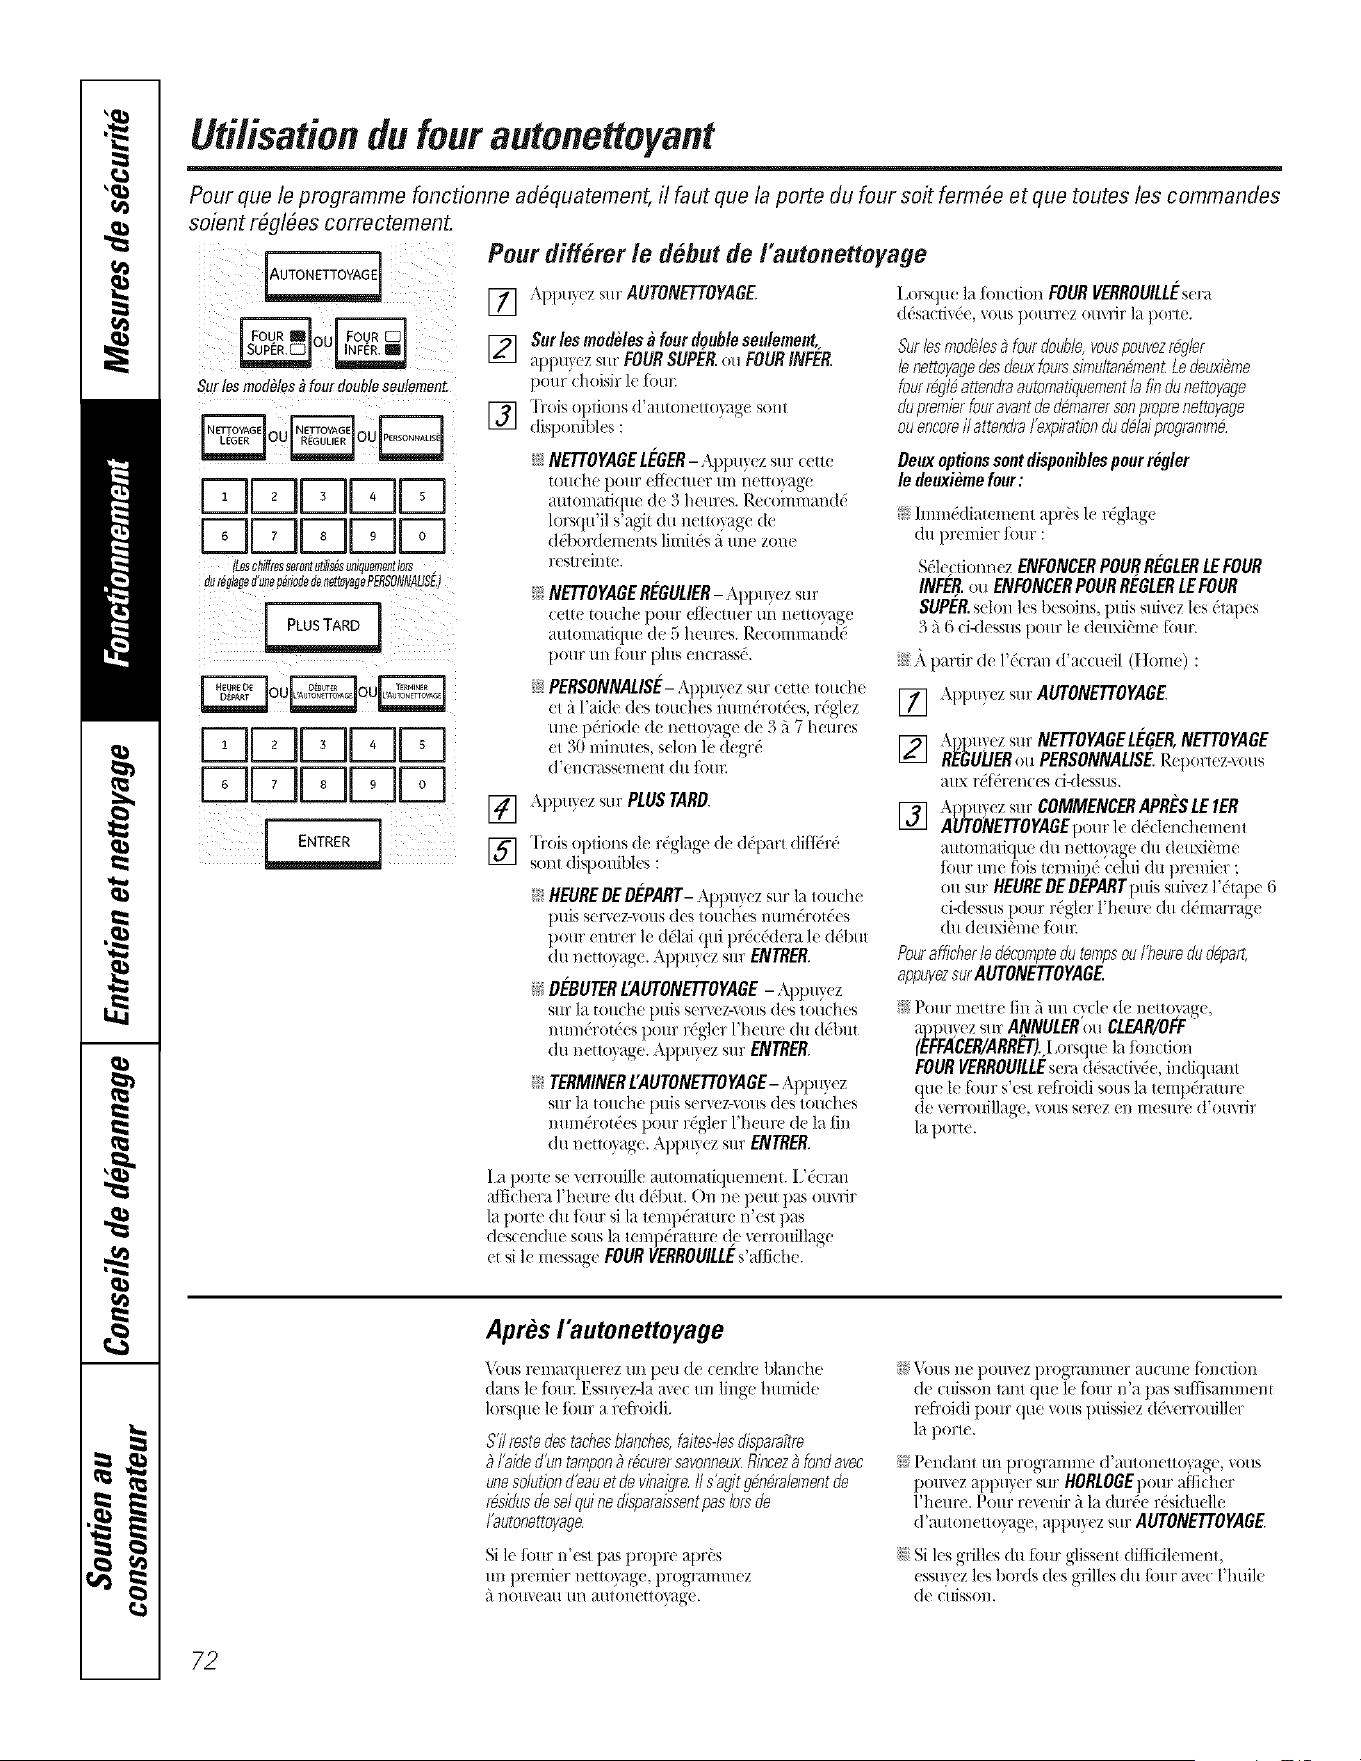
Utifisationdu four autone#oyant
Pour que le programme foncfionne adbquatement, il faut que la porte du four soit fermbe et que toutes les commandes
soient rbglbes correctement.
Pour diff#rer le dobut de l'autonettoyage
[] ,\ppIL}eZ SILl"AUTONETTOYAGE. I.or_/Lle ]afTm(don FOURVERROUILLEstra
tlesa(;ti_('(, VOltS ])otlrr(_z OllViJr ]a ])orlt +
Surles mod_/esDfourdoubleseulement.
LJLd F1F1
kll, ]D1-7]
Leschfl#e$serofltutl##$uniraemenrlors
e_[eNgeai _ep#fiofiedenettoyagePERSONNALSE
LdLdF1F1
I++1
[] Sur les modeles& four douflleseulement,
appuyez sur FOURSUPER.ou FOURINFER.
pour tf/oisir It Ibm:
] Trois opliol/s t/'a/ItOll(_ttt)}a_( sol/1
dispordbles :
_;fNETTOYAGELEGER- Appuyez s/tr (ette
t(>/Lcht' p(>/tr t'if('t;t/l('l"/iLl i/otlo)_lgt
auton/atiqut tie 3 lie/ires. Jx_ccommantld
forsqu'il s'ag_t du n(uo}age de
ddbor(l( menls limitds fi lille zol/e
wsm'iIlW.
_ifNETTOYAGEREGULIER- App/t? ez sur
t ('It( >tOtlt ho [Jo/lr t'fJt't flirT tlI/ I/('tto}a_t'
alltt)l//_it]t_lR' tit >_'_]/t'ttrt>s+ Jx)t'Ct>ll/l_/_iI/d( _
pt)lll" Ill/ [t)/lr pills ('I/CI'}tSS(',
N PERSONNALISE-Appxt?ezsur cette tOxLche
et it f'aide des tOLzchesnumdrot('es, rdglt z
lille p&iode tie hello}age de 3 _'l7 hel/res
et 30 nlinutes, stlon le ttt gr_
(]'el/crass( II/eDt d/t ]()LIE
[] App/Lvtz sLIr PlUS T4RB.
] Trois oplions de r('glag( de ddparl diflU'r('
s,.ml disponibf(s :
_: HEUREDEDEPART- Apl/Llyez Sur la 1oucll(
ptliS St!Y\( Z-\(>/IS d(?s t()llch(_s IItlln(TOt_(!S
pollr (nlrur l( (Idlai (t/ti prdc&Icra fe d('bLLI
(ill n( tlt)yag(, ,\pp/tyez SILl" ENTRER.
_: DEBUTERL'AUTONETTOYAGE- _\ppmez
sItr la [t>lt(i]l(_ pltiS S(Y\t Z-\OILS (l(_s lt)ll(h(_s
ntnndrot('t s potu" rU'gler f'h( ur( dtt tl+bttl
dtl n( [lt>yage. Allp/t} (z sin: ENTRER.
__:TERMINERL'AUTONETTOYAGE-Appu? ( z
SILl: ]a ttt/tch(_ p/tiS S( l+\t Z-\t>/tS d(s lt)llCh(_s
ntunt rot_ (s ptttu" I:('glcr f'h( ur,._de la fill
du nctmyag+.!. Apptt}+.!zstir ENTRER+
Sur bs modbiesD fourdouble,vouspouvezrbgler
ienettoyagedesdeuxfourssimultanbmentLedeuxibme
fourr@lb atten_raautomatiquementla findu nettoyage
du premierfour avantded_ma_rerson proprenettoyage
ou encoreil attendraI'expirationdud_laiprogrammb,
Deuxoptions sontdisponib/espourregler
/e deuxiemefour:
hnnl&liat(m(nl aprbs le rdglag(
(lit ]/r(mi(r four :
Sdle(:ti,.mnez ENFONCERPOURREGLERLEFOUR
/NFER`.ou ENFONCERPOURREGLERLEFOUR
SUPER.s_lon les lx loins, pills sttb.t z les dlapes
3 <l6 ci-d(ssus l/ottr le (l(/txibrLv_ [{>LIr.
;777_ partir de l'd( rail d'act ueil (1 Ion/el :
[] Appu}'.!z stir AUTONETTOYAGE
Awmyez sur NETTOYAGELEOER,NETTOYAGE
[] REGULIERou PERSONNAL/SE.P,eporlez-\ous
attx rdf('rences ti-dessus.
[] Apptty(z stir COMMENCERAPRESLE 1ER
AUTONETTOYAGEpourl( d('tlenc hemt nl
a/tttm/aliqu+._ du nt uoyagc dtt (1(ttxi_'m(
four tin( rids termil)(, celui dtt pr(n/i(r ;
OILSIll"HEUREDEOEPARrpttissuixt z l'dtap,.! 6
t:i-(lt!sS/ISpOllr r('gler l']/(!itl+( dlt ttdi//arrag(
(hL dt Hxi_?l//e [_>/LE
Poa affict?er/e Ncompte du tempsouI'heuredu d@art,
appuyezsur AUTONETTOYAGE.
P,.mr ineltrt fill 5 tin cycle tit netlovag,.
alJpLIvezsin: ANNULER'ouCLEAR/OFF'
(EFFACER/ARRET).Js,:squela tbn(don
FOURVERROUILLEsera d('sa( dr('(, indiquant
quc lc [i>tn+s'cst refi:oidi st)us la temp('ratul+e
dr' vcrrottill_igc, \rills strcz eli IIICSILrC d'Otl\Tir
la porto.
I+aport( st vt rroLlille a/ltOll/atiqtlelnei/L I ,'('cral/
affichera l'heure till d('but. Ol/ ne petit p_L_,o/t\'dr
la porte du toLlr sila mnlp&'atLire n'est pas
descendiit SOLLSla tenlp&'amre dc \vrroidllage
et si le message FOUR VERROUItLEs'aNche.
Apres I'autonettoyage
rOLlS rolllalr[/Lerez tlI/ [>ell (10 CeI/th'(' blanche
(lans le foul: Esstt}eMa a\cc tm linge htunide
lor.;que le tottr a/+,.'frtfidi.
871restedestaci?esblanct?es,faites-lesdisparaitre
D(aide d'un tamponDrbcurersavonneux,flincezD fondavec
unesolutiond'eauet de vinaigrafl s'agit gbnDralementde
rbsidusdesel quine disparaissentpas Iorsde
I'autonettoyaga
Si le fbttr n'esI pa:, I/roprt+ apt&
ILl/pr(?li/ier nt tmyag(, progl'aI//l//(!z
_'1 l/(>/l'_( all tlI/atllOl/t tlo,xag(,
i£ VOltS tie po/t\oz pl'ogr_/l//ii/er auC/lllO fi)l/€tiOll
de C/liSSOI/ taut qtle It' _()/Ll: I/'a p_ Stl_SaI///_/el/[
reffoidi po/tr que v()tlS puis4ez ddverrolfill( r
la porte.
Pel/dant till prograii/llle d'autont rio}age, \Oils
pou\cz appuyer sur HORLOGEpour;ifricher
l'ht t u+,.'. Potu: re\vnir it la duroc r&iduelle
d'autonetttgagc, appu}cz stu" AUTONETTOYAGE
;_iSi los grilles dn fbur glisscnt ditficih'ment,
¢'sstl)¢'z los bor(Is ties grilles d/t tbttr a\cc l'huil,.'
de c/tiSSOl/.
72
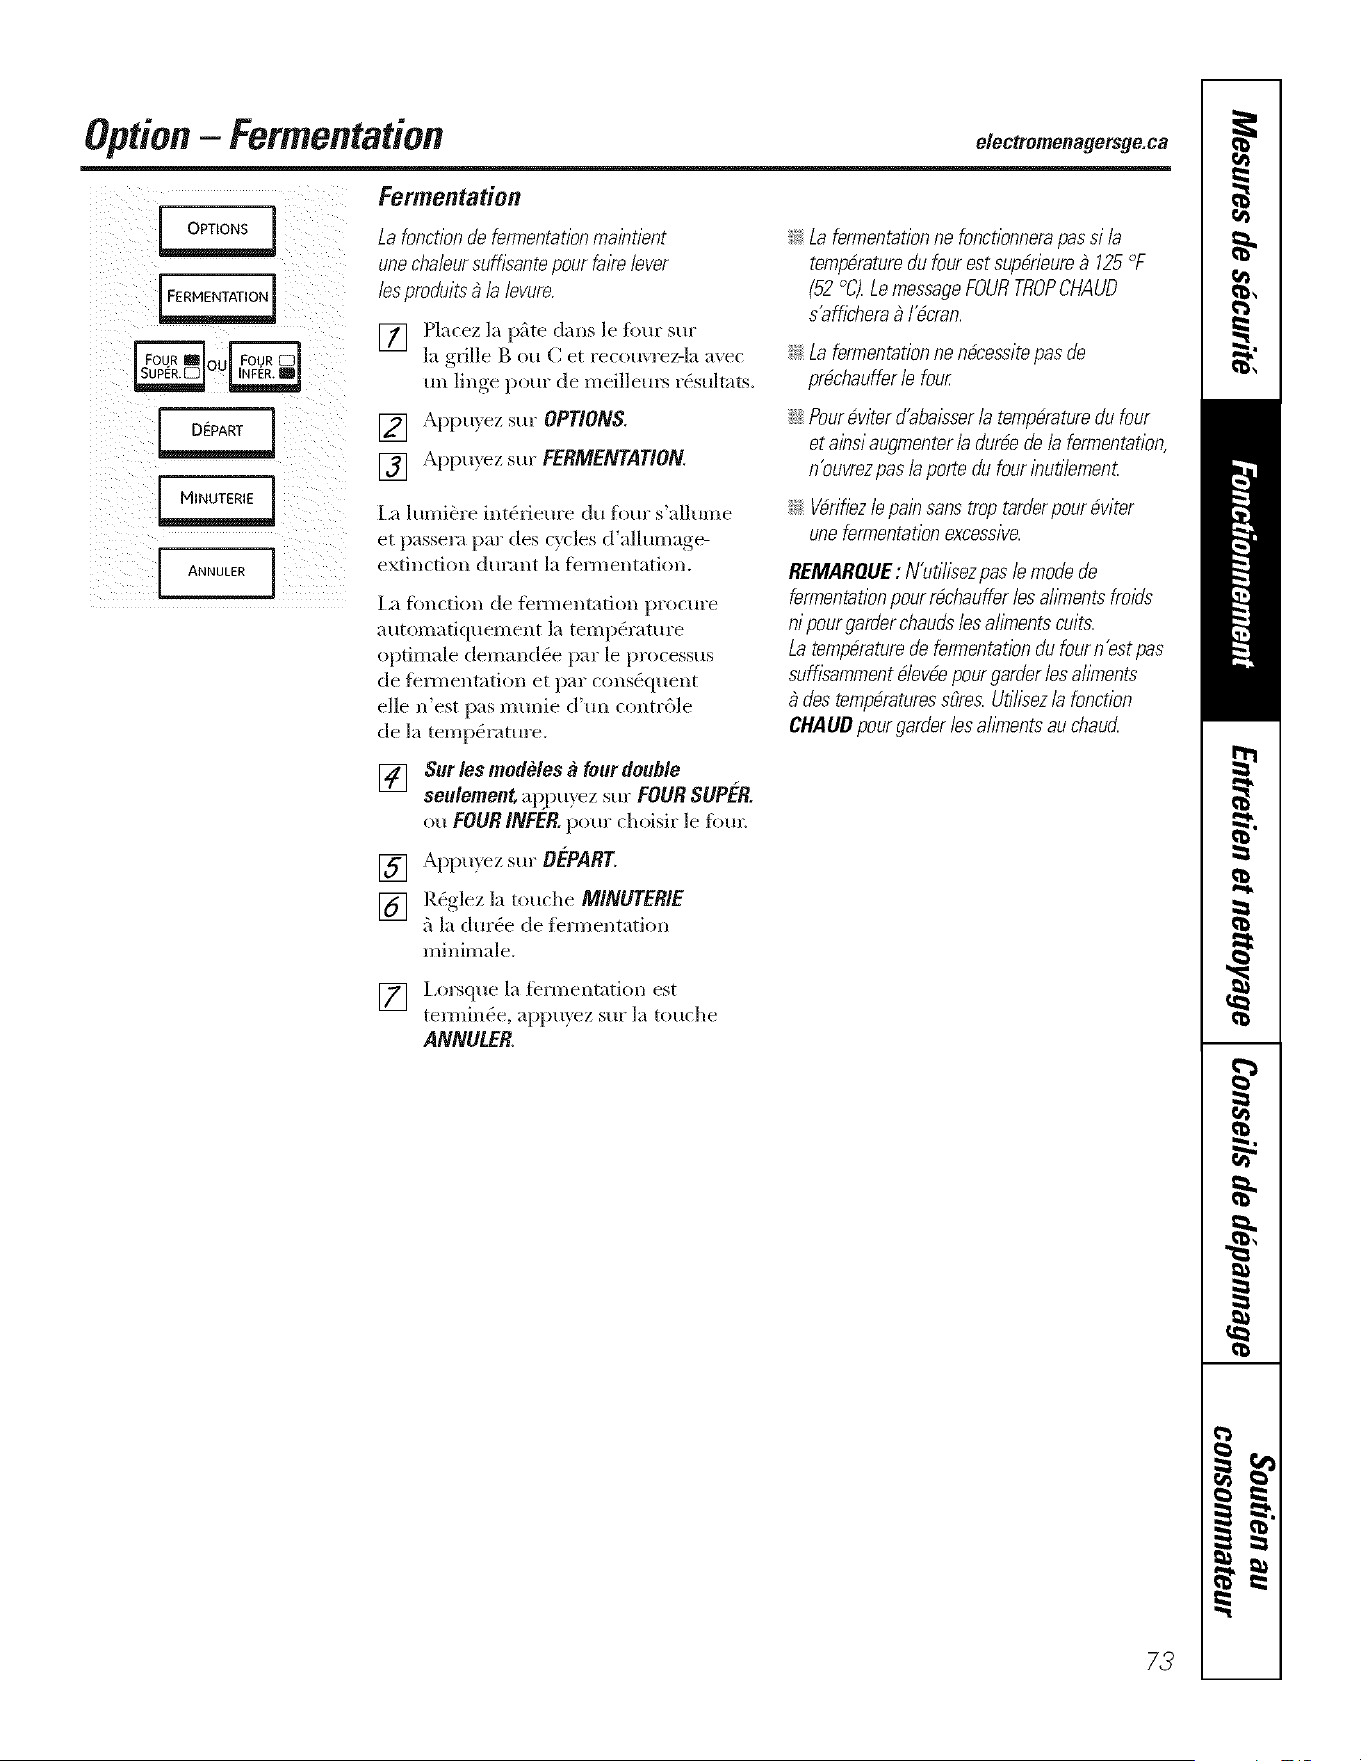
Option- Fermentation e/ectromenagersge.ca
iiiii
ii)i[i_ ii
_ili_ ii i_ [i ii
Fermentation
La fonction de fermentationmaint/ent
une cha/eursuff/2antepour faire lever
/esproduits _ /e /evure.
[] Placez la plate darts le fimr sur
la grille B ou Cet recouvrez-la avec
un linge pour de meillem_ r_sultats.
[] Appu}ez sur OPTIONS.
[] Appuyez sur FERMENTATION
I,a lumi_re int_fiem'e du four s'allume
et passera par des c) cles d'allumage-
extinction din'lint la tbm_entation.
La fimction de tbnnenmfion procure
automafiquement la temp&'amre
optimale demand6e par le processus
de tbm_entation et par consequent
elle n'est [:)as mtmie d'tm contr61e
de la tempt4rature.
[] Surlosmodeles& fourdouble
seu/ement,apj)u} ez sur FOURSUPER.
[]
[]
ou FOUR INFER.pour choisir le tirol:
Appuyez sur DEPART.
R6glez la touche MINUTER/E
fi la dur_e de iem_entation
minhnale.
_: Lafermentationne fonctionnerapassi /e
tempbraturedufourestsupbr/eure_ 125°F
(52°C).LemessageFOURTROPCHAUD
s'aff/ehera_ l'bcran.
_ Lafermentationnenbcessitepasde
prbchaufferle four
::Ji::Pourfiwterd'abaisser/etempdraturedu four
etainsiaugmenter/edurfiede/e fermentation,
n'ouvrezpas/eportedufourinutilemen£
_: Vbrif/ez/epainsanstroptarderpourbviter
unefermentationexcessive.
REMAROUE: N'utilisezpasle modede
fermentationpourrbchauffer/esahYnentsfroids
nipourgarderchauds/esalimentscuits.
Latempfiraturede fermentationdu fourn'estpas
suffisammentblevbepourgarder/esahYnents
destempbraturessores.Utilisez/e fonction
CHAUOpourgarder/esahmentsau chauc{
] Ixn'sque la Ibrmentation est
tem_in(!e, appuxez sin" la touche
ANNULER
73
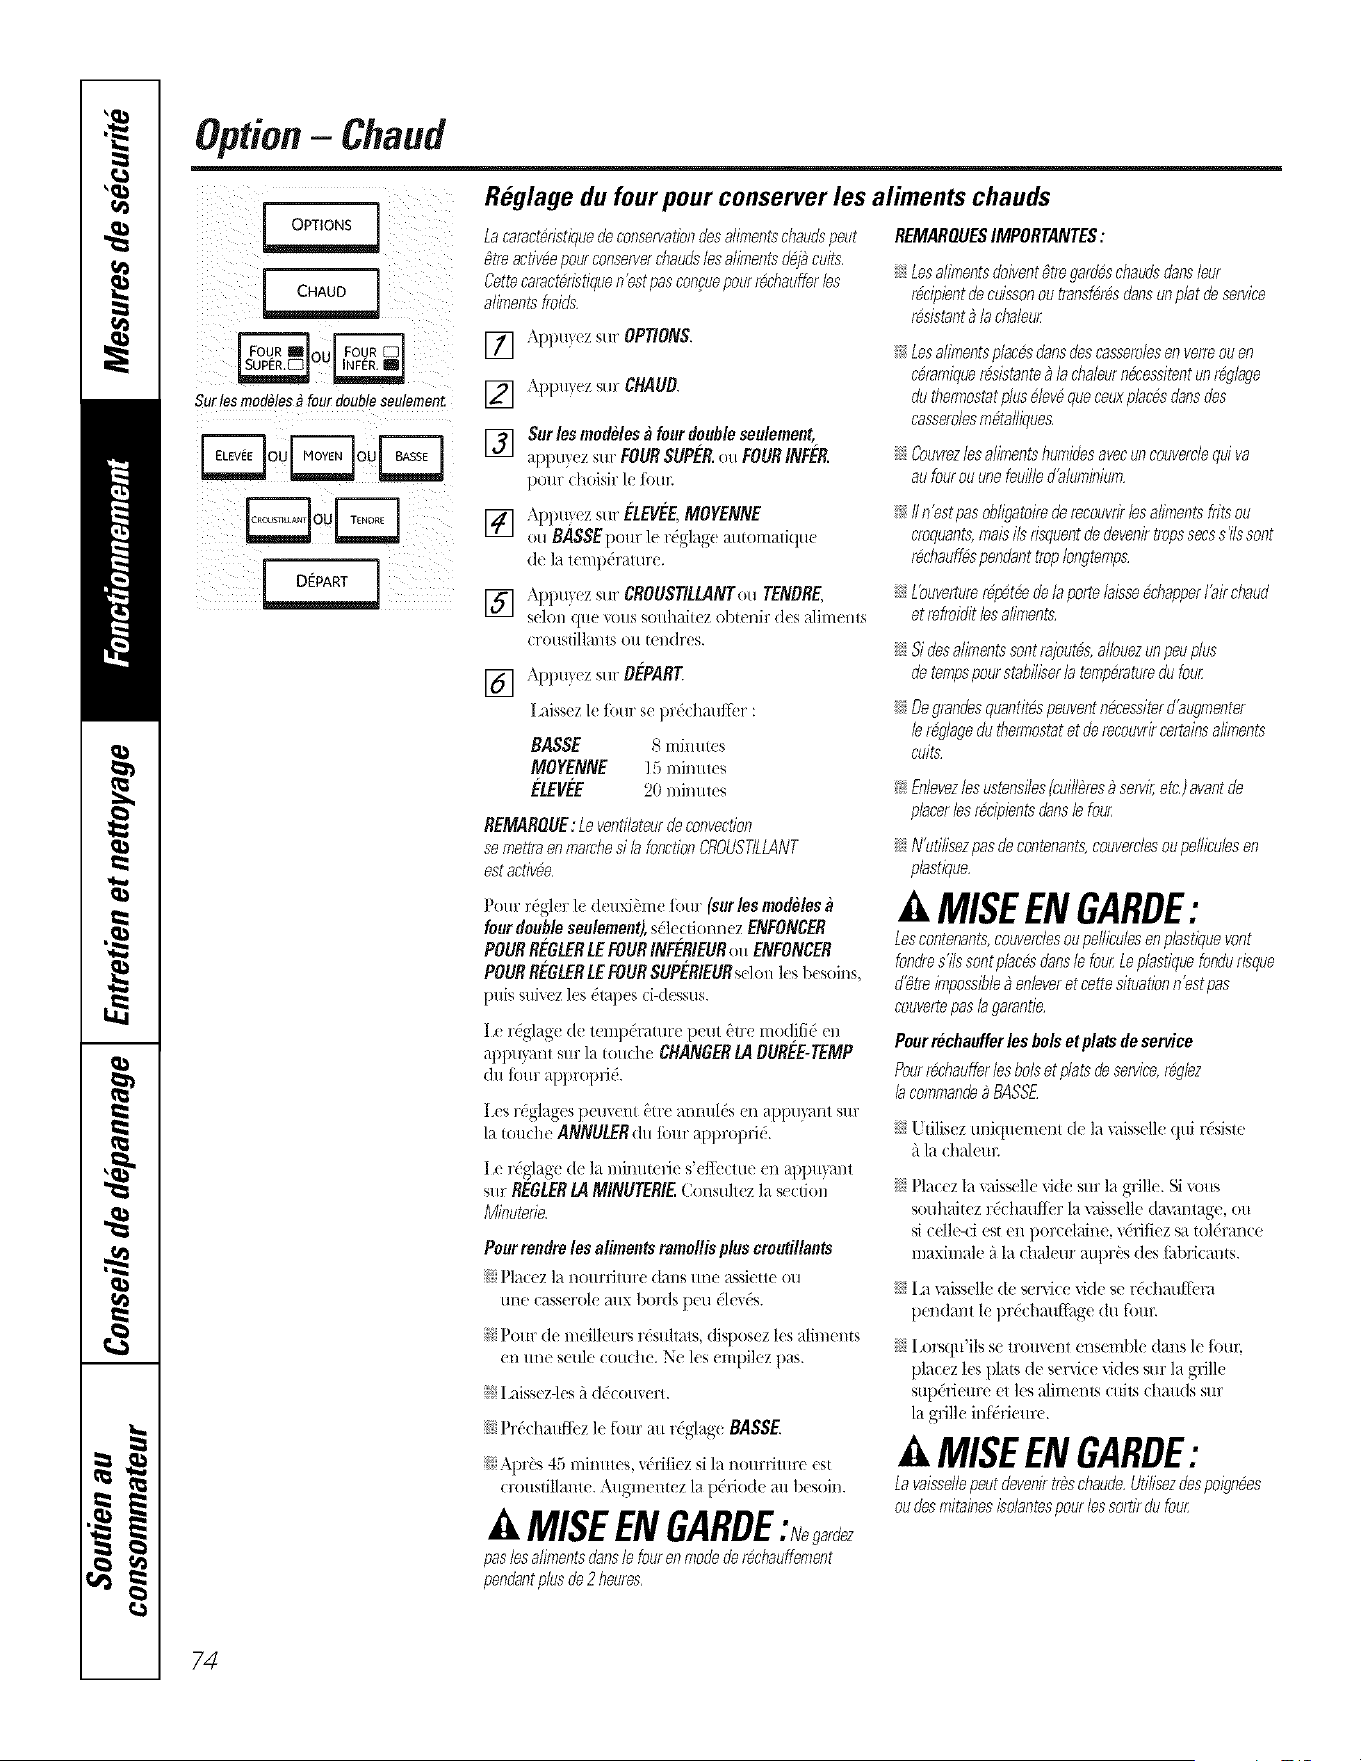
Option- Chaud
Surlesmodules_ fourdoublesememen_
Reglage du four pour conserver les aliments chauds
Lacaractbristiquedeconservationdesalimentschaudspeut
_treactiveepourconserverdmudslesalimentsd@ cults,
Cettecaracteristiquen'estpasconcj/epourr_chaufferles
alimentsfroids,
[] Appuyez sm'OPTIONS.
[]
[]
[]
[]
[]
Appu)ezsl,r CHAUD.
Sotles modeles& four doubleseulement,
appuyez Sttl" FOUR SUPER. oH FOUR INFER.
pour d_oisir lc tbu_:
\i_puy_ z sin" ELEVEE,MOYENNE
ou BASSEIxmr 1( rdglage a/iP,)maliqtlt
de la 1_ I?/p_l'}ll (II'(L
,\ppuyez sin" CROUST/LLANTou TENDRE,
selol/ (life _otls so/d/aiiez o})tel/ir ties alJl//el/l:_
( l'OtlSti]la//1s O11 I( I/(]l'(?s.
Appllyez sm'DE'PART
I.aissez k fore" s( pr&:hatdf_.r :
BASSE 8 mfimtes
MOYENNE 15mim._ s
ELEVEE 20 mim._s
REMARQUE :Leventilateurde convection
se mettraen marchesib fonctionCflOUSTILLANT
est activ_e,
Pour rdgkr k (l(uxiblne Ibm" (sotlos modeles
fourdoubleseulement),sdl_dionncz ENFONCER
POURREGLERLEFOURINFER/EURoil ENFONCER
POURREGLERLEFOURSUPERIEURselon ks besoins,
puis suixczlos dt_lpes(i-dessus.
I._ rdglag( (/( lempdratur( p(ul blre modifid en
appuyanl sin" la U.mdx( CHANGERLA DUREE-TEMP
(ht Ibm" appropri£
I xs rdglag(s p_tp,(nt btr( ammlds en ai)puyanl sin"
la toud/e ANNULF'Rdlt/bt,"al)proprid.
I ,e rdglag( de la minut(fie s'eft_ clue en api)uyanl
s/tr REGLERLA MINUTERI£ Col/stlll(z la sectiol/
Minuterie.
Poor rendre les aliments ramollis plus orootillants
i!i |)]a('ez ]a l/o/trritur(_ (l_/l/S/tlle _/ssJt'tlt' OU
IlI/e eass(TOlC a/tx bol'ds |)eli (_lt'_es.
_: Pore" de meilh'urs r&u]t_ls, di_poscz ks _dimems
cr_ m'..' se:fle (,.re(he. Nr{' los cmpilez ix*s.
_;:I,aissez-les g dd'(ouvert.
_)_Pr&chatt[fi_!zle fbttr art r('glag( BA$$E
_!iAprc)s 45 min/ttes, %rifiez si la nottrfitm'e est
(:roustillame. Augmentez la pddo(le mt besoin.
A MISEENGARDE: e arde
pasles alimentsdansle four enmodeder_chauffement
pendantplus de2 heures,
REMARQUESIMPORTANTES:
tes alimentsdoivent8tregard_schaudsdanslea
rbcipientde cuissonou transformsdansunpbt deservice
rbsistant_ la chaleur
Lesalimentsplacesdansdescasserolesen veLreouen
c4ramiquer4sistante_ la cttaleurn_'essitentun r4glage
du therrnostatplus4lev4queceuxplacesdansdes
casserolesm4talliques,
Cou_rezlesal_rlentshumidesavecuncouverclequiva
aufourouunefeui/led'aluminium,
II n'estpasobligatoirede recouvdr/esaliments#its ou
croquants,trialsib fisquentde devenirtropssecssils sont
r_chauff_spendanttropIongtemps.
t buverturerbt_tbe de laporte laisse_chapper#airct_aud
et refroiditles a#rrlents,
Si desal_rlentssontrajoutbs,albuezun peuplus
de tempspour stabi/iserla terrlperaturedu four
De grandesquantitbspeuventnbcessiterd'augmenter
b r@lagedu themlostatet derecouvrircertainsaliments
cults.
Enlevezles ustensi/es(cui/Ibres_ servir,etc,)avantde
placerles r_ciplentsdansle four
N'utilisezpasde contenants,couverclesoupelliculesen
plastique,
A MISEENGARDE:
tes contenants,couverclesoupelliculesen plastiquevont
fondres'i/s sontplacesdansle four Leplastiquefondurisque
d_re impossible_ en/everet cettesituationn'estpas
couvertepaslagarantie,
Pourreuhaofferles bo/set platsde service
Pourr_chaufferles bob et plats deservice,r_glez
lacommande_ BASS_
Utilisez uniquen)( nl (k la vaiss(ll( qtti resisle
_'/la(h:d,dm
i_iPlacez la _:dsselle _i(le sur la grille. Si _ous
souh_dt( z rdehauflbr la v;dss( lle (la_antage, ou
si eelle-d est en poreel_d_le, vdriti(z sa tol('rance
maximale i_la (haleur m_pr& des thbricants.
I.a _,aisselle de service vide s( rdchauffk_ra
peI/dal/I le i)rdchauff_ge du fbur.
i_iI ,orsqu'ils s( tr(mvent ensemble (la]]s le li>ur
placez les plats de serxice xides sin: la grille
sup&iem'e et les alimenls culls ehmtds sur
la grille inf&iem:e.
A MISEENGARDE:
ta vaissellepeutdevenir_rbschaude,Utilisezdespoignees
oudes mitainesisolantespour iessortirdu four
74
electromenagersge.ca
Tableaude selection des temperaturespour les aliments croutillants
Pour garder chauds diffbrents types d'aliments, rbglez la tempbrature en fonction de l'ahment qui
nbcessite le rbglage le plus filevfi. Placez les ahments qui nbcessitent le r@lage le plus dlevd sur
la grille infdrieure et ceux ont besoin de moins de chaleur sur la grille supdrieure.
Typed'aliment Reglagesen fonctien ]
Aliments flits ELEVEE
Bacon ELEVEE
Croustilie au mars BASSE
Pain, pains moilersdurs MOYEN
Pizza MOYEN
Potatoesde terre, au four ELEVEE
Tartes (deux creates) MOYEN
Censeils :
_: IMssez les aliIlleIlts ;'1de('ot/','ert.
::Ji::N' utilisez pas de contenants ou pellicules en plastique.
::Ji::Pr_cha ufli_z le tour a\m_t 1'utilisation.
Tableaude selection des temperaturespour les aliments molls
Pour garder chauds diffbrents types d'ahments, rbglez la tempbrature en fonction de l'ahment qui
nbcessite le rbg/age le plus blevb. Placez les ahments qui nbcessitent le rbglage le plus blevb sur
la grille inf_rieure et ceux ont besoin de moins de chaleur sur la grille sup_rieure.
Type d'aliment
Agneau
Boeuf,medium et bien cuR*
Casseroles
Cereale cure
Chili
Cr_pes,gaufres
Fruits
Jambon
Legumes
Oeufs
Pain,pains mollets mous
Poisson,fruits de mer
Potatoesde terre, pilees
Porc
Sauces, saucesa la creme
Tartes (une crofite)
Volaille
1
Reglagesen fonction /
MOYEN
MOYEN
MOYEN
MOYEN
ELEVEE
BASSE
MOYEN
MOYEN
MOYEN
MOYEN
MOYEN
MOYEN
MOYEN
MOYEN
MOYEN
MOYEN
ELEVEE
* LbrganisrneUSDA/FSISrecornmandeone ternpbratoreinternede 145 °F(63 °CI
pour la coissonrninirnaledu boeoLUtilisezun therrnornbtre_ viande _ourv6rifier
les ternpbraturesinternes
Conseils:
::Ji::Recotwrez les aliments d'un cotwercle ou de pai)mr
d'aluminium.
!_:_Ne mettez pas d'eau darts le ti)m:
N N'utilisez pas de contenants ou pellicules en plastique.
?_:Prg_chattftez le tour awmt l'ufilisafion.
75
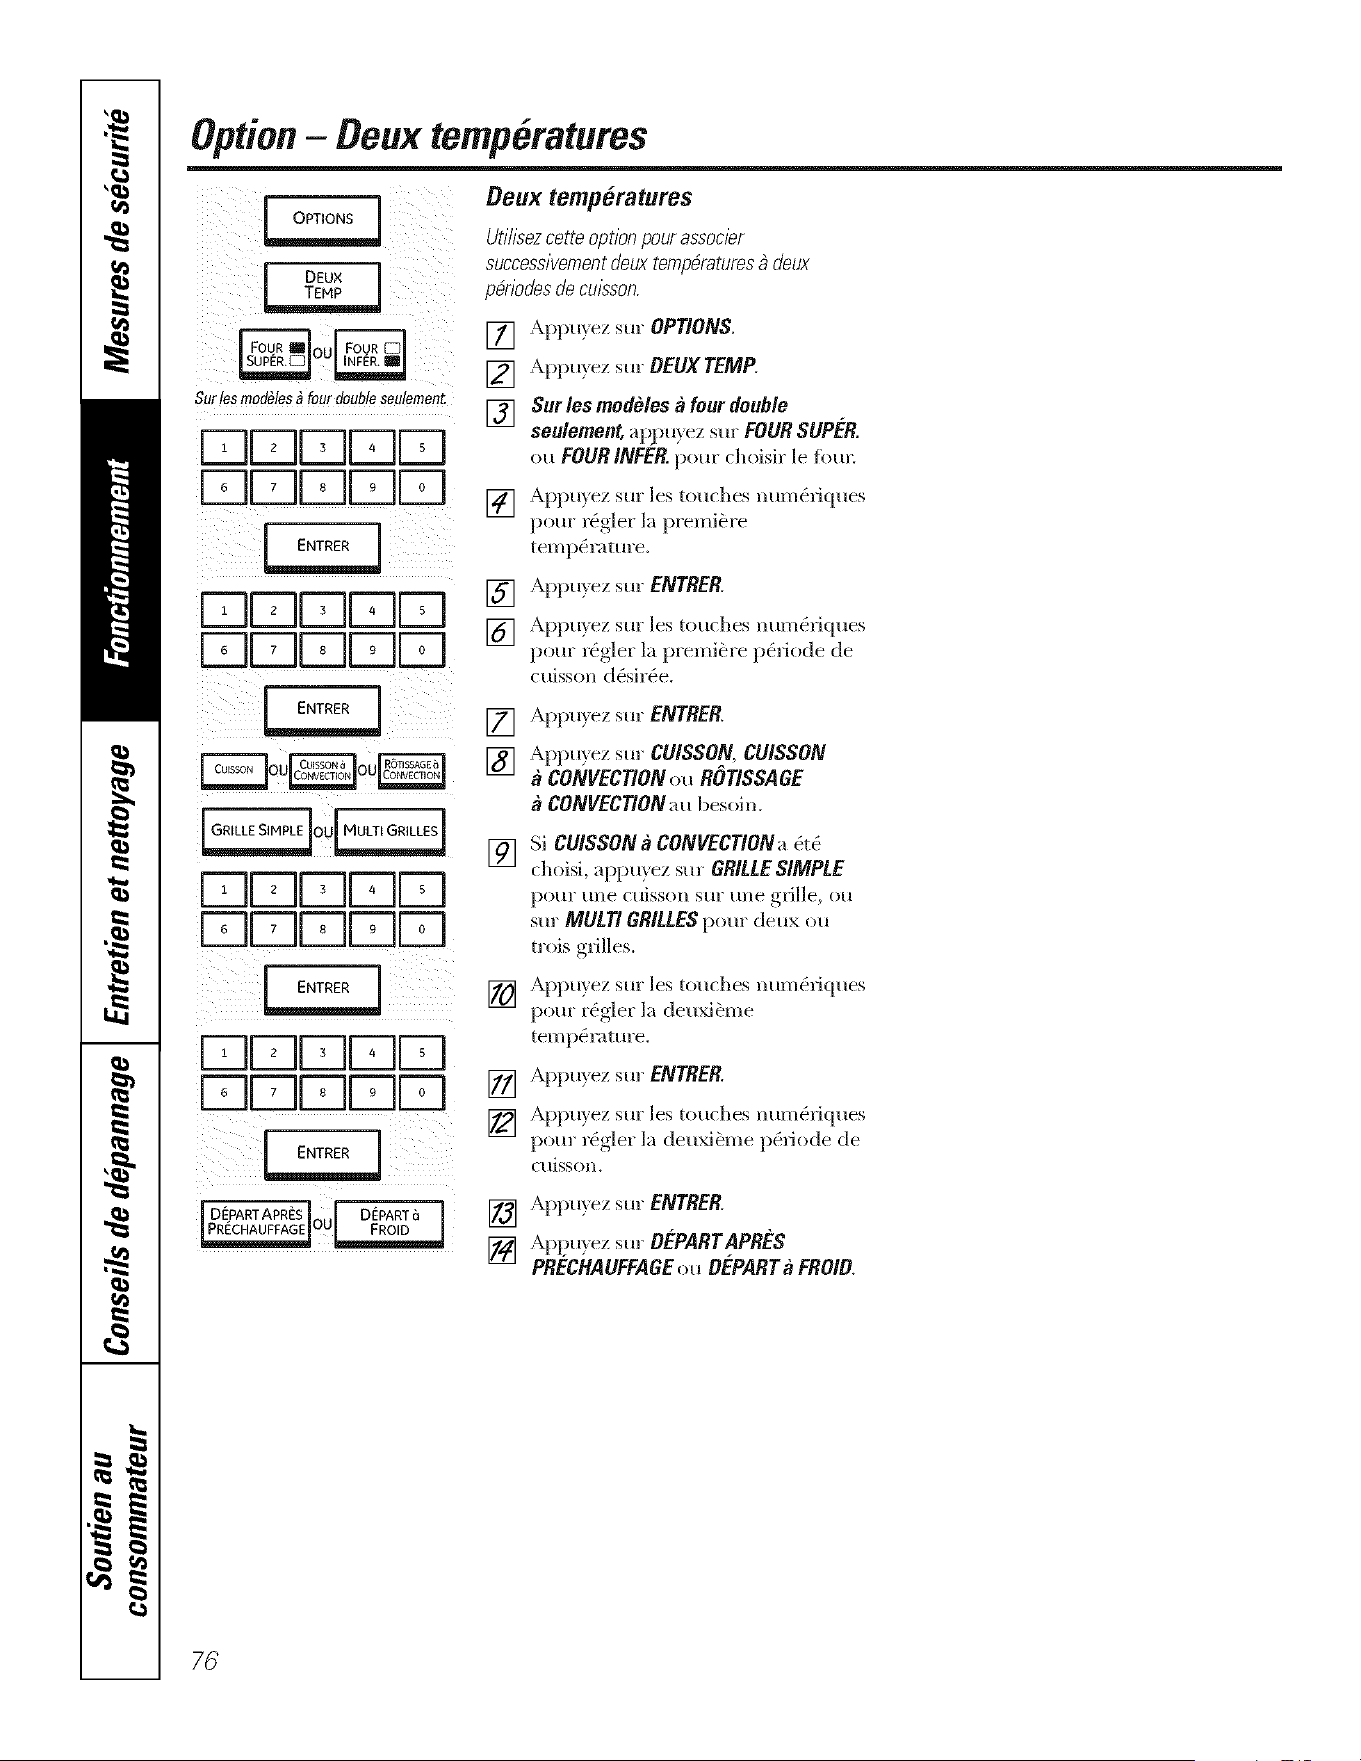
Option- Deux temperatures
L
OPTONS
[
[ DEU× ]
Surlesmodules_ fourdoubleseulement
DDDDD
DDDDD
E.T.E.
DDDDD
DDDDD
DDDDD
DDDDD
DDDDD
DDDDD
[D_PARTAPR_S[ D_PARTaI
[PR_CHaUF_aGEoU_
Deux temperatures
Ut///sezcetteoptionpourassoc/er
successivement deux temperatures _ deux
p_riodesdeculsson.
[] Appuyez sur OPTIONS.
[] Appu> ez sur OEUX TEMP.
[] Sur les modeles a four double
seulement, ap.pu) ez sur FOUR SUPER.
ou FOUR INFER.pore" choisir le fbm:
[] Appu}ez sm'les touches mm_Oliques
i_°ur rOgler, la premiere
tempOramre.
[] Appu}ez sur ENTRER
[] Appu}ez sin" les tol_ches num6fiques
l_our r_gler, la premiere p6_iode de
cuisson d6sir6e.
[] Appu}ez sur ENTRER
[] Appusez sur CUISSON,CUISSON
CONVECtiONou ROTISSAGE
CONVECTIONau besoin.
[] Si CUISSONa CONVECT/ONa&(_
choisi, appu) ez mr GRILLE SIMPLE
poLlY Line ctlisson Sill" Lille glJUe, o[1
sur MULTIGRILLESpour deux on
trois g_]]es.
[] Xpptl}ez stir les totlches lltlI//(2:lJqtles
pour r6gler la detlxibme
temp6ramre.
[] Appu}ez sur ENTRER.
[] Appuyez sur les touches mm_(_iques
pore" r6gler la detlxi_me p6_iode de
Ctlisson.
[] Appt_,xezsur ENTRER
[] Ap}?u}ez sur OEPARTAPRES
PRECHAUFFAGEou OEPARTaFROID.
76
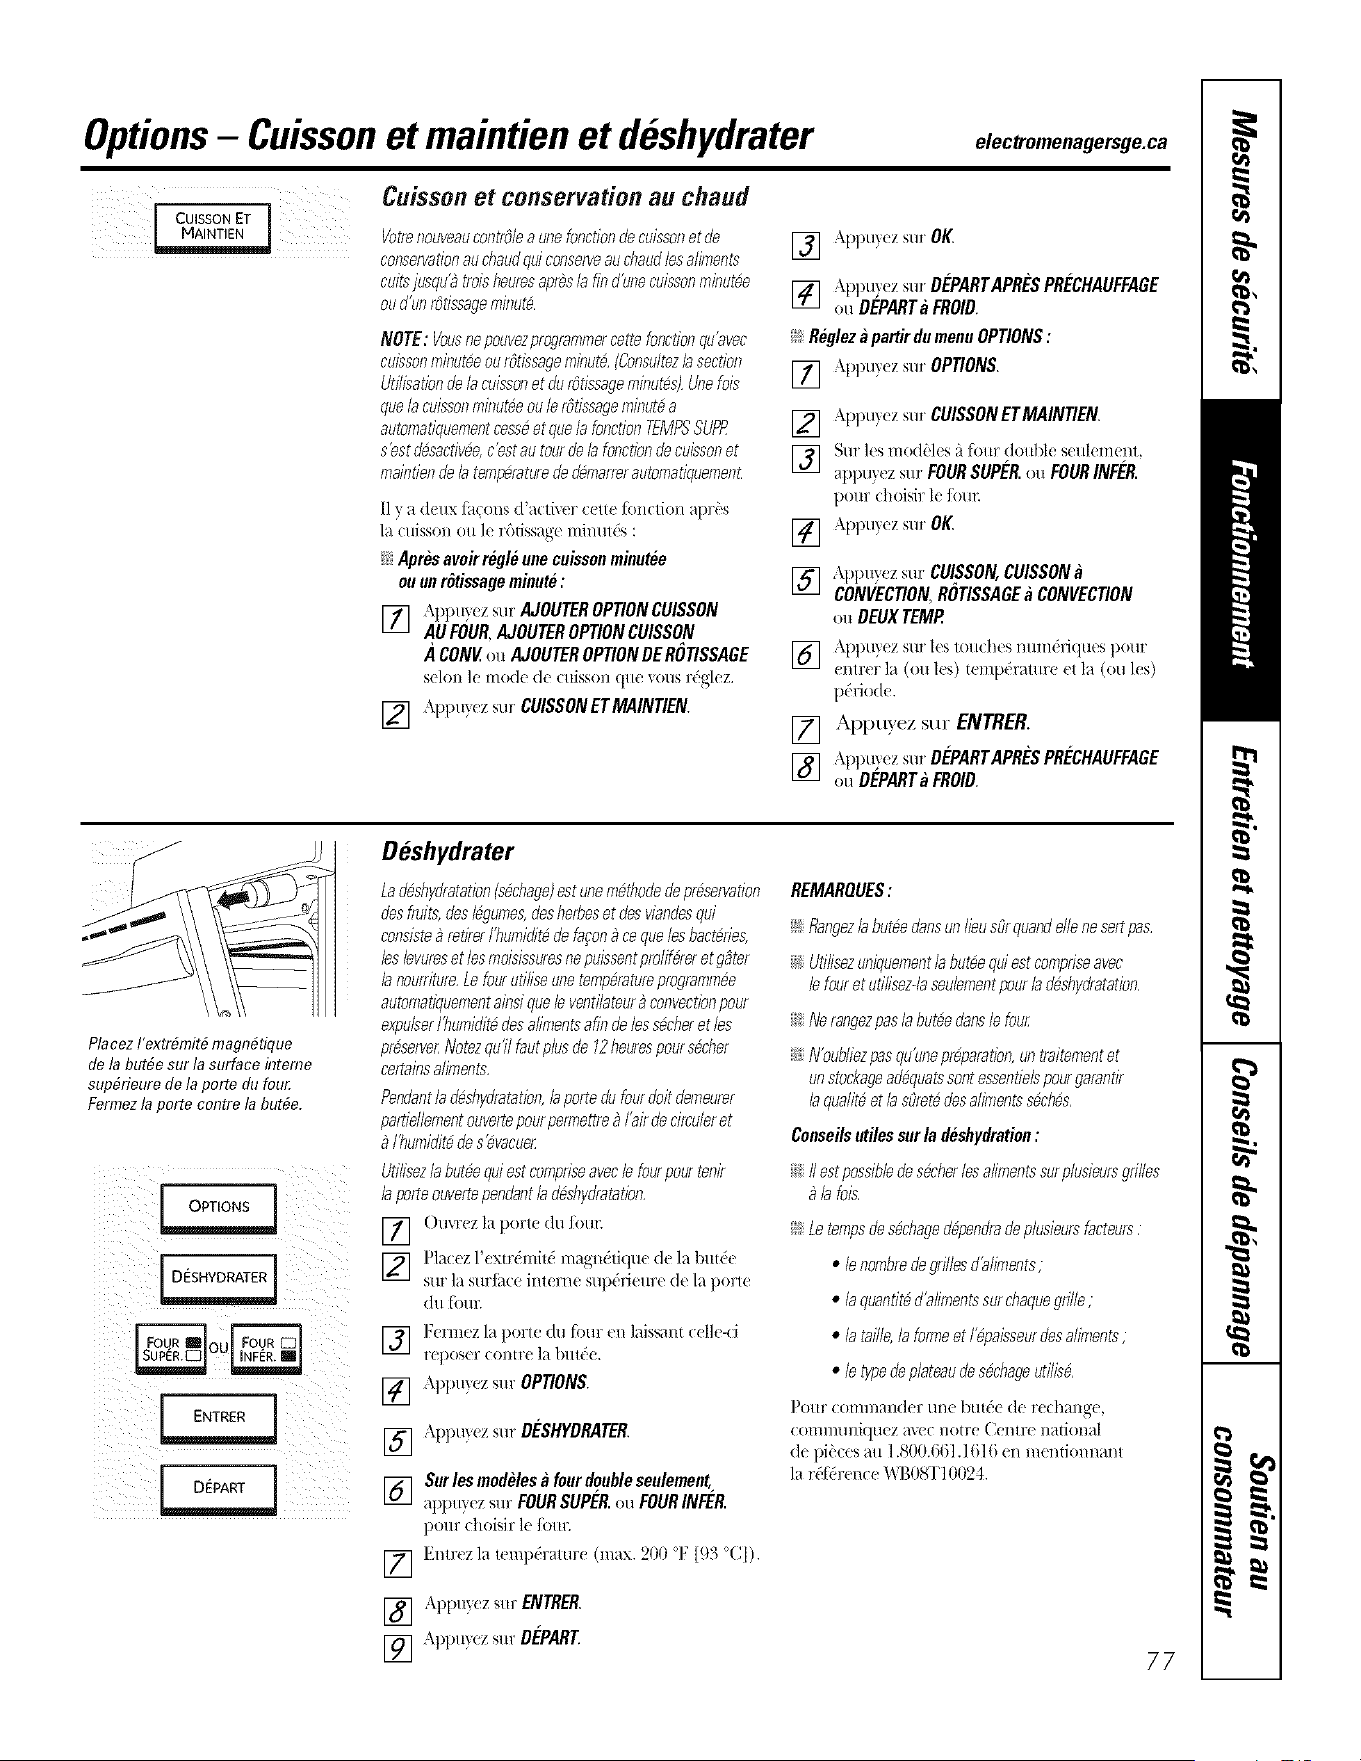
Options- Cuissonet maintien et deshydrater
[ CUISSONET 1
CUiSSOn et COnServatioA aU chaud
Votrenouveaucontrdeaunefonctiondecuissonetde
conservationauchaudquiconserveauchaudlesaliments
cuitsjusqu'9troisheuresaprbslafindt/necuissonminut_e
oud'tff7r6tissageminute,
NOTE: Vousfiepouvezprogrammercettefonctionqu'avec
cuissonminuteeour6tissageminute,(Consultezb section
Utilisationdela cuissonet du r6tissageminutes),Unefois
quela cuissonminuteeoule r6tissageminutea
automatiquementcess6et quela fonctionTEMPSSUPR
s'estdesacfiv6e,c'estau tour de b fonctionde cuissonet
maintiende latemperaturede demarrerautomatiquemenL
I1_ a (l_ux fiJ(ons (l'a(:ti*_:r (:_tte fbnction aprbs
la c/,isson (mle r&issage ininut& :
N Apres avoirregle une ouissoumiuutee
ouuu r_tissagemiuute:
I_ AP])/L_ezsllr AJOUTEROPTIONCU/SSON
ill
AU FOUR,AJOUTEROPTIONCUISSON
CONV.ou AJOUTEROPTIONDEROTISSAGE
scl(m le mode dc cuiss(m que _ous rdglez.
F2l APPK'_ z slur CUISSONET MANTIEN.
i¢-i
[] ,\pl)uyez surOK
[] ,\ppuy_zsur DEPARTAPRESPRECHAUFFAGE
ou DEPARTa FROID
__:Reglezapart#dumenuOPTIONS:
[] \ppuy_z surOPTIONS.
[]
[]
[]
[]
[]
[]
[]
&pl)uy,. z sur CUISSONETMAINTIEN.
Sur ICSmodc"l¢ s _'tf,.)ttr dottble s¢ul( m( nl,
appu}',, z sur FOURSUPER.ou FOURINFER.
pour (hoisir 1( foul:
,\pl)uy(tz Sill" OK.
Appux¢ z s/lr CUISSON,CUISSON
CONVECTION,ROT/SSAGEa CONVECtiON
ou DEUXTEMP.
\l)t)uy,_ z sur Its lo/t(hes lmn/diJquus pour
¢ntrer la (ou l¢s) t¢mp('ralure ¢1 l_l (ou les)
p(Mode.
Appuyez sur ENTRER
,\I)pu)'_ z sur DEPARTAPRESPRECHAUFFAGE
ou DEPARTa FRO/D
Placez I'extr#mit# magn#tique
de la but#e sur la surface interne
sup#rieure de la porte du fou_
Fermez la porte contre la but#e.
Deshydrater
Lad#shy_ratation(sechage)est unem#thodede preservation
desfruits,desI#gumes,desherbeset des viandesqui
consiste_ retirerI'humiditbde facon_ ce quelesbact#ries,
les levureset les moisisstzresnepuissentproli_rer etggter
b nou_riture,Le fourutffiseunetemperatureprogramm#e
automatiquementabsi quele ventilsteura convectionpour
expulserI'humiditbdes alimentsafin deles s#cheret bs
pr_serve_Notezqu'ilbut plus de 12heurespour s_cher
certainsa/_*r}ents,
Pendantla d#shy_ratation,laporte du fourdoltdemeurer
partiellementouvertepourperrnettre# Fairde drculeret
I'hurniditbde s#vacue_
Utilisezla butbequiest compriseavecle fourpour tenir
b porte ouvertependantb d_shy_ratation,
] O/IM:(Z 1_1 porle du [))ill:
] Placez l'¢xtrdmild mag_ti(lue (le la butde
Sill" ]_l S/lr[itt (1 iI]l(?rn(? S/ll)(ilJe/tr(? (1(? la p()Fl(?
(Ill [()/tl2
[]
[]
[]
12( I'lll_.!Z l_/])OFI( d/I [iIUF (11/]_:tissal/t (:elle-(i
I'(_])()S(_I _ (:()l/tl'(_ ]_l ])/tlee.
Appuy'. z sm _OPtiONS.
,\ppuy(z sur DESHYDRATER.
[] Surlesmode/esafourdoubleseu/ement,
al)ptt}(z s/trFOURSUPER.ou FOURINFER.
pour choisir le Ibm:
[] Emrezla leml)dramre (m:_x.200 oF 1(13°CI).
REMARQUES:
_!:flangezb butte clansun lieu sOrquanddie ne sertpas,
_!: Uti/isezuniquement/a butte qui est compriseavec
b four et utilisez-bseubmentpourb d#shydratation,
_!:Ne rangezpasla butte clansle four
_!iNbubliez pasqu'uneprbparation,un _raitementet
un stockagead#quatssontessentielspourgarantir
laqualitbet la sSretbdesal_*nentss#chbs,
Conseilsutiles sur /a deshydratiou:
__:II estpossiblede s_cherles alimentssurplusieursgrilles
# la lois,
_: Le tempsde s#ct_aged#pendrade plusieursfacteurs:
• lehombredegrillesd'al_,_lents,
• iaquantM d'alimentssur chaquegrille;
• ia tail/e,/afomleet I'@aisseurdes a/_*_lents,
• le typedeplateaude s_chageut,_lis_,
PO/IF ( OII/l//Hlldul" [Inu [)tl[(_(' d(' 1"(_( h_Hl_(!,
(OII/llltllliqu('Z _l\(t€ notre (]eiltl'(' i/ati()l)_t[
(le pi0ces au 1.800.661.1616 en mentiom_ant
la r&[dr('nce WB0gI'] 0024.
77
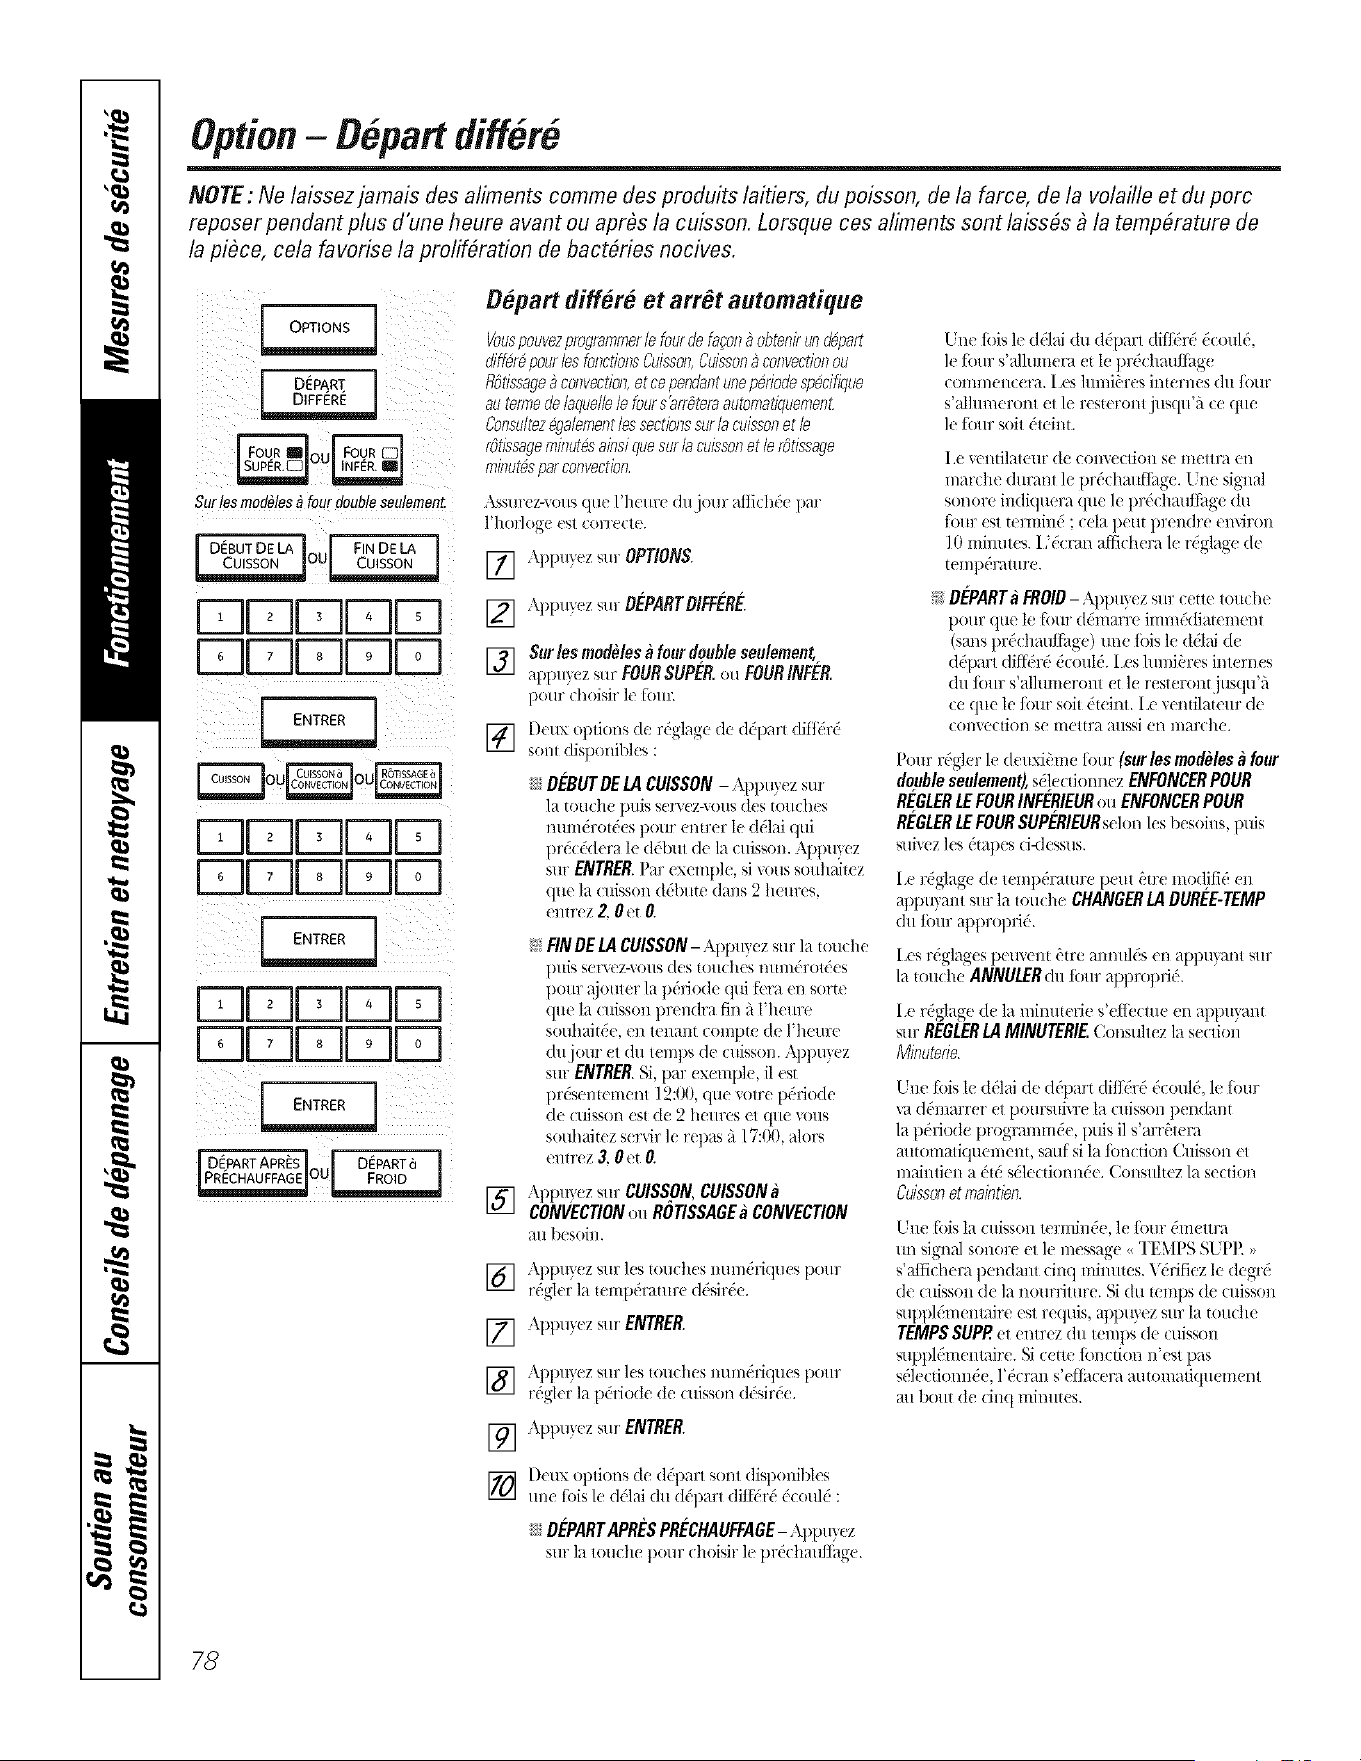
Option- DGpartdiff&e
NOTE: Ne laissez jamais des aliments comme des produits laitiers, du poisson, de la farce, de la volaille et du porc
reposer pendant plus d'une heure avant ou aprOs la cuisson. Lorsque ces aliments sont laiss6s _ la temp6rature de
la piOce, cela favorise la prolif_rafion de bact_ries nocives.
ii!i 711 _ iii_i_i_
J DISPART J
Surlesmodules_ fourdoubleseulemenL
_DEBUT DE LA _ [ FIN DE LA
IOU
DDDIqF=I
DDrqDFq
DDDIr-IF=i
DDDF;-IF;-I
DDDDD
DDDF;--IF;-I
ENTRER
rDEPARTAPRES] [ DEPARTa I
[PRI]CHAUFFAGEIOU_ FROID !
Depart differe et arr6t automatique
Vouspouvezprogrammerlefourdefacon_obtenirund@art
di@r_pourbs fonctionsCuisson,Cuisson_ convectionou
ROtissage9convection,etcependantunepModespecifique
autemTedelaquellelefours'a@teraautomatiquemenL
Consultezegalementlessectbnssurlacuissonet b
rOtissageminutesainsiquesurla cuissonet lerOtissage
minutesparconvectbn,
Assm'(z-xous que l'h(m'( du jour aflk:iff'e par
]'hoi']og( (';1 (orl'e(l_.
[] Appu}ez sur OPTIONS.
[] Appu}ez sur DEPARTD/FFERE.
[]
[]
[]
Surlesmodebs afourdoubleseubmeet,
appu_ezsurFOUR SUPtR.ou FOUR INFER.
pOtll" (]lOiSil" ]e [O/W.
[)eux op@ms & r('g]age de d('par/(/iM%('
sow disponibks :
i;iDEBUTDE LA CUISSON - Appu}ez sur
1_/toll(h( pills S( I'\(Z-\()/IS (l(_S to/t(h('s
nlm/('rotdes pour critter le ddlai qui
pr&:('dera le d('but de la cuisso_. Apl)u}ez
snr ENTRER. Par exemple, si _ous souhaiEcz
qne la cuisson d('bute dans 2 heurt's,
emrez 2. 0et (1
_ FIN DELA CUISSON- Appm ez sur la touche
]mis S(_I'\CZ-\ ()/lS d(s U,)/l(h('s n/lll](TOt('x's
p,.)/tr @outer la pddode qui fcra en sorte
que la cuisson }m'ndra fin it l']/(/tlX'
souhaitde, en tenant compte de l'heure
dujour et (fit ten]ps de cuisson. Appuyez
sin" ENTRER.Si, par exemple, il est
pr&enEcment ] 2:00, que _)tr( p&iode
(It' (/IJSSOD eSt (t( 2 ]le/tl'(+S et q/t( \_)/[S
souhait_ z s(r\ir le rq)as 5 17:00, alor_
enu'ez 3, 0 et (1
A])t)u?_ z sur CUISSON,CUISSON
CONVECTIONou ROTISSAGEa CONVECTION
_l/t |)('soil/.
] App/ty(z s/tr ](s tOtlCh(s lltllll_I'iqtl('i po/tr
rdgier la mmpEratur( ddsir(%.
[] .\ppuy'.z s/u" ENTRER
] Apl)u}(z sur 1(_ touches num&iqu(s p,.)ttr
rdgkr la t)('tiode de (uisson d('sir&.
[] '\pptly(tz Sill" ENTRER.
] D(ux ,.)ptic,ns de d('parl s,.ml disponibl(s
une rids le ddlai du d@arl (litfi_r_ d(oul(' :
DEPARTAPRESPRECHAUFFAGE-\})p/tyez
sin" la u)uche pour (:hoisir le prd(:hauithg(.
Lne Ibis le ddlai du ddpart diflE'rd &;ould,
le four s'allnmera et le pr('chaufl-ag(
COll/I//en( ( l'a. I PS hLilli('lTeS il_ternes (lit fotlr
s'a|huneront et le rester(mr jusqu% ce que
le four soit ('teim.
I ,e \('I/til_lt('llI" (le COlWeCtiOll s(' ii/ettr_l ('I]
marche durant k pr&:hauffi_ge. Lne signal
SOl,Ore i_Miquera quc le pr('chmfifag( du
[O/117 est tel:illille ; cela ])etlt prendre ei/\iroil
]0 mfimtes. I ;&:ran aNch( rale rdgl;_ge de
ten]pdrature.
N DEPARTaFROID-,\ppu? ez sur cette touche
pour que le [bur (l_mm're imm('diatement
(sans pr('(hauffage) tree Ibis le (l&d (1(
d('part dift-(,rd dcoul& I,es hurd_"res imernes
(1/l [o/tiTs'alh_mer(mt et le resteront,jusqu'_'_
(e que le four sol{ dtNnt. I._' ventilateur de
(Ol/\C(tion se II/ettra a/tssi eI/i//arche.
Pour rdgler le (1(ux£'me ti)ur (surles luodelesa four
doubleseulemeetl,s@,_donncz ENFONCERPOUR
REGLERLEFOURINFERIEURou ENFONCERPOUR
REGLERLEFOURSUPERIEURs('lon l('s b( soins, puis
sui',cz les drapes (i-dess'._s.
I* ixlglag( de mmpdramre ixul i_u:e mod)fi( en
appuyaw sur la tou(he CHANGERLADUREE-TEMP
du tbur appropfi('.
Les rdglag(s lXtr_(m &re amml& (n appuyanl sur
la tO/t(]/(? ANNUIIR (IlL t()Hr appl'O])lJ(".
I.er,Sglage(1(la minttu.!li( s'(fli_cltt,. (n apl)tt}am
sur REGLERLAMINUTERIE(;onsuhez la se(:don
Minuterie.
Une lois le ddlai de d@art (litti:r(' ('could, le tbur
va ddmarrer et poursuivrc la cuisson pendant
la i)('lJode programmde, puis il s'arN_tera
automatiquement, saul si la fimction Cuisson et
maintien a ('td sdlecdonl_(%. (kmsultez la section
Cuissonet mabtien.
Une rids la cuisson wrminde, l( Ji)ur &n(ttra
un signal sonore et le message <<TEMPS SUPE ,,
s'alfichera l)endan{ dnq mimttes. Vdrifiez le degrd
de cuisson de la nourdture. Si du temps de (;uisson
suppl_menmire est requis, appu}ez sur la touche
TEMPSSUPP et entrez d/t temps de cuisson
suppldm(mair(:. Si ceuc tonction _£cst pas
sdle(tionn_e, l'('cra_ s'efJi_cera automatiquement
a/t bo/tt de (inq II/iI]/t[CS.
78
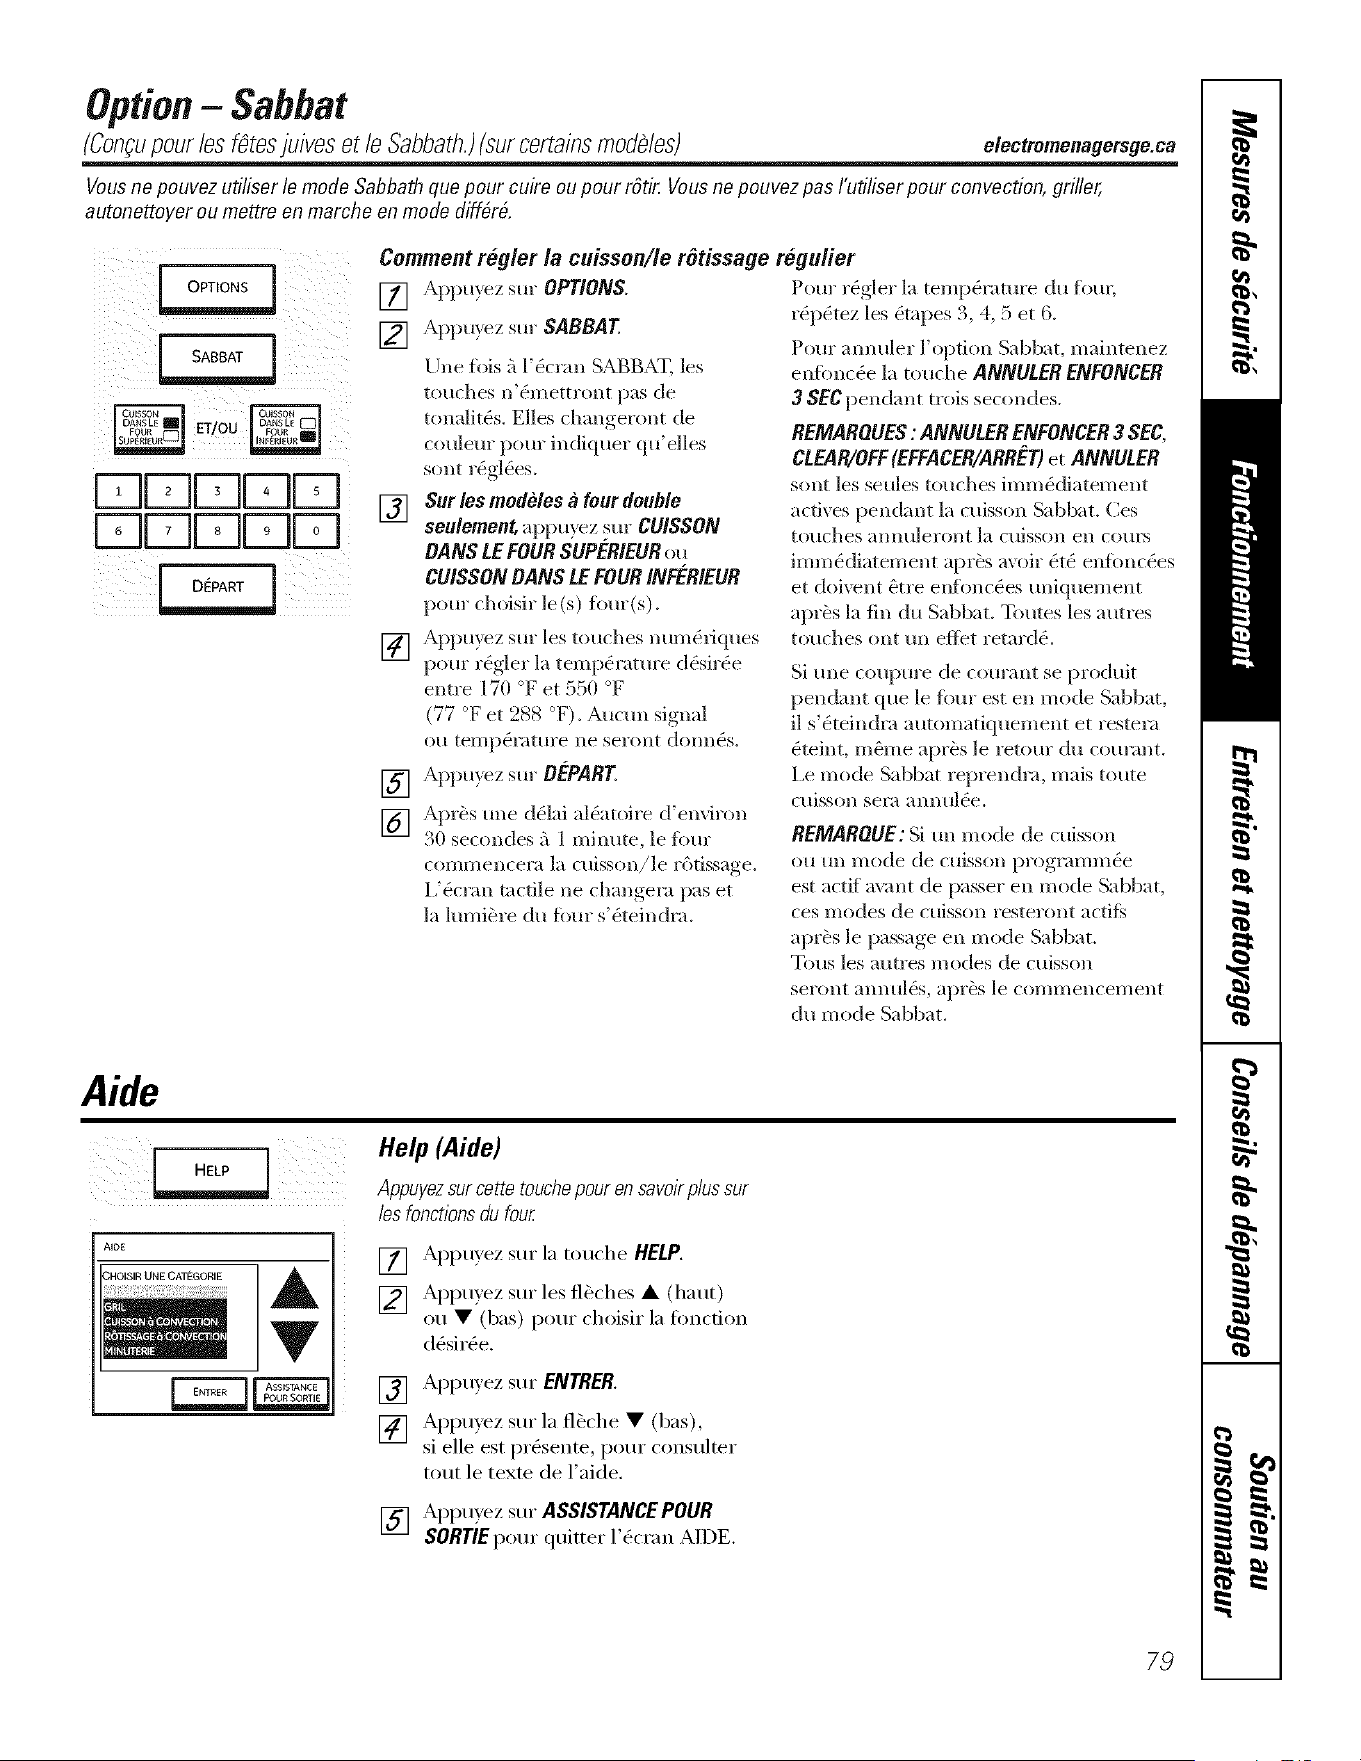
Option- Sabbat
(Confupour les fgtesjuives et le Sabbath.)(surcertainsmodges) electromenagersge.ca
Vous ne pouvez utiliser le mode Sabbath que pour cuire ou pour rStir Vous ne pouvez pas I'utiliser pour convection, griller,
autonettoyer ou mettre en marche en mode diff&#,
DDDDD
DDDDD
Comment reg/er /a cuisson//e rStissage regufier
[] Appu) ez stir OPTIONS.
[] Appu}ez sur SABBAT
Une lois :_lF&ran SABBAT, les
touches n'&netmmt pas de
tonalit&. EHes changeront de
coulem" pour indiquer qu'elles
sont r(4gl(%s.
[] Sur los medMes a four double
seulement, appu) ez sur CUISSON
BANS LEFOUR SUPERIEURol*
CUISSON BANS LE FOUR INFERIEUR
pour choisir le (s) fl,ur(s).
[] Appuyez sur les touches num(4fiques
pore" r(4gler la temp(4ramre d(4sir(%
entre 170 °F et 550 °F
(77 °F et 288 °F). Aucun signal
Oil {ell/p(41"ilEtlre ne seyont dolllle8,
[] Appu)ez sur B_'PART.
[] Apr&s tllle d(qai al(4atoire (|'environ
30 sectmdes a 1 mim_te, le fore"
commencera la cuisson/le r6tissage.
I,'(4cran tactile ne changera pas et
la lumi&re du four s'(4teindra.
Pour rg_gler la tempg_ramre du fore.
r@_!tez les _!tapes 3, 4, 5 et 6.
Pour annuler l'opdon Sabbat, maintenez
enfon((% la touche ANNULER ENFONCER
3 SEC pendant trois secondes.
REMARQUES : ANNULER ENFONCER3 SEC,
CLEAR/OFF(EFFACER/ARRET)et ANNULER
sont les seules touches imm&liatement
actives pendant la cuisson Sabbat. Ces
touches ammleront la C[liSSOll ell CO/llN
imm(4diatement aprbs avoir _t6 enfimc(%s
et doi_vnt 6tre eltfonc(4es uniquement
apr6s la fill du Sabbat. Tomes les autres
touches ont un eflet retardS.
Si tale coupure de corn';rot se produit
pendant que le ibm" est ell mode Sabbat,
il s'(4teindra automatiquement et restera
(4teint, m6me aprbs le retour du cotmmt.
Le mode Sabbat reprendra, mais toute
CtliSSOll Sel'il anntll(_e.
REMAROUE: Si un mode de ct/isson
(){1 {ln I/lode de CtliSSOll pl'ogi'ilI//l/l(4e
est actif" a\;mt de passer en mode Sabbat,
ces modes de ct/isson restel'ollt actifs
api&s le passage en mode Sabbat.
Tons les autres modes de cuisson
Sel'on[ annul(_s, aj[)i'(_s le COl//i/]encel//ellt
du mode Sabbat.
Aide
Help (Aide)
Appuyez e.e ou hepoure, avo r
les fonctions du four
[] Appuyez sin" la touche HELP.
[] Appu,_ez sin" les fl_ches • (haut)
ou • (bas) pour choisir la fimction
d6sir6e.
[] Appu)ez sur ENTRER
[] Appuyez sin" la fl_che • (bas),
si elle est prg_sente, pore" consulter
tout le texte de l'aide.
[] Appuyez sin" ASSISTANCE POUR
SORTIE pour quitter l'&ran AIDE.
79
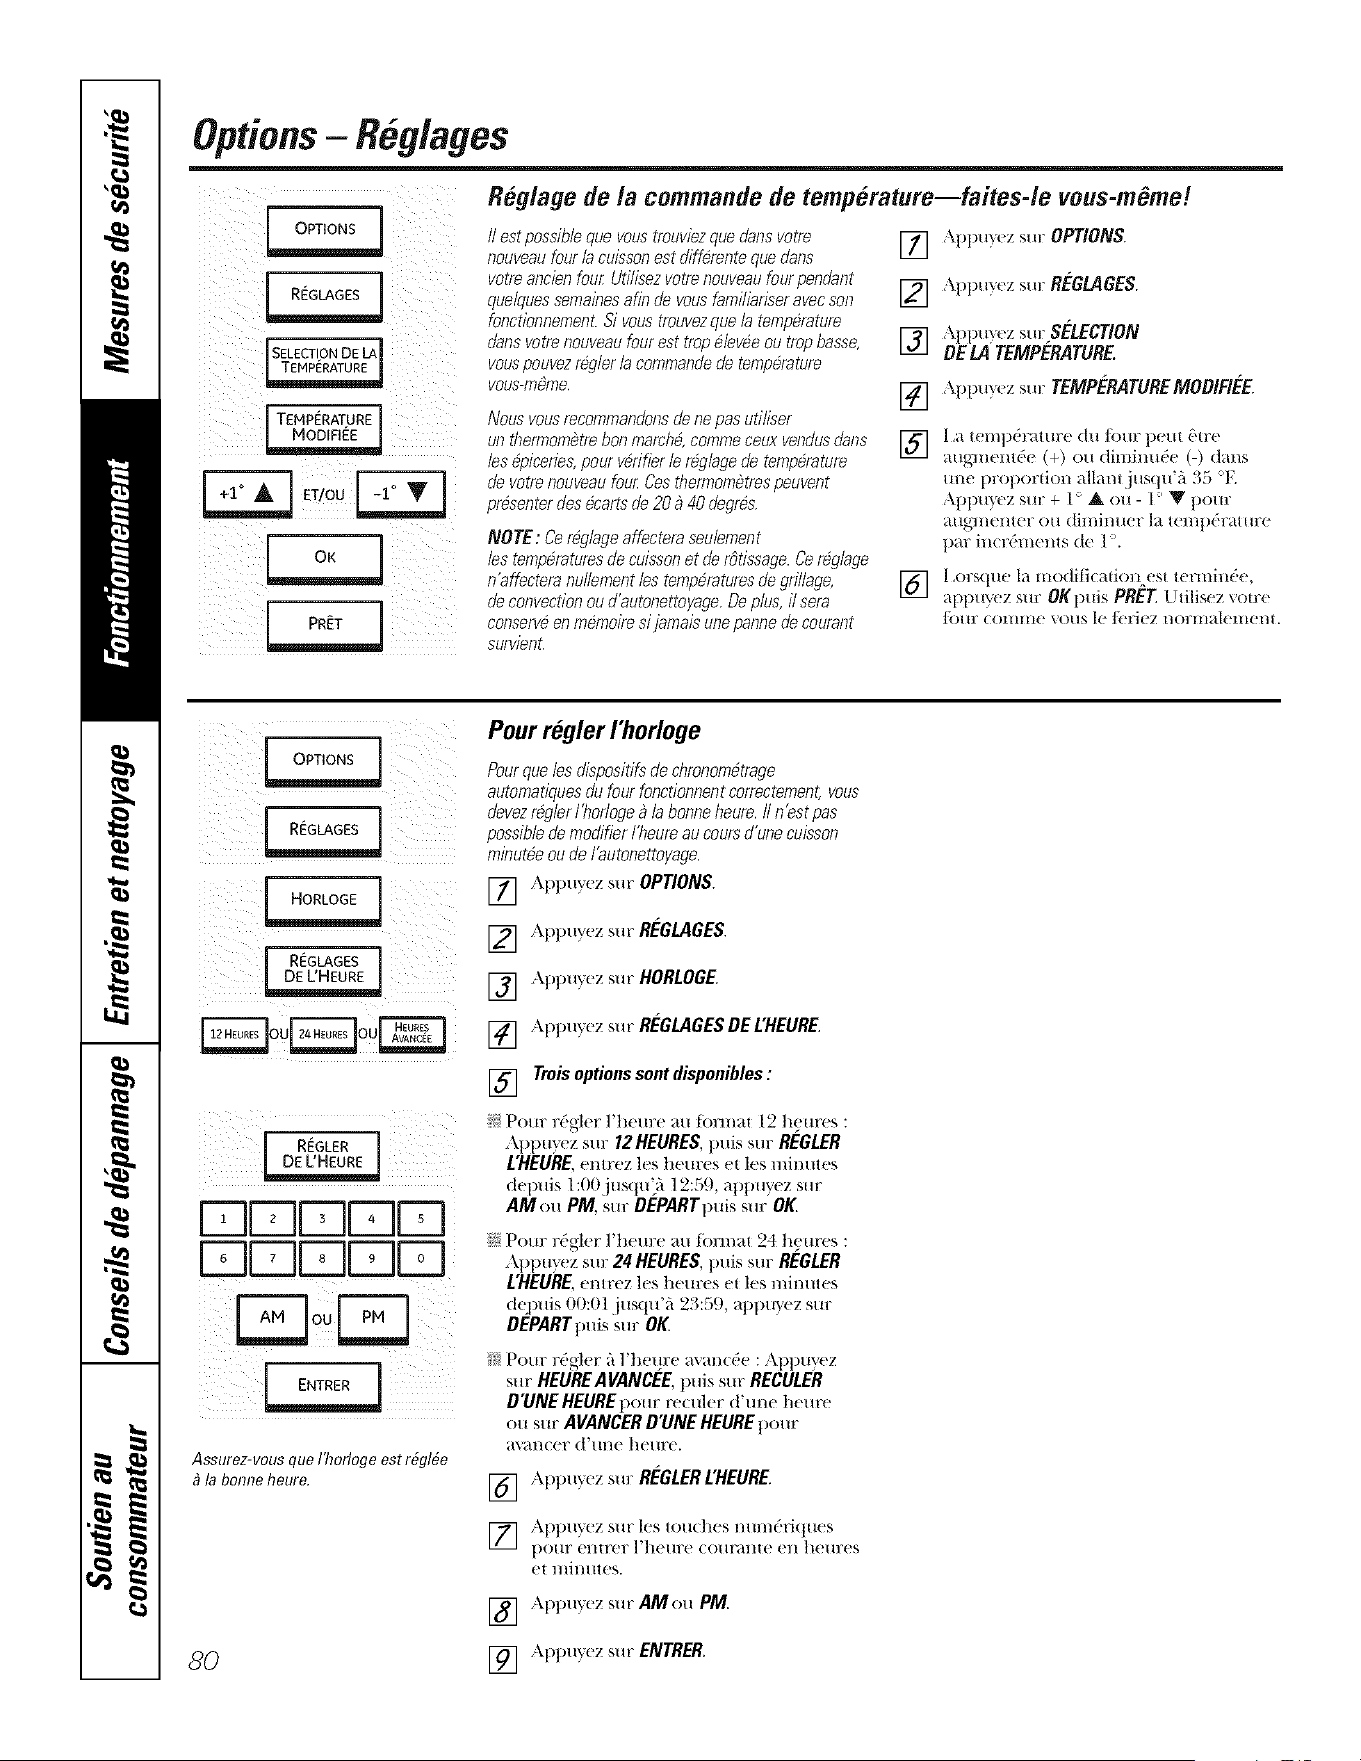
Options- R#glages
REGLAGES
[SELECTION DE LA
TEHPERATURE
ET/OU
°L...z_J
Reglage de la commando de temperature--faites-le veus-m#me!
//estpossible que vous trouviez que dans votre
nouveau four la cuisson est differente que clans
votre ancien four Utilisez votre nouveau four pendant
que/ques sernainesafin de vous fami/iariser avec son
fonctionnernent. Si vous trouvezque /a temperature
dans votre nouveau four est trop elel/ee ou trop basse,
vous pouvezregler /a commande de temperature
vous-mSme.
Nous vous recornmandonsde ne pas utiliser
un thermornetre bon marche, cornmeceux vendusdans
les epiceries, pour verifier le reglage de temperature
de votre nouveau four Cesthermometrespeuvent
presenter des ecarts de 20 _ 40 degres.
NOTE: Cereglage affectera seulement
les temperatures de cuisson et de rOtissage.Cereglage
n'affectera nullement les temperatures de grillage,
de convection ou fl'autonettoyage. De plus, il sera
conserveen memoire sijamais une panne de courant
survient.
[]
[]
[]
[]
[]
[]
,\ppu) ez sin: OPTIONS.
,\]_p_ry( z sl u: RCLGUIGES.
,\ppuX_z smLSELECT/ON
BE M TEMPERATURE.
,\ppuxez sin: TEMPERATUREMOO/F/EE.
][ Z_ |CIHp('F_| IIF(} dH f()/ll? pc/H L'|]'(!
Fdl_3/l(I/t6C (+) Oil dimiml6c (-) darts
m_e propordon allantjusqu'fi 35 'R
,\ppuy¢ z sin: + 1o & ou - 1' Y pour
augmmnter ou dimiimer la tempdramre
par incrdments de ] '.
I,ors(ple la modificad(nkest wmdnde,
at)im)ez sur 0Ktmis PRET Udlisez vo[yo
fo/tr (Ol/ll/IO VOHS 1(! f(!lJ_ Z l/Ol'l/lalOl/IOl/|.
o i i
iii i iii_ F i / I_
. HORLOGE I
[ REGLAGES ]
I R_,?LERl
[3[BDDD
DEBDDD
Assurez-vousque I'hofloge est r#,gl#,e
la bonne heure.
80
Pour regler rhorloge
Pour que les dispositifs de chronombtrage
automatiques du four fonctionnent correctement, vous
devezr@ler I'horloge _ la bonne heure. II n'est pas
possible de modifier I'heure au cours d'une cuisson
mleutbe ou de I'autonettoyage.
[] Appuyez sin" OPTIONS.
[] App_Wez sur REGLAGES.
[] ,\plmyez sur HORLOGE.
[] Appuyez sur REGLAGESDEL'HEURE.
[] Trois options sont disponibles :
!<:Pore: rdgier l'hem:e au tbnnat 12 hem'cs :
Appu_ez sin" 12HEURES,puis sin: REGLER
L'HEURE,enu'ez los heures et los mim.es
depuis 1:00jus(/u)'_ 12:59, aplmyez sur
AM ou PM, sin: DEPARTpuis sin: OK.
i?:Pour rdgier l'hem:e au (bmmt 24 hem'cs :
Appu_ez sin: 24 HEURES,puis sin: ReLGLER
L'HEURE,entrez los hem_eset los mim.es
(h3)uis O0:Ol .jus(/u'_'*23:59, appuyez sin:
OEPARrpuis sin: OK.
;/( Pore: rdgier _'_l'hem:e m anode : Appuvez
sur HEUREAVANCEE, trois sur RECULER
D'UNE HEUREpom" reculcr d'mw hcm'c
ou sin" AVANCER D'UNE HEURE pore"
_l\'_ll/( ('l" d'/ll/(' h('/IF('.
[] Appuyez sin: REGLERL'HEURE.
] Appuyez sur los touches mm_dri(lues
] ']1(? 1117(_ ]l(t I llT('S
t)ollr (?11|1"(!1 _ COlll'Hll|e ell
('| l//il//lt('s.
[] Appuyez sur AM ou PM.
[] ,\ppuyez sur ENTRER
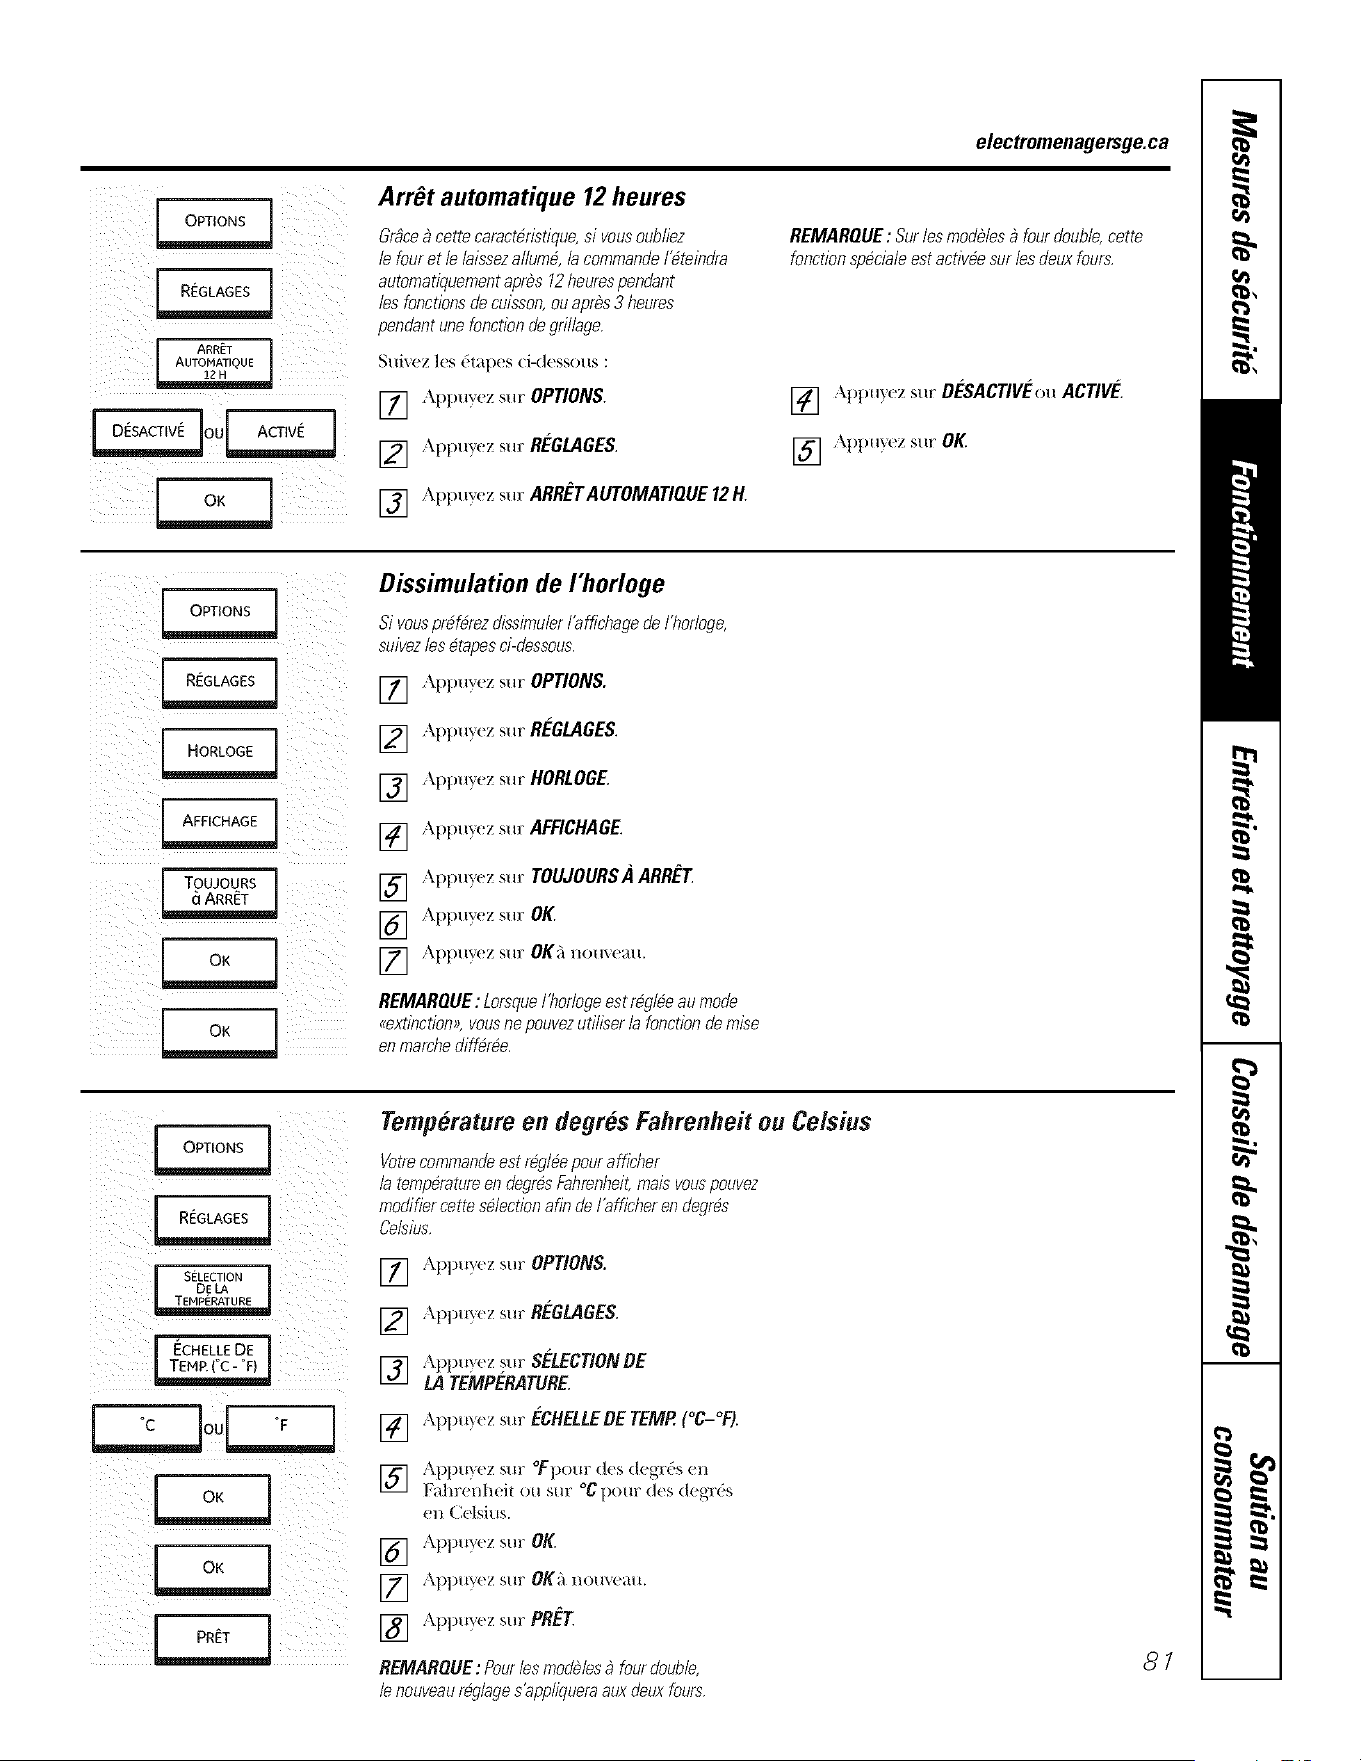
electromenagersge.ca
i_!([![_ [_iZ(_iI_
_i i i i
i i
ARR_T
AUTOMATIQUE Slli_,(!Z ]es ('tapes (i-d(!sso/Is :
[] ApPuY ez sur R_LGLAGES"
Arr6t automatique 12 heures
GrOce_ cette caractbdstique, si vousoub//ez
/e four et /e laissez a//umb, /a commande /_te/edra
automatiquemeet apr_s 12 heurespendant
les foectioes de cuissoe, ou apr_s 3 heures
pendant une fonction de gd/lage.
REMARQUE : Sur les modules _ four double, cette
fonction speciale est activ_e sur les deux fours.
[] ,\ppuyez sur DCLSACTIVCLouACTIVCL.
[_ Appu_ez sur OK.
Dissimulation de I'horloge
[_ S,vouspr_f_rezd,ss_mulerl'_f_cbagedel'borloge,
suivez /es_tapes ci-dessous.
[] ,,,,,,,_,,z,,,.OPTIONS.
[] \ppuyez sur HORLOGE.
J TOUJOURS [] Appu'>ez sur TOUJOURSA ARRET
[] App/lyez SHY OK.
REMARQUE : LorsqueI'borloge est r_gl_e au mode
_extiectiom), vousne pouvezutiliser la fonction de raise
en marche diff_r_e.
Temperature en degres Fahrenheit ou Celsius
Votrecommande est reglee pour afficher
/a temperature en degres Fahrenheit,mais vous pouvez
mod_f_er_els_usce,,es_le_,,onaf_ndel'_ff_,,erende_r_s
z
SELECTION
[ ECHELLEDE ]
[] Appuyez sur OPTIONS.
[] Appuyez sur REGLAGES.
[] AppuTez sur SELECTIONDE
LA TEMPERATURE.
[] ,\pp_._Tezsur ECHELLEDETEMP.(°C-°F).
[]
[]
[]
[]
Apt)u)ez sur °fl)Om" des (legr('s en
Fahrenhei_ ou sin: °C pour des degrd's
en C( lsius.
,kl)l)uyez sin" OK.
Appu_ez sur OK _l nomeau.
Appuyez sur PRET
REMAROUE : Pour les modules _ four double,
le nouveau reglage s'applkluera aux deux fours.
81
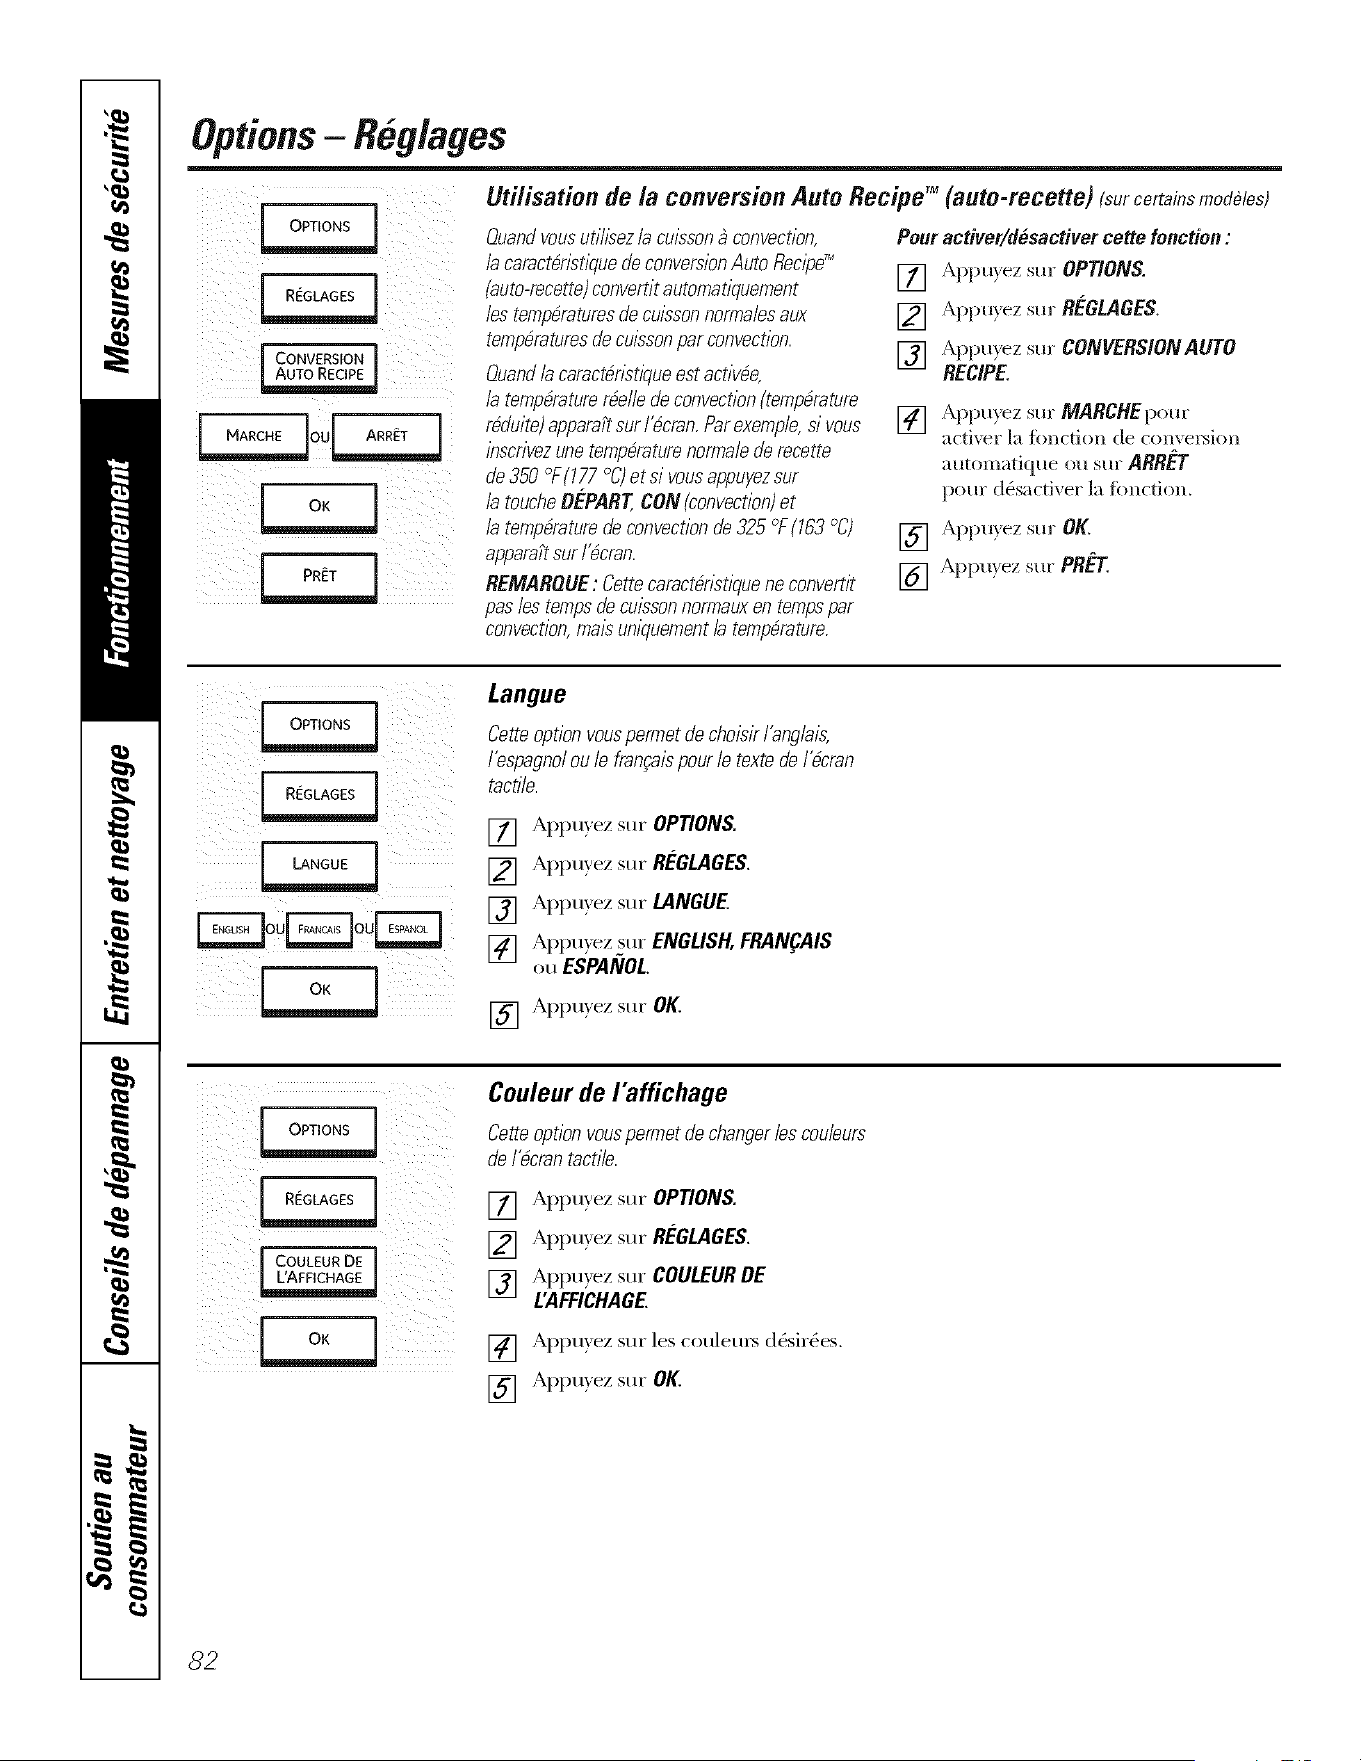
Options- Reglages
L
REGLAGES
[ CONVERSIONl
Utifisation de la conversion Auto Recipe TM (auto-recette) (surcertainsmode/es)
Ouandvousuti//sezla cu/sson_ convection,
lacaract_n2tiquedeconversionAutofleclpd'_
(auto-recette)convertitautomatiquement
lestemperaturesdecu/ssonnorma/esaux
temp_raturesdecu/2sonparconvection.
Ouandla caract_nstktueestactiv_e,
/a temperaturer_e//edeconvectionftemp_rature
rMuite)apparaPtsurI_cran.Parexemple,si vous
i}Tscrivezunetemp_raturenorma/ederecette
de350 °F(177°C)et si vousappuyezsur
la toucheDE-PART,CON(convection)et
la temperaturedeconvectionde325°F(163°C)
apparaPtsurI_cran.
REMARSUE: Cettecaract_nstiquene convertit
pas/estempsdecu/ssonnormauxen tempspar
convection, n?als,uniquement/a temperature.
Pouractiver/d_sactiver cette fonction :
[] Appu_ez sin" OPTIONS.
[] Appuyez sur REGLAGES.
[] Appuyez sur CONVERSIONAUTO
RECIPE.
[] Appu_ez sur MARCHEpom"
acti*er la fimction de corn eision
automatklue ou sm" ARRET
pore" d_sactiver ]a fimction.
[] Appu) ez sin" OK.
[] Appu}ez Stll" PR_'T.
[ opTo.s
ou ou
Langue
Cetteoptionvouspermetdechoisir/'ang/ais,
fespagnolou le fran_aispourle textedel'bcran
tacti/e.
[] Appuyez sin" OPTIONS.
[] Appuyez sin" R_'GLAGES.
[] Appu_ez sin" LANGUE.
[] Appuyez sur ENGLISH,FRAN_AIS
ou ESPANOL
[] Appuyez sin" OK.
[ COULEUR DE J
[ L'AFFICHAGE [
Couleur de I'affichage
Cetteoptionvouspermetdechangeriescouieurs
del_crantactile.
[] Appuyez sin" OPTIONS.
[] Appuyez sin" R_'GLAGES.
[] Appu}ez sur COULEURDE
L'AFFICHAGE.
[] Appu}ez sin" les coulem_ d&ir_es.
[] Appu)ez sin" OK.
o°2

electromenagersge.ca
=
I so,/ ]
Son marche/arr_t
Cetteoptionvouspermetd'acflveroude
d_sactlverlesliTna/sonorequlse faltentendre
/apresslond'onetouche,
[] Appu) ez sur OPTIONS.
[] Appuyez sur Rk'GLAGES.
[] Appuyez sur SONNOLUME.
[] Appu}ez sur SONMARCHE/ARFIf'T
[] Appu}ez sur SON EN MARCHEpour
actix er le signal sonore li_ _'lla
pres@m d'une touche ou sur SON
ARRETp,,ur d&activer ce signal.
[] N_puy_z sur OK.
[] Appuyez sur 0Ka nouveau.
[] N_puy_z sin"PRE'T
I" so,/ "1
F oir- qQir-
o__
Volume
Cette foncfion permet d'ajuster le volume_ un
nlveauplus acceptable. Troisnlveauxde volume
peuvent gtre s6lecfionn6s.
[] Appuyez sur OPTIONS.
[] Appuyez sur ReLGLAGES.
[] Appuyez sur SON/VOLUME.
[] Appuyez sur VOLUME.
[] Appu}ez sur €-LEVEE,MOYEN ou
BASSEpour le choisir le ni_eau du
volume li(_ _'ll'enloncement des
touches.
[] Appuyez sur OK.
[] Appuyez sur OK:,nouveau.
[] Apptqez sur PRE-I'.
83
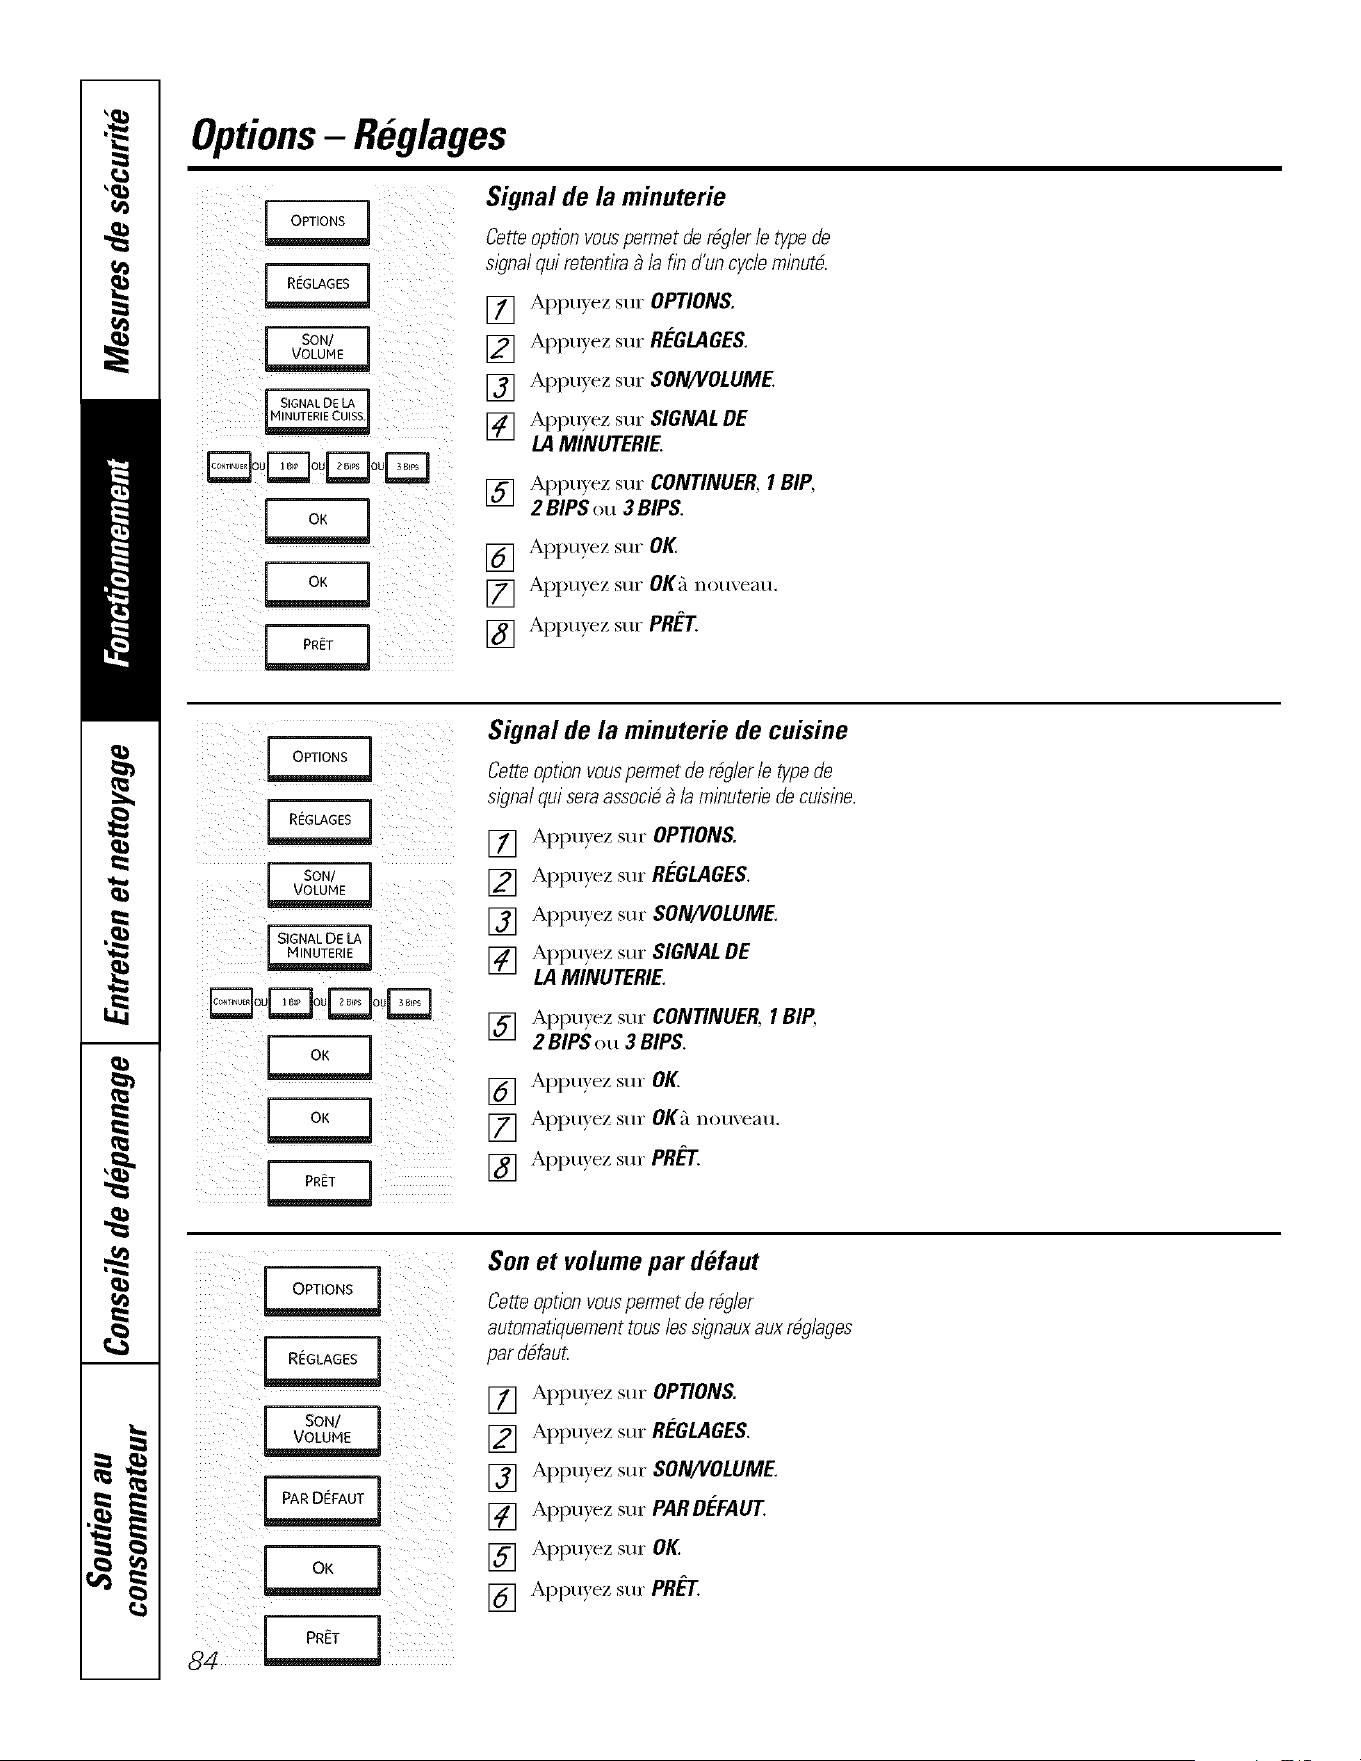
Options- Reglages
iill i !i
J REGEAGES
SON/
SIGNAL DE CA
_ou _ _ou ou
Signal de la minuterie
Cetteoptionvouspermetder@lerle typede
signalquiretenfira_ la fin d'uncycleminute.
[] Appuyez sin"OPTIONS.
[] Appuxez sur REGLAGES.
[] Appuyez sur SON/VOLUME
[] Appu}ez sur SIGNALDE
LAMINUTERIE.
[] Appu,xez sur CONTINUER, I BIP,
2 BIPS ou 3 BIPS.
[] Appu,xez sur OK.
[] Appuyez sur OK;i nomeau.
[] Appu_ez sur PR_'T
SON/
[ SIGNAL DE LA J
[; [ Po i ¸ :
Signal de la minuterie de cuisine
Cette option vouspermet de r@ler le type de
sl)nal qul sera assocl6_ /a minutene de cuisine.
[] Appuyez sin"OPtiONS.
[] Appu,xez sin"REGLAGES.
[] Appuyez sur SON/VOLUME.
[] Appuyez sur SIGNAL DE
LA MINUTERIE.
[] Appuyez sur CONtiNUER, I BIP,
2 BIPSou 3 BIPS.
[] Appuyez sur OK.
[] Appuxez sur OK_lnouveau.
[] Appuxez sur PRET.
iii_iii:_i_] i!i ::
l SON/ j
VoLlvoLu_ i []
[]
[]
i o_ ] []
[]
Son et volume par defaut
Cetteoptionvouspermetder@ler
automatiquementtous/esslgnauxauxr@/ages
pard6faut.
Appmez sur OPtiONS.
Appuvez sur REGLAGES.
Appuvez sur SON/VOLUME.
Appuxez sur PARDEFAUT.
Appmez sur OK.
Appux ez sin" PRET.
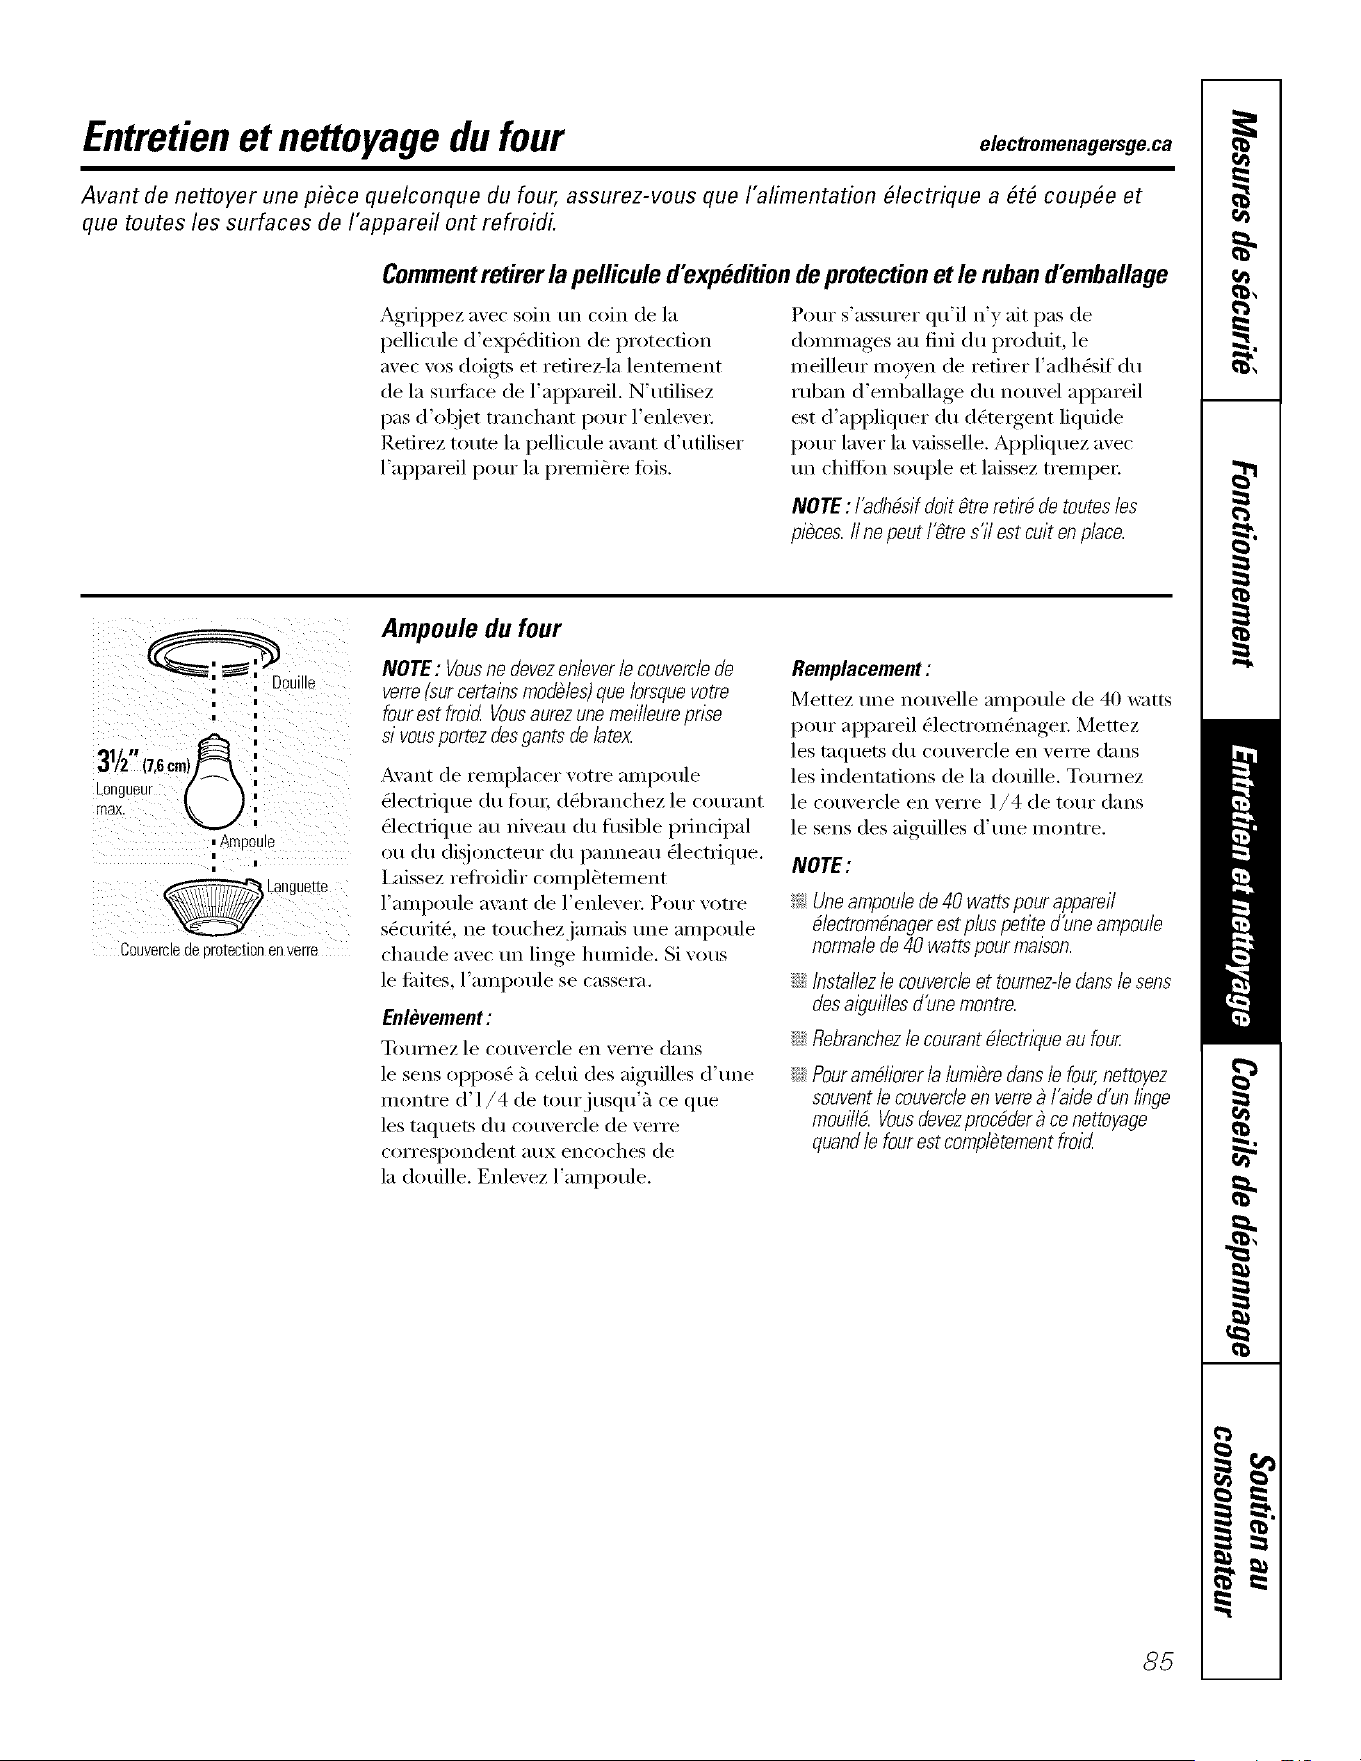
Entretienet nettoyagedu four
Avant de nettoyer une pibce quelconque du four, assurez-vous que I'alimentation #lectrique a #t# couple et
que toutes les surfaces de I'appareil ont refroidi.
Commentretirer la pellicule d'expeditionde protectionet le ruband'emballage
Agfippez avec soin un coin de la
pellicule d'exp_dition de protection
avec vos doigts et refirez-la lentement
de la sudi_ce de l'appareil. N'utilisez
pas d'objet tranchant pour l'enleve_:
Retirez toum la pellicule avant d'utiliser
l'appareil pour la premiere Ibis.
Pour s'assurer qu'il n'y ait pas de
dommages au fini du produit, le
meilleur moven de retirer l'adht)sif du
ruban d'emballage du nouvel appareil
est d'appliquer du d_te_gent liquide
pour laver la wfisselle. Appliquez avec
un chiffon souple et laissez tremper
NOTE: l'adhbs/f dolt gtre retkb de toutes los
pibces. I1ne pout l'gtre s'il est cult en place.
i
.,,A
1 rl |
3/2 (?,o
"[laX =
MJ,
mAmDOUI[-
|
i
2ouverclede ?ro[ecllon ell verre
Ampoule du four
NOTE: Vousno devezen/ever/e couverc/ede
verre(sur certains modbles)que lorsquevotre
four est froid Vousaurezunemei//eurepnse
si vousportez des gants de latex
Avant de rell/pla('er votre alllpotlle
(_lect_ique du Ibm; dg_bmnchez le courant
(_lectrique au ni;'eau du fllsible principal
ou du disjoncmur du panneau _lectrique.
IMssez refi'oidir compl_tement
l'ampoule a\:mt de l'enleve_: Pour votre
s_cufit(_, ne touchezjamais une ampoule
chaude avec un linge humide. Si vous
le tifites, l'ampoule se cassera.
Enlevement :
Totlrnez le ('otp,'ei'('le en ','ei're d;ins
le sens oppos_ Flcehfi des aiguilles d' une
montre d'l/4 de tourjusqu'_'l ce que
les taquets du couvercle de verre
cori'espondent atlX encoches de
la douille. Enlevez l'ampoule.
Remplacement :
Mettez une notwelle ampoule de 40 watts
pour appareil _lectrom_nage_: Mettez
les taquets du couvercle en verre darts
les indentations de la douille, Tom'nez
le couvercle en verre l/4 de tour darts
le sens des aiguilles d' une In ontre.
NOTE:
_: Une ampoule de 40 watts pour appareil
d/ectrom#nagerest p/us petite d'une ampoule
norma/ede 40 watts pour maison.
::Ji::Insta//ez/e couverc/eet tournez-/eclans/e sens
des aiguilles d'une montre.
::Ji::Rebranchez/e courant b/ectrklue au four
::Ji::Pourambliorer /a lumibreclans/e four,nettoyez
souvent/e couvercleen verre_ l'aide d'un linge
mouff/b. Vousdevezprocbder9 co nettoyage
quand/e four est comp/btementfroid
85
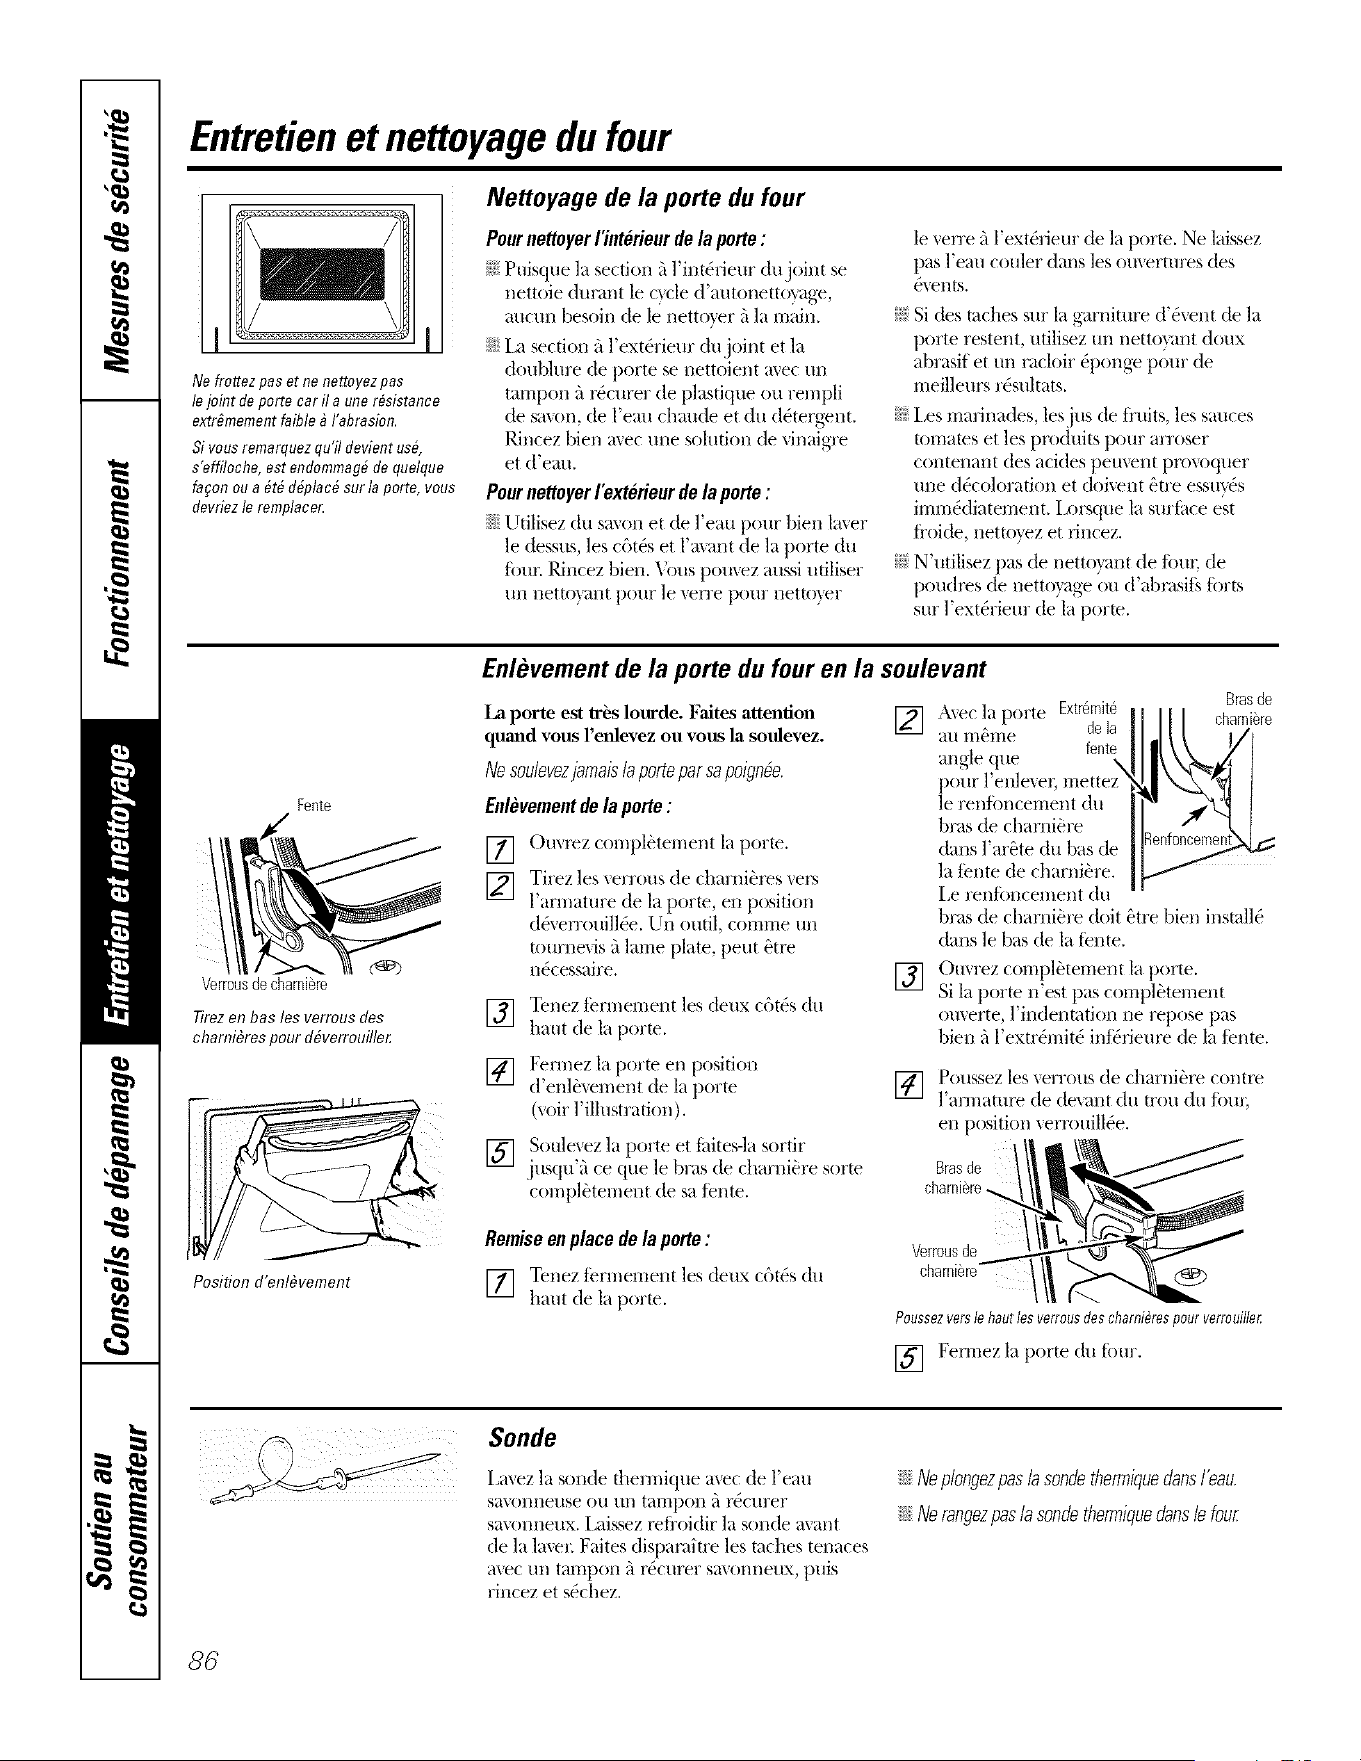
Entretienet nettoyagedu four
Ne frottez pas et ne nertoyez pas
le joint de porte car il a une r#sistanc e
extr#mement faible _ I'abrasion.
Si vous remarquez qu'il devient us#,
s'effiloche, est endommag# de quelque
fa_on ou a #t# d#plac# sur la porte, vous
devriez te remplace_
Nettoyage de la porte du four
Pour nettoyer I'interieur de la porte:
_,t_iPuisque la section _'Jl'im_fieur dujoim se
nettoie durant le cycle d'autonetto_age,
aucun besoin de le netto_r _'Jla main.
iJi_:I,a section a l'extOrieur du joint et la
doubhu'e de porte se nettoient mec tm
tampoll _'_r_curer de plastktue ou rempli
de smon, de l'eml chrome et du d(_tergent.
Rincez Nei/mec tree solution de vinaigTe
et d'eau.
Pour nettoyer I'extOrieur de la pone:
iJi::Utilisez du savon et de l'eau pour bien laver
le dessus, les c6t& et l'mant de la porte du
tbUl: Rincez bien. Vous pomez anssi utiliser
{lit netto}ant potlr le verre pot/l" nettot er
le _erre _'_l'ext(_rieur de la porte. Ne laissez
pas l'eau couler dans les omermres des
eveI/tS.
_?)Si des taches sur la garniture d'_vem de la
porte restent, utilisez un nettoxant, doux
abrasif et tin racloir @onge potlr de
meilleurs r&uhats.
_: i,es marinades, lesjus de traits, les sauces
inmates et les plx)duits pour arroser
contenant des acides peuvent plxlvoquer
m_e d&oloration et doivent ()n'e ess/r_es
imm_diatement. I z)rsque la surti_ce est
fi'oide, nettotez et rlncez.
N N'utilisez pas de netto}_mt de fbtm de
poudl_s de netto}_ge ou d'abn_sits forts
sur l'ext(Meur de la porto.
Fente
Verrousdechamiere
77rez017 bas los verrou$ dos
charnibres pour d#verrouille_
Position d'enlbvement
Enlevement de la porte du four en la soulevant
La porte est lr_s lourde. Faites attenlion
qumld vous l'e_flevez ou vous la soulevez.
Nosoulevezjamaisla portepar sapoignbe.
Enlevementde la pone:
[] Ouvrez complb_tement la porte.
[_] Tirez les _errous de charni_res vel_
Fannature de la porte, en position
d_verrouill_e. Un outil, corrm-le un
tournexis _'tlm-ne plate, peut _tre
n0cessaire.
[] Tenez tennerrlent les deux c6t0s du
haul de la porte.
[] Fennez la porte ell position
d'enlbxement de la porte
(voir l'illustration).
] Soulevez la porte et iidtes-la sortir
jusqu'_'_ ce que le bras de charni_)re sorte
complbtement de sa tente.
] A\ec ]a porte Extr6mite
au rn_rrle dela
fente
an_leque
pour l'enle_ el:
le renibncement du
bras de chamiOre
darts l'ar_te du has de
la tente de charniOre.
[,e renibncement du
bras de chami_)re dolt _tre bien insmll(_
dans le bas de la tente.
Omrez corrlpl_terrlent la porte.
_LEJ Si la porte n'est pas c(m-@_tement
ou_erte, l'indentafion ne repose pas
bien a l'extr(_mit_ ini_riem_ de la tante.
Brasde
charniere
[] Poussez les xerrous de charnibre contre
l'ammmre de (levant (Ill [l'Otl (hi t{)tll;
en position verrouill_e.
Brasde
chamiere•
Remiseenplace dela pone:
[] Tenez termerrlent les deux c6t& du
haut de la porte.
Verrousde
charni_re (_
PoussezvorsIohautlosvorrousdoschornibrespourverrouille_
[] Femlez la porte du fi)ur.
Sonde
i,avez la sonde themfique avec de l'eau
saXOlllletlse oil ui/talllpoll _'l r0curer
skl\()nnetlx. [,aissez refl'oidir la sonde avant
de la la\el; Faites dispandu'e les inches tenaces
?l_,ec t/I/tarrlpon _'1r_curer skl_,oi/i/eilx, puis
rincez et s0chez.
i_i::NeplongezpaslasondethermiquedamI'eau.
i_i::Nerangezpaslasondethermiquedans/efour
86
electromenagersge.ca
L
6rille dufour Grilles du four
Vo_As po_.e,'ez nettoyer toutes ]a grilles du
fbur 5 Ia main avec un produit nettovant
abrasif ou de la ]aine d'ade_: Pdncez
ensuite i?tl'eau claire et s6chez avec tm
tinge propre.
I,es grilles peuvent demem'er darts le fimr
dm';mt ]e cycle d'autonettoyage sans
fisquer de les endommager_
Si le glissement des grilles devient
diflidle, enduisez lem_ bords d'tme
mince couche d'huile v_g_tale apr_s
a_fir nettov6 ]es grilles 5 ]a main ou
automatiquement darts le fimr. Cette
mesm'e fi_dlitera le glissement des grilles
loI_ de lem" introduction ou retrait du
Tableau de commande
ll est conseill_ d'essuver le tableau de
comnmnde api'_s chaque utilisation.
Nettovez-le avec tin S_l\'on dOHX et de
l'eatl, Oil line sohltion d'eatl et de
5naigre. Rincez 5 l'eau claire et essuvez
avec un linge doux. Pour netto)'er le
tableau de contrgle, vous devez le laisser
_'ltelnp_rature ambiante, et ne
pas l'exposer direcmment au soleil.
I,'ufilisafion d'autres nettovants
liquides n'est pas recolnlnai_dg_e--
le d(_pgt rg_siduel pourrait aflecter
le fimcfiolmemei_t de contr61e.
N'ufilisez pas de produits netto)m_ts
abrasifs, de produits netto)m_ts liquides
puissants, de talnpoi_s 5 rgmurer en
plasfique ou de produits netto_m_ts
COlnn_erciaux pour le four sur le tableau
de conmmnde--ces produits
ei_dolmnageroi_t le fini. ljne solution
coi_telmnt autai_t d'eau chaude que de
vinaigre est la meilleure.
Surfaces en acier inoxydable (surcertainsmodbles)
N_tilisez pas de tampons de laine d'acier;
ils pourraient rayer la surface.
Potlr nettover la StlK[il('e en a('ier
inoxydable, ufilisez de l'eau chaude
S}lVonnetlX Oil tin produit nettoyant oH
dre 5 ader inoxydable. Essuyez toqjoui_
la sui'ti_ce darts le sens du grain. Suivez les
instrucfioI_s du produit nettoyant pour
nettover la stm'i_ce en acier inoxvdable.
Pour savoir comlnei_t acheter le produit
netto_m_t ou le cire pour appareils
_lectrom_nagei_ en acier inoxydable,
ou pour localiser le d_taillant le plus
prbs de chez vous, veuillez composer
notI'e ntlI//eI'o S}lIIS fl'ais :
Centre national de pieces
1.800.661.1616
electromenagersge.ca
oo7
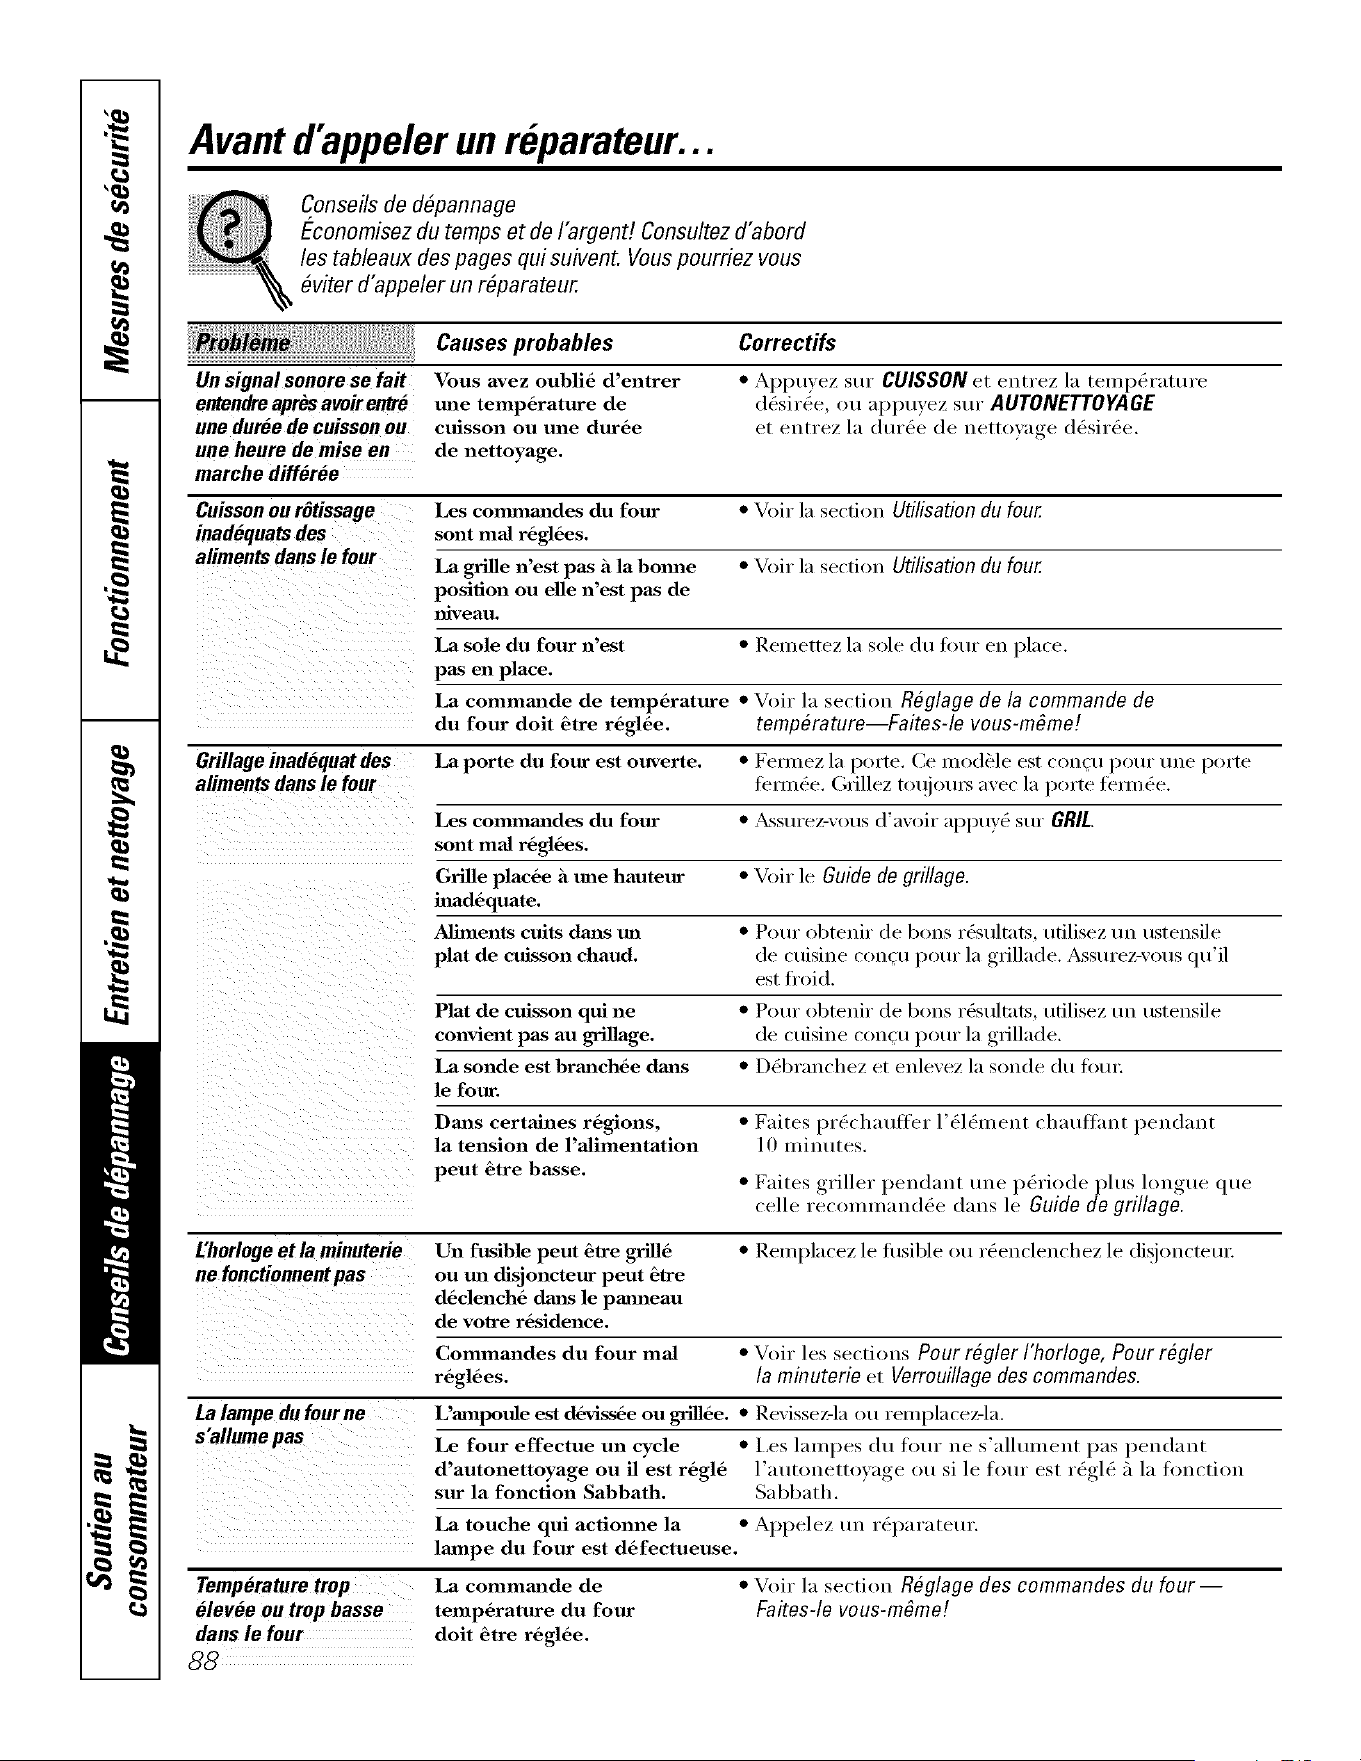
Avant d'appeler unreparateur...
Conseils de d#pannage
E-conomisezdu temps et de I'argent! Consultez d'abord
los tableaux des pages qui suivent. Vous pourriez vous
#viter d'appeler un r#parateur.
Unsignalsonorese fait
entendreaprOsavoirentr6
unedureede cuissonou
une heure de mise en
marchedifferee
Causes probables
Vous avez oubli6 d'entrer
tree tenap6rature de
cuisson ou une dur6e
de nettoyage.
Correetifs
• Appuyez sur CUISSON et entrez la tenapt_rature
d_sir_e, ou appuyez sur AUTONETTOYAGE
et entrez 1;i dur_e de nettoyage d_sir_e.
Cnisson on rOtissage Les cnananmldes du four •Voir 1:1section Utilisation du four.
inad6quats des sent real r6gl6es.
aliments dans le four La grille n'est pas & la bonale •Voir 1:1section Utilisationdu four.
position ou elle n'est pas de
niveau.
La sole du four n'est • Renaettez la sole du 10111"ell place.
pas en place.
La conanam_de de tenap6rature •Voir 1;i section R_glago de la commando de
du four doit _tre r6gl6e, tomp&aturo--Faites-le vous-mgmo!
Grillage inadequat des La porte du four est ouverte. • [_eYInez 1;i porte. (]e inodele est ('on(t/})OUI" tlne porte
alimentsdansle four temple. (;fillez tot/iOt/I_ ;1vet 1;Iporte tenure.
Los conanamades du four • _sSt/l'ez-\'ot/s d'avoir appt/y_ sur GRIL
sont naal r_gl6es.
Grille plac6e a tree hauteur •Voir le Guide de grillage.
inadequate.
Alinaents cults dmls tm • Pour obtenir de bons r_sultnts, ufilisez tna ustensile
plat de cuisson chaud, de cuisine cono/pore" la grillade. _&ssurez-\'ous qu'il
est fl'oid.
Plat de cuisson qui ne • Pour obtenir de bons r_sultnts, ufilisez un ustensile
convient pas au grillage, de cuisine concu, l)°m" la ,grillade.
La sonde est brm)ch6e dmas • D_br;mchez et enlevez la sonde du fi)tn:
le four.
Dm_s certaJnes r6gions, • Faites pr_chaufler l'_l_naent chauflm_t pendant
la tension de l'alinaentation 1 0 minutes.
peut 6tre basso.
• Faites griller pendant une p_riode plus longue que
cello recoiuinan(l_e dans le Guidede grillage.
L'horloge etla minnterie Un fusible pout 61re grill6 • Ileiul)lacez le fl/sible ou rtSenclenchez le disjon('tetlr
ne fonctionnentpas ou na_disjoncteur peut _tre
d6dench6 dm_s le pmnaeau
de volre r6sidence.
Conanaandes du four naal •Voir los sections Pour r@lor I'horlogo, Pour r@lor
r6gl6es, la minutorio et Vorrouillagedes commandos.
La lampe du fonrne L'ampoule est d6viss6e ou grill6e. • Revissez-la or! relnplacez-1;i.
s'allumepas Le four effectue un cycle • Los lampes du tour ne s'allmnent pas pendant
d'autonettoyage ou il est r6g16 l':lutonettox':lge ou si le four est r_gl_ ;'1 la fl)nction
sur la fonction Sabbath. Sabbath.
La touche qui actionne la • Appelez tna r_parateur.
lanape du four est d6fectueuse.
Temperaturetrop La conanam_de de •Voir la section R@Iage des commandos du four
elev6e on trap basse tenap6rature du four FaRes-le vous-mgmo!
dans le font dolt btre r6gl6e.
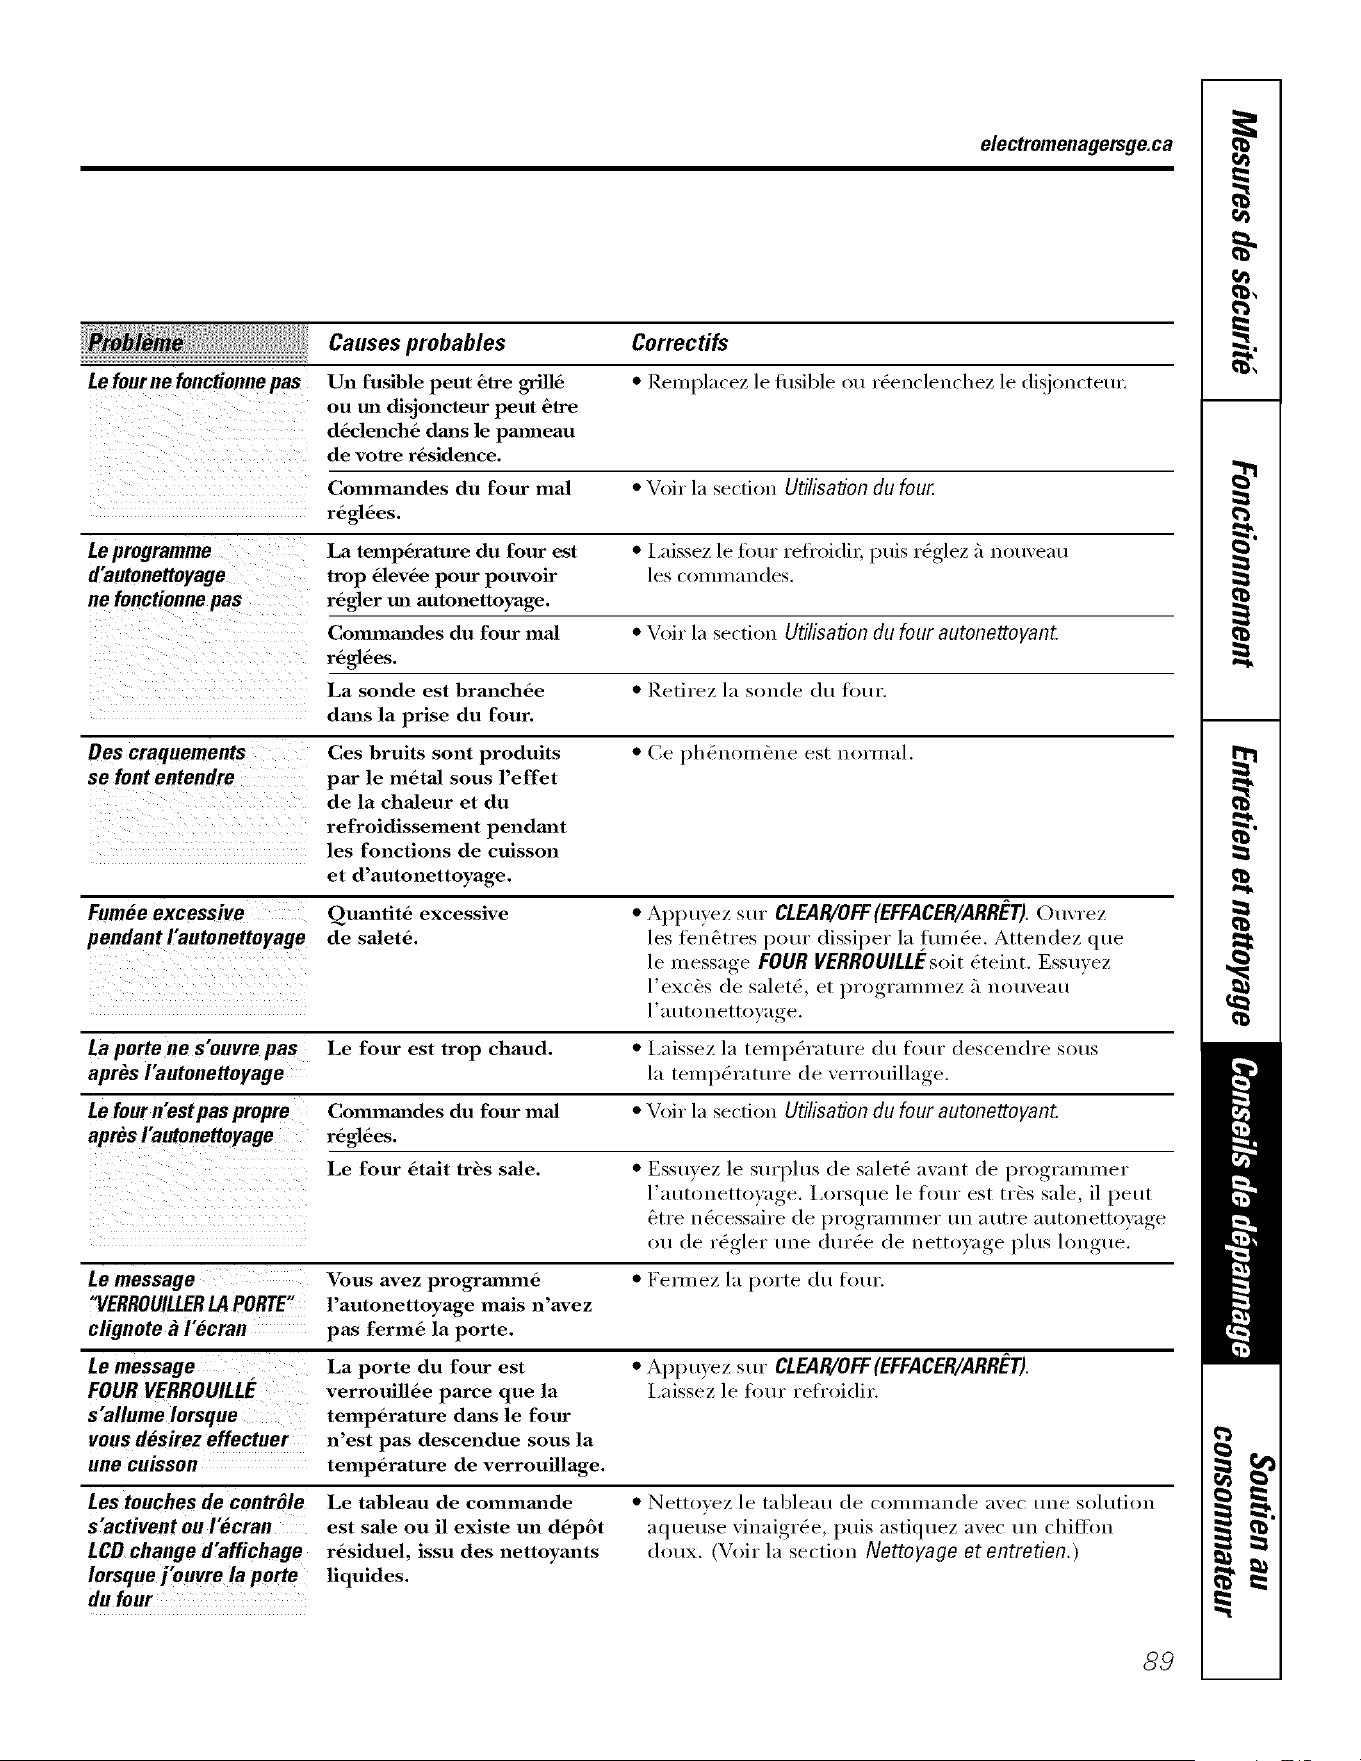
electromenagetsge.ca
Le four ne fonctionne pas
Causes probables
Un fusible peut 6_ce grill6
ou tm dJsjoncteur peut {_tre
d6clench_ dm_s le pmmeau
de volre r_sidence.
Correetifs
• I_emplacez le fusible ou r_enclenchez le disjonctem:
Commandes du four real • Voir la section Utilisation du four
r6gl6es.
Le programme La temp6rature du four est • Laissez le four refl'oidil, puis rt;glez h uouveau
d'autonettoyage trop 61ev6e pour pouvoir les cumin:males.
ne fonctionne pas r_gler m_ autonettoyage.
Commmldes du four real • Voir la section Utilisation du four autonettoyant.
regl6es.
La sonde est branchOe • Retirez la soude du fl)t/l'.
dm_s la prise du four.
Des craquements Ces bruits sont produits • Ce ph_nom_ne est uorln;ll.
se font entendre par le m6tal sous l'effet
de la chaleur et du
refroidissement pendant
les functions de cuisson
et d'autonettoyage.
Fumee excessive Quantit_ excessive • Appu}ez sur CLEAR/OFF(EFFACER/ARRET).Ouvrez
pendant I'autonettoYage de salet& les fen_tres pour dissiper la fulng_e. Attendez que
le message FOUR VERROUILLk'soit 6teint. Essuvez
l'exc_s de salet(_, et programmez ;'l nouveau
l'at/tonettoyage.
La porte ne S'ouvre pas te four est trop chaud. • I,aissez la temp&'ature du four descendre sous
apr_s I'autonettoyage la telni)g_rature.... de verrouillage, .
Le four n'est pas propre Commmldes du four real • Voir la section Utilisation du four autonettoyant.
aprOsI'autonettoyage r6gl_es.
Le four _tait tr_s sale. • Essmez le surplus de salet(_ a',ant de l)r°grammer,
l'autonetto)age. I,orsque le flmr est tr&s sale, il peut
&tre n6cessaire de programmer tm autre autonetto)age
ou de r_gler tlue (lurg_e de nettoxa_*e plus hm *tie
Le message Vous avez progrmnmO • Fem_ez la porte du four.
"VERROUILLERLAPORTE" l'autonettoyage mais n'avez
clignote k I_cran pas ferm_ la porte.
Le message La porte du four est • Appu}ez sur CLEAR/OFF(EFFACER/ARRk'T).
FOUR VERROUILLE verrouill6e parce que la I,aissez le flmr reh'oidir.
s'allume Iorsque temp6rature dm_s le four
vous desirez effectuer n'est pas descendue sous la
une cuisson temp6rature de verrouillage.
Lestouchesde contrOle
s'activentouI_cran
LCDchanged'affichage
Iorsquej'ouvre la porte
du four
Le tableau de commmade
est sale ou il existe un d6p6t
r6siduel, issu des nettoyants
liquides.
• Nettoxez le tableau de coxnxnaxade avec tree solutioxa
aqueuse vinaigrg_e, puis astiquez avec un chiffon
doux. (Voir la section Nettoyage et entretien.)
89
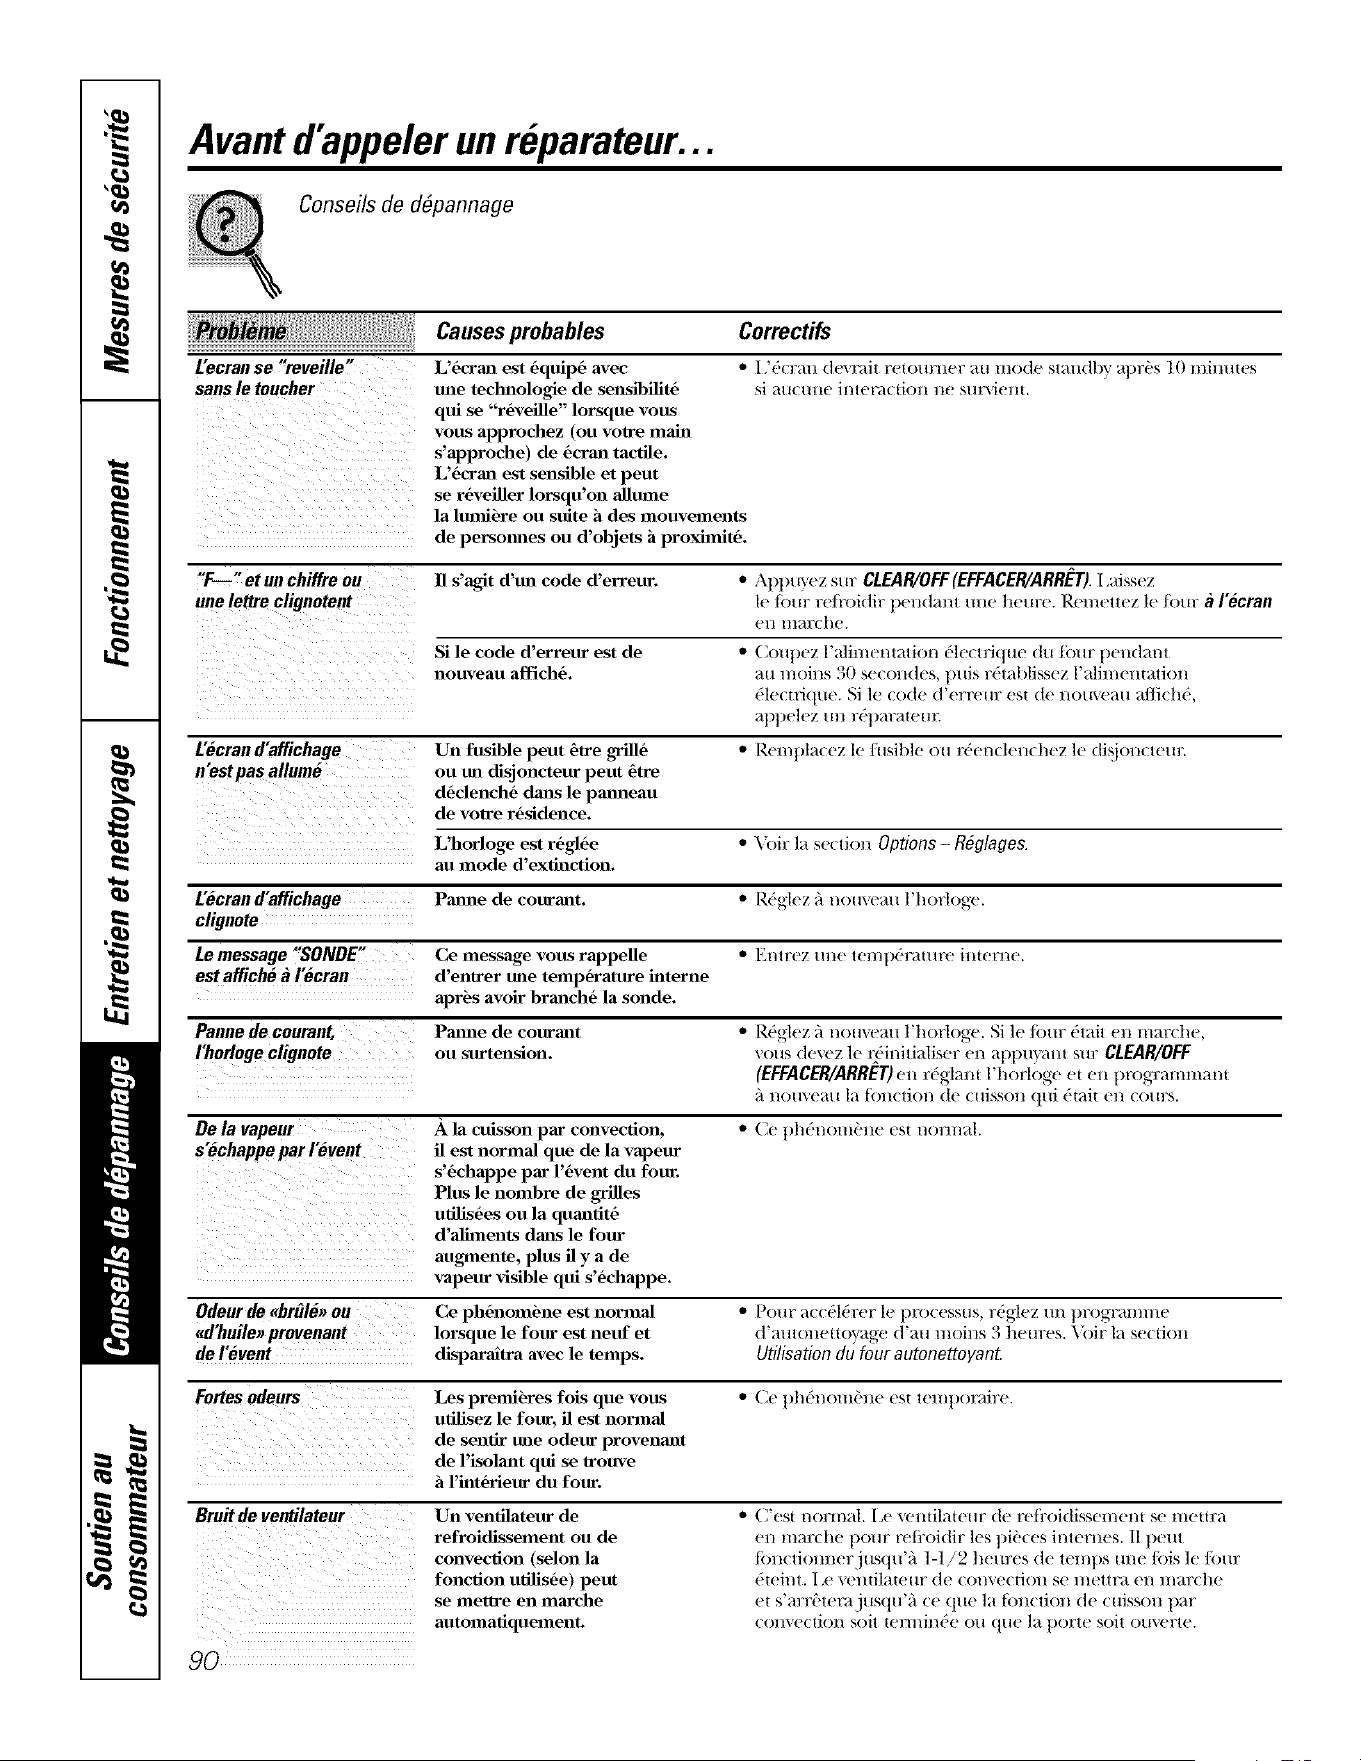
Avant d'appeler unreparateur...
Conseils de d_pannage
L'ecranse ,'reveille,
sansle toucher
Causesprobables
L'tcrml est 6quip6 avec
role technologic de seusibilit6
qui se "rtveille" lorsque vous
vous approchez (on voWe main
s'approche) de 6crml tactile.
L'tcrml est sensible et pent
se rtveiller lorsqu'on allume
la lumitre ou suite h des nlouvements
de persomles ou d'objets h prox_nitt.
Correctifs
• 1,'(*'(17_tll (Icxnfit F(ttOHI'IICl _ _t11 IIIO(IC st_llld|)_' _t])£(!s 10 lIlilllliCS
Si _t/l(/lll(? il/tCl_lctiOll 11(_ SHFX_iCll|.
,'F--"etunchiffreou 11s'agit d'ml code d'erreur. •Appu_czsurCLEAR/OFF(EFFACER/ARRET).I_aisscz
une lettre cligeotent le Ibm: reti'oidir pendm_t role hem:e. Remcttcz lc Ibm: _iI_crae
(!11 III_I1X he.
Si le code d'erreur est de • Coul)cz l'alimcntation dlc( tfi(itm ,:tu tour pendant
nonve.,a ch , sc,o,,dcs,
('lc(tri(l/le. Si ]e (od(! d'crretlr est d(! I/OlI'_(!_lil _dtl(h(',
apl)elez/Ill F('])alTatcllE
L_cran d'affichage Un fusible pent 6Ire grill6 • Rcml)la(ez lc fusible ou r('cnclcnch('z lc di@)n(teur.
n'estpas a//um_ on tm disjoncteur pent 6tre
dtclench6 dmls le pmmeau
de voWe rtsldence.
L'horloge est rtglte • Voir la section Options - R@lagos.
an mode d'extinction.
t_cran d'affichage Pmme de courmlt. • R('glez 5 nomeau l'horloge.
c/ignote
Le message "SONDE" Ce message vous rappelle • Entrcz/me tcmp(Tamre interne.
est affiche _/_cran d'entrer m_e temptrature h_terne
aprts avolr brmlch6 la sonde.
Panne de courant, Pmme de courmlt • R('glcz fi nomeau l'horlogc. Si le tkmr ('tait en marchc,
rhorloge clignote on surtension, xous (tcxcz lc rdinitialiser (!l/ al)pU_mlt sin: CLEAR/OFF
(EFFACER/ARRET)cn rdglam l'horli)gc eten progTammam
_1 I/()H_(?_t/I 1_t _()ll(tiOl/ dc (Hiss(HI (t/li ('t:ait cn (()Hrs.
De/a vapeur A la cuisson par convection, • Cc |)h('nom_'nc cst n(mnal.
s_chappe par I_vent il est normal que de la vapeur
lusS' cl'aPP°lonomb ol' ventdeg esd"
utilistes on la qumltit6
d' ,,ent d ,sle
augqnente, plus il y a de
vapeur visible qui s'tchappe.
Odeur de _brOlOJ_ou
_d'huileJ_ provenant
de I_vent
Fortes odeurs
ii i i i i i i i
Bruit de ventilateur
9O
Ce phtnomtne est normal
lorsque le four est neuf et
disparaltra avec le temps.
Les prenfitres fois que vous
ufilisez le four, il eslt normal
de sentir tree odeur provenmlt
de l'isolmlt qui se Wouve
h l'h_ttrieur du four.
Un venfilateur de
refroidissement ou de
convection (selon la
fonction utilis6e) peut
se nleHre ell lllarclle
automatiquement.
• Pour accdl('rer lc t)rocessus, r('glcz m_ t)rogramme
d'autoncttoyage d'au moius 3 bcm:es. Voir la so(don
Utilisation du four autonottoyan_
• (]C t)h('l/()lIl(!llC cs| t(?l//])Ol_iFC.
• C'est normal. I_e vcntilatcur (to r('fl:oidissclnent sc mcm:a
en marche pour rcii'oidir les t)ii'ces internes. I11)cut
t()nctionnerjusqu'fi 1-1/2 beures de temps m_e R)is le R)ur
('feint. I e v('ntilatellr (te €onvectJOll se ]/lettra el/l/l_trC]lC
et s'arri'tem.jusqu'fi ce (tuc la t()nction de cuisson par
convectiOl/soit teYI//il/('e Oil (llle 1_t porte soit OtlV(,rtc.
Garantie du four#iectrique encastre.
Toutesles r#parations sous garantie sent effectu#es
par nos Centres de r#paration ou par nos r#parateurs Mabe
autoris#s. Pour obtenir du service en ligne 24 heures par jour,
veuillez nous visiter au site electromenagersge.ca ou appelez
le no 1.800.561.3344.Veuillez foumir le num#ro de s#rie et
le hum#re de mod#le Iorsque vous appelez pour obtenir le service.
Agraphez votre regu icL
Vousdevez fournir la preuve de
I'achat original pour obtenir des
services en vertu de la garantie.
Unan
# compterde la date
d'achat d'origine
Mabe remplacera :
Toute piece du tour qui se r&_le d_lbctueuse en raison d'un vice de mafi&res
ou de tid)ficatit]n. At] corns de cette garantie limitee d_n an, nous tbtmdrt]ns
(_galement sans frais la main-d'oeuvrc et le service de r_parafion connexe
pour rcmplacer la piece d_lbctueuse.
!i_:Toute visite a votre domicile pour vous expliquer le
fonctiomlement de l'appaxeiL
::Ji::Installation, livraJson ou enlretien hmd6quats.
_: Toute d6fectuosit6 du produit lo_qu'il a 6t6 utilis6
d'tme facon abusive ou hmd6quate, ou employ6 a des
FLus commerciales ou a toute auU'e fin que celle pour
laquelle il a 6t6 conc u.
i[_?_Le remplacement des fusibles ou le r6enclenchement
des dJsjoncteurs du pmmeau de distribution de voU'e
r6sidence.
_: Tout dommage au produit attribuable atm accident, tm
hacendie, tree hlondation ou tmcas de force majeure.
::Ji::Tout dommage direct ou indirect caus6 par
tree d6fectuosit6 possible de cet appm'eil.
!_,_Dommages survenus aprbs la livraJson.
_: Le service s'il est impossible d'avoir accbs au produit
pour ce faire.
EXCLUSION DE GARANTIES IMPLICITES- Votreseul et unique recours est la reparation du produit selon
les dispositions de cette Garantie limitee. Teutes les garanties implicites, incluant les garanties de
cemmercialite et d'adequatien a un usage specifique, sent limitees a une annee eu a la periede la plus
courte autorisee par la legislation.
Cette garantie est valable pour le premier propri#taire et tout autre propri#taire du produ# s'il achet# pour utilisation
domestique au Canada. Le service _ domicile sous garantie sera fourni l& o_ il est disponible et dans les r#gions que
Mabe consid#re que I'offre de service est raisonnable.
Darts certaines provinces, fl est interdit d'exclure ou de limiter les dommages directs ou indirects. II est alors possible
que les limitations ou exclusions ci-dessus ne s'appliquent pas clans votre cas. La pr#sente garantie vous confute
des droits juridiques sp#cifiques. Vous pouvez b#n#ficier d'autres droits, qui varient d'une province _ I'autre. Pour
connafre les droits dent vous b#n#ficiez clans votre province, communiquez avec le bureau des relations avec les
consommateurs de votre r#gion.
Garant: Mabe Canada Inc.,
Burlington,Ontario
91
SoutJefi aU coflsommateur.
Site Webappareilsdectrom_nagersGE electromenagersge.ca
Vires a_ez une question ou xous a_ez besoin (|'aide pore _votre appareil (dectrom&mger? Contactez-nous
p u Inte_ net au, lte eleetromenagersge.ea 24 heures parjotu; tous lesjom_ de l'mmg_e.
Servicede r6parations
Service de rg_parations (;E est tout i)r_s de vous.
Pour fidre rg_parer votre (dectromg_nager (;E, il suttit de nous tgdg_phoner.
1.800.561.3344
Studio de conception r6aliste
Sur demande, (;E peut tournir une brochure sin" l'amg_nagement d'une cuisine pour les pel_om_es
a mobilit(_ rg_duite.
Ecfivez: Ditectetm Relations avec les consommatem_, Mabe Canada Inc.
Bm'eau 310, 1 Factory lane
Moncton, N.B. E1C 9M3
Prolongationde garantie electromenagersge.ca
A(hetez un contrat d'entretien (;E ax';mt que votre garantie n'expire et b_n_fi(iez d'un rabais substantiek
_Mnsi le serxice aprbs-vente (;E sera tot!}Otll_ la apres expiration de 1;1gm'antie.
Visitez notre site Web ou appdez-nous au 1.800.461.3636.
Pibceset accessoires
Ceux qui d(_sirent rg_parer eux-m&mes lem_ (dectromg_nage*_ petwent rece\_)ir pi&ces et accessoires
directement a la maison (calq:es VISA, MasterCard et Disco\ er accept_es).
tes directives stipulOes dans le prOsentmanuel peuvent Otre effeetuOes par n'importe quel utilisateur, ies autres
r@arations doivent gOn_ralement Otre effectu6es par un technicien qualifiO. SeFezprudent, car une r_paratien
inadOquate peut affecter le fenctiennement sOcuritaire de I'appamil.
Vous trouverez dans les i)agesj:mnes de votre ammaire le numg_ro du Centre de service Mabe le plus
proche. Autrement, appelez-nous au 1.888.261.3055.
Contactez-nous
Si vous n'&tes pas satisfidt du sets'ice apr&>vente dont x_)us avez b_ng_fid(_ :
Premi_rement, communiquez avec les gens qui ont r_par_ _)tre appareil.
Ensttite, si vous n'Otes tot!}()/lI_ })as satisfifit envovez tous les dg_tails-numg_ro de tg_lg_phone comp_is--au
Directem; ]).elations avec ]es consommatem_, Mabe (;anada Inc.
Btll'eatl 3] 0, 1 Factolw lane
Moncton, N.B. E1C 9M3
"] Inscrivezvotreappareildectrom_nager
Inserivez votre appameil &lectrom&nager en direct, aussit&t que possible. Cela aln_li(n'el'a nos
Coi/lllltlllications et llotre service apres-vellte. Foils potlvez egaleI//ellt IlO{iS ellvoyer pal" _a poste
j le formulaire d'insc_iption joint a votre documentation.
92
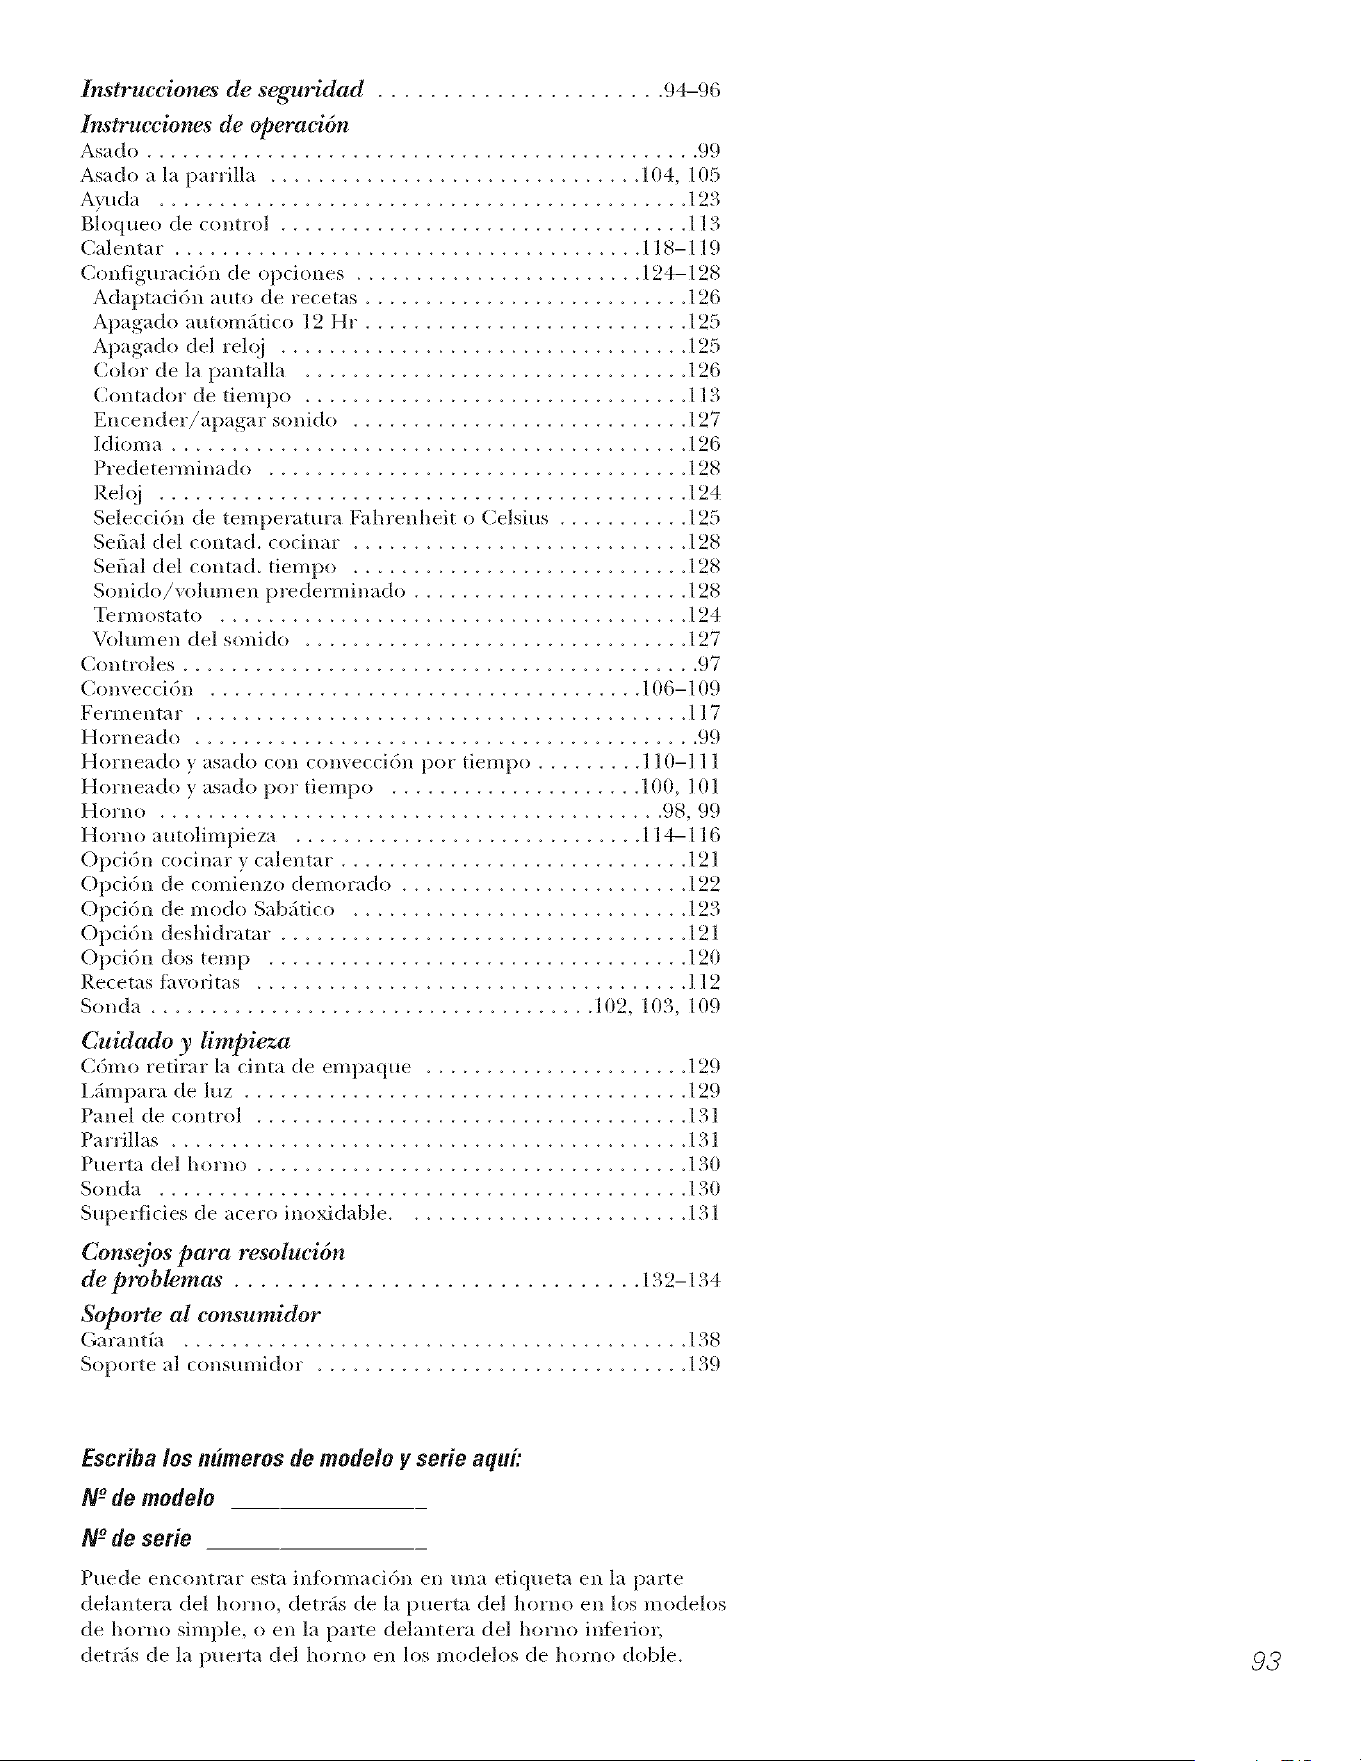
lnstrucciones de seguridad ...................... 94-96
lnstrucciones de operad6n
Asado .............................................. 99
Asado a la parrilla ............................... 104, 105
Ayuda ............................................ 123
Bloqueo de control .................................. I 13
Calentar . ...................................... 118-119
Configm'iici6n de opciones ........................ 124-128
Adaptaci6n auto de recetas ........................... 126
Apagado autonMtico 12 Hr . .......................... 125
Apagado del reloj .................................. 125
Color de la pantalla ................................ 126
Contador de tiempo ................................ 113
Encender/apagar sonido ............................ 127
Idioma ........................................... 126
Predeterminado ................................... 128
Rel oj ............................................ 12 4
Selecci6n de temperatm'i_ Fahrenheit (>Celsius ........... 125
Serial del conrad, cocinar . ........................... 128
Serial del contad, tiempo ............................ 128
Sonido/volmnen prederminado ....................... 128
Termostato ....................................... 124
V01umen del sonido ................................ 127
Controles ........................................... 97
Convecci6n .................................... 106-I 09
Fermentar . ........................................ 117
Horneado .......................................... 99
Horneado v asado con convecci6n por tiempo ......... 1 ] 0-I l l
Horneado y asado por tiempo ..................... 100, 101
Horno .......................................... 98, 99
Horn(> a utolimpieza ............................. 114-116
Opci6n cocinar v calentar . ............................ 12 ]
Opd6n de comienzo demorado ........................ 122
Opci6n de modo SabStico ............................ 123
Opci6n deshidramr .................................. 121
Opci6n dos temp ................................... 120
Recetas fhvofi tas .................................... ] ] 2
Sonda ..................................... 102, 103, 109
Cuidado y limpieza
C6mo retirar la cinta de empaque ...................... 129
IAmpara de luz ..................................... 129
Panel de control .................................... 131
Pa rrillas ........................................... 131
Puerta del h orno .................................... 130
Sonda ............................................ 130
Superficies de acero inoxidable ........................ 131
Consejos para resoluci6n
.............................. '.2)c '.2)
de problemas .1.2-1.4
Soporte al consumidor
Garantfa .......................................... 138
Soporte al consmnidor ............................... 139
Escriba los nOmems de modelo y serie aquk
N -_de modelo
N -°de serie
Puede encontrar esta inflmnacidn en una etiqueta en la parte
delantera del horno, detrils de la puerta del horno en los modeh>s
de homo simple, (> en la parte delantera de] homo inieri(>L
detlSs de la puerta de] homo en los modelos de homo doble.
93
INFORMAC/ONIMPORTANTEBE SEGUR/DAB.
LEATODAS/.ASINSTRUCCIONESANTESOEUSAR
iADVERTENCIA!
Si no se sigue exactamente la informaci6n de este manual, puede ocurrir un incendio,
una explosi6n o un cortocircuito que podrfa causar dafios a la propiedad, lesiones personales
o la muerte.
AVISO/MPORTANTEDESEGUR/DAD
La Ley de tSxicos y agua potable segura de California (California Safe Drinking Water and Toxic
Enforcement Act) exige al gobemador de California publicar una lista de las sustancias conocidas
en el estado que causan cfincer, defectos de nacimiento u otros dafios, y exige a las empresas que
alerten a los clientes sobre la exposiciSn potencial a dichas sustancias.
El aislamiento de fibra de vidrio en los homos de autolimpieza emite una pequefia cantidad de
monSxido de carbono durante el ciclo de limpieza. Puede minimizarse la exposiciSn permitiendo
la ventilaci6n con una ventana abierta o utilizando un ventilador.
94
PRECAUCIONESDESEGURIDAD
Cuando se ufilizan aparatos el6ctricos, se deben seguir las precauciones de segufidad b#sicas,
incluyendo las siguientes:
iJii:iUse este apamto finicamente pava los fines
descfitos en este Manual del propiemfio.
iJii:iAsegOrese de que su apamto sea instalado
x conecmdo a tierm co,rectamente pot
un tOcnico calificado, de acuerdo con
las instrucciones de instalaci6n suministvadas.
iJii:iNo intente repavar o reemplazar ninguna
parte de su homo a menos que este manual
lo recolniende de manem espedfica. Todos
los derails servicios de mantenimiento del)e,_n
deriva,se a un t_cnico calificado.
!?:Pida al instalador que le muestre la ubicaci6n
del cormcircuitos o filsible. Mfirquelo pare una
referencia fi_cil.
_: .M_tesde realizar cualquier se,s'icio de
manmnimiento, desconecte el suministm de
ene,gfa del homo en el panel de distribuci6n
dom_stico quimndo el fusible o apagando
el cormcircuitos.
iJii:iNo deje a los nifios sin supervisi6n; los nifios
no deben estar solos o sin supe,s'isi6n en
un ;_rea en la que un apavato est_ en uso.
No se les debe pemddr sentaL_e o pam,se
sobre ninguna de las partes del apavato.
iJii:iNo deje que nadie se suba, se pare o se cuelgue
de la pue,m. Podrian dahar el homo o suffir
lesiones peL_onales groves.
!?:Asegfirese de que el homo est_ instalado
correcmmente en un am_afio que est_ bien
sujeto a la estructum de la casa. Nunca pemdm
que alguien se trepe, se siente, se pare o
se cuelg_e de la puerto del homo.
iJii:iNunca deje la pue,m del homo abierta cuando
no est_ observfindolo.
!?:Siempre mantenga mpices, cortinas o patios
que puedan prende,se filego a una dismncia
segum del homo.
iJii:iSiempre mantenga los patios de cocina,
repasadores, guantes pava cacerolas } todo tipo
de tela a una distancia seguva de su homo.
iJii:iSiempre mantenga los utensilios de madem
} pl;istico, asi como alimentos enlamdos, a
una dismncia seguva de su homo.
iJii:iEnsefie a los nifios que no debenjugar
con los controles ni con ning_ma otto parte
del artefi_cto.
iJii:iI,os myones o impactos severos sol)re
las puerms de vidfio podrian romper
o astillar el vidfio.
iJi;:iNo guarde materiales inflamables en un homo.
pava los nihos no deben guardaL_e en ammrios
arfiba de un homo; O que los nifios podrian
suflir lesiones groves al intenmr trepa,se sobre
_1pare alcanzar los objetos.
ge.com
iADVERTENCIA!
PRECAUCIONESDESEGURIDAD
)!i!Nunca use vestiinenm floja o que cuelgue
inienti'as hace uso del apai'ato. Tenga cuidado
al intentar alcailali articulos guardados en
aimaiios sobre el horno, i,os n/atefiales
inflan/ables podrian encendeise si enti'an en
conmcto COilsui/erficies calientes o eleinentos
calefi/ctoies y podrian i/ioxocai quen/adui'as
gi'aves.
iJii:iUse finicainente guantes l/aia cacerolas que
est_n secos; los guantes hOinedos o inojados
sobre superficies calientes podrian causar
queinadui'as debido al vai/or No peimita
que los guantes entrenen contacto COil
los eleinentos calefi/ctoies calientes. No use
una toalla u otro tipo de tela xolun/inosa.
!:_;:Por su seguridad, nunca use su apaiato paia
calentar la habimci6n.
!_:No peimim que la gvasa de la cocci6n u otros
inateiiales inflan/ables se acunlulen dentro o
cerca del horno.
!';::No use agua pai,q apagar incendios COil
gi'asa. Nunca toine una cacerola que se est_
quemando. Apague los controles.
ias llam_s en el horno i/ueden apagai._e
por coinpleto al ceriar la i/uerta del horno
y apagarlo o al utiliau un i/roducto quin/ico
nmltiuso seco o un extintor de tipo espuma.
iJ_i:iNo toque los elementos cale[ilctoies ni la
sui/erficie intema del horno. Esms sui/erficies !:_:
podrian estar lo suficienteinente calientes coino
pai,q quenlar afin si estSn oscui'as. Dui,'ante iJii:i
el uso } luego de _ste, no toque ni pem/ita
que las i/rendas u otros n/ateiMes inflamables
entien ell contacto con nlngtln area lnteina iJ)i:i
del horno; deje que se enflfe i/iilneio.
i,as superficies que pueden estar calientes
inchgen: ofificios de ventilaci6n del horno,
sui/erficies cercanas a los orificios, grietas
ahededor de la i/uerta del horno, los bordes de
la ventana v los fibetes inet_licos sobre la puerta.
RECUERDE."ia superficie interna del homo
puede estar caliente al abfir la puerto.
iJi;:iNunca coloque utensilios de cocina ni otros
elelnentos en el piso del horno. Debajo del piso
del horno hay un elen/ento calefilctor Si coloca
eleinentos sobre el piso del homo, _ste i/odria
sobrecalentaise v daflaise al igual que
los am/afios.
Nunca deje fl'ascos o latas COilgi'asa de carne
asada dentro o cerca de su horno.
No guarde ni use matefiales conlbustibles,
gasolina u otros lfquidos } vai/ores inflanlables
cerca de este apavato ni ningfin otto.
Al_jese del homo cuando abia la puerta.
E1aire o vai/or caliente que sale puede causar
quen/ad/mls en las manos, la cava} los ojos.
No caliente recii/ientes de aliinentos sin abiii-
ia presi6n podi{a acuinulaise } el recii/iente
podiia exi/lotar } i/rovocar una lesi6n.
Mantenga libre la ventilaci6n del homo.
No i/eimita que se acunmle gmsa en el horno.
Coloque la pariilla del horno en la posici6n que
desee n/ienti'as el horno est_ fi%. Si es necesario
nlanipular las pariJllas cuando est_i1 calientes,
no peimita que los guantes pai'a cacerolas
entien ell contacto COil ]os elell/entos
calefi_ctores.
Cuando utilice bolsas i/aia cocinar o asar en
el horno, siga las indicaciones del fiJ)ficante.
Sacar la pan_illa hasta el tope resulta fidl
pava levantar coInidas pesadas. _mlbi_n
es una i/recauci6n pava evitar queinaise
al tocar las sui/erficies calientes de la pueim
o las paredes del horno.
No utilice el horno pare secar i/efi6dicos.
Si se sobrecalientan, pueden incendiai_e.
No utilice el horno coino fiiea de
ahnacenainiento. Los eleinentos ahnacenados
en un horno pueden incendia,se.
No deje objetos hechos de papel, utensilios
de cocina o alin/entos en el horno n/ienti'as
no est(_ell tlSO.
Luego de asara la pairilla, sieini)re reti,e
una asadeva del homo y lfinpiela, ia gi_sa
que quede en una asadei,q puede incendia,se
la i/r6xima vez que utilice la bandeja.
(lnican/ente limpie las partes enlistadas en
este Manual del propietafio.
No utilice papel de alunlinio pava revestir
la paI*e iilfbrior del horno, i,a insmlaci6n
incorrecta del papel de ahm/inio puede
i/iox_cai un riesgo de descaiga el_ctrica
o incendio.
95
INFORMACIONIMPORTANTEDESEGURIDAD.
LEATODASLASINSTRUCCIONESANTESDEUSAR
CUEZALASCARNESYELPOLLOCOMPLETAMENTE...
Cuezala came roja gde avepor coropleto.la cameroja a una temperaturaINTERNAde al roenos 160°Fy la de
avea unateroperaturaINTERNAde al menos 180°E La coccibna estas teroperaturasofreceproteccibncontra
enferroedadesde transroisibnper aliroentos.
AUTOLIMPIEZADELHORNO
No limpie el empaque de la puerto.
E1 empaque de la puerta es esencial para
un buen cien_e. Debe mnerse cuidado de
no desgastar, dmSar o mox>r el empaque.
No utilice limpiadores. Ningfin limpiador
come,vial para hornos ni ningmm cubierm
promctora para homos debe udlizarse
dentro o ahededor de las parms del homo.
Los residuos de los limpiadores de homos
dmSar_in el inm_ior del homo cuando
se uolice el ciclo de aumlimpieza.
;f; Antes de la autolimpieza del homo,
remueva la sonda, cualquier cacerola para
asa_, panqlla y ouos umnsilios de cocina.
_f;Antes de comenzar un ciclo de
autolimpieza, asegdrese de limpiar
con un trapo los delxames.
_f;Si el modo de autolimpieza no flmciona
bien, apague el homo y desconecm
el suministro de co_xiente. Haga que
un t_cnico calificado realice la reparaci6n.
LEAYSIGAESTAINFORMACIONDESEGURIDAD
CUIDADOSAMENTE.
GUARDEESTASINSTRUCCIONES
96
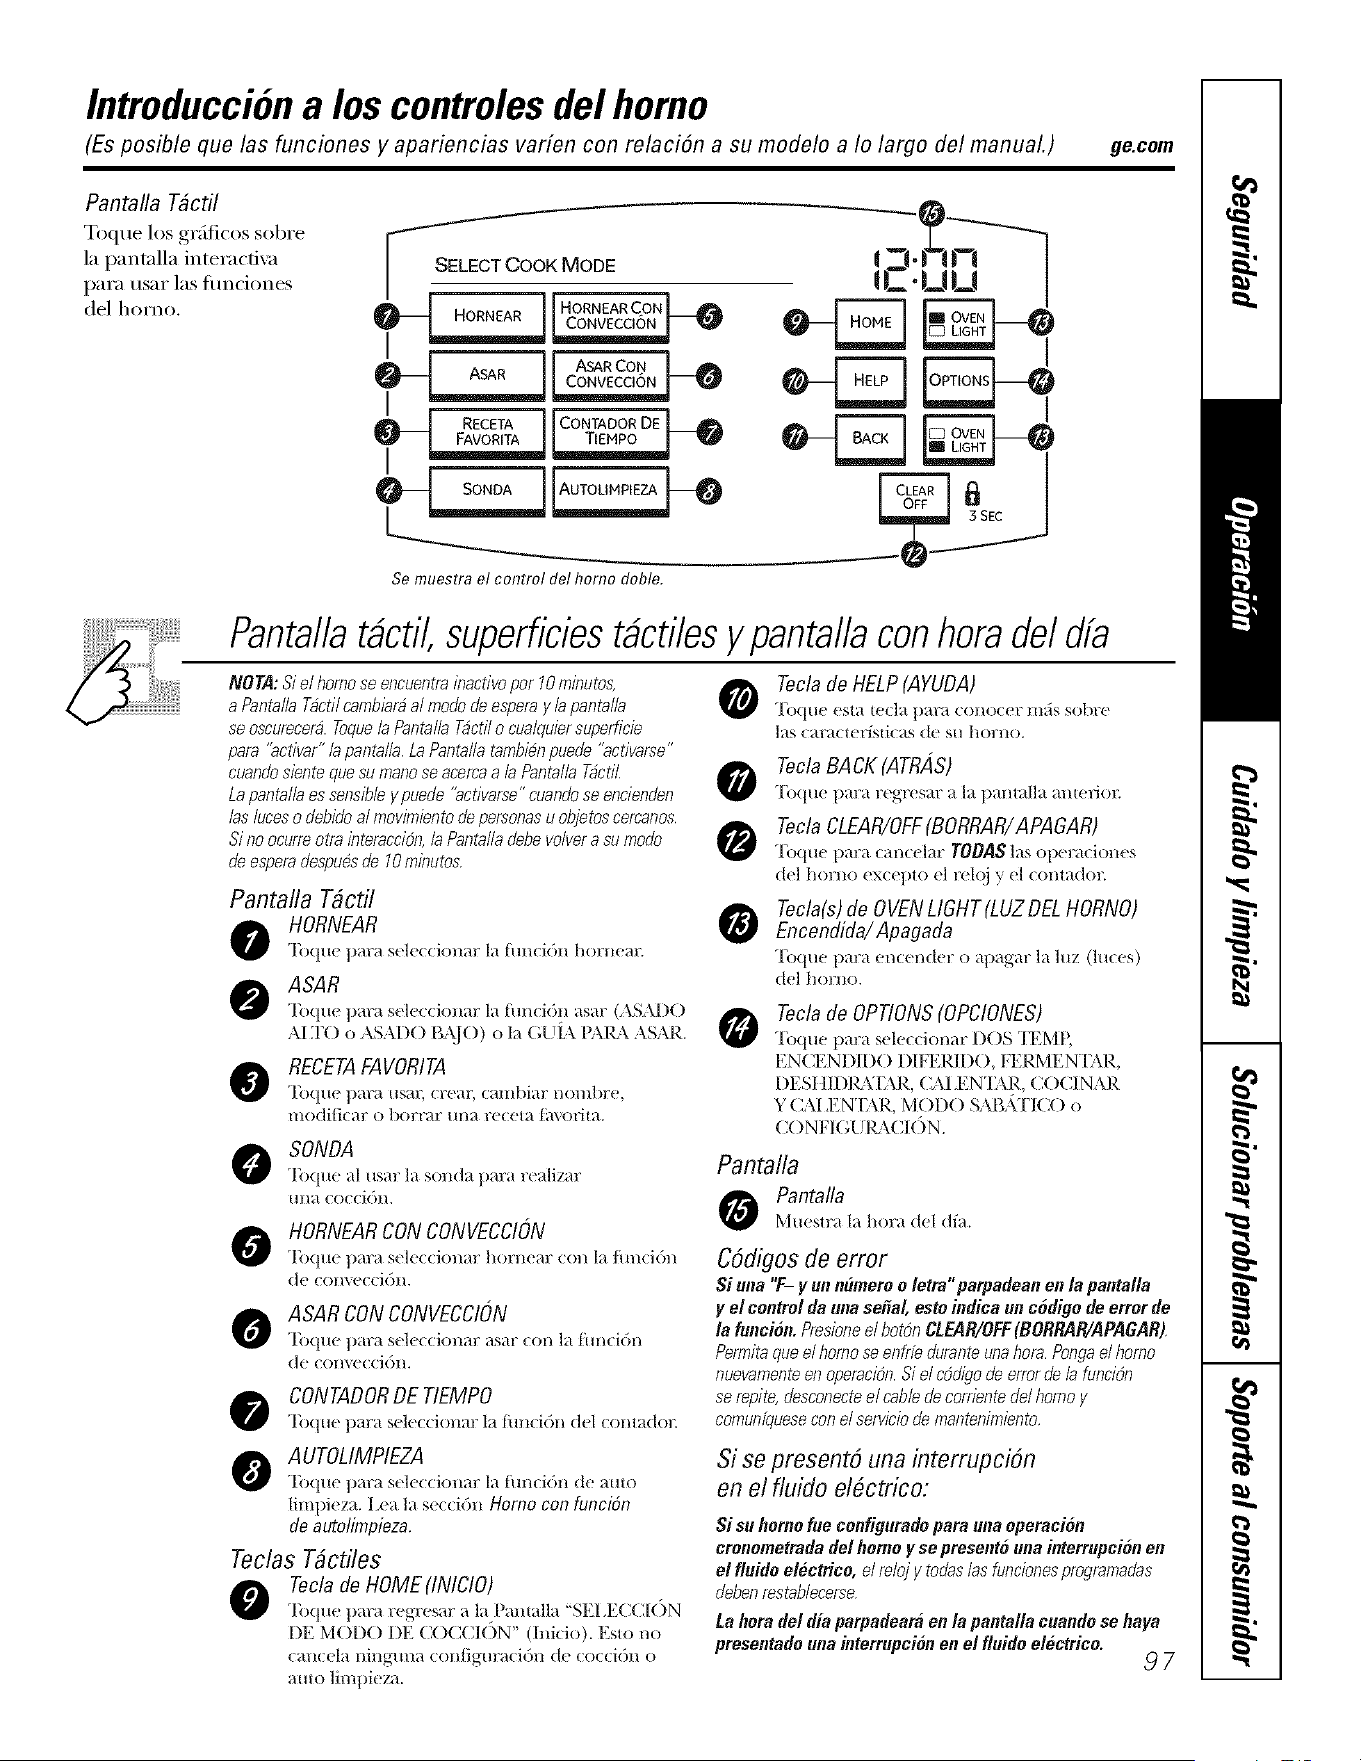
Introducciona los controlesdel homo
(Es posible que las funciones y apariencias varien con relaci6n a su modelo a Io largo del manual.)
ge.com
Pantalla T#ctil
Toque los gI';_ficos sobre
la pantalla interacfi\:_
para usar las fimciones
del homo.
SELECT COOK MODE
k Rco.
- - ASAR CON "
_J RECETA J JCONTADORDE j
Se muestra el control del horno doble.
Pantal/at#cti/,superficiest#cti/esy pantal/aconheradel dfa
NOTA: Siel horno se encuentrainactive per 10 mbutos,
a Pantalla Tacfil cambiara al mode de espera y la pantalla
se oscurecera. Toquela Pantalla Tactilo cuakluier superficie
para "acfil/ar" lapantalla, LaPantalla tambien puede "activarse"
cuando siente que su mane se acerca a/a Pantal/a Tact//,
La pantalla es sensible y puede "activarse" cuando se encienden
/as luces o debido al movirniento de personas u objetos cercanos,
Sino ocarre otra interacci6n, /a Panta//a debe volver a su mode
de espera despu#,,sde 10 minutes,
Pantalla T#ctil
HORNEAR
TO(Ill( })aYa SOI(X (:iollar 1_1_[ll/(i()l/ hol?llOay.
ASAR
']b(lUC para s_ kcdonar la tunddi_ asar (ASAD()
AI ;1"() o ,\S \D()I_AJ()) o la (,,[i L\ E_,/L _,\SAR.
RECETAFAVORITA
To(l/le l)ara Hsar, (real', (:;_ill[)iar l/()1/l])Fe,
l/lOdi[i( _ir 0 borl;_il;/ll/_/]'(!((!1_t _/_,Ol'i|_/.
SONDA
Toque al usar la sonda para realizar
una (oc(idn.
HORNEARCONCONVECCION
"]'oqu( para s( Iccci(mar hornear con la thncidn
(IC (X)I/'_ (!(X i(_)l/,
ASARCONCONVECCION
To(l/te ])ara s( ]e( (:iollar aSal? (Ol/I_i _Hl/(:i()l/
(1(! CO1/'_ (!( (J()l/.
CONTADORDE TIEMPO
']'oquc para sdc((i(mar la tun(idn dcl (onlador.
AUTOLIMPIEZA
To(lUC para sel_ c(:ionar la tun(idn (le auto
limt)ieza. I,ea la s(((i6n Homo con funcibn
de autolimpieza.
Teclas T#ctiles
Teclade HOME(INICIO)
"]'O(lUUpara rcgrcsar a la)_anlalla "SH ,E(;(;[(')N
DE MOD() I)E C()CCR )N" (hdcio). Esto no
can{ (la ningima conligm'avidn de (oc(idn o
auto limpk za.
Teclade HELP(AYUDA)
"['oqtl(' ('st_t t(.cl_t ])_r;_ ('OHO((T Iliads so[)£('
bts caracte_Ssdcas de su homo.
ToclaBACK(ATRAS)
Toque I)m:a regrcsm: a la panmlla ant(.rio_
TeclaCLEAR/OFF(BORRAR/APAGAR)
Toque t)m:a canc('lm: TOBAS las OlX'radoncs
del homo excepto el rcloj y el contador.
Tecla(s)de0 VENLIGHT(LUZDELHORNO)
Encendida/ Apagada
Toque I)m:a cnc(,ndcr o apagm: la luz (hw('s)
del homo.
Teclade OPTIONS(OPCIONES)
"Ibquc 1)m:a sclc(cionm: DOS TEMR
ENCENDII)() DIH(IdDO, FHO.MEN'E_\R,
DESItlD]*L\E\R, (2\I.EN'IAR, C()CINAR
Y (:\l _EN'E\R, MOIl)() S,\B,{F1C() o
C( )NF1GU I*b\C[()N.
Pantalla
Pantalla
Mucslra la hora dcl d/a.
Cddigos de error
Si una "F- y un nomero o letm" parpadean en la pat#alia
y el control da una se#a/, esto indiea un o6digo de error de
/a funci6n. Presionee/bot6n CLEAR/OFF(BORRAR/APAGAR).
Permita que el horno se enfrie durante una hera. Ponga el homo
nuevamente en operaci6n. Si el cddigo Lie error de la funci6n
se repite, desconecte el cable de corriente de/horno y
cornunfquesecon el servicio de mantenimiento,
Si so present6 una interrupcidn
on el fluido el#ctrico:
$i su homo rue oonfigurado para mm operaci6n
omnometmda de/homo y se pmsento una hltermpci6n en
el fluido eleetrieo, el reloj y todas /as funcionesprogramadas
deben restablecerse,
ta hera de/dia parpadear# en la pantalla cuando se haya
pmsentado una interruption en e! fluido electrico.
97
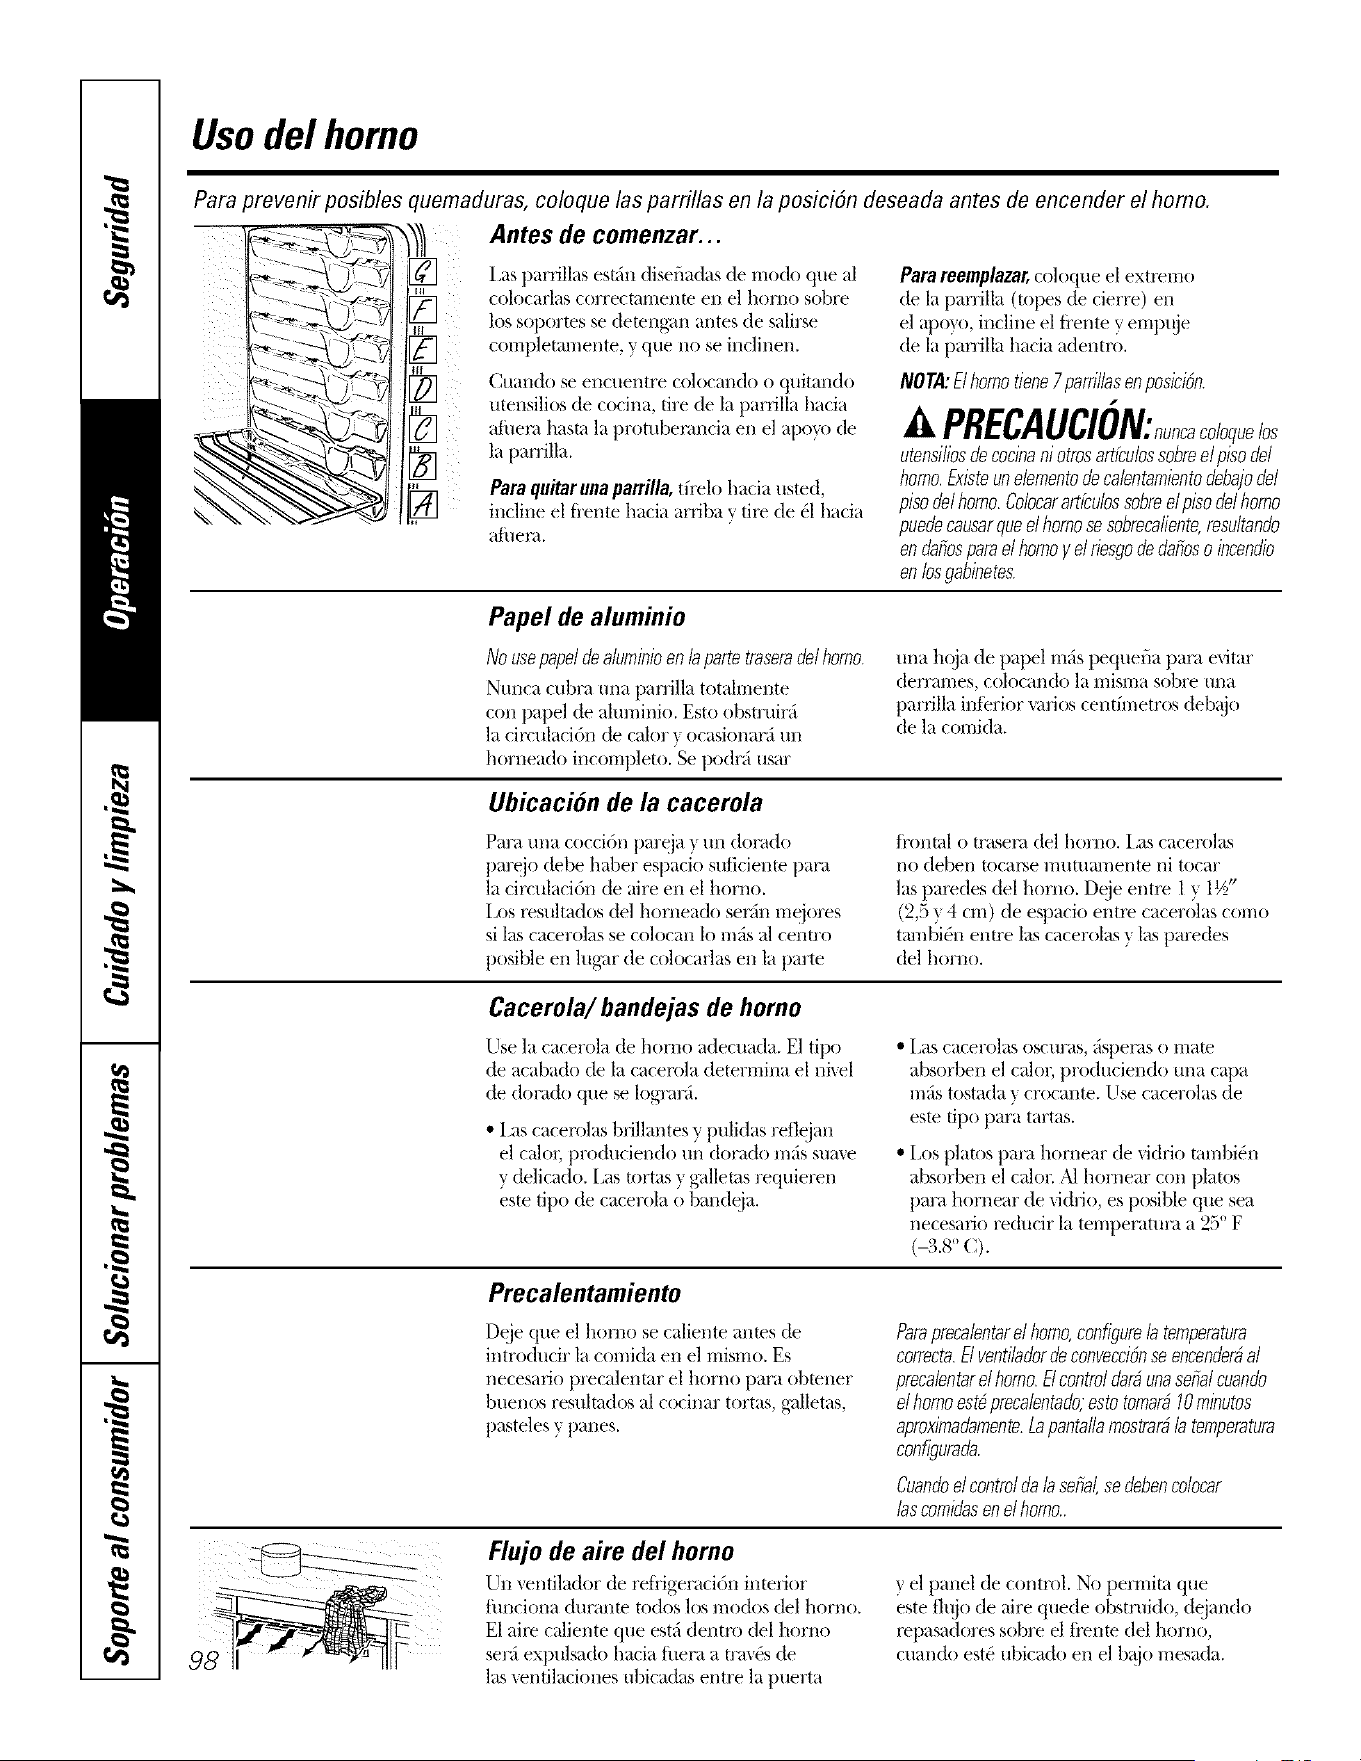
Usodel homo
Para prevenir posibles quemaduras, coloque las parrillas en la posici6n deseada antes de encender el homo.
ii
Antes de comenzar...
i,as parrillas estfin disefiadas tie rflodo que al
colocarlas correo[:drrlell[e ell e] hor/lo sobre
los soportes se de[en<gm/antes tie salirse
corrlpletamente, y que no se indinen.
Cuando se encuentre colocando o quitando
utensilios de cocina, fire de la parrilla hacia
afisenl hasta la prombenmcia en el aposa) de
la pan'ilia.
Paraquitarunaparri//a,th'elo hada usted,
incline el fl'ente hacia arrlba v tix_ tie _1hacia
afuel';i.
Parareemplazar,coloque el extremo
de la pan'ilia (topes de cierre) en
el apo}o, incline el tJ'ente y empt!je
de la pan'ilia hacia adentro.
NOTA:Elhomotiene7 parrillasenposicidn.
PRECAUCION:n.ncaco<.elos
utensiliosdecocinani otrosarticulossobreel pisode/
homo.Existeunelementofie calentamientoflebajode/
pisoflelhomo.Colocararticulossobreel pisofielhomo
pueflecausarqueelhomosesobrecaliente,resultanflo
en flariosparael homo/ el riesgofieflarioso incenflio
en losgabinetes.
Papel de aluminio
No usepapeldealuminioen b partetraseraflelhomo.
Nunca cubra Ulla parfilla totalmente
con papel de aluminio. Esto obsn uirfi
]a circulaci6i_ de calorv ocasionarfi tm
horneado incorripleto. Se podrfi usar
una hoja de pal)el 1-i-i;:/spequefia panl evitar
derral-i-ies, colocando la nliSl-i-iasobre ilna
parrilla interior ratios centfinetros debajo
de la comida.
Ubicacion de la cacerola
Para una coccidn pareja y un dorado
parejo debe haber espacio suticienw para
]a circulacidn de aire en el horno.
I,os x>sultados del horneado senln mejores
si las cacerolas se colocan lo mils al centro
posible en lug_lr de colocarla.s en la parte
tionml o trasenl del homo. i,as cacerolas
i/o deben tocal_e l//ii[t/al//ente ni tocar
las pal>des del homo. Deje entre 1 _,1½"
(2,5 } 4 cm) de espacio entre cacerolas con/o
tamN(_n entre las cacerolas t las paredes
del homo.
Cacerola/ bandejas de homo
Use la cacerola de homo adecuada. El tipo
de acabado de la cacerola determina el hi, el
de dorado que se lograrfi.
• i as cacerolas brillantes y pulidas reflejan
el calo_; produciendo un dorado mils stl;:l_,e
v delicado. [_as tortas y g;dlems requieren
este tipo de cacerola o bandeja.
• I,as cacel'olas oscuras, _spems o 1Tia[e
absorbei_ el calo_; produciendo tlna capa
mils tostada v crocante, Use cacerolas tie
esm tipo para tartas.
• i,os platos para homear de vidrio mmbiOn
absorbei_ el calol: ,M hornear con platos
para hornear de vidi]o, es posible que sea
necesarlo reducir la temperatura a 25° F
(4.8" C).
Precalentamiento
Deje que el homo se caliente antes de
introducir la comida en el mismo. Es
necesario precalenmr el horno para obtener
buenos resulmdos al cocinar tortas, g_alletas,
pasteles y palms.
Paraprecalentarel homo,configure/atemperatura
correcta.El ventilaflordeconvecci6nseencender_al
precalentarel homo.Elcontrolflar_,unaserialcuanflo
elhomoestOprecalentaflo;estotornar_,10minutos
aproximadamente./_apantallamostrar_la temperatura
con@urafla.
Cuanfloel controlfialaserial,seflebencolocar
/ascomidasenelhomo..
Flujo de aire del homo
Un ventilador de retJ'igeraci6i_ interior
flmciona duranm todos los modos del horno.
E1aire c_fliente que estfi dentro del horno
sel'klexpulsado hacia fllera a [r;:lv0sde
las ventilaciones ubicadas entre la puerta
v el panel de control. No permim que
este tlujo de aire quede obstmido, dejando
repasadores sobre el ti'ente del homo,
cuando est_ ubicado en el k!jo mesada,

Horneary asar ge.com
$51o en mode!os de homo doble.
r-qr-qDDD
[-qDDDD
NOTA: es posible que se encienda
autom#ticamente un ventilador de
enfriamiento para refrigerar las
partes intemas. Esto es normal, y el
ventilador puede continuar andando
hTcluso despu#s de apagar el homo.
Como configurar el homo para homear
[] Toque HORNEAR
[] Enmodelosdehomodoblesolamente,
toque HORNOSUPER.u HORNO
INFER.para seleccionar el homo
deseado.
] moqt/e los nt/illei'os p[lI'a pI'ogI'[lIIl[lI"
la temperatm'a deseada.
[] Toque ACEPTAR
[] Toque INICIAR.
E1 ventilador de conveccidn se en(ender_i
al precalentnr el homo. E1 control (lar_i
tma serial ctmndo el homo est(_
precalentado; esto tomar_i 10 minutos
aproMmadamente. I,a pantalla mostrar_i
la temperatm'a configm'ada.
Cuando el control da la serial, se deben
coloc_lI" l_ls coII/id_ls en el hoYno.
En modolos de homo doble solamento,
[ )_1 I'_1 [ )I'()gI'_lI//_1I', el segundo, hoi'no,
seleccione OPRIMAPARASELEC.
OPCIONESHORNOINFERIORu OPRIMA
PARASELEC.OPCIONESHORNOSUPERIOR
seg(m sea necesario y siga los pasos
anteiJoi'es.
Ia tern I)eratm'a configm'ada, se puede
cambiar tocando CAMBIAR TIEMPO-
TEMP.
o asar
Posicion
]ipo de comida de la parrilla
Pasteles congelados C o D
(sobre una bandeja para hornear)
Torta ligera (angel cake) A
Tarta de libra o Bundt B o C
Bizcochos,muffins, C o D
brownies, galletas,
pasteles individuales
en capa, bizcochos,pasteles
Guiso C o D
Si hornea cuatro capas de pastel al
II/iSIIlO tiei/lpo, coloque dos capas en
la parfilla B y dos capas en la parfilla D.
Ubiqtle las cacerolas en la pan_illa
de tnl t0mm que tma no est_ colocada
direcmmente sobre la otra.
Ia configm'aci6n se puede cancelar
tocando CANCELAR
E1con[;ldoi" se puede pI'ogI'_lIIl_lI" [OC_lndo
PROGRAMARCONTADORDE TIEMPO.
I,ea la secddn Contador de Tiempo.
[] Constflte el fiempo mfnimo de
coccidn de tma recetn. Cocine
din'ante mils tiempo si es necesafio.
[] Toque CANCELARcuando la coccidn
est_ completn.
iEI tipo de margarina afectara el desempe#odel horneado!
La mayorfa de las recetas para homear se han desarroflado usando pmductos de alto contenido on grasa como
mantequilla o margarina (80% de grasa). Si disminuye la grasa, es posible que la receta no tenga los mismos
resultados que con un producto de mayor contenido de grasa.
Las recetas pueden fallar si las tortas, pasteles, galletas o dulces se preparan con productos bajos en grasa.
Mientras menos sea el contenido de grasa de un producto tipo mantequilla, m#s se notar#n estas diferencias.
I,os est:hldares tedeI'ales exigen que los productos ill_li'('_ldos ('()Ill() Ill_lI'g_lIJIl_lS, ('onteng_ln poi" lo illenos tin 80%
de grasa pot peso. Pot otra parte, los productos tipo manteqtfilla bajos en grasa contienen menos grasa y mils agua.
E1 alto contenido de humedad de estos procltlctos afecta la textm'a y el sabot de los alimentos horneados. Para mejores
resultndos con sus viejas recetns th\'o_itas, use ma_ga_ina, manteqtfilla u otros productos clue contengan pot lo _
menos un 70% de aceite vegetal.
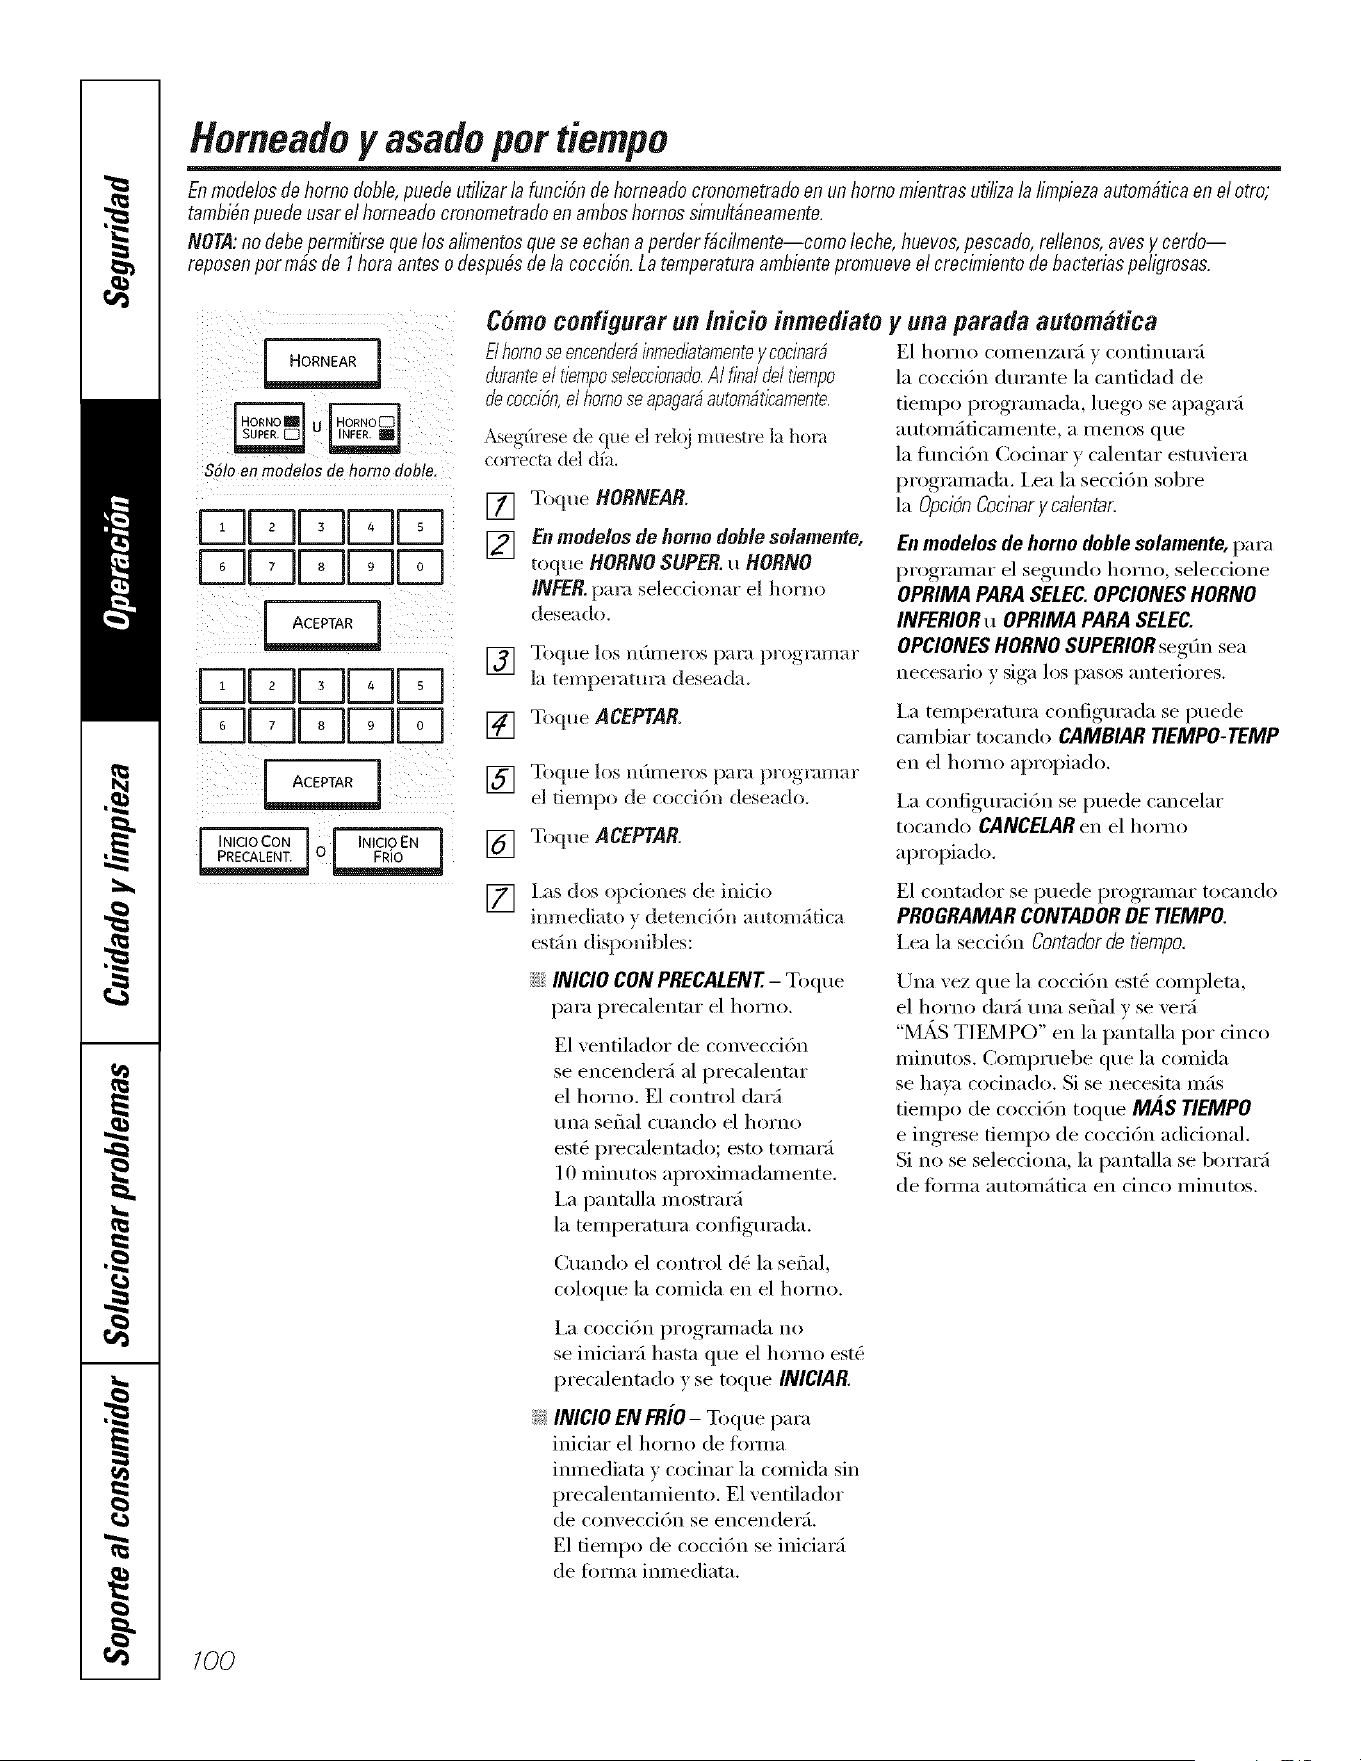
Horneadoy asadopot tiempo
Enmodelosdehomodoble,puedeutilizerle funciSnde horneadocronometredoenunhomomientresutilizele limpiezeeutom#ticaenel otro;
tambi#npuedeuserel homeadocronometradoenamboshomossimult#neamente.
NOTA:nodebepermitirsequelosalimentosquese echana perderf#cilmente--comoleche,huevos,pescado,rellenos,evesy cerdo--
reposenporm#sde 1horaanteso despu#sdela cocciSn.Latemperatureambientepromueveel crecimientodebacteriaspeligrosas.
$51oen modetos de homo doble.
iFqFqr-qFqFq
ir-qFqr-qr-qr-q
i i ii
rqqrq ¸
Dr-qrqDD ¸
% ii
I JNICIOCON i _ INICIOEN
PRECALENT 0
Como confLgurar un Inicio inmediato y una parada automatica
Elhomoseencenflerbinmediatamenteycocinar#
fluranteeltiemposeleccionafio.AIfinaldeltiempo
decocci6n,elhomoseapagadautombticamente.
A,_eg(lrese de clue el relQj nluestre la horn
correcta del d[a.
[]
[]
Toque HORNEAR
Enmodelosde homo deblesolamente,
toque HORNOSUPER.u HORNO
INFER.pm'a seleccionm" el horno
deseado.
] Toqtle los ll{_lIl/el'os p;ll';/pl'ogi';/n/[ll"
]a temperatm'a deseada.
[] Toque ACEPTAR
] Toque los nI_lI/leI'os paI';l pl'ogi';/n];ll"
el tiempo de coccidn deseado.
[] Toque ACEPTAR
E1 hoI'no COil/eiiz;li';/v Coiltiilll}li';/
la cocd6n din'ante la cantidad de
tiempo programada, luego se apagar;_
_ltl[Oill;/ticail/eilte_ _1 i/lenos que
la flmcidn Codnar v calentnr esmviera
programada. I,ea la secci6n sobre
la OpcibnCocinarycalentar.
Enmodelosdehomodoblesolamente,para
programar el segm_do homo, selec(-ione
OPRIMAPARASELEC.OPCIONESHORNO
INFERIORu OPRIMAPARASELEC.
OPCIONESHORNOSUPERIORseg(m sea
necesaiJo y siga los pasos anteiJores.
I,a temperamra configm'ada se puede
caml)iar tocando CAMBIARTIEMPO-TEMP
en el homo apropiado.
I,a configm'acidn se puede cancelar
tocando CANCELARen el homo
apropiado.
[] Ias dos opciones de inicio
imnediato } detenci6n autom_tica
estSn disponibles:
El contador se puede programar tocando
PROGRAMAR CONTADOR DE TIEMPO.
i,ea la secci6n Contador do tiempo.
::Ji::INICIOCONPRECALENT- Toque
para precalentnr el homo.
El ventilador de convecci6n
se en(ender_ al pre(alentnr
el homo. E1 control (larfi
tma serial cuando el homo
est(_ precalentndo; esto tomar_i
l 0 Ininutos aproximadamente.
I,a pant;ilia mostrar_i
la temperamra configm'ada.
Una vez que la cocci6n est_ complem,
el homo dar;i tma serial v se ver;i
"M_S TIEMPO" en la pantnlla pot cinco
minutos. Compruebe que la comida
se ha_:_ cocinado. Si se necesita mils
tiempo de cocci6n toque MAS TIEMPO
e ingrese tiempo de coccidn adicional.
Si no se selecciona, la pantnlla se l)orrarfi
de fimna mKomffica en cinco minutos.
Cuando el control (l_ la serial,
coloque la coillida en el hoYno.
I,a cocci()n pi'ogi'ai//[id[i no
se inicimfi hasm que el homo est_
precalentndo } se toque INICIAR
!;_:INICIOEN FRiO- Toque para
iniciar el homo de flmna
imnediam _ c(xinar la comida sin
precalentnmiento. E1ventilador
de comeccidn se encenderfi,
E1 fiempo de cocci6n se iniciarfi
de fimna imnediata.
100
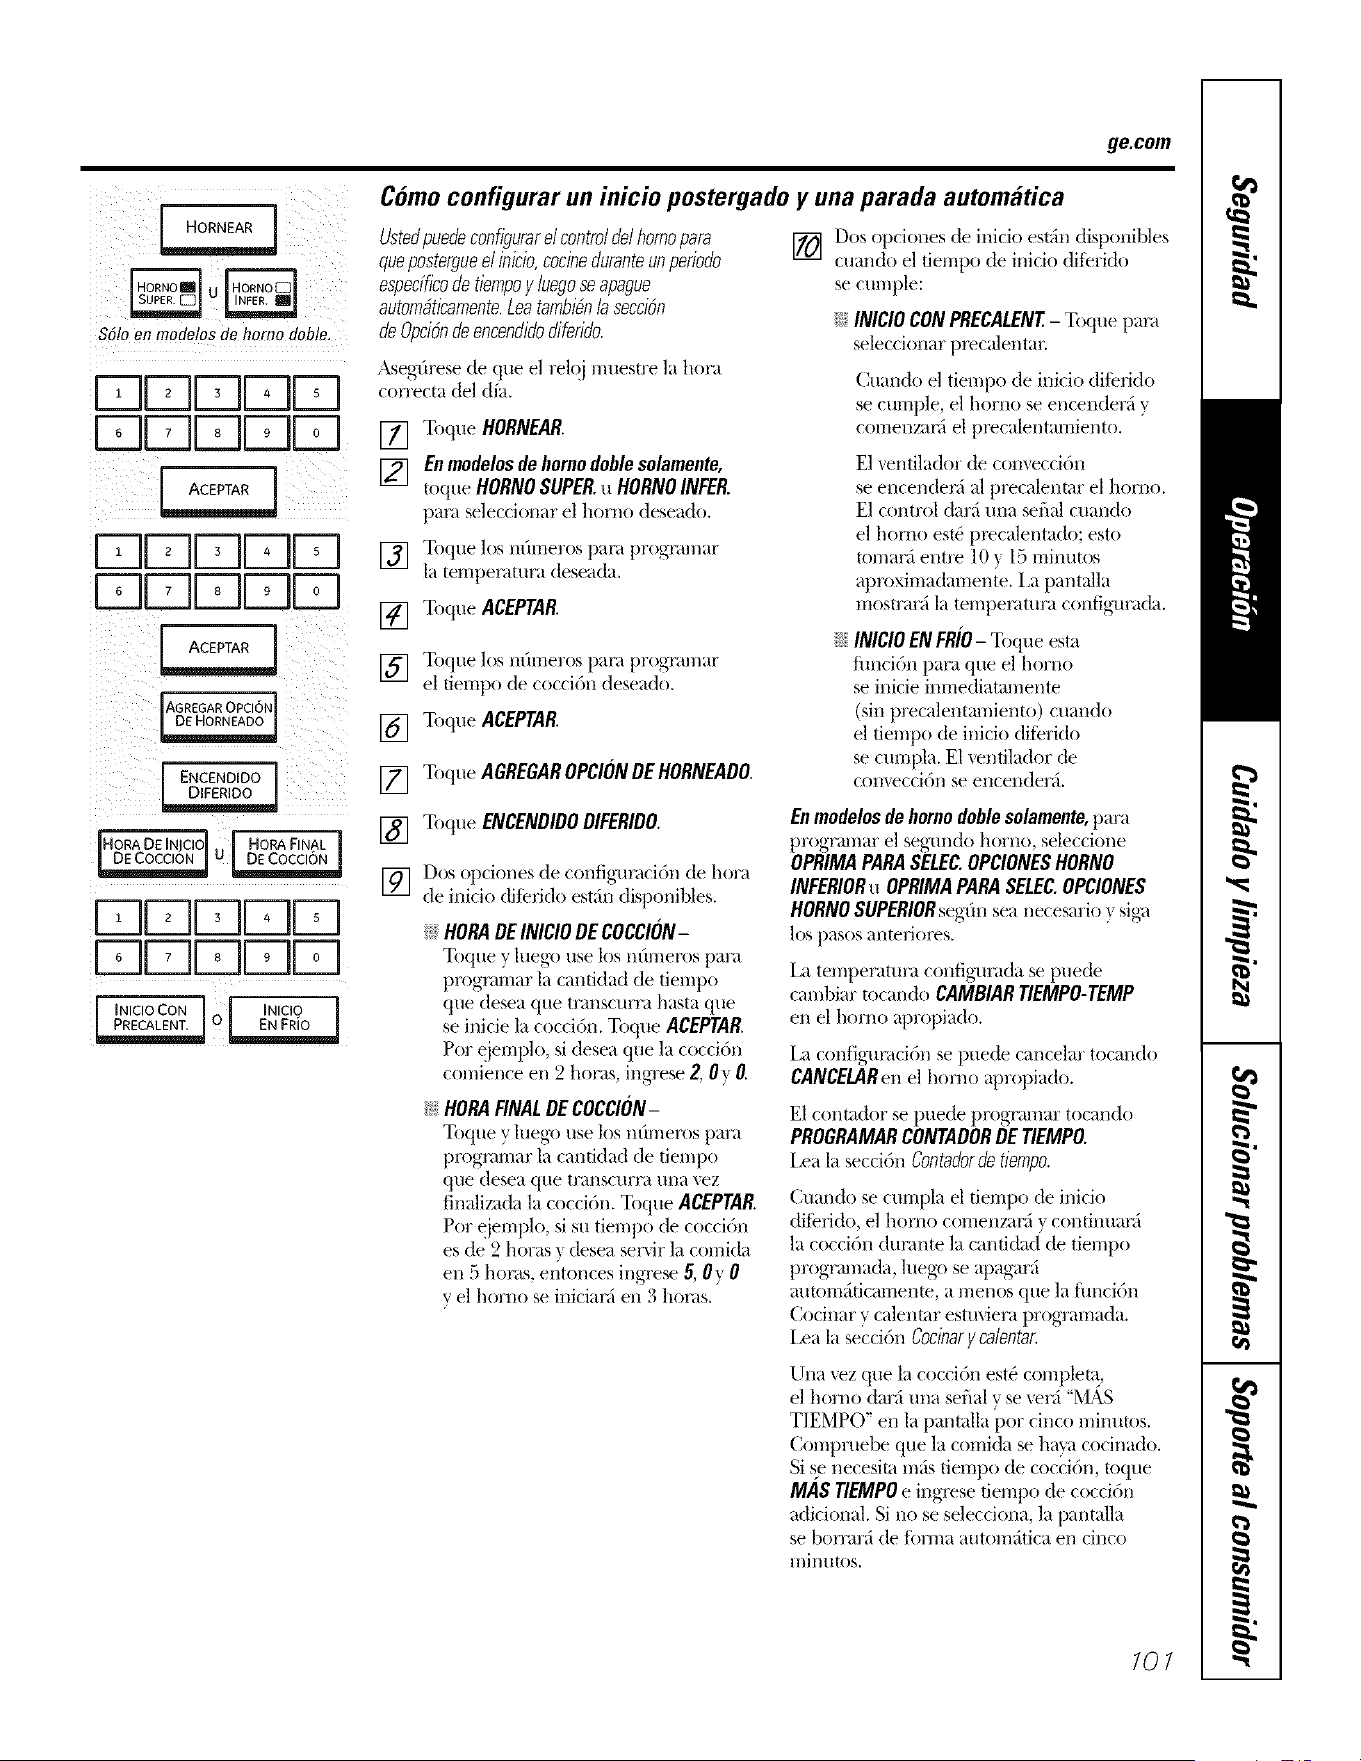
$61oon modetosde homodoble.
FqFqFqFqF-q
FqFqFqFqFq []
[]
FI Fq Fq []
r-qr-qr--qr-qr--q[]
[]
JAGREGAROPC,6NI []
ENCENDIDO 1
[HORADEINJC,OI[ HORAFINAL I []
-- []
DDDDD
DDDDD
INICIO CON I [ INICIO ]
ge.com
Como configurar un inicio postergado y una parada automgltica
Usteflpueflecon@urarelcontrolfie/homopara
quepostergueel inicio,cocinefluranteunperiMo
especfficofie tiempoy luegoseapague
automDticamente.Leatambi#n/asecci6n
fie Opci6nfieencenfliflofliferiflo.
Asegfirese de que el reloj muestre la hora
c/tn'ecta del d{a.
Toque HORNEAR.
Enmodelosde homodoblesolamente,
toque HORNOSUPER.u HORNOINFER.
pan, selecdolmr el horno deseado.
Toque Ills n(tl-l-leros panl pr/lgnunar
la tempenmtra deseada.
T(ique ACEPTAR.
Toque los n(tl-l-leros pan, t)r/lgnunar
el tielrlpo de C/tccidI_ deseado.
Toque ACEPTAR
Toque AGREGAROPCIONDEHORNEADO
Toque ENCENDIDODIFERIDO
Dos/tpciones de eonfigun,ei(m de h/tra
de inicio (hfelid/t est_hl disponibles.
!(: HORADEINICIODE COCCION-
Toque y luego use los netmer(_spara
pl'ogrmTi;:u"la cantidad de tiempo
que desea que t/'_lI/SOll/Tahasta title
se inicie la c/tccidn. Toque ACEPTAR
P/tr eierr@/t, si desea que la c/tcci6n
comienee en 2 horas, ingrese 2, 0_ 0.
!(: HORAFINALDECOCCION-
Toque y luego use los nfimer(is para
progrmTi;:u"la cantidad de tiemp/t
que desea que transcurra una vez
finalizada la coccidn. Toque ACEPTAR.
P/tr eiernplo, si su tiempo de e/tcddn
es de 2 horas v desea servir la comida
en 5 hill;is, elltonces ingTese 5, 0_, 0
v el h/lrno se iniciani en 3 honls."
[] Dos opci/tnes de inicio estfin disponil)les
cuando el tiemp/t de inicio diterido
se CUlnl)le:
iJi::INICIOCONPRECALENT- Toque par<l
seleccionar prec_flentar.
Cuando el tiempo de inici/t diferid/t
se CUl-l-lple,el h/trno se encenderfi v
c/tmenaml el precalental-rliento.
El venfilador de c/tnvecci6n
se encenden1 al precalentar el homo.
El contr/tl darfi una seri_flcuando
el hor/K_ est4 prec_flentado; est/t
tomarfi entre 10 v 15 rain ut/ts
aplx_Xil-riadal-riente,i,a pantalla
lnOstrarfi la ten/l)er, itura c/tnfigurada.
iJi;:INICIOEN FR]O- Toque esta
fllnddn para que el h/trno
se inicie im-rlediatamente
(sin precalentamiento) cuand/t
el fiemp/t de inicio dilerido
se cumpla. E1 _entilador de
comeccidn se encenderfi.
Enmodelosdehomodoblesolamente,para
pr/lgrmnar el segundo homo, seleccione
OPRIMAPARASELEC.OPCIONESHORNO
INFERIORu OPRIMAPARASELEC.OPCIONES
HORNOSUPERIORseg-(ln sea neeesario } sig;i
Ills pas/lS anmd/lXeS.
I,a telnperatm'a c/tnfig-m'ada se puede
calnbiar tocando CAMBIARTIEMPO-TEMP
en el horn/1 apr/tpiado.
I,a configunici6n se puede cancelar tocand/t
CANCELAReI; el hom/t apr/lpiado.
E1contador se puede programar tocand/t
PROGRAMARCONTADORDETIEMPO,
i,ea la seccidn Contaflordo tiempo.
Cuando se CUl-riplael demp/t de inicio
difesid/t, el hllr/_o CltlTienzar,l Vcolltinuar,i
la C/tCcidn dunmte la cantidad de tiempo
pr/tgramada, hlego se apaffarfi
mltOl-r@ticameI_m, a men/ts que la flmcidn
Cocinar y calenmr estuviera programada.
[,ea la seccidn Cocinary calentar.
Una vez que la c/tcci6n est4 completa,
el h/lrno darfi una serial v se verfi "lVbkS
TIEMPO" en la pantalla i)/tr cinco minutos.
Compmebe que la comida se hKv,J cocinad/t.
Si se necesim mils fiemp/t de cocci6n, U)que
MASTIEMPOe ingl_se tiemp/t de C/tccidn
adicional. Si no se selecciona, la pantalla
se b/lrrarfi de tbnna automfitica en cinc/t
l//iI/II[OS.
707
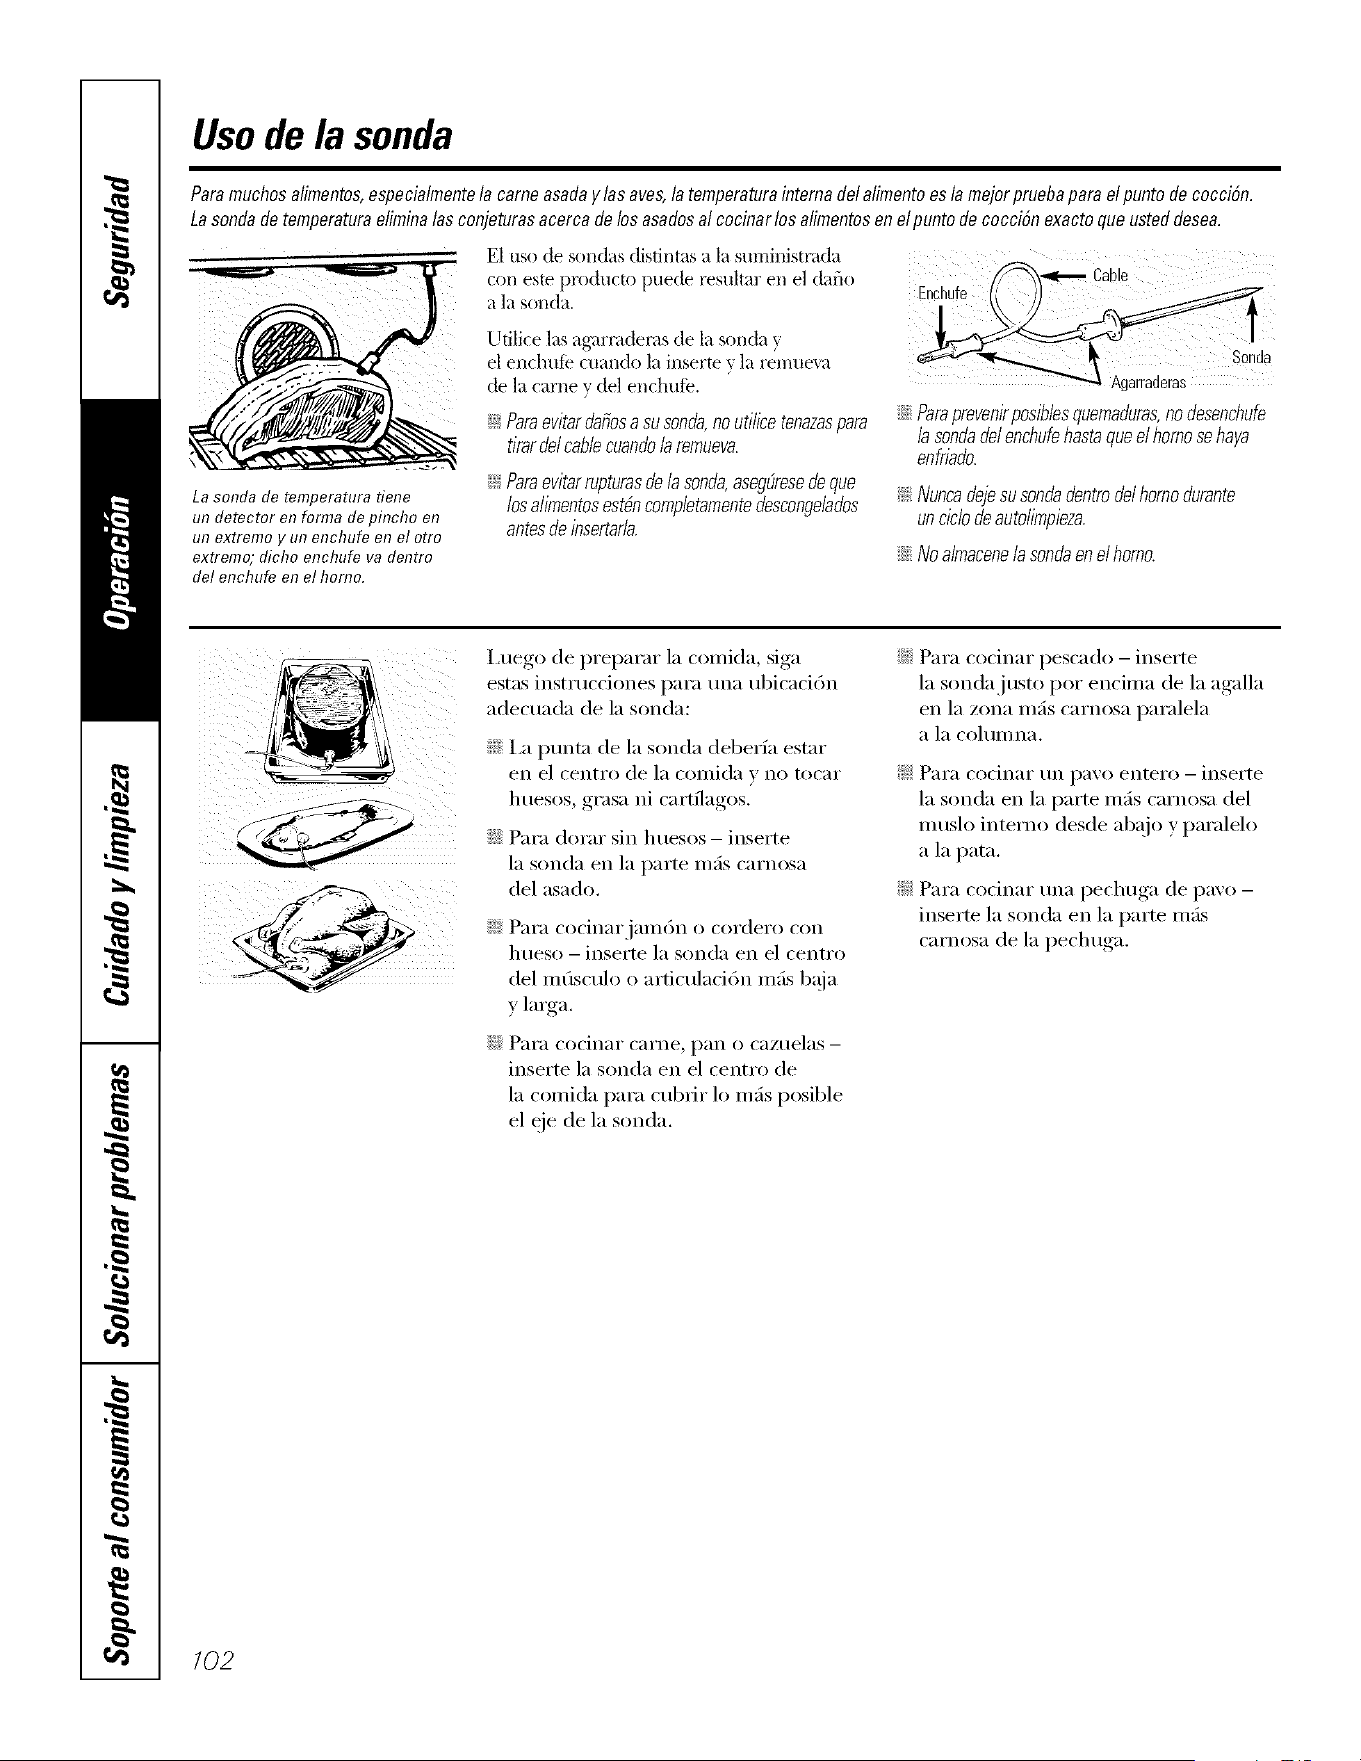
Usode la sonda
Paramuchos alimentos,especialmentela came asadaylas aves,la temperaturaintema de/alimentoesla meierpruebaparaelpunto de cocciSn.
La sondade temperaturaeliminalasconjeturasacerca de losasadosalcocinar los alimentosen elpunto de coccbn exactoque usteddesea.
La sonda de temperatura tiene
un detector en forma de pincho en
un extremo y un enchufe el7e/otro
extremo; dicho enchufe va dentro
del enchufe en el homo.
E1 uso de sondas disuI/tas a la SmlliI_isu_da .....................
con este IlrodI_ctII lluede resultar en el (tafio
a la son&. Enchufe
Udlice las ag,u'I_dems de la sonda y
el eI_clIufe cuaI_(lo la inserte v la I'eInue_a
de la came v del eIIdmfe.
__ Paraevitarflafiosasusonfia,noutilicetenazaspara
tirarfielcableeuandola remueva.
__ Paraevitarrupturasde/asonfla,aseg_resedeque
losalimentosest#ncompletamenteflescongebflos
antesdeinsertarla.
Agarraderas
ij_::Paraprevenirposib/esquemaduras,nodesenchufe
/a sondade/enchufehastaquee/homosehaya
enfriado.
!i:::Nuncaflejesusonflaflentroflelhomoflurante
uncicbdeautolimpieza.
iJi::Noalmaeenela sonflaenelhomo.
I,uego de preparar la coniida, siga
estas instrucciones pai'a una ubicaci6n
adecuada de la sonda:
_!!I,a punta de la sonda deberfa estar
en el centro de la coillida v no [OC_li"
huesos, grasa ni cartflagos.
iJi::Pai'a doi'ar sin huesos - inserte
la sonda en la parte mils carnosa
del asado.
_J:_Para cocinarjaillon O cordero COil
hueso - inserte la sonda en el centro
del infisculo o articulaci6n mils b_!ja
y laiga.
N Para cocinar carne, pan o cazuelas -
inserte la sonda en el centro de
la coinida paI'a cubiir lo mils posible
el eje de la sonda,
::Ji::Para cocinar pescado - inserte
la sonda justo por encinla de la agalla
en la zona infis carnosa pai'alela
a la cohinina.
_: Par;I codnar tin [)avo entero -- inserte
la sonda en la parte Infis carnosa del
IIluslo interno desde abajo y pai'alelo
a la pata.
_: PaI'a codnar uIla pechuga de pavo -
inserte la sonda en la parte infis
carnosa de la pechuga.
102
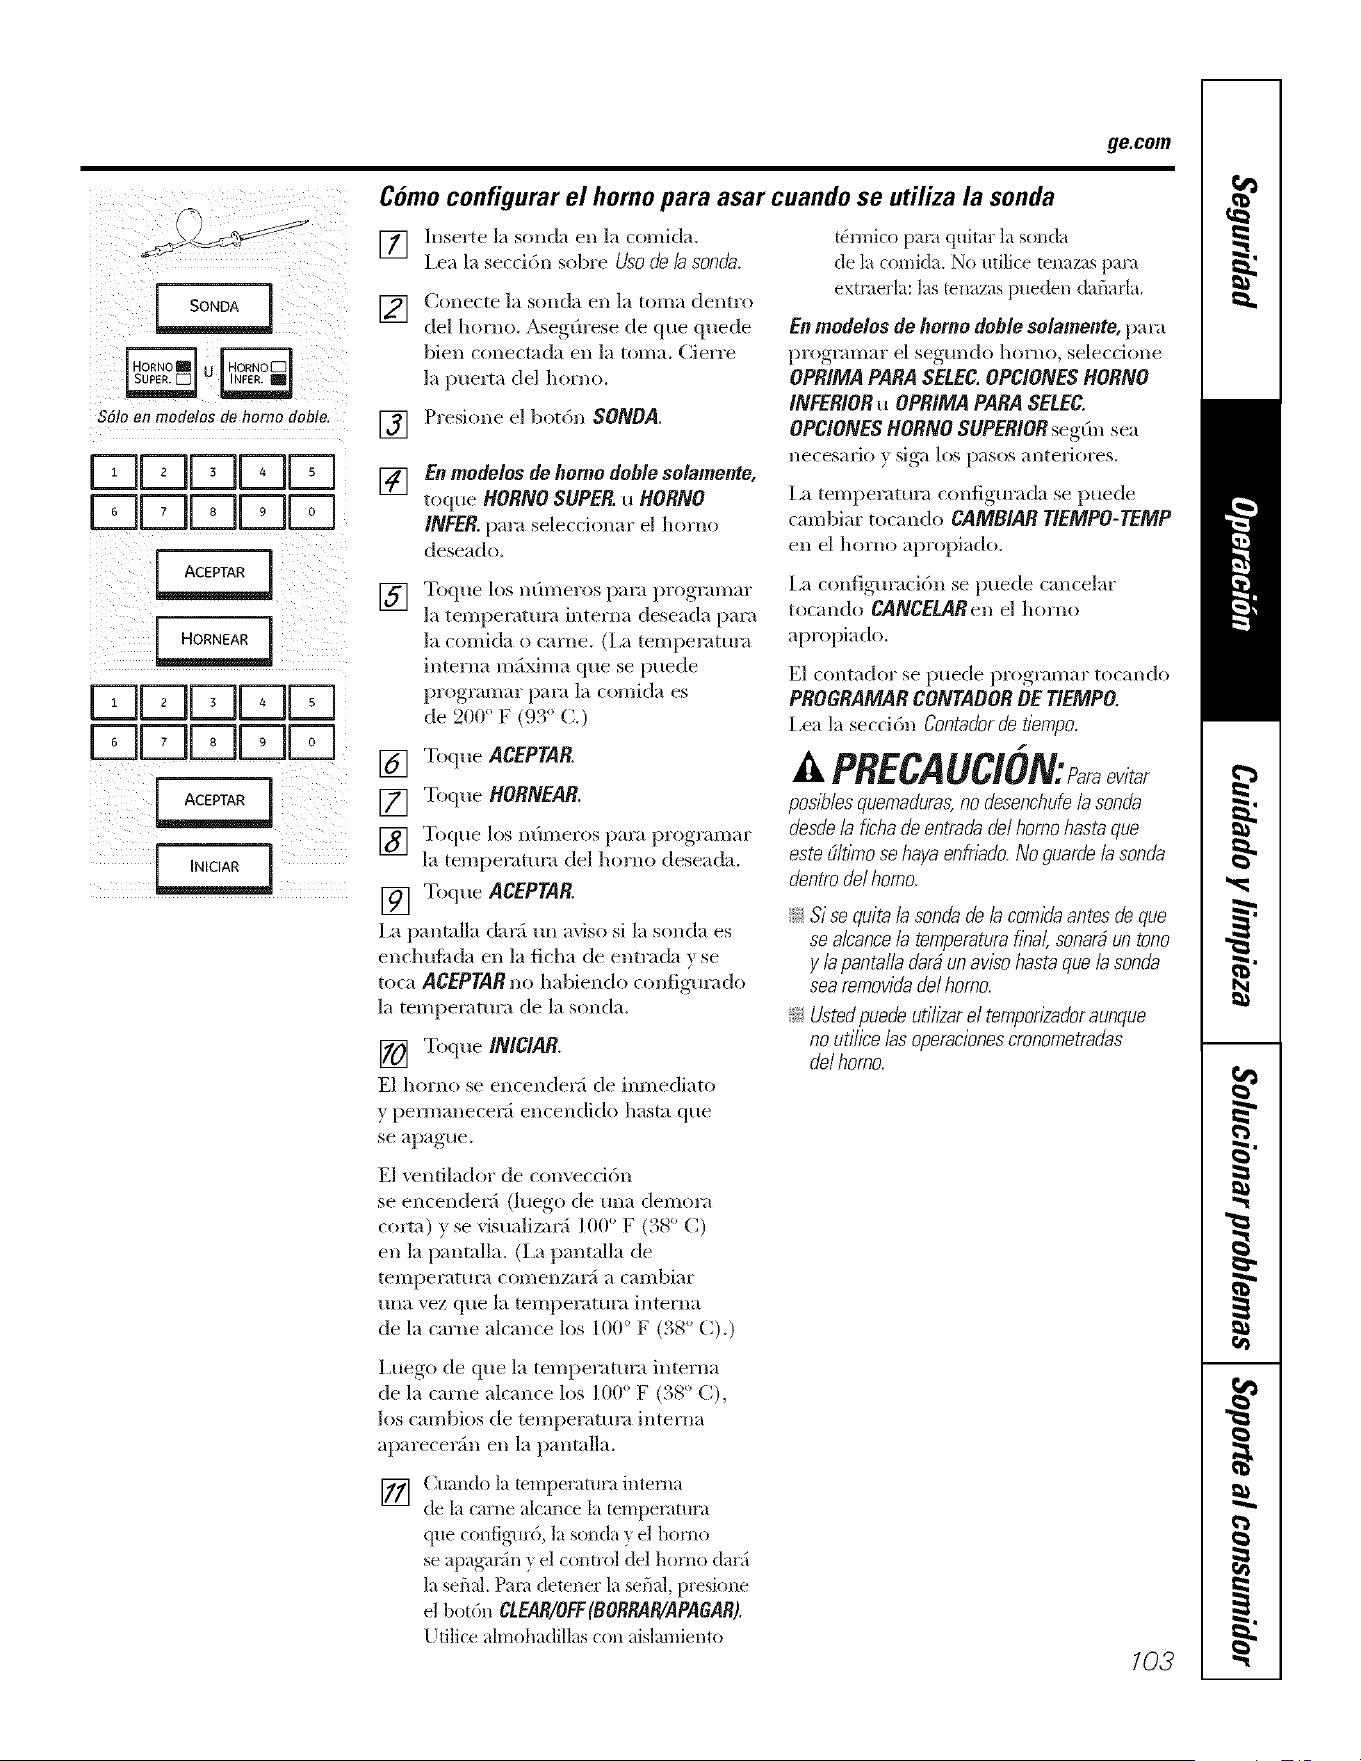
ge.com
Sdloen mode!osdehomo doble
DD[][]D
DDDDD
DDDDD
Como configurar el homo para asar cuando se utiliza la sonda
[]
[]
[]
]nsexnte la sonda en ]a comidm
I_ea la secci6n sobre USOde/a sonda.
Conec[e la Solld_| en la toula delltro
del hol'llO, AsegOrese de que quede
bien conectada en ]a toma. Cierre
la puerta del horn().
Presi(me el bot6n SONOA.
[]
En modelos de homo doh/e solamente,
toque HORNO SUPER. u HORNO
INFER.pa,'a seleccionm" el homo
deseado,
] Toque los II(lI/]el'os );_I'a )I'()_I';llll_lI"
la temperatm'a interna deseada pm'a
la comida o came. (La temperamra
interna mfi_ma que se puede
programar para la comida es
de 200 ° F (93 ° C.)
[] Toque ACEPTAR
[] Toque HORNEAR.
] Toque los ll(lI//el'oS pal';t pi'ogl';llll;ll"
la temperatura del horno deseada.
[] Toque ACEPTAR.
I,a panmlla danl un aviso si la sonda es
enchufitda en la ficha de entrada v se
toca ACEPTAR no habiendo configm'ado
la temperatura de la sonda.
[] Toque/NIC/AR
El horno se encender:_ de imnediato
y pemmneceni encendido basra que
se apague.
E1 _vntilado_ de convecddn
se encende_5 (luego de una demora
corm) y se visuali/mi 100° F (38 ° C)
en la pantalla. (i,a pantalla de
telllpel'iff[ll'il coI//enzai'ii ;! cambiar
una vez que la temperatma interna
de la came alcance los 100 ° F (38 ° C).)
t&_nico pan_ quitar la sonda
de la comida. No utifice tenazas para
extmerla: las mnazas pueden daflafla.
En modo/os do homo doh/o solamonto, para
programar el segm_do homo, seleccione
OPR/MA PARA SELEC.OPC/ONES HORNO
INFERIORu OPR/MA PARA SELEC.
OPC/ONESHORNO SUPERIORsegfin sea
necesario y siga los pasos antefiores.
La temperature configurada se puede
cambiar tocando CAMB/AR TIEMPO-TEMP
en el homo apropiado.
La configm'aci6n se puede cancelar
tocando CANCELARen el homo
apropiado.
El contado/" se puede programar tocando
PROGRAMAR CONTABOR BE T/EMPO.
I,ea la seccidn Contadorde tiempo.
y
A PRECAtlCiON: a aev,
pos/_/esquemaduras,no desenchufe/a sonda
desdela f/bha do entrada de/homo hasta que
este Efft/nTose haya enfnado. No guarde la sonda
dentro de/homo.
_ Si se quita la sonda de la com/_taantes de que
se alcancela temperaturaf}_al, sonarfi un tono
y la pantalla darfi un aviso hasta que la soma
sea removida del homo.
_ Listedpuede utilizarel temporizadoraunque
no utiiice /as operacionescronometradas
de/homo.
I,uego de que la temperamra interna
de la came alcance los ] 00 ° F (38 ° C),
los cambios de temperamra interna
aparecenhl en la panmlla.
] Cuando la temperamrainterna
de la cal'ne alcance la teillpet_tttli'a
que configm'd, la sonda y el homo
se apaganln y el control del homo darfi
la serial. Pare detener la serial, presione
el 1)ot6n CLEAR/OFF(BORRAR/APAGAR).
Udlice almohadillas con aislamiento
103
Asar a la parrilla
Cierre la puerta. Siempre ase a
la parrilla con la puerta cerrada.
] ASADO j0[ ASADO i
Si su homo esN conectado a 208 voJtios,
los fiJetes poco cocidos pueden asarse
a la parrilla precalentando la parrilla y
posicionando la parrilla del homo
en una posiciM m&s aJta.
Como configurar el homo para asar a
Cierre la puerta. Siempreaseala parrillacon
lapuertacerrada.
[] Toque ASAR
[] (_oloque la comida en una parrilla
paI'a asar sobi'e [In[I cacerola para
[IS[II:
[]
Enmodelosde homodoblesolamente,
toque HORNOSUPER.u HORNO
INFER.para seleccionar el homo
deseado.
[] Siga las )osiciones sugeridas para
las pardllas en la Gufaparaasar
a laparrilla.
EltamaM,peso,grosor,temperaturainicialysu
prefereneiasobreelpuntodeeocei6ndelosalimentos
afeetarbnlostiemposdeeoecibn.Estagufaesd
basadaenearnesa temperaturaderefrigerador
[] Toque ASADOALTOo ASADOBAJO.
[] Toque INICIAR
NOTA:Esposlblequeel ventiladorseencienda
yapaguede formaautom_tlcaparaenfnar
laspartesinteriores.Estoesnormal,yes posible
queel ventiladorcontinElefuncionandoincluso
luegodequeel homoseapague.
la parrilla
En la i/l[iV()i'l[i de los casos, no es
necesafio precalent;u" la parfilla. Sin
embargo, es posible que las comidas de
rSpida coccidn, tales como ti_tnsfinas de
came o pesca(h), requieran tm perfodo
de precalentamiento corto de 2 a 3
minutos para hacer que la supe_ticie de
la comida se (lore mientras al mismo
tiempo 0stn se cocina pot dentro.
Encienda la comida tma sola vez al asar
la misma.
NOTA:Lafuncidndeasarnofuncionar_si
/asomade temperaturaseenchufa.Nuncadeje
/asomadentrode/homodurantee/cic/ode
asado.
Para programar el segtmdo homo,
selecdone OPRIMAPARASELEC.
OPCIONESHORNOINFERIORu OPRIMA
PARASELEC.OPCIONESHORNOSUPERIOR
segdm sea ne('esmio y siga los pasos
antelJoi'es.
i,a temperatm'a configm'ada se puede
cambiar tocan(h) CAMBIARTIEMPO-
TEMP.
I,a configm'aci6n se puede cancelar
tocan(h) CANCELAR
E1cont;ldoi" se p//ede pi'ogi'_llil_li" [OC_lndo
PROGRAMARCONTADORDETIEMPO.
I,ea la se(cidn Contadordetiempo.
[] Quando el asado est(! completa, toque
CANCELAR.
/04
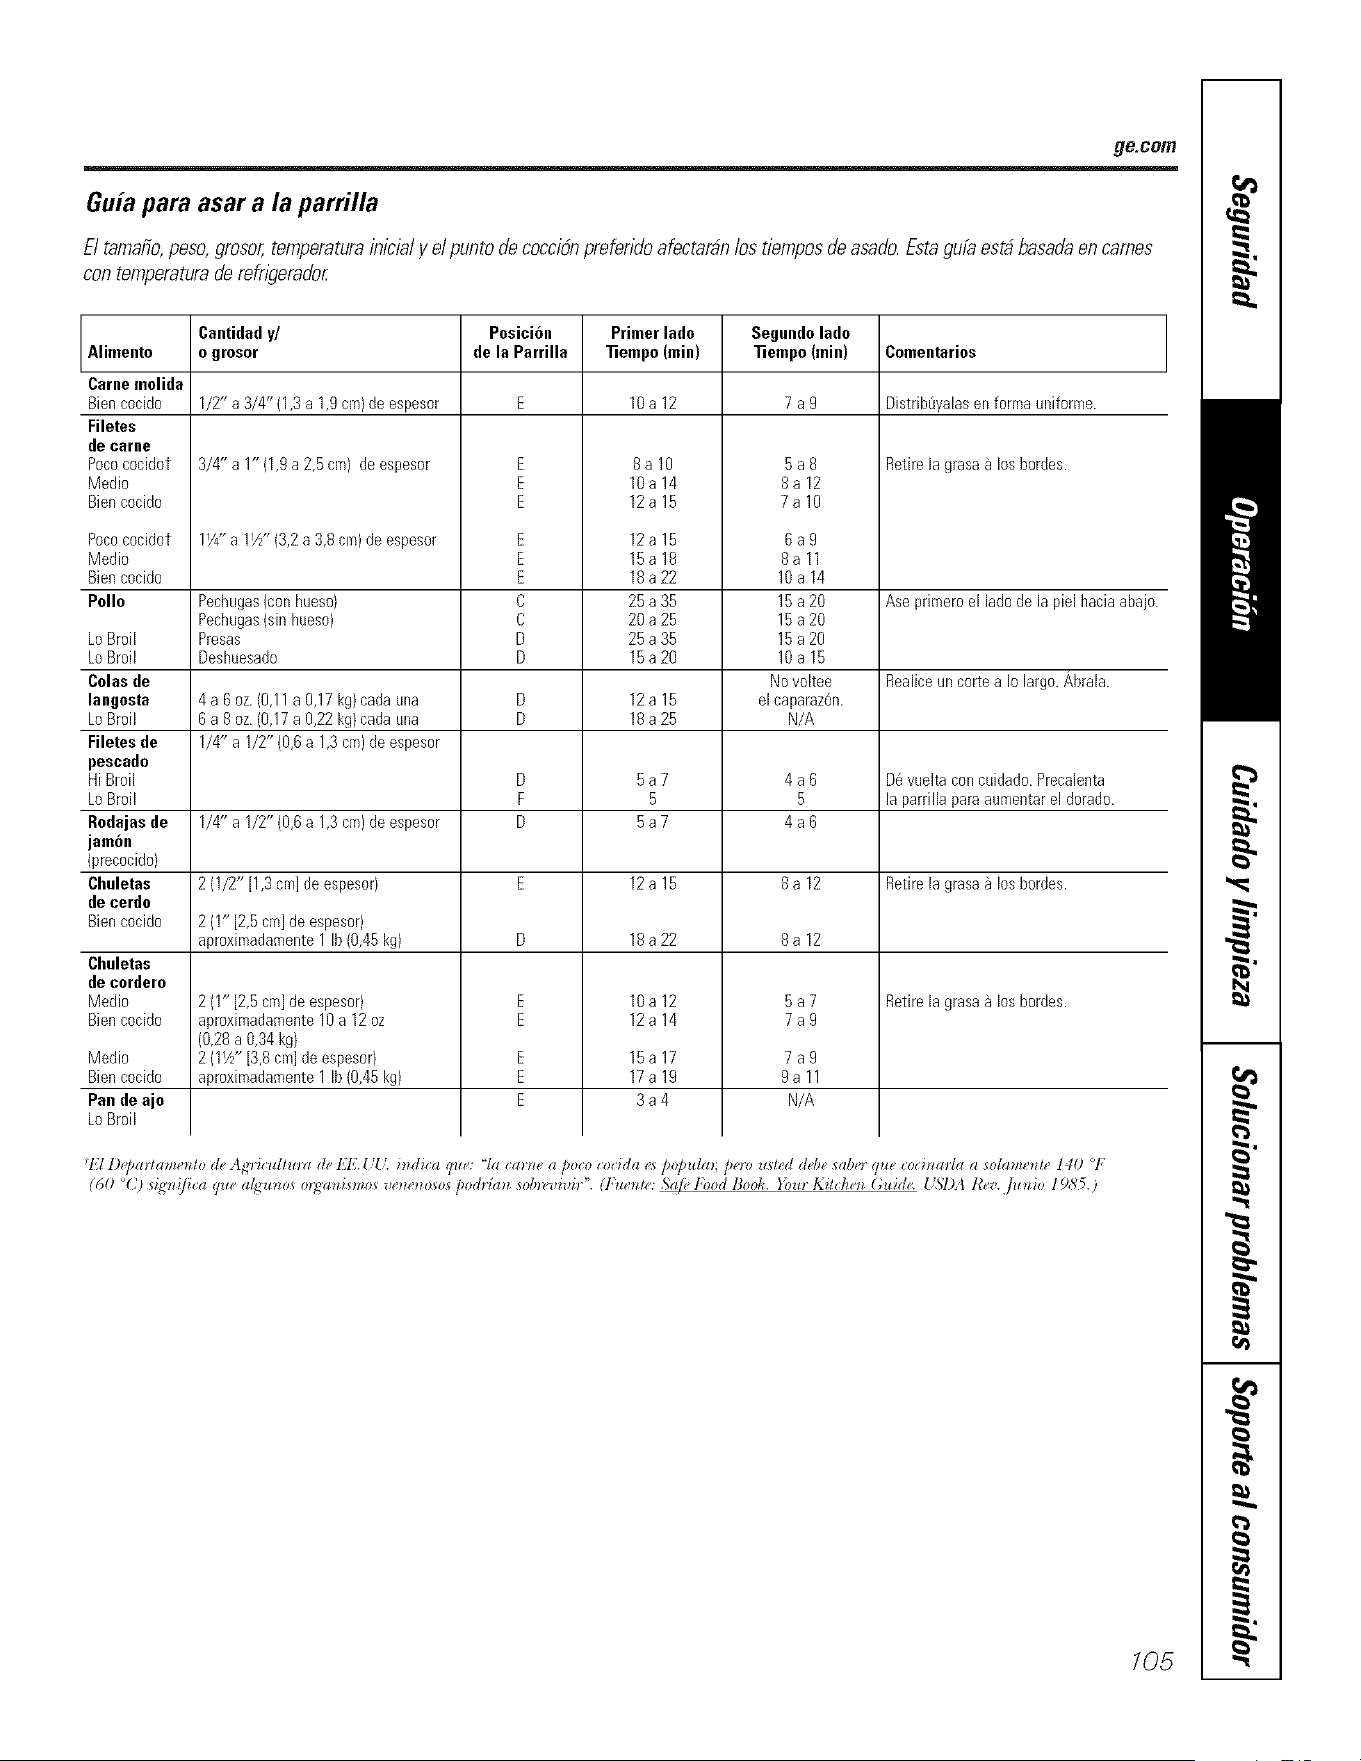
_e.com
Guia para asar a la parrilla
Eltamafio,peso,grosor,temperaturainicia/y e/puntodecocci6npreferidoafectar_nlostiernposdeasado.Estagufaesd basadaen carnes
con temperatura de refr/gerador
Alimento
Cornemolido
Bien cocido
Filetes
de corne
Pocococidot
Medio
Bien cocido
Pocococidot
Medio
Bien cocido
Polio
Contidady/ Posici6n Primerlado Segundolado
o grosor de la Parrillo "fiempo(rain) "fiempo(min)
1/2" a 3/4" [1,3 a 1,9cro/de espesor E 10a 12 7 a 9
3/4" a 1" (1,9 a 2,5 cm) de espesor
11/Z"a 11/z"(3,2 a 3,8 cm)de espeser
E
E
E
E
E
E
C
C
D
D
8 a 10
10a 14
12a 15
12a 15
15a 18
18a 22
25 a 35
20 a 25
25 a 35
15a 20
5a8
8a12
7a10
6a9
8all
10a14
15a20
15a20
15a20
10a15
No voltee
el caparaz@.
N/A
Comentorios
Distrib(lyalasenforma uniforme.
Retirela grasaa los hordes.
Pechugas(con hueso) Ase primeroel lado de la piel haciaabajo.
Pechugas(sin hueso)
Lo Broil Presas
Lo Broil Deshuesado
Colas de Realiceun cortea Io largo.Abrala.
langosta 4 a 6 oz.(0,11a 0,17 kg)cadauna D 12a15
Lo Broil 6 a 8 oz.(0,17a 0,22 kg)cadaulla D 18a 25
Filetes de 1/4" a 1/2" (0,6a 1,3 cm)de espesor
)escado
Hi Broil D 5 a 7 4 a 6 D_ wleita con cuidado.Precaienta
Le Broil F 5 5 la parrillapara aumentarel dorado.
Flodajasde 1/4"al/2"(O,Sal,3cm)deespesor D 5a7 4a8
amon
(precocido)
Chuletas 2 [1/2" [1,3cm]de espesor) E 12a 15 8 a 12 Retirela grasaa los bordes.
de cerdo
Bien cocido 2 (1" [2,5 cm]de espesor)
aproximadamente1 Ib (0,45kg) D 18a 22 8 a 12
Chuletas
de cordero
Medio 2 (1" [2,5 cm] de espeser) E 10a 12 5 a 7 Retirela grasaa los hordes.
Bien cocido aproxiroadamente10 a 12 oz E 12a 14 7 a 9
(0,28a 0,34kg)
Mealie 2 (11//" [3,8cm]de espesor) E 15a 17 7 a 9
Bien cocido aproximadamente1 Ib (0,45kg) E 17a 19 9 a 11
Pan de ajo E 3 a 4 N/A
Lo Broil
'El l)e/Jmta_l_etzlo d_ Ag'ricullura d# i'l:. I U. i_d_ca qu#: '7_t carm_ a Doco cocida es /)o/Juhn; p_l) uslvd dd)# sab#r qu_ cochlmht a solml_enle 140 °F
(60 °C) s/,ej_i//((t qu# (tl,ey_o_ mq(t_no_ ve_emm_s fiodr/m_ sob_,v_vh". (]:uetzt#: S(t/e ].})od Boo]_. }_)ur K_t(h#_ (;uid#. U.',I)A R_,_,..]u_zio 19,'_5.)
105
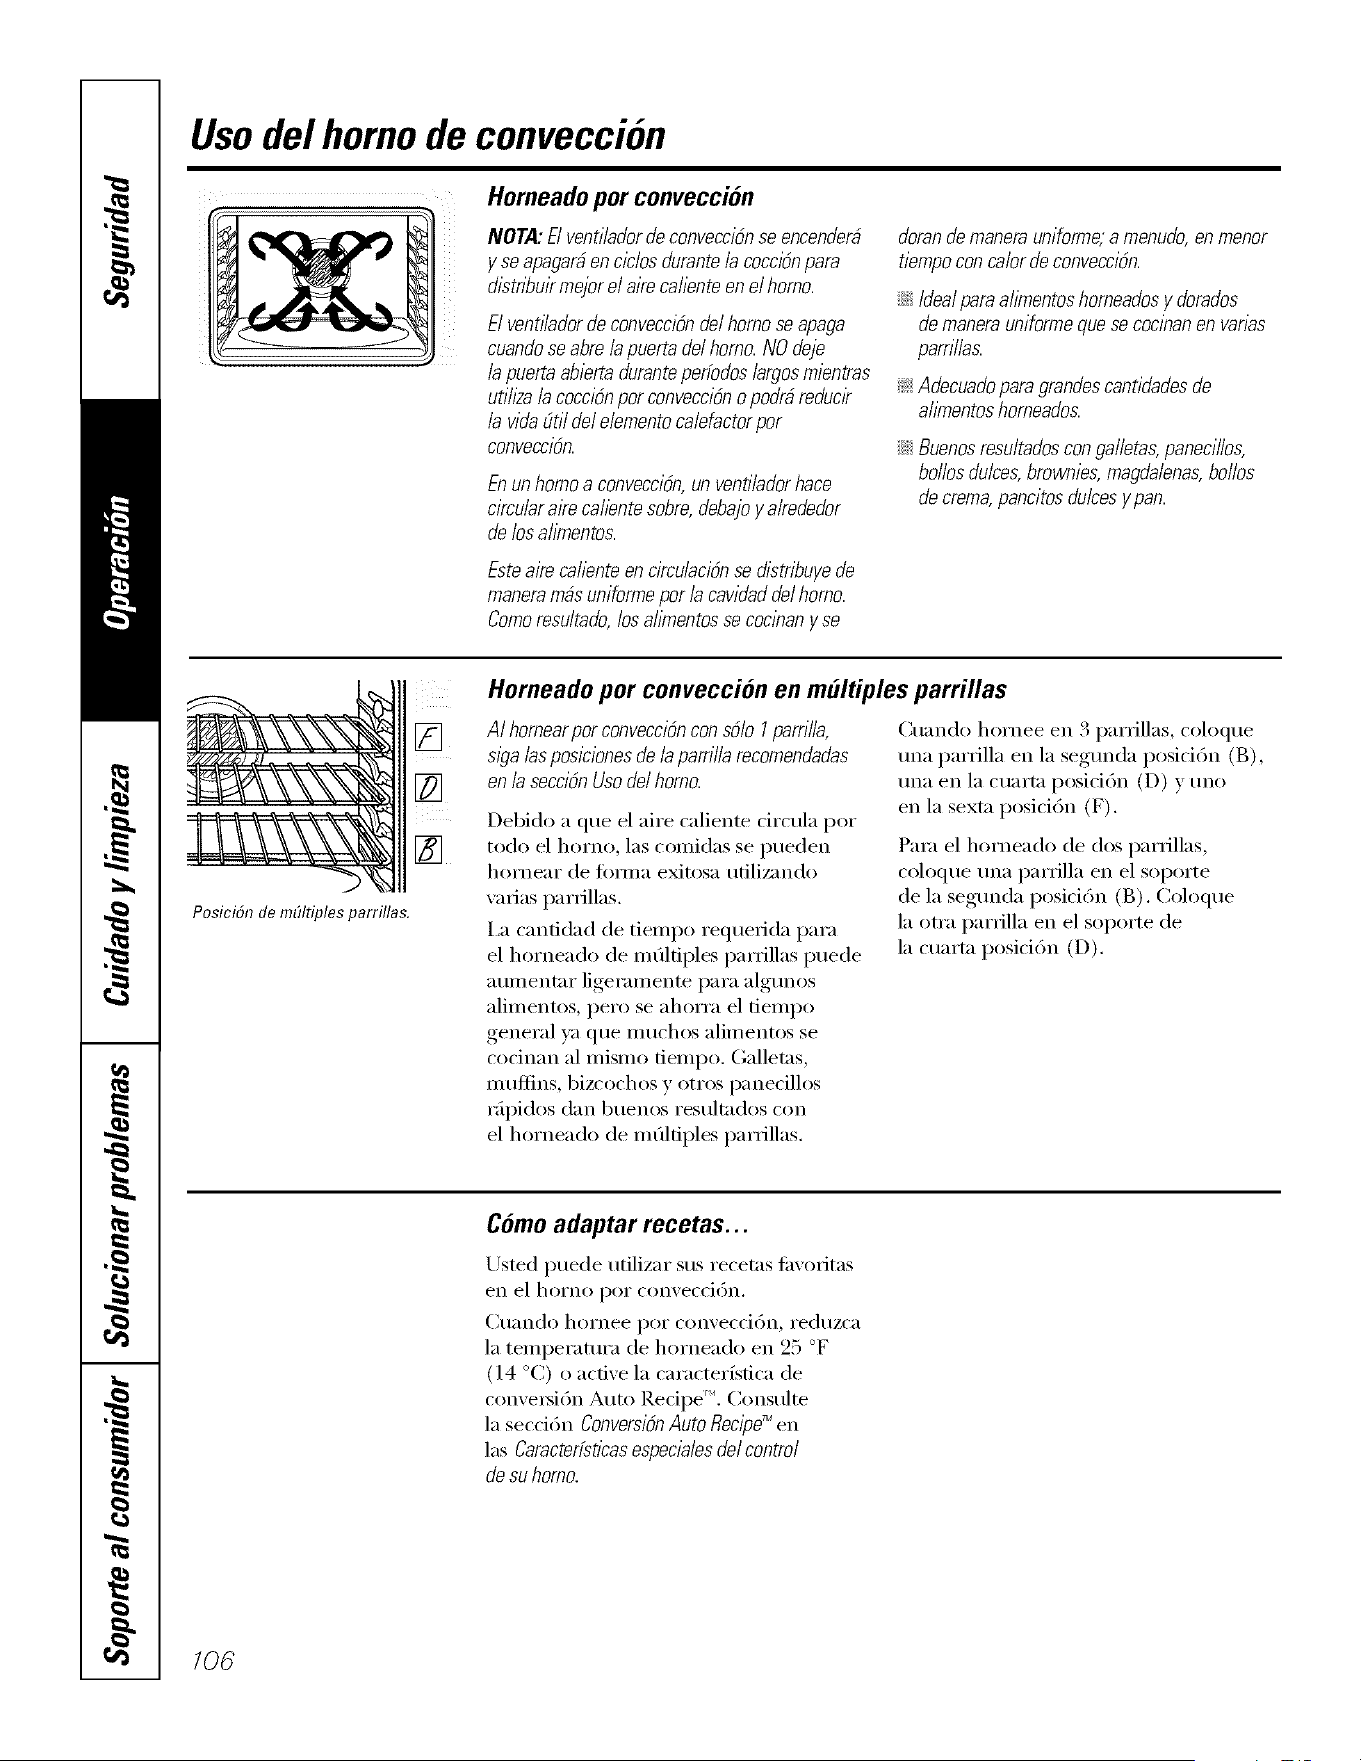
Usodel homo de conveccion
Horneado por conveccion
IVOTA:Eivent//adorde conveccidnse encender9
y se apagar9en cic/os durante/a cocc/_npara
distnbuir mejor el aire cal/ante enel homo.
Elventffadordeconveccidnde/homoseapaga
cuandoseabre/apuertade/homo.NOdeje
/apuertaab/artaduranteperfodoslargosm/antras
ut/h2a/acoccidnpor conveccidnopodr9redu&
/a v/flaOt//de/e/ementoca/efactorpor
convecci6n.
En un homo a conveccidn,un vent//adorhace
circular ake ca//antesobre, debajo y a/rededor
de losa//mentos.
Esteairecal/anteencircu/acidnsed/stribuyede
maneramilsuniformepor/acav/dadde/homo.
Comoresultado,losahmentossecocinanyse
dorande manerauniforme,a menudo,enmenor
t/ampoconcalordeconvecci6n.
;;Ji::IdealparaaflYnentoshorneadosy dorados
demanerauniformequesecoc/)_anen varbs
parr///as.
_ Adecuadoparagrandescantidadesde
a//mentoshomeados.
;;Ji::Buenosresu/tadoscon ga//etas,paneci//os,
bollos dulces,brownies, magdalenas,bollos
de crema,pancitos du/cesypan.
Posici6n de mgltiples parrillas.
[]
[]
Horneado por conveccion en mOltiples parrillas
AI hornearpor conveccidncons51oI parr/l/a,
s/ga/aspos/c/onesde/aparr/l/arecomendadas
en/aseccidnUsode/homo.
Debido a que el aire caliente circtda pot
todo el homo, las comidas se pueden
hornear de fimna exitosa utilizando
wuias parfillas.
i,a canfidad de tiempo requerida para
el horneado de m(dtiples parrillas puede
aumentar ligeramente para algunos
alimentos, pero se ahorra el fiempo
general ya que inuchos alimentos se
cocinan al mismo tiempo. Galletas,
muffins, bizcochos y otros panecillos
r_ipi(los dan btlenos resultados con
el horneado de m (dfiples par_illas.
Cuando hornee en 3 parrillas, coloque
una parfilla en la segunda posiddn (B),
una en la cuarta posici6n (D) y uno
en la sexta posici6n (F).
Pare el horneado de dos par_illas,
coloque t:ma par_illa en el soporte
de la segunda posici6n (B). Coloqt:m
la otra par_illa en el soporte de
la cuarta posici6n (D).
Como adaptar recetas...
ILrsted puede utilizar sus recetas tm,o_itas
eI1 el hoi'no poI" convecci(Sn.
()lan(lo hornee pot convecd(Sn, reduzca
la temperatura de horneado en 25 °F
(14 °C) o active la caracteHstica de
conve_i(Sn Auto Redpe'". Consulte
la secci6n Convers/6nAuto Recipe_ en
las Caracterfsflcasespec/a/esdel control
de su homo.
106
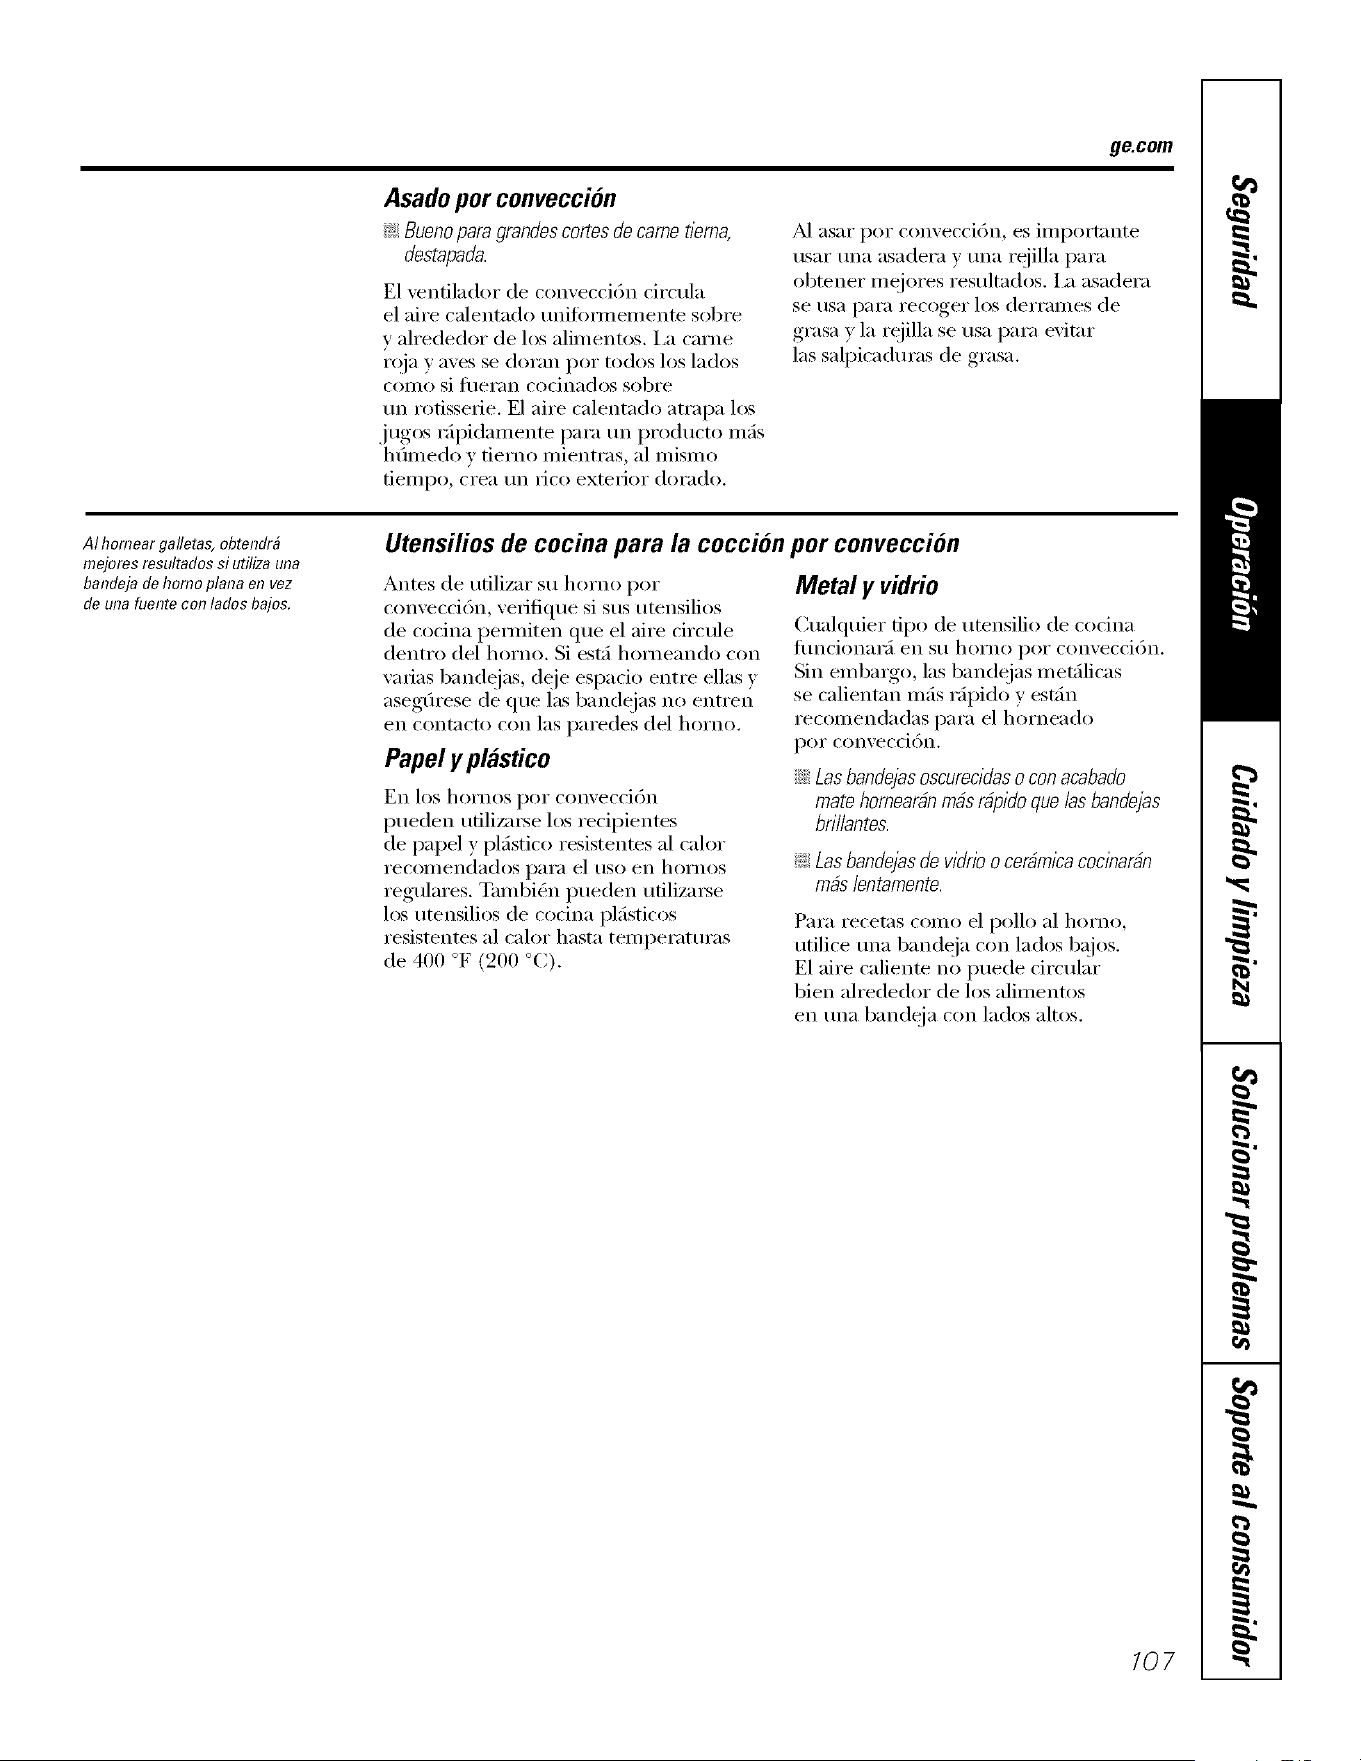
ge.com
Asado por conveccion
_ Bueno para grandes cortes de came tiema,
destapada.
E1 ventilador de convecci6n circula
el aire calentado unifi)m_en/ente sobre
v ah'ededor de los alimentos, i,a came
i'oia y ayes se doran por todos los lados
CoIIlO Si fueI';In codnados sobre
tm rotisserie. E1 aire calentado atrapa los
jugos Mpidamente para tm producto re;is
hfimedo y tiemo mientras, al mismo
tieillpo , ci'ea tlil iJco exteiJor dorado.
M asar por convecci6n, es importnnte
usar tma asadera y tma rejilla para
obtener mejores resultados, i_ asadera
se usa para recoger los derraines de
grasa y la rejilla se usa para evitnr
las salpicaduras de grasa.
AI homear galletas, obtendrb
mejores resultados si utiliza una
bandeja de homo plana en vez
de una fuente con &dos bajos.
Utensilios de cocina para la coccion
Antes de utilizar su homo por
com'eccidn, veiifique si sus utensilios
de cocina pemfiten que el aire circule
dentro del homo. Si est_i horneando con
wuias bandejas, deje espado entre ellas v
aseg(u'ese de que las bandejas no enti'en
ell contncto con las paredes del homo.
Papel y plastico
Ell los homos por com'eccidn
pueden udli/;u'se los recipientes
de papel y plfistico resistentes al calor
recolllendados i)_li';i el tlSO ell hoI'nos
regulares. Tambi(_n pueden utilizai_e
los utensilios de codna pl:isticos
resistentes al calor hasta temperaturas
de 400 °F (200 °C).
por conveccion
Metal y vidrio
Cualquier fipo de utensilio de cocina
JilnCiOll[lI';/ ell Stl hoi'no i)oi" conveccil_)n.
Sill embaigo, las bandejas met;ilicas
se calientnn m_is Mpido y est_in
recomendadas para el horneado
[)oI" conveccion.
N Lasbandejasoscurecidaso conacabado
matehomearfinmilsr@idoque/asbandejas
bri//antes.
_ Lasbandejasdevidrioocer#micacocinar#n
robs/entamente.
Pai'a i'ecet_ls COlllO el pollo al hoYno_
utilice tma bandeia con lados bajos.
E1 aire caliente no puede circular
bien alrededor de los alimentos
ell tma b:mdeja con lados altos.
107
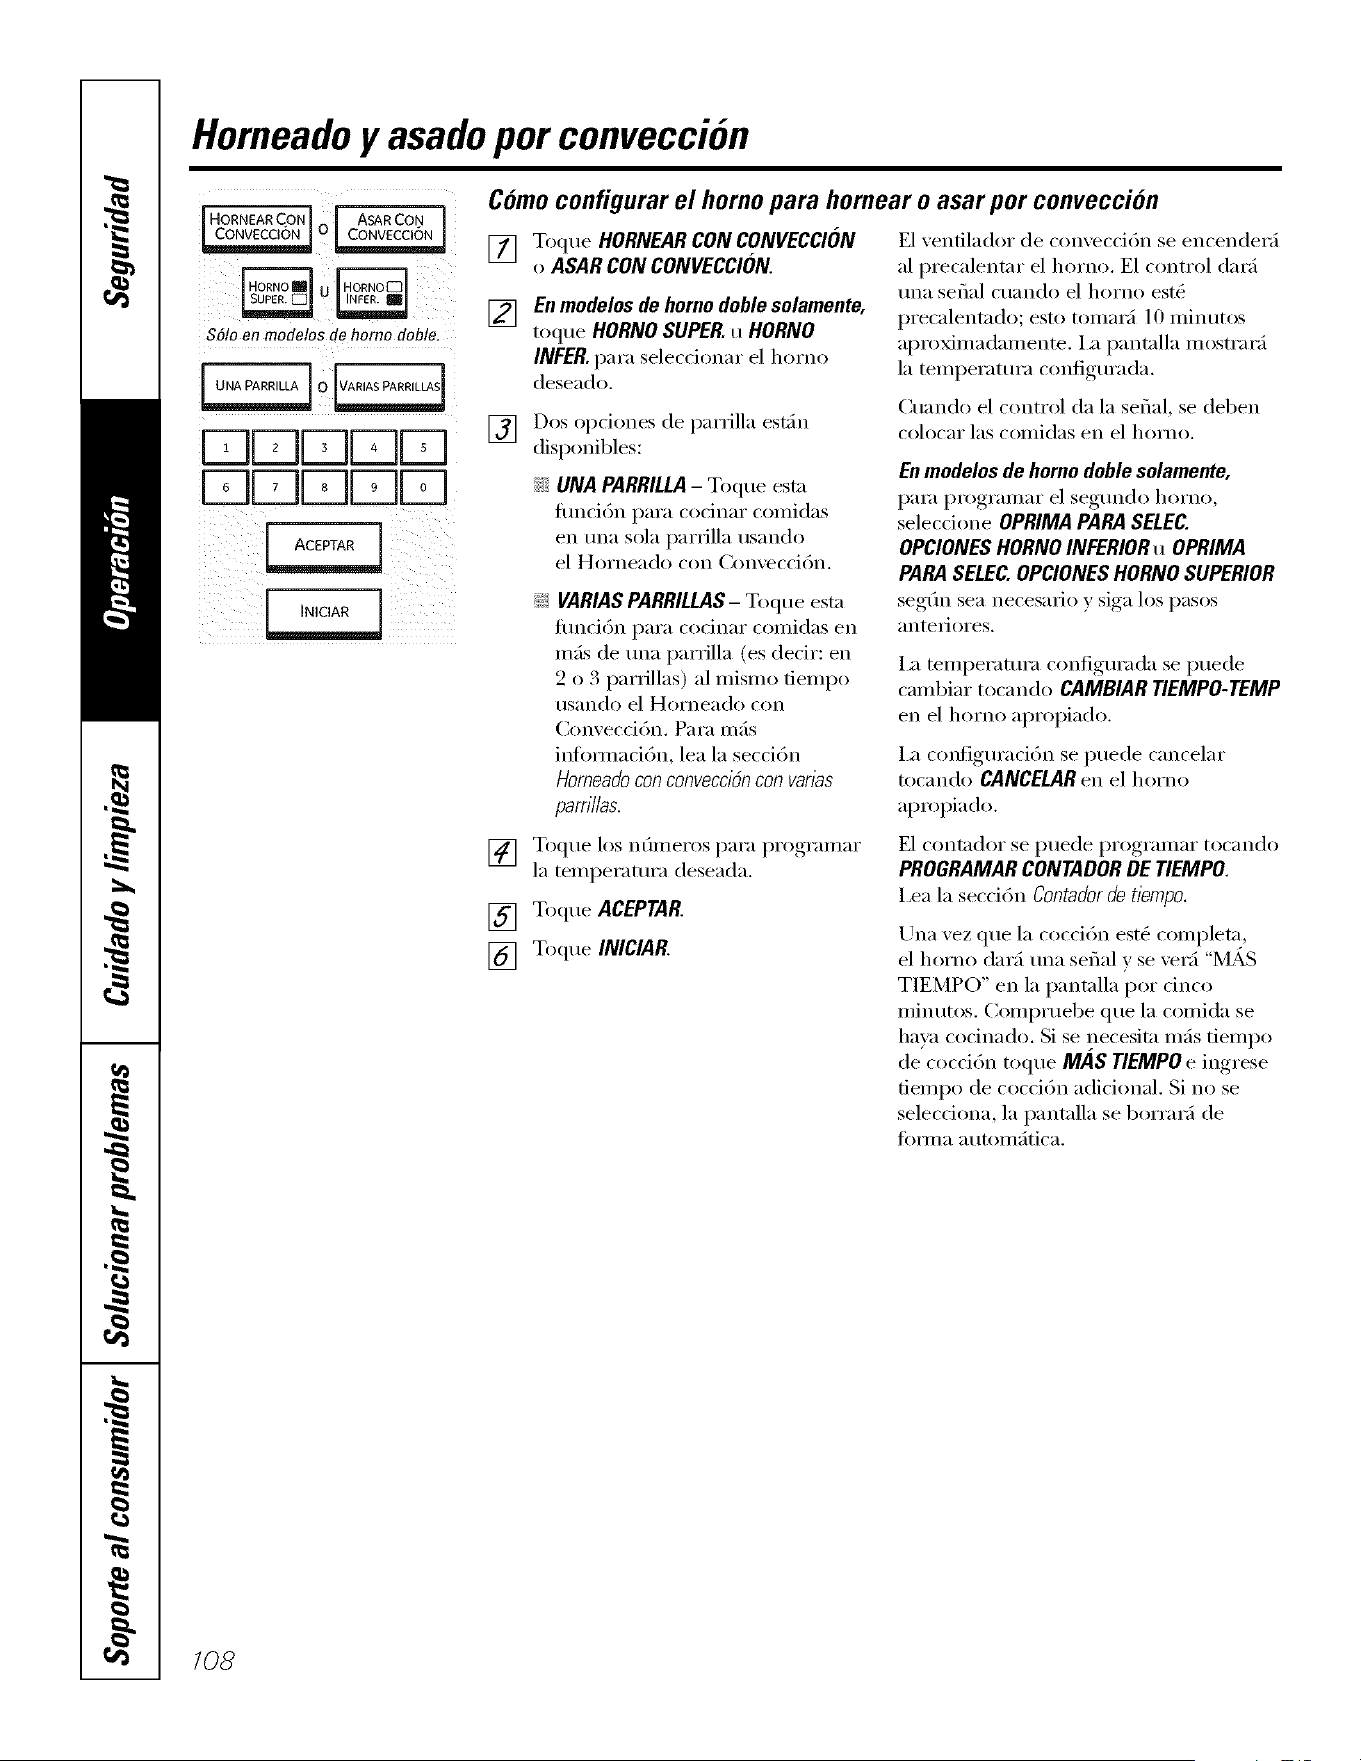
Horneadoy asadopor conveccion
IHORmEARCO"Ioj ASARCOm]
S61oon modolos dohomo dobto.
vqDDDD
DDDDD
Como configurar el homo para hornear o asar por conveccion
[]
Toque HORNEARCONCONVECCION
o ASARCONCONVECCION.
En modelos de homo doble solamente,
toque HORNO SUPER.u HORNO
INFER.para seleccionar el homo
deseado.
Dos opciones de parfilla est_hl
disponibles:
_i_:UNA PARRILLA- Toque esta
flmci6n para cocinar comidas
en una sola parfilla tlsando
el Horneado con Conveccidn.
_ VARIASPARRILLAS- Toque estn
flmd6n para cocinar comidas en
mils de tma parrilla (es dedr: en
2 o 3 parfillas) al mismo dempo
tlsando el Horneado con
Convecd6n. Para mils
inflmnacidn, lea la secci6n
Horneadoconconvecci6ncon van;_s
parriiias.
E1venfilador de convecci6n se encender5
al precalentar el homo. E1 control dar5
tma serial cuando el homo est(_
precalentado; esto tomar5 10 minutos
aproximadamente. I_ pantalla mostrar5
la temperamra configm'ada.
Cuando el control da la serial, se deben
colocar las COlIlidas eI1 el hoYno.
gn modelos de homo doble solamente,
pare programar el segtmdo homo,
selecdone OPRIMA PARA SELEC.
OPCIONES HORNO INFERIORu OPRIMA
PARA SELEC.OPCIONESHORNO SUPERIOR
seg(m sea necesa_io y siga los pasos
antelJores.
i_ mmperatm'a configm'ada se puede
cambiar tocando CAMBIAR TIEMPO-TEMP
en el homo apropiado.
I_ configm'acidn se puede cancelar
tocando CANCELAR en el homo
apropiado.
[] Toque los ndmeros para programar
la temperamra deseada.
[] Toque ACEPTAR
[] Toque INICIAR
E1 contador se puede programar tocando
PROGRAMAR CONTADOR DE TIEMPO.
I,ea la secci6n Contadorde tiernpo.
[Jll[l vez que la (-o(ci6n est(_ (-Olltpletn,
el horno (lar5 una serial v se ver5 "M,_S
TIEMPO" en la pantalla pot dnco
minutos. (]ompruebe que la comida se
hava cocinado. Si se necesitn ross tiempo
de coccidn toque MAS TIEMPOe ingrese
tiempo de cocci6n adicional. Si no se
selecciona, la pantalla se borrar5 de
fi)m]a automfitica.
108
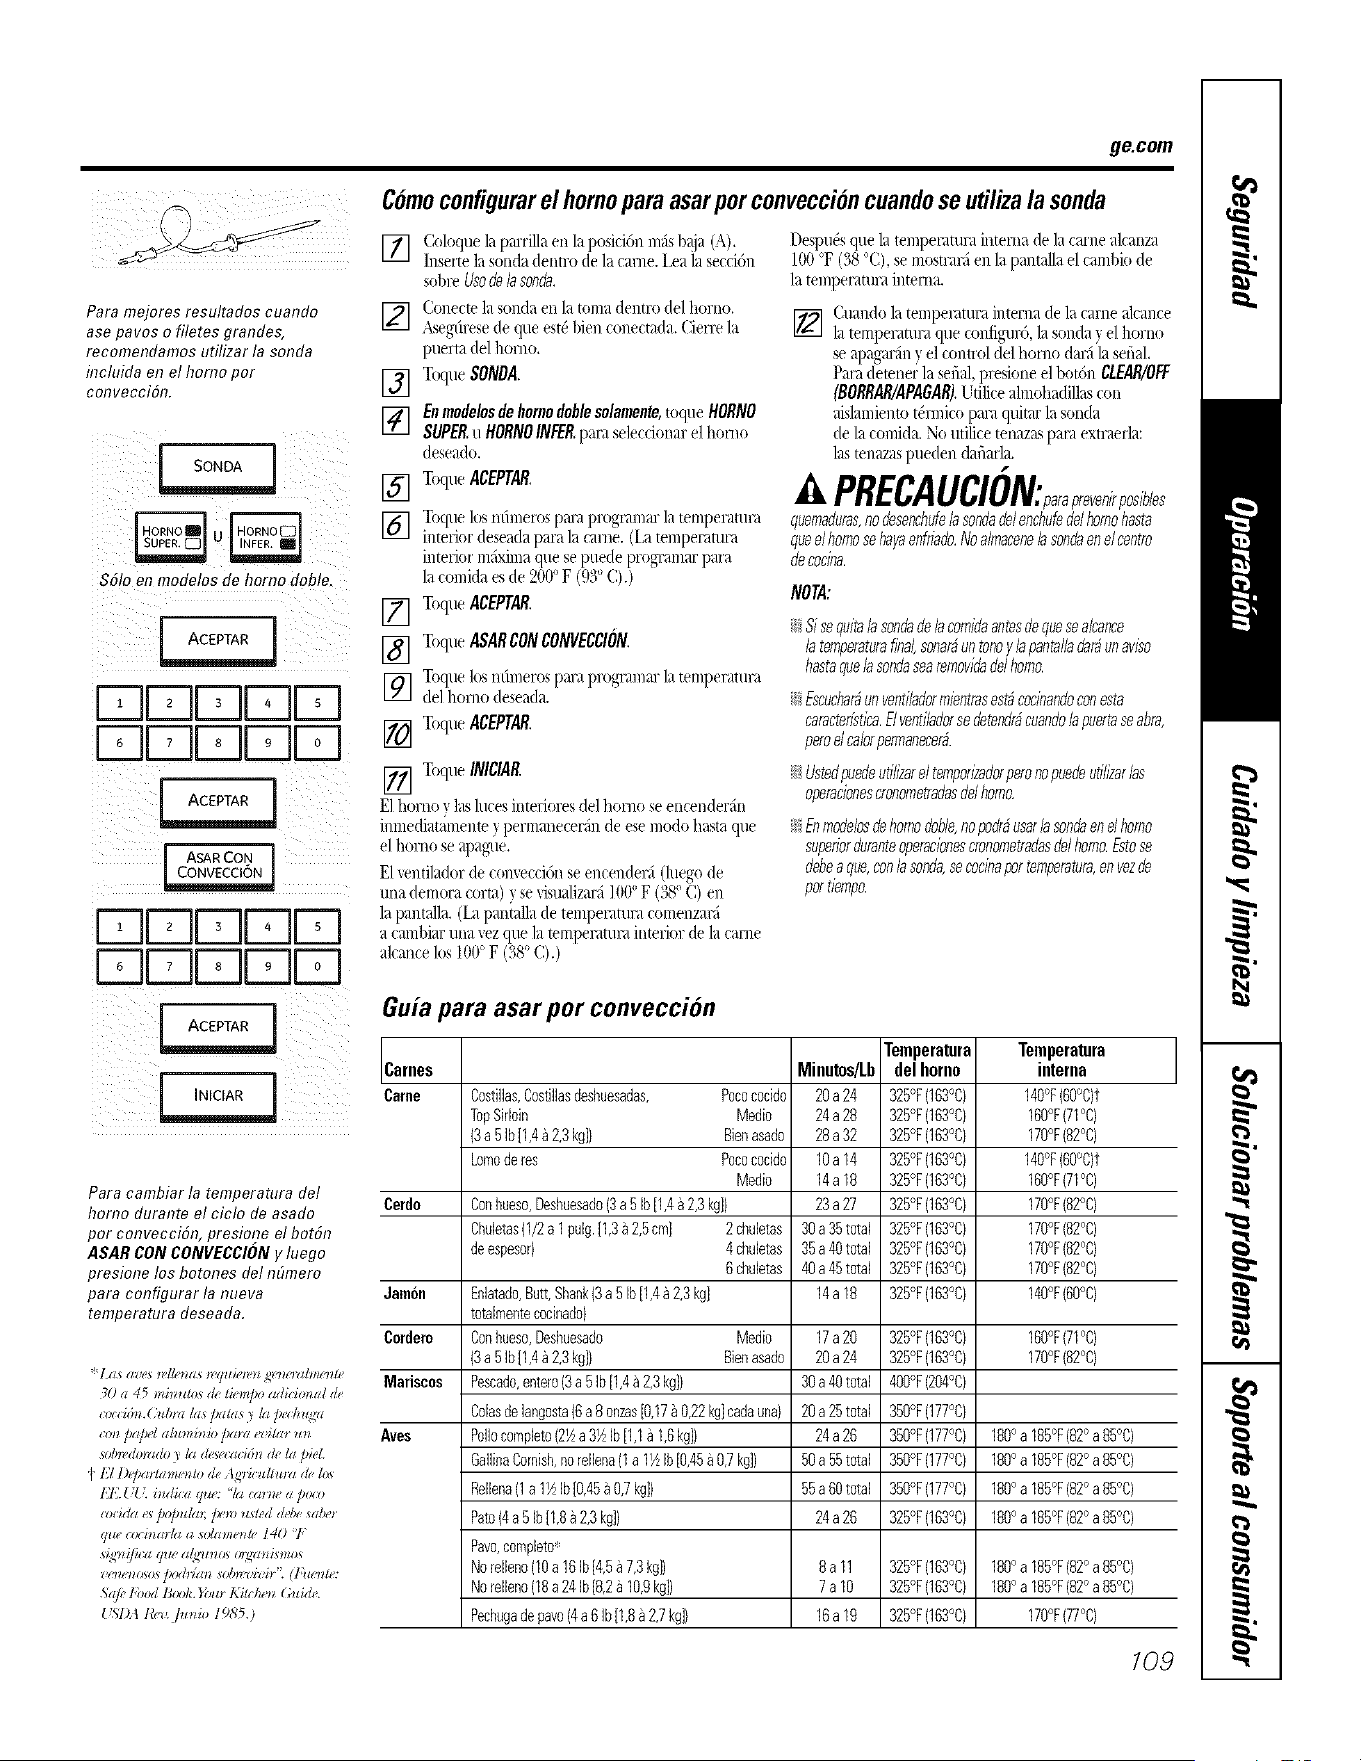
ge.com
!{ }(iI
Para mejores resultados cualTdo
ase paves o filetes grandes,
recomendamos utilizar la sonda
hTcluidaen el homo per
convecci6n.
!I!LI/ o[92bii I}:L
$6!o en mode!os de horno dob!e,
FqLdlzJUFq
FqLdLdLdFq
[ I
rqDDDrq
Dr-qr-qDD
Para cambiar la temperatura del
homo duranto el ciclo de asado
per convecci6n, presione el bot6n
ASAR CONCONVECCIONy luego
presione los botones del re)mere
para configurar la nueva
temperatura deseada.
70 a 45 mi_do_ d# U*'m[_o adh hmal de
*vccibn.(h*bnsla_/*am_y [a/wdmq,z_
_on DaDd ahmlinio /_mw _,it_z_ Itn
sobll@._ldv y/a d#w_ m i&7 d#/a p@L
t' 12 D@m/amento _# Agricu//_,w d#/o_
ElL {ff i_ di_a qla': '% <wl'_u a polo
<ocida e_ [_@u/m; /u'nJ usted Ud,_" _(dm
que _o_i_m /a a sdm_e_/_, I40 7;
z,f'#Tenofo_ )€_oddm7 fob_-#i'oif'L (l@_'n/e:
",'@" lbod Book. l'bm Ki/Hwlz (bride.
Comeconfigurarel homoparaasarperconveccioncuandose utilizala sonda
] ColoquelapmTillaenlaposici6nnldsb_ja (A),
Inserte la sonda dentro de la came. Lea la secci6n
sobre Usedelasonda.
] Cone(te la sonda en la toma dentro del homo.
,A_g-(lresede que est_ bien _one(tada. Cierre la
puerta del homo.
[] Tuque SONDA,
[_] Ellmodelosdehomodohlesolamente,toque HORNO
itl
SUPER.u HORNOINFER.para sele((ion_u: el homo
deseado,
[] Toque ACEPTAR.
] Toque losn(imeros pro'4progmnlar la temper, mini
interior deseada para la came. (La temperatura
inwrior maxima que se puede programar pm'a
lacomida es de 20if' F (930 C).)
Toque ACEPTAR.
Toque ASARCONCONVECCION.
[]
[]
[]
[]
Toquelosndmerospm;iprogmmm"]atemperature
de1homo deseada.
ToqueACEPTAR.
[] Toque INIglA£
E1borne y l_ksluces inmriores del homo se encenderfin
inmediatamenw y permm_ecerfin de ese mode basra que
el homo se apag-ue.
E1ventilador de convecci6n se enceMel',i (luego de
tma demora corta) y se Viqlalizarfi100<'F ()k'5° C) en
la pmtaila. ([a pm_mlla de wmpemmm comenzaN
a cambiar una _vz que ]a mmpelattna inmrkn: de ]a carrie
alcm_celos 100° F (380 C).)
Despu&que la tempemm_ainterna de la came alcanza
100°F(38 °C),se mostr,ml en la pant_dlael cambiode
la tempemmr,_interna.
] Cuando la tempesatura intema de la came alcance
la tempe_mm_ que configur6 la sonda 5 el homo
apagm',in y el control del borne dm',ila serial.
Para detener la serial, presione el botdn CLEAR/OFE
(BORR,4R/ANGAR).Utilice almohadill_k,_con
aislamiento t&mico para quitm' la sonda
de la comida. No ufilice wnaz_t'_pan_ extr, wrla:
las wn_zas pueden dafiarla.
A PRECAUClON:para .even, pos, es
quemaduras,nodesenchufelasondade/enchufede/homohasta
queelhomosehayaenfriado.Noa/macene/asomaenelcentre
decocina.
NOT&
_ Sisequitala somadelacomidaantesdequesoa/cance
/atemperaturafind, sonar#untoneylapantal/adar#unarise
hastaquelasondasearemovidadelhomo.
_ Escuchar#unventiladormmntrasest#cocbandoconesta
caracteffstica.E/ventiladorsedetendr#cuando/apuertaseabra,
peroel calorpermanecer#.
_! Ustedpuedeutilizarel tempors}adorpetenopuedeuti/izar/as
operacionescronometradasde/homo.
_ Enmodelosdehomodoble,nopodr#usarlasondaond homo
superiorduranteoperacbnescronometradasde/homo.Estose
debeaque,conlasonda,secoclnapertemperatura,envezde
pertmmpo.
Guia para asar per convecciOn
Carnes
Came
Cerdo
Jam6n
Cordero
Mariscos
_tves
Temperatura
Minutos/I.b del homo
Costillas,Costillasdeshuesadas, Pocococido 20a 24 325°F(163%)
TopSirloin Med[o 24a 28 325°F(163°C)
(3a 5 Ib[1,4a 2,3kg[) Bieoasado 28a 32 325°F(163°C)
Lomoderes Pococoddo 10a 14 325°F(163°C)
Medio 14a18 325°F(163°C)
Conhueso,Deshuesado(3a 5 Ib[1,4a 2,3kgl) 23a 27 325°F(163°C)
Chuletas(1/2a 1puig.[1,3a 2,5cm[ 2 chuletas 30a35total 325°F(163°C)
deespesor) 4 chubtas 35a40total 325°F(163%)
6 chubtas 40a45total 325°F(163%)
Enlatado,Butt,Shank(3a 5Ib[1,4a2,3kgl 14a 18 325°F(163°C)
totaimentecocinado)
Conhueso,Deshuesado Med[o 17a 20 325°F(163°C)
(3a 5 Ib[1,4a 2,3kg[) Bienasado 20a 24 325°F(163°C)
Pescado,entero(3a 5 Ib[1,4a 2,3kg[) 30a40total 400°F(204°C)
Colasdelangosta(Ba8 onzas[0,17_ 0,22kglcadauna) 20a25total 350°F(177%)
Poliocompbto(21ka31kIb[1,1a 1,6kg[) 24a 26 350°F(177%)
GallinaCornish,noreNena(1a 11_Ib[0,45a 0,7kg]) 50a55total 350°F(177%)
Rellena(1a 11kIb[0,45a 0,7kgl) 55a60total 350°F(177%)
Pate(4a 5Ib[1,8a2,3kg]) 24a 26 325°F(163%)
Pave,compbto:
Norelleno(10a 16Ib[4,5a7,3kgl) 8a 11 325°F(163%)
Norelleno(18a24Ib[8,2a 10,9kg]) 7a 10 325°F(163%)
Pechugadegave(4aBIb[1,8a2,7kg]) 1Ba 19 325°F(163%)
Temperatura
interna
140°F(6O°C)t
160°F(71°C)
170°F(82°C)
140°F(6O°C)t
160°F(71°C)
170°F(82°C)
170°F(82°0)
170°F(82°0)
170°F(82°C)
140°F(60°0)
160°F(71°C)
170°F(82°C)
1800a 185°F(820a85%)
1800a 185°F(820a85%)
1800a 185°F(820a85%)
1800a 185°F(820a85%)
o o o o
180 a 185F(82 a85 C)
o o o o
180 a 185F(B2a85 C)
170°F(77°C)
109

Horneadoy asado con conveccionpor tiempo
Enmodelosde homodoble,puedeutilizarla funci6ndehomeadocronometradoenunhomomientrasutilizalalimpiezaautom#ficaenelotto;
tambi#npuedeusarelhomeadocronometradoen amboshomossimult#neamente,
NOTA:nodebepermitirsequelos alimentosquese echana perderf#cilmente--comoleche,huevos,pescado,rellenos,ayesy cerdo--
reposenporm#sde 1horaanteso despu#sdela cocciSn,Latemperaturaambientepromueveelcrecimientodebacteriaspeligrosas,
HORNEAR CON 1 [ ASAR CON
$51oen modelosde homo doble.
EC]DDFqFq
DDDFqFq
DDDFqFq
DDDr-qr-q
J INICIOCON J J JNICIOEN J
Como configurar un Inicio inmediato y una parada automgttica
E/homose encender_inrnecl/atarnente7 cocinar_durante
el tiernposeleccionado.AI final de/tiernpode cocci@,
el homose apagar_autorn_ticarnen£
_sugl]I'(_e de ([tie el rd(!i lnH(s[re 1_1|]or_'t ( ol'r( (to
&l dia.
[] "lbqtw HORNEARCONCONVECC/ON
o ASARCONCONVECC/ON.
[]
[]
Enmode/osde homo dohleso/mnente,
I(_qm HORNOSUPER.u NORNOINFER.
])al"Zt seletxiOl/_/$ d }lorI/o (l(_s(!zt(]o.
Dos otx:ion(s de parrilla est:il/disponibles:
UNAPARRILLA-Toqu(! (sta l%nci6n
])_/y_'t COCiI/_/J" COIIIi(t_/S (1/ /t11_1 SO1_1 1);ll]Jl]_'t
/tsaI/d(I (1 ] ]Ol'l/(?_tdO (/)1/(.}OI/"_( C(i/)n.
[]
[]
!i VARIASPARRILLAS-Toque esta
flmcidn para cocinm: comidas en m;_s
(1_ tma parrilla (es decir: en 2 o 3 parfillas)
al mismo tiempo usando el I ]lorlieado
con Conv(ccidn. Para md_ infi_rmacidn,
lea 1;tseccidn Horneadoconconvecc@?con
variaspa_riiias.
"lbqttc los ndm4 ros para programar
la lemt)eramra des_ ado.
"lb(lu( ACEPTAR
] "lbq(t( los mimeros para ]/rogramar
(1 t](I](])o (Je (X(C(i(')]/(t(seado.
E1 homo (Oll(e(/zar_i v (o(/ti(ltlar_i la (occid(l
(htrante la (;and(lad (ie tiempo progrmnada,
]l/('go se ap_lgi/n_ _llltOl_(_tica(t/ente, a i_(('((os
qlte la fttncidn Cocinar y cal(ntar estlt\iera
])rogrmn;_da. I _eala se(:cidn sol)re la Opci6n
Cocinar7 colentor.
Enmodelosdehomodob/esolamente,p_ra
l)rogrmnar el s_g(mdo homo, selec(ione OPRIMA
PARASELEC.OPCIONESHORNOINFERIORu OPRIMA
PARASELEC.OPCIONESHORNOSUPERIORsc'gdnsc_
nc'(('sm+ioy siga los ltasos am_,rlon,s.
][_1 t( 11(I)(?1"_(I II1"_1 ( OI)[ig'llI'_/d_( S(! ])ll(!(]( (_lI/(bi_(F
_oca_l(]o CAMBIARTIEMPO-TEMP_n d homo
apropiado.
][21 (X)(/J-ig/lI'3(i/)l) S(_ l)/t(?(l(? (;a(I( (]kzr [O(al/dO
CANCELARen el hor_(o al/ropiado.
El (o111_((Io1" s( p/t(?()(? 111"o_1"_11]/_117 Jo({t,l/do
PROGRAMARCONTADORDE T/EMPO.
I_a la s_((idn Contadorde tiernpo.
I_xla wz que la cocddn estd comt)lem,
el lmrno (larfi (ma serial v se _crd "MAS TIEMPO"
en la pantalla pot dnco rain tlt/)s. Compruebe
que la comida se h_£_;_codn%do. N se necesita m;k
tiempo de coccidn, toque MAS TIEMPOe ingrese
tiempo de coccid(/_dicional. Si no se selecciona,
la pantalla st borrw'fi (le fimna a/_mmddca
ell (JI/CO lI/il//It_)s.
[] "l?_(lueACEPTAR
//0
] I,as dos ot)dones de inicio inmedialo y
(let(_lKi6n mttom_lica es_n disl!onibles:
INICIO CONPRECALENT.- "lbqu(! para
])1°( ( _ll(_I(l_'tI" (] hol°l(O.
E1 vcndlador de com'_'ccidn se encender;_
;d precalemar el homo. E1 control (lar_i
/tna serial ( it}/]/(]o el horno estd
l)rccalentado; esto tomard 10 minutos
_|)roximadmnente. I.a pantalla mostrard
la temperamra configurada.
][,a (()(:d0n ]/rograli/ad_( no s(_ inkJani
}1_1s|_1 (]tm (1 ]/oFno (?s'.(_ t)r(?(_ll(nta(]o
v, se tO(Ill(! INICIAR
Cttando el co](lrol (Id la serial, colo(tue
]_'t(_Ol//i(l_( (1/ (l hoI'I/O+
i_iINICIOEN FRIO-Toque para iniciar
el }(ori(o (le ]()rlt/a imllediata y codnar
la comida bin p_x'calt mamiento.
E1 ventilador de comx'cci6n se encenderfi.
E1 d(mpo de (:occi6(( se ini(:iarfi de Ji_rma
imnediata.
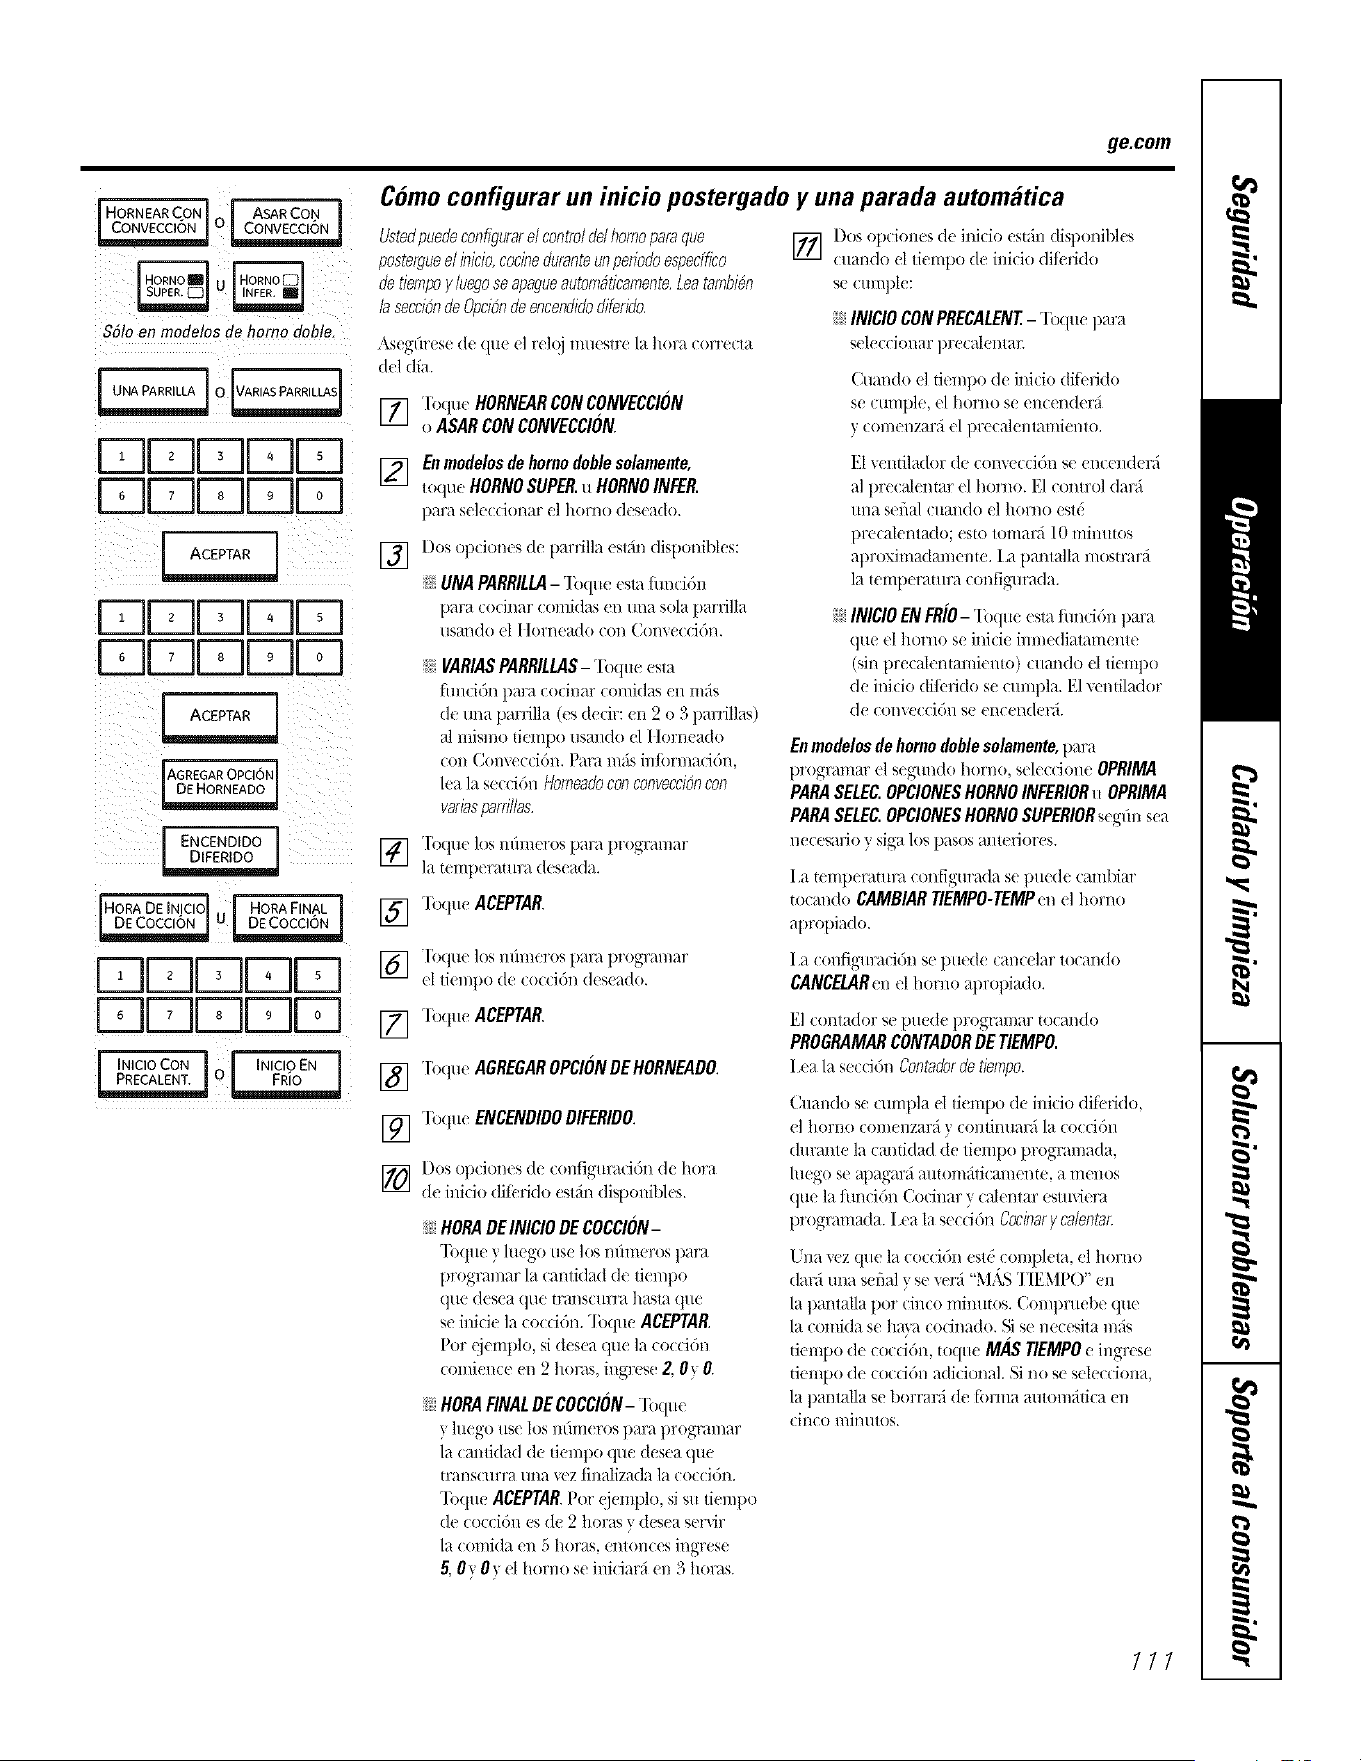
[HORNEARCON_ _ ASARCON i
S61o on modotos rio homo doblo.
DDDDD
DDDDD
DDDDD
DDDDD
[AGREGAROPCl6N]
J ENCENDIDO I
DDDDD
DDDDD
[ INICIOCON J 0 I INICIOEN
ge.com
Como configurar un inicio postergado y una parada automgltica
Ustedpuedeconfig_zrarelcontroldd homoparaque
postergueel inicio,cocineduranteunperiodoespec/fico
de tiempoyluegose apagueautom_ticamente.Leatambi_n
la seccibnde Opcibnde encendidodiferido.
A_e_(lr(se de (i/t( _l 1"_l(!j li/lleSlre la hora COrl'eC/a
&l dfa.
"lbque HORNEARCONCONVECCIONV_
o ASARCONCONVECC/ON.
] Dos opciones de inicio estfin disponibl_s
c/talK]o (1 demp() de inMo (lili rid()
s(" ctt_nple:
N INICIO CONPRECALENT- "Ibque para
Scl('cciol_lr pl'('( _l[cnt_l£
(il/_JI/(lll el dcmpo dc inido difcfido
se cumple, el homo se eiKenderd
y comenzarfi el precalentamiento.
[_ Enmodelosdehomo doblesolamente,
loque HORNOSUPER.u HORNOINFER.
])_11"_1Sele((ion_lr c] horno d('s('ztdo.
] Dos opdones de parrilla _s@n disponiblcs:
N UNAPARRILLA- "lbqueestathncidn
para cocinar commas en una sola parfilla
usando el I Iorneado con Convecci6n.
[]
[]
_i VARIASPARRILL4S- "[bque esta
[illl(idn para co(ilmr (oi//i(]_lS el/II/_/s
de una panilla (es decir: en 2 o 3 parrill;_s)
al mismo dempo usm/do el I torneado
c(m Comccci6n. Para mils inlbrmaddn,
lea la secci6n Homeadoconconvecci6ncon
variasparri/ias.
TO(] lit' los, nlIll/Ol'os [)_'tF_/ t )l'O_F_I//_II',
]a ".(?I]lp( F_II/W_I deseada+
Toque ACEPTAR
E1 vendlador de comvccidn se encenderfi
al precalemar el homo. E1 control darfi
/tI/_t serial c/l_/l/do e] homo estd
precalentado; esto tomarfi l 0 mimttos
aproximadmneme. I,a pantalla mostrard
la tell/pel'alttra coi/figtlrada.
N INICIOENFRIO-"Ibqu_estafimcidnpara
que el homo se inicie inmediatamente
(sin prec;dentamiemo) cttando el tkmpo
de ini(io (lilinido se cmnpl;i. E1 vt,mil_ldor
de (onve(cidl/se encen(ler_i.
Enmodelosdehornodoble solamente,para
programar el segundo homo, sek cdone OPRIMA
PARASELEC.OPCIONESHORNOINFERIORu OPRIMA
PARASELEC.OPCIONESHORNOSUPERIORscg(m sc_*
l/('c('salio } Si_l los 1)asos _l/t('liol'('s.
I .il t(I/lper_/t/wa (oI?_igtlrada se p/t((le ( alI/|)ial"
:(x:ando CAMBIAR TIEMPO-TEMPend homo
apropiado.
[]
[]
[]
[]
[]
"lb(tue los mhneros para programar
(| li(mpo de (o((i()n dese?ldo.
"lbque ACEPTAR.
Toque AGREGAROPCIONDEHORNEADO.
"lbque ENCEND/DODIFERIDO.
Dos op(iones de (Ol/figtllZ/( i(')n de hol'_l
(1( inicio di[_ rklo ¢sl;in disponibl(s.
N HORADEINICIO DE COCCION-
"I'oqtt( } h1,.'go use los nitm,.'r()s para
programar la (anfidad de tieml)o
que desea que transctu:ra basra que
se inide la coccidn. "]bqtte ACEPTAR
Por £jemplo, si desea que la coccidn
comie_Ke erl 2 horas, i_@+('s( 2. 0y 0.
N HORAFINALDECOCCION- "Ibque
y htego/18(" |os i/t'lUl( Fos para progr;u nat
la (:anti(lad de tieml)o que (tesea que
mmscurra una _vz finalizada la coccidn.
Toque ACEPTAR.Pot ejemplo, si sit fieml)o
(le coccidn es de 2 hot:is _ (ksea ser_ir
la (olI/ida oil S) horn/% Cllton(es ingrese
5, 0y 0y el homo se iniciard e_ 3 horas.
I.zt (o11[ig/waci()l] se plied( (ai/(dar tocando
CANCELARen el horno apropiado.
El (ontador se pttede ])rogt'al//ar tocando
PROGRAMARCONTADORDE TIEMPO.
I,ea la sc((:idn Contadordo tiompo.
Cttand(_ s_ Cmnl)la cl ti_mpo de inicio difcrido,
el 11017110 (OI//eI/ZalTfi y (Ol/tintlarfi la (o(cion
durante la canddad (le tiempo programada,
luego se _pagarfi a/tton/fiti(_/l/len'.e, a Ill( IIOS
que la thncidn C()dnar y cNentar estmiem
programada. I .ca la seccidn Cocinar}/ca/entar.
Una _cz que la coccidn estd (ompleta, cl homo
dar;i tma s_flal y se _crd "M.kS T/I£ \lifO '+en
la l)antalla pot cinco mimttos. Coml)rttebe que
la comida s_ hK_:_cocinado. Si se necesita mils
dempo de coccidn, toque MAS TIEMPOe ingrese
tiempo de c()ccidn adici()nal. N no se selecciona,
la pantalla se borrarfi de fbrma automddca e_
(in(o ii/]n utos.
III
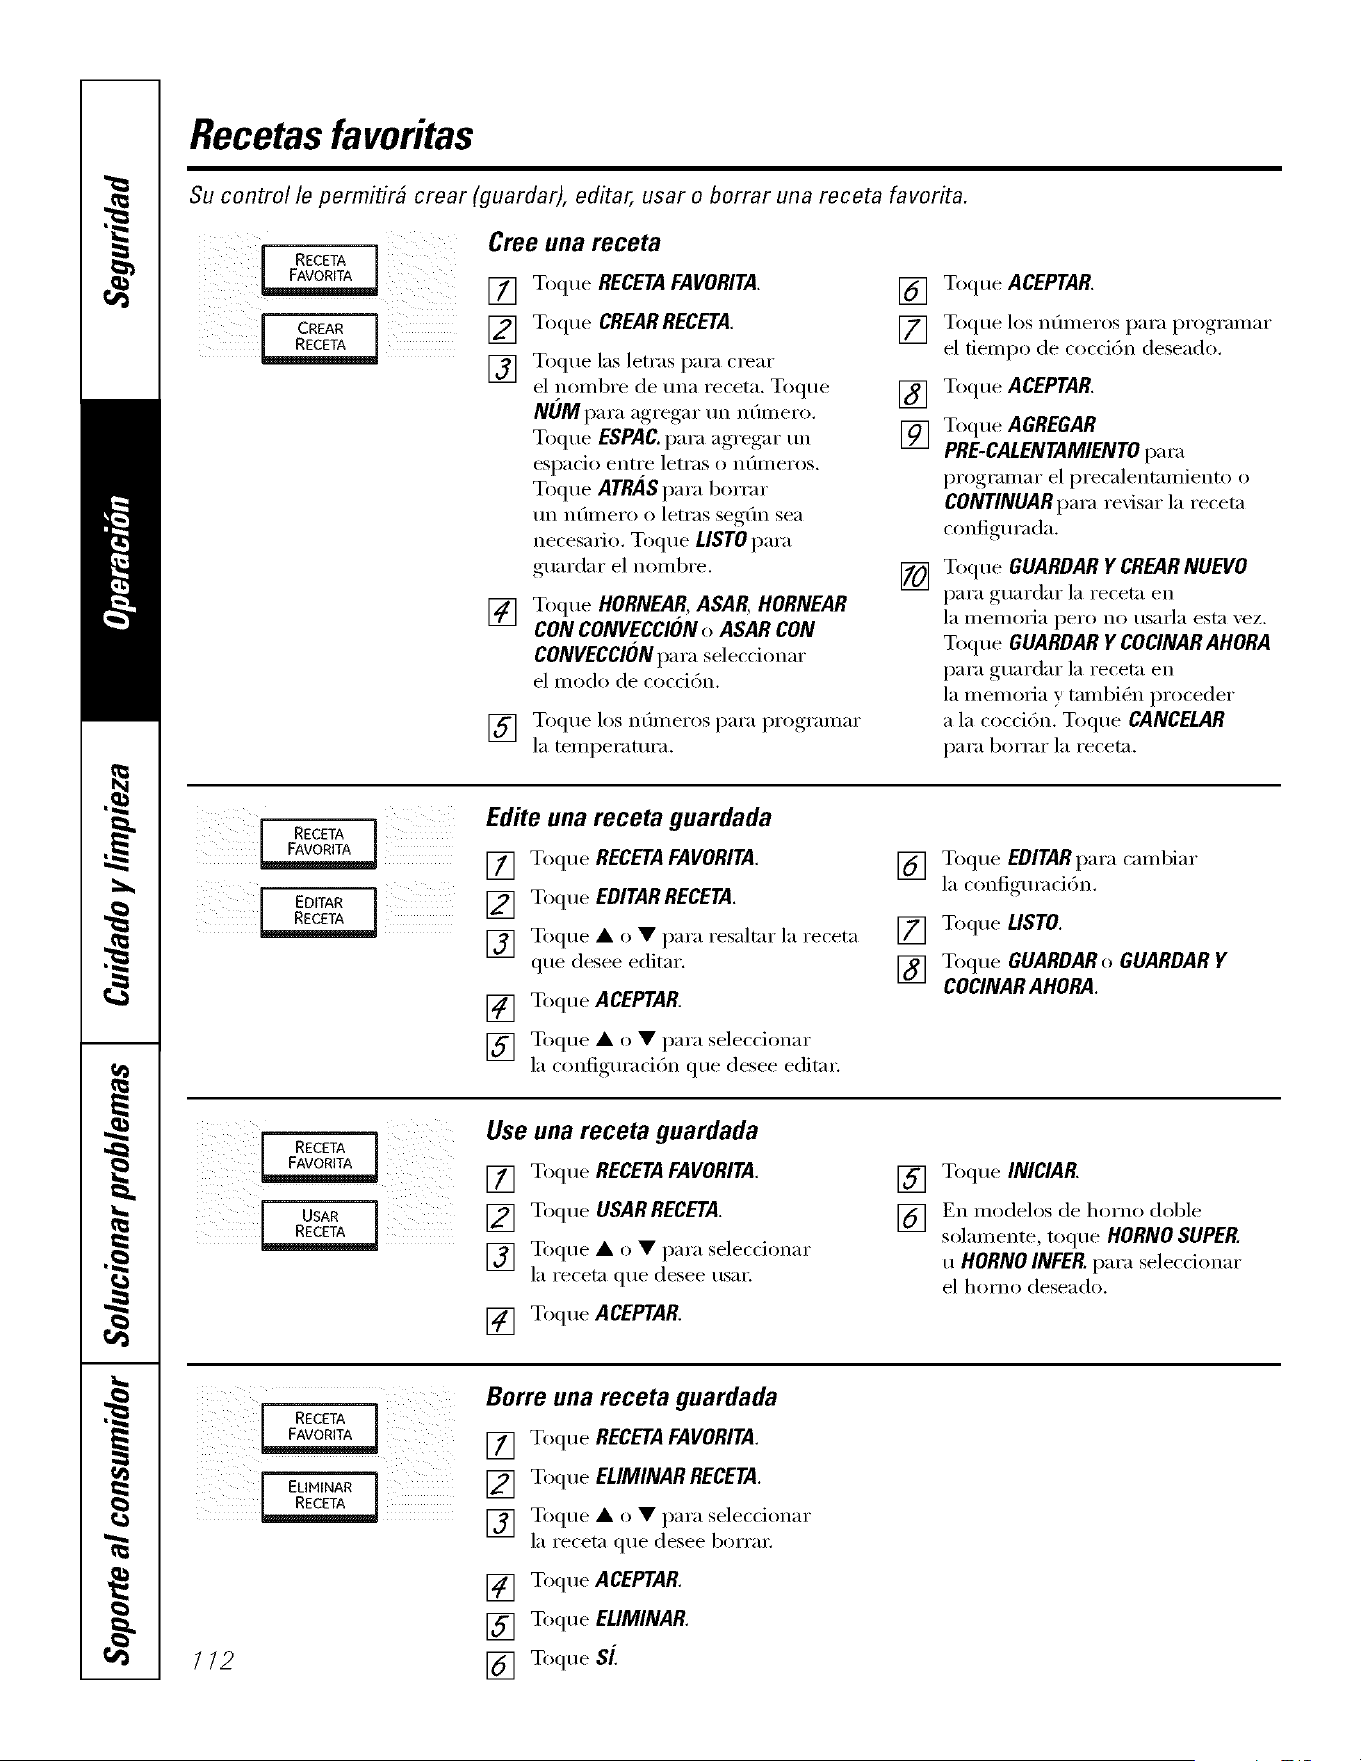
Recetasfavoritas
Su control le permifir# crear (guardar), editar, usar o borrar una receta favorita.
RECETA
(]REAR
Cree una receta
[] Toque RECETAFAVORITA.
[] Toque CREARRECETA.
[] Toque las letras para treat
el nonfl)re de una receta. Toque
NOMpara aoTegar un nCunero
Toque ESPAC. para agregar un
espacio entre letras o n0iilei'os,
Toque ATRASpma bom_r
tin n(llilei'o O letras seg(m sea
necesai_o. Toque LISTOpaIa
guardar el hombre.
[] Toque HORNEAR,ASARHORNEAR
CONCONVECCIONo ASARCON
CONVECCIONpara seleccionar
el modo de cocci6n.
[] Toque los nfimeros para programar
la temperatm'a.
[] Toque ACEPTAR
[] Toque los n0meros para programar
el fiempo de cocci6n deseado.
[] Toque ACEPTAR
[] Toque AGREGAR
PRE-CALENTAMIENTOpara
programar el precalentamiento o
CONTINUARpara revisar la recetn
configm'ada.
[] Toque GUARDARYCREARNUEVO
para guardar la receta en
la i/leli/Oi_l pero no tlS_lI'l_l estn vez.
Toque GUARDARY COCINARAHORA
para guardar 1;i receta en
1;I memofia y tambi_n proceder
a la cocci6n. Toque CANCELAR
para bormr la recetn.
RECETA
J EDITAR j
Edite una receta guardada
[] Toque RECETAFAVORITA.
[] Toque EDITARRECETA.
[] Toque • o • para resaltar 1;i receta
que desee editar,
[] Toque ACEPTAR
[] Toque • o • para seleccionar
la configuraci6n que desee editm:
[] Toque EDITARpara cambiar
1;i configumci6n.
[] Toque LISTO.
[] Toque GUARDAR o GUARDAR Y
COCINARAHORA.
[ RECETA [
[ USAR l
Use una receta guardada
[] Toque RECETAFAVORITA.
[] Toque USARRECETA.
[] Toque • o • para selec(ionar
1;i receta que desee usm:
[] Toque ACEPTAR
[] Toque INICIAR
[] En modelos de horno doble
solamente, toque HORNOSUPER.
u HORNOINFER.para selecchmar
el homo deseado.
RECETA
J ELININAR j
112
Borre una receta guardada
[] Toque RECETAFAVORITA.
[] Toque ELIMINAR RECETA.
[] Toque • o • para selecdonar
la receta que desee borr;m
[] Toque ACEPTAR
[] Toque ELIMINAR
[] Toque SL

Contadorde tiempoy controlbloqueado ge.com
FqFqFqFqFq
FqFqFqFqFq
iiii!i iill iii iiilli
El CONTADORDE TIEMPO se puede
programar desde I minuto hasta
24 horas.
Este contador no controla
las operaciones del homo.
Para programar el contador de tiempo
[] Toque CONTADORDE TIEMPO. [] Cuando el contador llegue a :00,
el control harfi 3 son. agudos
[] Enmedeles de home deble selamente,
toque HORNO SUPER. u HORNO
INFER.para seleccionar el contador
para el homo deseado.
[]
Toque los n0meros hasta que
la cantidad de dempo que desea
aparezca en la pantalla. Pot
ejemplo, para programar 2 horas
v 4.:')n]inutos, toque Z 4y 5en ese
orden.
[] Toque INICIAR.
Si el dempo configm'ado o el dempo
I'eSt;lIlte es III_IVOI" O igual a tlil_l hoi'a_
la pantalla mosmml horas y Illilltlt()s
[HH: MM]. i,as letras "H" v "M"
aparecerfin para indicar que el tiempo
se expresa en horas v illilltlt()s. (Si se
configm'a tma o mils horas, la pantalla
no coiileilZ_li';/_1 ii/osti';li" el conteo
de tiempo hasta que haya pasado
tln I/lintltO.)
seguidos de tm son. agudo cada
6 segtmdos hasta que se toque
el CONTADORDE TIEMPO.
E1 tono se puede cancelar siguiendo
h)s pasos de la secci6n Opc/onos-
Con@uraci6nen Sonldo/Volumen.
Para cancelar el CONTADOR(ES)DE
TIEMPO, toque CANCELARCONT TIEMPO.
Para reiniciar el CONTADOR(ES)DE
TIEMPO, toque CANCELARCONT TIEMPO
y configm'e tm nuevo tiempo.
Si el fiempo configm'ado o el tiempo
I'est;lllte es illenor a Ull}l hoi';l_ l}l palltalla
mostrarfi minutos y segtmdos [MM: SS].
I_s letras "M" v "S" aparecerfin para
indicar que el tiempo se expresa en
minutos y segundos.
Bloqueo de controles
Sucontrollepermitir_quebloqueelosbotonest_ctiles
paraquenopueflanactivarsealpresionar/os.
NOTA:Enlosmoflelosfie homofloble,estoactivael
funci6nen amboshornos.
Para bloquear/desbloquear los comroles:
[]
Toque la tecla CLEAR/OFF
(BORRAR/APAGAR)durante
3 segtmdos, hasta que
la pantalla muestre CONTROL
BLOQUEADO.
[]
Para desbloquear el control, toque
la tecla CLEAR/OFF(BORRAR/APAGAR)
din'ante 3 segtmdos, hasta que
aparezca la pantalla de inicio.
Cuando esta flmcidn estfi acti_J(la v
se presionan los botones t_ktiles, ei control
emitinl un bip } aparecerfi CONTROL
BLOQUEADOen la pantalla.
NOTAS:
_: El modo de controlbloqueadoafecta
todoslos contro/es excepto/a tec/a
CLEAR/OFF(BORRAR/APAGAR).Ninguna
otra tocla t_ctil funcionar_cuandoesta funciSn
est6 activada.
!i> El ajustepermanecer#en /a memorialuego
de una interrupci6n de/a energfa.
1/3
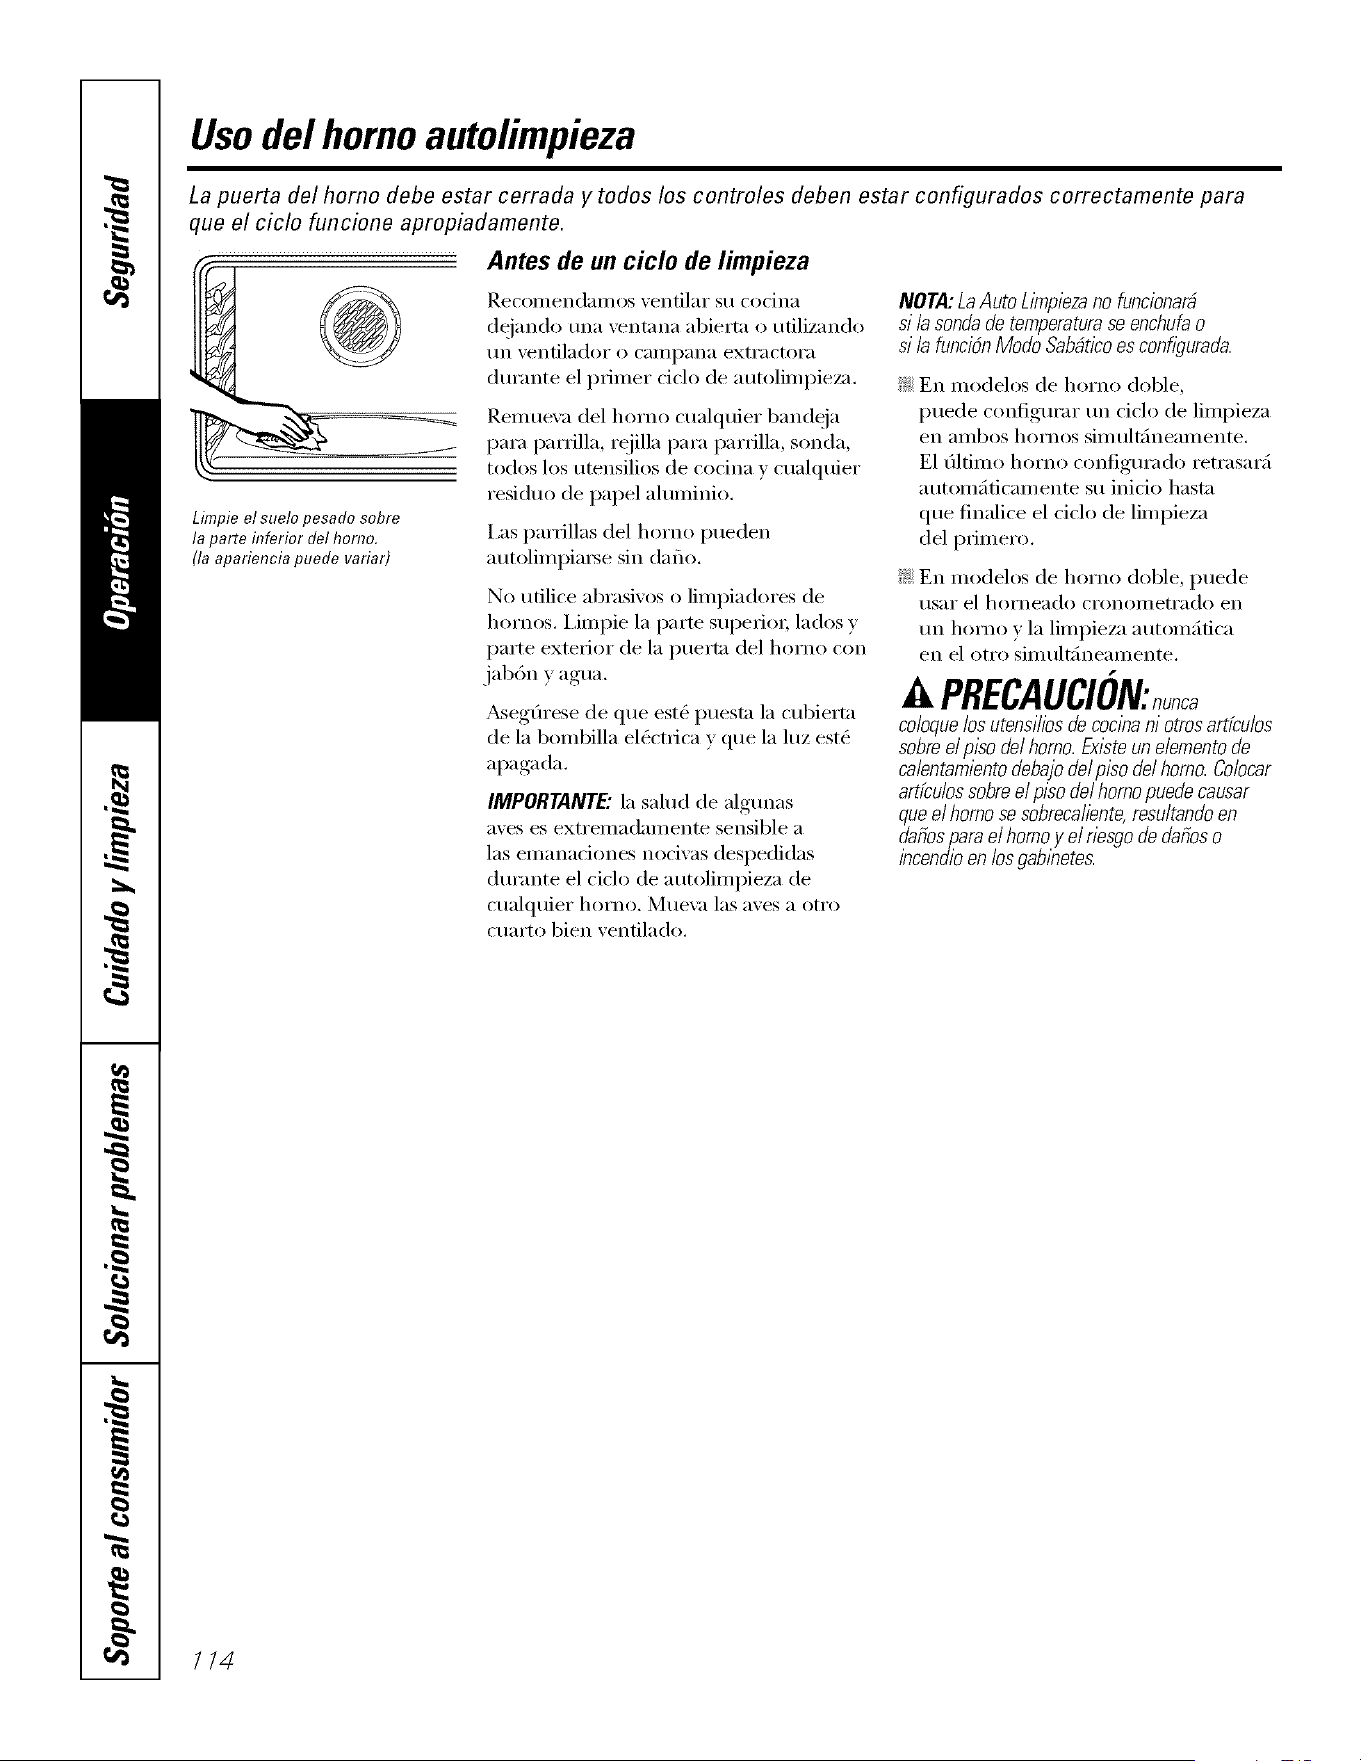
Usodel homo autolimpieza
La puerta del homo debe estar cerrada y todos los controles deben estar configurados correctamente para
que el ciclo funcione apropiadamente.
@
J
Limpie el suelo pesado sobre
la parte fl#erior del homo.
(la apariencia puede variar)
Antes de un ciclo de limpieza
]_e('OIllend_lI/lOS \'entilar SU (o(ina
dejando una ventnna abiertn o ufilizando
[In ventilador 0 C_llllp_lIl_l extractora
din'ante el prin/er ciclo de autolimpieza.
Remueva del homo cualquier bandeja
para parrilla, rejilla para parrilla, sonda,
todos los utensilios de cocina y cualquier
residuo de papel aluminio.
I,as parrillas del homo pueden
autolimpia_se sin daflo.
No ufilice abrasivos o limpiadores de
hornos. I,impie la parte superior; lados y
parte exterior de la puertn del homo con
jab6n y agua.
,&segfirese de qtle est(_ ptlestn la cubiertn
de la bombilla el(_ctrica y que la luz est(_
apagada.
IMPORTAIVTE"la salud de algtmas
ayes es extremadamente sensible a
las emanaciones nocivas despedidas
din'ante el ciclo de autolimpieza de
cualquier hoI'no, Mt]e\:_ las ayes a otro
cuarto bien ventilado.
NOTA:LaAutoLl_npiezanofuncionara
si /a sonda de temperatura se enchufa o
si iafuncidnModoSab#ticoescon@urada.
_: En modelos de homo doble,
puede configm'ar tm ciclo de limpieza
en _lillbos hoFnos siIl/tllt_/neaillente.
E1 filfimo homo configm'ado retrasar;i
automfiticamente su inicio hastn
que finalice el ciclo de limpieza
del primero.
_: En modelos de homo doble, puede
IIS}II" el hoFne_ldo cronoilleti'ado en
tm homo y la limpieza atltOillfifica
en el otto simult;ineamente.
PRECAUCION:nunca
coloquelosutensiliosdecoclhani otrosartbulos
sobreelpisode/homo.Exlsteune/ementode
caientamientodebajode/pisode/homo.Coiocar
artfcuiossobreei plsode/homopuedecausar
quee/homose sobrecaiiente,resu/tandoen
dafiosparaei homoy el riesgodedafioso
bcendioonlosgabinetes.
114
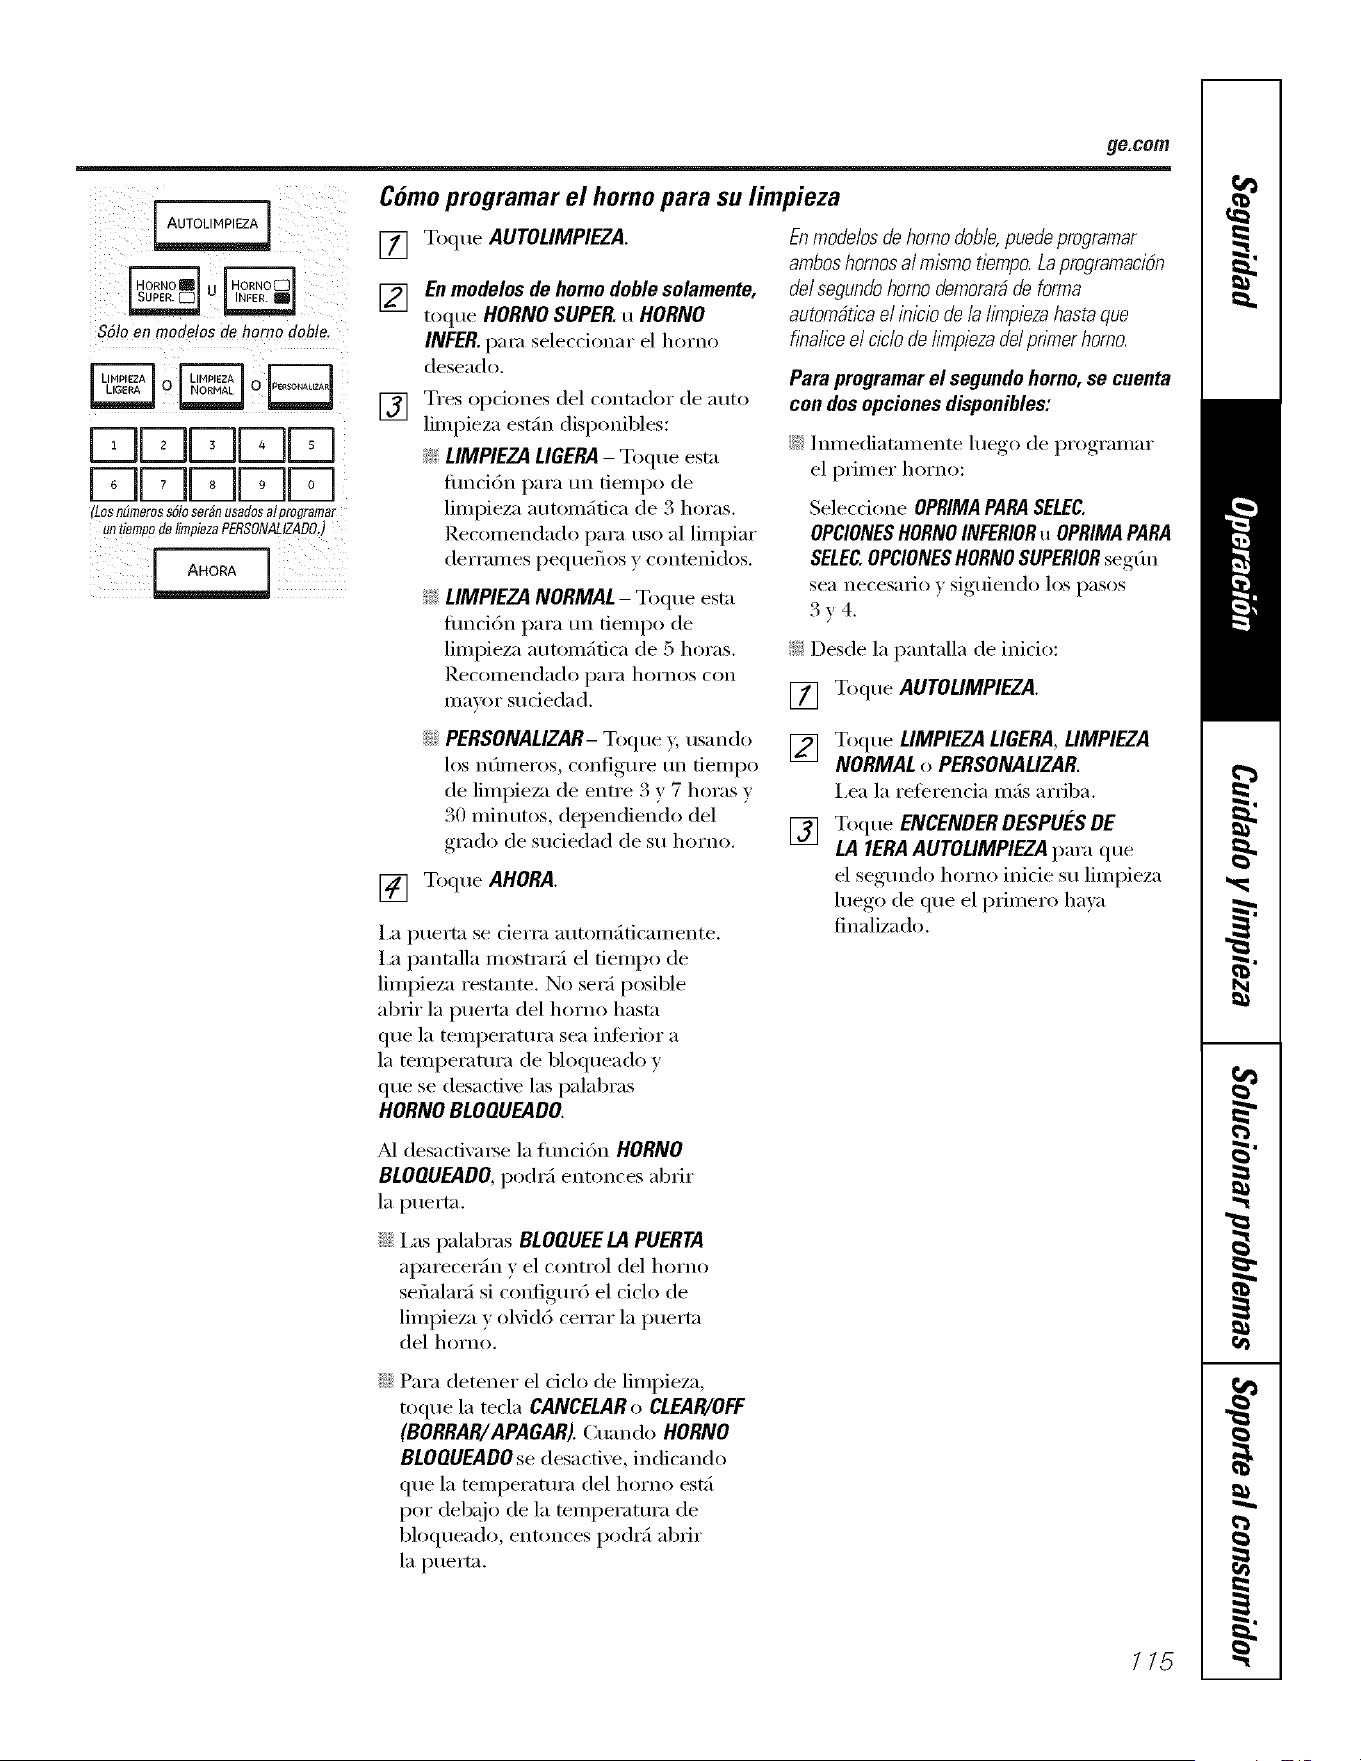
_e.com
$61oen mode!osdehomodoble
DUUUD
FTI[-qMMD
'LOS numofos SOlO SOfSn 11$8d0s 81 plogfamsf
untlomoodohmoiozaPERSONALtZADO.;
Como pmgramar el homo para su limpieza
[]
[]
[]
Toque AUTOLIMPIEZA.
Enmodelos de homo doble solamente,
toque NORNO SUPER. u NORNO
INFER.pare seleccionar el homo
deseado.
Tres opciones del contador de auto
limpieza estfin disponibles:
_ LIMPIEZA LIGERA- Toque esta
flmci6n para un tiempo de
limpieza automfifica de 3 horas.
Recomendado para uso al limpiar
derrames pequefios y conmnidos.
_: LIMPIEZA NORMAL - Toque esta
flmci6n para un tiempo de
limpieza atltolllfifica de 5 horas.
]_eCOlllendado p}li'}l hoYnos con
mau)r suciedad.
Enmodelos dehomo dome,puede programar
ambos hornos al mismo tiempa La programacidn
de/segundo homo demorar#de forma
autom#tica el inicio de ia hmpiezahasta que
flnahce el ctcio de hmpiezade/pnmer homo.
Para programar el segundo homo, se cuenta
con dos opciones disponibles:
::Ji::]mnediatamente luego de programar
el primer homo:
Selecdone OPRIMAPARASELEC.
OPCIONESHORNOINFERIORu OPRIMAPARA
SELEC.OPCIONESHORNOSUPERIORsegCm
sea necesario y siguiendo los pasos
3v4.
!i?:Desde la pantalla de inicio:
[] Toque AUTOLIMPIEZA.
::Ji::PERSONALIZAR-Toque y, usando
los nfimeros, configure un fiempo
de limpie/;_ de entre 3 v 7 horas v
30 minutos, dependiendo del
grado de sudedad de su homo.
[] Toque AHORA.
I,a puerta se cierra automfiticamente.
I,a pantalla mostrarfi el fiempo de
limpieza restnnte. No seI'_i posible
abrir la puerta del homo hasta
que la temperamra sea inferior a
la temperamra de bloqueado y
que se desacfive las palal)ras
HORNO BLOQUEADO.
[] Toque LIMPIEZALIGERA,LIMPIEZA
NORMALo PERSONALIZAR.
I,ea la relerencia mils arriba.
[] Toque ENGENDERDESPUE'SDE
LA IERAAUTOLIMPIEZApara que
el segmMo homo inicie su limpieza
luego de que el primero ha)_
finalizado.
M desacfiw_se la flmci6n HORNO
BLOQUEADO,podr_i entonces abrir
la puerta.
::Ji::I,as palabras BLOQUEELA PUERTA
aparecer;h_ y el control del homo
sefialar;i si configur6 el cMo de
limpieza y olvid6 cerrar la puerta
del homo.
Para detener el dclo de limpieza,
toque la tecla CANCELARo CLEAR/OFF
(BORRAR/APAGAR). Cuando NORNO
BLOQUEADOse desactive, indicando
que la temperamra del homo estfi
pot debajo de la temperatm'a de
bloqueado, entonces po(h'fi abrir
la puerta.
//5
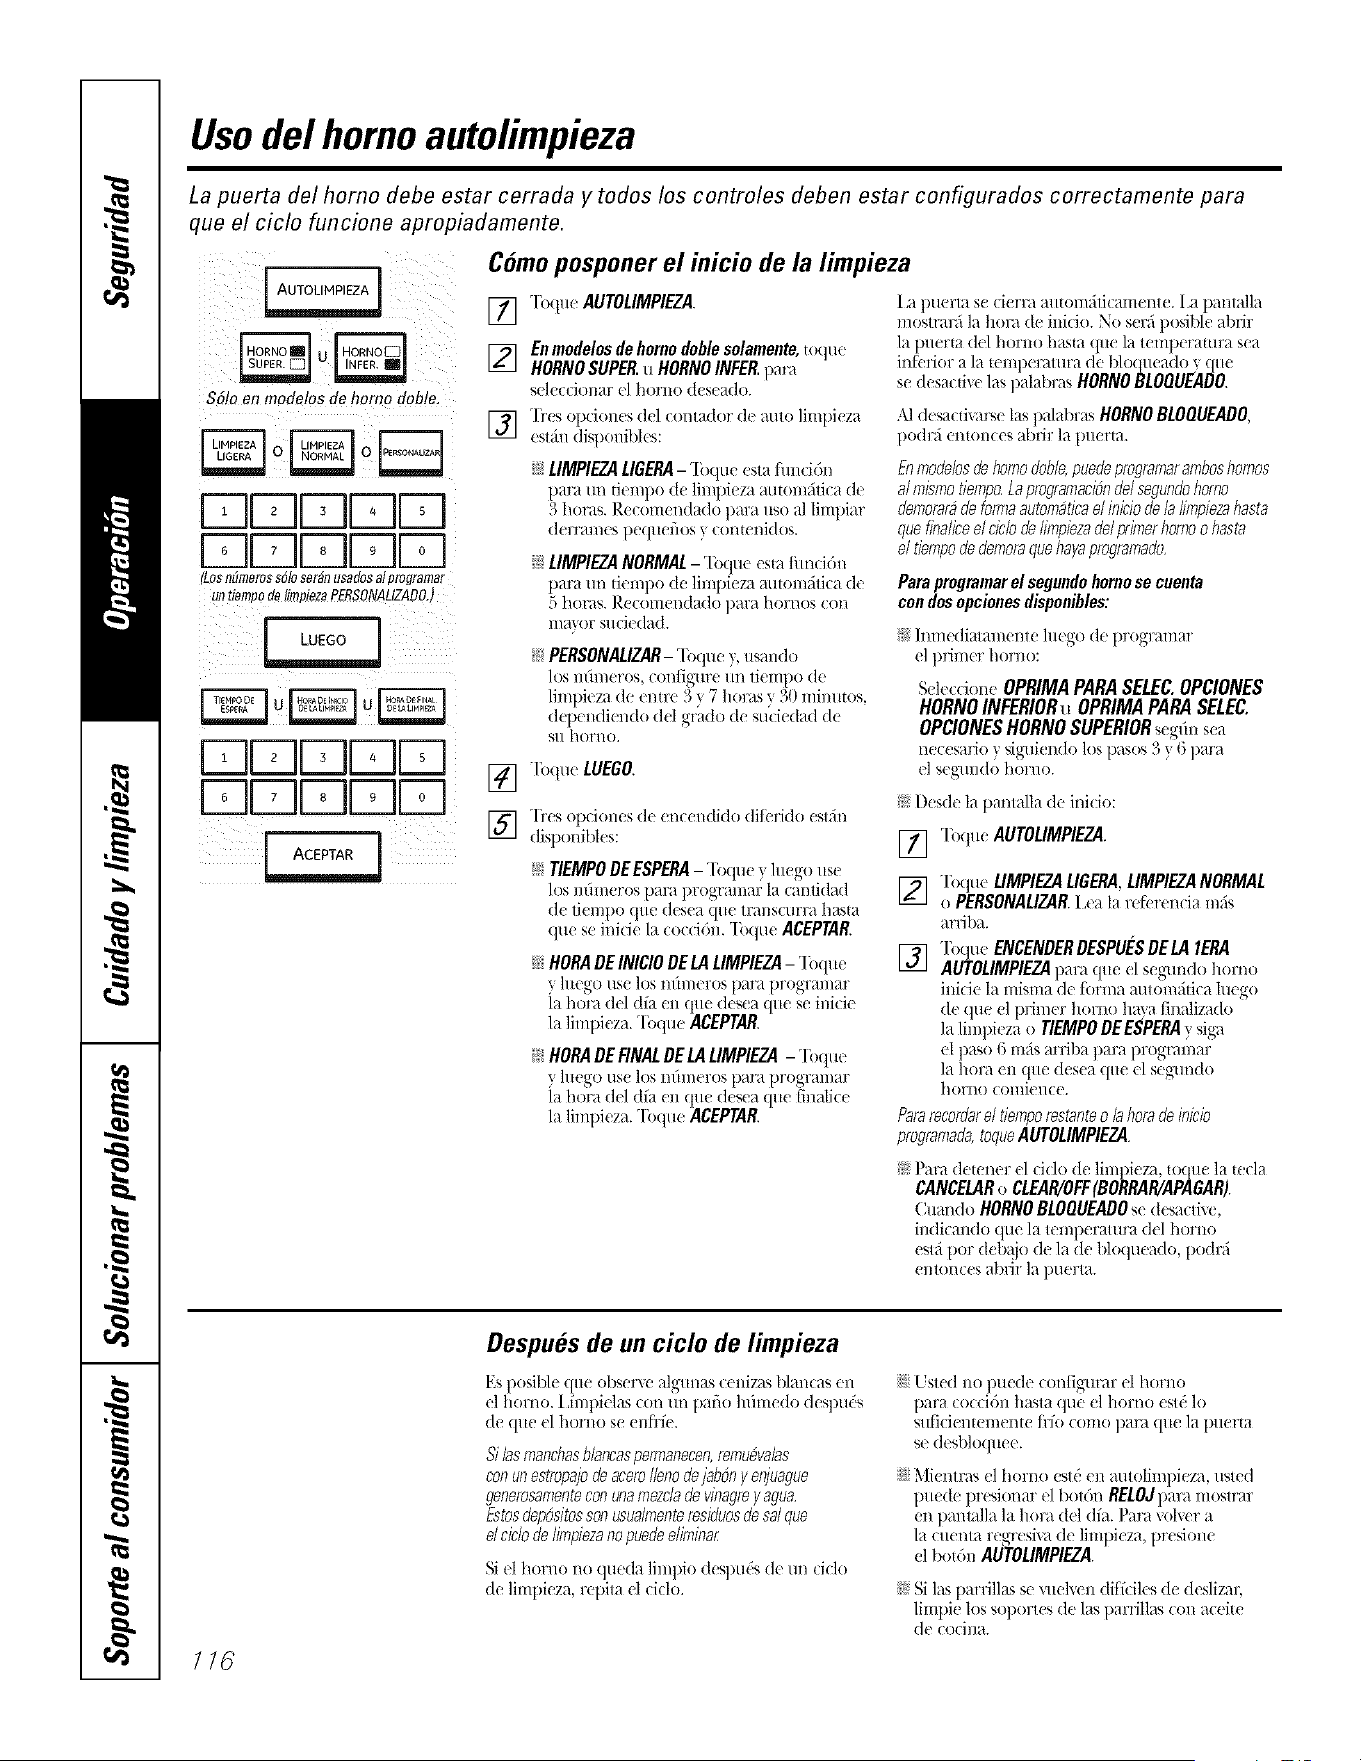
Usodel homo autolimpieza
La puerta del homo debe estar cerrada y todos los controles deben estar configurados correctamente para
que el ciclo funcione apropiadamente.
$5!o en mode!os de homo dobte.
r-qFqEZ]FqFq
FqFqr-qr-qr-q
ILosnumorosSOlOseranusaaosalprogramar
untlomoodelimoiezaPERSONALtZADOJ
FqFqFqFqFq
FqFqFqFqr-q
Como posponer el inicio de la limpieza
[] Toque AUTOLIMPIEZA
[] Enmodelosdehomodoblesolamente, toque
HORNOSUPER.u HORNOINFER.para
self f('iom/r c] hol'IlO (t( st'_tdo.
] "Des option( s del (omador de alllO limpieza
f slain disponibles:
NLIMPIEZALIOERA-"Ibque estafimcidn
para un fiempo (k limpk za automfidca de
3 horas. Recomendado para uso al limpiar
derrames pequefios y COHtPHJ(IOS.
N LIMPIEZANORMAL- 1bque esta thnci6_/
para un dempo de limpk za mltomfitica (le
_'_horas. |),e(omei]dado para hori]os (OH
]l/_l}()r suciedad.
N PERSONALIZAR- Toque y, usando
los ndmeros, configm'e m] tiempo de
limpieza de entre 3 y 7 horas v 30 mim]tos,
det)e_/diendo del grado (to su'cie(lad (le
SIt ho]+l/().
[] Toque LUEGO.
] Tres opciones de fnceIIdklo dilirldo fsl_;,n
dislxmibles:
N TIEMPOOEESPEtN-"]bquey htegouse
los mhnerf)s para programar la cantidad
de tielI/po que desea (lira tlTal/sc/li'ra h_Lsta
que se inicie la coccidn. "Ibque ACEPTAR
N ttORA DEINICIODELA LIMPIEZA- "lbque
y hlego use los nfimeros para wf)gramar
la hora del dl'a fn qttf di.!st_a([1l/?s(?i_/ick
la limpieza. Toque ACEPrAR.
N HORADEFINALDE LALIMPIEZA - "lbque
y ]re'go us( los II['Hn(TOSpara DI'OgYHII/HF
la hora (kl d_a fn q/tf (]esea f[tte [inatice
la limpieza. Toque ACEPTAR.
I.a puerto sf cierra automfiticamente. I.a pal]talla
Inostrarfi la hora (te inicio. No serfi iIo_ibl( abrir
la puerto del homo h_t_m que la temperamra sea
in[f riot a latemi)( ralm'a de blof_t( a(lo _._ue
se flesa( dxe los palabras HORNODLOQUEAuO.
A1(lcsaf d_arsc los palabras HORNOBLOQUEAO0,
p()(lr_ ('IItOllf ('s a|)I'h7 la l)uerta.
Enmodelosde homodobb, puedeprogramaramboshornos
al mbmo tiempo,Laprogran}acibnde/segundohomo
demorarbde formaautomaticael iniciode la limpiezahasta
que finaliceel ciclodeIimpiezade/prb}er homoo hasta
el tbmpo de demoraquehayaprogramada
Paraprogramarel segondo homo se ouenta
con dosopoionesdisponibles:
Imnediatmnente hmgo de programar
el primer homo:
S(lecdone OPRIMAPARASELEC.OPCIONE$
HORNOINFERIORu OPRIMAPAPASELEC.
OPCIONE$HORNOSUPERIORsega_]sea
necesario y siguiendo los pasos 3 y 6 para
el S('gl[ll([O hOl'l/O,
[)f sde la panlalla (k inici():
[] "lbqueAUTOLIMPIEZA.
V_ "lb(tue UMPIEZA LIGERA.LIMPIEZANORMAL
o PERSONALIZAR.I,(a la rderenda re:is
arriba.
Toque ENCENOEROESPUESDEI.,4 IERA
IN
AUTOLIMPIEZApara que (1 segm]do ]xorno
il]ific I_1II]isll]a de [()I'Ill}l_ltHf)///_ifiCahlt'go
(le (tue el primer homo ha\ a finalizado
la limpieza o TIEMPODEESPERAy sig'.
cl l)a_o (i mfi_ arfilia para programar
la hora cn flit,.' dcsea qm' ,.'1segm]do
horno( ()l/lJ('l/ce.
Paraxcordar d tbmpo restanteo lahor8de if?icio
programada,toqueAUTOtlMPIEZ4
)
I ara detener el ddo de limpif za, mquf la t(cla
CANCELARo CLEAR/OFF(BORRAR/APAGAR).
Cuando HORNOBLOQUEADOsc desacti\ e,
indicm]do qll(' la tclllperattlra del homo
cstfi pot (h:b_jo d(' la (h' bloqlu'a(lo, po(lrfi
('IltOI]C('S ablJr 1_1pl]('rta.
116
Despues de un ciclo de limpieza
Espf)siNf que obser\e algunas cenizas blancas en
el homo. I ,flnpiel_t_con m/ patio hdme(Io deslIu('s
fie (/ue cl homo se el/fife.
Silosmanchasb/ancaspermanecen,remu&a/as
conunestropajodeaceroIlenodejabbny eojuague
generosamenteconunamezc/adevinagrey agua,
Estosdepbsitossonusualmenteresiduosdesalclue
d cic/odeIi*Tlpiezanopuedeeli*Tlinar
Si el homo no queda limpio deSptl(;S d( tin cMo
(le limpieza, repila fl (:iflo.
i_)Ustcd no puede configurar el hornf)
pm'a cf)cfidn hasta qu(' (:l hf)rno f'std lo
S/tfitif'I/t(']//('I]tf' Jl'fO (:Ol//O ])oral ({It(' ]a p/t(Tta
s(' dcslIloquec.
i_iMif ntras el homo estd el/autolimpieza, usted
puff to presionar el botdn RELOJpm'amosmu:
en panmlla la hora del dfa. Para x()lwr a
la cur nta regresixa de limpi(za, presione
el bo(dn AUTOLIMPIEZA
Si los t/arrill_ts se xu(lx(n ftiffcih s fir fh slizar,
limpif los sopf)r(es de las pardllas ffm ac(ile
(]e (:o(:i]/a.
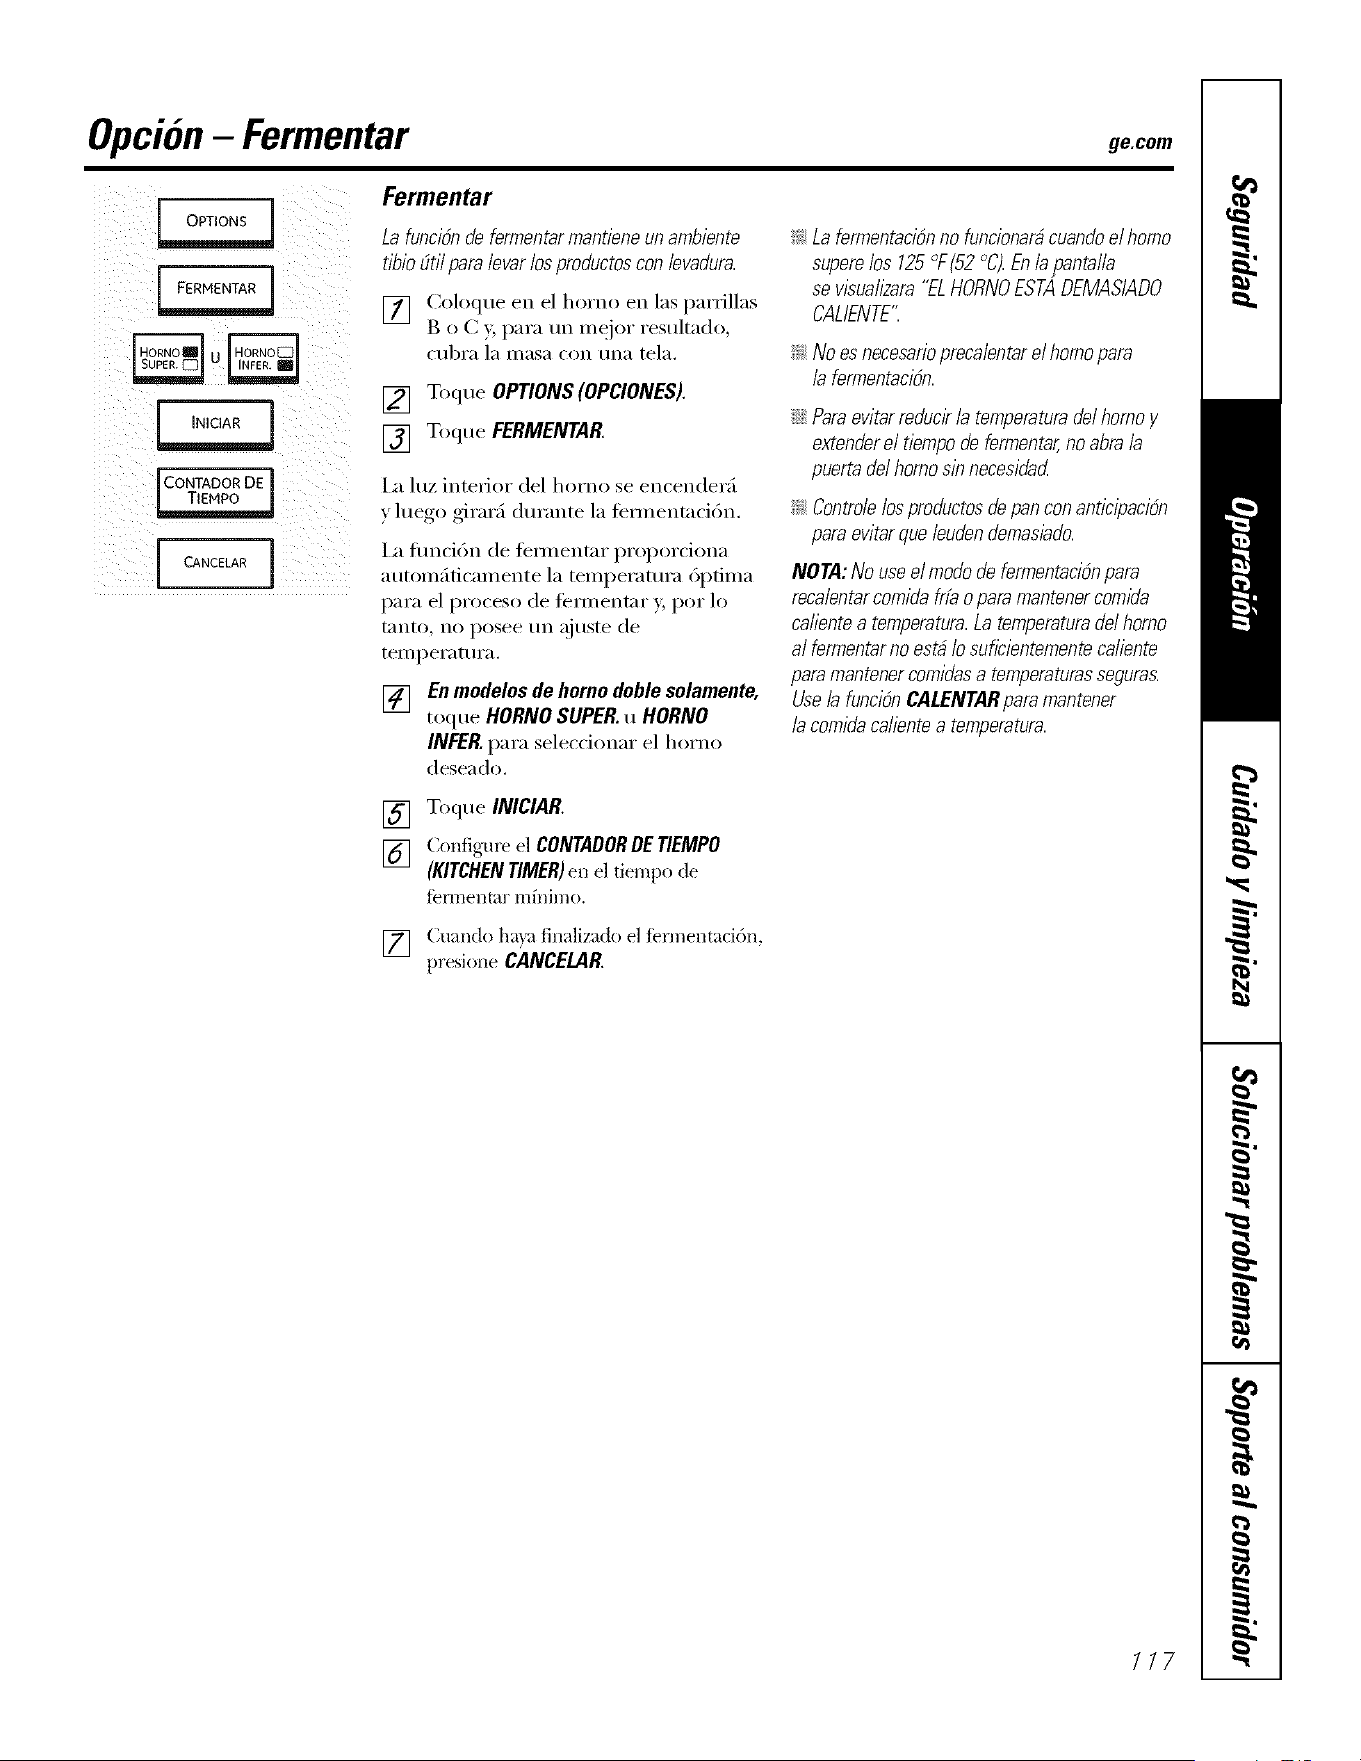
Opcion- Fermentar ge.com
i!i!(ii ii !
ii i
[co. oo 1
Fermentar
La funci6n de fermentarmanfiene un ambiente
tibio E1tilpara levar losproductos con/evMura.
Coloque en el homo en las parrillas
B o C 3, para un in@)r resultado,
c/lbI'a 1[I II/[IS[I con tlIl[I tela.
[] Toque OPTIONS (OPCIONES).
[] Toque FERMENTAR
I_ luz interior del homo se encender_
y luego girar_ din'ante la ti_mmntacidn.
I_ flmci6n de tem_entar proporciona
automfiticamente la temperatura 6ptima
para el proceso de tbm/entar > pot lo
tanto, no posee un _!juste de
temperamra.
[] Enmedeles de homo deble selamente,
toque HORNO SUPER. u HORNO
INFER.para seleccionar el homo
deseado.
!i>Lafermentacibnnofuncionar_cuandoelhomo
superelos 125°F(52°C).Enlapantalla
sev/sual/2ara"ELHORNOESTADEMASIADO
CALIENTE'.
!i> No es necesarioprecalentarel homopara
/a fermentaci6n.
::Ji::Para evitar reducir/a temperatura de/homo y
extenderel tiempode fermentar,no abra /a
puerta de/homo sin necesidad
_: Controlelosproductosde pan con anticipaci6n
para evitar que /eudendemasiado.
NOTA: No use el modo de fermentacibnpara
reca/entarcomida fr/a o para mantener comlcfa
ca/ientea temperatura.La temperaturade/homo
a/ fermentar no esN /o suflcientemente ca/iente
para mantenercomidasa temperaturas seguras.
Use/a funci6n CALENTARpara mantener
/a commaca/iente a temperatura.
[] Toque INICIAR.
[] Contigure el CONTADORDETIEMPO
(KITCHENTIMER)en el tiempo de
femlentar mhfimo.
[] Cuando hava finalizado el tennentacidn,
presione CANCELAR
7/7
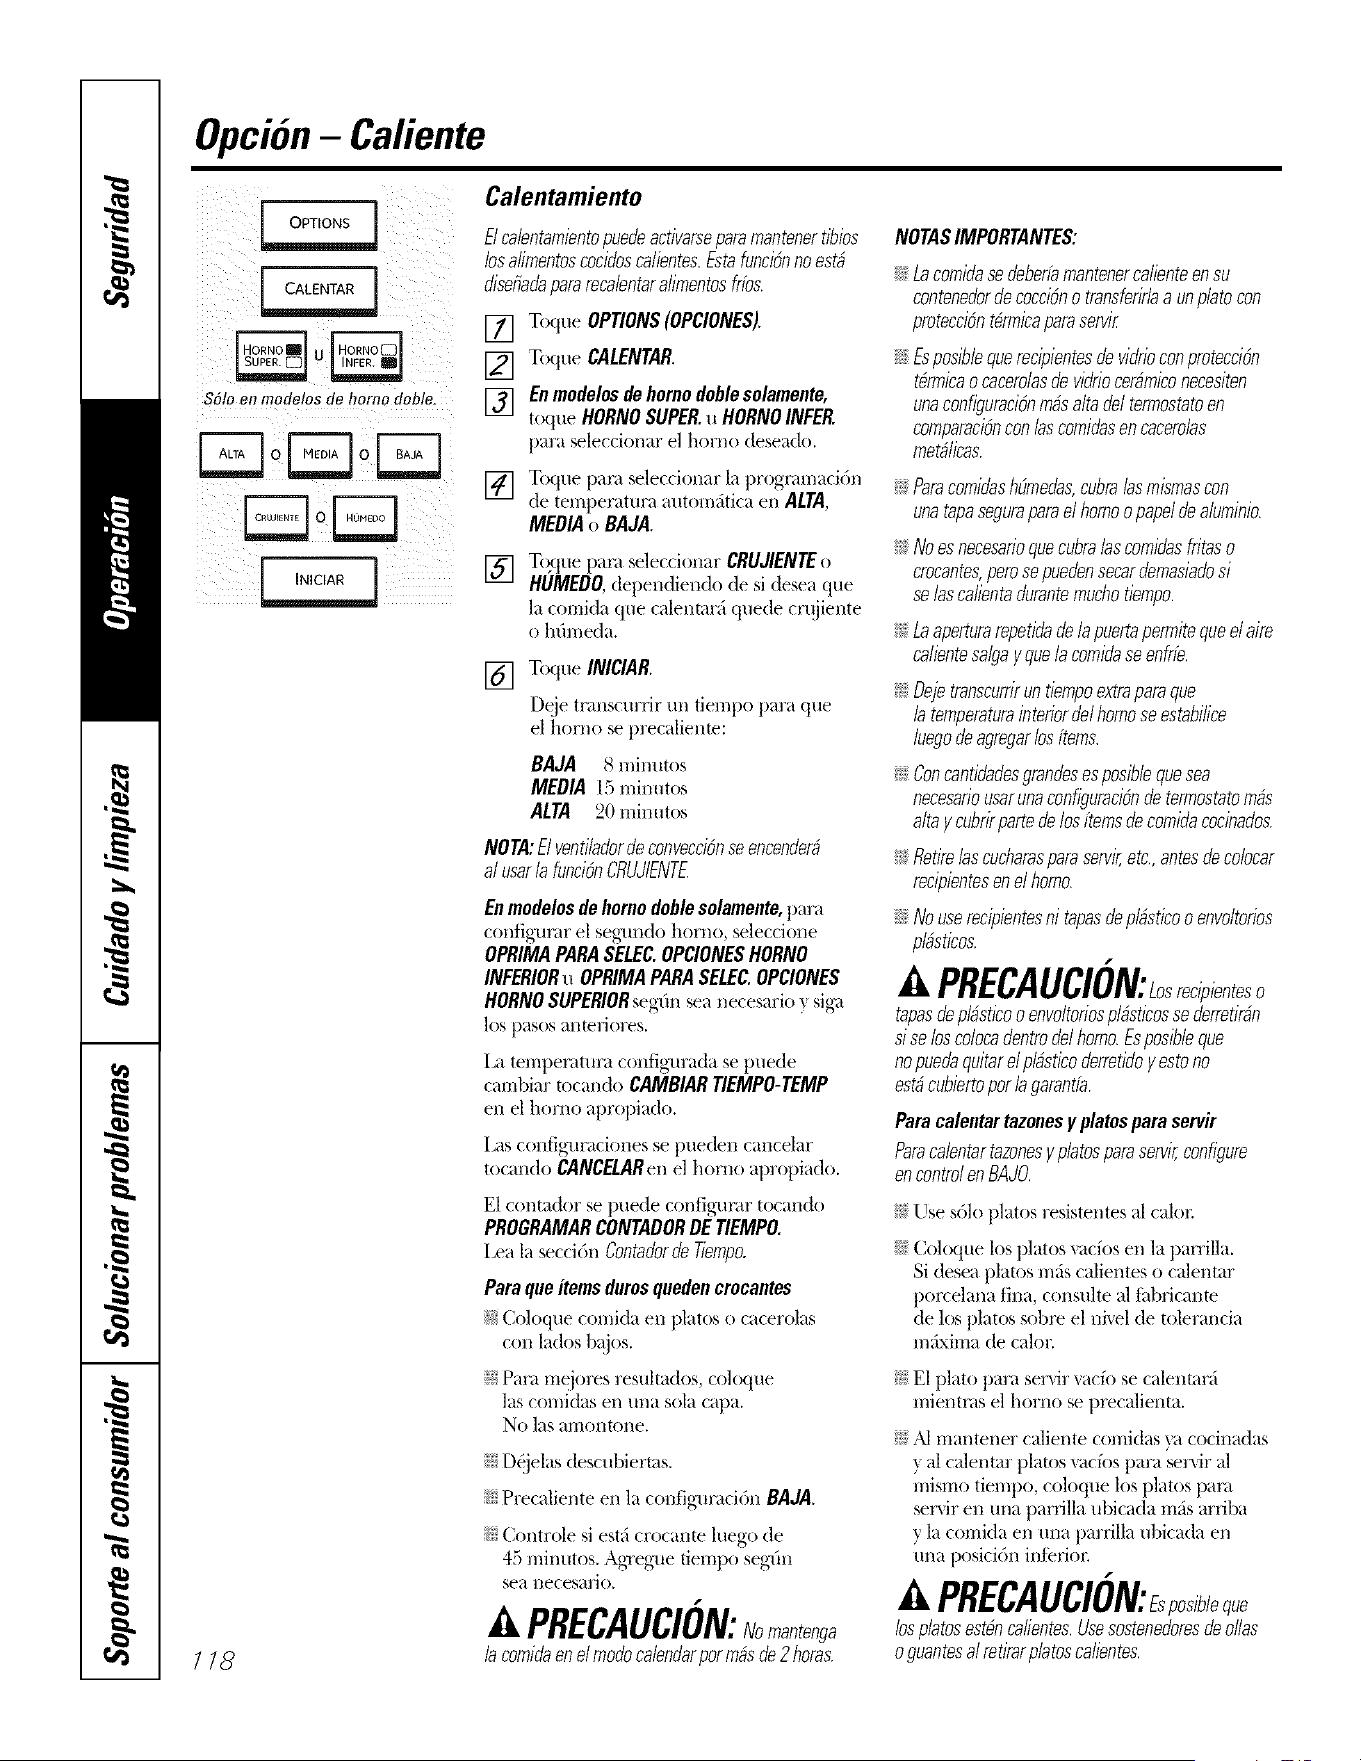
Opcion- Caliente
$61o en moaetos de homo doble.
118
Calentamiento
E/calentamientopuedeactivarseparamantenertibias
bsalimentoscocidoscalientes.Estafuncibnnoestb
disefiadapararecalentaralimentosfrbs.
[] Toque OPtiONS(OPCIONES).
[] Toque CALENTAR.
[] Enmodelos dehomo doblesolamente,
toque HORNOSUPER.u HORNOINFER.
para seleccionar el homo deseado.
[] Toque l)am seleccionar la prognunaci6n
de temperatura automfitica en AfT&
MEDIA o BAJA.
[]
Toque pare seleccioilar CRUJIENIEo
HUMEDO,dependiendo de si desea que
la comida que calentarfi quede crt!jiente
o hfime(la.
[] Toque INICIAR.
Deje transcurrir un fiempo para que
el horno se precalienm:
BAJA 8 milmtos
MEDIA15mimm)s
ALTA 20 mimm)s
NOTA:ElventilaflordeconvecciOnseencender_,
alusarlafunci6nCRUJIENTE
En modelosdehomodoblesolamente,para
config-unlr el segundo borne, seleccione
OPRIMAPARASELEC.OPCIONESHORNO
INFERIORu OPRIMAPARASELEC.OPCIONES
HORNOSUPERIORseg-(m sea necesario } sig'a
los pasos amefiores.
I,a tempemtura config-urada se puede
cambiar tocando CAMBIAR TIEMPO-TEMP
en el homo apropiado.
I,as config-uracioi_es se pue(lei_ cancelar
tocandoCANCELARen el horno apropiado.
E1contador ,seI)ue(le configurar, tocando
PROGRAMARCONTADORDETIEMPO,
I,ea la secd()n Contadorde Tiempo.
Para queitemsdurosquedencrocantes
_ Coloque comida en plates o cacerolas
con lades b@)s.
_ Para meiores resultados, coloque
las comidas en una sola capa.
No las ;:ffHOIl[OI/e,
_??D_jelas descubiertas.
_: Precaliente en la configuraci()n BAdA.
_: Controle si estfi crocante luego de
47).minutes,. AgTeg-ue,, tiemI)o seg-(m
se_:t ilecesalJ(),
PRECAUCION:Nomantenga
lacomifiaen elmafiacalendarparm_,sde2 heros.
NOTASIMPORTANTES:
ik:ta comidasedeberfamantenercalienteon su
contenedorde cocci6no transferirlaa unpbto con
pmtecci6nt_rmicaparaservir
ik:Esposiblequerecipientesde vidrioconprotecci6n
tbrrnicao cacerolasde vidriocerbmiconecesiten
unaconfiguraci6nrobsaltodel termostatoen
comparaci6ncon loscomidasencacerolas
metblicas.
!(_Paracomidashfimedas,cubrabsmismascon
unatapaseguraparaelhomoopapeldealuminb.
!(_No esnecesarioquecubrabs comidasfrias o
crocantes,perosopuedensecardemasiadosi
seloscalientadurantetouchetiempo.
!(_Laaperturarepetidade la puertopermitequeel aire
calientesa/gayque/acomidaseenfrfe.
!(_Oejetranscurriruntiempoextraparaque
b temperaturainteriordelhomoseestabilice
luegodeagregarbs ftems.
!(_Concantidaflesgrandesesposiblequesea
necesanousarunaconf/guraci6nde termostatombs
alto y cubrirpartedelosftemsdecomidacocinados.
!(_Retireloscucharasparaservir,etc.,antesdecobcar
recipientesenel homo.
ik:Nouserecipientesni toposdeplbsticoo envoltodos
p/bsticos.
PRECAUClON:Losreci ienteso
toposdep/bsticooenvoltoriosp/bsticosseflerretirbn
siseloscolocadentrofielhomo.Esposibleque
nopueflaquitarelplbsticoderretidoyestono
estbcubiertoparlagarantfa.
Para calentartazonesy platospara servir
Farocalentartazonesy platesparaservir,configure
encontrolen BAJO.
!(_Use s61oplates resistentes al calm;
ik:Coloque los plates vacfos en la parrilla.
Si desea plates mils calientes o calentar
porcelana fina, consulte al thbricame
de los plates sabra el hi, el de tolerancia
imlxima de calor
!(_E1 plato para set'dr xacfo se calentarfi
inielm_s el homo se precalienta.
}(:A1 mantener caliente comidas ya cocinadas
y al calentar plates _acfos para serxir al
mismo tiempo, coloque los plates pare
sex_'ir en una parrilla ubicada mils arriba
y la comida en tma parlilla ubicada en
una posicidn infeliOl:
PRECAUClON:Es osih/eque
bsplatesestbncalientes.Usesostenedoresdealias
oguantesalretirarp/atoscalientes.
ge.com
Cuadrode selection de temperaturapara comidas crocantes
Para mantener ca/ientes varios tipos de comldas diferentes, programe /a temperatura en
la con@uracidn para comidas que necesitan el grado robs alto. Coloque los ftems que necesitan
la con@uracidn robs alta en una parrilla de la parte inferior y los ftems que necesiten menos
calor en una parrilla de la parte superior
Tipo de comida Configuracionde control ]
Comidasfritas ALTO
Pan, panes crocantes MEDIO
Papas, horneadas ALTO
Pizza MEDIO
Tartas (dohle crocante) MEDIO
Tocino ALTO
Tortilla Chips BAJO
Consejos:
::Ji::Deie la comida des('ubierta.
::Ji::No use recipientes ni envoltodos de plfisfico.
?_:Precaliente antes de usa_:
Cuadrode seleccion de temperatura para comidas h#medas
Para mantener calientes varios tipos de comidas diferentes, programe /a temperatura en
/a con@uraci6n para comidas que necesitan el grado robs alto. Coloque los ftems que necesitan
/a con@uraci6n robs alta en una parri//a de/a parte inferior y los ftems que necesiten menos
calor en una parril/a de/a parte superior
Tipo de Comida Configuracionde Control ]
Bife, medio o bien cocido* MEDIO
Cacerolas MEDIO
Came de ave ALTO
Cerdo MEDIO
Cereal cocido MEDIO
Chili ALTO
Cordero MEDIO
Fruta MEDIO
Huevos MEDIO
Jamon MEDIO
Pan, panesblandos MEDIO
Panqueqoes,gofres BAJO
Papas, pisadas MEDIO
Pescado,mariscos MEDIO
Salsa de la carne, salsas cremosas MEDIO
Tartas (una capa crocante) MEDIO
Vegetales MEDIO
* USDA/FSISrecomiendauna temperatarainterior de 145° F(62° C)come
mfnimopara unbife Useun tenrlbmetropara came portA,til para controlar
las temperaturasinteriores
Consejos:
::Ji::(:ubra la comida ('on tma tapa o papel de aluminio.
?_:No \'ierta agua en el homo.
::)i::No use recipientes ni enw)ltorios de plfisfico.
?_:Precaliente antes de usar
119
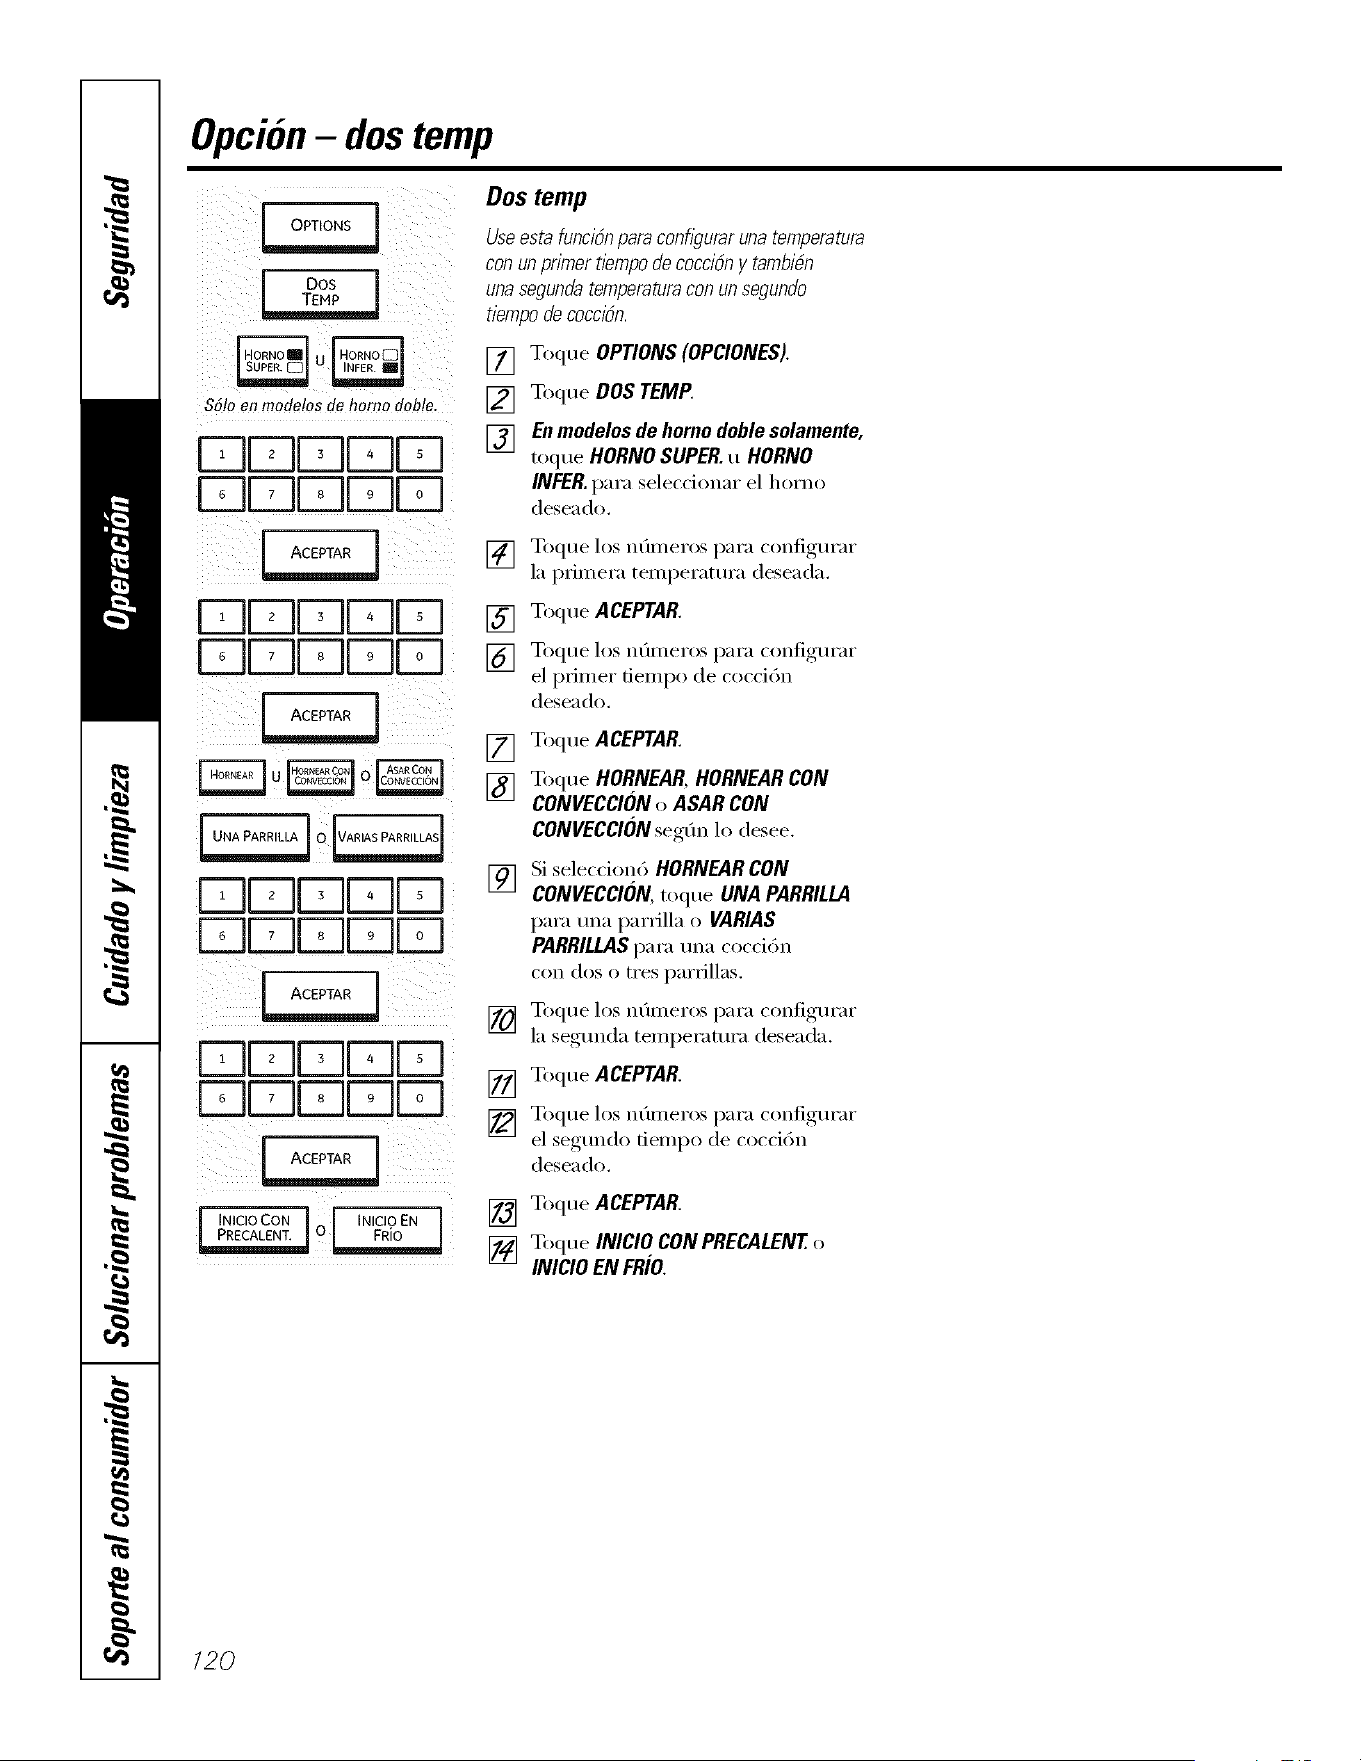
Opcion- dostemp
OPT ONS I
$6!oon modelosde homo doble.
DDDDD
FT-1DDDF:-I
DDDDD
DDDDD
i_ii$(__!!_i_ii__ i il_I_i_iii_i!i_
_ i
UNA PARRIL_ I 0 _
ir-qLdLdbjF-q¸
r-qFqFqFqFqi
S i i
_r-qNqrqrqr-q
FqFqFqFqFq!
J" INICIOCON I J INICIOEN J
Dos temp
Useesta funci6npara con@urar una temperatura
con un primer t/empode coccidn y tambibn
una segundatemperaturacon un segundo
tiempo decocci6n.
[] Toque OPTIONS (OPCIONES).
[] Toque DOS TEMP.
[] Enmodelos de homo doble solamente,
toque HORNO SUPER. u HORNO
INFER.para seleccionar el homo
deseado.
] Toque los n(lIl/eI'os [)}lI'a COlllig/li'ai"
la pHmera temperatura deseada.
[] Toque ACEPTAR.
] Toque los n(lI/leI'OS paI'a COlllig/li'ai"
el primer tiempo de coccidn
deseado.
[] Toque ACEPTAR
[] Toque HORNEAR, HORNEAR CON
CONVECCIONo ASAR CON
CONVECCIONseg(m lo desee.
[] Si selecdo@ HORNEAR CON
CONVECCION,toque UNA PARRILL4
para una pardlla o VARIAS
PARRILLASpara una cocddn
c(m dos o tres parHllas.
[] Toque los nOmeros para configm'ar
la se(/I
• ;g nda temperatura deseada.
[] Toque ACEPTAR
[] Toque los nOmeros para configurar
el seMmdo dempo de cocci6n
deseado.
[] Toque ACEPTAR.
[] Toque INICIOCONPRECALENTo
INICIOENFRIO.
120
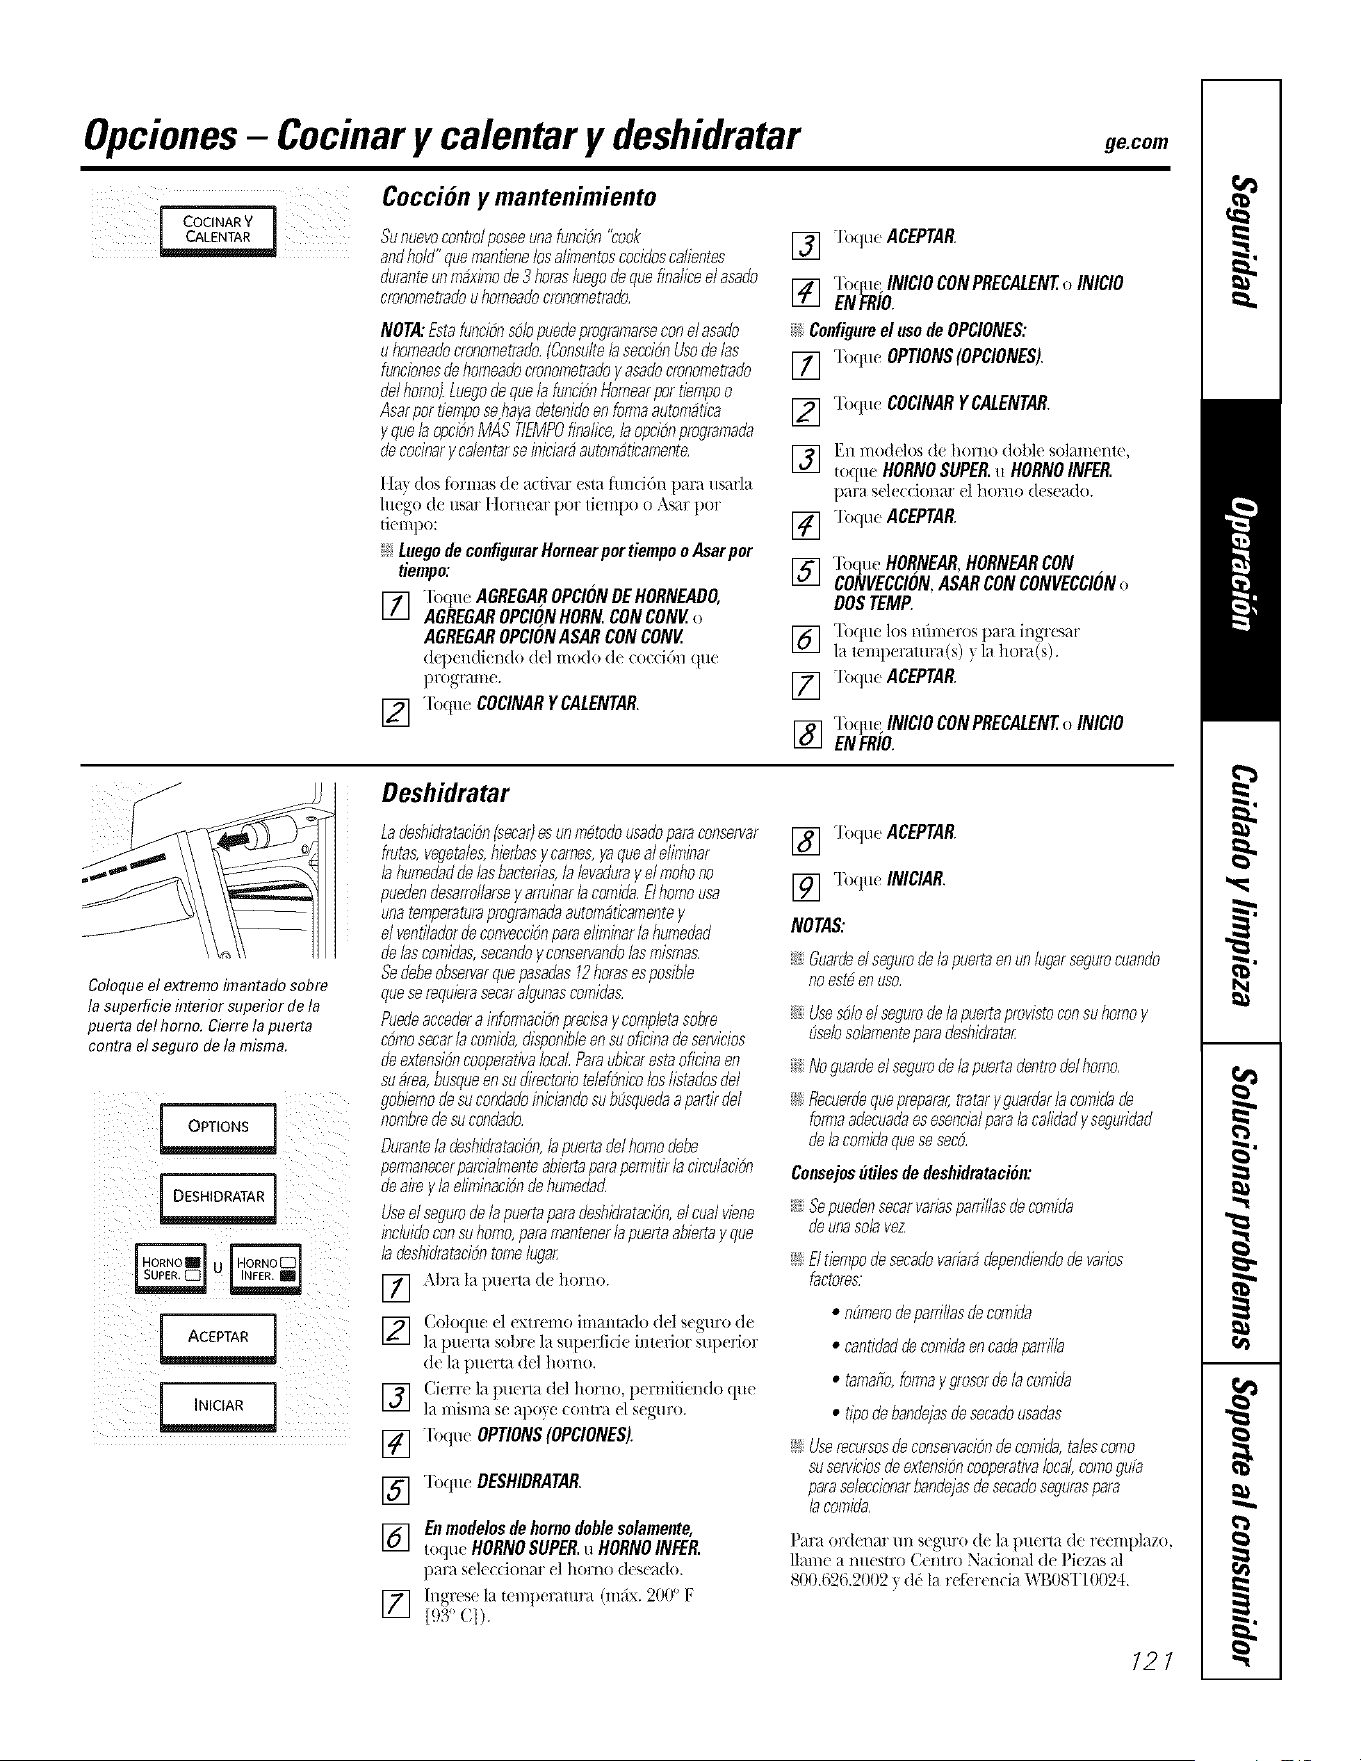
Opciones- Cocinary calentar y deshidratar ge.com
Coccion y mantenimiento
[ COCINARV
Sunuevocontrolposeeuna funcibn"cook
andhold"quemantienelos al_'T_entoscocidoscalientes
duranteunro_x_'T_ode 3 horasluegode quefinaliceel asado
cronoroetradou horoeadocronoroetrado,
NOTA:Estafuncibns6b puedeprogramarseconelasado
u horoeadocronoroetrado,(Consulteb secci6nUsede/as
funcionesde horoeadocronoroetradoy asadocronoroe_rado
de/homo).Luegode quela funcibnHoroearper tieropoo
Asarpor tieroposehayadetenidoen fomla autoro_tica
yque/a opcibnMAS TIEMPOfinalice,la opcbn prograroada
decocinary calentarseiniciar_autoro_ticaroente,
IL+}(los formas de acti_r esta fimcidn 1)ara ttsafla
htego de ttsar Itomear pOT tiempo o A_r pOT
dempo:
+ Loogodo oonfigorarHomoarpoTtiompoo Asar poT
tiempo:
[] "lb(lue AGREGAROPC/ONDEHORNEAO0,
AGREGAROPC/ONHORN.CONCONEo
AGREGAROPC/ONASAR CONCONE
(l([_endi(n(Io (M modo de eo(eidn ([u('
l)rogr_/II/('.
I_] "]i)(t/te COCINARY CALENTAR
[] "lb(tue ACEPTAR
[] Te,que/NIC/OCONPRECALENTo /N/C/O
ENFRIO
_ Configuree/ osodeOPC/ONES:
[] Toque OPTIONS(OPC/ONES).
[] "lbque COCINARYCALENTAR.
] 1_11 ]/'lO(l(]OS de horHo doble sol_tlI/eI/t(,
to(lue HORNOSUPER.u HORNOINFER.
para s(]( ((ionar (1 hOFl/O ([ese_/do.
[] To(lue ACEPTAR
[] "lbque HORNEAR,HORNEARCON ,
CONEECCION,ASAR CONCONEECCIONo
DOS TEMP.
] "Ib(lue los mhneros i)ara ingr(sar
la lemperalm'a(s) ? la hora(s).
[] To(lue ACEPTAR
Toque INICIO CONPRECALENTo INICIO
[] EN FRIO.
Coloque el extreme imantado sobre
la superficie hTteriorsuperior de la
puerta del homo. Cierre la puerta
contra el seguro de la misma.
i_I _i _
iii
_ii_i_i_i i/iiiii_
ii i i i i i i i i []
Deshidratar
Ladeshidratacibn(secar)esun ro_todousadoparaconservar
ffutas,vegetales,hbrbas ycaroes,yaquea/ e/iro/nar
la huroedadde las bactedas,la levaduray elroohono
puedendesarrollarsey arruinaria coroida,El homousa
unateroperaturaprograroadaautoro_ticaroentey
ei ventiladordeconveccibnpara elirobarla huroedad
de/as coroidas,secandoyconservando/asroisroas,
Sedebeobservarquepasadas12horasesposible
queserequierasecaralgunascoroidas,
Puedeaccedera infdroacibnprecisaycoropletasol2re
cbroosecarla coroida,disponibleensuoficinade servicios
de extensibncooperativalocal Paraubicaresta oficinaen
su_rea,busqueensudirectodotelefbnicolos listadosde/
gobieroodesucondadoiniciandosubEJsquedaa partir del
norobredesucondado,
Ourantela deshiflratacibn,iapuertade/homodebe
perroanecerparcia/roenteabiertaparaperolitir la circulacibn
de aireyia eliroinacibndehuroedacL
Useei segurodeia puertaparadeshifiratacibn,ei cualviene
incluidoconsuhomo,pararoantenerlapuertaabiertay que
la deshiflratacibntomeiugaL
] Abra la l)uert_l (le hor£1o.
] Coloqu( el (xlr(mo imanmdo del s(guro (le
la pu(rm sot)r( la superfi(i( inl(fior sul)edor
de la puerta del homo.
Cierre la puerta del homo, 1)_rnfidend() ([u(
la l//JSl/l_l se _t])o}e eol/tlT_/(1 segllro.
"]bque OPTIONS(OPCIONES).
[] Toque OESHIDRATAR.
F_7 En modelosde homodoblesolamente,
IvI
Ioque HORNOSUPER.u HORNOINFER.
])_tr3 sele((ioiwti" (1 ]/orno (]es(_l(lo.
] Ingrese la t(mperamra (mdx. 200" F
193"(q).
[] Toque ACEPTAR
[] "lbque INICIAR.
NOTAS:
_!i Guarded segurode/a puertaen un /ugarsegurocuando
no est6en usa
_!i Usesbloei segurode lapuertaprovistoconsuhomoy
E_selosolaroentepara desUdratar
_: No guardeei segurode la puertadentrode/homo,
_: Recuerdequepreparar,tratary guardarla coroidade
fomlaadecuadaesesenciaipara lacalidady seguddad
de ia coroidaquese seco,
Consejoshtilesde deshidrataoion:
_!iSepuedensecarvadaspardllasde coroida
de un_sob vez
_: El tieropode secadovadar_dependiendode vados
factores:
• nE_roerodepardliasdecoroida
• cantidadde coroidaen cadaparriiia
• taroafio,forolaygrosorde lacoroida
• tipodebandejasde secadousadas
__: Userecursosdeconservacionde coroida,talescoroo
suserviciosde extensibncooperativa/ocal,coroogufa
parase/eccionarbandejasde secadoseguraspara
lacoroida,
Pm'a ord('nm" ill/seguro (1('l_ pucrta de re('mpl_zo,
ll_nne _ nu(su'o (>ntro N_(ion_d de Pi('zas al
800.6262002 y d(' la refbrenek_ WI',08T10024.
121
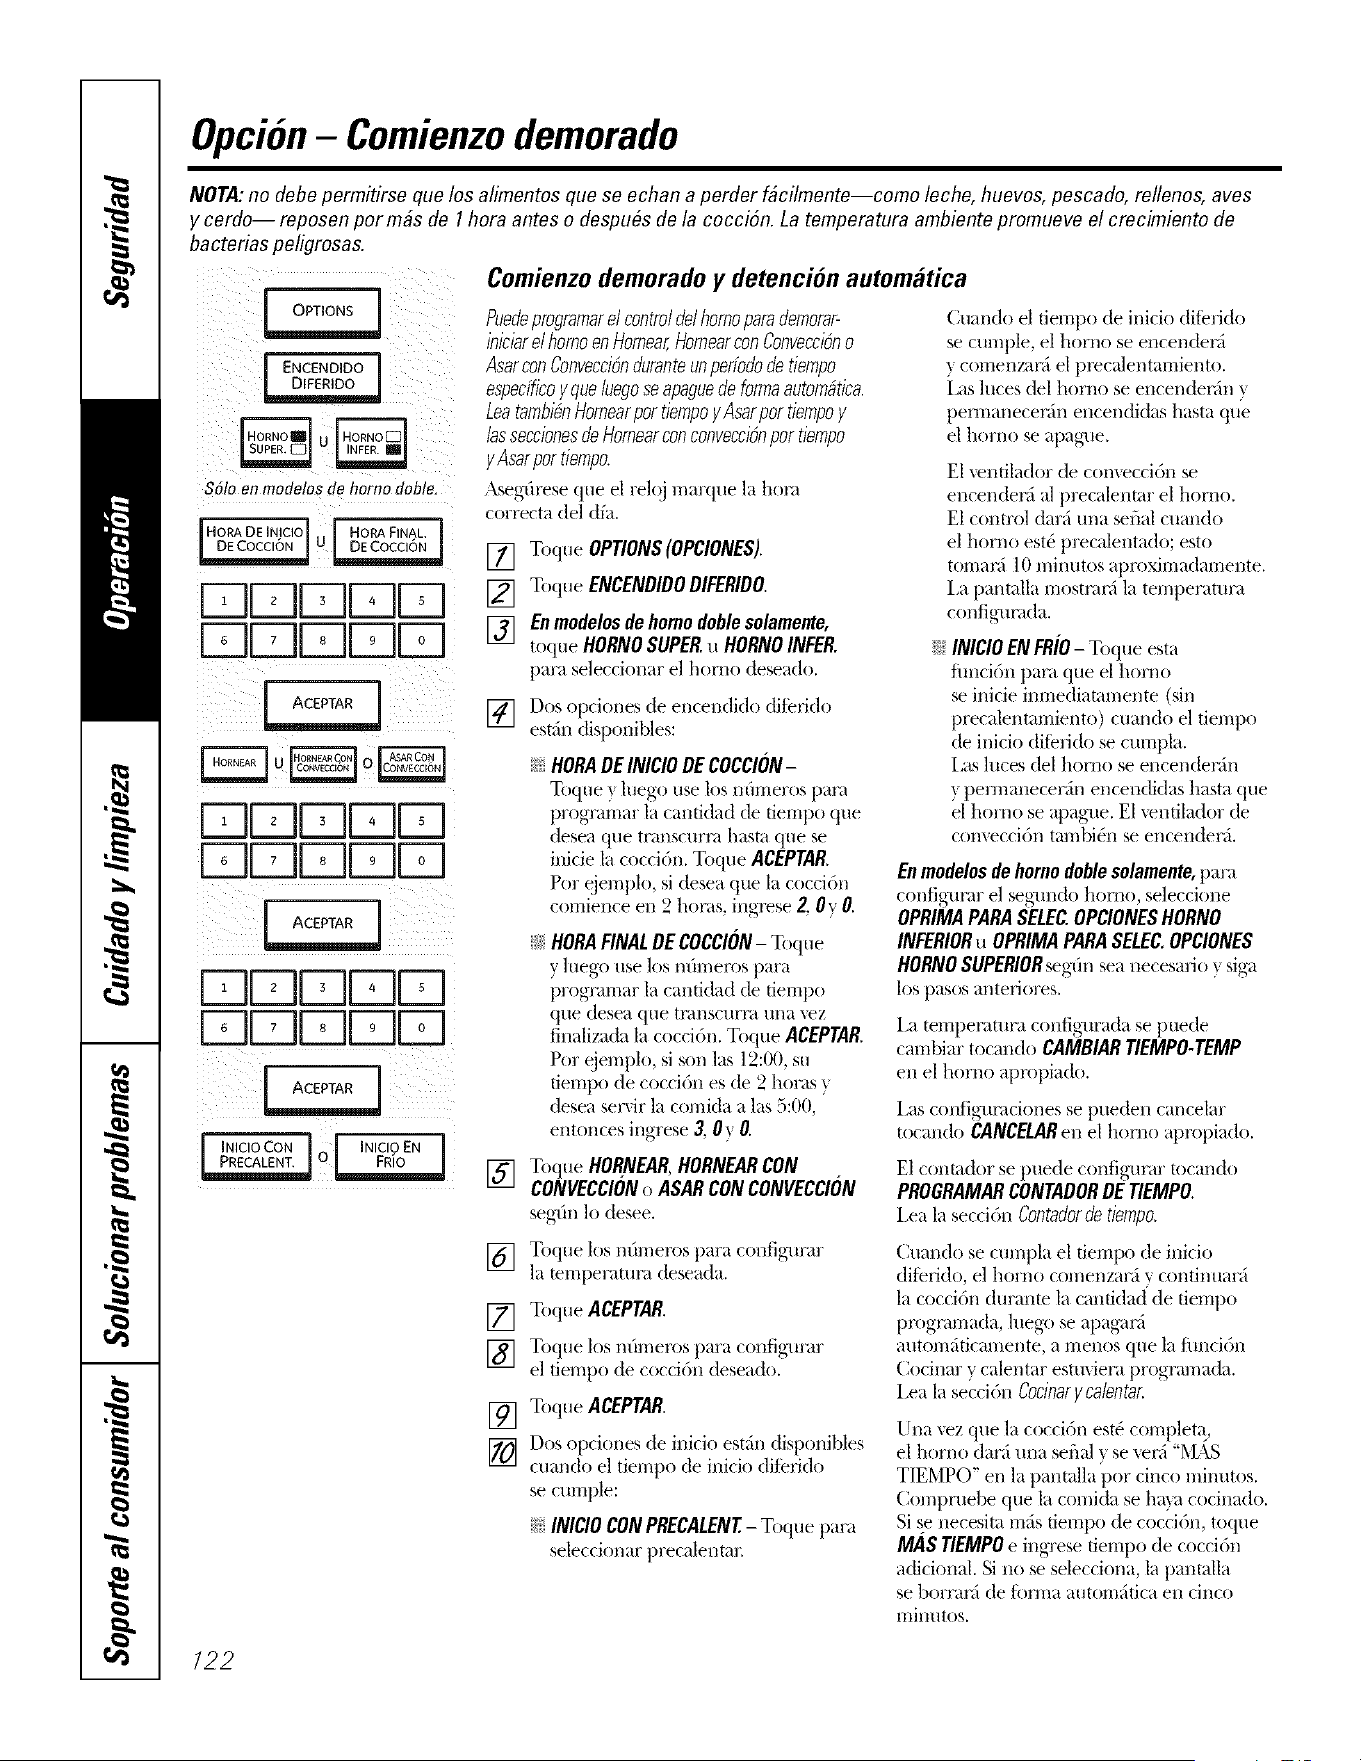
Opcion- Comienzodemorado
NOTA:no debepermitirse que los alimentosquese echan a perder f#cilmente--como leche, huevos,pescado, rellenos,aves
y cerdo-- reposenporm#s de 1horn antes o despu#sde la coccidn.La temperaturaambientepromueveel crecimiento de
bacterias pe/igrosas.
I OPTIONS
- OPTIONS !
ENCENDIDO
$51oen modelosde homodoble.
HORA DE INICIO] [ HORA FINAL,
r-qr-qDDD
Dr-qr-qr-qr-q
Fqr-qDDD
r-qr-qr-qFqD
ACEPTAR !
r-qFqDDD
FqFqFqFqFq
I ACEPTAR
INIClOCON_ l INICIOENl
Comienzodemorado y detencion automfttica
Puefleprogramarelcontrolflel homoparademorar-
iniciarelhomoenHornear,HornearconConvecci6no
AsarconConvecci6nfluranteunperfo@fie tiempo
especfficoy queluegose@aguefie forrnaautorn#tica.
Leatambi@Homearpor tiempoy Asarpor tiernpoy
/asseccionesde,Hornearconconvecci6npor tiempo
y Asarpor tiempo.
Aseg@_se que el relqj marque la horn
correcta del dfa.
[] Toque OPTIONS(OPCIONES).
[] Toque ENCENDIDODIFERIDO.
[] Enmodelosdehomodoblesolamente,
toque HORNOSUPER.u HORNOINFER.
para seleccionar el homo deseado.
[] Dos opciones de encendid(t (fii(rid(t
est_in disp(mibles:
% HORABEINICIODECOCCION-
Toque } luego use los re'm-taros pare
progTamar la cantidad de tlempo que
desea que transcuml hasm que se
inicie la cocci6n. Toque ACEPTAR.
Por ejemplo, si desea que la coccidn
comience ell 2 h(lr,_s, ingl_se Z 0v O.
14_HORAFINALDE COCCION-Toque
y hlego use los n(m/elx)S para
programar la camidad de tiempo
que desea que transcurr, i una ',ez
finalizada la coccidn. Toque ACEPTAR.
Por ejemplo, si son las 12:00, su
tiempo de coccidn es de 2 horas y
desea serqr la comida alas 5:00,
ent(mces ingrese 3, 0_. 0
[] Toque HORNEAR,HORNEARCON .
CONVECCIONo ASARCONCONVECCION
seg-(m lo desee.
Cuando el dempo de illicit) ditelido
se CUlllple, el horno se encen(ter,i
v c()mew'm_i el pmcalentamiento.
][as luces del homo se encendenin v
pem-lanecenin encendidas hasta que
el homo se apague.
E1 \endlador de conveccidn se
encen(teni al precalenmr el homo.
E1 control darfi una serial cuan(lo
el homo est(_precalentado; esto
t(lmani 10 minutos apmximadamente.
i,a pantalla mostnmi la temperatura
configun_da.
iJi::INICIOEN FRIO- Toque esta
thncidn pare que el horn(t
se inicie imnediamnmnte (sill
precalentamiento) cuando el tiempo
de inicio ditelido se cumpla.
I,as luces del homo se encendelSn
y t)emlanecer_in encendidas hasta que
el homo se apague. E1 \emilador de
comeccidn tmnN_n se encender_i.
Enmodelosdehomodoblesolamente,para
config-unlrel seg-undohorn(l, seleccione
OPRIMAPARRSELEC.OPCIONESHORNO
INFERIORu OPRIMAPARRSELEC,OPCIONES
HORNOSUPERIORseg-(msea necesari(t } sigma
los pasos antefiores.
i,a temperatura configurada se puede
cambiar tocan(lo CAMBIARTIEMPO-TEMP
ell el homo apropiado.
i,as coi_igumciones se pueden cancelar
tocall(lo CANCELARell el horno apropiado.
)uede c(mfigunu" tocando
E1c(mtador set ,
PROGRAMARCONTADORDETIEMPO.
i,ea la sec(i()n Contadorde tiempo.
[] Toque los n(uneros para configurar
la temperamn_ deseada.
[] Toque ACEPTAR.
[] Toque los n(nneros para config-urar
el tiempo de coccidn deseado.
[] Toque ACEPTAR.
[] Dos op(iones de inicio estfin disponibles
cuando el tiempo de inicio (lifeli(lo
se cumple:
% INICIOCONPRECALENT-Toque para
selecci(mar precalentar.
Cuando se cumpla el dempo de inicio
dilelido, el horno c(/menzarfi y continuarfi
la coccidn duranw la cantidad de tiempo
plx)gr,m-lada, luego se apagm',i
auton/fiticmnente, a menos que la fimcidn
Cocinar y calentar estmiera progrmnada.
i,ea la seccidn Coc/nary calentac
Una vez que la coccidn est_ completa,
el horno darfi una serial v se _enl '%LA_S
TIEMPO" el/la pantalla'por cinco minutos.
(_on/pmebe que la comida se ha}a cocinado.
Si se necesita mils tiempo de cocci@l, toque
MRSTIEMPOe ingrese tiempo de coccidn
adicional. Si no se selecci(ma, la panmlla
se borranl de forma automfitica ell cinco
1-rfint/tos.
722
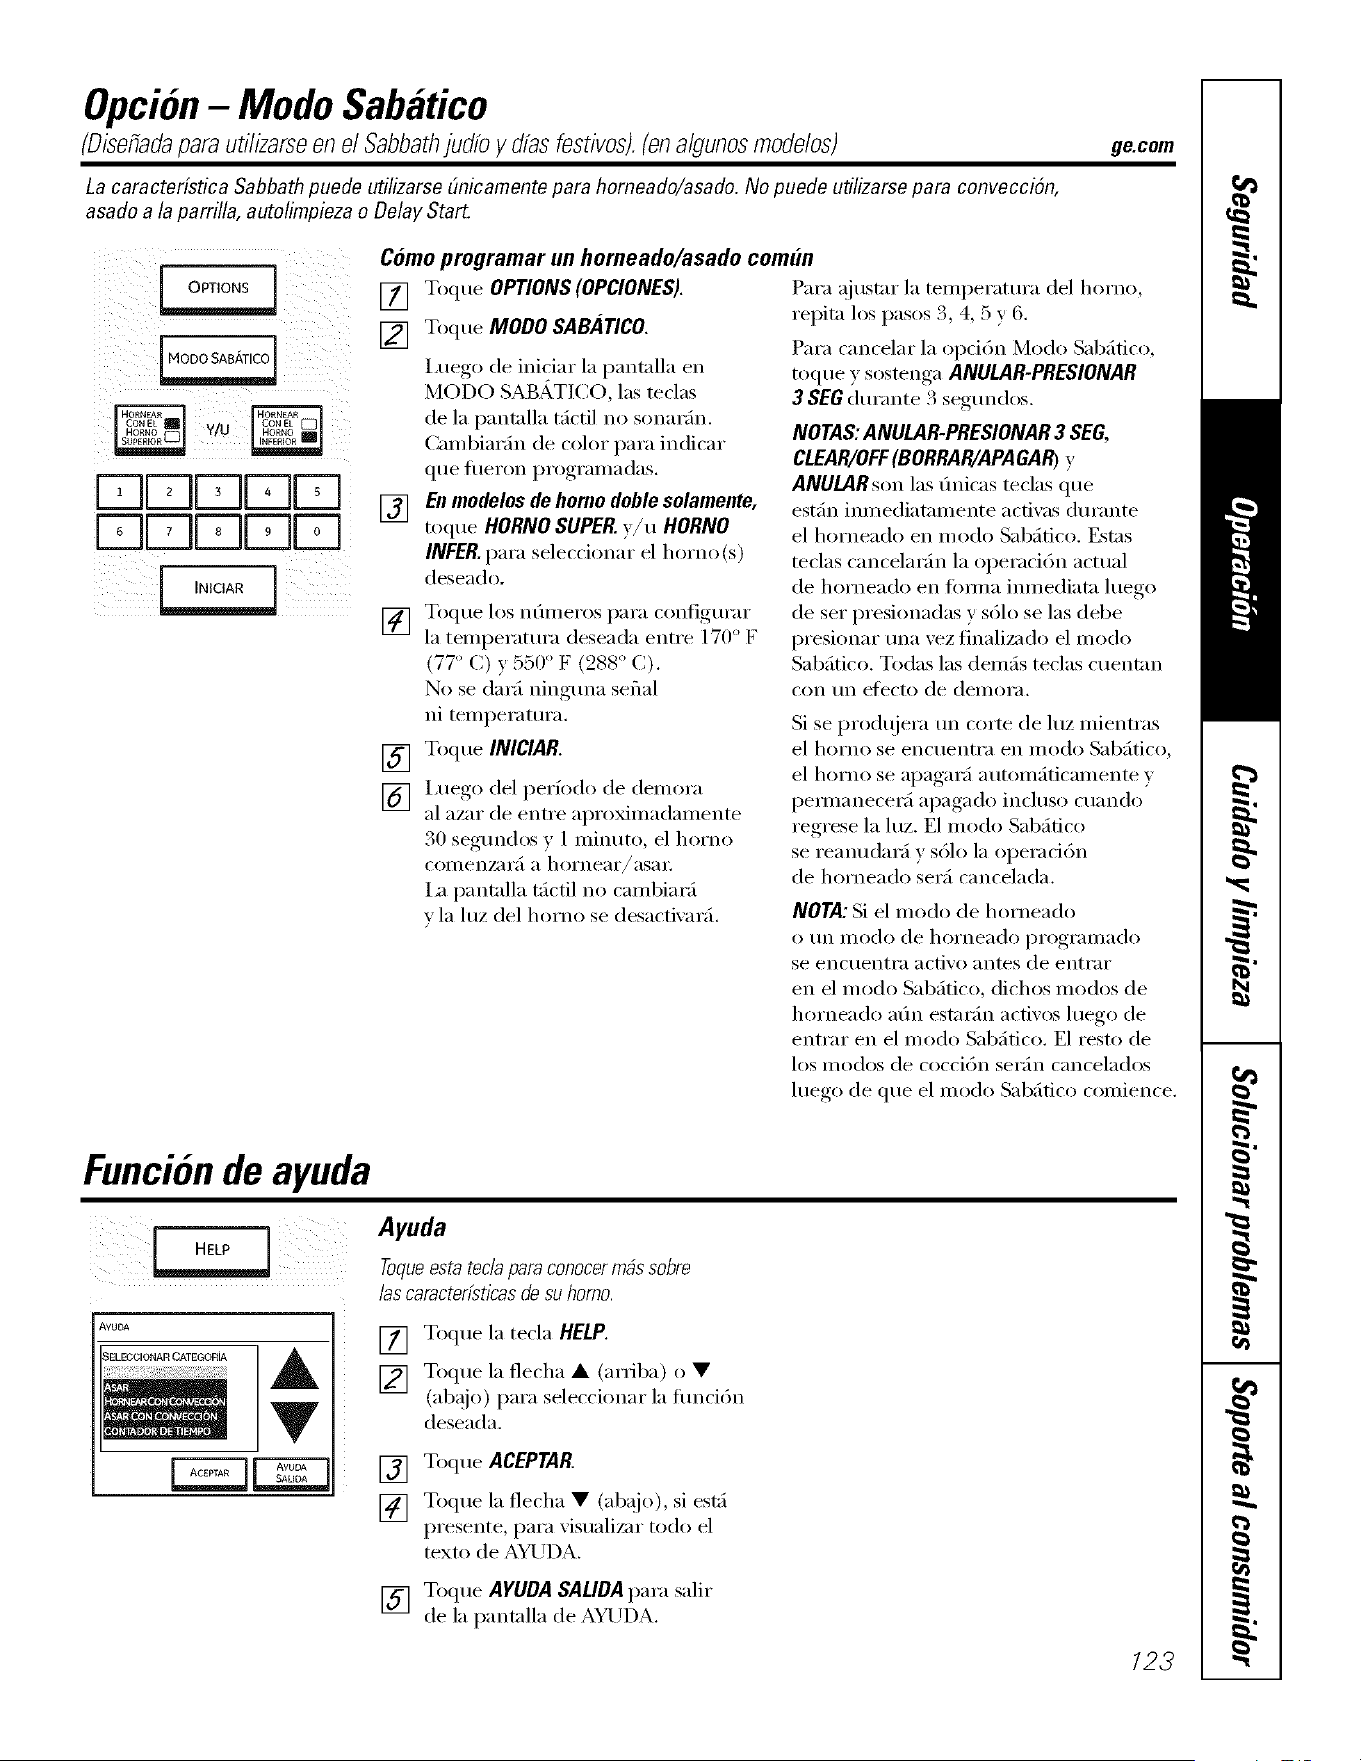
Opcion- ModoSabatico
(Disefiadapara utilizarseen el Sabbathjudfo y dfas festivos).(on algunosmodelos)
ge.com
La caracteristica Sabbathpuede utilizarse(micamentepara homeado/asado.No puede utilizarsepara convecci6n,
asado a laparrilla, autolimpiezao DelayStart.
FT1EZ]DE Fq
iFT]FrilDDD
!!ill
Comoprogramar un homeado/asado comfin
[] Toque OPtiONS (OPCIONES).
[] Toque MODO SABATICO.
i,uego de inMar la pantalla en
MODO SAB,_TICO, las teclas
de la pantalla t_ictil no sonai'_hl.
Calnbiar_h_ de color para indicar
qt/e f/leI'on programadas.
[] En modelos de homo doble solamente,
toque HORNO SUPER.y/u HORNO
INFER.para selecci(mar e] homo(s)
deseado.
] Toque los n(/IIleI'os [)[1I"[I con][ig//i'ai"
la temperatm'a deseada entre 170°F
(77' C) y 550 ° F (988" C).
No se darfi ninguna serial
ni temperatm'a.
[] Toque INICIAR
I,uego del perfodo de demora
[] al azar de entre aproximadamente
30 segundos y 1 minuto, el horno
cOi/lenzai'}] a hoi'neai'/asai',
I;a pantalla t_ictil no calnbiar_i
v la luz del horno se desactixai'_i.
Para ajusmr la temperatm'a del homo,
repita los pasos 3, 4, 5 v 6.
Para cancelar la opddn Modo Sabfitico,
toque y sostenga ANULAR-PRESIONAR
3 SEG durante 3 segm_dos.
NOTAS:ANULAR-PRESIONAR 3 SEG,
CLEAR/OFF(BORRAR/APAGAR)y
ANULAR son las 6nicas teclas que
estfin imnediatamente acti\_ls durante
el horneado en modo Sabfitico. Estas
teclas cancelar_in la operaci6n actual
de horneado en fimna imnediata luego
de set presionadas y s61o se las debe
presionar tma vez finali/;ido el modo
Sabfitico. Todas las derails teclas cuentan
con tm efl_cto de demora.
Si se prodqjera tm corte de luz mientras
el homo se encuentra en modo Sabfitico,
el homo se apagar_i automfiticamente v
pemmnecer_i apagado incluso cuando
regrese la luz. E1 modo Sabfifico
se reanudar_i v s61o la operad6n
de horneado ser_i cancelada.
NOTA:Si el modo de horneado
otm modo de horneado programado
se enc/lenti'a activo antes de enti'ai"
en el modo Sabfitico, dichos modos de
horneado aOn estar_in activos luego de
entrar en el modo Sabfitico. E1 resto de
los modos de cocci6n set;in cancelados
hlego de que el modo Sab;itico comience.
Funcionde ayuda
- - Ayuda
/as caracterfst/casde su homo.
[] Toque la tecla HELP.
[] Toque 1;I flecha • (arfiba) (>•
(ab@)) para seleccionar la flmci6n
deseada.
[] Toque ACEPTAR
[] Toque la tlecha • (ab@:,), si est:i
presente, para visualizar todo el
texto de AYUDA.
[] Toque AYUDA SALIDA para salir
de la pantalla de AYUDA.
123
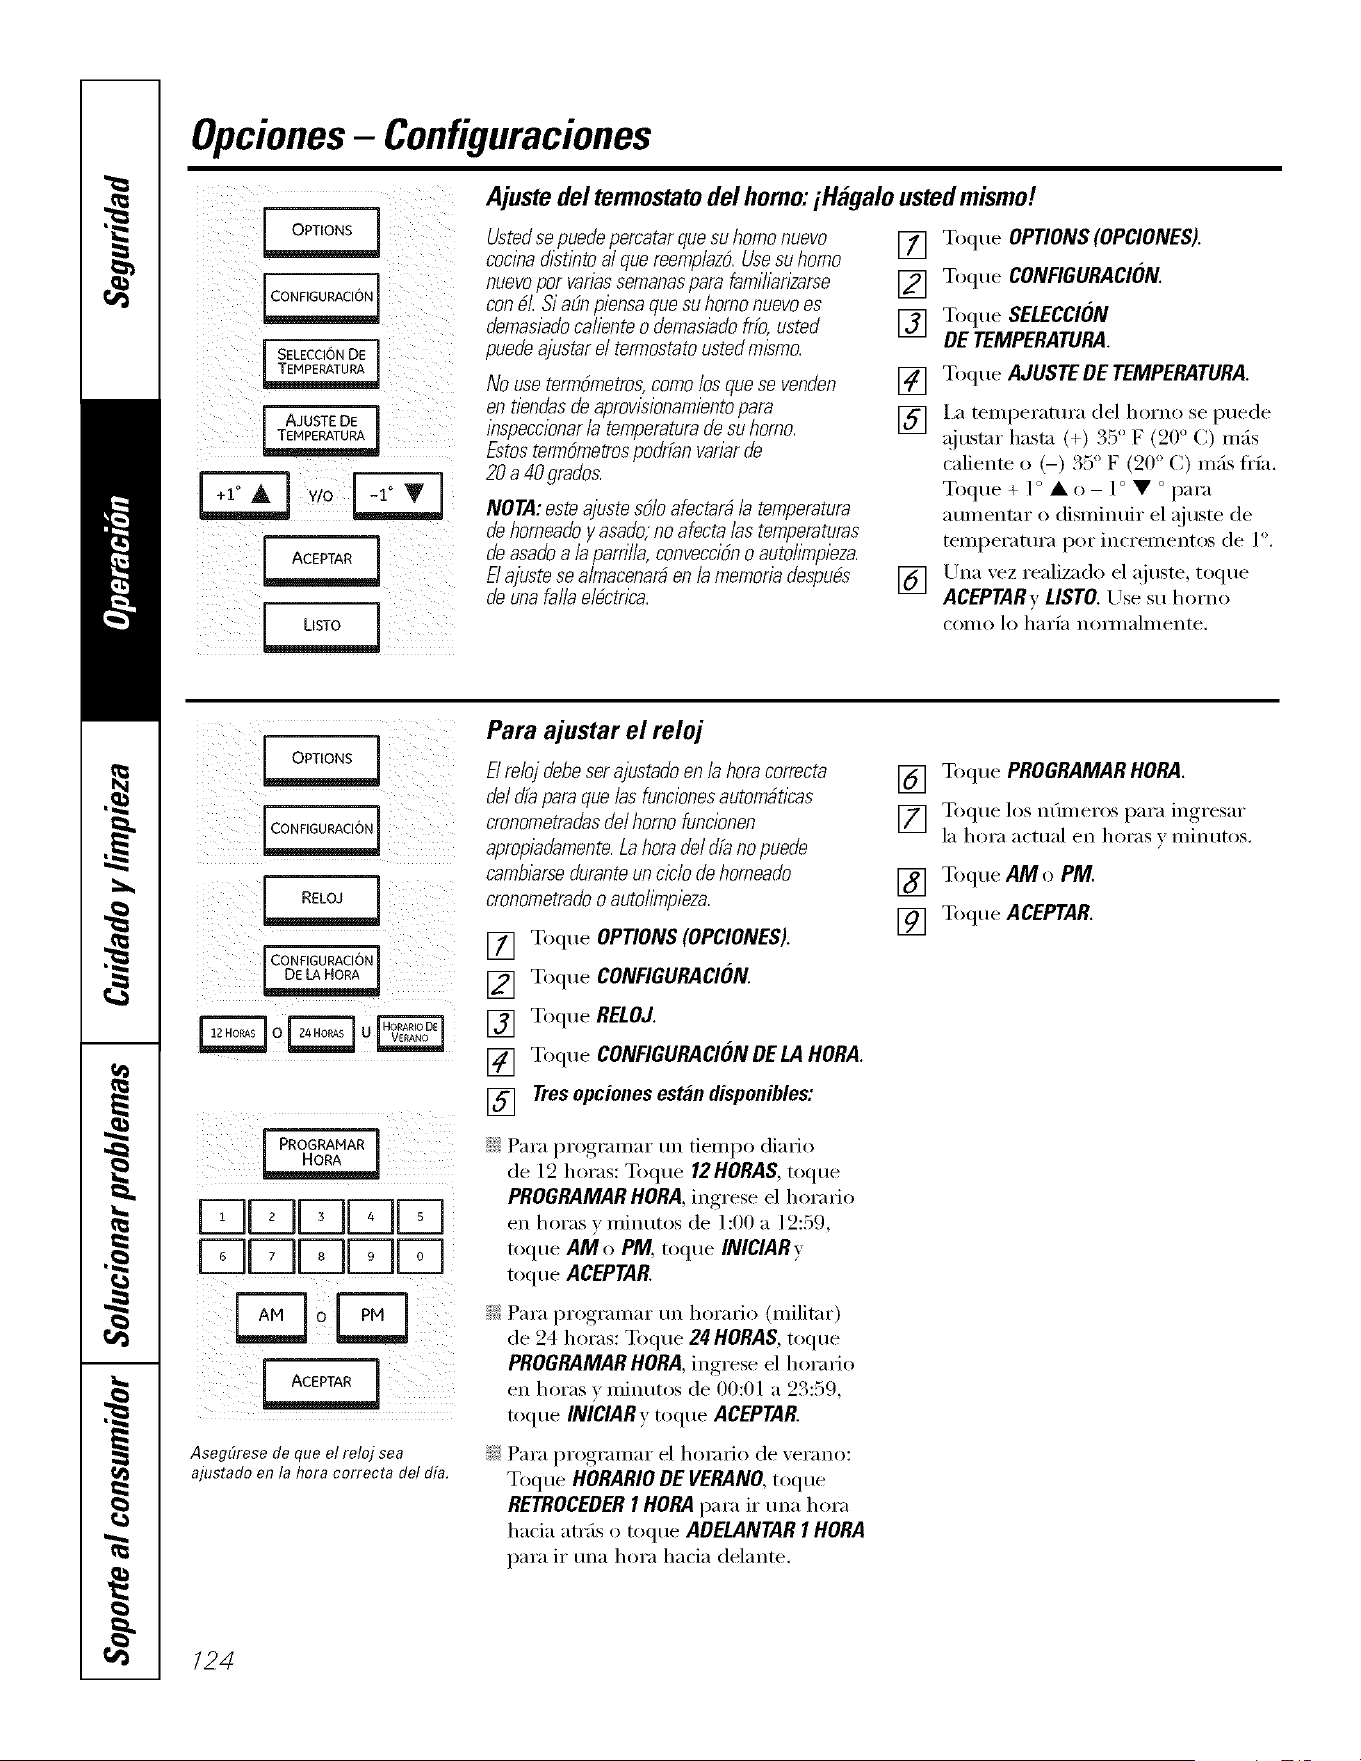
Opciones- Configuraciones
ii!ii i ! !
J SELECCION DE
l
]
AJUSTEDE ]
Ajuste del termostatodel homo:iHglgaloustedmismo!
Ustedse puedepercatar que su homo nuevo
cocina fllstlnto al quereemplazb.Usesu homo
nuevo por vanassemanaspara famihan2arse
con _/. Si aE_npiensa que su homo nuevo es
demasladocaliente o demasiado fifo, usted
puedeajustar ei termostato usted mismo.
No useterm6metros,como los quese venden
en tiendas de aprowsionamientopara
inspeccionar/a temperatura de su homo.
Estos term6metrospodffan vanarde
20 a 40 grados.
NOTN: este ajuste s6/oafectar# /a temperatura
de horneadoy asado;no afecta /as temperaturas
de asadoa/a parrilla, convecci6no autohYnpieza.
E!ajuste se almacenar#en /a memoriadespu#s
de una fa//a e/#ctrica.
[] Toque OPTIONS (OPCIONES).
[] Toque CONFIGURACION.
[] Toque SELECCION
DE TEMPERATURA.
[] Toque AJUSTE DE TEMPERATURA.
[] I_ telnperatura del homo se puede
a lustar hasta (+) 35 ° F (90 ° C) m_is
caliente o (-) 35 ° F (20 ° C) m_is fl'fa.
Toque + ] ° • o- 1° • ° para
atli/lentar o disi/lintlir el aitlste de
temperamra pot incrementos de 1°.
[] Una "_ezrealizado el ajuste, toque
ACEPTARv LISTO. Use su homo
(()Ill() lo h}lx'l}l noli/l}lhllente,
i _ i _ _ ii i/_ _
CONFIGURACION|
FqEz]rqrqD
FqFqDFqFq ¸
Z I
;¸¸¸¸[223
III
AsegEIresede que el reloj sea
ajustado on la hora correcta del dfa.
Para ajustar el reloj
Elreloj debe ser ajustado en la hora correcta
de/dfa para que /as funcionesautombtlcas
cronometradasde/homo funcionen
apropiadamente.La hora de/dfa no puede
camblarse duranteun cicio de horneado
cronometradoo autohmpieza.
[] Toque OPTIONS (OPCIONES).
[] Toque CONFIGURACION.
[] Toque RELOJ.
[] Toque CONFIGURACION DE LA HORN.
[] Tres opciones estan disponibles:
Para programar tm tiempo diafio
de 19 horas: Toque 12HORAS, toque
PROGRNMAR HORN, ingrese el horatio
en horas v minutos de 1:00 a 12:59,
toque AM o PM, toque INICIARy
toque ACEPTAR
Para programar un horatio (militar)
de 24 horas: Toque 24 HORA&toque
PROGRNMNR HORN, ingrese el horatio
en horas v minutos de 00:01 a 23:59,
toque INICIARy toque ACEPTAR
Para programar el horatio de verano:
Toque HORARIODEVERANO,toque
RETROCEDERI HORApara ir una hora
hacia amls o toque ADELANTARI HORN
para ix"una hora hacia delanw.
[] Toque PROGRAMAR HORA.
[] Toque los n0meros para ingresar
la hol'a a(-ttla] en box'as v illintltOS.
[] Toque AMo PM.
[] Toque ACEPTAR.
/24
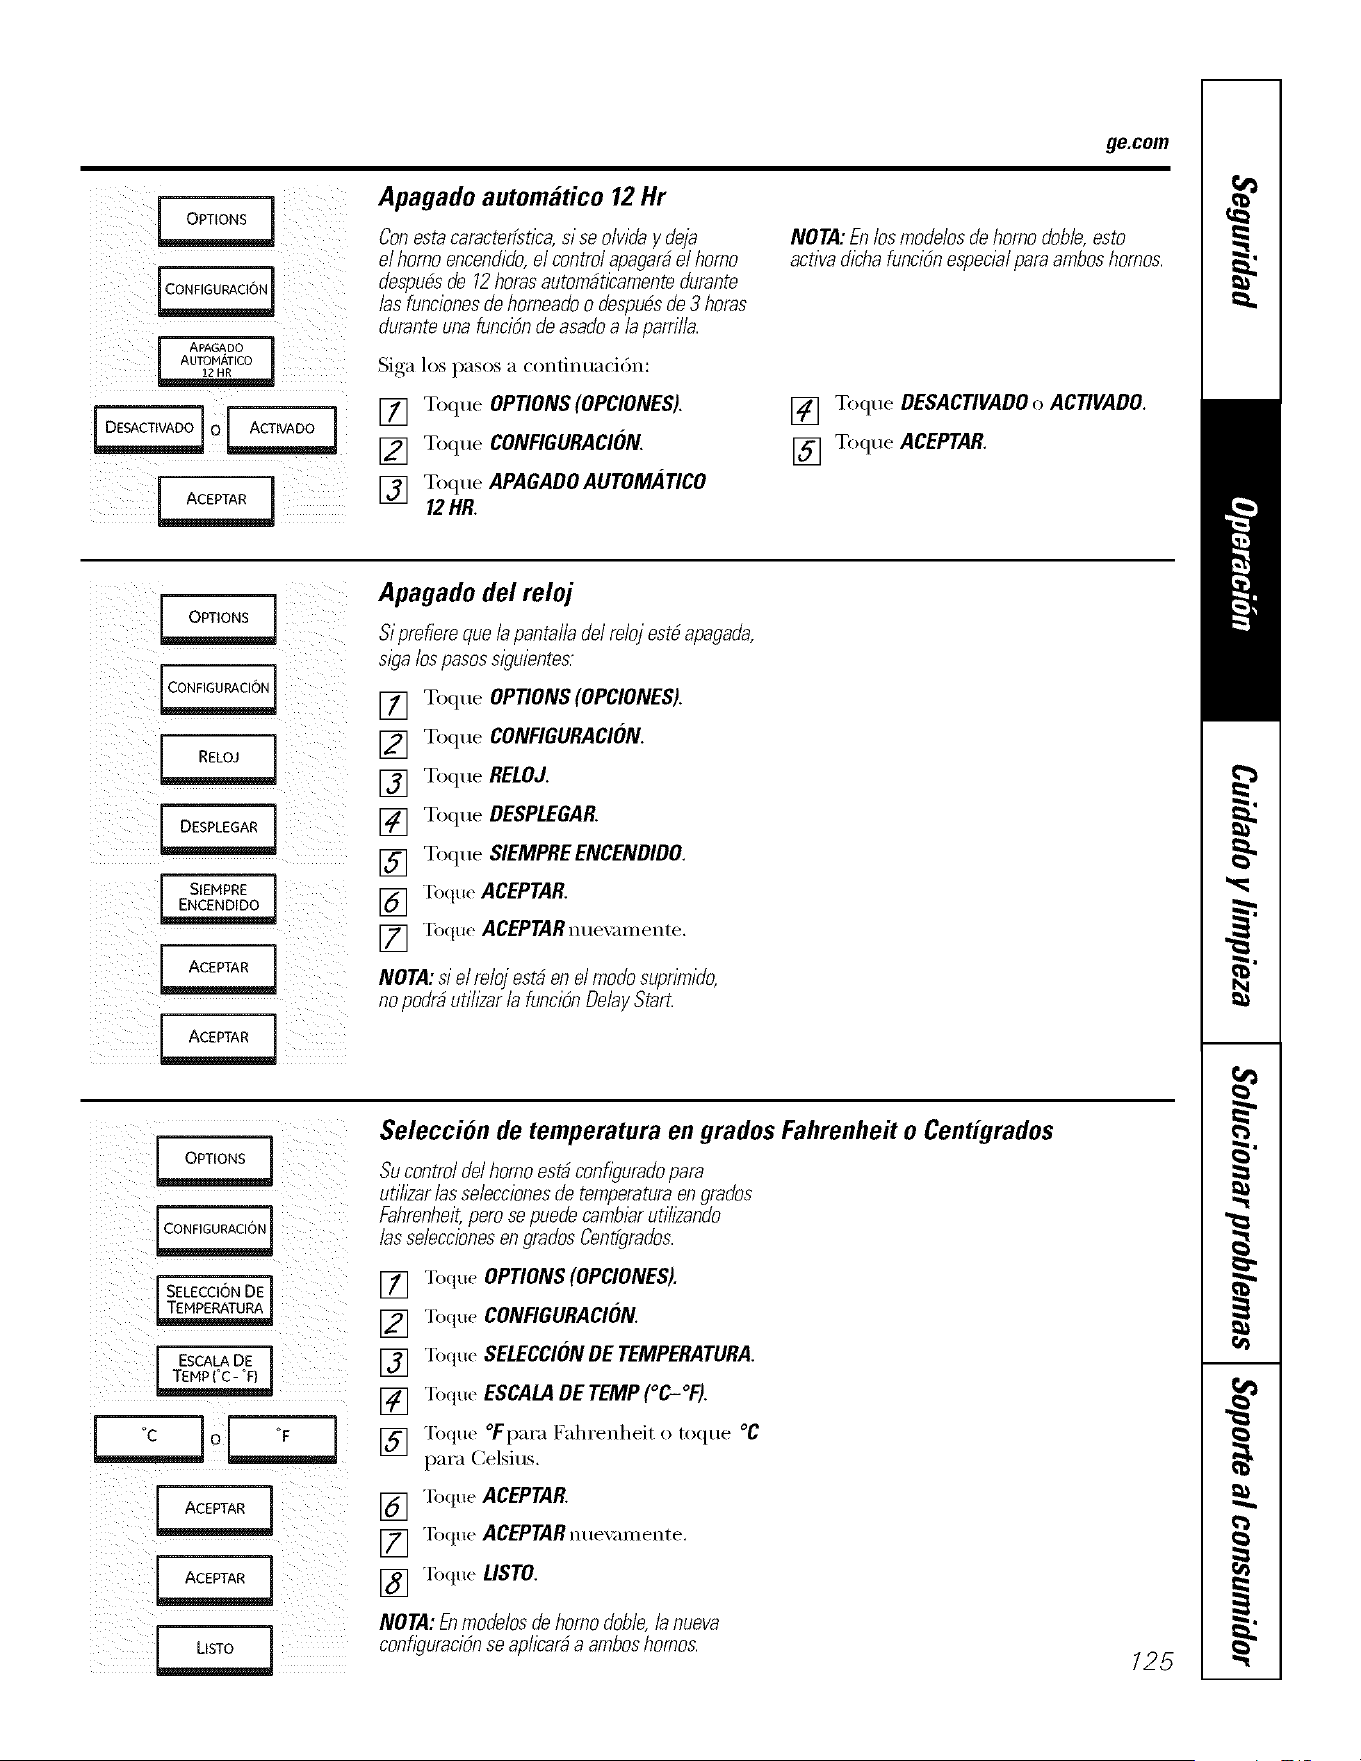
ge.com
_i_i__i_!_i__ !!i_ii(iii_I
APAGADO
Apagado automgltico 12 Hr
Conestacaracterfstlca,si seo/viday deja
elhomoencendido,el controlapagarfielhomo
despudsde 12horasautornfitlcarnentedurante
/asfuncionesde horneadoo despubsde 3horas
duranteunafunci6ndeasadoa/a parrilla.
Siga los pasos a continuaci6n:
[] Toque OPTIONS(OPCIONES).
[] Toque CONFIGURACION.
[] Toque APAGADOAUTOMATICO
12HR
NOTA:Enlosrnodelosdehomodob/e,esto
activadichafuncidnespecialparaarnboshornos.
[] Toque DESACTIVADOo AC77VADO.
[] Toque ACEPTAR
!/(: _ _(i ¸¸
i(i _I_II ii
!>_i__[_ _i_!_!i_iiiii_
[ SlEMPRE]
Apagado del reloj
Siprefierequelapantalladel relojestbapagada,
sigalospasossiguientes:
[] Toque OPTIONS(OPCIONES).
[] Toque CONFIGURACION.
[] Toque RELOJ.
[] Toque DESPLEGAR
[] Toque SIEMPREENCENDIDO.
[] "[bqueACEPTAR
[] "[bqueACEPTARnue_m_ente.
NOTA:si elrelojest_enel rnodosupnYnido,
nopodrfiutih#ar/a funcibnDelayStart.
i¸¸¸¸¸(L_ i(:
i¸¸¸¸¸¸5¸¸sE=c,6No4 [] r.,,,,,_,
TEMPERATURA _ [] "]()(]U(!
ESCALA DE [] Toque
[] Toque
[]
[] Toque
Seleccion de temperatura en grados Fahrenhe# o Centigrados
Su control del homoest# confgurado para
uti/izar /as se/ecclonesde ternperaturaen grados
Fahrenheit,pero se puedecarnbiar utill#ando
/as se/eccionesen grados Centfgrados.
OPTIONS(OPCIONES).
CONFIGURACION.
SELECCIONDE TEMPERATURA.
ESCALADETEMP(°C-°F).
"[bque °Fpara Fahrenheit o toque °C
para Celsius.
ACEPTAR
ACEPTARnuex m_ente.
LISTO.
NOTA:Enrnodelosdehomodoble,/anueva
confguracidnseaplicar#aarnboshornos.
125
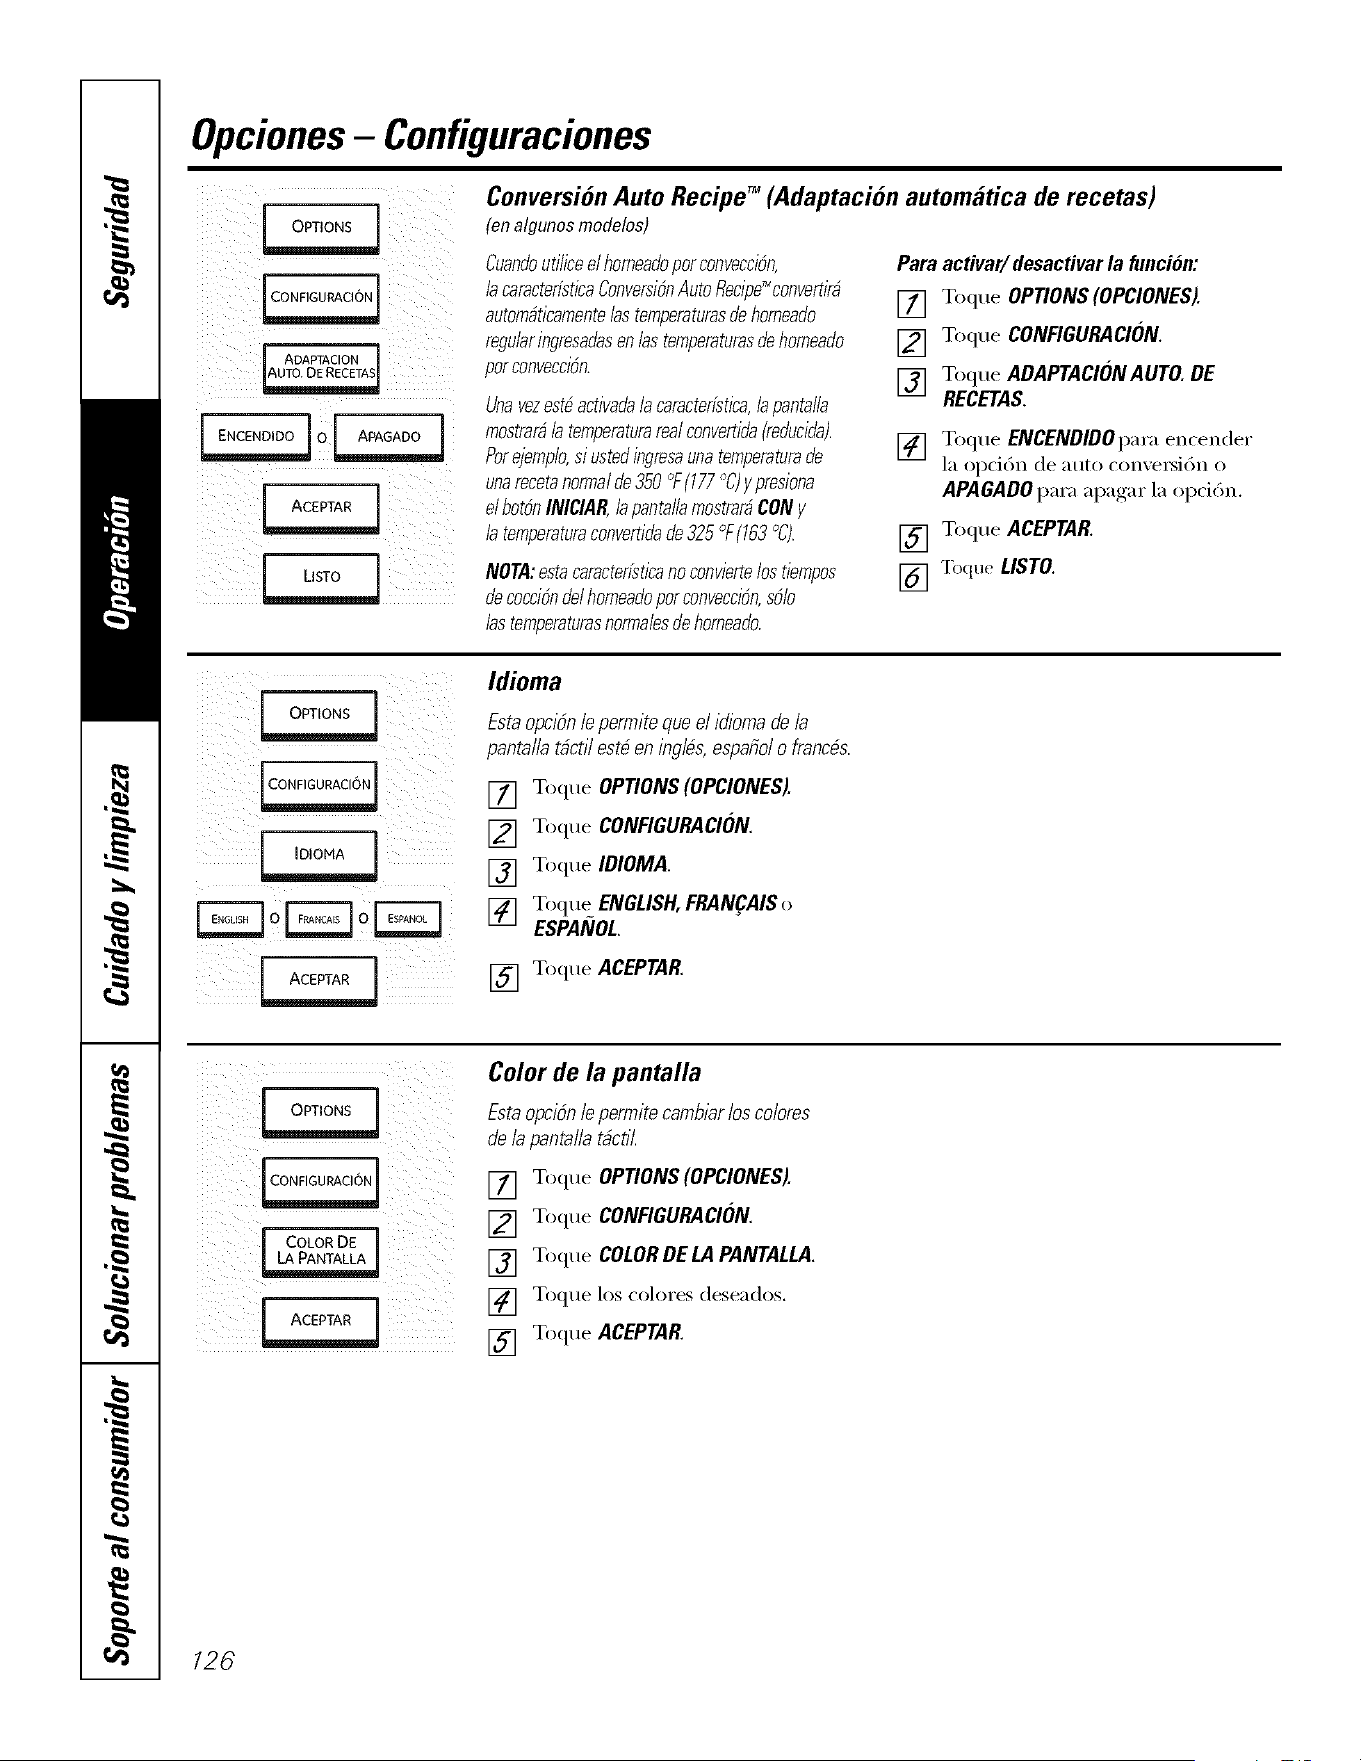
Opciones- Configuraciones
J ADAPTACION 1
ACEPTAR J
Conversion Auto Recipe TM (Adaptacion automglticade recetas)
(en algunosmodelos)
Cuandoutilieeel horneafloporeonvecci6n,
b caracterfsticaConversi6nAutoRecipe_convertirb
autombticamente/astemperaturasdehorneaflo
regu/aringresaflasen /astemperaturasde horneafio
porconveeei6n.
Unavezestbactivafla/a caraeterfstica,/apanta//a
mostrarb/a temperaturarealeonvertifla(reflueifla).
Porejemp/o,si usteflingresaunatemperaturade
unareeetanormaI de350 °F(177°C)ypresiona
elbot6nINICIAR,lapantallamostrarbCONy
/a temperaturaeonvertiflade 325°F(163°C).
NOTA:estacaractedsticano conviertelostiempos
decocci6nflel homeaflopor convecei6n,s61o
/astemperaturasnorma/esdehorneaflo.
Paraactivar/desactivarla funci6n:
[] Toque OPTIONS(OPCIONES).
[] Toque CONFIGURACION
[] Toque ADAPTACIONAUTO.DE
RECETAS.
[] Toque ENCENDIDOpara encender
la opci6n de auto convex_i6n o
APAGADO para apagar la opci6n.
[] Toque ACEPTAR
[] "[bque LISTO.
[ OPTIONS
CONF GURAC ON
J
0 0
Idioma
Esta opci6n lepermite que el idioma de ia
pantalia tbctil estb en ingibs, espafioi o francds.
[] Toque OPtiONS (OPCIONES).
[] Toque CONFIGURACION
[] Toque IDIOMA.
[] Toque ENGLISH, FRAN_AIS o
ESPANOL
[] Toque ACEPTAR
i iii TM ii
_ii! i
iiTM _:i[_ii_ _
Color de la pantalla
Esta opci6n lepermite camblar los colores
de la pantalla tbcfil.
[] Toque OPTIONS (OPCIONES).
[] Toque CONFIGURACION
[] Toque COLORDE LA PANTALLA.
[] Toque los colores deseados.
[] Toque ACEPTAR
I26
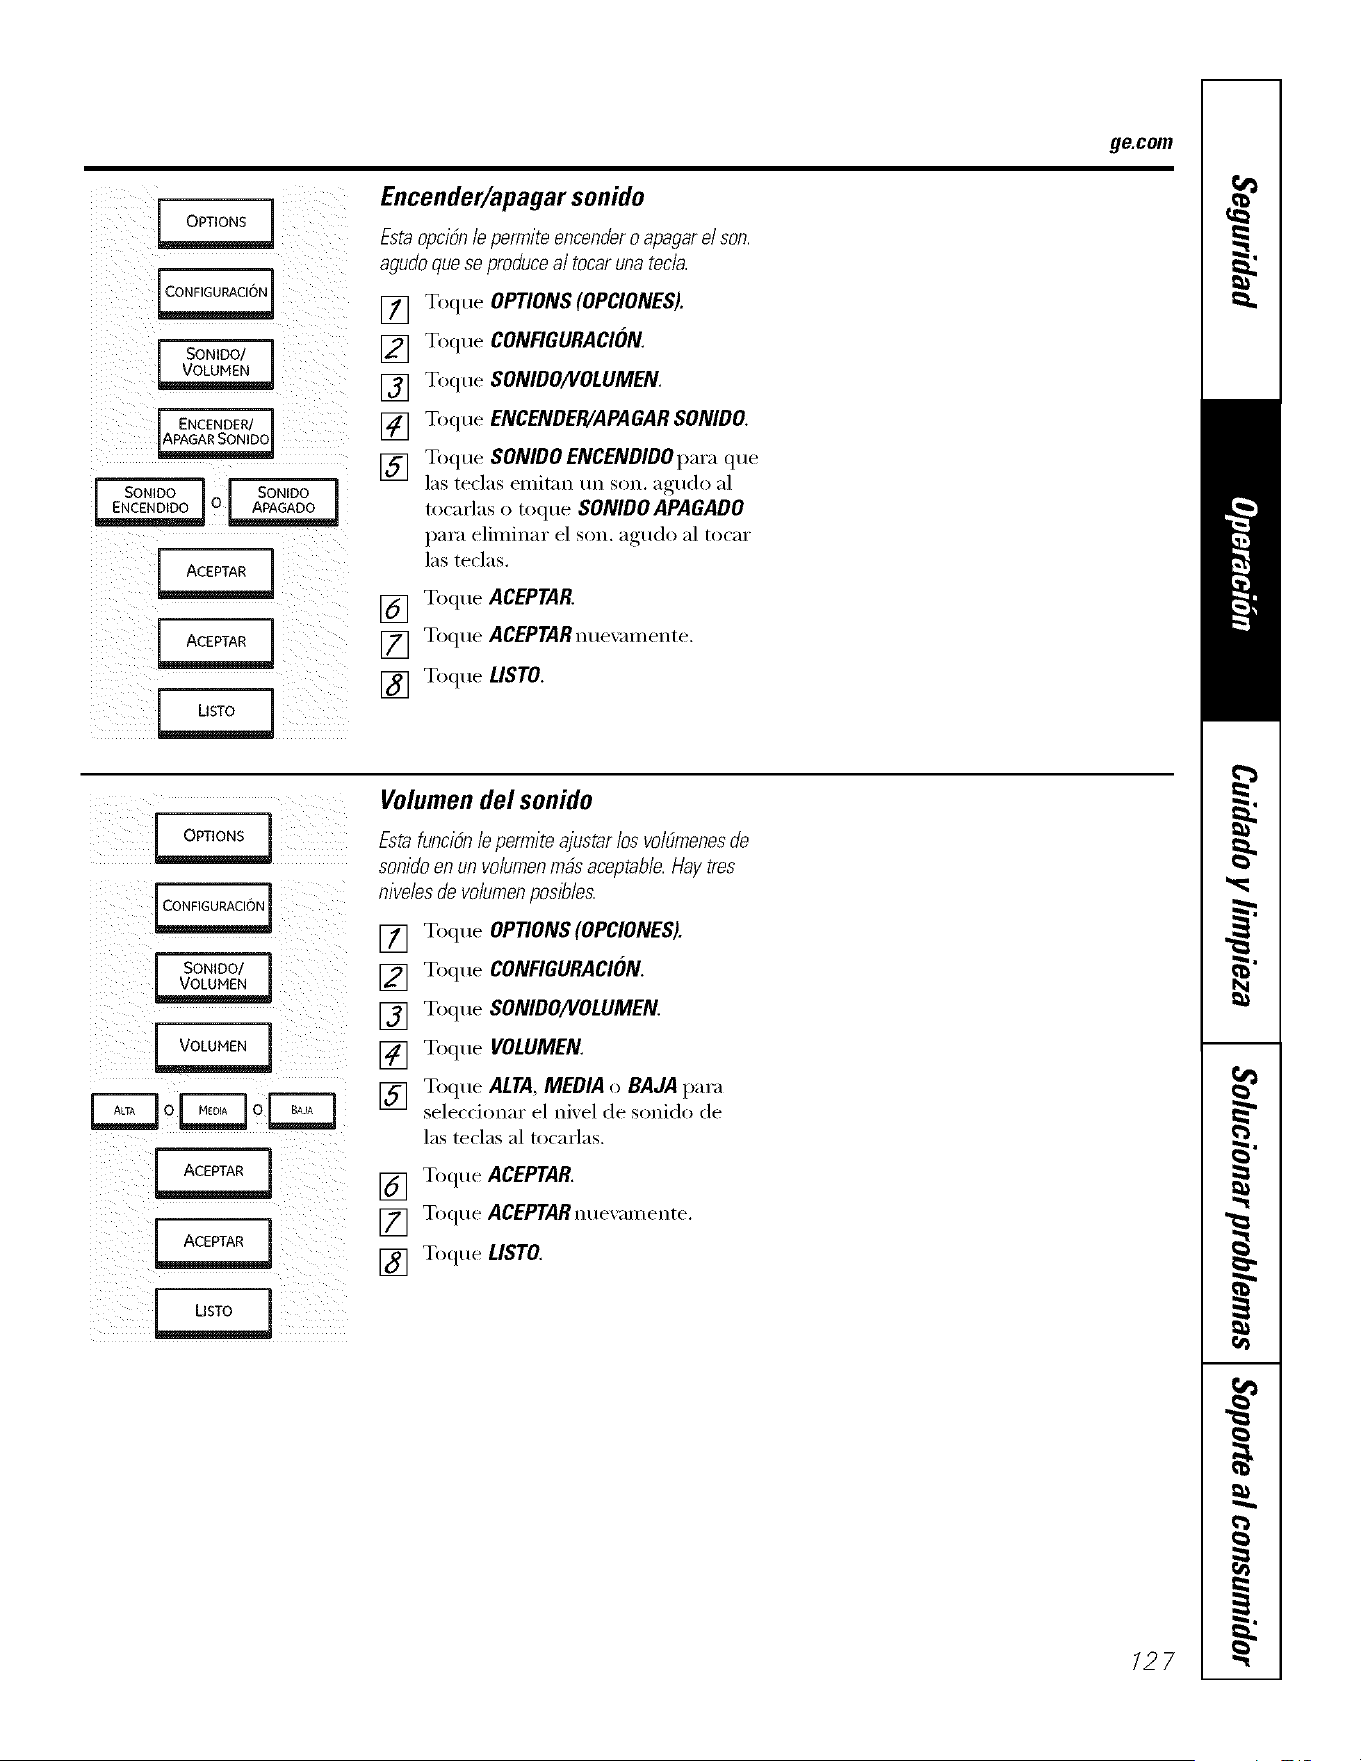
[ so._Do/ ]
ENCENaER/]
_SoNIDO ] [ SON_O0!
° I #,FdG_6oI
Encender/apagar sonido
EstaopciSn/epermiteencenderoapagare/son,
agudoqueseproducea/ tocarunatec/a,
[] Toque OPTIONS(OPCIONES).
[] Toque CONFIGURACION.
[] Toque SONIDO/VOLUMEN.
[] Toque ENCENDER/APAGARSONIDO.
[] Toque SONIDOENCENDIDOpara que
las tedas emitnn tm son. agudo al
tocarlas o toque SONIDOAPAGADO
para eliminar el son. agudo al tocar
las teclas,
[] Toque ACEPTAR.
[] T_que ACEPTARnue_mnente.
[] Toque LISTO.
ge.com
[ SONIDO/ 1
[ VOLUMEN j
0r- qo
Volumen del sonido
Esta funci6n le permite ajustar losvolOmenesde
sonido en un vo/umenrods aceptable. Haytres
niveles de vo/umenposl_les.
[] Toque OPTIONS (OPCIONES).
[] Toque CONFIGURACION.
[] Toque SONIDO/VOLUMEN.
[] Toque VOLUMEN.
[] Toque ALTA, MEDIA o BAJA para
seleccionar el hi, el de sonido de
las teclas al tocarlas.
[] Toque ACEPTAR.
[] Toque ACEPTARnuevam ente.
[] Toque LISTO.
127
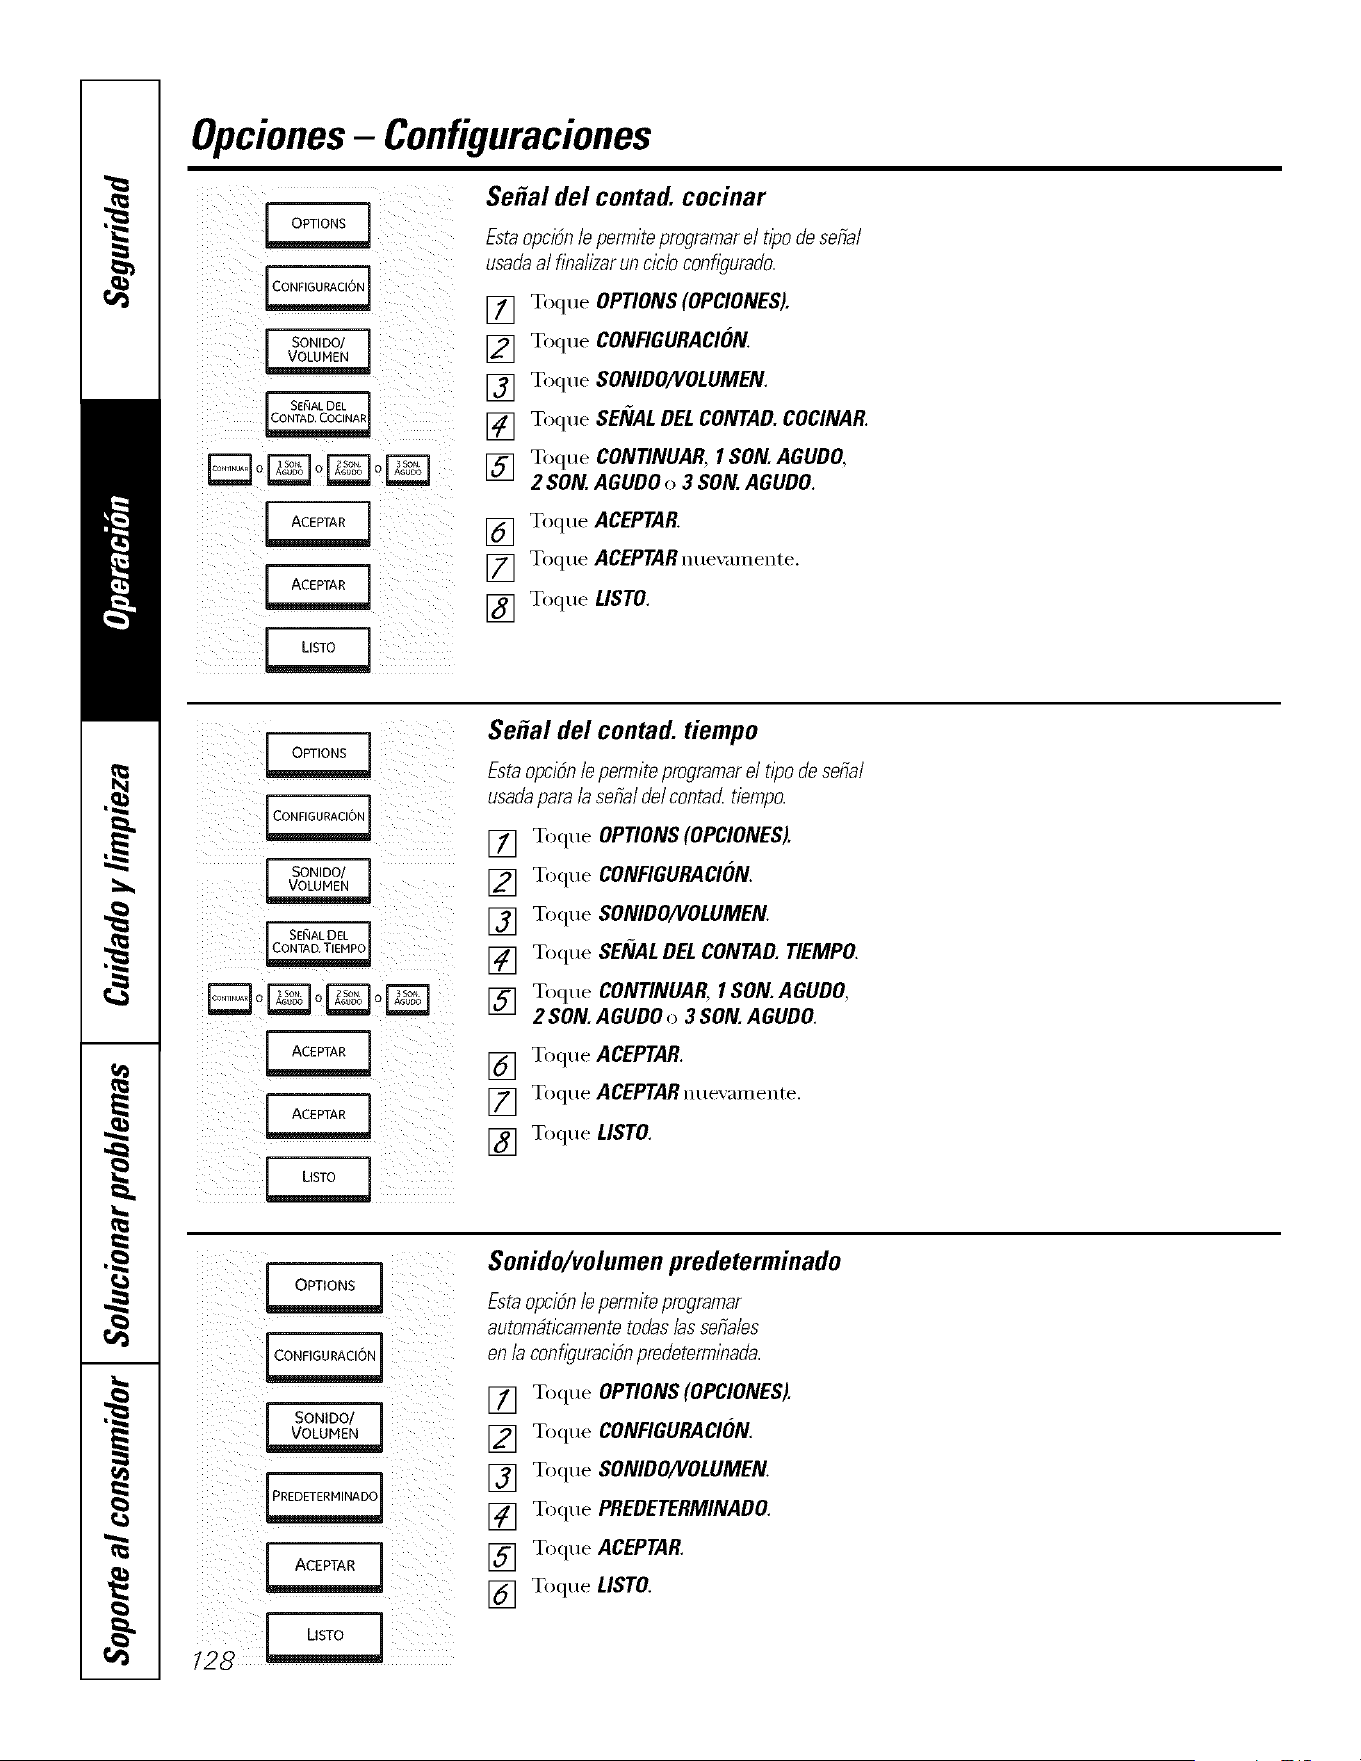
Opciones- Configuraciones
%
iiii :iilIc°"_'GuRAc'6"]!:_:_i
j so.loo/ I
_o o o
Se#al del contad, cocinar
Estaopc/6n/epermiteprogramare/ t/podesefia/
usadaa/hna//zarunc/c/oconhgurado
[] Toque OPTIONS(OPCIONES).
[] Toque CONFIGURACION.
[] Toque SONIDO/VOLUMEN.
[] Toque SENALDELCONTAD.COCINAR
[] Toque CONTINUAR,I SON.AGUDO,
2 SON.AGUDOo 3 SON.AGUDO.
[] Toque ACEPTAR
[] Toque ACEPTAR role; m_ente.
[] Toque LISTO.
JJ o_10NsJOPTO.S
[ SONIDO/ 1
SEi_IAL DEL
CONTAD. TIEHPO
o_o_o
ACE_ARI
I .
Se#al del contad, tiempo
Estaopci6nlepermiteprogramarel t/podeserial
usadapara/aserialdelcontacLfiempo.
[] Toque OPTIONS(OPCIONES).
[] Toque CONFIGURACION.
[] Toque SONIDOA!OLUMEN.
[] Toque SERIALDELCONTAD. TIEMPO.
[] Toque CONTINUAR, I SON. AGUDO,
2 SON. AGUDO o 3 SON. AGUDO.
[] Toque ACEPTAR
[] Toque ACEPTARnuevamente.
[] Toque LISTO.
[ SONIDO/
ACEPTAR J
Sonido/volumen predeterminado
Estaopci6nlepermiteprogramar
autom#t/camentetodas/asseria/es
en/aconhguraci6npredeterm/nada.
[] Toque OPtiONS(OPCIONES).
[] Toque CONFIGURACION.
[] Toque SONIDO/I/OLUMEN.
[] Toque PREDETERMINADO.
[] Toque ACEPTAR
[] Toque LISTO.
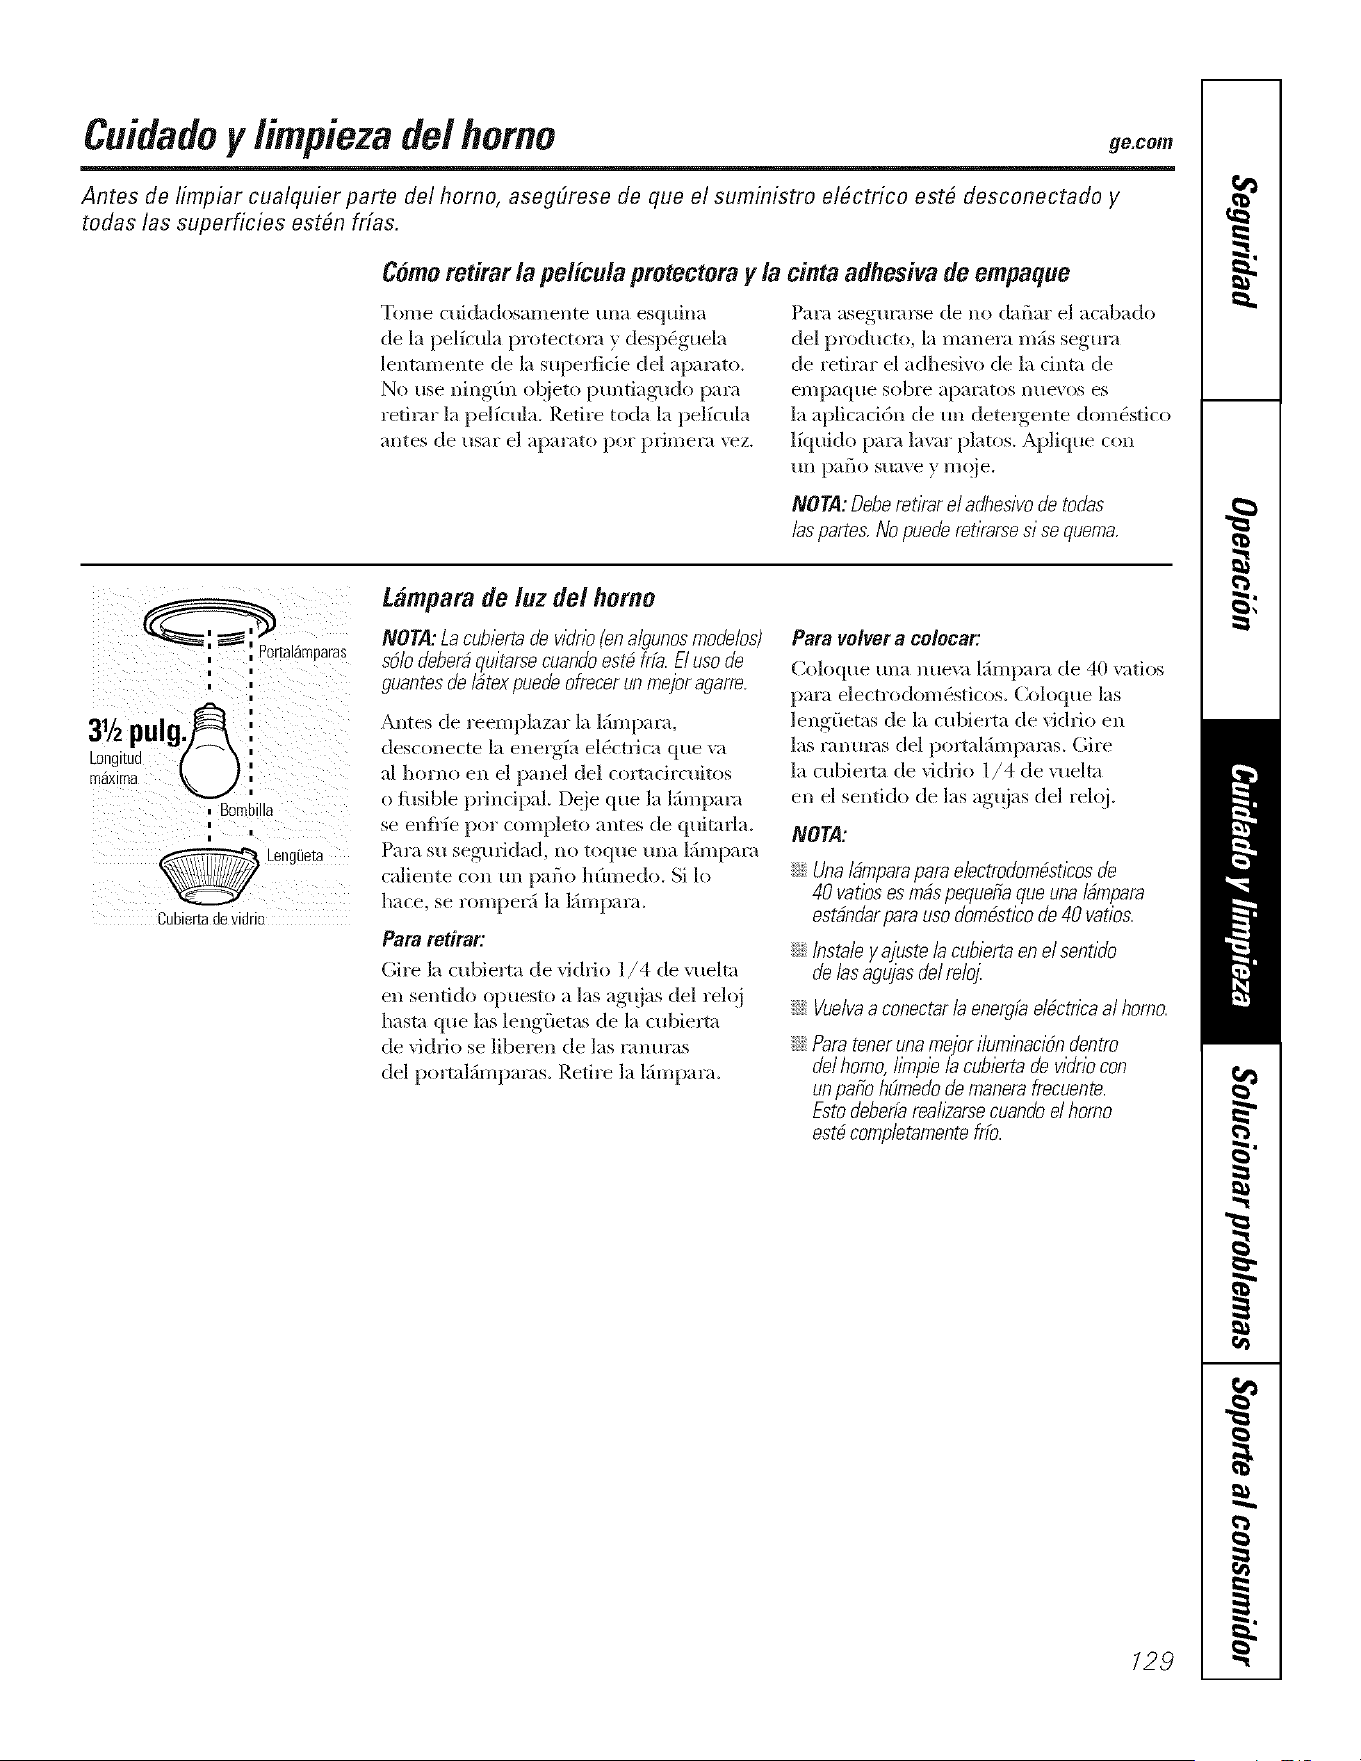
Cuidadoy limpiezade/homo ge.com
Antes de limpiar cualquier parte del homo, asegOrese de que el suministro el_ctrico est_ desconectado y
todas las superficies est#n fdas.
Como retirar /a pe/icula pmtectora y/a cinta adhesiva de empaque
Tome cuidadosamente tma esquina
de la pelicula protectora y deslx!guela
lenmmente de la supe_ficie del aparato.
No use ningOn objeto puntiagudo para
refirar la pelfcula. Retire toda la pelfcula
antes de usar el aparato pot prhnera vez.
Para asegm'arse de no dafiar el acabado
de] producto, la mane_a m;_s segum
de retirar el adhesivo de la cinta de
empaque sobre aparatos lille\ (}s es
la aplicad6n de un dete_gente dom_stico
]fquido para lavar platos. Aplique con
[Ill patio Stl;we y l//Q)e.
NorA: Oeberetkar e/adhesivo de todas
/aspartes. No puede retirarsesi se quema.
i i
i i
i
,.A
3gzpul i
b'Nimd ( '_,
ma,ma _
= BNrflOllla
i
i
Cubiertadevidric
tampara de/uz de/homo
NorA: La cubierta de vidriofen a/gunosmode/os)
sb/o deberfiquitarse cuandoest# frfa. E/uso de
guantes de Ibtex puede ofrecerun mejor agarre.
Antes de reemplazar la ]ihnpara,
desconecte la energfa eh4ctfica que x_
al horno el* el panel del co*_adrcuitos
o fl_sible prindpal. Deje que la hhnpara
se enfl'_e pot completo antes de quitaJa.
Pant st* segmidad, no toque mm hhnpara
caliente con un patio hOmedo. Si lo
hace, se romper5 la lSmpara.
Para retirar:
Oire la cubierta de vidfio 1/4 de vuelta
en sentido opuesto a las agujas del reloj
hasm que las lengfietas de la cubierta
de vidfio se liberen de las ranuras
del portah%nparas. Retire la hhnpara.
PBEB VOIVeE B CO[OCEIE
Coloque mm II[le\ri| 15mpari_ de 40 x;itios
para electrodom&ticos. Coloque las
leng(ietas de la cubie*ta de vidfio en
]as r:mm'as del portahimpams. Gire
]a cubiertn de vidfio 1/4 de vuelta
en el sentido de las agtjas del reloj.
NORA:
iJi::Unalfimparaparaelectrodombstlcosde
40vatiosesm#spequetiaqueunai#mpara
estfindarparausodomfisticode40 vafios.
iJi::/nstaley a]usmia cubiartaenelsentido
de/asagujasdelmloj.
iJi::Vuelvaa conectar ia energia elbctrica al homo.
;;Ji::Paratenerunamejoriluminacidndentro
de/homo,h_npiaia cubiartade vidriocon
unpatiohE!medodemanerafrecuente.
Estodeberiarealkarsecuandoelhomo
estbcompletamentefifo.
129
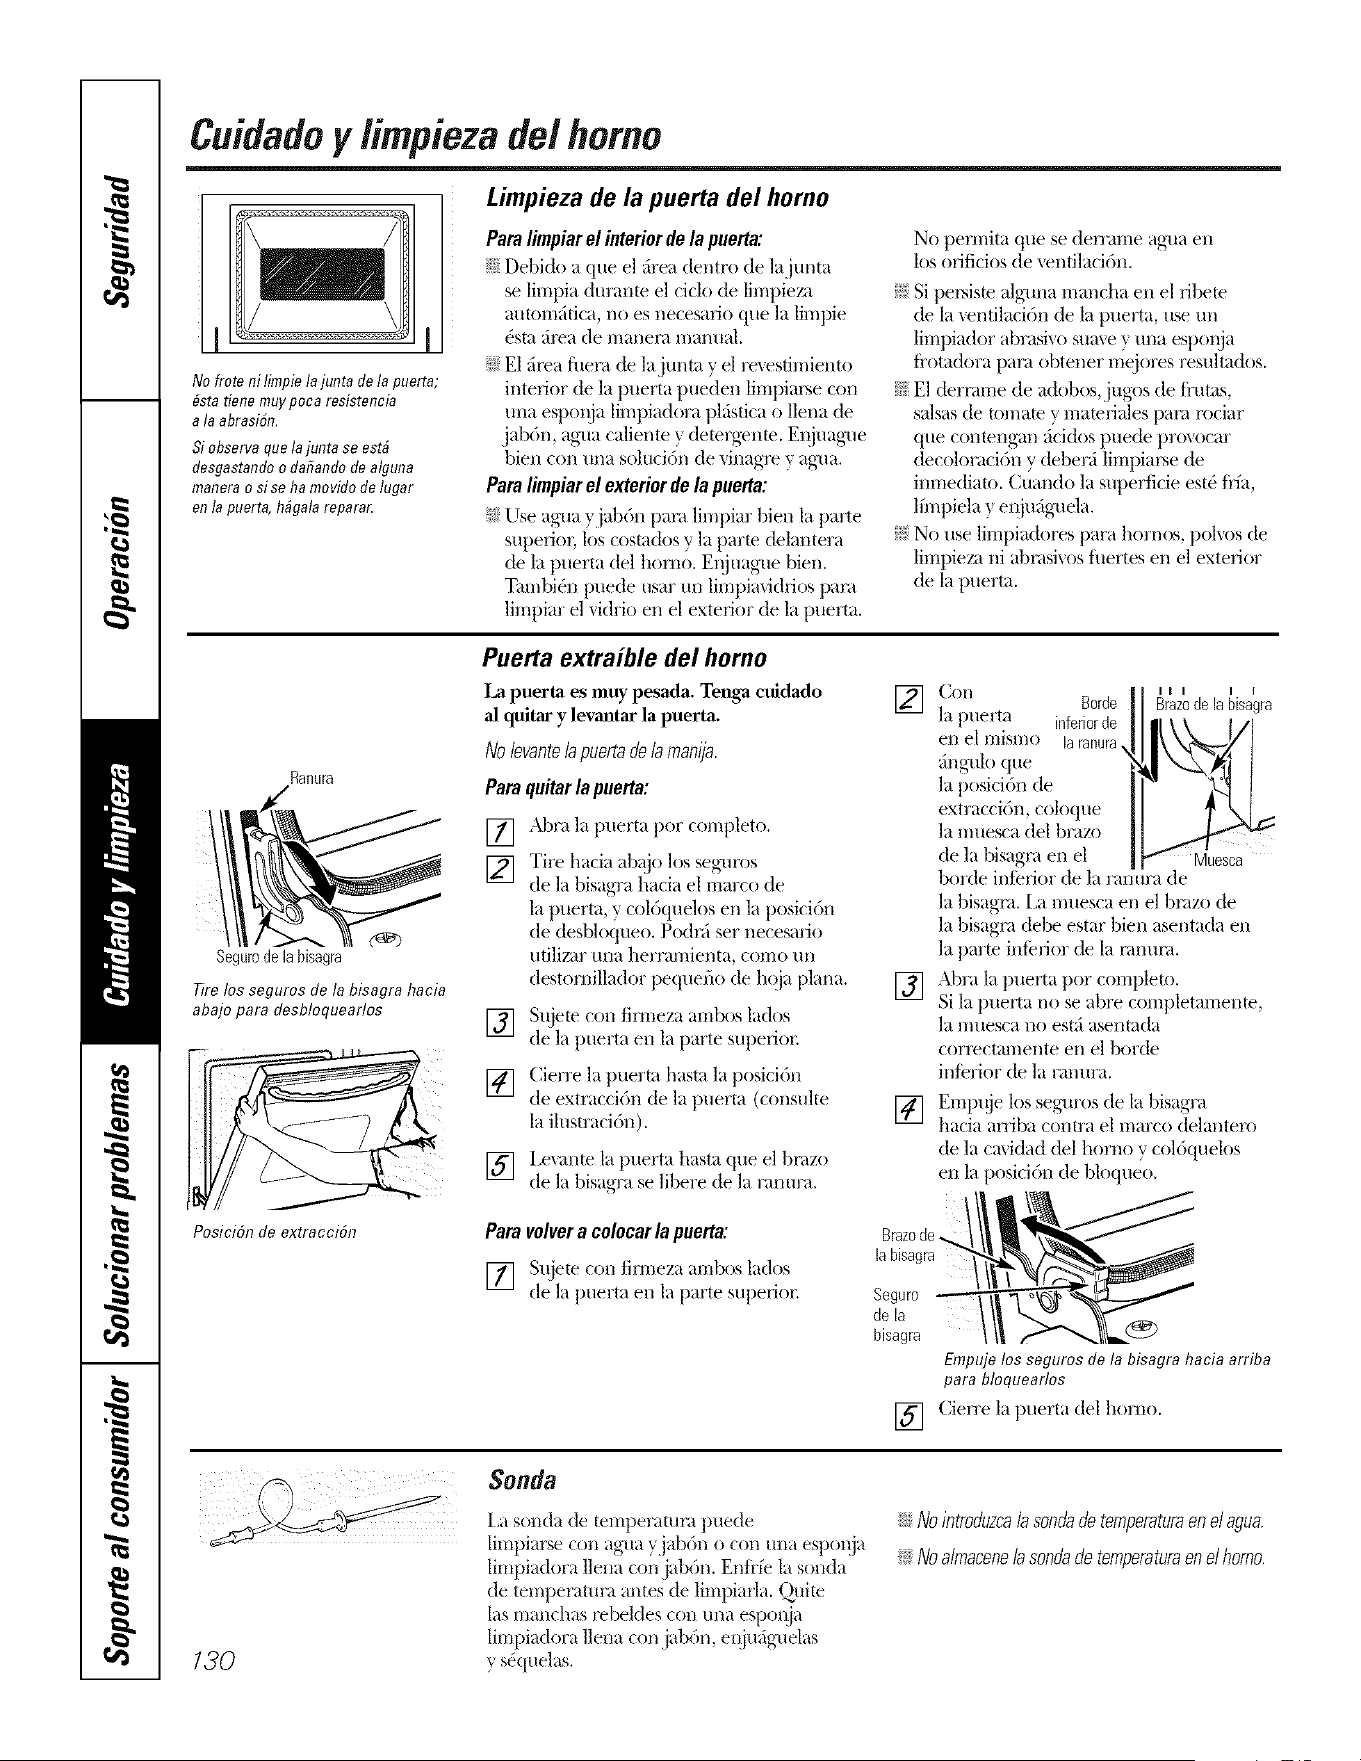
Cuidadoy fimpieza de/homo
Limpieza de la puerta del homo
No frote ni limpie la junta de la puerta;
#sta tiene muy poca resistencia
a la abrasi@.
Si observa que la junta se est#
desgastando o dafiando de alguna
manera o si se ha movido de lugar
en la puerta, h@ata repara_
Para limpiar el interiordela pnerta:
;'t:iDebido a que el firea dentro de lajunta
se limpia durame el dclo de limpieza
autorrlfifica, no es necesarlo que la limpie
_sta fil_a de manel_ manual.
!(:E1 firea fllenl de lajunta y el re_esfimiento
intelior de la puerta pue(lei_ limpial_e con
una esp(mja limpiadora plfistica o llena de
jab6n, ag-ua caliente y detergente. Eqjuag-ue
bien con una soluci6n de vinagl> y agua.
Paralimpiar el exterior dela pnerta:
}(:Use agua }jab6I_ pare limpiar bien la parte
superior, los cosmdos y la parm delantera
de la puerta del homo. Eqjuague bien.
TamN(q_ puede usar un limpiavidrios pare
limpiar el vidrio en el exterior de la puerta.
No pem-fita que se den'ame agua en
los ofificios de xentilaci6n.
_}}Si pel_iste algtma mancha ell el ribete
de la venfilaci6n de la puerta, use un
limpiador abrasivo suave y una espoqja
fl'otadora pare obtener mejores resultados.
_: El dermme de adobos, jugos de tmtas,
salsas de u)mam y mamfiales pare mciar
que comeng'an tlcidos puede provocar
decoloraci6n y deber_ limpial_e de
im-nediato. Cuando la supedicie est4 fi'fa,
lhnpiela y ei_jufiguela.
_ No use limpiadores para hornos, polvos de
limpieza ni abmsivos fllertes en el exterior
de la puerta.
Ran{ira
d_b
Segurodeiabisagra
Tire los seguros de la bisagra hacia
abajo para desbloquearlos
Posici6n de extracci6n
Puerta extraible del homo
La puerta es nmy pesada. Tenga cuidado
al quitar y levmltar la puerta.
Nolevantelapuortadela manija.
Paraquitarla puerta:
[] Abra la puerta por completo.
.] • ,
[] Tire hacia aba'o los seg-uros
de la bisagra hacia el marco de
la puerta, y col6quelos en la posici6n
de desNoqueo. Podnl ser necesario
ufilizar tma herramienta, como un
destomillador pequefio de h(!ja plana.
[] Sujete con tirmeza m-nbos lados
de la puerta en la parte superior.
[] Cierre la puerta hasta la posi(-i6i_
de extrac(idn de la puerta (consulte
la ilusmmi6n).
[] i,ev, mte la puerta hasta que el bmzo
de la bisagra se libere de la mlmra.
Paravolver a colocarla poet*a:
[] Sujete con tirmeza ambos lados
de la puerta en la parte supeliOl:
] Con Borde
]a puerta inferiorde
en el mismo laranura,
_ng-ulo que
la posici6n de
extracci6n, coloque
la muesca del braa)
de la Nsagm ell el
borde inielior de
la bisagn_. [,a muesca el/el bmzo de
la bisagnl debe estar bien asentada en
la parte int_efior de la nmum.
[] Abra la puerta, por completo.
Si la puerta no se abre COlnpletamente,
la muesca no estfi asenmda
corlectamente el/ el borde
interior de la ranura.
Brazede la bisagra
Muesca
[] Empuje los seguros de la bisa,,'ra.
hacia arriba COlm'a el marco delantero
de la cmidad (]el homo y col6qudos
en la posici6n de 1)loqueo.
Empujelossegurosdo la bisagrahaciaarriba
para bloquearlos
[] Cierre la puerta del homo.
130
Sonda
La sonda de temperami_ puede
limpiarse con agua _.jab6n o con una espoqja
limpiadora llena con.jab6n. Enfi'fe la sonda
(le temperatm'a antes de limpiarla. Qtfite
las manchas *_bel(les con una espoqja
limpiadora llena con jab&l, eqjufiguelas
y s(_quelas.
Nointroduzca/asomadetemperaturaenelagua.
!(_Noalmaceneb somadetemperaturaonelhomo.
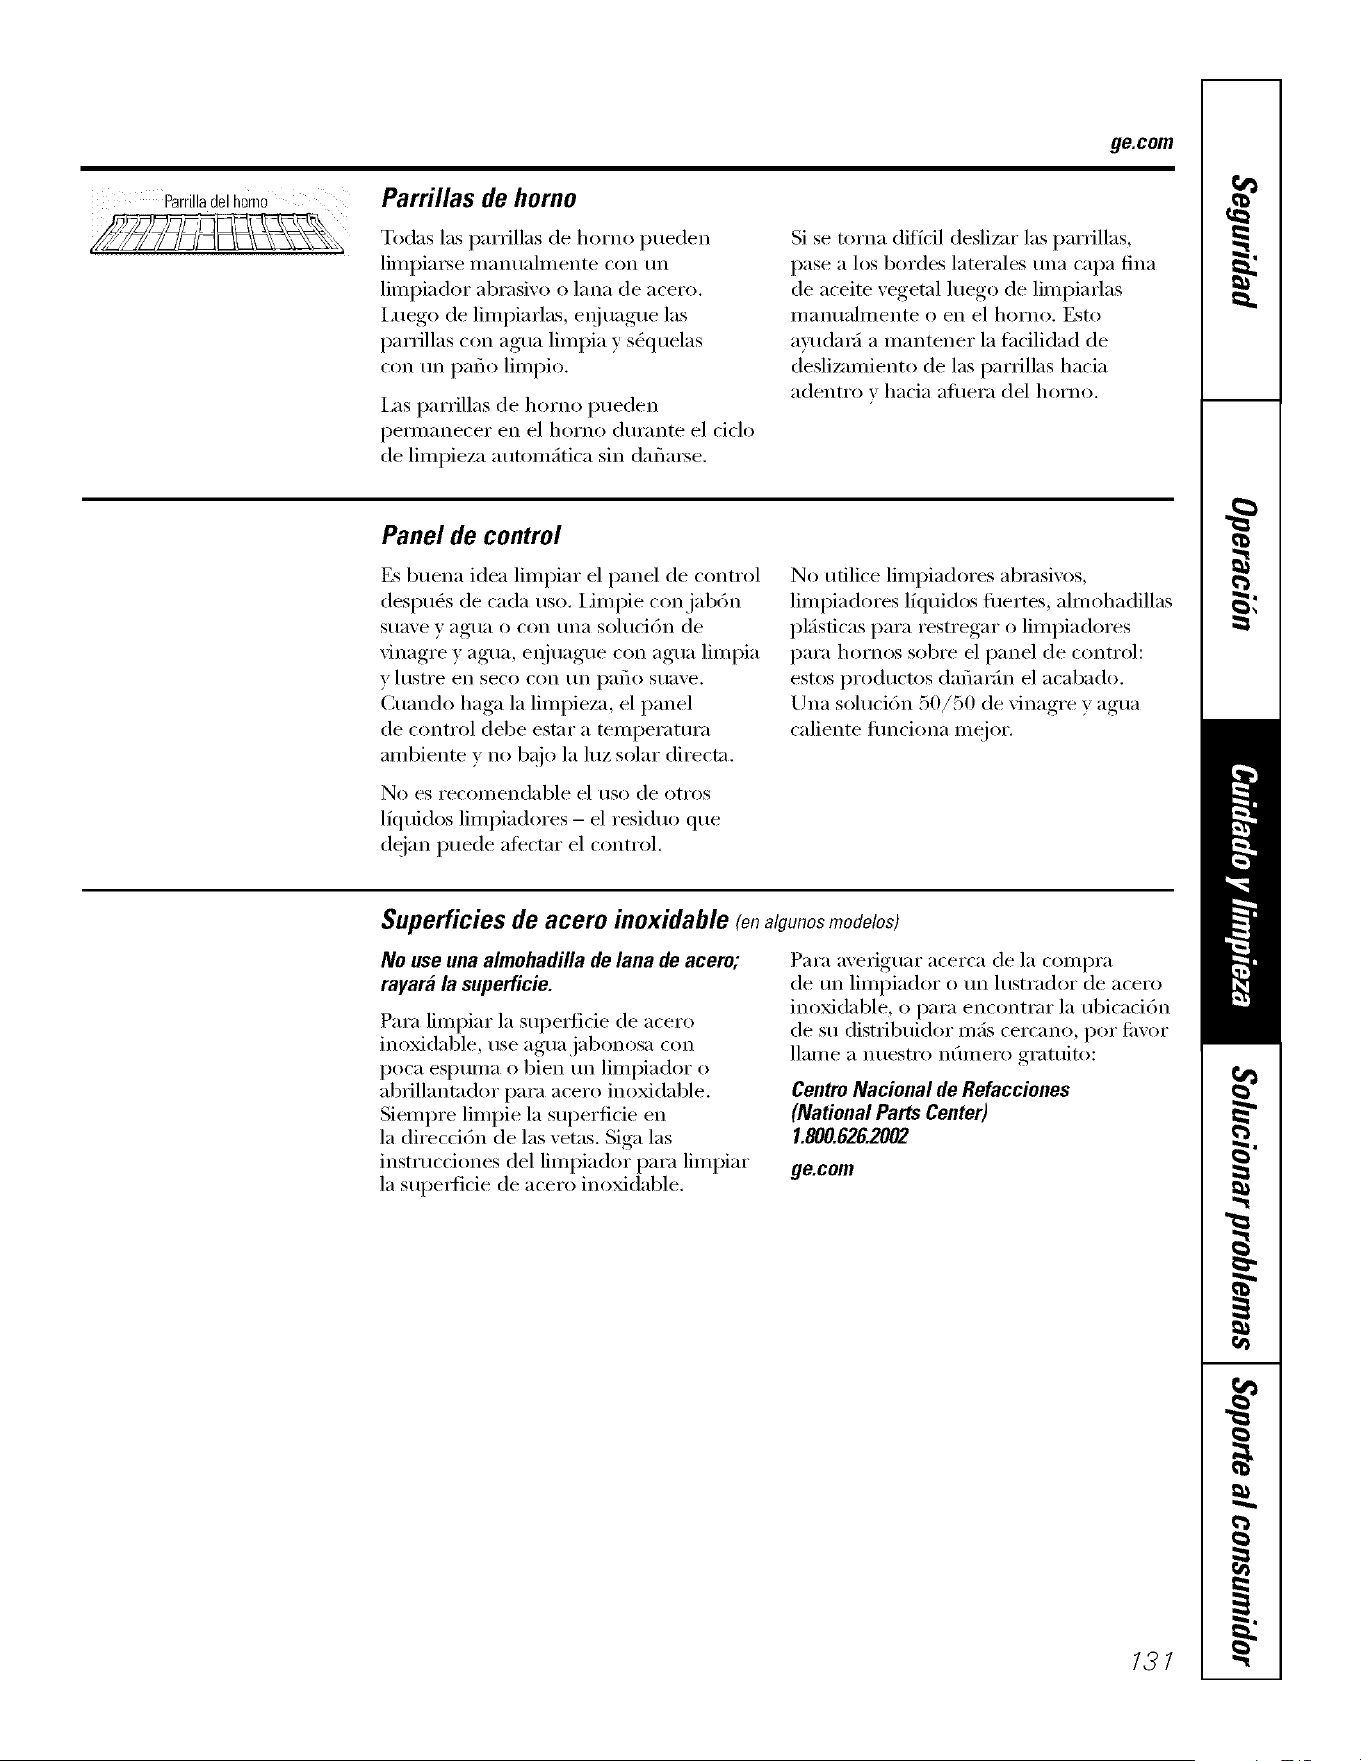
ge.com
Parrilladel h0m0 Parrillas de homo
Todas las parrillas de homo pueden
limpia_se manuahnente con un
linlpiador abrasive o lana de acero.
I,uego de lilnpiarlas, eqiuague las
parrillas con agua limpia y S&luelas
con tm patio limpio.
ias parrillas de homo pueden
pernmnecer en el horno durante el ciclo
de limpieza mm)mfitica sill daflm_e.
Si se toma ditidl deslizm" las parrillas,
pase a los hordes laterales tma capa fina
de aceite vegetal luego de limpiarlas
ii/antlahl/ente o en el hoYno. Esto
apldaM a mantener la facilidad de
(leslizamiento de las parfillas hacia
adentro v hacia aflmra del homo.
Panel de control
Es buena idea limpiar el panel de control
(lespu_s de cada use. Limpie conjabdn
suave y agua o con una solucidn de
vinagre y agua, ei_juague con agua limpia
v hlstre ell seco con tlIl p[iflO S/l[IVe.
()mn(lo haga la limpieza, el panel
de control debe estar a temperatura
ambiente v no b_!jo la luz solar directa.
No es recomendable el use de otros
lkluidos limpiadores - el residue que
dejan puede atectar el control.
No ufilice limpiadores abrasivos,
limpiadores lfquidos fimrtes, ahnohadillas
plfisticas para restregar o limpiadores
para homes sobre el panel de control:
estos productos dafiaMn el acabado.
Una solucidn 50/50 de vinagre y agua
caliente flmciona meier.
Superficies de acero inoxidable (onalgunosmodelos)
No use una almohadilla de lana de acero;
rayara la superficie.
Para limpiar la supeHide de acero
ino_dable, use agua.jabonosa con
poca espunm o bien tm limpiador o
abrillantador para acero inoxidable.
Siempre limpie la superfide ell
la direcd6n de las vetas. Siga las
instrucciones del limpiador para limpiar
la supeil'icie de acero inoxidable.
Para averiguar acerca de la compra
de tm limpiador o tm lustrador de acero
inoMdable, o para encontrar la ubicaddn
de su distribuidor mils cercano, per fi_vor
llame a nuestro n6mero gramito:
CentroNacionaldeRefacciones
(National PartsCenter)
1.800.626.2002
ge.com
121
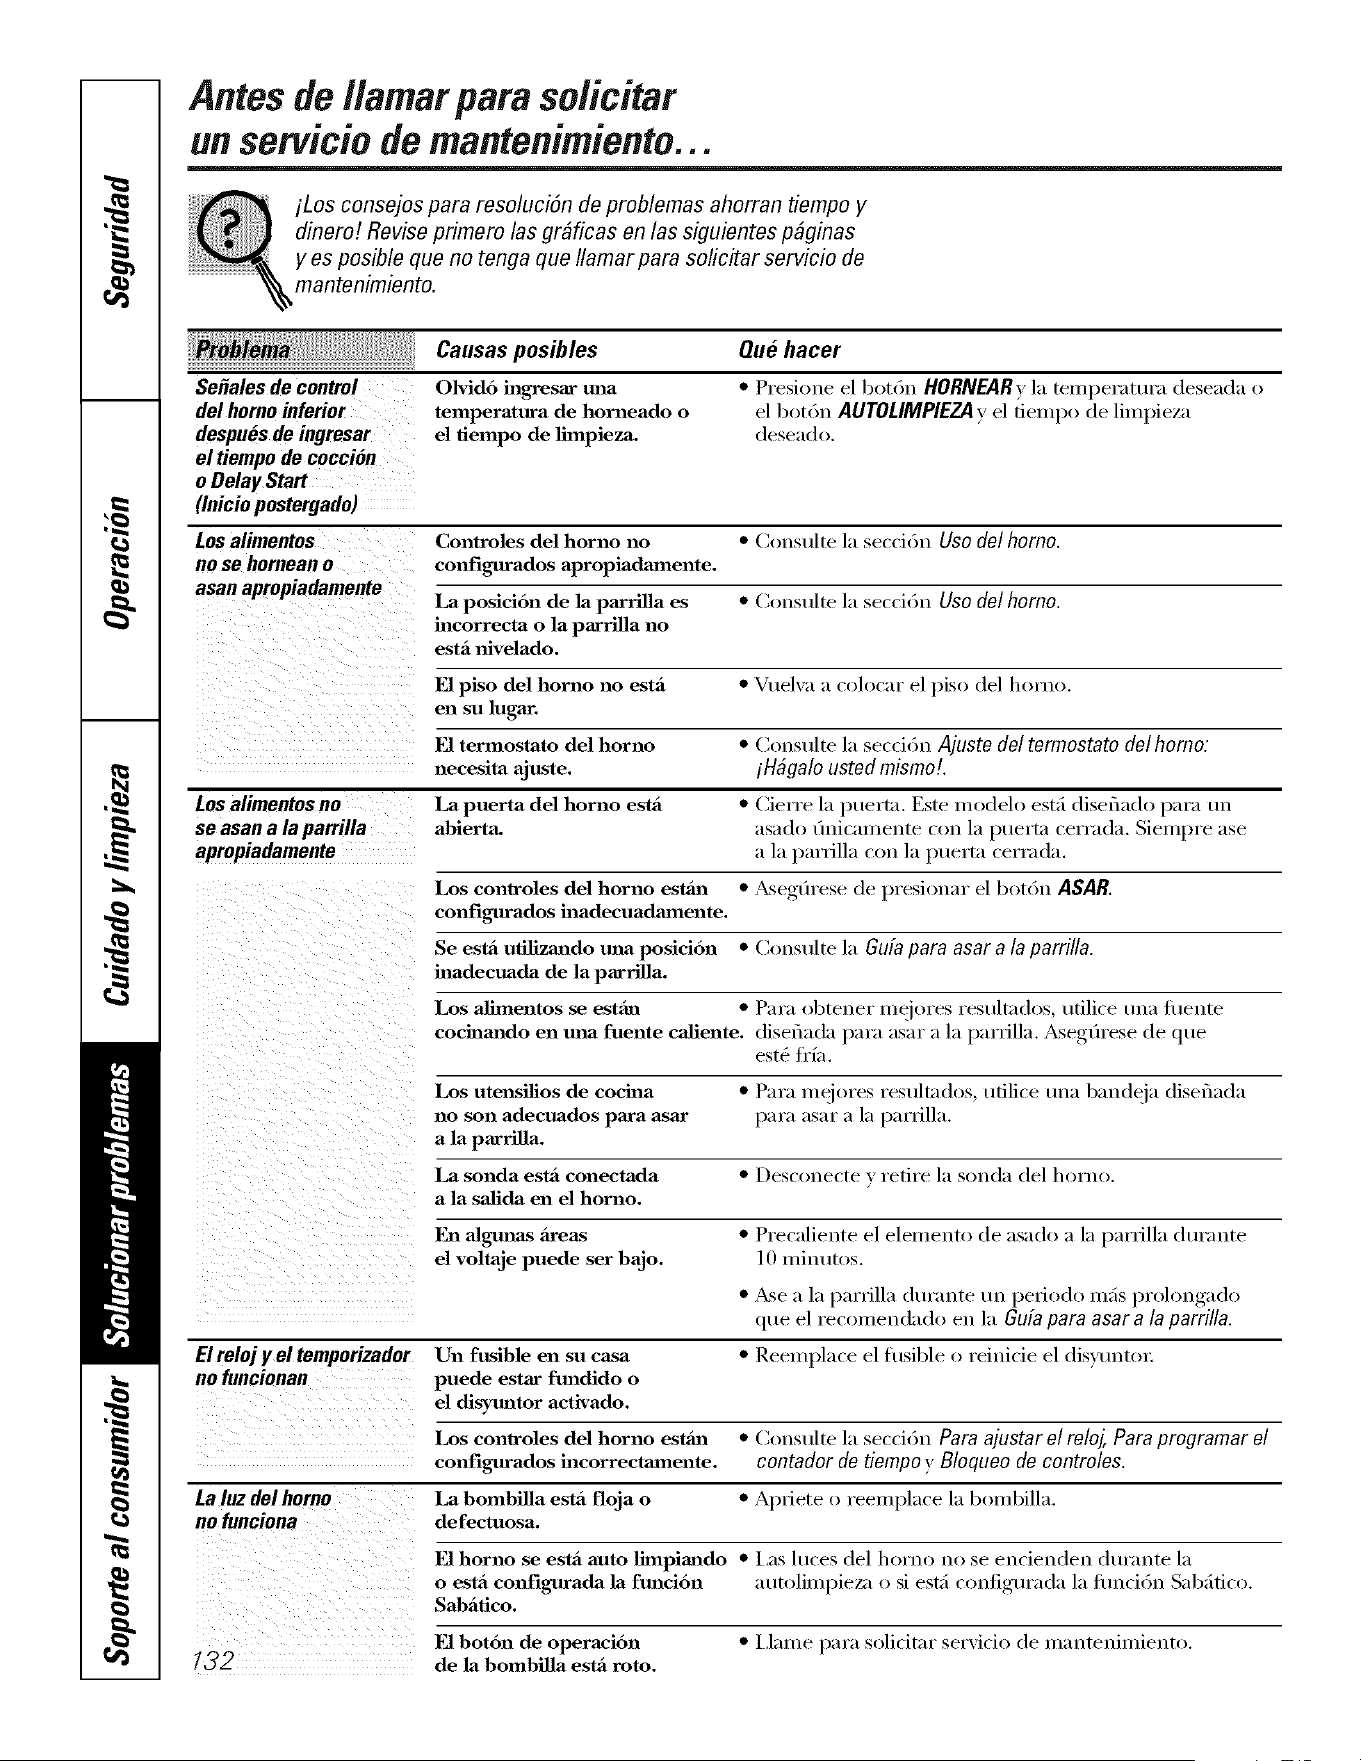
Antesde//amarpara so/icitar
un servicio demantenimiento...
iLos consejos para resolucidn de problemas ahorran tiempo y
dinero! Revise primero las gr#ficas en las siguientes p@inas
y es posible que no tenga que Ilamar para solicitar servicio de
mantenimiento.
Se#alesde control
del homoinferior
despuesde ingresar
el tiempode coccion
oDelayStart
(Iniciopostergado)
Causas posibles
Olvido hlgresar tma
telnperatttra de horneado o
el tiempo de limpieza.
Que hacer
• Presione el bot6n HORNEARyla temperatura deseada o
el bot6n AUTOLIMPIEZAv el fiempo de limpieza
deseado.
Losalimentos Controles del horno no • Consulte 1;I secci6n Uso de/homo,
no se hornean o configurados apropiadmuente.
asanapropiadamente
La posicion de la pardlla es • (',(n_sulte la secci6n USO del homo,
hlcorrecta o la pardlla no
estfi _fivelado.
E1 piso del homo no estfi • Vuelva a colocar el piso del horno.
en su lugar.
E1 termostato del horno • Consulte la secd()n Ajuste de[ termostato de[homo:
necesita ajuste, iH@alo ustedmismo!.
Los alimentos no La puerta del homo es_ • (;ien'e 1;i puertn. Este modelo est5 disefiado l)ara un
se asan a la parrilla abierta, asado finicamente con 1:1puertn terraria. Siempre ase
apropiadamente a la parfilla con la puertn cerrada.
Los conlroles del horno estmz • _seg(u'ese de presionar el bot6n ASAR
configurados hmdecuada_aente.
Se estfi ufilizm_do tma posicion • (:()nsulte la Gu[a para asar a la parrilla.
inadecuada de la parfilla.
Los alhuentos se est_h_ • Para obtener mejores resultndos, ufili(e una fllente
coch_mldo en tma fuente caliente, diseflada para as:u" a la parfilla. _seg(/rese de que
est_ fl'fa.
Los utensilios de coch:m • Para meiores resultndos, ufilice tma bandeja diseflada
no son adecuados para asar para as:u" a la parrilla.
a la parrilla.
La sonda es_ conectada • Desconecte v retire la sonda del homo.
a la salida en el homo.
I_ha algtmas 5teas • Precaliente el elemento de asado a la parrilla din'ante
el voltaje puede ser bajo. 10 minutos.
• _se a la parrilla durante un pelJodo ross pr(_h)ngado
que el recomendado en 1:1 Gt/[a para asara/a parrilla.
flrelojyeltemporizador Un fusible en su casa • Reemplace el fl/sible o reinicie el disvm_to_:
no fnncionan puede estar ftmdido o
el disytmtor activado.
Los controles del horno estma • Consulte la secci6n Para ajustar el re/o_ Para programar el
configttrados incorrectamente, contador de tiempoy Bloqueo de controles.
La luz del homo La bombilla esUi floja o • Apriete o reemplace la bombilla.
no funciona defectuosa.
E1 horno se esfi auto limpimado • Las hwes del homo no se encienden din'ante la
o es_ configurada la fm_ci6n autolimpieza o si est5 configurada 1:1flmci6n SabSfico.
Sabfitico.
E1 boton de operacion • lJame para solicitnr servicio de mantenimiento.
[_ de la bombilla estfi roto.
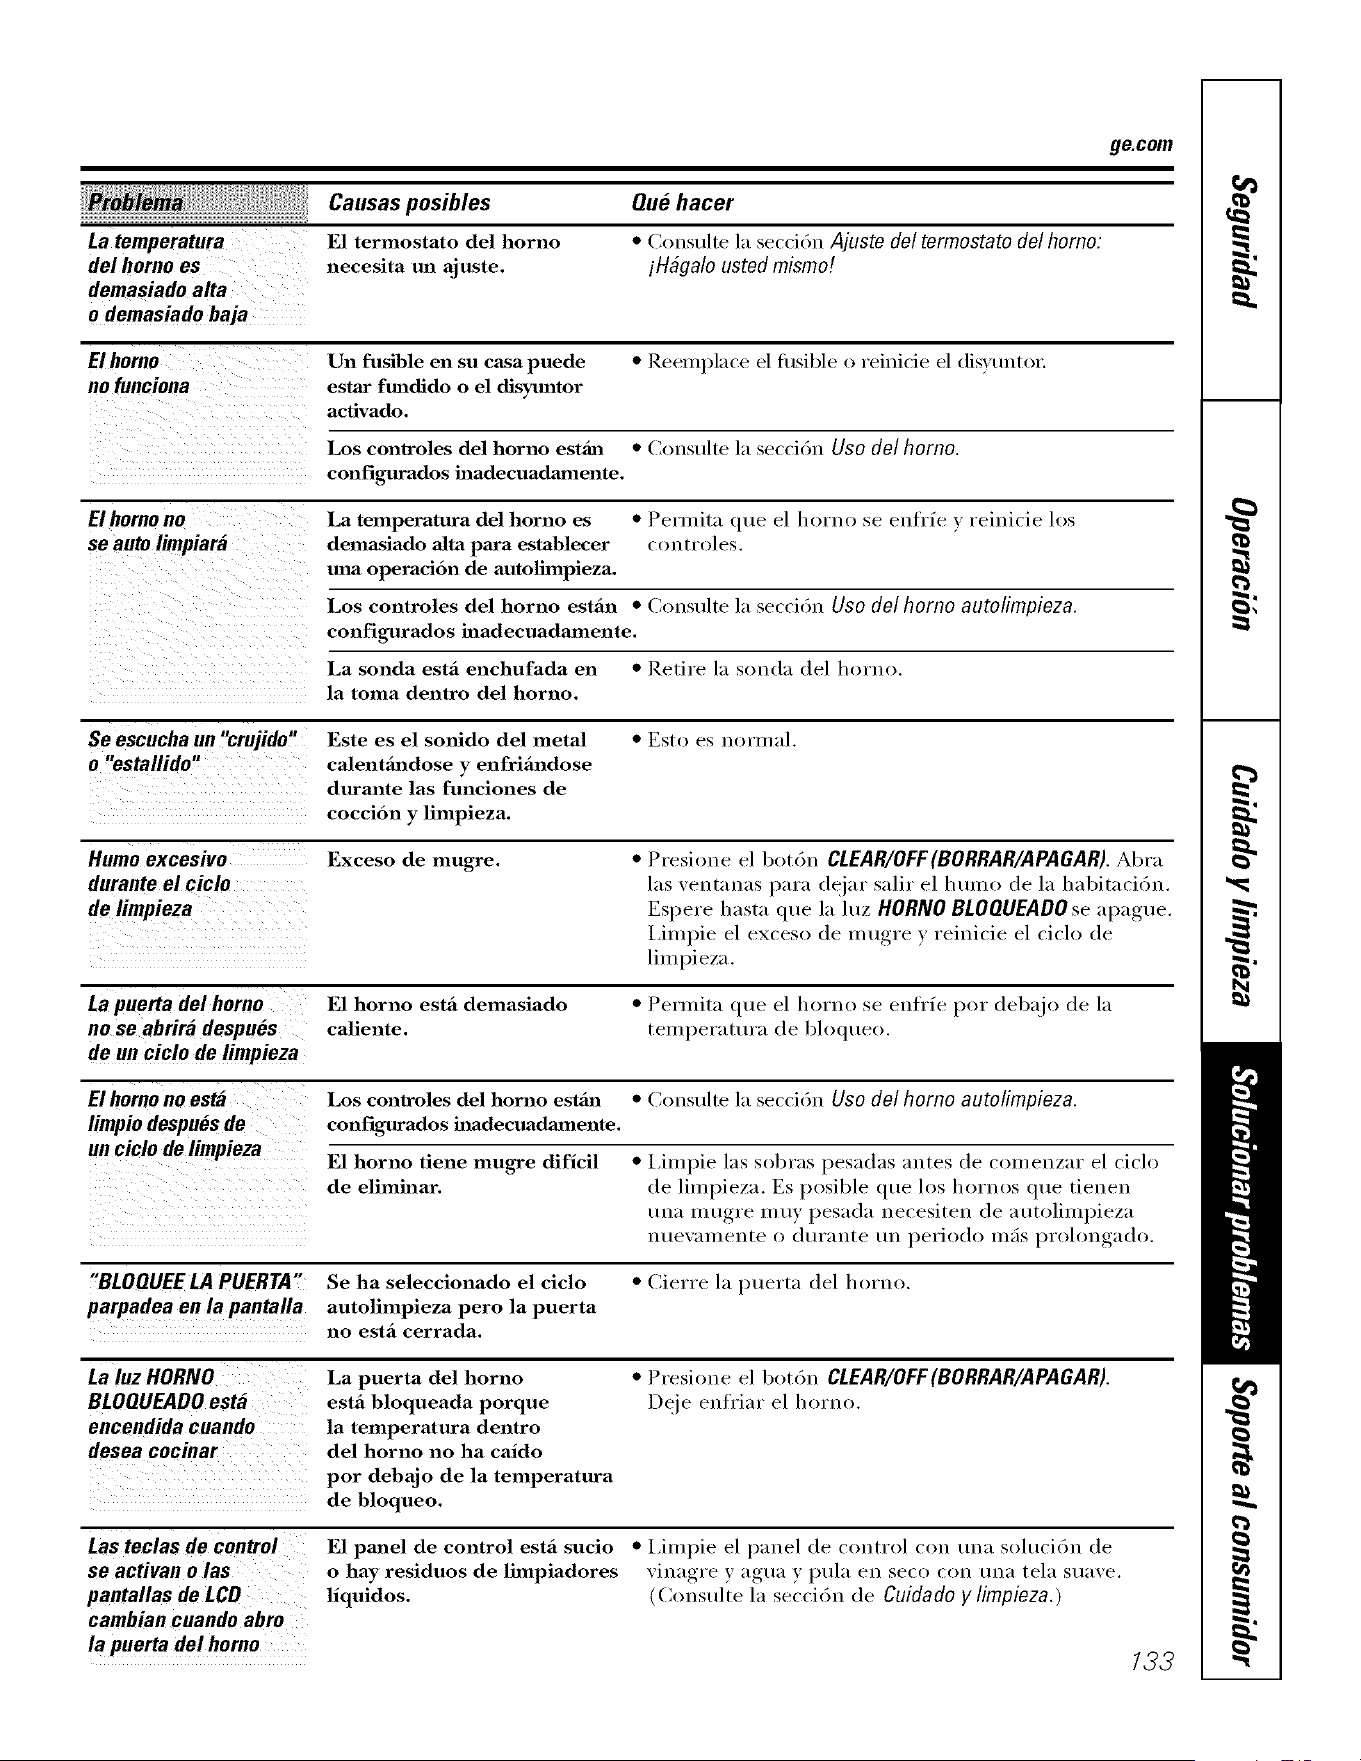
ge.com
La temperatura
del homo es
demasiadoalta
o demasiadobaja
Causas posibles
E1 termostato del horno
necesita tm ajuste.
Que hacer
• Consulte la secci6n Ajuste de/termostato de/homo:
iHdgalo ustedmismo!
El homo Un fusible en su casa puede • Reemplace el fl/sible o reinicie el disvuntox:
no funciona estar ftmdido o el disym_tor
activado.
Los conecoles del horno estahl * Consulte la secci6n Uso de[ homo.
configurados hmdecuadamente.
El homo no La temperatura del horno es * Permita que el homo se enfrfe v reinicie los
se auto limpiara demasiado alta para establecer controles.
tma operacion de autolhnpieza.
Los controles del horno estfin * Consulte la secci6n Uso do[ homo autolimpieza.
configurados h_adecuadamente.
La sonda estfi enchufada en * Retire la sonda del homo.
la toma dentro del horno.
Se escucha un "crujido" Este es el smfido del metal * Esto es normal.
o "estallido" calentimdose y enfrifindose
durante las funciones de
coccion y limpieza.
Humo excesivo Exceso de mugre. * Presione el bot6n CLEAR/OFF(BORRAR/APAGAR). Abra
durante el ciclo las ventanas para deiar salir el humo de la habitaci6n.
de limpieza Espere hasta que la luz HORNO BLOQUEADO se apague.
IJmpie el e×ceso de mw,re_ v, reinicie el ('iclo de
limpieza.
La puerta del homo E1 horno estfi demasiado
no se abfira despues caliente.
de un cic!o de limpieza
• Permita que el homo se enfrfe pot debajo de la
temperatura de 1)loqueo.
El homonoesta
limpiodespuesde
unciclo tie limpieza
Los controles del homo estfial • Consulte la secci6n Uso de/horno autolimpieza.
configurados hmdecuadamaente.
E1 horno tiene mugre diflcil
de elimhaar.
• I,impie las sobras pesadas antes de comenzar el ciclo
de limpieza. Es posible que los hornos que tienen
tma mugre muy pesada necesiten de autolimpieza
nuewm/ente o durante tm perio(h) ross prolongado.
"BLOQUEELAPUERTA"
parpadea en la pantalla
Se ha seleccionado el ciclo
autolimpieza pero la puerta
no estfi cerrada.
• Cierre la puerta del homo.
La luz HORNO
BLOQUEADO esta
encendida cuando
ii i i i i i i i
La puerta del horno
estfi bloqueada porque
la temperatura dentro
del horno no ha caldo
por debajo de la temperatura
de bloqueo.
• Presione el bot6n CLEAR/OFF(BORRAR/APAGAR).
Deje enfriar el homo.
Lasteclas de control
se activan o las
pantallas tie LCD
cambiancuandoabm
la puerta del homo
E1 panel de control estfi sucio
o hay residuos de limpiadores
llquidos.
• i,impie el panel de control con tma soluci6n de
xinagi'e, X, _l_tl_l_ X,I)tlla en seco con tlll_l tela Stl_l_,e,
(Consulte la secci6n de Cuidado y limpieza.)
133
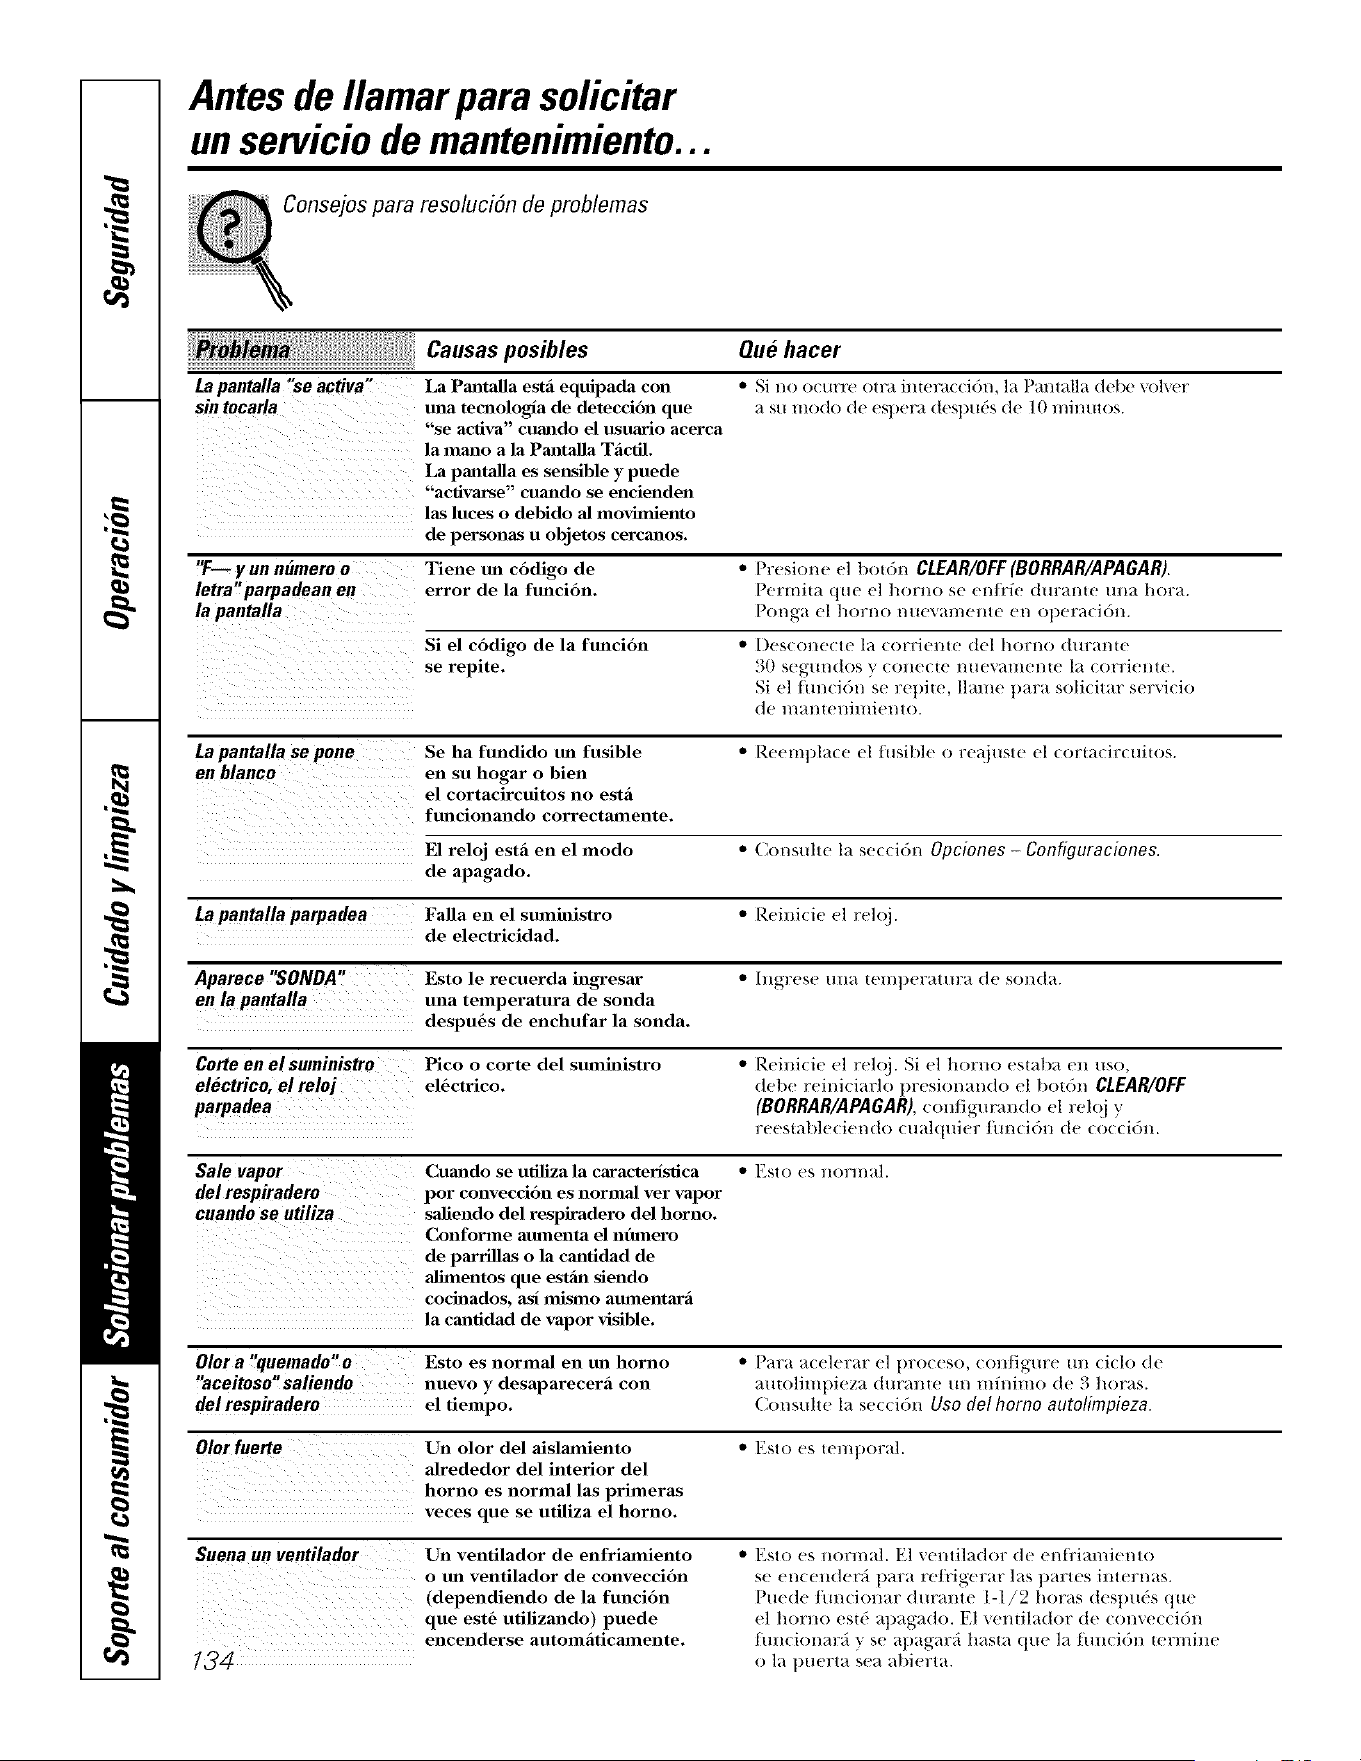
Antes de Ilamar para solicitar
un servicio de mantenimiento...
Consejos para resoluci6n de problemas
Causas posibles
La pantalla "se activa" La Pantaga estS_equipada con
sin tocarla tma teolologla de detecci6n que
.soa va"cu , oel acorca
la mmlo a la Pantalla Tfictil.
La pantalla es sensible y puede
"activarse" cuando se euciendeu
las luces o debido al lnovhniento
de personas u objetos cercanos.
Que hacer
)
* Si no o(urre otra inwra((idn, la I antalla debe "_ol'_er
_) su modo de espera despuSs de 10 minutos.
'F-- y on n#mero o Tiene ml c6digo de " Presione el bot6n CLEAR/OFF (BORRAR/APAGAR).
letra',parpadean el) error de la ftmcidn. Permita que el b(n'no se enii'ie (tin'ante mla hora.
la pantalla Ponga el borno mlexan/ente en oper_,cidn.
Si el cddigo de la ftmcidn " Des((me(te 1_1(orrienw del horno (hlranw
se repite. 30 seg-/lndos y ((111(_1te 1)11(!'_1ii1(!1)t(_la 1(/rri(!nt(_.
Si el flm(idn se repiw, llame pm:a soli(itar serxi(io
d(! 1//all t (!11i1//i(!1/t (1.
La pantalla se pone Se ha fundido tm fusible " Reempla(e el tusible o re_tiust(! el (orta(ir(uims.
el) b/anco en su hogar o bien
el cortacircuitos no esth
f iouau o orre t oouto.
E1 reloj esth en el modo " (_onsulte la se((idn Opciones - Configuraciones.
de apagado.
La panta!la parpadea Falla en el stunhfistro • P.einicie el reloj.
de electricidad.
Aparece "SONDA, Esto le recuerda ingresar " lngrese ml_ i(!111peratllra de sonda.
el) la pantalla una temperatura de sonda
despu6s de enchufar la sonda.
Corte en el soministro Pico o corte del smnhfistro " Reinicie el reloj. Si el borno esml)a cn uso,
ol#ctrico, el reloj el6ctrico. (t(!t)(! reini(iarlo presi(mando el |)or()1/ CLEAR/OFF
parpade a (BORRAR/APAGAR), (onfigur_,ndo el rel(_i y
reesmble(i(mdo (md(luier hm(idn de (o((idn.
Sa/evapor Cumldo se ufiliza la caracterlsfica • Esto es norn/al.
de/respiradoro por couvecddn es normal ver vapor
cuando se otiliza saliendo del respiradero del horno.
Conforme amnenta el nfnnero
de parrillas o la cantidad de
alhnentos que estan slendo
cochlados, asl lnislno atuneutarfi
la canfidad de vapor visible.
OIor a "qoemado"o Esto es normal entm horno * Para acelerar el pro/eso, configure ml ciclo de
"aoeitoso, saliendo nuevo y desaparecerh con mltolimpieza (hll'allt(!/11/111i1/i111(1 (te _{ boras.
delrespiradero el tiempo. Consuh(! 1_ seccidn Uso delhorno autolimpieza.
Olor foerte Uu olor del aislmnieuto • Esto es teml)ora].
alrededor del interior del
horno es normal las primeras
veces que se utiliza el horno.
Soena on venti/ador Un ventilador de enfrimniento
o tin ventilador de convecci6n
(dependiendo de la funci6n
que est6 utilizando) puede
encenderse automfiticmnente.
* Esto es nornml. El vcmilador de enfi'iamiento
se en(end('rfi pm:a re/i'igcrar las partes imernas.
Pue(te tuncionar durante l-I/2 horas desl)uOs que
el horllo esi(' apagado. E1 vemilador (te convecci6)_
hlllcionar5 v se al)ag+ar5 hasta que la hlll€i6n termine
o la puerta sea abierta.
_otas, ge.oom
135
w
I
I
N
_ta$.
m
N
w
m
I
m
m
m
i
i
136
137
r_
w
I
I
N
m
m
r_
Garantiade GEparasu homoe/#ctrico empotrado
Todos los servicios de garantfa los proporcionan nuestros Centros
de Reparaci6n de F#brica o nuestros t#cnicos Customer Care®
autorizados. Para concertar una cita de reparaci6n, en Ifnea,
24 horas al dfa, visftenos en ge.com, o Ilame al SOO.GE.CARES
(800.432.2737). Cuando Ilame para solicitar servicio, por favor
tenga a mano el n6mero de serie y el nOmero de modelo.
Pegueaquf su recibo.
Se requiere facilitar prueba
de la fecha de compra original
para obtener un servicio
bajo la garantfa.
Una#o
A pardr de la fecha
de la compraoriginal
GE reemplazar&
Cualquierparte del homo que fidle debido a defectos en los materiales o en la fid)ficaci6n.
Durante este garantia limitada de un a#o, GE tambiOn proporcionfi, sin costo alguno,
toda la mano de obra y los servicios internos para reemplazar partes def'ectuosas.
_: Viajes de servicio a su casa paaca ensefiarle como usar
el producto.
iJi::Insta]aci6n, entrega o mmltenhniento hmpropiada.
_: FaJlas del producto si hay abuso, maJ uso, o uso para
otros propositos que los propuestos, o uso paaca fines
comerciaJes.
_: Reemplazo de fusibles de su casa o reajuste de
hlterruptores de circuito.
_: Da6o al producto causado por accidente, fuego,
hlm_dadones o actos de Dios.
::Ji::Da6o iuddentaJ o consecuenciaJ causado por posJbles
defectos con el apaacato.
!_,2Da6o causado despu6s de la entrega.
_: Producto no accesible paaca facilitaac el servicio
requerido.
EXCLUSION BE GARANT]AS IMPL]CITAS--Su #nico y exclusivo derecho es la reparacion del pmducto,
tal y como se indica en esta Garantia limitada. Cualquier garantia implicit& incluyendo las garantias
implicitas de comerciabilidad o adecuacion para un fin determinado, estan limitadas a un a#o o el
periodo de tiempo mas breve permitido pot la ley.
Esta garantia se extiende al comprador original y cualquier comprador posterior de pmductos comprados para
uso residencial dentro des Estados Unidos. Si el producto est# situado en un #rea que no dispone de servicio pot
parte de un proveedor de servicio autorizado de GE,podda tenet que hacerse cargo de los costes de envio o bien
podda solicit#rsele que Ileve el producto a un centro de servicio de GEautorizado para realizar la reparaciSn.
EnAlaska, la garantia excluye el costo de env[o o las visitas de servicio a su casa.
Algunos estados no permiten la exclusiSn o las limitaciones de dafios incidentales o consecuenciales. Esta garantfa
da derechos legales especfficos, y usted podda tenet otros derechos que variar#n de estado a estado. Para saber
cu#les son sus derechos legales, consulte a la oficina de asuntos del consumidor local o la oficina del Prucurador
(Attorney General) en su Iocalidad.
Garante: General Electric Company.Louisville,KY 40225
138
Soportea/consumidor
"I P@inaWebde gEAppliances ge.com
_Tiene_ alguna, })regt/llta, sobre stl electrodol-a6stico? iPl t/ebe la })_gilla \'_1) de GE Appliances 24 horas al
dfa, cualquier dfa del afio! Para ma}or corn eniencia _ servicio m_s r_pido, }a puede descargar los Manuales
t de los Propietarios, pedir piezas o incluso hacer una cita en lfnea para (]ue vengan, a reali/m" una
reparaci6n.
Soliciteunareparacibn
E1 servicio de expe_qtos GE est;_ a tan s61o m_ paso de su pue_qra, iEntre en lfnea ) solicite su reparaci6n
cuando le _enga bien 24 horas al dfa cualquier dfa del aflo! O llame al 800.(IiE.CARES (800.432.2737)
(hlrallte horas llOF///ales de otiCilla.
ge. com
RealLifeDesignStudio(Estudiodedisefioparalavidareal) ge.oom
GE apoya el concepto de Diseflo Universal--productos, servicios y ambientes que pueden usar gente de
todas las edades, mmaflos y capaddades. Reconocemos la necesidad de diseflar pant tma gran gama de
habilidades v dificultades fisicas v mentales. Pant re;is detalles cobre las aplicadones de GE Diseflo l_)nivel_al,
inchwendo ideas de diseflo para la codna para personas con discapacidades, mire nuestra pfigina Web boy
mismo. Pare personas con dificultades auditix;is, fi_vo* de llamar al 800.TDD.GEAC (800.833.4322).
garantfasampliadas ge.com
Coillple tllla garant/a ampliada } obteilga detalles sol)re desctlelltos especiales disponibles I/lientras stl
garantfa est5 adn actixa. Puede comprarla en lfnea en cuakluier momento, o llamar al 800.626.2224
durante horas nom_ales de oficina. (;E (kmsumer Home Services estm5 aOn ahf ctmndo su garantfa termine.
[ "I
J
Piezasy accesorios
Aquellos individuos con la calificaci6n necesmia para repm'ar sus propios electrodom_sticos pueden
pedir que se les manden las piezas o accesorios directamente a sus hogares (aceptamos las mljetas
VISA, MasterCard y Discover). Haga su pedido en lfnea hoy, 24 horas cada dfa o llamar por tel6ibno
al 800.626.2002 durante horas nonnales de oficina.
ge. com
tas instrucdones descritas en este manual cubmn los pmcedhnientos a segu# per cualquier usuarie. Cualquier
etra reparaci6n deberia, per mg/a general, refer#se a personal ca/ificado auterizade. Oebe e]ercerse precauci6n
ya que /as reparacienes incorrectas pueden causar condiciones de funcionamiente inseguras.
Pongsse en contscto con nosotl'OS ge.cem
Si no est_i safisfecho con el servido que redbe de GE, pdngase en conmcto con nosotros en nuestra pSgina
Web indicando todos los detal]es asf como su nfimero de tel(_fimo o escrfl)anos a:
General Manage_; (Mstomer Relations
GE Appliances, Appliance Park
Louisville, KY 40225
Registresu electrodom6stico
iRegistre su nuevo electrodom&stico en linea--cuaJado usted prefiera! El registrar su producto a tiempo le
, proporcionar_, si .suroiera_ la necesidad, una me]or comtmicaci6n _, tm servicio mils r_pido bajo los t6rminos
de su garantfa. _lhmbi6n puede enviar su tmjeta de o's - "regl,_tlo premnpresa clue se incline en el material
de embalaie.
go. com
/39
ConsumerSupport
gEAppliancesWebsite ge.com
Have a question or need assistance _dth yore" appliance? Tr} tile GE Appliances _\ ebsite 24 hom_ a day,
' am da_ of tile _ear! For greater convenience and ihster service, }ou can now download Owner's Mmmals,
order pm_ts or even schedule service on-line.
ScheduleService
Ex[)exl GE repair service is onl} one step awa} fl'om }our door. Get on-line and schedule xour service at
xour, convenience 24 hom_ an} da} of tile )ear! O1" call 800.(;E.CARES 800.432.2737) during nom/al
btIsilleSS berlin.
go. corn
RealLife DesignStudio ge.com
GE suppol_s tile Universal Design concept--products, services, and environments that can be used by
people _ff all ages, sizes and capabilities. We recognize tile need to design fin" a wide range d physical and
mental abilities and impaimlents. For derails of GE's Univel_al Design applications, including ldtchen
design ideas for people with disabilities, check out our Website today. For tile heating impaired, })lease call
800.TDD.GEAC (800.833A322).
ExtendedWarranties
go. corn
Purchase a GE extended warrant} and learn about special discounts that are available while }our warrant}
00 "_ " __
is still in effect. YOu can purchase it on-line amtime or call 8 .626.2224 during normal business hours.
GE (]Ollstln/el" Home Services will still be there after }our warrant} expires.
PartsandAccessories
go. corn
Individuals qualified to sei_'ice their own appliances can have parts o1"accessories sent directly to their
homes (VISA, MasterCaid, and Discover cards are accepted). Order on-fine today, 24 hom_ every day o1"by
phone at 800.626.2002 during mmnal business houl_.
Instructions contained in this manual cover procedures to he performed by any user. Other servicing generally
should fie referred to qualified service personnel. Caution must he exercised, since impreper servicing may cause
unsafe operation.
Contact Us
go. corn
If you are not satisfied with tile service you receive fl'om GE, contact us on our Website with all tile details
including your phone numbel; or write to: General Manage1; Customer Relations
GE Appliances, Appliance Park
I,ouisville, KY 40225
l RegisterYourAppliance
Register your new appliance on-line--at your convenience! Tillle}} prodtlct registration *_ill allow for
' enhanced communication and prompt ser'dce tinder tile temls of}otlr WalTallty, should tile need arise.
You ma} also mail in tile prepfinted registration card included in tile })acldno_ material.
go. corn
Printed in fl?e United States
Imprim# aux Etats-Unis
Impreso en los Estados Unidos

