Loading ...
Loading ...
Loading ...
5. Placeapprovedrecyclableoilcontainerunderoildrain
plug.SeeFigures47and48startingonpage20.After-
ward,continuereadinginstructionsbelow.
6. Tipenginetopositiontheoildrainplugatthelowest
pointontheengine(seeequipmentmanufacturer's
instructions).
7. Removeoildrainpluganddrainoil
intoanapprovedrecyclableoil
container.
NOTE
Used oil must be disposed of at a proper coflection center.
8. Install oil drain plug and tighten securely.
See Figure 48.
9. Remove oil fill cap/plug from oil fill hole.
• See Figures 47 and 48 starting on page 20.
Afterward, continue reading instructions below.
• See "111.Oil and Fuel Specifications" instructions on
page 4. Afterward, continue reading instructions
below.
• See Table 1 on page 4. Afterward, continue reading
instructions below.
10. Add oil to overflow point, making sure to avoid spilling
and fill with recommended oil.
NOTES
DO NOT overfill oil filler. Doing so may result in oil carry-
over to the equipment and cause malfunction or damage.
Contact your Authorized Tecumseh Servicing Dealer for
Tecumseh Oil.
11. Wipe away any spilled oil.
12. Screw oil fill cap/plug back into oil fill hole. Tighten
securely. See Figures 47 and 48 starting on page 20.
Afterward, continue reading instructions below.
13. Carefully disconnect spark plug wire from grounding
post, if provided. See Figure 49. See "G. Avoid Acci-
dental Starts" instructions on page 2. Afterward, con-
tinue reading instructions below.
14. Carefully re-connect spark plug wire to spark plug.
See Figure 50.
C. Spark Plug
Check spark plug yearly or every 100 operating hours.
1. Clean area around spark plug.
2. Remove and inspect spark plug.
3. Replace spark plug if porcelain is cracked or if elec-
trodes are:
• Pitted
• Burned
• Fouled with Deposits
4. Check electrode gap with wire feeler gauge and set
gap to--.030 in. (0.76mm) if necessary. See Figure 51.
5. Install spark plug and tighten securely.
1
2
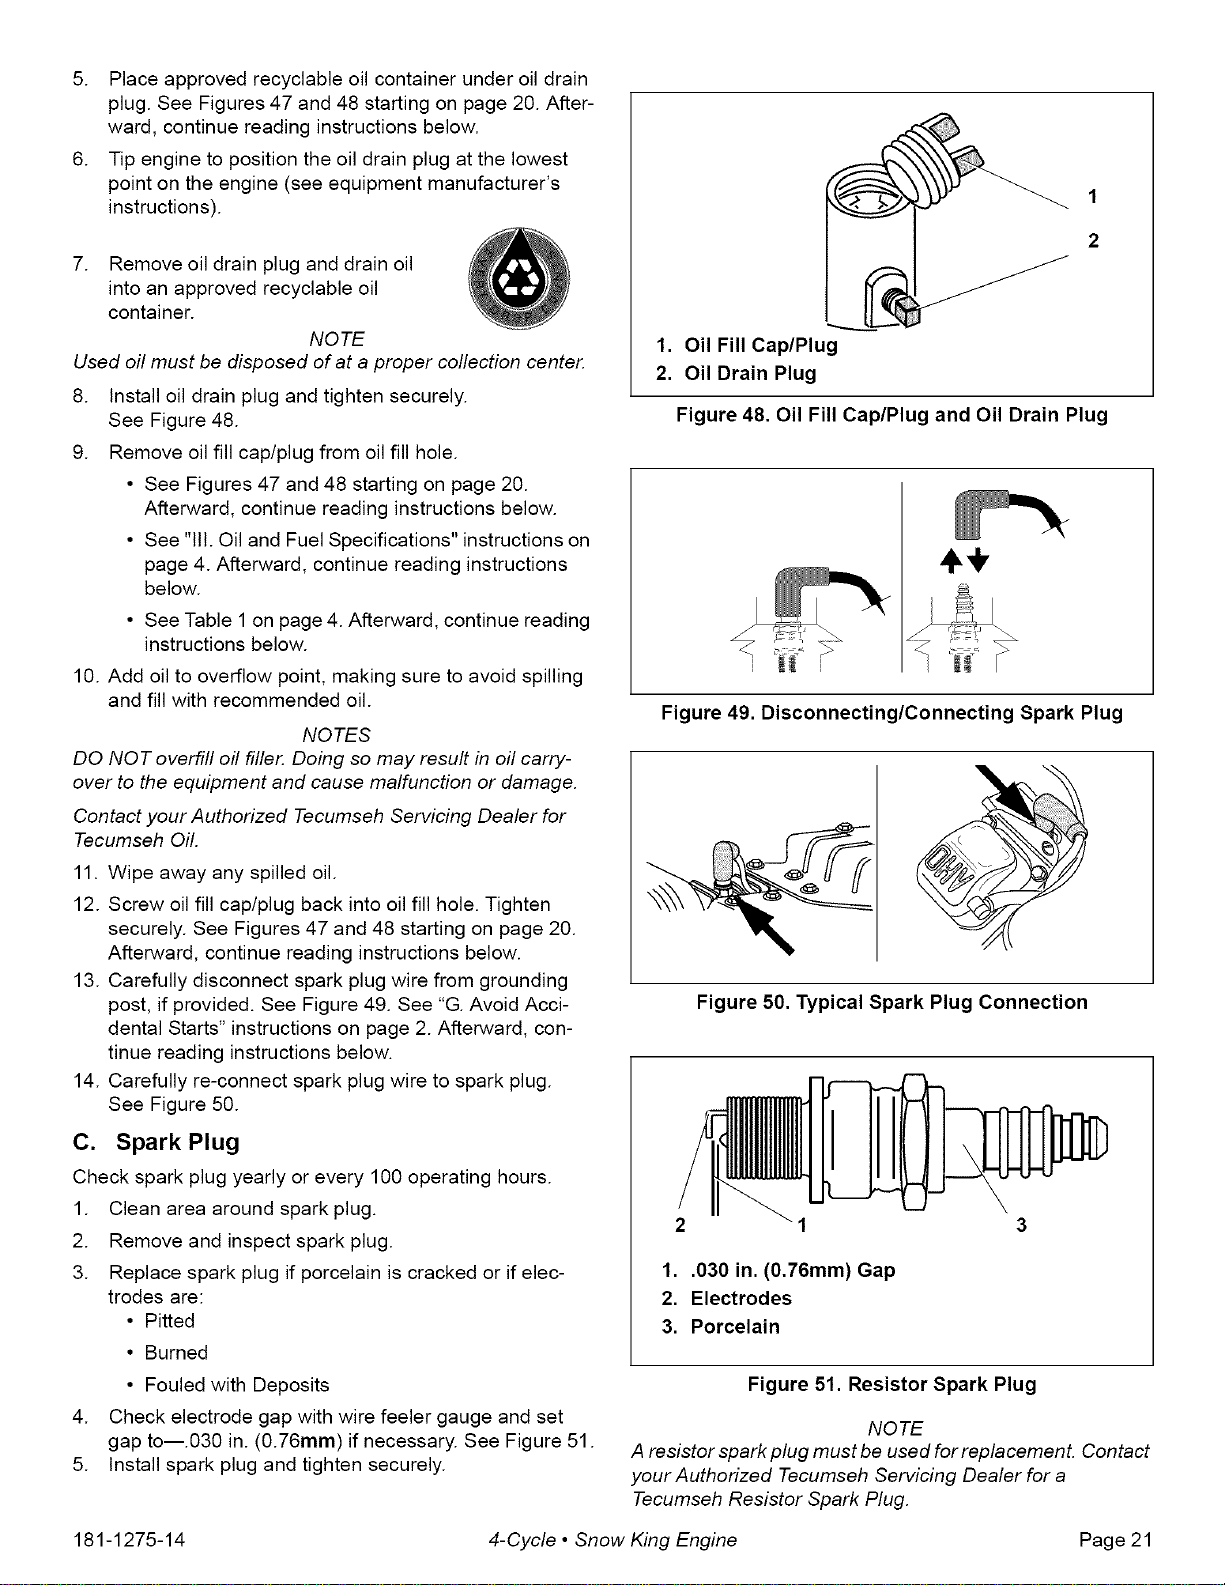
1. Oil Fill Cap/Plug
2. Oil Drain Plug
Figure 48. Oil Fill Cap/Plug and Oil Drain Plug
÷÷
Figure 49. Disconnecting/Connecting Spark Plug
Figure 50. Typical Spark Plug Connection
2 1
1..030 in. (0.76mm) Gap
2. Electrodes
3. Porcelain
Figure 51. Resistor Spark Plug
NOTE
A resistorsparkplug mustbe usedforreplacemenL Contact
your Authorized Tecumseh Servicing Dealer for a
Tecumseh Resistor Spark Plug.
181-1275-14 4-Cycle • Snow King Engine Page 21
Loading ...
Loading ...
Loading ...