Loading ...
Loading ...
Loading ...
13
4. It's normal that during the operation there will be a slight
amount of sparks. Lift the motor head assembly often and
examine the tooth. If there's a full curve of the tooth with a
shiny metal nish, the tooth is well sharpened.
Note: A good grind occurs when the contact between the
wheel and the teeth are gradual and smooth. Do not keep
the grinding wheel in contact with one tooth for too long.
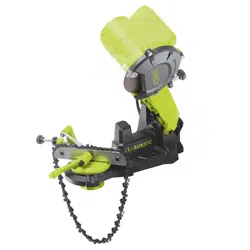
5. After sharpening one tooth, turn o the machine by
pressing the OFF(O) side of the On/O switch. Lift up the
motor head assembly. Flip the chain guide lock to the
unlock position and move the chain so that the next chain
tooth comes before the chain stop. Flip the chain guide
lock to the lock position and continue to sharpen the next
tooth. Repeat this process until you have sharpened all the
teeth on the same side (Fig. 17).
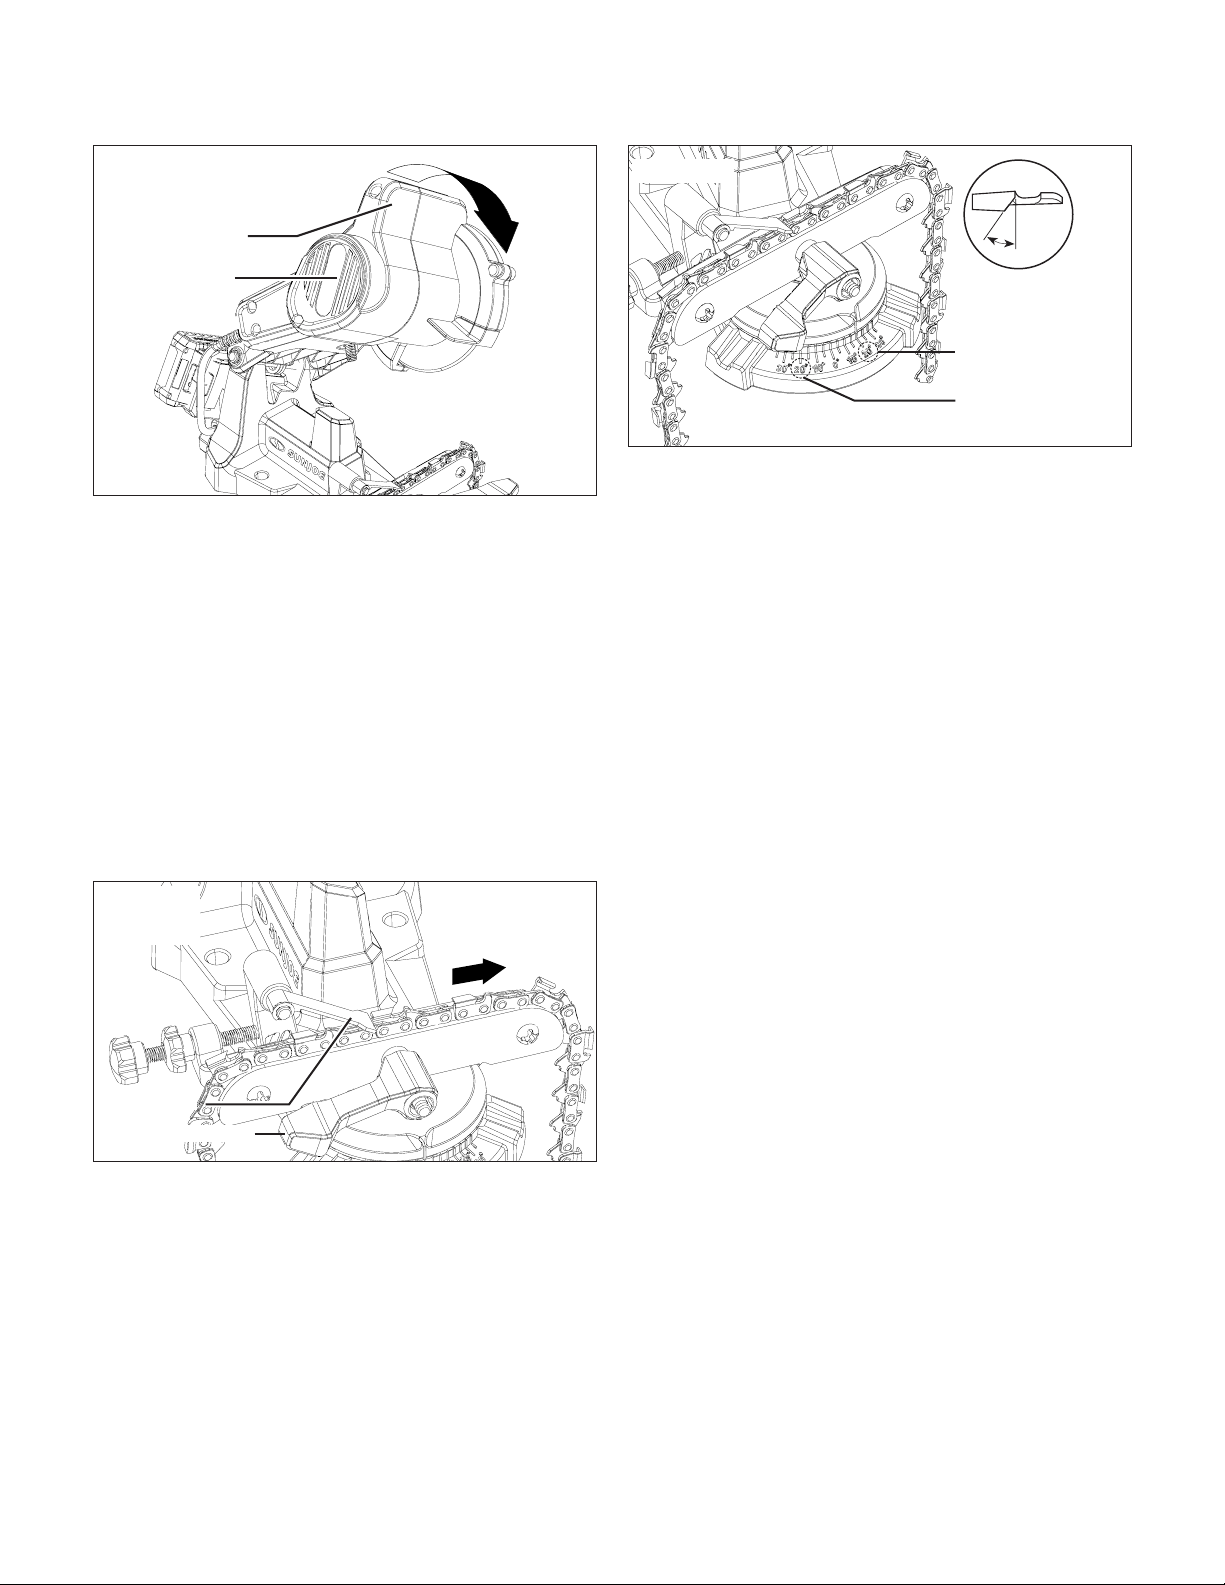
6. After you nished sharpening all of the teeth on one side,
turn o the machine and remove the battery. Loosen the
swivel angle adjusting knob and reset the swivel angle to
the same angle on the other side (e.g. if you use 20° on
right as the swivel angle for one side, set it to 20° on left
for the other side) (Fig. 18).
Note: Refer to Set the Swivel Angle section on page 10 for
detailed instruction of how to adjust the swivel angle.
7. The other side of the chain teeth should be able to t the
same setting of chain stop and grinding depth. However,
it's recommended to double check everything before
inserting the battery and turning on the machine.
8. After all of the teeth have been sharpened, turn o the
machine and remove the battery.
Operating Tips
mWARNING! To ensure that the chain saw works safely
and eciently, it is essential that the cutting components
are well-sharpened. Any work on the chain and bar requires
specic experience and special tools.
Sharpening is necessary when:
• the sawdust looks like dust;
• cutting becomes more dicult;
• the cut is not straight;
• vibrations increase.
After sharpening, check that the depth limiter tooth does not
stick out farther than the inspection tool and le any projecting
parts with a at le (not included), rounding o the edges
(Fig. 19).
Fig. 16
Upper handle
Motor head
assembly
Fig. 17
Chain guide lock
Move the chain
Chain stop
Fig. 18
Top view of the
tooth
Swivel angle for
the other side
Swivel angle
for one side
20°
Loading ...
Loading ...
Loading ...