W082050A
SAVE THIS MANUAL FOR FUTURE REFERENCE
WARNING: To reduce the risk of injury, the user must read and understand the operator’s manual before
using this product.
Thank you for buying a WORKPRO product. Your multi-function tool has been engineered and manufactured to
WORKPRO’s high standard for dependability, ease of operation, and operator safety. When properly cared for, it will
give you years of rugged, trouble-free performance.
Distributed by:
Hangzhou Great Star Industrial Co., Ltd.
No.35 Jiuhuan Road, Jiubao Town,
Hangzhou 310019, China
www.greatstartools.com
OPERATOR'S MANUAL
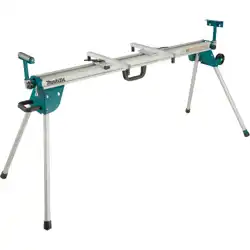
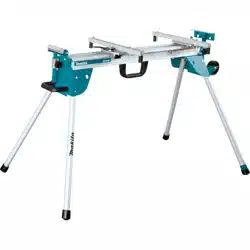
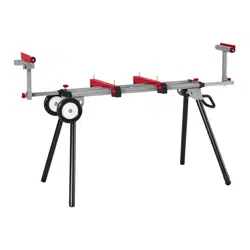
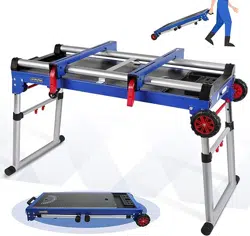
4 IN 1 MULTI FUNCTION
WORK STATION
USE PRECAUTION
For your safety
INSTRUCTION
MANUAL
Read and understand
RISK OF INDURY
Keep hands at a
safe distance
EYE PROTECTION
Must be worn
PROTECTIVE GLOVES
Must be worn when
handling tool
3165047

2
IMPORTANT SAFETY INFORMATION
Safe operation of this work station requires that you
read and understand this operator’s manual, the
operator’s manual for the saw.
This appliance is not intended for use by persons
(including children) with reduced physical, sensory or
mental capabilities, or lack of experience and knowledge,
unless they have been given supervision or instruction
concerning use of the appliance by a person responsi-
ble for their safety.
Children should be supervised to ensure that they do
not play with the appliance.
Know your work station. Read the operator’s manual
carefully. Learn its applications and limitations, as well
as the specific potential hazards related to this
accessory.
If any parts are missing, do not use the stand until the
missing parts are replaced.
NOTE: This stand is designed for use with mitre saws
and slide mitre saws with mounting dimension not
larger than 530mm.
NOTE: Maximum weight of the mitre saw and
workpiece together must not exceed 330lbs (150 kg).
Do not modify or use this stand for any purpose for
which it is not intended.
Always ensure the mitre saw used is mounted securely
and is stable before plugging in the mitre saw.
This stand is designed to be used on a flat, stable
SAFETY INFORMATION
surface. Do not use the product on an uneven or
unstable surface. Be sure to allow enough room to
handle and properly support the workpiece.
Follow the tool mounting instructions carefully, and
ensure the tool is fastened securely.
To reduce the risk of injury from the mitre saw moving
or falling off the stand, always check that all mounting
bolts and nuts are securely tightened before moving the
stand or using the tool.
Do not lift any part of the mitre saw that is attached to
the stand.
When servicing, use only identical replacement parts.
Use of any other parts may create a hazard or cause
product damage.
Save these instructions. Refer to them frequently and
use them to instruct others who may use this work
station. If you loan someone this work station, loan
them these instructions also to prevent misuse of the
product and possible injury.
ALWAYS KEEP WORK AREA CLEAN Cluttered
areas and benches invite accidents. Make sure the
floor is clean and not slippery due to wax or sawdust
build-up.
CAUTION: The assembly pack contains small parts
which can pose a choking hazard to children and pets.
3
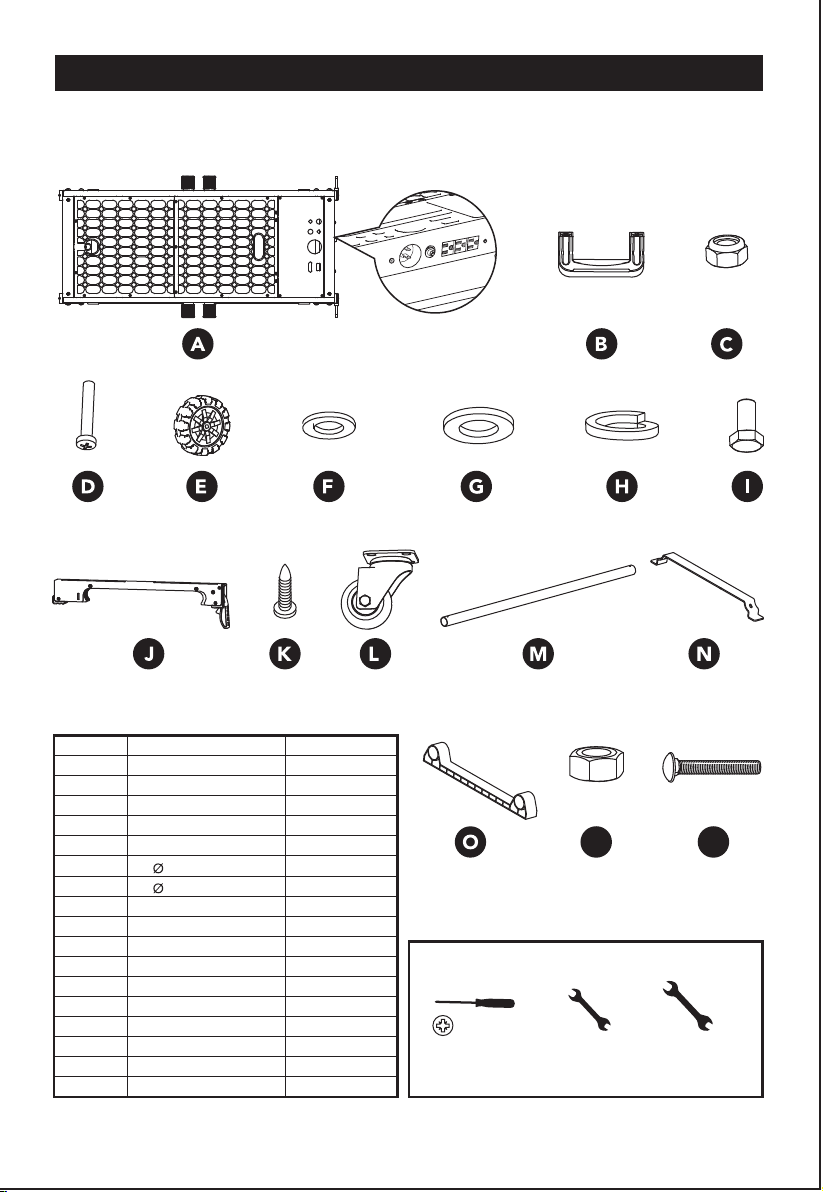
Ensure all components are present. If any components are missing, do not proceed with assembly. Contact
Brands customer services at [email protected]
COMPONENTS
Tools Required (not included):
10mm
Spanner
14mm
Spanner
PH2
Screwdriver
Stand
Handle
M6 Nut
M6 x 35
5" Wheel
6 Washer
8 Washer
M8 Spring Washer
M8x16
Tool Mount
Screw
Swivel Wheel
Top Tube
Central Support
Plastic Base
M8 Nut
M6 x 45
x1
x1
x4
x2
x2
x2
x12
x12
x8
x2
x6
x2
x2
x1
x2
x4
x4
PART DESCRIPTION QTY
A
B
C
D
E
F
G
H
I
J
K
L
M
N
O
P
Q
QP
4
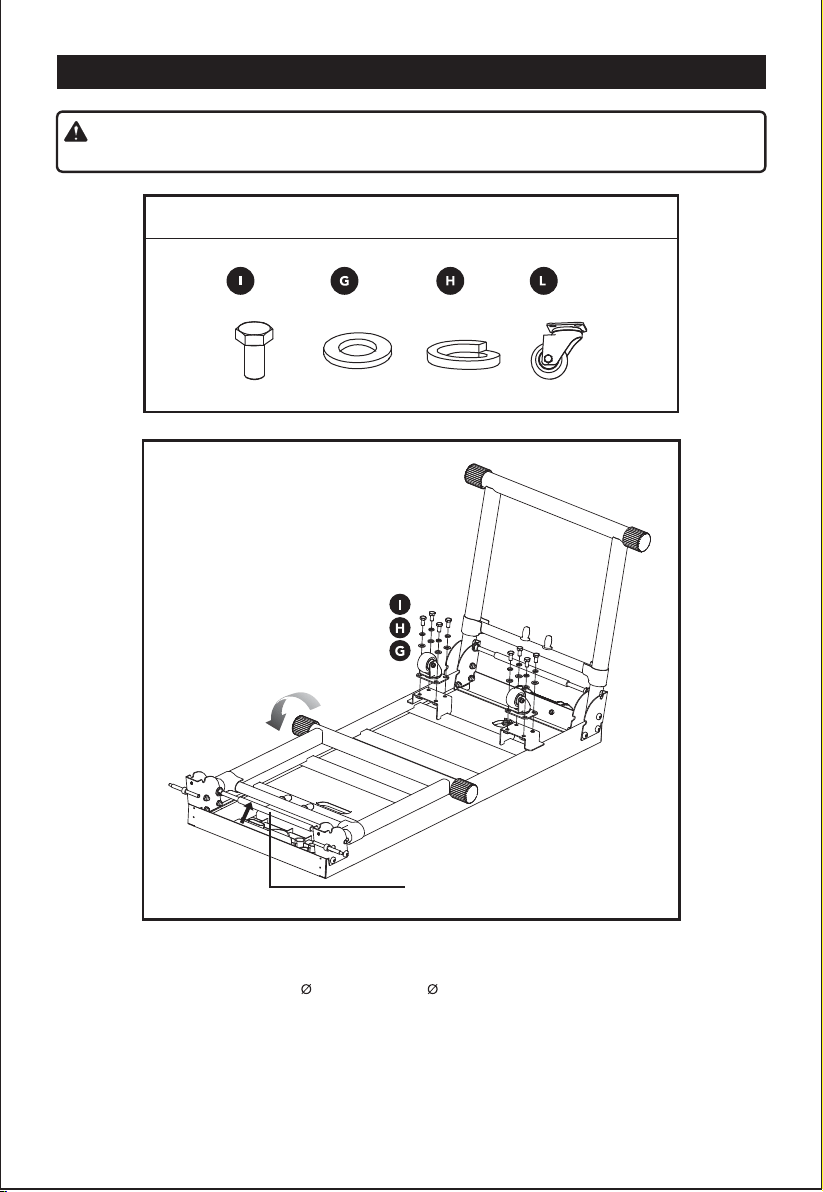
ASSEMBLY
Lay the Stand (A) top surface on the floor
Press the leg lock lever and lift leg up until the lever clicks into place.
Use M8 x 16 bolt (I) , 8 washer (G) and 8 Spring Washer (H) to assemble the
Swivel Wheels (L)
Lift the stand
Exercise caution. There is a potential for finger pinch/entrapment.
WARNING!
Leg Lock Lever
x8 x8 x8 x2
Components required to complete this assembly step.
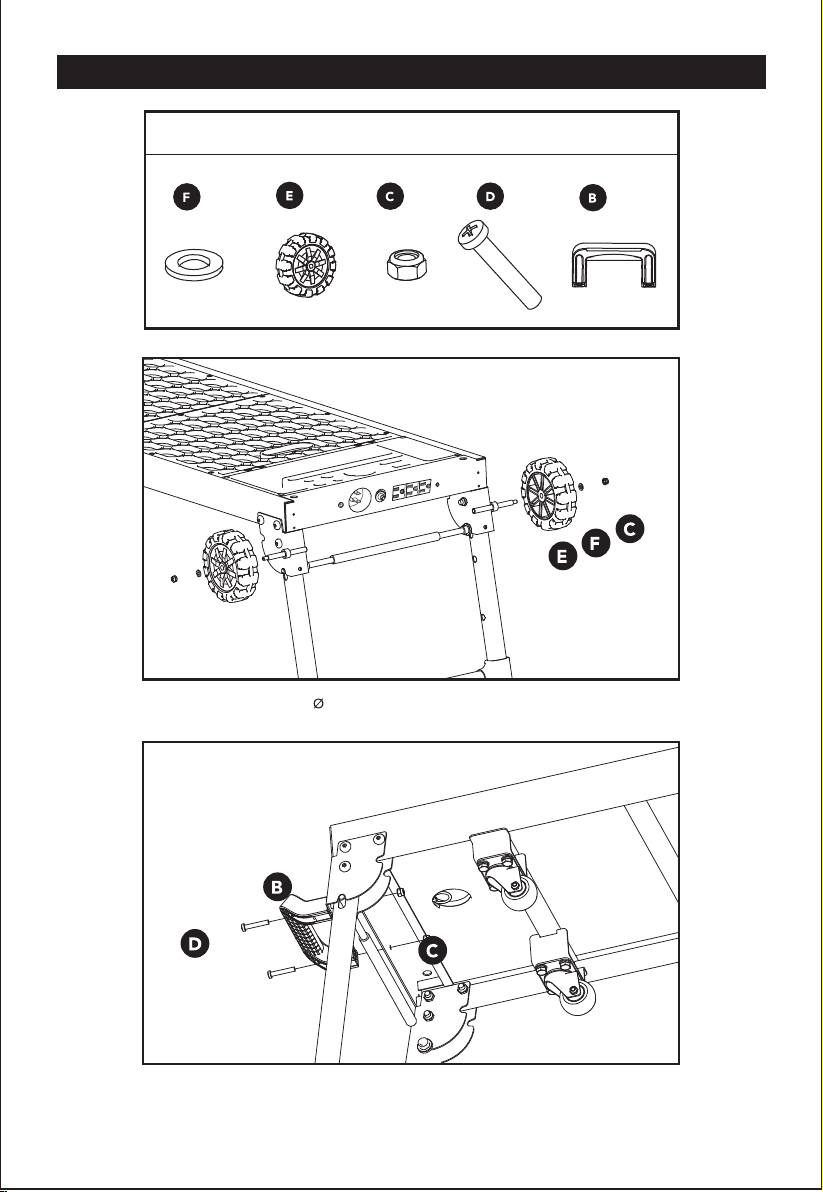
Use the M6 Nut (C) and 6 Washer (F) to assemble the 5'' Wheel ( E) to the axel.
5
ASSEMBLY
x2 x2 x4 x2 x1
Components required to complete this assembly step.
Use the M6x35 Bolt (D) and M6 Nut (C) to assemble the Handle (B).
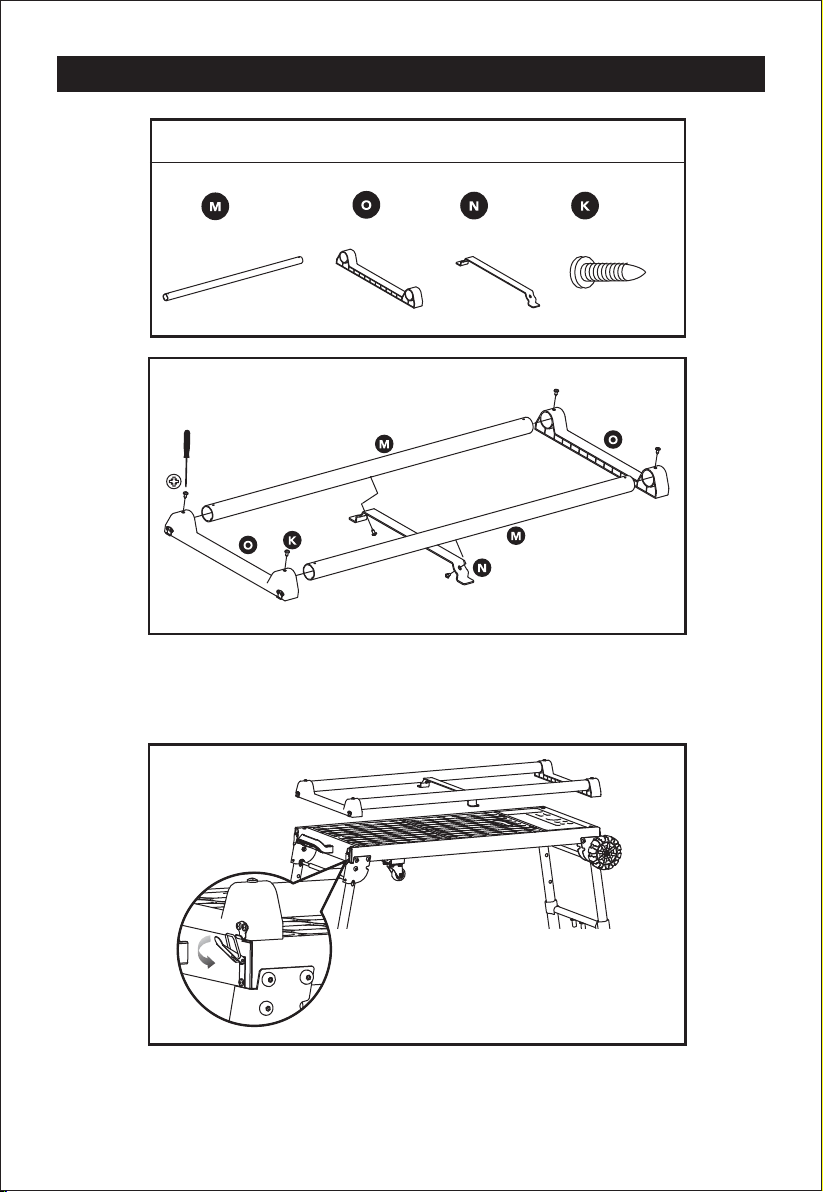
Attach the Central Support (N) to the Top Tube (M) with the Screws (K)
Insert the Top Tube (M) into the Plastic Base (O), be sure to align the two holes,
then fix with the Screws (K)
Put the assembled work top onto the stand and fix it by 4 lock catches.
6
ASSEMBLY
x2 x2 x1 x6
Components required to complete this assembly step.
7
ASSEMBLY
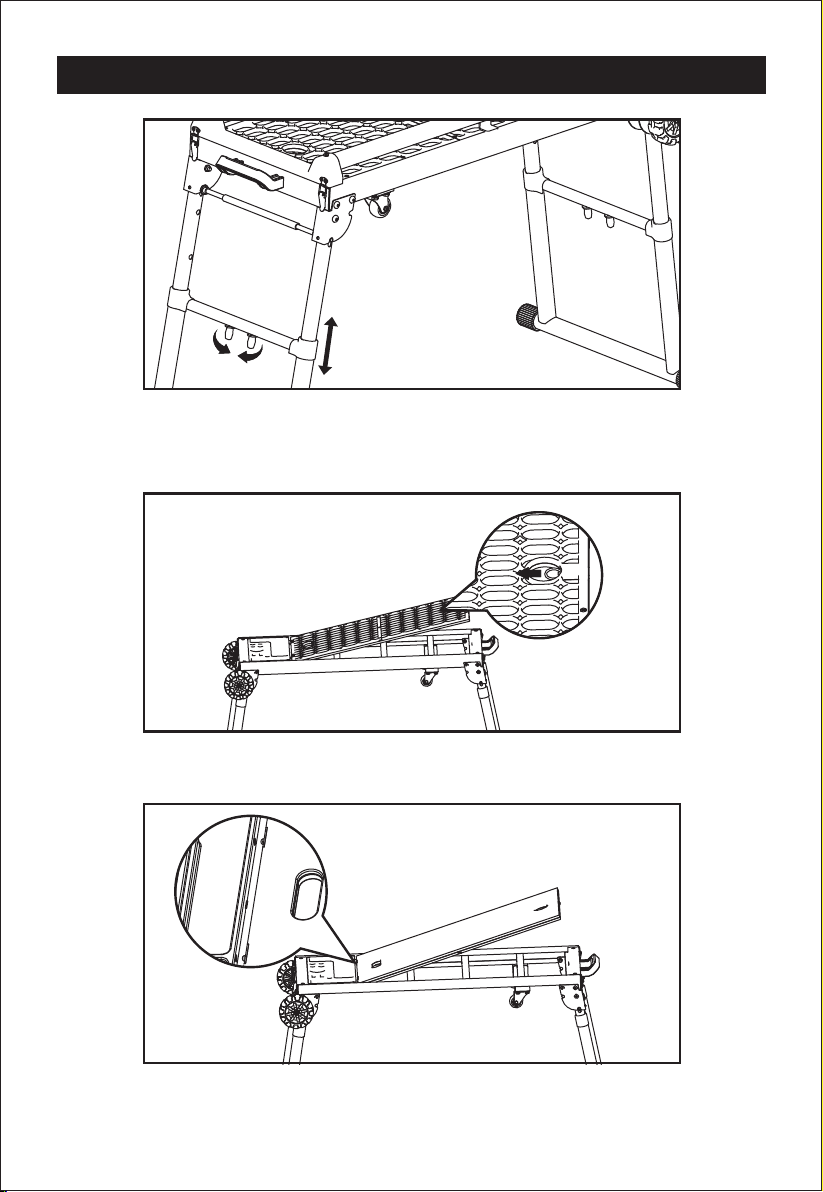
Clench the button inside and pull the bench up and down to adjust to the desired
height, 3-positon adjustable height: 22"-26"-30".
Ensure the locking pin locks securely at the new height. Check and make sure the
work bench is horizontal.
Please make sure the insert pins on the other side of board match the two holes
while shifting the board.
Pull out the ring to unfasten the plastic board, then turn over the board into MDF
side; Double side can be used interchangeably.
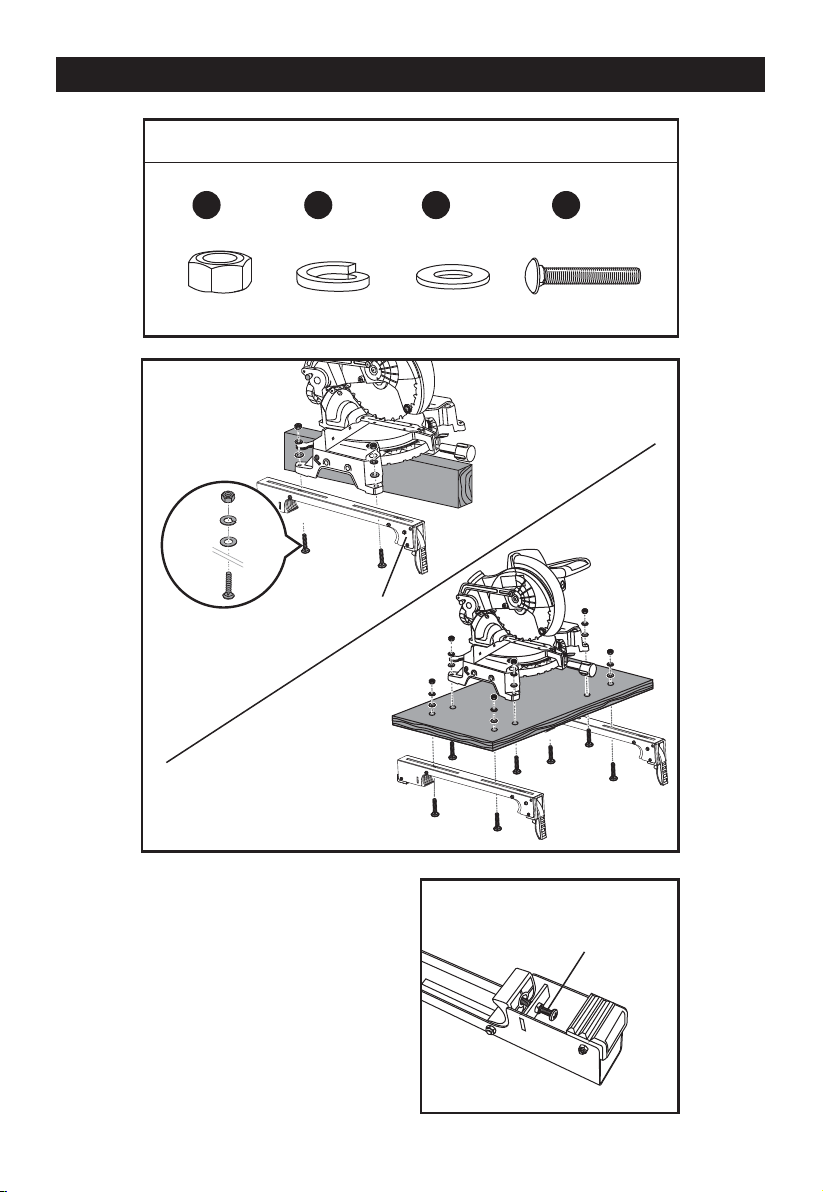
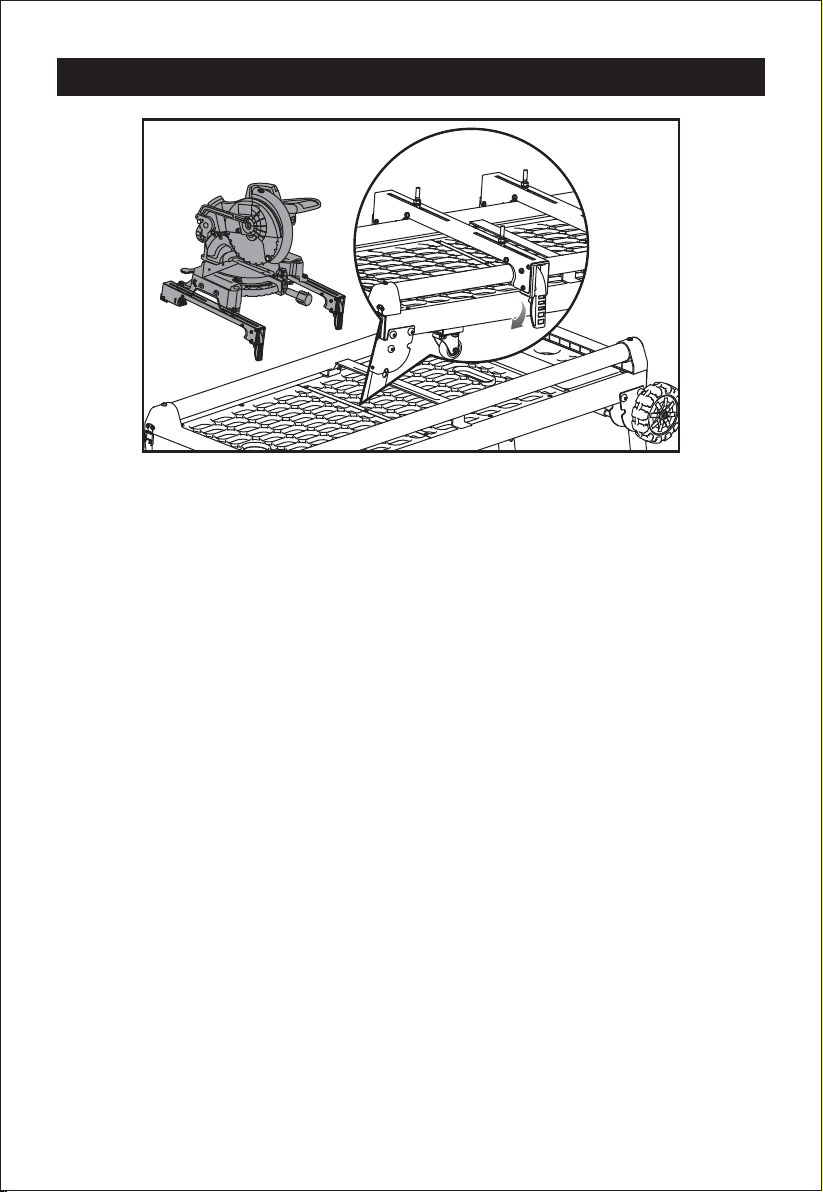
Making sure both tool mounts are
parallel to each other
Unplug the saw and lock the saw arm in
the down position.
Place a Tool Mount (J) underneath the
saw, aligning the mounting holes on the
mitre saw base with the slot in the top of
the tool mount.
Fix carriage bolt up through both the
Tool Mount (J) and a mounting hole in
the saw.
Secure in place using a flat washer.
Lock washer and nut, repeat through
the other end of the tool mount.
8
MOUNTING A MITRE SAW TO THE STAND
NOTE: Only 4 sets
components are
supplied, additional 4
sets will be required
Tool mount
Tool mount can be
tightened by this screw
x4 x4 x4 x4
Components required to complete this assembly step.
PH G Q
9
MOUNTING A MITRE SAW TO THE STAND
Use the handles located at the rear of the tool mounts to aid in installing or removing
saw and bracket assembly.
Lift the saw and tool mount assembly, allowing the assembly to tilt slightly toward
your body.
Hook the front edge of the tool mount assembly onto the front rail of the stand.
Lower the tool mount assembly to allow the rear edge of the tool mount to seat fully
over the rear rail.
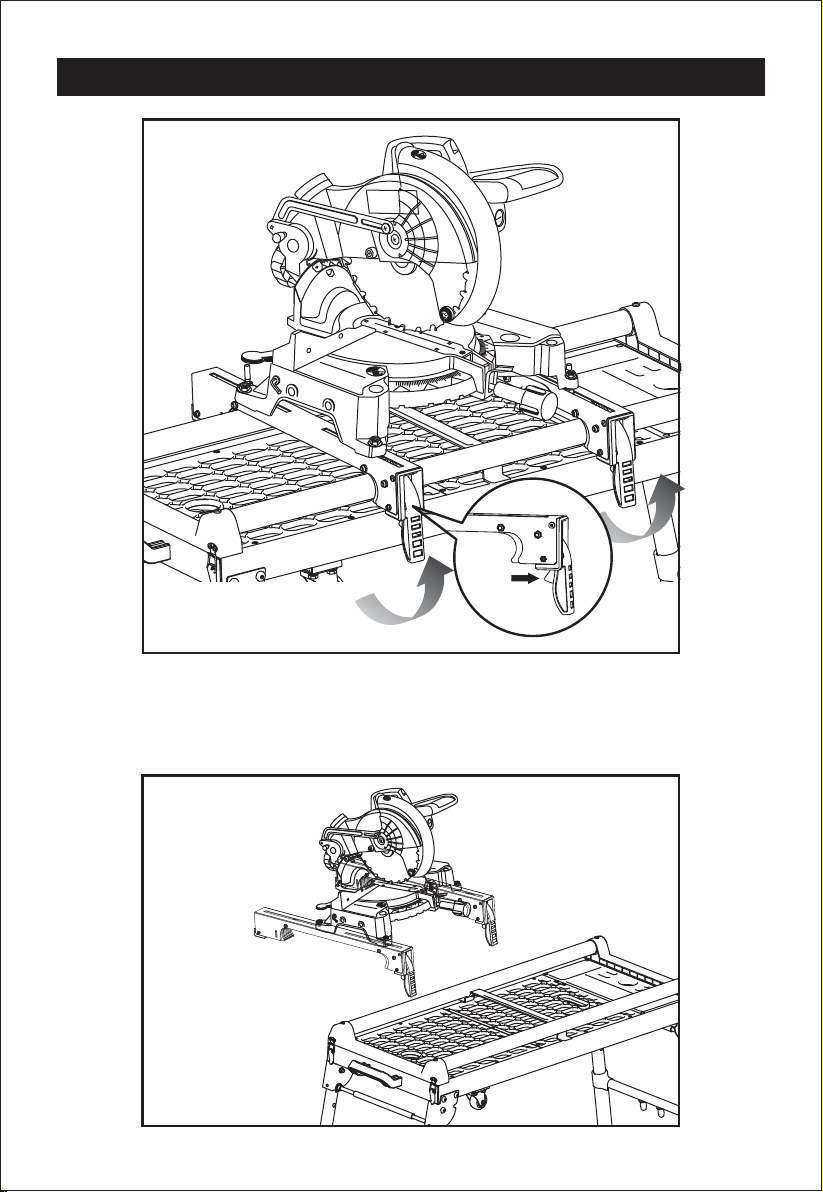
Press and raise the Tool Mount (J) to unlock the saw and tool mounts.
Grasp the handles on either side of the assembly and lift away from the rear rail of
the stand to disengage.
With the assembly tilted slightly toward you, lift the front part of the assembly to
disengage from the front rail of the stand.
10
UNMOUNTING A MITRE SAW FROM THE STAND
Press
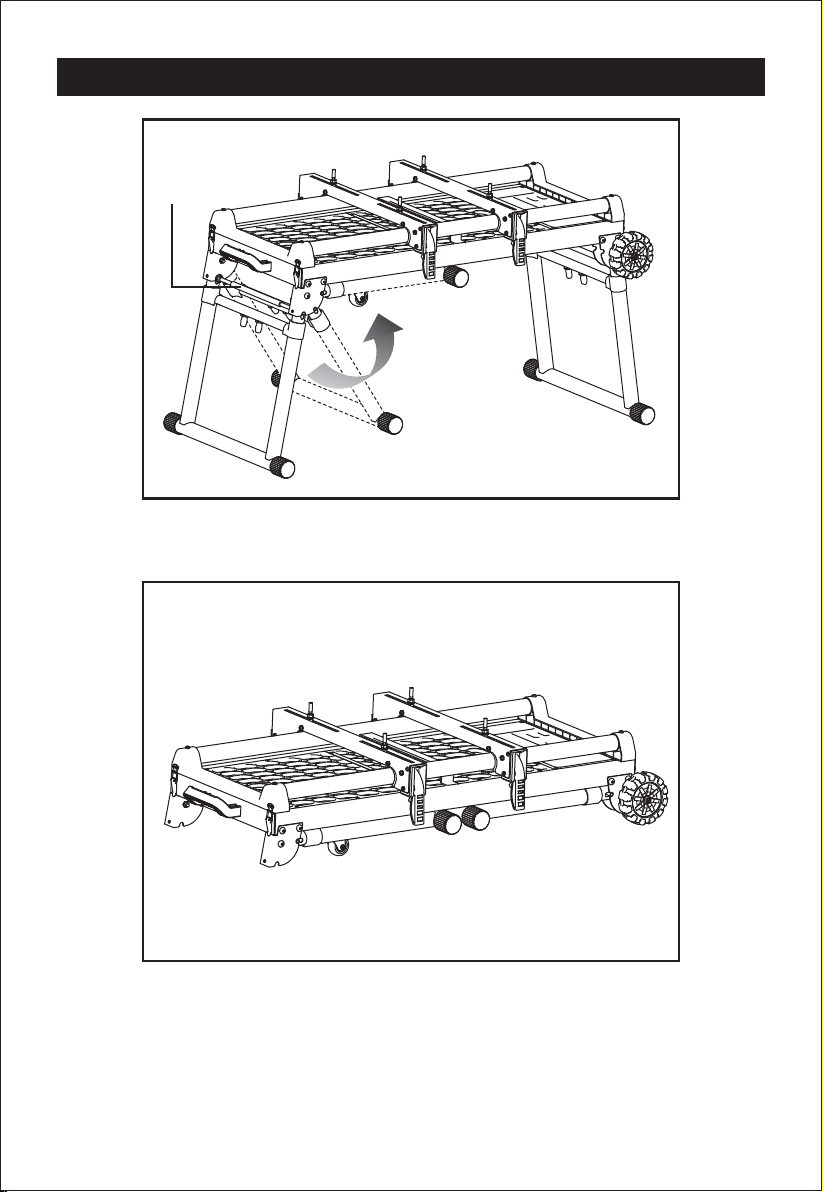
Press the lock lever until the legs are fully folded.
The same goes for the other leg.
11
FOLDING THE STAND
Leg Lock Lever
12
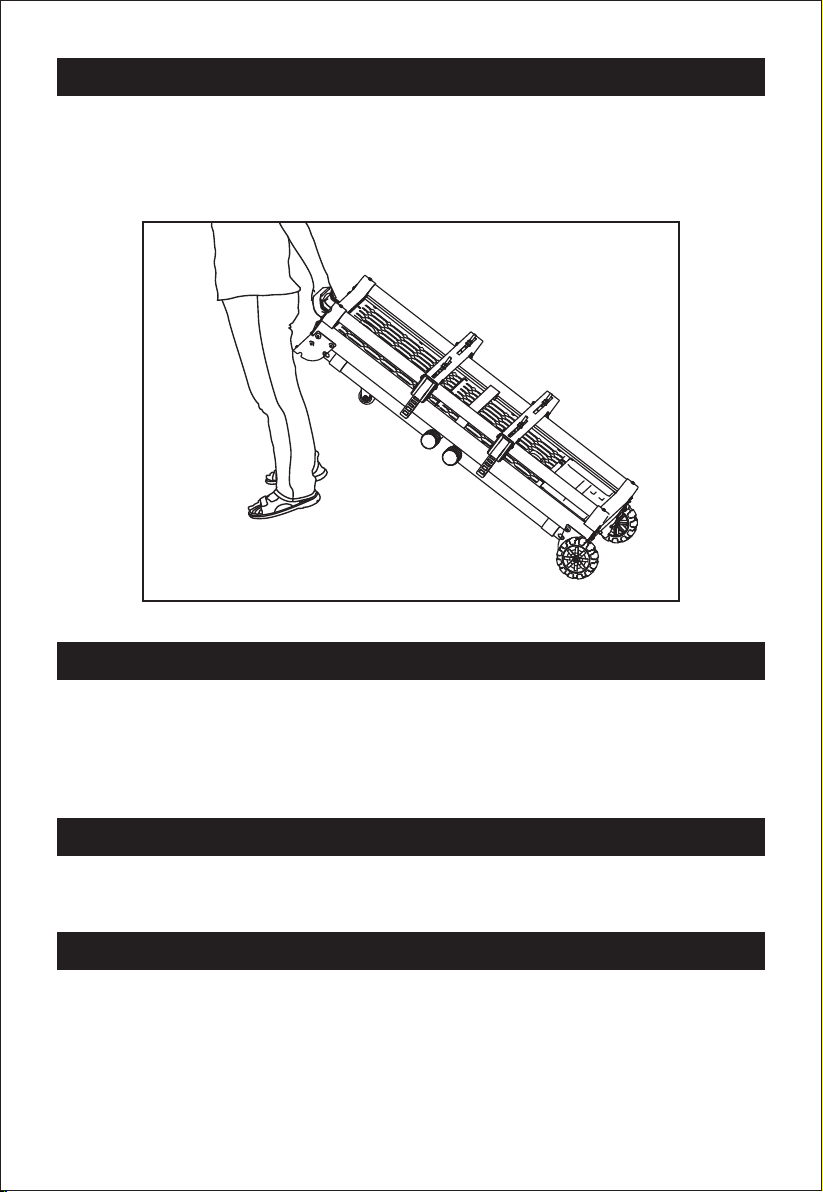
Before storing or transporting, make sure all attachments are secure and benchtop
tool is removed. Collapse extension rails.
Pivot collapsing legs until the lock pin engages to hold the leg in the closed position.
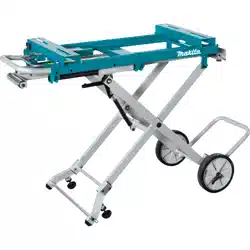
Work Stand can be transported by grasping the handle with one hand and material
support with other hand for balance. Roll like a wheelbarrow.
TRANSPORTING AND STORING
Keep the stand clean by wiping down with a clean damp cloth and store in a dry place when not in use.
Before storing or transporting make sure all attachments are secure and benchtop tool is removed. Collapse
extension rails.
The stand can be transported by grasping the handle with one hand and wheeling in the same manner as a
wheelbarrow.
CLEANING & MAINTENANCE
Please recycle where facilities exist. Check with your local authority for recycling advice.
DISPOSAL INFORMATION
If you are having difficultly using this product and require support, please contact
CUSTOMER SERVICE