Loading ...
Loading ...
Loading ...
en Installation instructions
46
¡ Contact protection must be guaranteed by the in-
stallation.
¡ If the display on the appliance remains dark, it has
not been connected correctly. Disconnect the appli-
ance from the mains and check the connection.
Electrically connect the appliance with the
protective contact plug
Note:The appliance must only be connected to a pro-
tective contact socket that has been correctly installed.
▶
Insert the plug into the protective contact socket.
When the appliance is installed, the mains plug of
the power cord must be freely accessible. If free ac-
cess is not possible, an isolating switch must be in-
tegrated into the permanent electrical installation ac-
cording to the installation regulations.
Electrically connecting an appliance without a
protective contact plug
Note:Only licensed specialists may connect the appli-
ance. Damage caused by incorrect connection is not
covered under the warranty.
An isolating switch must be integrated into the perman-
ent electrical installation according to the installation
regulations.
1.
Identify the phase and neutral conductors in the
socket.
The appliance may be damaged if it is not connec-
ted correctly.
2.
Connect the hob in accordance with the connection
diagram.
See the rating plate for the voltage.
3.
Connect the wires of the mains power cable accord-
ing to the colour coding:
‒ Green/yellow = Protective conductor
‒ Blue = Neutral conductor
‒ Brown = Phase (external conductor)
29.10 Installing the appliance
WARNING‒Risk of injury!
Opening the appliance door without installing the door
handle and panels may result in injury.
▶ Operate the appliance only with the door handle
and the panels fitted.
Note:Do not use a cordless screwdriver to secure the
panels and door handle. It may damage them.
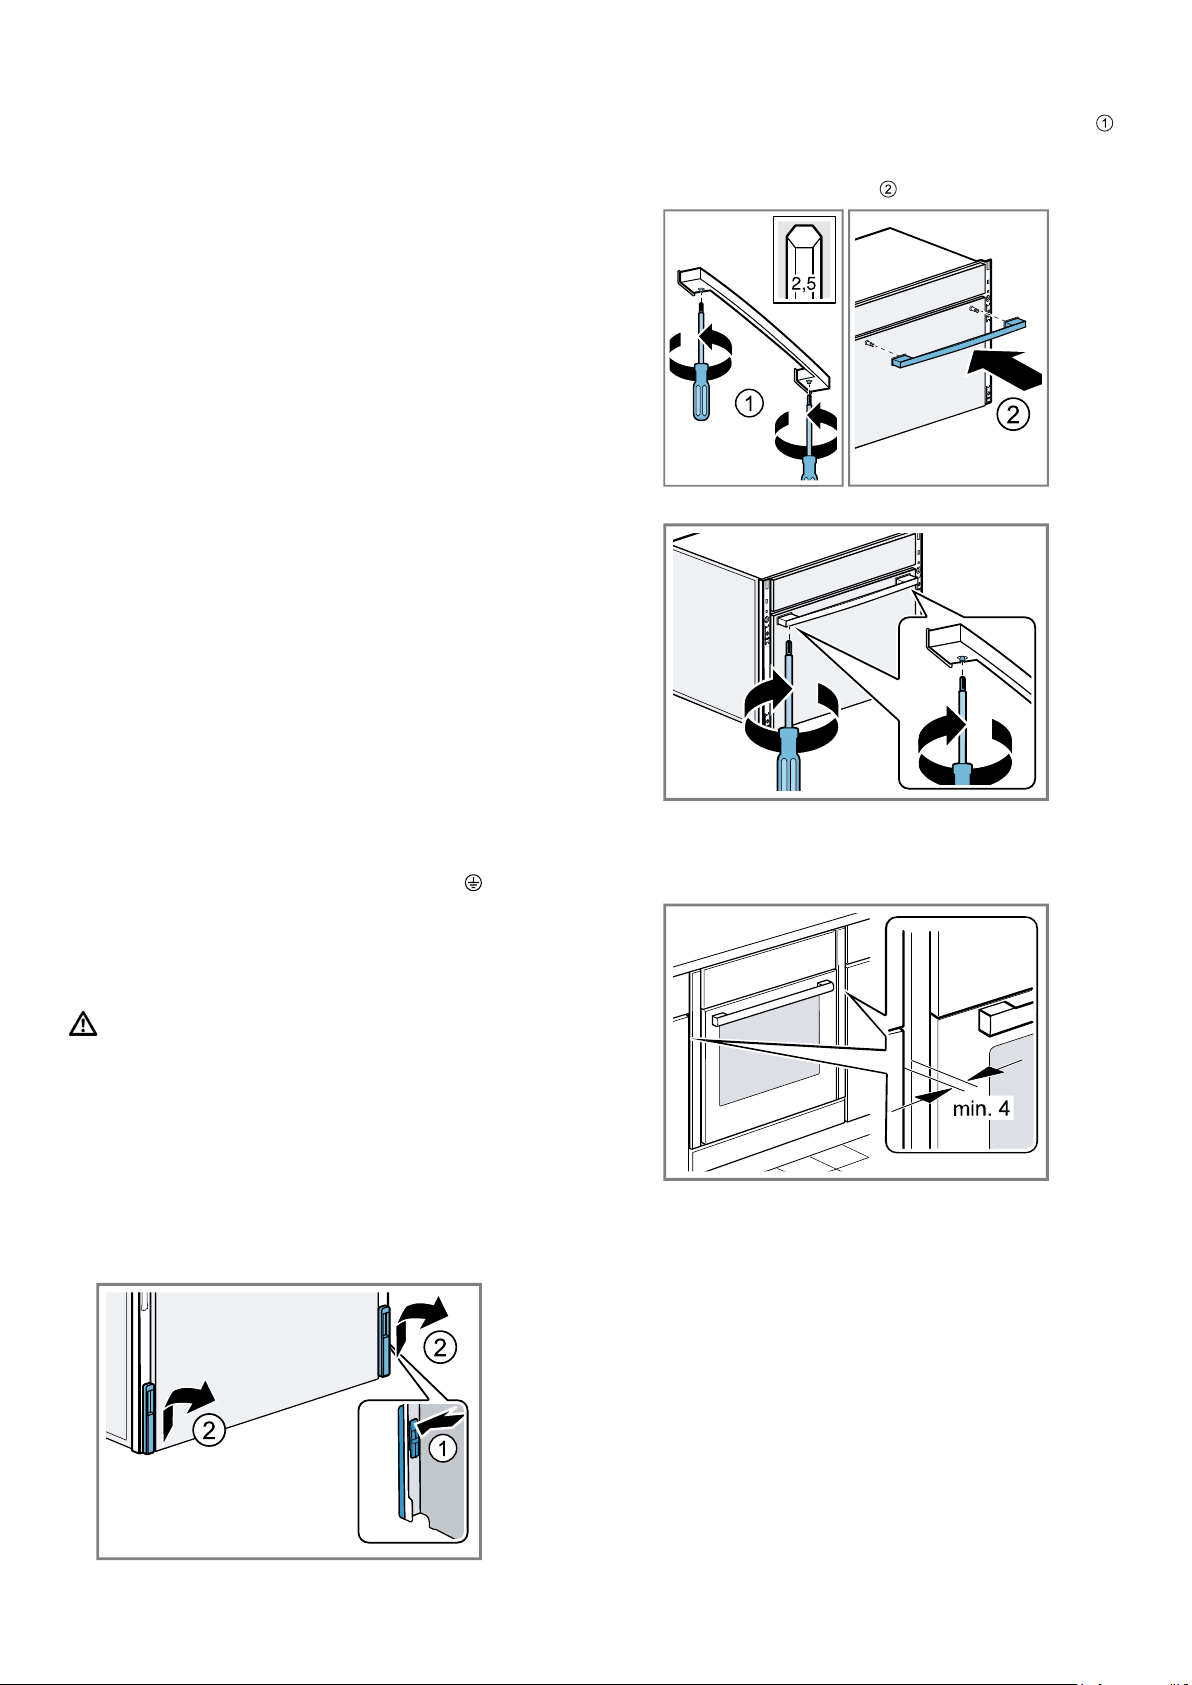
1.
Remove the two transport locks.
‒ Press on the sloped surface on the rear of the
transport lock.
‒ Push out the transport locks.
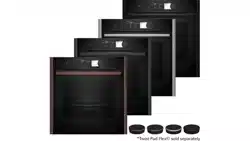
2.
Unscrew the screws on the door handle a little .
‒ Check whether the silicone base is between the
panel and the door handle.
3.
Attach the door handle .
4.
Tighten the screws until the door handle is secured.
5.
Push the appliance in fully.
Do not kink or trap the connection cable, or route it
over sharp edges.
6.
Centre the appliance.
There must be an air gap of at least 4mm between
the appliance and adjacent unit fronts.
7.
Attach the four fastening elements. →Page48
Attach the red fastening elements at the top.
Attach the green fastening elements at the bottom.
Loading ...
Loading ...
Loading ...