Owner’s Manual (this document)
Read this rst. It explains the basic things you need to know in order to use the RD-2000.
PDF Manual (download from the Web)
5 Parameter Guide (English)
This explains all parameters of the RD-2000.
5 MIDI Implementation
This is detailed information about MIDI messages.
To obtain the PDF manual
1. Enter the following URL in your computer.
http://www.roland.com/manuals/
I
2. Choose “RD-2000” as the product name.
Before using this unit, carefully read “IMPORTANT SAFETY INSTRUCTIONS” (inside front cover), “USING THE UNIT SAFELY” (p. 2), and “IMPORTANT NOTES” (p. 4). After
reading, keep the document(s) where it will be available for immediate reference.
Copyright © 2017 ROLAND CORPORATION
What do you want to do?
You want to Recommended functions
Play the piano
One touch piano (p. 9)
Tone (p. 14)
Play various sounds
Tone (p. 14)
Program (p. 15)
Place sounds in a desired order Scene (p. 15)
Control an external device
Scene (p. 15)
Assign (p. 17*)
Ext Label Edit (p. 18)
Connecting to your computer (p. 18)
Combine sounds as desired
Editing the Sound (p. 20)
Operation Guide (p. 14)
Make settings for performance
Menu screen (p. 26)
System settings (p. 26)
Use the RD-2000’s functions
Using the Convenient Functions in Performances
(p. 24)
Operation Guide (p. 14)
Store the RD-2000’s settings Backup (p. 27)
Owner’s Manual
2
USING THE UNIT SAFELY
WARNING
Make sure that the power cord is grounded
Connect mains plug of this model to a
mains socket outlet with a protective
earthing connection.
To completely turn o power to the unit, pull out
the plug from the outlet
Even with the RD-2000’s [
L
] switch turned
o, this unit is not completely separated
from its main source of power. When the
power needs to be completely turned o,
turn o the RD-2000’s [
L
] switch on the
unit, then pull out the plug from the outlet. For this
reason, the outlet into which you choose to connect
the power cord’s plug should be one that is within
easy reach and readily accessible.
Concerning the Auto O function
The power to this unit will be turned
o automatically after a predetermined
amount of time has passed since it was
last used for playing music, or its buttons
or controls were operated (Auto O
function). If you do not want the power to be turned
o automatically, disengage the Auto O function
(p. 11).
Do not disassemble or modify by yourself
Do not carry out anything unless you are
instructed to do so in the owner’s manual.
Otherwise, you risk causing malfunction.
Do not repair or replace parts by yourself
Refer all servicing to your retailer, the
nearest Roland Service Center, or an
authorized Roland distributor, as listed on
the “Information.”
WARNING
Do not use or store in the following types of
locations
• Subject to temperature extremes (e.g.,
direct sunlight in an enclosed vehicle,
near a heating duct, on top of heat-
generating equipment); or are
• Damp (e.g., baths, washrooms, on wet
oors); or are
• Exposed to steam or smoke; or are
• Subject to salt exposure; or are
• Exposed to rain; or are
• Dusty or sandy; or are
• Subject to high levels of vibration and shakiness;
or are
• Placed in a poorly ventilated location.
Use only the stand that is recommended
This unit should be used only with a stand
that is recommended by Roland.
Do not place in a location that is unstable
When using the unit with a stand
recommended by Roland, the stand must
be carefully placed so it is level and sure to
remain stable. If not using a stand, you still
need to make sure that any location you
choose for placing the unit provides a level surface
that will properly support the unit, and keep it from
wobbling.
Connect the power cord to an outlet of the correct
voltage
The unit should be connected to a power
supply only of the type described as
marked on the rear side of unit.
Use only the supplied power cord
Use only the attached power cord. Also,
the supplied power cord must not be used
with any other device.
Do not bend the power cord or place heavy objects
on it
Otherwise, re or electric shock may result.
WARNING
Avoid extended use at high volume
Use of the unit at high volume for
extended periods of time may cause
hearing loss. If you ever experience any
hearing loss or ringing in the ears, you
should immediately stop using the unit
and consult a specialized physician.
Do not allow foreign objects or liquids to enter
unit; never place containers with liquid on unit
Do not place containers containing liquid
(e.g., ower vases) on this product. Never
allow foreign objects (e.g., ammable
objects, coins, wires) or liquids (e.g., water
or juice) to enter this product. Doing so
may cause short circuits, faulty operation,
or other malfunctions.
Turn o the unit if an abnormality or malfunction
occurs
Immediately turn the unit o, remove the
power cord from the outlet, and request
servicing by your retailer, the nearest
Roland Service Center, or an authorized
Roland distributor, as listed on the
“Information” when:
• The power cord has been damaged; or
• If smoke or unusual odor occurs; or
• Objects have fallen into, or liquid has been spilled
onto the unit; or
• The unit has been exposed to rain (or otherwise has
become wet); or
• The unit does not appear to operate normally or
exhibits a marked change in performance.
Be cautious to protect children from injury
Always make sure that an adult is on hand
to provide supervision and guidance when
using the unit in places where children
are present, or when a child will be using
the unit.
Do not drop or subject to strong impact
Otherwise, you risk causing damage or
malfunction.
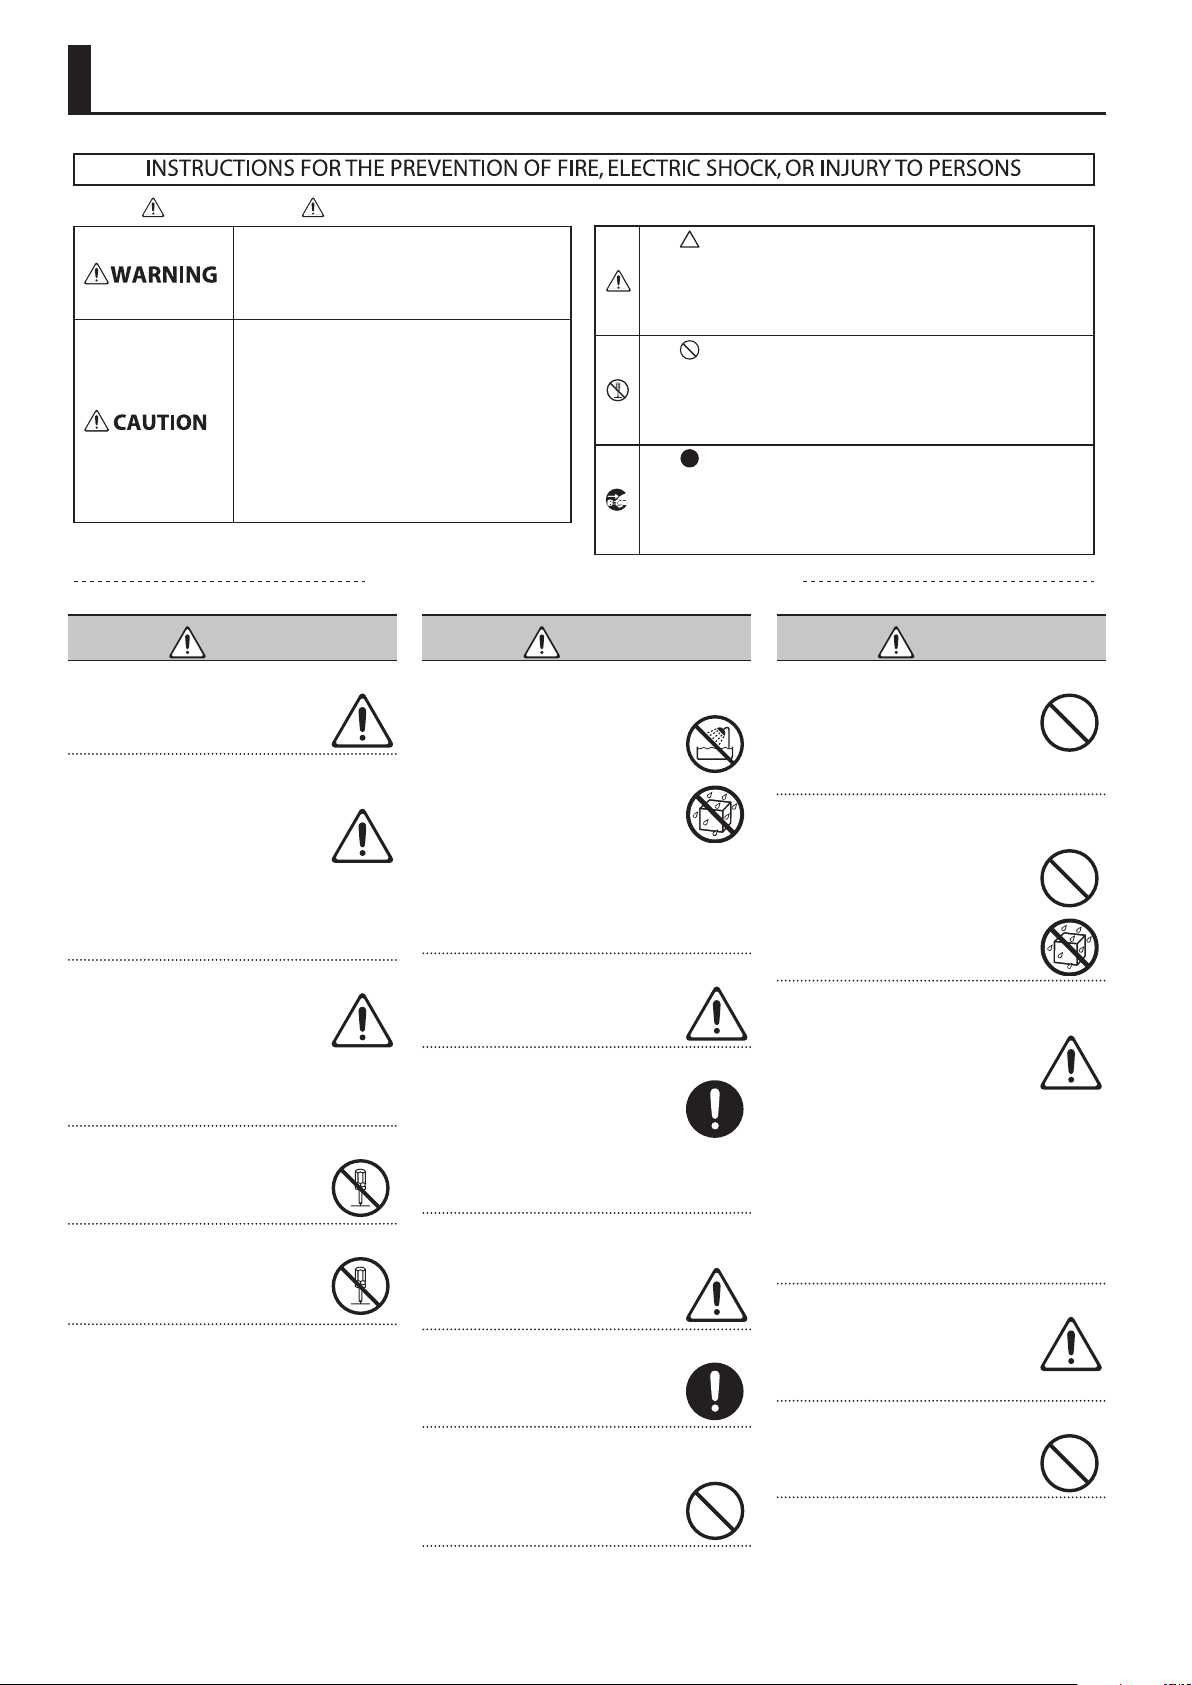
Used for instructions intended to alert the
user to the risk of injury or material
damage should the unit be used
improperly.
* Material damage refers to damage or
other adverse effects caused with
respect to the home and all its
furnishings, as well to domestic animals
or pets.
Used for instructions intended to alert the
user to the risk of death or severe injury
should the unit be used improperly.
The symbol alerts the user to things that must be
carried out. The specific thing that must be done is
indicated by the design contained within the circle. In the
case of the symbol at left, it means that the power-cord
plug must be unplugged from the outlet.
The symbol alerts the user to important instructions or
warnings.The specific meaning of the symbol is
determined by the design contained within the triangle. In
the case of the symbol at left, it is used for general
cautions, warnings, or alerts to danger.
The symbol alerts the user to items that must never be
carried out (are forbidden). The specific thing that must
not be done is indicated by the design contained within
the circle. In the case of the symbol at left, it means that
the unit must never be disassembled.
About WARNING and CAUTION Notices
About the Symbols
ALWAYS OBSERVE THE FOLLOWING
3
USING THE UNIT SAFELY
WARNING
Do not share an outlet with an unreasonable
number of other devices
Otherwise, you risk overheating or re.
Do not use overseas
Before using the unit in overseas, consult
with your retailer, the nearest Roland
Service Center, or an authorized Roland
distributor, as listed on the “Information.”
No naked ame sources as lighted candles should be
placed on the apparatus.
Use the apparatus in moderate climates.
CAUTION
Use only the specied stand(s)
This unit is designed to be used in
combination with specic stands (KS-
G8B) manufactured by Roland. If used in
combination with other stands, you risk
sustaining injuries as the result of this
product dropping down or toppling over due to a lack
of stability.
Evaluate safety issues before using stands
Even if you observe the cautions given
in the owner’s manual, certain types of
handling may allow this product to fall
from the stand, or cause the stand to
overturn. Please be mindful of any safety
issues before using this product.
When disconnecting the power cord, grasp it by the
plug
To prevent conductor damage, always
grasp the power cord by its plug when
disconnecting it.
Periodically clean the power plug
An accumulation of dust or foreign objects
between the power plug and the power
outlet can lead to re or electric shock.
At regular intervals, be sure to pull out
the power plug, and using a dry cloth,
wipe away any dust or foreign objects that may have
accumulated.
Disconnect the power plug whenever the unit will
not be used for an extended period of time
Fire may result in the unlikely event that a
breakdown occurs.
Route all power cords and cables in such a way as
to prevent them from getting entangled
Injury could result if someone were to
trip on a cable and cause the unit to fall
or topple.
Avoid climbing on top of the unit, or placing heavy
objects on it
Otherwise, you risk injury as the result of
the unit toppling over or dropping down.
CAUTION
Never connect/disconnect a power plug if your
hands are wet
Otherwise, you could receive an electric
shock.
Disconnect all cords/cables before moving the unit
Before moving the unit, disconnect the
power plug from the outlet, and pull out all
cords from external devices.
Before cleaning the unit, disconnect the power
plug from the outlet
If the power plug is not removed from the
outlet, you risk receiving an electric shock.
Whenever there is a threat of lightning, disconnect
the power plug from the outlet
If the power plug is not removed from the
outlet, you risk causing malfunction or
receiving an electric shock.
Keep small items out of the reach of children
To prevent accidental ingestion of the
parts listed below, always keep them out of
the reach of small children.
• Removable Parts
USB cap (p. 10)

4
IMPORTANT NOTES
Power Supply
• Do not connect this unit to same electrical outlet
that is being used by an electrical appliance that
is controlled by an inverter or a motor (such as a
refrigerator, washing machine, microwave oven, or
air conditioner). Depending on the way in which
the electrical appliance is used, power supply noise
may cause this unit to malfunction or may produce
audible noise. If it is not practical to use a separate
electrical outlet, connect a power supply noise lter
between this unit and the electrical outlet.
Placement
• Using the unit near power ampliers (or other
equipment containing large power transformers)
may induce hum. To alleviate the problem, change
the orientation of this unit; or move it farther away
from the source of interference.
• This unit may interfere with radio and television
reception. Do not use this unit in the vicinity of such
receivers.
• Noise may be produced if wireless communications
devices, such as cell phones, are operated in the
vicinity of this unit. Such noise could occur when
receiving or initiating a call, or while conversing.
Should you experience such problems, you should
relocate such wireless devices so they are at a greater
distance from this unit, or switch them o.
• When moved from one location to another where the
temperature and/or humidity is very dierent, water
droplets (condensation) may form inside the unit.
Damage or malfunction may result if you attempt to
use the unit in this condition. Therefore, before using
the unit, you must allow it to stand for several hours,
until the condensation has completely evaporated.
• Do not allow objects to remain on top of the
keyboard. This can be the cause of malfunction, such
as keys ceasing to produce sound.
• Depending on the material and temperature of the
surface on which you place the unit, its rubber feet
may discolor or mar the surface.
• Do not place containers or anything else containing
liquid on top of this unit. Also, whenever any liquid
has been spilled on the surface of this unit, be sure to
promptly wipe it away using a soft, dry cloth.
Maintenance
• Never use benzine, thinners, alcohol or solvents of
any kind, to avoid the possibility of discoloration and/
or deformation.
Care of the Keyboard
• Do not write on the keyboard with any pen or other
implement, and do not stamp or place any marking
on the instrument. Ink will seep into the surface lines
and become unremovable.
• Do not ax stickers on the keyboard. You may be
unable to remove stickers that use strong adhesives,
and the adhesive may cause discoloration.
• To remove stubborn dirt, use a commercially
available keyboard cleaner that does not contain
abrasives. Start by wiping lightly. If the dirt does not
come o, wipe using gradually increasing amounts of
pressure while taking care not to scratch the keys.
Repairs and Data
• Before sending the unit away for repairs, be sure to
make a backup of the data stored within it; or you
may prefer to write down the needed information.
Although we will do our utmost to preserve the
data stored in your unit when we carry out repairs,
in some cases, such as when the memory section is
physically damaged, restoration of the stored content
may be impossible. Roland assumes no liability
concerning the restoration of any stored content that
has been lost.
Additional Precautions
• Any data stored within the unit can be lost as the
result of equipment failure, incorrect operation, etc.
To protect yourself against the irretrievable loss of
data, try to make a habit of creating regular backups
of the data you’ve stored in the unit.
• Roland assumes no liability concerning the
restoration of any stored content that has been lost.
• Use a reasonable amount of care when using the
unit’s buttons, sliders, or other controls; and when
using its jacks and connectors. Rough handling can
lead to malfunctions.
• Never strike or apply strong pressure to the display.
• When disconnecting all cables, grasp the connector
itself—never pull on the cable. This way you will
avoid causing shorts, or damage to the cable’s
internal elements.
• A small amount of heat will radiate from the unit
during normal operation.
• To avoid disturbing others nearby, try to keep the
unit’s volume at reasonable levels.
• The sound of keys being struck and vibrations
produced by playing an instrument can be
transmitted through a oor or wall to an unexpected
extent. Please take care not to cause annoyance to
others nearby.
• Use only the specied expression pedal. By
connecting any other expression pedals, you risk
causing malfunction and/or damage to the unit.
• Do not use connection cables that contain a built-in
resistor.
Using External Memories
• Please observe the following precautions when
handling external memory devices. Also, make sure
to carefully observe all the precautions that were
supplied with the external memory device.
• Do not remove the device while reading/writing
is in progress.
• To prevent damage from static electricity,
discharge all static electricity from your person
before handling the device.
Intellectual Property Right
• It is forbidden by law to make an audio recording,
video recording, copy or revision of a third party’s
copyrighted work (musical work, video work,
broadcast, live performance, or other work), whether
in whole or in part, and distribute, sell, lease, perform
or broadcast it without the permission of the
copyright owner.
• Do not use this product for purposes that could
infringe on a copyright held by a third party. We
assume no responsibility whatsoever with regard to
any infringements of third-party copyrights arising
through your use of this product.
• The copyright of content in this product (the sound
waveform data, style data, accompaniment patterns,
phrase data, audio loops and image data) is reserved
by Roland Corporation.
• Purchasers of this product are permitted to utilize
said content (except song data such as Demo
Songs) for the creating, performing, recording and
distributing original musical works.
• Purchasers of this product are NOT permitted to
extract said content in original or modied form, for
the purpose of distributing recorded medium of said
content or making them available on a computer
network.
• MMP (Moore Microprocessor Portfolio) refers to a
patent portfolio concerned with microprocessor
architecture, which was developed by Technology
Properties Limited (TPL). Roland has licensed this
technology from the TPL Group.
• ASIO is a trademark and software of Steinberg Media
Technologies GmbH.
• This product contains eParts integrated software
platform of eSOL Co.,Ltd. eParts is a trademark of
eSOL Co., Ltd. in Japan.
• This Product uses the Source Code of μT-Kernel under
T-License 2.0 granted by the T-Engine Forum (www.
tron.org).
• Roland, SuperNATURAL are either registered
trademarks or trademarks of Roland Corporation in
the United States and/or other countries.
• Company names and product names appearing
in this document are registered trademarks or
trademarks of their respective owners.
5
USING THE UNIT SAFELY . . . . . . . . . . . . . . . . . . . . . . . . . . . . . . . . . . 2
IMPORTANT NOTES . . . . . . . . . . . . . . . . . . . . . . . . . . . . . . . . . . . . . . . 4
Placing the RD-2000 on a Stand . . . . . . . . . . . . . . . . . . . . . . . . . . 6
Main Specications . . . . . . . . . . . . . . . . . . . . . . . . . . . . . . . . . . . . . . . 6
Basic Operation . . . . . . . . . . . . . . . . . . . . . . . . . . . . . . . . . . . . . . . . . . . 7
Panel Descriptions . . . . . . . . . . . . . . . . . . . . . . . . . . . . . . . . . . . . . . . . 8
Top Panel . . . . . . . . . . . . . . . . . . . . . . . . . . . . . . . . . . . . . . . . . . . . . . . 8
Rear Panel (Connecting the External Equipment) . . . . . . . . . . . . 10
Turning the RD-2000 On . . . . . . . . . . . . . . . . . . . . . . . . . . . . . . . . . . 11
Turning O the Power . . . . . . . . . . . . . . . . . . . . . . . . . . . . . . . . . . . . 11
If you don’t want the power to turn o automatically, change
the “Auto O” setting to “O” . . . . . . . . . . . . . . . . . . . . . . . . . . . . . 11
Overview of the RD-2000 . . . . . . . . . . . . . . . . . . . . . . . . . . . . . . . . . 12
Basic Organization of the RD-2000 . . . . . . . . . . . . . . . . . . . . . . . . . 12
About Memory . . . . . . . . . . . . . . . . . . . . . . . . . . . . . . . . . . . . . . . . . . 12
Units of Sound . . . . . . . . . . . . . . . . . . . . . . . . . . . . . . . . . . . . . . . . . . 13
Operation Guide . . . . . . . . . . . . . . . . . . . . . . . . . . . . . . . . . . . . . . . . . . 14
Adjusting the Overall Volume . . . . . . . . . . . . . . . . . . . . . . . . . . . . . 14
Adjusting the Volume of Each Zone . . . . . . . . . . . . . . . . . . . . . . . . 14
Using an Assigned Function to Modify the Sound
(MOD WHEEL 1/2) . . . . . . . . . . . . . . . . . . . . . . . . . . . . . . . . . . . . . . . 14
Changing the Sound’s Pitch in Real Time (Pitch bend lever) . . . 14
Adding Vibrato or Dynamics (Modulation lever) . . . . . . . . . . . . . 14
Disabling the Button (Panel Lock) . . . . . . . . . . . . . . . . . . . . . . . . . . 14
Transposing Your Performance (Transpose) . . . . . . . . . . . . . . . . . 14
Selecting Sounds (TONE/SCENE/PROGRAM) . . . . . . . . . . . . . . . . 14
Layering Tones . . . . . . . . . . . . . . . . . . . . . . . . . . . . . . . . . . . . . . . . . . 15
Dividing the Keyboard into Two Regions (Split) . . . . . . . . . . . . . . 15
Adding Reverberation to the Sound (REVERB) . . . . . . . . . . . . . . . 16
Adding Delay to the Sound (DELAY) . . . . . . . . . . . . . . . . . . . . . . . 16
Applying an Eect (MODULATION FX) . . . . . . . . . . . . . . . . . . . . . . 16
Applying Tremolo (TREMOLO) . . . . . . . . . . . . . . . . . . . . . . . . . . . . . 16
Adjusting the Distortion (AMP SIM) . . . . . . . . . . . . . . . . . . . . . . . . 17
Switching the Tremolo Type and the AMP SIM Type . . . . . . . . . . 17
Adjusting the Levels of Each Frequency Range (EQUALIZER) . . 17
Controlling the Functions Assigned to the Knobs (ASSIGN) . . . 17
Performing Live with a Plug-in Synthesizer . . . . . . . . . . . . . . . . . 18
Using USB Audio . . . . . . . . . . . . . . . . . . . . . . . . . . . . . . . . . . . . . . . . 19
Using SUB OUT . . . . . . . . . . . . . . . . . . . . . . . . . . . . . . . . . . . . . . . . . . 19
Editing the Sound . . . . . . . . . . . . . . . . . . . . . . . . . . . . . . . . . . . . . . . . 20
Adjusting the Character of the Sound (TONE COLOR) . . . . . . . . 20
Using the Knobs to Adjust the Sound . . . . . . . . . . . . . . . . . . . . . . 20
Editing a Program (Program Edit) . . . . . . . . . . . . . . . . . . . . . . . . . . 21
Editing a Tone (Designer) . . . . . . . . . . . . . . . . . . . . . . . . . . . . . . . . . 21
Creating the Organ Tones. . . . . . . . . . . . . . . . . . . . . . . . . . . . . . . . . 22
Viewing the State of Each Zone (Zone Info Screen) . . . . . . . . . . . 22
Saving the Sound Settings in a Program (Program Write) . . . . . 23
Changing the Order of Programs (Program Swap) . . . . . . . . . . . 23
Using the Convenient Functions in Performances . . . . . . . . 24
Playing Rhythm . . . . . . . . . . . . . . . . . . . . . . . . . . . . . . . . . . . . . . . . . 24
Recording Audio . . . . . . . . . . . . . . . . . . . . . . . . . . . . . . . . . . . . . . . . 24
Playing Audio Files from USB Flash Drive . . . . . . . . . . . . . . . . . . . 25
Various Settings . . . . . . . . . . . . . . . . . . . . . . . . . . . . . . . . . . . . . . . . . . 26
Accessing the Menu Screens . . . . . . . . . . . . . . . . . . . . . . . . . . . . . . 26
Setting Parameters (System) . . . . . . . . . . . . . . . . . . . . . . . . . . . . . . 26
Formatting Memory (Format) . . . . . . . . . . . . . . . . . . . . . . . . . . . . . 26
Returning to the Factory Settings (Factory Reset) . . . . . . . . . . . . 27
Making the Power Automatically Turn O After a Time
(Auto O ) . . . . . . . . . . . . . . . . . . . . . . . . . . . . . . . . . . . . . . . . . . . . . . 27
Listening to the Demo Songs . . . . . . . . . . . . . . . . . . . . . . . . . . . . . 27
Backing Up RD-2000 Data to a USB Flash Drive (Backup Save) . 27
Restoring Backup Data from a USB Flash Drive to the RD-2000 27
List of Shortcut Keys . . . . . . . . . . . . . . . . . . . . . . . . . . . . . . . . . . . . . . 28
Contents
6
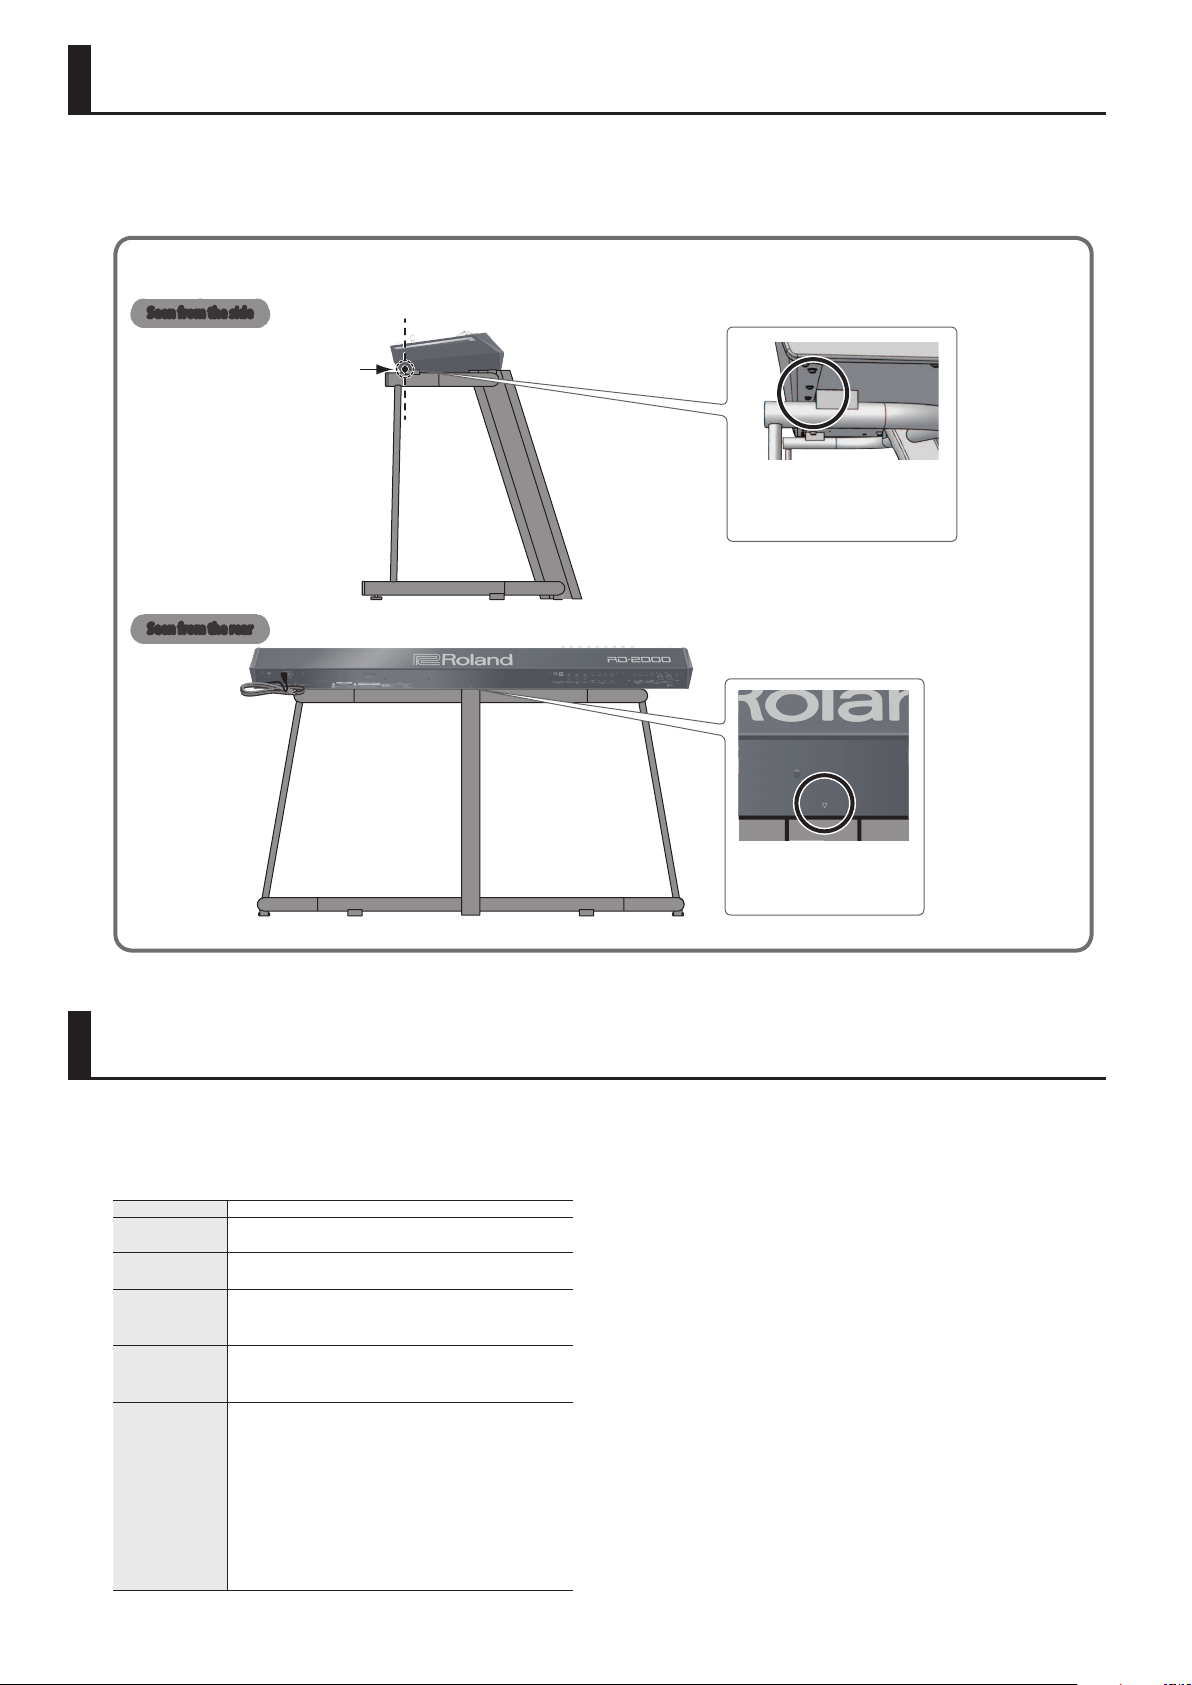
Placing the RD-2000 on a Stand
If you want to place the RD-2000 on a stand, use the Roland KS-G8B.
Place the instrument on the stand as follows.
* Be careful not to pinch your ngers when setting up the stand.
KS-G8B
Align the mark on the
RD-2000’s rear panel with
the center of the stand
Seen from the rear
Align the seam in the RD-2000’s
panel (on the bottom, near the
front) with the corners of the
stand’s rubber feet
Seen from the side
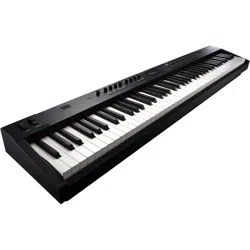
Main Specications
Roland RD-2000: Digital Piano
Keyboard 88 keys (PHA-50)
Power
Consumption
23W
Dimensions
1,412 (W) x 367 (D) x 140 (H) mm
55-5/8 (W) x 14-1/2 (D) x 5-9/16 (H) inches
Weight
21.7 kg/47 lbs 14 oz
* Actual weight can vary slightly from that indicated due
to the fact that wooden parts are involved.
Accessories
Owner’s Manual
Power Cord
Damper pedal (capable of continuous detection)
Options
Keyboard stand: KS-G8B
Piano pedal: RPU-3
Damper pedal: DP-10
Pedal switch: DP-2
Expression pedal: EV-5
USB ash drive (*)
* Use a commercially available USB ash drive or a
USB ash drive sold by Roland. However, we cannot
guarantee that all commercially available USB ash
drives will work with this unit.
* This document explains the specications of the product at the
time that the document was issued. For the latest information,
refer to the Roland website.
7
Basic Operation
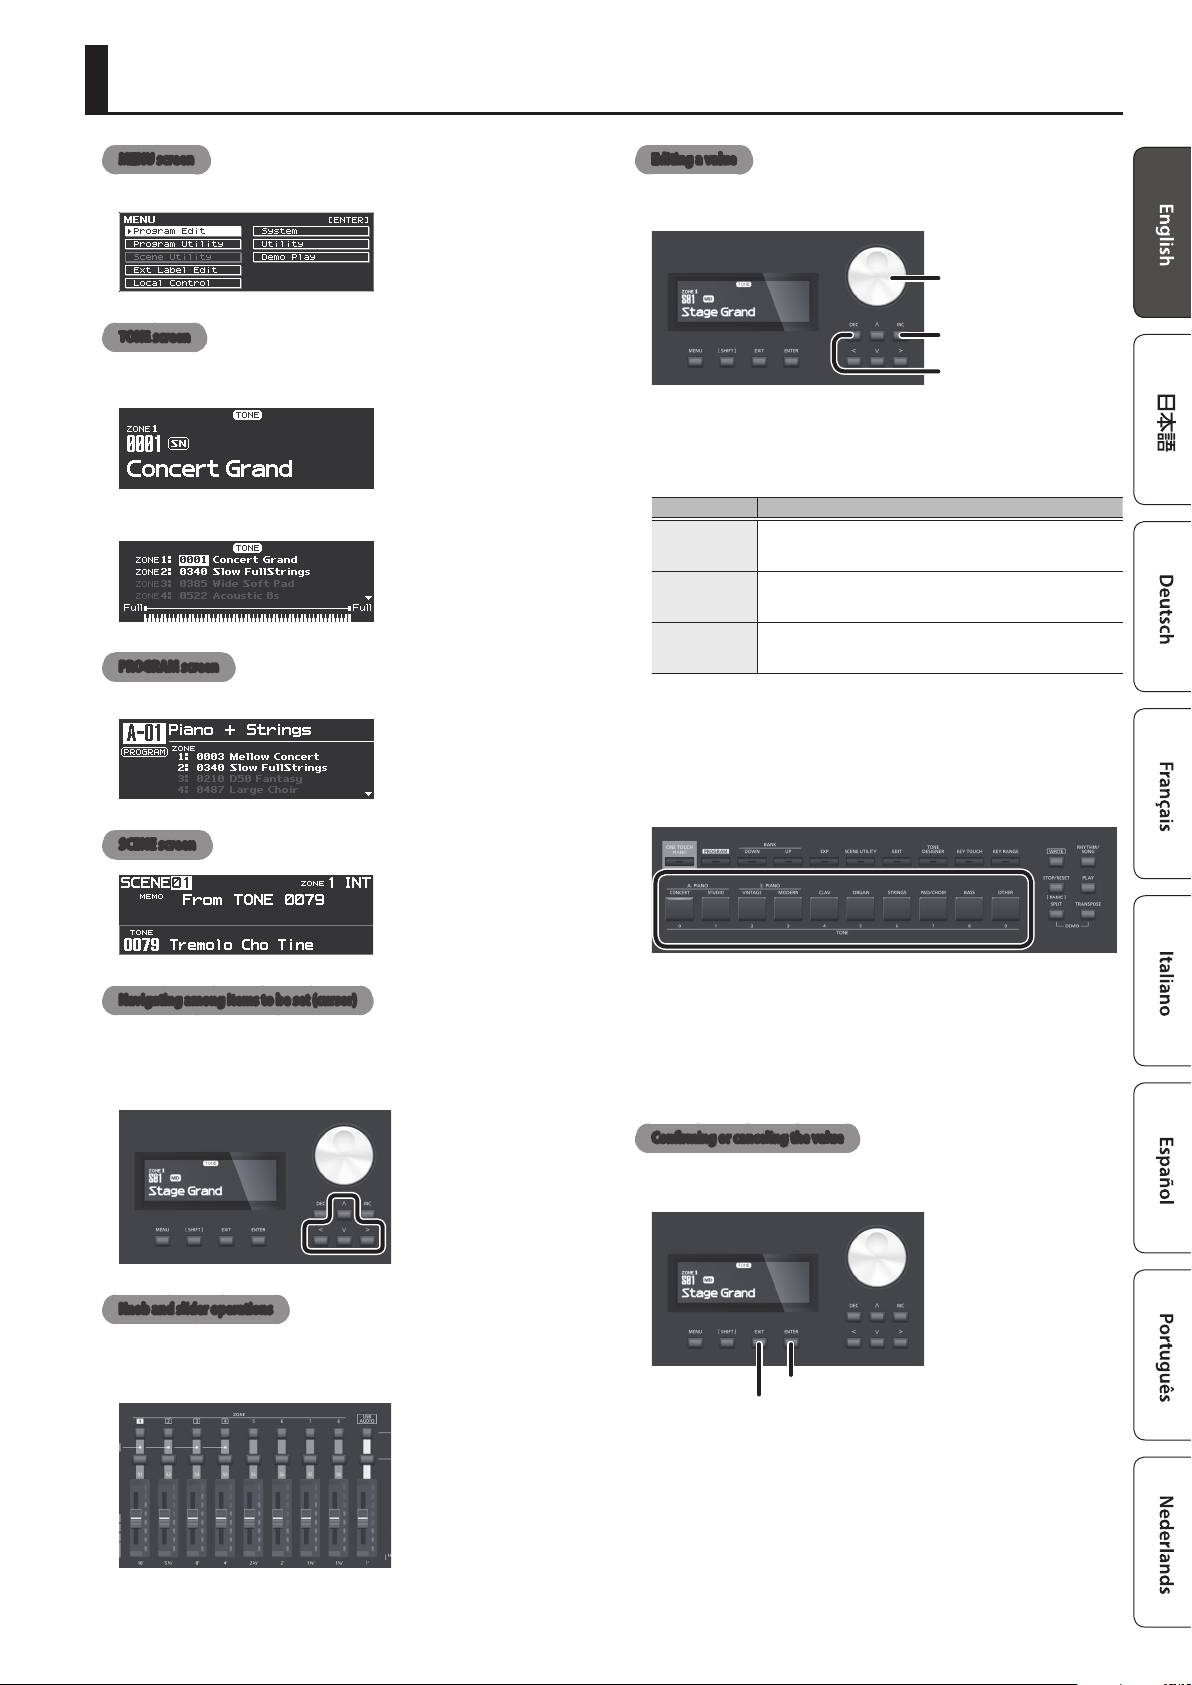
MENU screen
Here you can make system settings for the RD-2000 or manage les.
TONE screen
This is the screen that appears when you start up the RD-2000 or when
you press a TONE button.
This is the screen when zones are layered.
PROGRAM screen
This is the screen that appears when you press a PROGRAM button.
SCENE screen
Navigating among items to be set (cursor)
When more than one parameter is present in a screen, the name and
value of the parameter to be changed is shown with a box around
it. This box is referred to as the “cursor.” The cursor is moved with the
Cursor [
H
] [
I
] [
K
] [
J
] buttons.
Knob and slider operations
When you use a knob or slider to modify a setting, the modied
parameter and its value appears in a popup screen.
This screen will automatically close after a time.
For some parameters, a popup screen does not appear.
Editing a value
When changing settings values, you can use the [DEC] and [INC]
buttons, value dial, or the TONE buttons (numeric keys).
Value dial
[DEC] button
[INC] button
[DEC] button, [INC] button
Pressing the [INC] button increases the value, and the [DEC] button
decreases it.
Purpose Operation
To continuously
change the
value
Hold down the [DEC] button or [INC] button.
To rapidly
change the
value
Hold down the [INC] button and press the [DEC] button.
Hold down the [DEC] button and press the [INC] button.
To set the item
to its default
value
Press the [DEC] button and [INC] button simultaneously.
Value dial
Turn the dial clockwise to increase the value, or counterclockwise to
decrease the value.
TONE buttons ( numeric keys)
For some of the items, you can use the TONE buttons ([0]–[9]) as
numeric keys to directly specify a numeric value.
To use these as numeric keys in the TONE / PROGRAM / SCENE / ZONE
EDIT screen, operate the buttons while holding down the [SHIFT]
button. When you use the numeric keys to enter a value, the value
in the screen blinks. The blinking means that the value is not yet
conrmed, so press the [ENTER] button to conrm the value.
Conrming or canceling the value
To conrm the specied value, press the [ENTER] button.
If you decide to cancel, press the [EXIT] button.
[ENTER] button
[EXIT] button

8
Panel Descriptions
1
MOD WHEEL 1/2
You can assign various functions to these wheels.
You can use the assigned functions by moving these wheels while you
perform.
2
[MASTER VOLUME] knob
Adjusts the overall volume of the RD-2000.
3
MODULATION FX
[ON] button
Turns the eect on/o.
[TYPE] knob
Selects the type of the modulation FX.
[DEPTH] knob
Adjusts the depth of the modulation FX.
[RATE] knob
Adjusts the rate of the modulation FX.
[FEEDBACK] knob
Adjusts the amount of feedback for the modulation FX.
4
TREMOLO
[ON] button
Turns the eect on/o.
[TYPE] knob
Selects the type of tremolo.
[DEPTH] knob
Adjusts the depth of the tremolo eect.
[RATE] knob
Adjusts the rate of the tremolo eect.
5
AMP SIM
[DRIVE] knob
Adjusts the amount of distortion.
[ON] button
Turns the eect on/o.
6
[ZONE EFFECTS] button
Turns the ZONE EFFECT on/o.
If ZONE EFFECT is on, the MODULATION FX, TREMOLO, and AMP SIM
knobs and buttons operate as controllers for each function.
If this button is o, the knobs and buttons operate as controllers for
the function that is selected by the [SELECT] knob.
[SELECT] button
Selects the function that the knobs and buttons will have when ZONE
EFFECT is o. The function changes each time you press the button.
CTRL, ASSIGN, EQ, REVERB/DELAY indicator
Indicate the function that is selected by the [SELECT] button.
7
ZONE
SELECT buttons (1–8, USB-AUDIO)
Select the zone to control.
By holding down the [SHIFT] button and pressing one of these
buttons, you can access the ZONE EDIT screen of each zone.
INT/EXT select buttons (1–8, USB-AUDIO)
Turns each ZONE’s sound on and o.
Select whether the knobs and slider operate the RD-2000 itself or an
external MIDI sound module.
Sliders (S1–S8, USB-AUDIO)
Use these sliders to adjust the volume of each zone, or to edit values.
[LEVEL] button
If you press this button to make it light, you can use the sliders to
adjust the volume of each zone.
[ASSIGN] button
If you press this button to make it light, you can adjust the value that is
assigned to the sliders.
[SCENE] button
If you press this button to make it light, you can use the TONE buttons
to recall scenes.
If a TW organ sound is selected for the zone that is selected by the
SELECT button, you can hold down the [SHIFT] button and press this
button, and then use the sliders to modify the sound as when using
the harmonic bars of a tonewheel organ.
Top Panel
1 2 3 4 5 6
7
8
9
10
11
12
13
9
Owner’s Manual
8
Display
This shows the Tone name, the Program names and the values of
various settings, etc.
[MENU] button
Accesses the MENU screen. In the MENU screen, you can make overall
settings for the entire RD-2000.
[SHIFT] button
You can easily call up Edit screens for related parameters by holding
down this button while pressing buttons, turning knobs, or operating
other controllers. For details, refer to “List of Shortcut Keys” (p. 28).
If you edit a parameter value while holding down this button, the
value will change more greatly.
[EXIT] button
This is used to return to a previous screen or to cancel a procedure.
[ENTER] button
This is used to nalize a value or execute an operation.
9
Cursor buttons/Value dial
Value dial
These are used to modify values.
[DEC] button, [INC] button
These are used to modify values.
If you keep on holding down one button while pressing the other, the
value change accelerates.
These buttons modify the value that’s controlled by the value dial.
Cursor [
K
] [
J
] [
H
] [
I
] buttons
Press these to switch pages and to move the cursor.
10
[ONE TOUCH PIANO] button
Recalls a piano sound to zone 1. Zones other than zone 1 and zone 5
(EXT) are turned o.
You can also specify a favorite sound (STARTUP).
NOTE
Be aware that when you press this button to recall a piano sound, the
previous settings are lost.
[PROGRAM] button
Selects a program.
BANK [UP] [DOWN] buttons
Change the program or scene bank.
[EXP] button
Selects banks of expansion sounds (p. 15).
[SCENE UTILITY] button
Accesses the SCENE UTILITY MENU screen.
[EDIT] button
Allows you to edit program settings.
[TONE DESIGNER] button
Accesses the TONE DESIGNER screen.
[KEY TOUCH] button
Adjusts the key touch.
[KEY RANGE] button
Species the key range.
11
TONE buttons
Select tones in each category.
12
[WRITE] button
Stores the current settings in a program.
If you press this button in certain screens (such as the System screen),
system parameters (p. 26) are stored.
[STOP/RESET] button
Stops playback of the song or rhythm.
[RHYTHM/SONG] button
Accesses a screen where you can select songs or rhythms.
[PLAY] button
Starts playback of the song or rhythm.
[SPLIT] button
Turns the split function on/o.
This lets you divide the keyboard into left and right regions and play a
dierent sound in each.
By pressing this button and the [TRANSPOSE] button simultaneously,
you can listen to demo songs.
[TRANSPOSE] button
Lets you transpose your performance.
13
Pitch bend/Modulation lever
This allows you to control pitch bend or apply vibrato.
NOTE
The eect of moving the lever will dier depending on the tone. The
eect of this lever is xed for each tone, and cannot be changed.
10
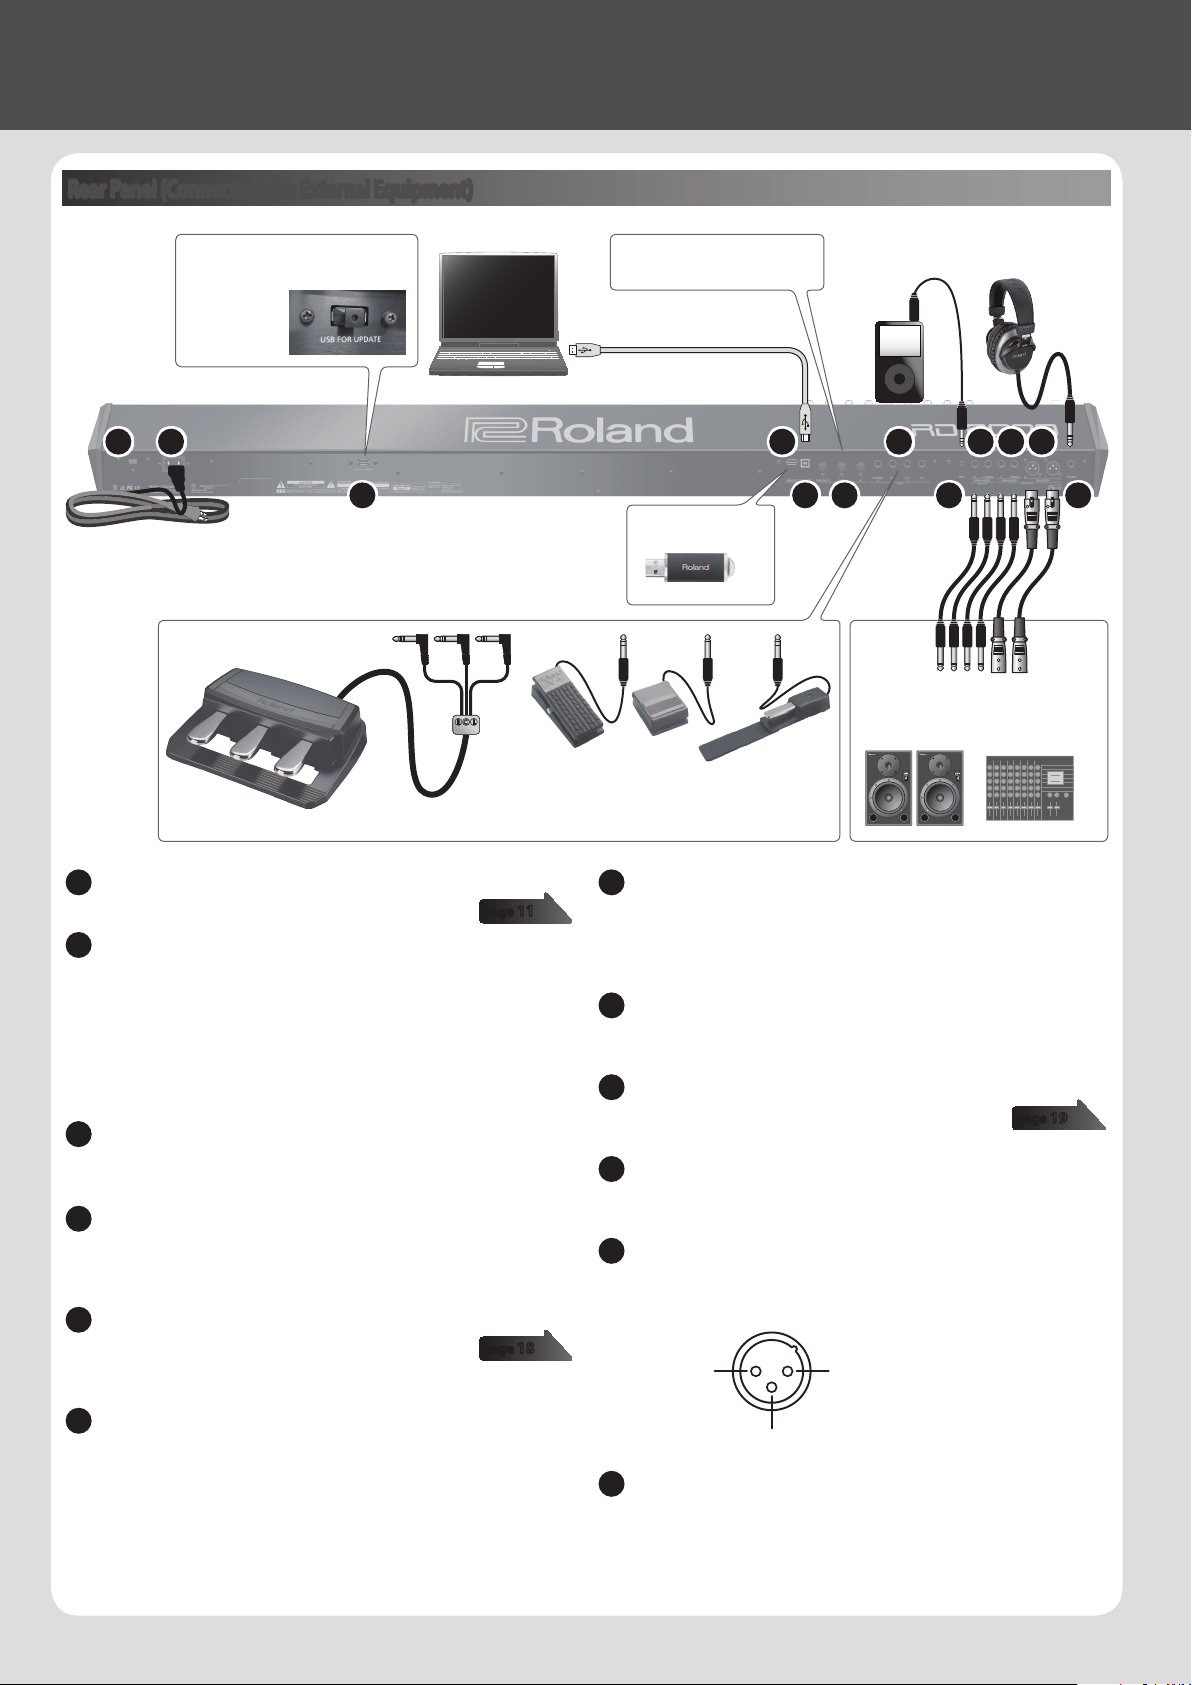
Rear Panel (Connecting the External Equipment)
A
[
L
] switch
This turns the power on/o.
B
AC IN jack
Connect the included power cord to this connector.
* To prevent malfunction and equipment failure, always turn
down the volume, and turn o all the units before making any
connections.
* Use only the specied expression pedal. By connecting any other
expression pedals, you risk causing malfunction and/or damage
to the unit.
C
USB FOR UPDATE jack
Use this to update the RD-2000.
Normally you should leave the USB cap inserted to protect the port.
D
USB MEMORY port
Use a commercially available USB ash drive or a USB ash drive
sold by Roland. However, we cannot guarantee that all commercially
available USB ash drives will work with this unit.
E
USB COMPUTER port
You can connect this to your computer so that it can
exchange performance data and audio signal with the
RD-2000.
F
MIDI connectors (IN, OUT 1, THRU/OUT 2)
Used for connecting external MIDI devices and for transmission of MIDI
messages.
The THRU/OUT 2 connector’s function can be switched to operate
either as MIDI THRU or as MIDI OUT (p. 26).
G
PEDAL jack (DAMPER, FC1, FC2, EXT)
Connecting the pedal switch provided with the RD-2000 to the
DAMPER jack allows you to use the switch as a damper pedal.
With a pedal connected to the FC1, FC2 or EXT jack, you can then
assign a variety of functions to the pedal (p. 21).
H
INPUT jack
This is an audio input jack. You can connect your audio player or other
audio source here.
I
SUB OUT jack (L/MONO, R)
Provide output of the audio signals. For mono output,
use the L/MONO jack.
J
MAIN OUT jack (L/MONO, R)
These are connected to an amp or other device. For mono output, use
the L/MONO jack.
K
MAIN OUT jack (L, R) (XLR type)
Connectors for balanced output of the audio signals. Connect to
mixers and other such gear.
* Pin assignment of MAIN OUT jack
1: GND
2: HOT
3: COLD
L
PHONES jack
A set of headphones can be connected to this jack.
Even when headphones are connected, audio signals will still be
output from the OUTPUT jacks and BALANCED OUT jacks.
page 11
page 18
page 19
to Power outlet
USB ash drive
For connecting MIDI device.
Audio player Stereo
headphones
Computer
A B
C
D
E F
G
H
I
Pedal unit
(RPU-3)
Expression pedal (EV-5)
or
Pedal switch (DP Series)
J K
L
Mixer etc.
Monitor speakers
(powered)
This port is only used for updates.
Normally you should leave the USB
cap inserted
to protect the
port.
11
Owner’s Manual
Turning the RD-2000 On
Once everything is properly connected, be sure to follow the
procedure below to turn on their power. If you turn on equipment in
the wrong order, you risk causing malfunction or equipment failure.
1. Turn down the volume of the RD-2000.
Also completely turn down the volume of any connected external
devices.
2. Press the [
L
] switch.
The unit is turned on, and the display’s backlighting comes on.
3. Turn on the power to connected external devices.
4. Adjust the volume of the connected external devices.
5. Adjust the RD-2000’s volume.
Turning O the Power
1. Turn down the volume of the RD-2000.
Also completely turn down the volume of any connected external
devices.
2. Turn o the power to connected external devices.
3. Press the [
L
] switch.
The unit is turned o.
* Before turning the unit on/o, always be sure to turn the volume
down. Even with the volume turned down, you might hear some
sound when switching the unit on/o. However, this is normal
and does not indicate a malfunction.
* If you need to turn o the power completely, rst turn o the
unit, then unplug the power cord from the power outlet. Refer to
“To completely turn o power to the unit, pull out the plug
from the outlet” (p. 2).
If you don’t want the power to turn o
automatically, change the “Auto O” setting to “O”
The power to this unit will be turned o automatically after a
predetermined amount of time has passed since it was last used for
playing music, or its buttons or controls were operated (Auto O
function).
If you do not want the power to be turned o automatically, disengage
the Auto O function.
NOTE
5 When the power is turned o, any settings you were editing will
be lost. You must save settings that you want to keep.
5 To restore power, turn the power on again.
Changing the auto o setting
1. In the MENU screen, select “SYSTEM” and press the [ENTER]
button.
The System screen appears.
2. Choose “Auto O,” and change the setting.
Parameter
[
K
] [
J
]
Value
[DEC] [INC]
Explanation
Auto O
O
The power will not turn o
automatically.
30 min
The power will automatically turn o
if no operation is performed for 30
minutes.
240 min (default)
The power will automatically turn o
if no operation is performed for 240
minutes (four hours).
3. To store the auto o setting, press the [WRITE] button in the
System screen.
NOTE
When the auto o function turns the power o, the settings that you
were editing will be lost. If there are settings that you want to keep,
you should save them beforehand. For details, refer to “Saving the
Sound Settings in a Program (Program Write)” (p. 23) and “Saving the
system settings” (p. 26).
To Turn the Power On Again After It Was Turned O by”Auto-O”
If the auto o function turned the power o, turn o the [
L
] switch
and then turn the power on again.
12
Basic Organization of the RD-2000
Controller Section
This section includes the keyboard, the Pitch Bend/Modulation
lever, the panel knobs, the sliders, and any pedal connected to the
rear panel. Actions such as pressing and releasing of keys on the
keyboard, depressing a damper pedal, and so forth, are converted
to MIDI messages and sent to the sound generator section, or to
an external MIDI device.
Sound generator/Eect section
This is the section that produces and modies the sound.
Performance data from the controller section is converted into
audio signal, which is output from the OUTPUT jacks or PHONES
jack.
V-Piano Technology sound generator (only zone 1 can be selected) (MD)
For sounds beginning with S01, this sound generator reproduces
the sound of a piano based on its structure.
NOTE
This sound generator does not support Modulation FX, Tremolo/
Amp Sim, or Tone/Program Remain.
SuperNATURAL (SN)/PCM sound generator
This sound generator lets you play a variety of high-quality
sounds, including SuperNATURAL sounds that faithfully reproduce
the character and behavior of musical instruments.
The RD-2000 contains more than a thousand sounds.
Eects
Each zone 1–4 provides a Modulation FX and Tremolo/Amp Sim
that can be set independently for each zone.
There are also reverb, delay, and EQ that can be used in common
by all zones.
Overview of the RD-2000
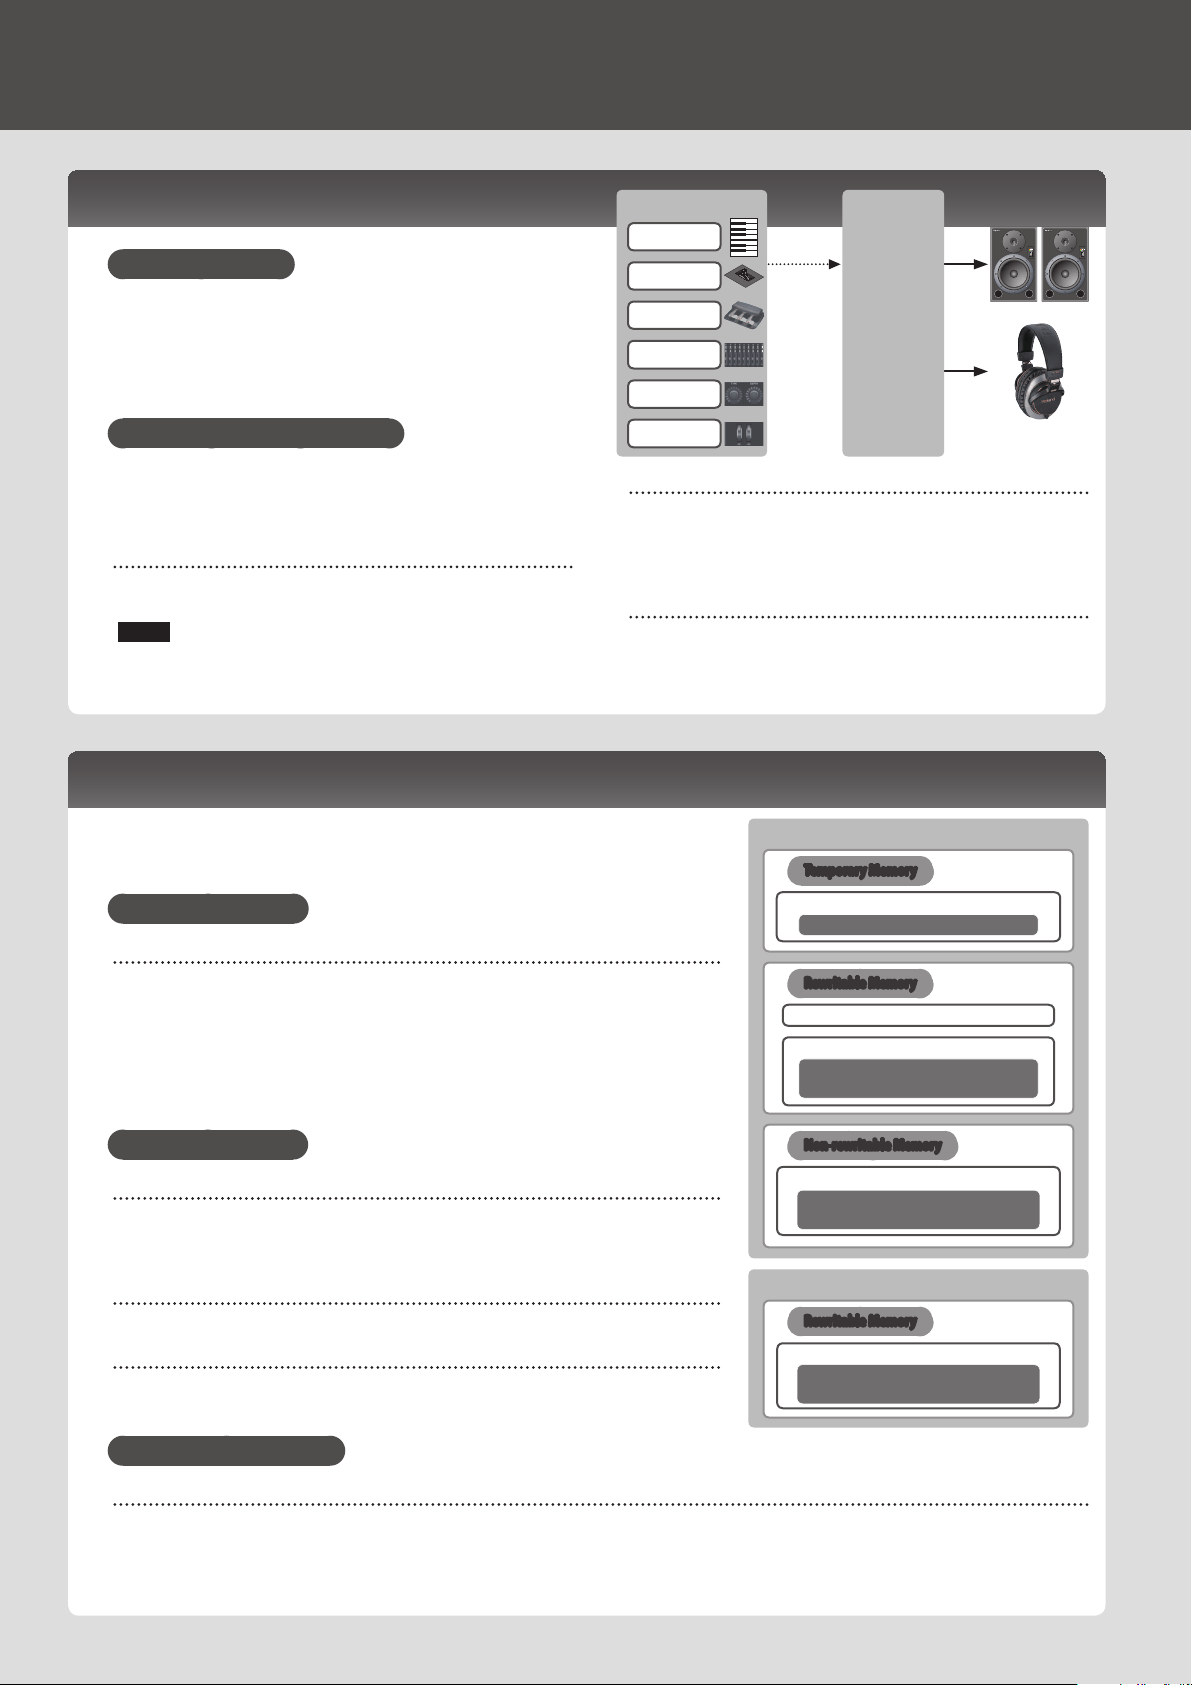
About Memory
“Memories” are locations where settings such as programs are stored.
There are three types of memory: “temporary memory,” “rewritable memory,” and “non-
rewritable memory.”
Temporary Memory
Temporary area
The tones, programs, scenes, or controller settings that you select using the panel TONE
buttons or PROGRAM button are recalled into the temporary area.
When you play the keyboard, sounds are produced according to the settings that are in
the temporary area.
The settings in the temporary area will be lost when you turn o the power or call up
other settings. If you want to keep the data that’s in the temporary area, you must store
it into rewritable memory.
Rewritable Memory
System memory
System memory contains system parameter settings that specify how the RD-2000 is to
operate.
To store system parameters, save the system settings (p. 26).
User memory
Programs and scenes can be stored in user memory (Program Write: p. 23).
USB ash drive
You can save all of the programs in a single le (Backup Save: p. 27).
The USB ash drive is also used as the storage location for audio recording.
Non-rewritable Memory
Preset memory
The demo songs and the tones are stored in preset memory; they cannot be rewritten.
USB ash drive
RD-2000
Rewritable Memory
USB ash drive
Backup fales
Audio-recorded data
Non-rewritable Memory
Preset memory
Tone
DEMO songs
Rewritable Memory
User memory
Program
Scene
System memory
Temporary Memory
Temporary area
Tone/Program/scene
Controller Section Sound
generator/
Eect section
Performance
data
Keyboard
Pitch Bend
Knob
Slider
Wheel
Pedal
Audio signal
13
Owner’s Manual
Units of Sound
Tone
Tones are an ideal way to select and play a sound.
The sounds that you select using the TONE buttons are called “tones.” Tones can be assigned to each of the eight zones (zone 1–8) and played.
You can play multiple zones simultaneously from the keyboard, or play them in separate regions of the keyboard.
You can use the Designer function (p. 21) to edit a tone to your taste. You can store an edited tone in a program.
Some of the tones are “rhythm sets” which contain multiple percussion instrument sounds.
A rhythm set will produce a dierent percussion instrument sound for each key (note number) that you press.
Program
Programs let you store a combination of settings and multiple sounds.
The sounds that you select using the PROGRAM button are called “programs.”
Programs contain settings for the tones that are assigned to the zones, along with settings that are common to all zones (such as reverb, delay,
and EQ). You can store 300 programs containing settings that you’ve edited to your taste.
Scene
Scenes are an ideal way to store and order favorite tones or programs, or when using an external MIDI device.
The sounds that you select using the SCENE button are called “scenes.”
Scenes let you store performance settings that you’ve edited to your taste. Up to 100 scenes that you save can be recalled from the TONE
buttons, with ten scenes for each button.
You can use scenes to easily recall settings in the order of the songs in your live performance, or to control or set up an external device.
It’s also easy to store tones or programs without change, modify their sound or settings, or change the order in which they are recalled.
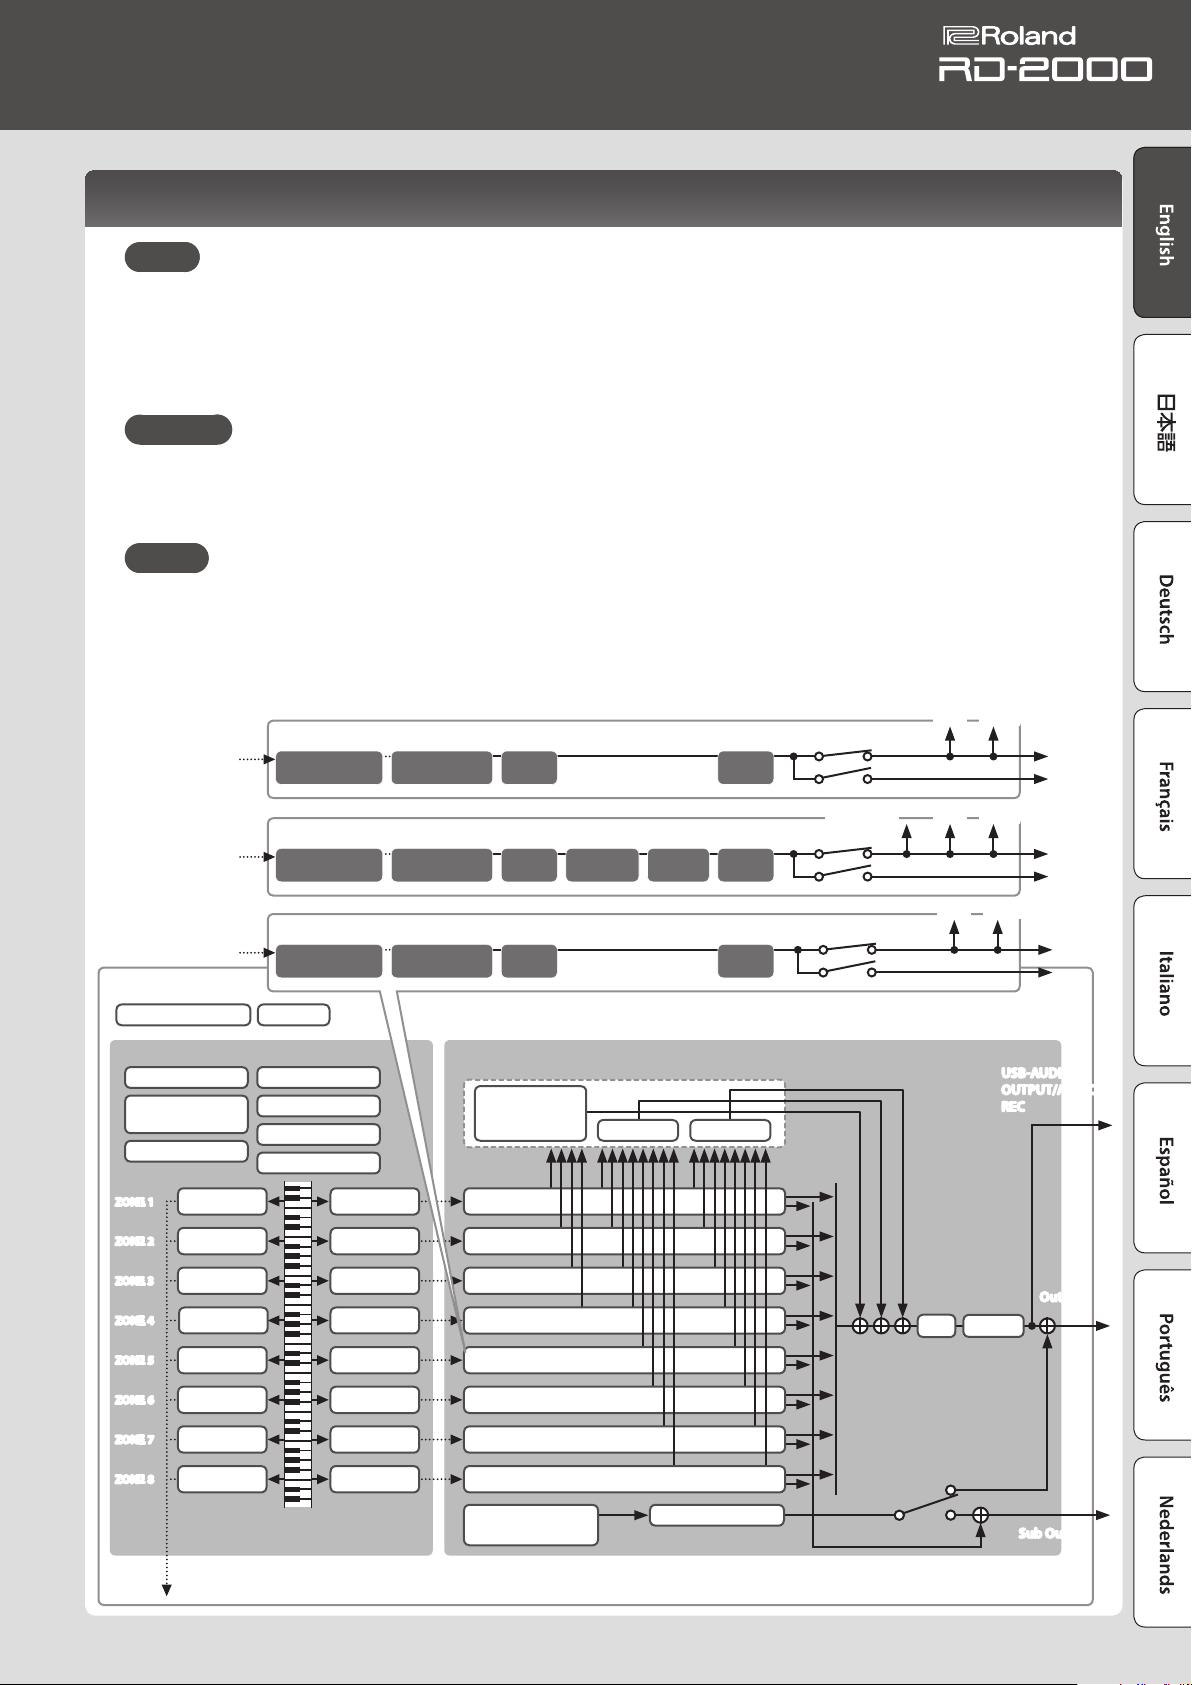
Program/scene
Sound generator/Eect section
EQ
USB
Audio Input
Volume
Program name Rhythm
MIDI OUT
USB MIDI
* Eect settings inside the dotted line will reect the settings of the ZONE 1 that you
selected in the TONE screen or the PROGRAM screen.
Comp
Controller Section
Pedal
Modulation
SliderKnob
Modulation
wheel
Key Touch
Pitch Bend
External 1
External 2
External 3
External 4
External 5
External 6
External 7
External 8
Internal 1
Internal 2
Internal 4
Internal 5
Internal 6
Internal 7
Internal 8
Internal 3
Delay Reverb
Sympathetic
Resonance
(Piano Only)
Tone
Tone
Tone
Tone
Tone
Tone
Tone
Tone
USB-AUDIO
OUTPUT/AUDIO
REC
Sub Out
Output
ZONE 1
ZONE 2
ZONE 3
ZONE 4
ZONE 5
ZONE 6
ZONE 7
ZONE 8
Tone
(S type: ZONE 1 only)
Reverb
Output
Sub Out
Delay
Volume
Pan
V-Piano
Technology
Controller section
reception settings
Tone
Color
Tone
(A type: ZONE 1–4)
Sympathetic
Resonance
Reverb
Output
Sub Out
Delay
Modulation
FX
Tone
Color
Tremolo
Amp Sim
Volume
Pan
SuperNATURAL
PCM
Controller section
reception settings
Tone
(B type: ZONE 5–8)
Reverb
Output
Sub Out
Delay
Volume
Pan
SuperNATURAL
PCM
Controller section
reception settings
Tone
Color
14
Operation Guide
Adjusting the Overall Volume
1. Turn the [MASTER VOLUME] knob.
Adjusting the Volume of Each Zone
Selecting the zone to adjust
Select the zone whose settings you want to adjust.
1. Press one of the SELECT [S1]–[S8] buttons.
MEMO
You can’t select multiple zones.
Turning each zone on/o
1. Press the INT/EXT [S1]–[S8]
buttons to turn each zone on
(lit) or o (unlit).
MEMO
By holding down the [SHIFT]
button and pressing an INT/EXT
[S1]–[S8] button, you can switch
what the knob and slider of each zone will control (the RD-2000: lit
red, or an external device: lit green).
NOTE
Eects cannot be applied to zones 5–8.
If zones 5–8 are also assigned as internal zones, and if an extremely
large amount of data is being produced by the controllers, a
substantial burden is placed on the RD-2000, possibly making it
unable to process the performance data from the keyboard.
Adjusting the volume of each zone
1. Use the sliders [S1]–[S8] to adjust the volume of each zone.
Using an Assigned Function to Modify the Sound
(MOD WHEEL 1/2)
A variety of functions are assigned to the modulation wheels (p. 21).
By moving the modulation wheels while you perform, you can control
the assigned function.
Changing the Sound’s Pitch in Real Time (Pitch bend lever)
While playing the keyboard, move the lever to the left
to lower the pitch, or to the right to raise the pitch. This
is known as Pitch Bend.
If you move the lever away from yourself while also
moving it to left or right, the pitch bend and modulation eects will be
applied simultaneously.
Adding Vibrato or Dynamics (Modulation lever)
You can also apply vibrato by manipulating the lever
away from you. This is known as Modulation.
If you move the lever away from yourself while
also moving it to left or right, the pitch bend and
modulation eects will be applied simultaneously.
Disabling the Button (Panel Lock)
By engaging the Panel Lock function, you can disable panel functions.
This prevents settings from being changed inadvertently on stage or
in other such situations.
1. Hold down the [MENU] button and press the [ENTER] button.
The panel lock popup screen appears for a time and then disappear;
then an icon indicating the panel lock status appears in the upper
right of the TONE screen and the PROGRAM screen or the upper left of
the SCENE screen.
2. To disengage the Panel Lock function, press the [EXIT] button
twice in succession.
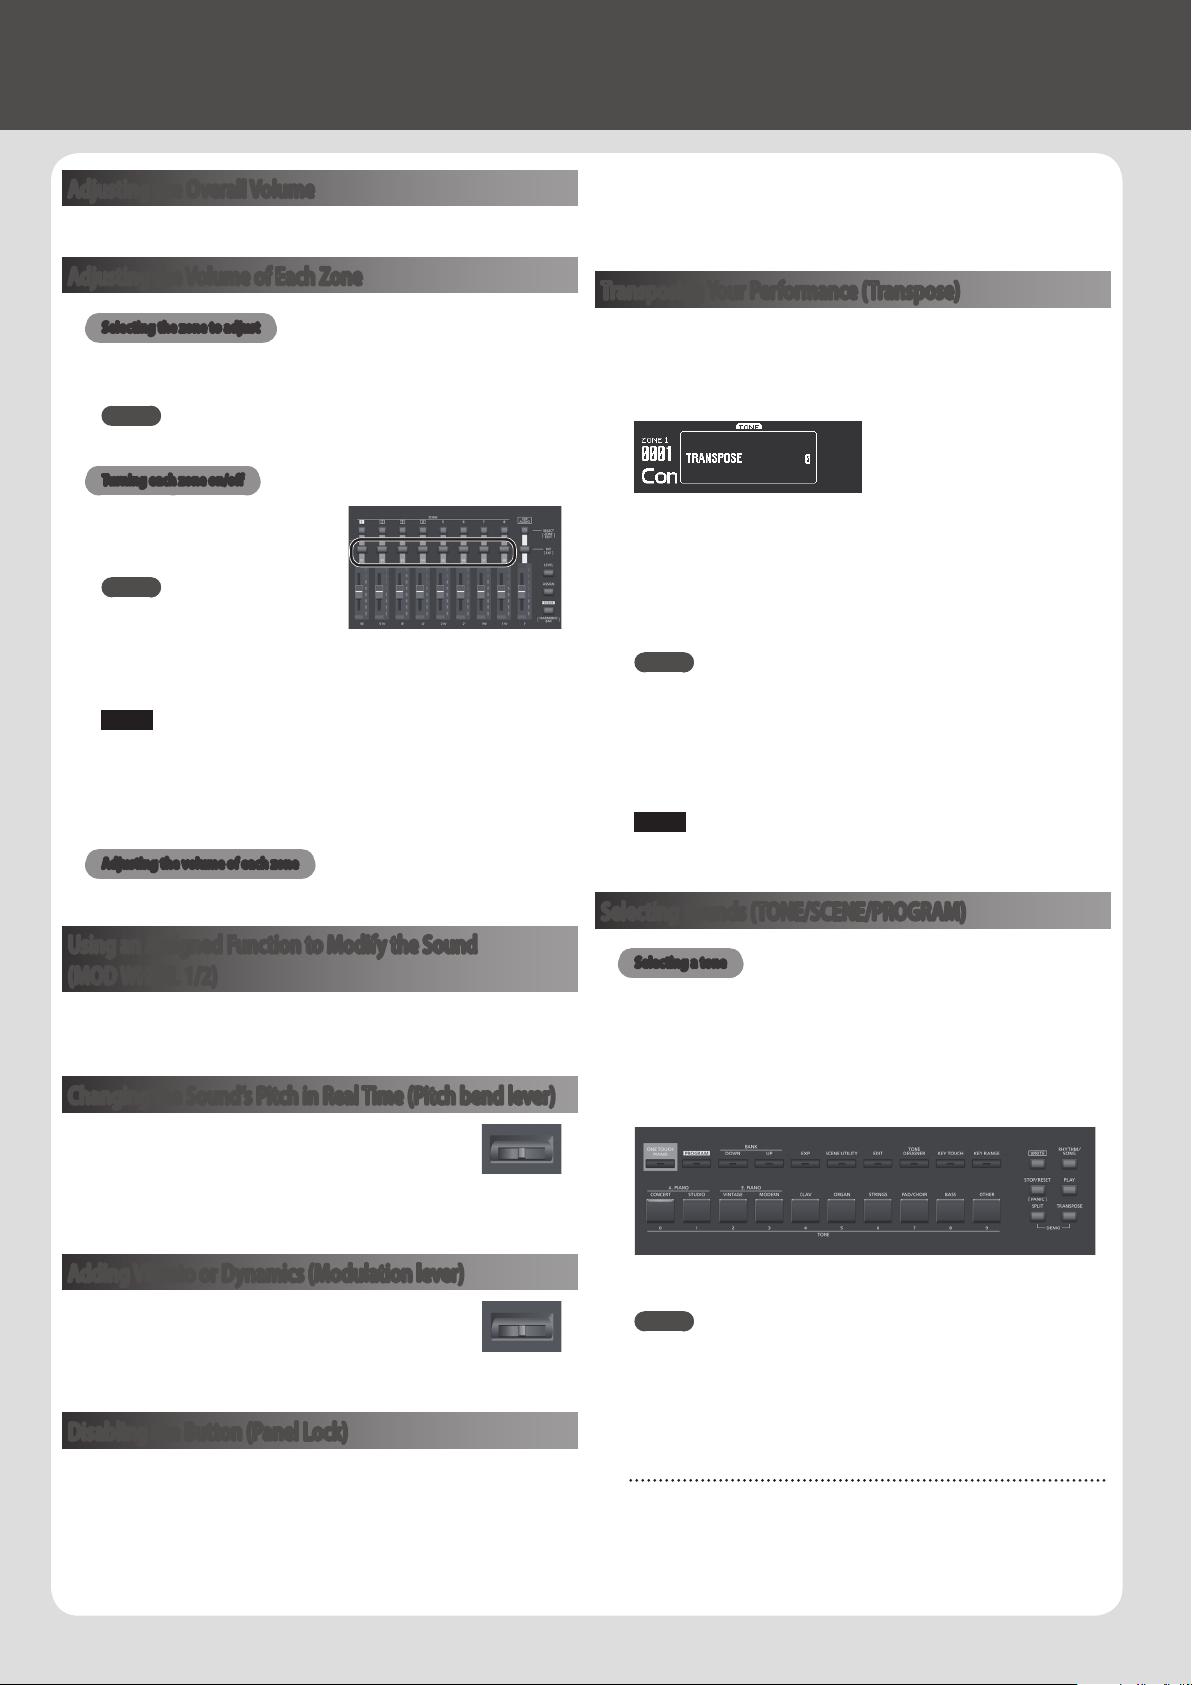
Transposing Your Performance (Transpose)
You can adjust the transpose setting in semitone steps over a range of
-48–0–+48 relative to C4.
1. Hold down the [TRANSPOSE] button for several seconds.
The current setting is shown.
2. Hold down the [TRANSPOSE] button and use the [DEC][INC]
buttons or the keyboard to specify the amount of transposition.
When you release the [TRANSPOSE] button, the previous screen
reappears.
When the amount of transposition is set, the Transpose function
switches on, and the [TRANSPOSE] button lights up.
MEMO
5 If you press the C4 (middle C) key, the transpose amount will be
set to “0.” For example, to have “E” sound when you play “C” on the
keyboard, hold down the [TRANSPOSE] button and press the E4
key. The degree of transposition then becomes “+4.”
5 You can set the degree of transposition for each of the Layer
individually. For details, refer to “Parameter Guide (English)” (PDF).
NOTE
If the transpose amount is 0, the [TRANSPOSE] button will not turn
on even if you press it.
Selecting Sounds (TONE/SCENE/PROGRAM)
Selecting a tone
1. Make the [SCENE] button go dark.
Or, press the [One Touch Piano] button.
2. Press a SELECT [S1]–[S8] button to select the zone for which you
want to select a sound.
3. Press any of the TONE buttons to select the category.
4. Use the [DEC] [INC] buttons or value dial to select the tone.
MEMO
5 By holding down the [SHIFT] button and using the [INC] [DEC]
buttons or the value dial, you can select the rst sound of each
tone category.
5 Sounds beginning with S01 are only for zone 1. These piano
sounds cannot be selected for zones 2–8.
Using the Numeric Keys to Select Tones
1. While holding down the [SHIFT] button, use the [0]–[9] to enter
a tone number.
The value blinks while you’re entering the tone number.
15
Owner’s Manual
2. Release the [SHIFT] button.
The tone number is nalized.
MEMO
To enter an S sound, hold down the [SHIFT] button and press the
[ONE TOUCH PIANO] button. To enter EXP A/B, hold down the [SHIFT]
button and press the [EXP] button.
Selecting the EXP category
[EXP] button
This is a bank for expansion sounds.
To switch between A/B, press the [EXP] button.
The wide variety of tones available from the Axial sound library site
can be added to the RD-2000.
For details, refer to the Axial site.
&
http://axial.roland.com/
Selecting a program
The RD-2000 has 15 banks, A–O, and each bank lets you store 20
programs (for a total of 300).
1. Press the [PROGRAM] button to make it light.
2. Use the BANK [UP] [DOWN] buttons to select the program bank
(A–O).
3. Use the [DEC] [INC] buttons or value dial to select the program
number.
Using the Numeric Keys to Select Programs
1. Use the BANK [UP] [DOWN] buttons to select the program bank
(A–O).
2. While holding down the [SHIFT] button, use the [0]–[9] to enter
a program number.
The value blinks while you’re entering the program number.
3. Release the [SHIFT] button.
The program number is nalized.
Registering a scene
1. Select the settings and the program or tone that you want to
register in the scene.
2. Hold down the [SCENE] button and use the BANK [UP] [DOWN]
buttons to select the desired registration-destination program
bank, and then press one of the TONE buttons.
The currently selected tone or program together with the performance
status are registered.
Lit button A scene is already registered.
Blinking button A scene is not registered.
The currently selected scene can also be registered in another button,
or you can modify the settings and overwrite them.
Recalling a scene
You can store up to 100 settings, such as for frequently used programs.
One setting can be stored in each TONE button. Ten settings can be
registered in each bank for instant recall.
1. Press the [SCENE] button to make it light.
2. To select a scene (0–9), press any TONE button that is lit.
MEMO
Pressing an unlit TONE button won’t select anything.
Layering Tones
According to the order in which you press the TONE buttons, you can
layer up to four zones ZONE (only zones 1–4).
1. Press two, three, or four TONE buttons together in the desired
order.
NOTE
If the previous sound has been edited, the result of your editing is
lost when you execute this operation. If you want to keep the sound,
save it before you proceed.
Changing a zone’s tone
1. Press a SELECT [S1]–[S8] button to select a zone.
The cursor moves to the tone number of the selected zone.
2. Select a tone as described in “Selecting a tone” (p. 14).
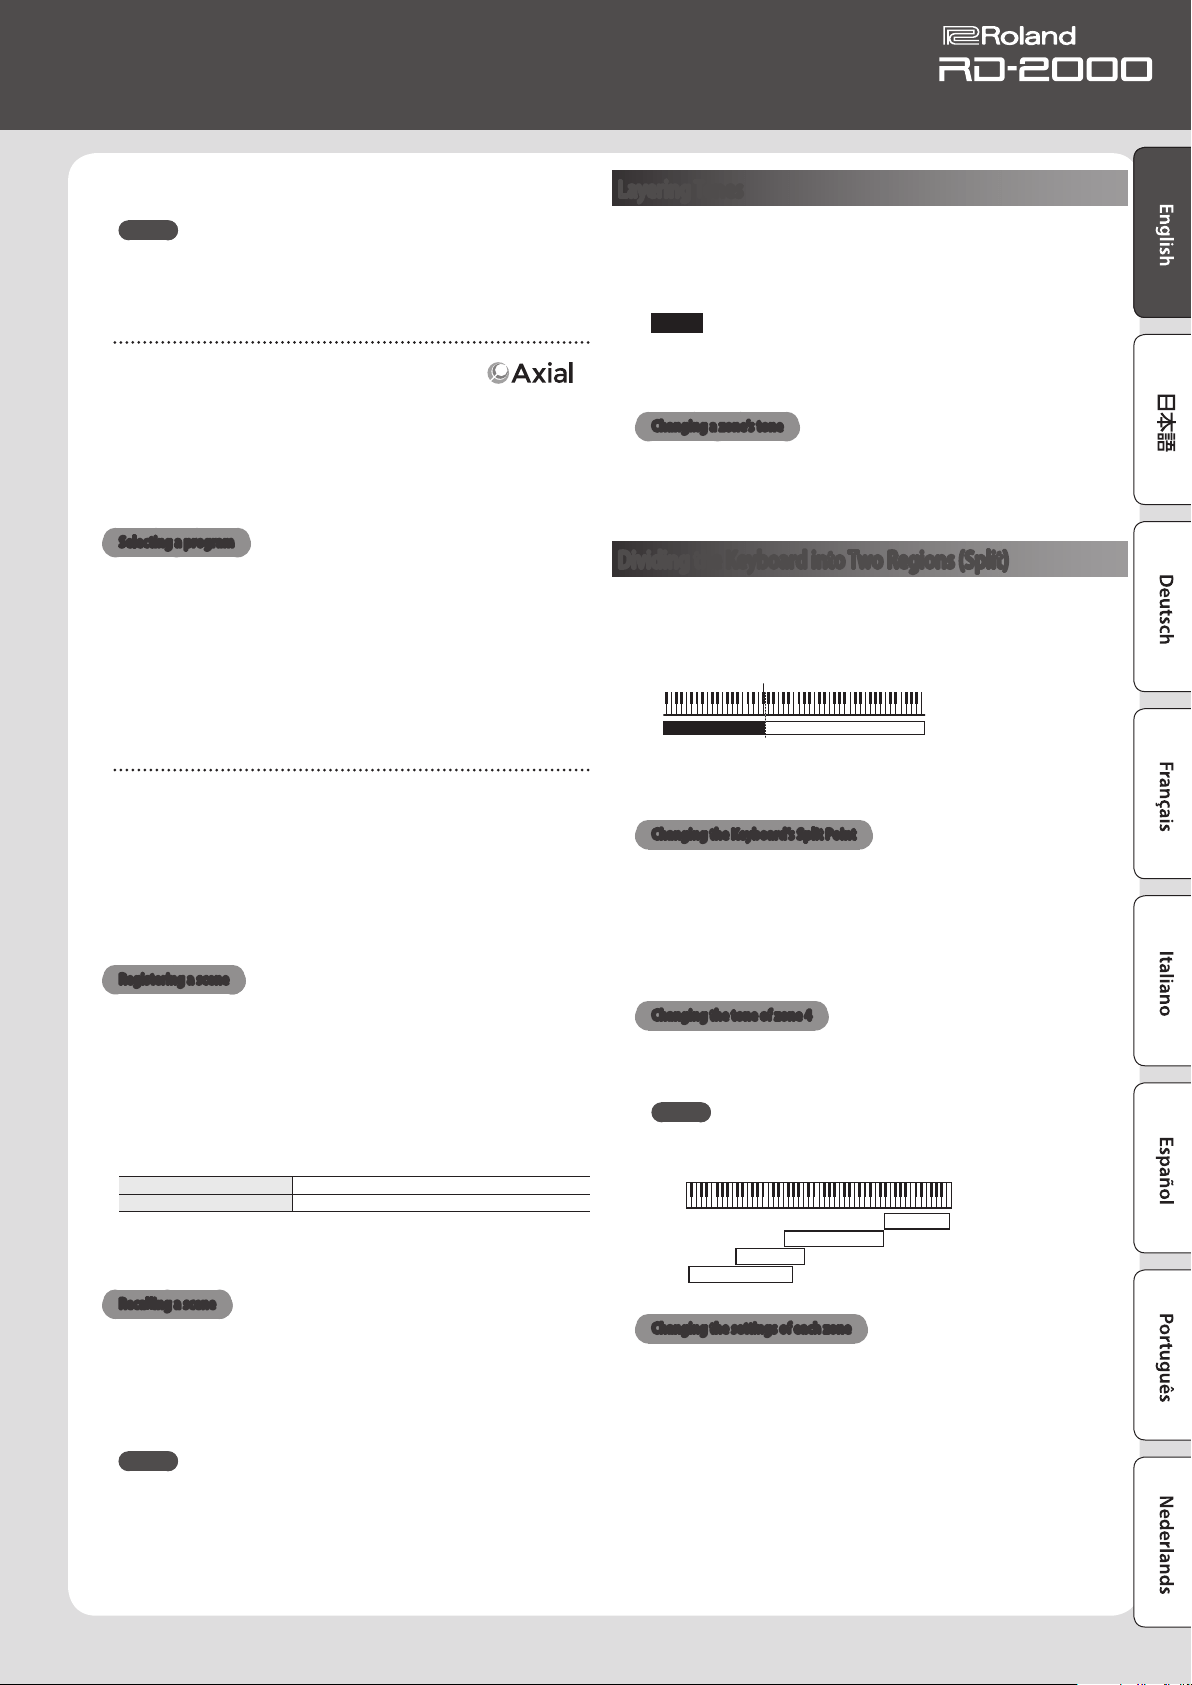
Dividing the Keyboard into Two Regions (Split)
1. Press the [SPLIT] button to make it light.
The zone 1 tone sounds in the right-hand region of the keyboard, and
the zone 4 tone sounds in the left-hand region.
Split Point (F#3)
ZONE 4 ZONE 1
2. To exit Split mode, press the [SPLIT] button once more to make
it unlit.
Changing the Keyboard’s Split Point
1. While holding down the [SPLIT] button, press the key that is to
become the new split point.
The split point is shown.
When you release the [SPLIT] button, the previous display will
reappear.
The split-point key is included in the ZONE 4 section.
Changing the tone of zone 4
1. Press the SELECT [S4] button to select zone 4.
2. Select a tone as described in “Selecting a tone” (p. 14).
MEMO
By using the key range function, you can freely specify the key range
of each zone.
ZONE 1
ZONE 2
ZONE 3
ZONE 4
Changing the settings of each zone
Here’s how to turn each zone on or o.
1. Press the button several times until the INT/EXT button goes
dark.
The zone turns o.
2. If you press the INT/EXT button once again.
The INT/EXT button lights and the zone turns on.
Now you can use the indicated function.
16
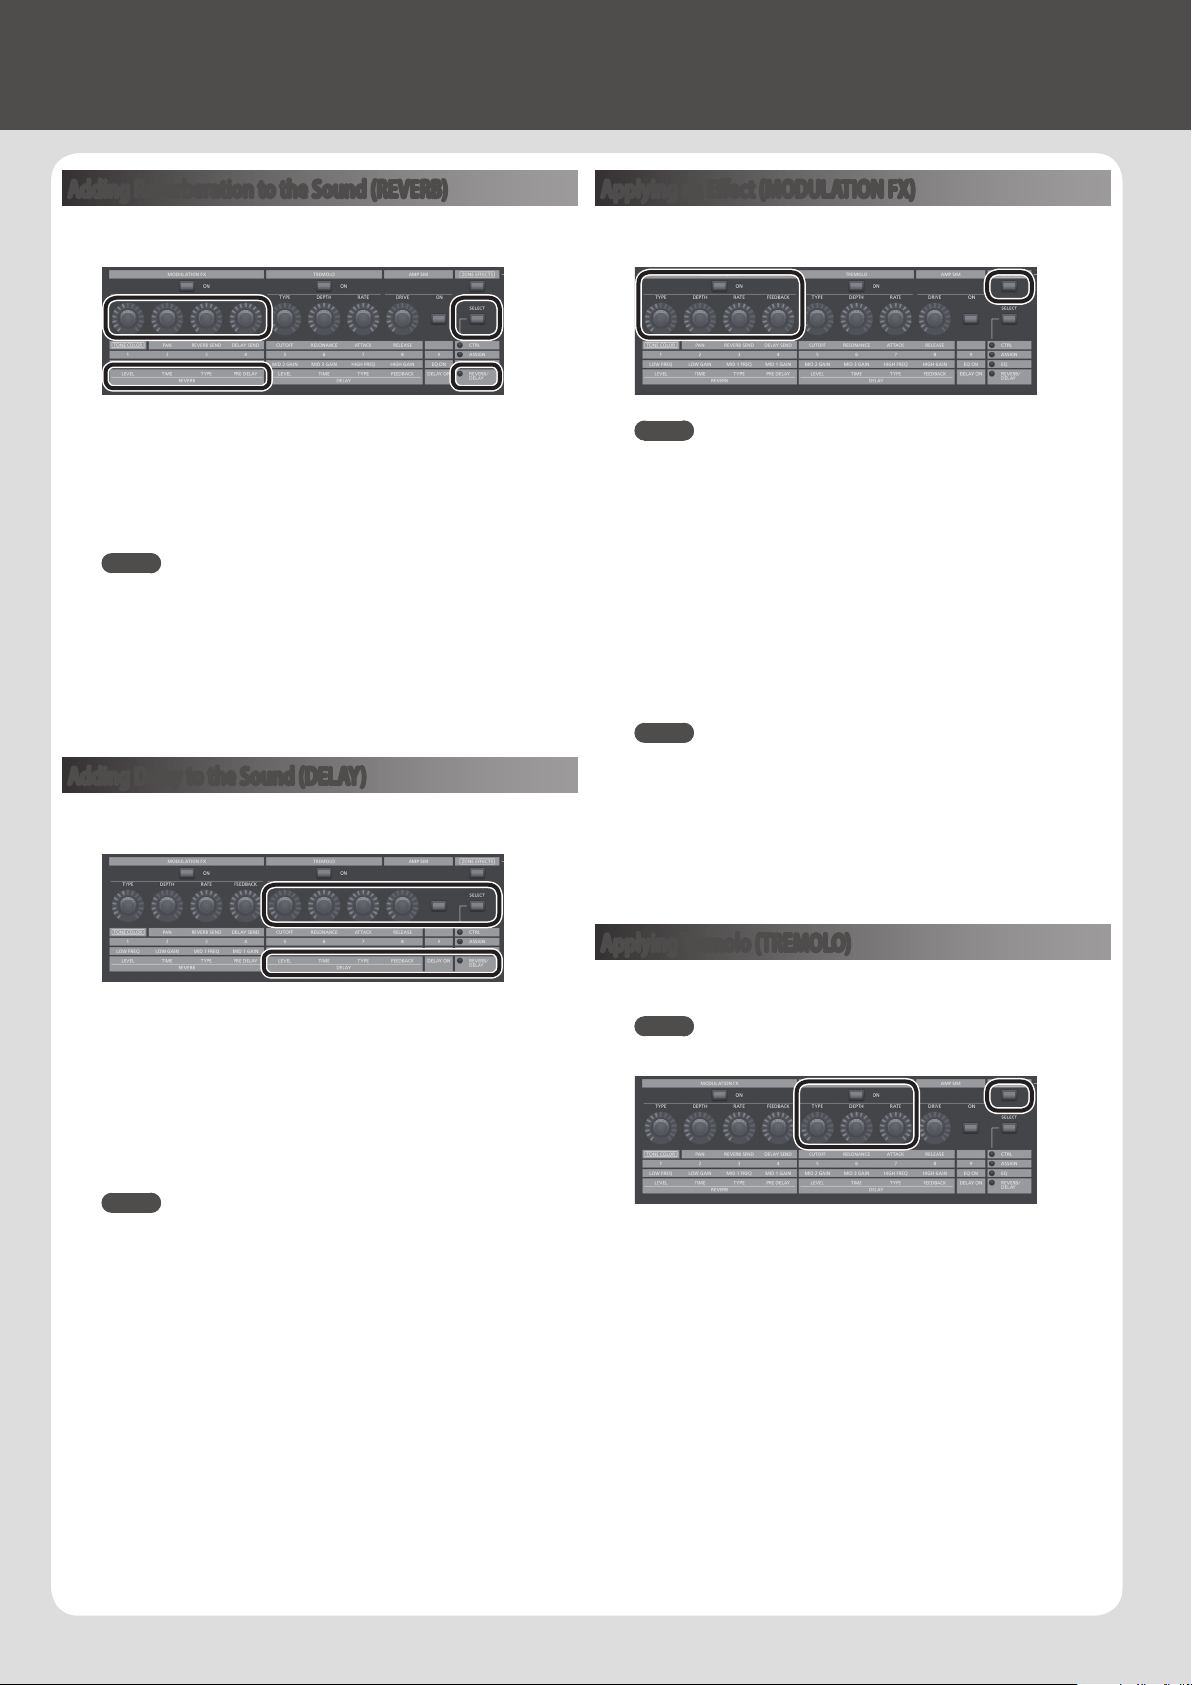
Adding Reverberation to the Sound (REVERB)
Applying reverb adds pleasing reverberation to what you play, so it
sounds almost as if you were playing in a concert hall.
1. Press the ZONE EFFECTS [SELECT] button several times, to select
the “REVERB/DELAY.”
2. Turn the REVERB [TYPE] knob, to select the reverb type.
3. Turn the REVERB [LEVEL], [TIME] and [PRE DELAY] knobs to
adjust the amount of reverb eect to be applied.
MEMO
5 If you use the ZONE EFFECTS [SELECT] button to select “CTRL,” the
[REV SEND] knob can adjust the reverb send level. If this value is
“0,” turning the REVERB [LEVEL]–[PRE DELAY] knobs has no eect.
&
REV (Reverb Send Level) in the zone settings (ZONE EDIT)
5 If you hold down the [SHIFT] button and turn the REVERB
[LEVEL]–[PRE DELAY] knobs, the Reverb screen appears. In the
Reverb screen, you can edit the reverb type and other reverb-
related parameters.
Adding Delay to the Sound (DELAY)
By adding the delay eect, you can give the sound greater dimension,
with more fatness and breadth.
1. Press the ZONE EFFECTS [SELECT] button several times, to select
the “REVERB/DELAY.”
2. Press the [DELAY ON] button to make the indicator light.
The delay eect will turn on/o each time you press the button.
3. Turn the DELAY [TYPE] knob, to select the delay type.
4. Turn the DELAY [LEVEL], [TIME] and [FEEDBACK] knobs to adjust
the character of the delay eect.
MEMO
If you use the ZONE EFFECTS [SELECT] button to select “CTRL,” the
[DLY SEND] knob can adjust the delay send level. If this value is “0,”
turning the DELAY [LEVEL]–[FEEDBACK] knobs has no eect.
&
“DLY (Delay Send Level)” in the zone settings (ZONE EDIT)
Applying an Eect (MODULATION FX)
In the MODULATION FX section you can apply a variety of eects such
as modulation-type eects to zones 1–4.
MEMO
Eects cannot be applied to zones 5–8.
1. Press the [ZONE EFFECTS] button to make the indicator light.
2. In the MODULATION FX section, press the [ON] button to make
the indicator light.
The eect will turn on/o each time you press the button.
3. In the MODULATION FX section, turn the [TYPE] knob to select
the eect type.
For a list of the eects that can be used in modulation FX, refer to
“Parameter Guide (English)” (PDF).
4. In the MODULATION FX section, turn the [DEPTH], [RATE] and
[FEEDBACK] knobs to adjust the eect.
MEMO
For details on the eect parameters, refer to “Parameter Guide
(English)” (PDF). For details on how to obtain the PDF, refer to
“Obtaining PDF Manuals” on the front cover.
* You can assign this to a pedal by setting the Program Edit
“Pedal” parameter. In this case, if the SYSTEM setting “Control
Destination” is set to PROGRAM, you can control the tones
whose zone setting (ZONE EDIT) has a check mark for “MOD FX
(Modulation FX Control Destination).”
Applying Tremolo (TREMOLO)
In the TREMOLO section, you can adjust the rate and depth of the
tremolo eect.
MEMO
Tremolo is applied only to zones 1–4. It does not apply to zones 5–8.
1. Press the [ZONE EFFECTS] button to make the indicator light.
2. In the TREMOLO section, press the [ON] button to make the
indicator light.
The tremolo will turn on/o each time you press the button.
3. In the TREMOLO section, turn the [TYPE] to select the tremolo
waveform.
4. In the TREMOLO section, turn the [DEPTH] and [RATE] knobs to
adjust the tremolo.
17
Owner’s Manual
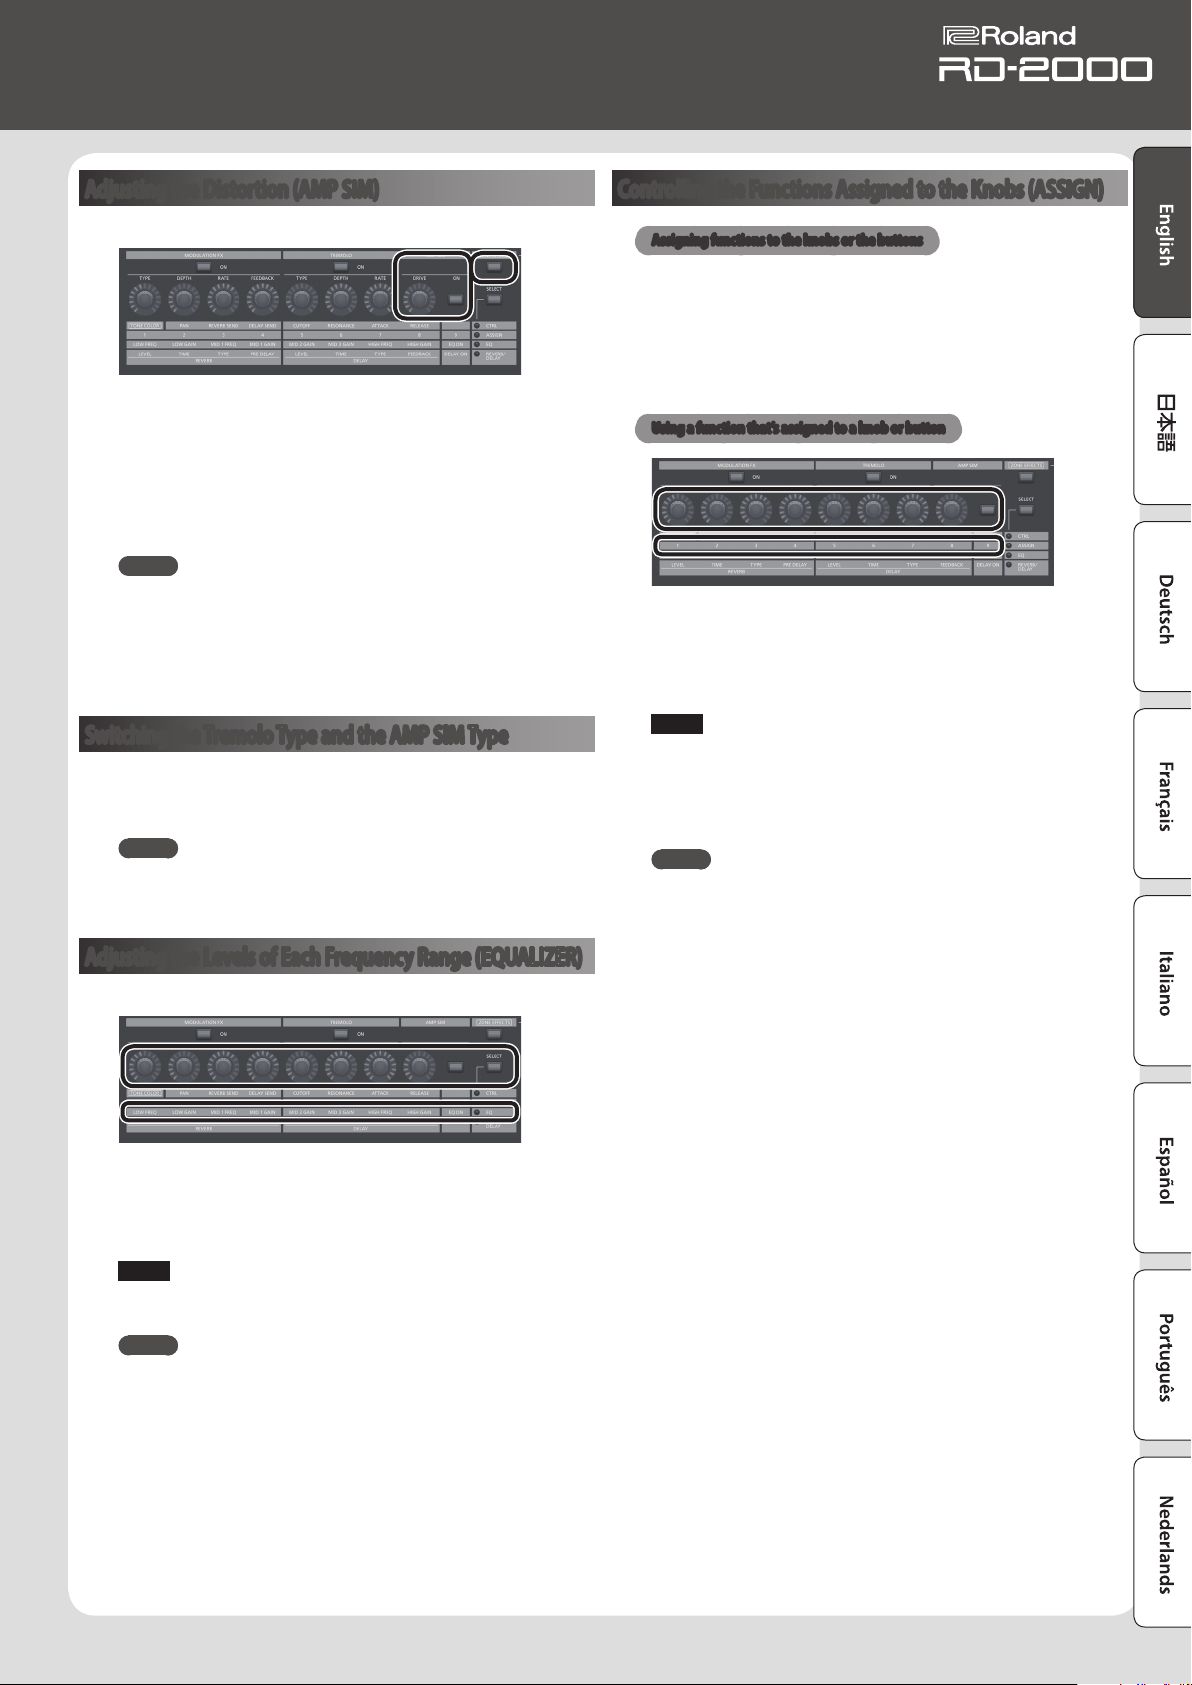
Adjusting the Distortion (AMP SIM)
In the AMP SIM section, you can adjust the amount of distortion.
1. Press the [ZONE EFFECTS] button to make the indicator light.
2. In the AMP SIM section, press the [ON] button to make the
indicator light.
The amp simulator will turn on/o each time you press the button.
3. In the AMP SIM section, turn the [DRIVE] knob to adjust the
amount of distortion.
MEMO
You can assign tremolo and amp simulator to a pedal by editing the
Program Edit “Pedal” parameter.
In this case, if the SYSTEM setting “Control Destination” is set
to PROGRAM, you can control the tones whose zone setting
(ZONE EDIT) has a check mark for “TR/AMP (Tremolo/Amp Control
Destination).”
Switching the Tremolo Type and the AMP SIM Type
1. While holding down the TREMOLO [ON/OFF] button or the AMP
SIM [ON/OFF] button, press the [INC] [DEC] buttons or turn the
value dial.
MEMO
For more about tremolo and amp simulator, refer to “Parameter
Guide (English)” (PDF). For details on how to obtain the PDF, refer to
“Obtaining PDF Manuals” on the front cover.
Adjusting the Levels of Each Frequency Range (EQUALIZER)
The RD-2000 is equipped with a ve-band equalizer.
1. Use the ZONE EFFECTS [SELECT] button to select “EQ.”
2. Press the [EQ ON] button to make the indicator light.
3. Turn the knobs to adjust the levels in each range.
NOTE
Sounds may be distorted with certain knob settings. If this occurs,
adjust the Input Gain.
MEMO
5 You can specify that the equalizer settings do not change even
when you switch programs. In “system settings,” set EQ Mode
(p. 26) to “REMAIN.”
5 For details on the equalizer, refer to the “Parameter Guide
(English)” (PDF).
For details on how to obtain the PDF, refer to “Obtaining PDF
Manuals” on the front cover.
Controlling the Functions Assigned to the Knobs (ASSIGN)
Assigning functions to the knobs or the buttons
1. Use the ZONE EFFECTS [SELECT] button to select “ASSIGN.”
2. Hold down the [SHIFT] button and turn one of the ASSIGN
[1]–[8] knobs. Or, hold down the [SHIFT] button and press the
ASSIGN [9] button.
The Assign1-9 screen appears. Here you can specify the functions that
are assigned to the ASSIGN [1]–[8] knobs and the ASSIGN [9] button.
Using a function that’s assigned to a knob or button
1. Use the ZONE EFFECTS [SELECT] button to select “ASSIGN.”
2. Turn the ASSIGN [1]–[8] knobs to adjust the depth of the eect.
By pressing the ASSIGN [9] button, you can switch the eect of the
assigned function.
NOTE
Each eect is applied only to the zone that’s selected by SELECT.
If the SYSTEM setting “Control Destination” is set to PROGRAM,
operating the various ASSIGN knobs or the ASSIGN [9] button does
not apply an eect to zones whose zone setting (ZONE EDIT) “A1–A9
(Assign 1–9 Control Switch)” check box is not selected.
MEMO
Depending on the state of the selected program or tone, the
assigned function might not be supported, so that you might not
obtain the eect you expect.
The values that are recalled when you switch sounds will be either
the default values or the most recently-operated value.
18
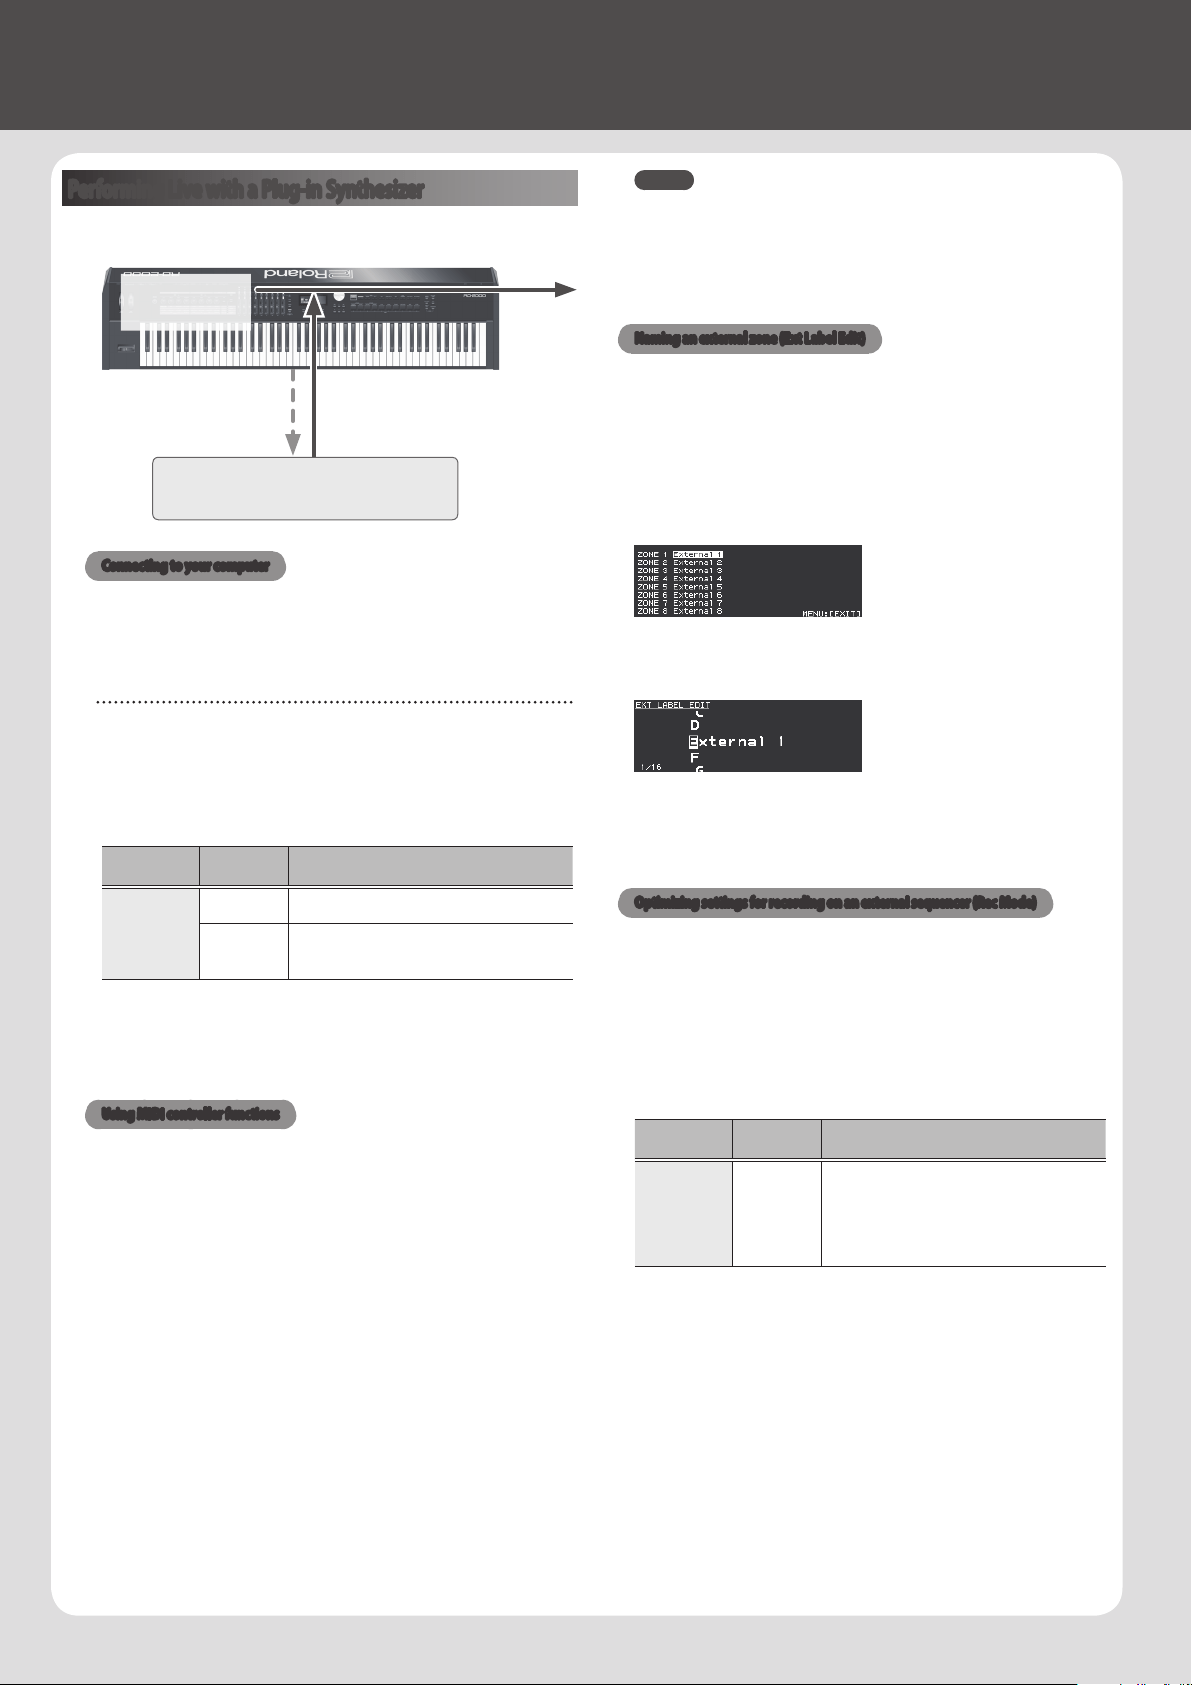
Performing Live with a Plug-in Synthesizer
Here’s how you can use the RD-2000 to play a plug-in synthesizer that’s
installed on your computer.
Performance data
for external zones
(USB MIDI)
Audio from the
computer (USB audio)
Performance using
internal zones
(audio)
Plug-in synthesizer
installed on the computer
Output
Connecting to your computer
In order to use the RD-2000, you need to download the driver from the
following URL and install it on your computer.
For details on installation, refer to the Roland website.
&
http://www.roland.com/support/
USB driver settings
Here’s how to specify the USB driver that’s used when connecting the
RD-2000 to your computer via the USB COMPUTER port.
1. In the MENU screen, select “SYSTEM” and press the [ENTER]
button.
2. Set the “USB Driver” parameter to “VENDER.”
Parameter
[
K
] [
J
]
Value
[DEC] [INC]
Explanation
USB Driver
VENDER
Choose this if you want to use a USB driver
downloaded from the Roland website.
GENERIC
Choose this if you want to use the standard USB
driver that was included with your computer.
* Only MIDI is available.
3. Save the setting.
&
“Saving the system settings” (p. 26)
4. Turn the power of the RD-2000 o, then on again.
Using MIDI controller functions
Data produced by operating the RD-2000’s knobs and keyboard can be
transmitted as MIDI messages from the RD-2000’s MIDI OUT connector
and from USB MIDI OUT.
1. Press the SELECT button of the zone that you want to transmit
MIDI.
2. Hold down the [SHIFT] button, and press the INT/EXT button of
the selected zone several times to make it light green.
MIDI messages are transmitted according to the settings of the zone.
MIDI messages are not transmitted if the button is unlit or lit red.
3. Press the ZONE EFFECTS [SELECT] button several times to select
“CTRL” or “ASSIGN.”
Knob [1]–[8] information is transmitted if “CTRL” or “ASSIGN” are
selected.
If “EQ” or “REVERB/DELAY” are selected, MIDI messages are not
transmitted.
4. Make the slider [LEVEL] button or [ASSIGN] button light.
Sliders [S1]–[S8] transmit MIDI messages according to the state of the
[LEVEL] button or [ASSIGN] button.
MEMO
You can make detailed settings in the “EXTERNAL” tab of ZONE EDIT
(p. 21).
5. Save the specied settings as a scene or program.
&
“Registering a scene” (p. 15)
&
“Saving the Sound Settings in a Program (Program Write)” (p. 23)
Naming an external zone (Ext Label Edit)
You can assign a label to each external zone.
These labels are shown as the external device name in various screens.
1. Press the [MENU] button.
2. Use the Cursor buttons to select “Ext Label Edit,” and then press
the [ENTER] button.
3. Select the zone that you want to name, and press the [ENTER]
button.
If you decide to cancel, press the [EXIT] button.
4. Assign a name and press the [ENTER] button.
For details on how to enter a name, refer to “Saving the Sound Settings
in a Program (Program Write)” (p. 23).
A conrmation message appears.
If you decide to cancel, press the [EXIT] button.
Optimizing settings for recording on an external sequencer (Rec Mode)
If you’re using an external sequencer to record internal parts, it’s
convenient to use the Rec Mode function.
The Rec Mode function lets you use settings that are optimal for
recording to an external sequencer, without having to edit the zone or
channel settings.
1. In the MENU screen, select “Local Control” and press the [ENTER]
button.
2. Set the Rec Mode parameter.
Parameter
[
K
] [
J
]
Value
[DEC] [INC]
Explanation
Rec Mode OFF, ON
When this is set to ON, settings appropriate for
recording are used with respect to the output
from MIDI OUT, regardless of the INTERNAL
layer settings. Ordinarily, this should be set to
OFF.
(OFF when the system is started up)
19
Owner’s Manual
Using USB Audio
You can connect the RD-2000 via USB to a computer, and use it to
handle audio signals.
To use USB audio functionality, install the “VENDER” driver.
&
For details, refer to “Connecting to your computer” (p. 18).
Adjusting the USB audio input
Here’s how to make settings for audio that’s input from a USB-
connected computer.
1. In the ZONE area, press the SELECT [USB-AUDIO] button.
The USB-AUDIO menu appears.
2. Use the cursor buttons to select “USB Audio Input Switch.”
3. Use the [DEC] [INC] buttons or the value dial to turn the setting
“ON.”
Audio input from the connected device turns on.
4. Use the cursor buttons to select “USB Audio Input Volume,” and
use the [DEC][INC] buttons or the value dial to adjust the input
level.
MEMO
If “USB Audio In/Out Select” is set to IN, you can also use the slider to
adjust the value.
Adjusting the USB audio output
Here’s how to output the RD-2000’s audio to a USB-connected
computer.
1. In the ZONE area, press the SELECT [USB-AUDIO] button.
The USB-AUDIO menu appears.
2. Use the cursor buttons to select “USB Audio Output Switch.”
3. Use the [DEC] [INC] buttons or the value dial to turn the setting
“ON.”
Audio output to the connected device turns on.
4. Use the cursor buttons to select “USB Audio Output Level,” and
use the [USB-AUDIO] slider to adjust the output level.
You can also use the [DEC] [INC] buttons or the value dial to change
the value.
Using the panel controls to adjust USB audio
Here’s how to choose whether the panel button, knob, and slider will
control the input or the output.
1. In the ZONE area, press the SELECT [USB-AUDIO] button.
The USB-AUDIO menu appears.
2. Use the cursor buttons to select “USB Audio In/Out Select.”
3. Use the [DEC] [INC] buttons or the value dial to change the
setting.
The color of the INT/EXT button changes depending on the setting.
USB Audio In/Out Select [INT/EXT] button color
INPUT Green
OUTPUT Red
MEMO
You can also change the setting by holding down the [SHIFT] button
and pressing the INT/EXT button in the ZONE area.
Using SUB OUT
As output destinations for audio signals, the RD-2000 provides SUB
OUT jacks in addition to the MAIN OUT jacks.
As appropriate for your situation, you can use these jacks to output
audio signals from zones or from USB audio.
NOTE
5 MASTER VOLUME does not aect audio signals that are output to
SUB OUT.
The audio output level is determined by the level setting of each
zone.
5 Reverb and delay do not apply to audio signals that are output to
SUB OUT.
Settings for each zone
1. Hold down the [SHIFT] button and press a SELECT [1]–[8]
button.
The ZONE EDIT screen appears.
2. Use the cursor buttons to select the “VOL” tab for “INTERNAL.”
3. Use the cursor buttons to select the item that you want to edit,
and use the [DEC][INC] buttons or the value dial to select the
value.
MAIN The audio signal is output from the MAIN OUT jacks.
SUB The audio signal is output from the SUB OUT jacks.
4. Use the sliders to adjust the level of the specied zones.
USB audio settings
1. In the ZONE area, press the SELECT [USB-AUDIO] button.
The USB-AUDIO menu appears.
2. Use the cursor buttons to select “USB Audio Output Assign,” and
use the [DEC] [INC] buttons or the value dial to select the value.
MAIN The USB audio signal is output from the MAIN OUT jacks.
SUB The USB audio signal is output from the SUB OUT jacks.
3. Use the cursor buttons to select “USB Audio In/Out Select,” and
use the [DEC][INC] buttons or the value dial to select “IN.”
4. Use the slider to adjust the USB audio output LEVEL.
Temporarily outputting from the MAIN OUT jacks
The audio signals that are output from the SUB OUT jacks can also be
output from the MAIN OUT jacks.
NOTE
5 Reverb and delay do not apply to zones that are assigned to the
SUB OUT jacks.
5 If this is set to “MIX,” sound is no longer output from the SUB OUT
jacks.
5 If this is set to “MIX,” the MASTER VOLUME aects the sound.
1. In the MENU screen, select “SYSTEM” and press the [ENTER]
button.
The SYSTEM EDIT screen appears.
2. Use the cursor [
K
] [
J
] buttons to select “SYSTEM” tab.
3. Use the cursor buttons to select “Output Mix/Parallel,” and use
the [INC][DEC] buttons or the value dial to select the value.
MIX
Audio signals are output from the MAIN OUT jacks regardless of
the setting.
PARALLEL
Audio signals are output from the MAIN OUT jacks or from the
SUB OUT jacks depending on the setting.
20
Editing the Sound
Adjusting the Character of the Sound (TONE COLOR)
Turning the [TONE COLOR] knob will modify an aspect of the sound,
such as its character or acoustic image.
1. Use the ZONE EFFECTS [SELECT] button to select “CTRL.”
2. Use the [TONE COLOR] knob to adjust the amount of eect.
MEMO
5 The popup indication will dier depending on the eect.
5 When you select a tone or program, the settings will return to the
Tone Color default values of each tone.
NOTE
The eect that changes when you turn a knob can be specied
for each program. To specify this, change the System setting
“Control Destination” to “PROGRAM,” and then use the zone setting
(ZONE EDIT) “TON CLR (Tone Color Control Destination)” to select the
zone whose eect you want to change.
MEMO
The adjusted sound can be saved in the program by pressing the
[WRITE] button (p. 23).
Main Eects for Tone Color
5 Stereo Width & Pan Key Follow
5 Morphing
5 Boost
5 Harmonic Bar
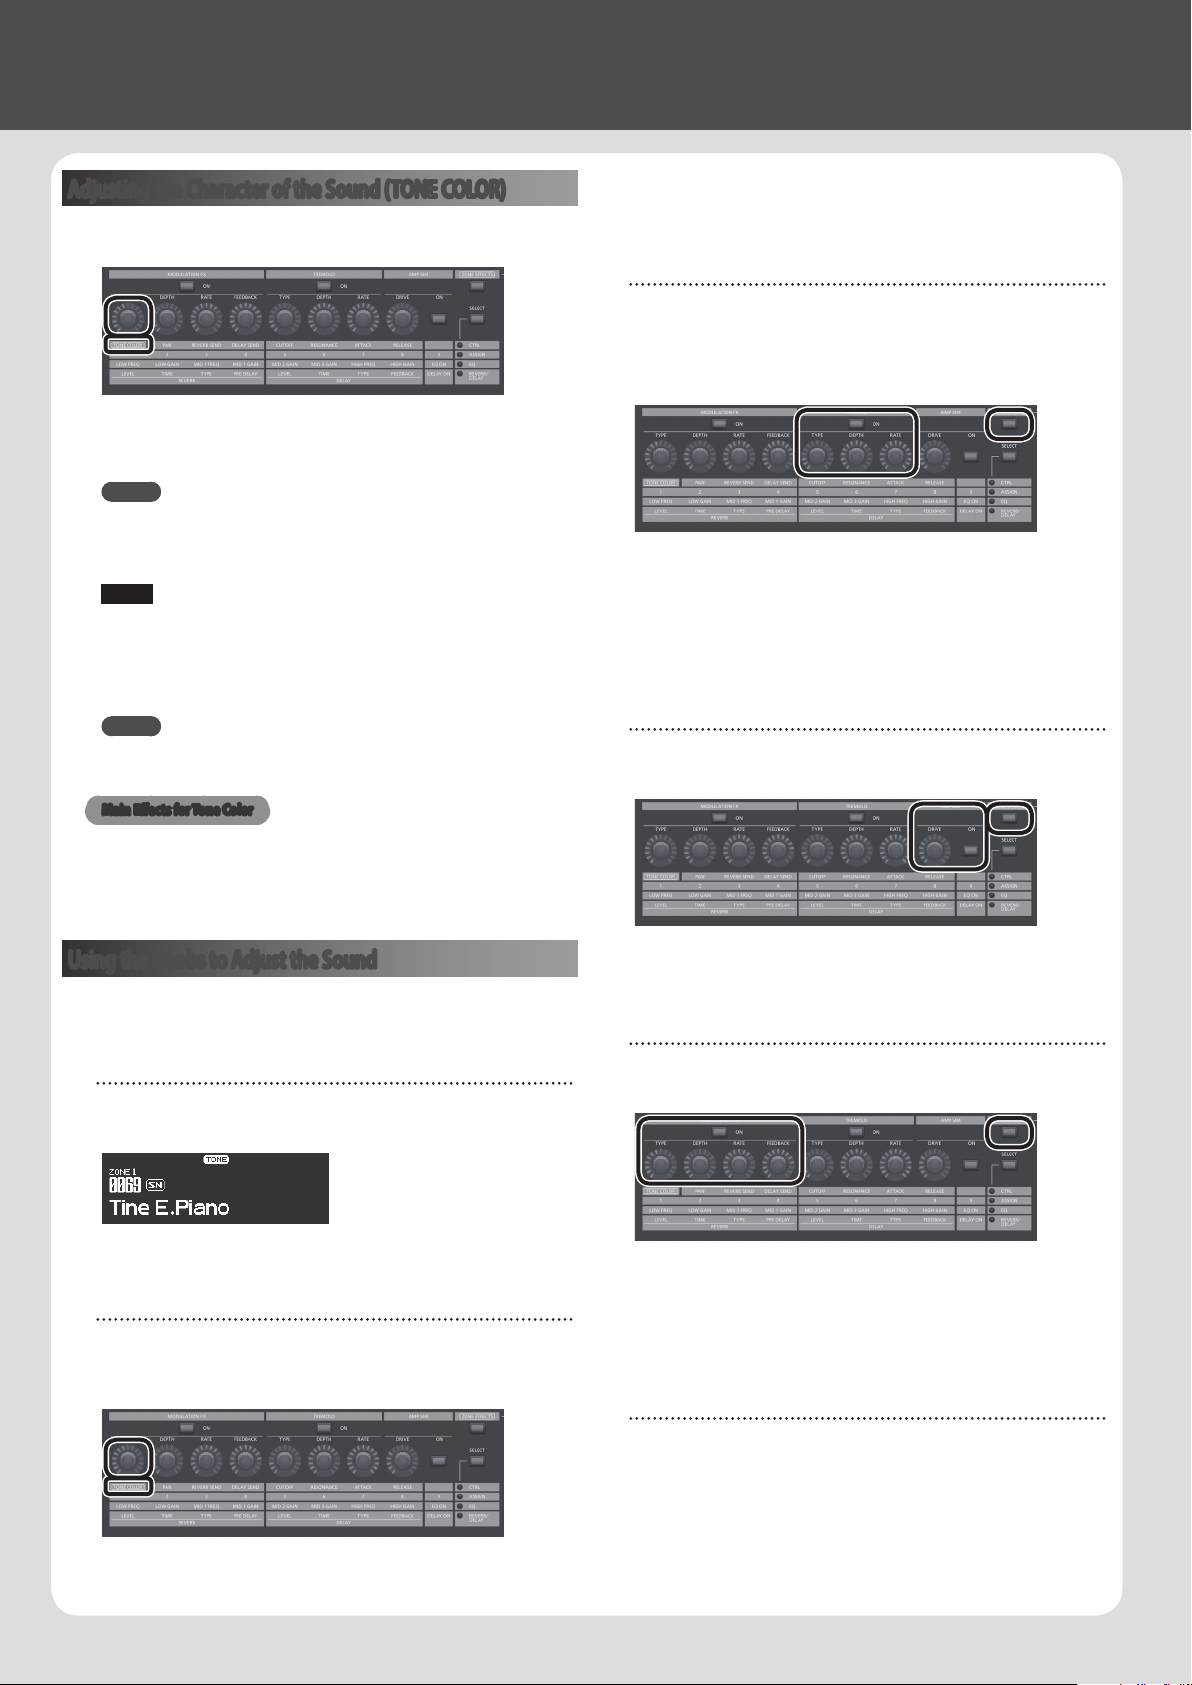
Using the Knobs to Adjust the Sound
The RD-2000 lets you easily adjust the sound to your taste.
Here’s an actual example that shows the steps of adjusting the sound
of the RD-2000 and the features that are available.
Selecting a sound
1. In the TONE screen (p. 7), use the [DEC] [INC] buttons or value
dial to select the tone 0069 “Tine E.Piano.”
A pleasant-sounding electric piano tone with a mellow feel often used
in pop or jazz is selected.
Adjusting the tonal color of the sound
2. Press the ZONE EFFECTS [SELECT] button several times to make
the CTRL LED light. Turn the [TONE COLOR] knob all the way to
the left, and then gradually turn it toward the right.
The character of the sound changes; the attack will initially be soft,
but this will gradually become harder, nally transforming into a very
brilliant sound.
Adjust the character to your taste.
Adjusting the tremolo
3. Press the [ZONE EFFECT] button to make it light.
4. Press the TREMOLO [ON] button to make it light, turning it on.
Then adjust the tremolo eect, which makes the sound sway
between left and right.
Turning the TREMOLO [RATE] knob changes the speed at which the
sound moves between left and right.
Turning the TREMOLO [DEPTH] knob changes the amount by which
the sound moves between left and right. Adjust the tremolo as
appropriate for the song you’re playing.
If you don’t want tremolo, turn the TREMOLO [ON/OFF] button o to
make it go dark.
Adjusting the amp simulator
5. Press the AMP SIM [ON/OFF] button to turn it on and make it
light; then turn the AMP SIM [DRIVE] knob.
Turning the knob toward the right adds distortion to the sound.
Although you’re free to make the sound distort intensely, you might
want to add just a bit of distortion as a subtle edge.
Adjusting the modulation FX
6. Press the MODULATION FX [ON/OFF] button to turn it on and
make it light.
This lets you apply an eect.
Use the MODULATION FX [RATE] knob and MODULATION FX [DEPTH]
knob to adjust the settings to your taste.
You can also switch the MODULATION FX type by holding down the
MODULATION FX [ON/OFF] button and using the [DEC] [INC] buttons
or the VALUE dial.
Saving the sound you created
7. When you’ve adjusted the sound to your liking, save it as a
program.
&
“Saving the Sound Settings in a Program (Program Write)” (p. 23)
Next time, you can simply select the saved program and immediately
start playing the sound that you adjusted to your taste.
21
Owner’s Manual
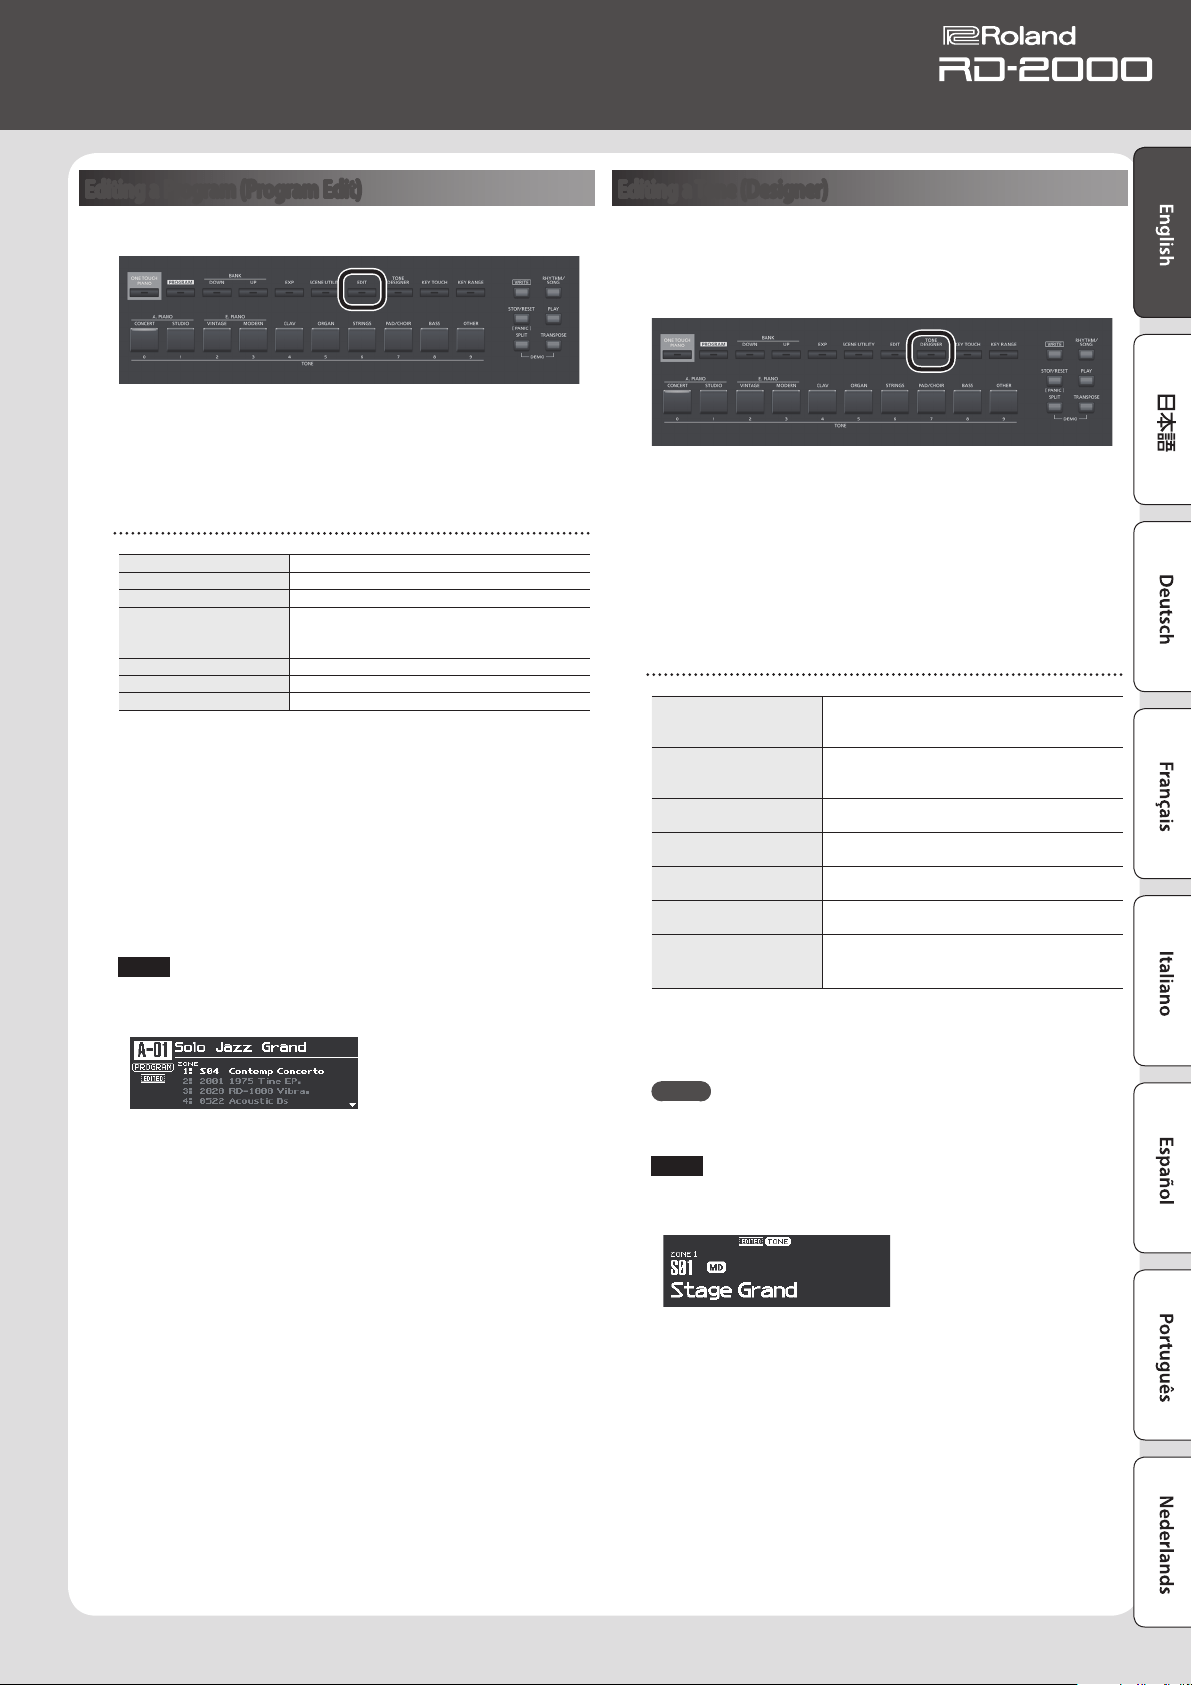
Editing a Program (Program Edit)
1. In the PROGRAM screen, press the [EDIT] button.
The PROGRAM EDIT MENU screen appears.
2. Use the cursor buttons to select the item that you want to edit,
and press the [ENTER] button.
The corresponding edit screen appears.
Program Edit Menu
Zone Edit Makes settings for each zone (1–8).
Key Touch Edits the keyboard touch sensitivity.
Pedal Edits the pedal settings.
Assign
Species the function of the modulation wheels,
sliders, ASSIGN [1]–[8] knobs, and ASSIGN [9]
button.
Reverb Edits the reverb settings.
Delay Edits the delay settings.
EQ Edits the equalizer settings.
&
For details on the program edit, refer to “Parameter Guide
(English)” (PDF). For details on how to obtain the PDF, refer to
“Obtaining PDF Manuals” on the front cover.
3. Select the parameter that you want to edit, and use the [DEC]
[INC] buttons or the value dial to edit the value.
Press the [EXIT] button to return to the PROGRAM EDIT Menu screen.
4. Repeat steps 2–3 to continue editing.
5. When you’ve nished making settings, press the [EXIT] button
several times to return to the Tone screen or the Program screen.
NOTE
If you’ve edited the settings, an “EDITED” indication is shown in the
Program screen or the Tone screen.
If you turn o the power, select another Program, or select another
tone in the Tone screen while the “EDITED” indication is shown, the
edits you made are discarded. If you want to keep your edits, press
the [WRITE] button to save the Program (p. 23).
Editing a Tone (Designer)
By using the Designer function, you can make more detailed settings
for a tone.
1. Use the SELECT [S1]–[S8] buttons to select a zone, and press the
[TONE DESIGNER] button.
The TONE DESIGNER MENU screen (in the case of TW-Organ sounds,
the Tone Wheel & Designer Menu screen) of the selected ZONE
appears.
In the Designer menu you’ll choose the broad category of tone
settings that you want to edit.
2. Use the cursor buttons to select the item that you want to edit,
and press the [ENTER] button.
The corresponding edit screen appears.
Designer Menu
Piano Designer (only for
certain piano sounds)
Lets you create your own personalized piano
sound by adjusting various aspects of a piano’s
tonality.
Tone Designer (other than
certain piano sounds)
Edits detailed settings of the piano sound. The
editable parameters will depend on the piano
sound that is selected.
Indiv. Voicing (only for
certain piano sounds)
Edits the pitch, volume, and character of each key.
Sym. Resonance (only for
certain piano sounds)
Edits the sympathetic resonances that are heard
when you hold down the damper pedal.
Modulation FX
Edits parameters that are related to Modulation
FX.
Tremolo /AMP Sim
Edits parameters that are related to tremolo and
amp simulator.
TONE WHEEL&Designer
Menu
(TW-Organ sounds only)
Edits TW-Organ sounds.
&
For details on the designer, refer to “Parameter Guide (English)”
(PDF). For details on how to obtain the PDF, refer to “Obtaining PDF
Manuals” on the front cover.
MEMO
The items that you can set will dier depending on the type of
sound.
NOTE
If you’ve edited the settings, an “EDITED” indication is shown in the
Program screen or the Tone screen.
If you turn o the power, select another Program, or select another
tone in the Tone screen while the “EDITED” indication is shown, the
edits you made are discarded. If you want to keep your edits, press
the [WRITE] button to save the Program (p. 23).
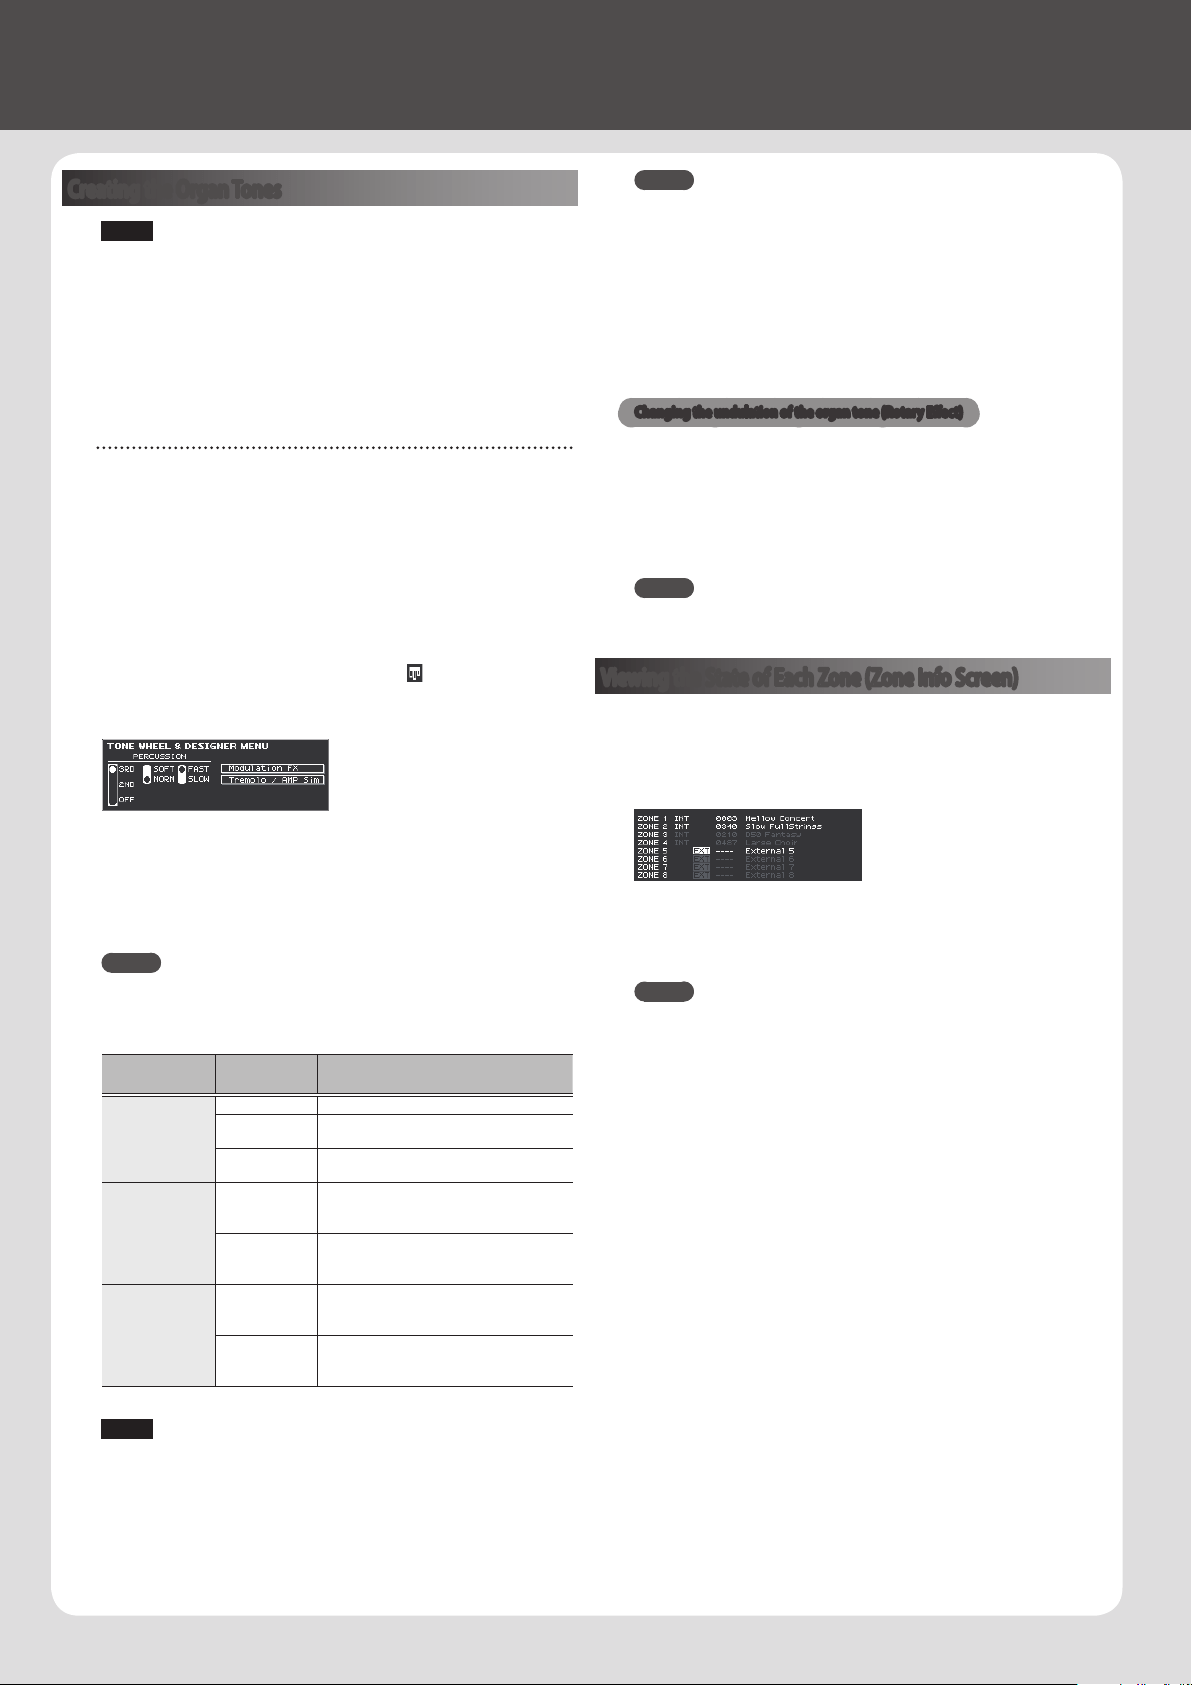
22
Creating the Organ Tones
NOTE
These settings are available only when a TW-Organ sound is selected.
Some organ feature nine “harmonic bars” that can be drawn in and out,
and by using the bars in dierent combinations of positions, a variety
of dierent tones can be created. Dierent “Feet” are assigned to each
bar, with the pitches of the sounds being determined by these “Feet.”
You can create of tones using the Layer LEVEL sliders just as you
operate the harmonic bars.
What are “ feet?”
Feet basically refers to the lengths of pipe used in pipe organs.
The length of pipe used to produce the reference pitch (the
fundamental) for the keyboard is eight feet. Reducing the pipe to half
its length produces a pitch one octave higher; conversely, doubling
the pipe length creates a pitch one octave lower.
Therefore, a pipe producing a pitch one octave below that of the
reference of 8’ (eight feet) would be 16’; for one octave above the
reference, the pipe would be 4’, and to take the pitch up yet another
octave it would be shortened to 2’.
1. Use the SELECT [S1]–[S8] buttons to select the zone to which
a TW Organ sound (a sound for which the icon is shown) is
assigned; then hold down the [SHIFT] button and press the
“SCENE” button.
The Tone Wheel & Designer Menu screen of the selected layer appears.
2. Move the LAYER LEVEL sliders.
The sound changes in tandem with the indication in the screen.
You can use the cursor [K] [J] buttons to switch between harmonic bar
and percussion switch groups.
MEMO
Percussion adds a sound with a sense of attack at the beginning
of the note, giving the sound a crisper feel. The attack sound will
change depending on this value.
Parameter
[
K
] [
J
]
Value
[DEC] [INC]
Explanation
Percussion
Switch
OFF No percussion is added.
2nd
Percussion sounds at a pitch one octave
above that of the key pressed.
3rd
Percussion sounds at a pitch an octave and
a fth above that of the key pressed.
Percussion
Volume
Soft
The percussion sound is diminished, and
the harmonic bars produce their normal
volume.
Normal
The percussion sound will be at its normal
volume, and the sound of the harmonic
bars is diminished.
Percussion
Decay
Slow
The percussion’s attenuation time is
lengthened. This softens the sense of
attack.
Fast
The percussion sound decays more
quickly. This gives more of a sense of
attack for a sharp sound.
NOTE
When percussion is on, the 1’ pitch will not be produced.
MEMO
5 You can also use the cursor [
K
] [
J
] buttons to move the cursor to
the Modulation FX or Tremolo/Amp Simulator menu items.
5 When the cursor is located at Modulation FX or Tremolo/Amp
Simulator, you can go to the corresponding item by pressing
the [ENTER] button. For details on the eect parameters, refer to
“Parameter Guide (English)” (PDF). For details on how to obtain
the PDF, refer to “Obtaining PDF Manuals” on the front cover.
5 When a TW-Organ sound is selected, turning the [TONE COLOR]
knob will move all of the harmonic bars simultaneously.
Changing the undulation of the organ tone (Rotary Eect)
While the Tone Wheel & Designer Menu screen is displayed, you can
change the undulation rate of the Rotary eect with the Pitch Bend
lever. The Rotary eect is an eect that recreates the sound of the
rotating speakers used to augment the sound of an organ.
Moving the pitch bend lever to left or right will toggle the Rotary
eect between fast and slow regardless of the direction in which you
move the lever.
MEMO
This Pitch Bend Lever setting is eective only in the Tone Wheel &
Designer Menu screen.
Viewing the State of Each Zone (Zone Info Screen)
The zone info screen shows a list of each zone’s settings.
1. While in the tone screen, program screen, or scene screen, press
the [ENTER] button.
The settings of zones 1–8 appear.
Bright text: the zone is on.
Dim text: the zone is o.
2. Press the [EXIT] button to return to the previous screen.
MEMO
You can’t edit the settings in the zone info screen.
If you edit a sound or switch modes while this screen is displayed,
this screen closes and the necessary screen appears.
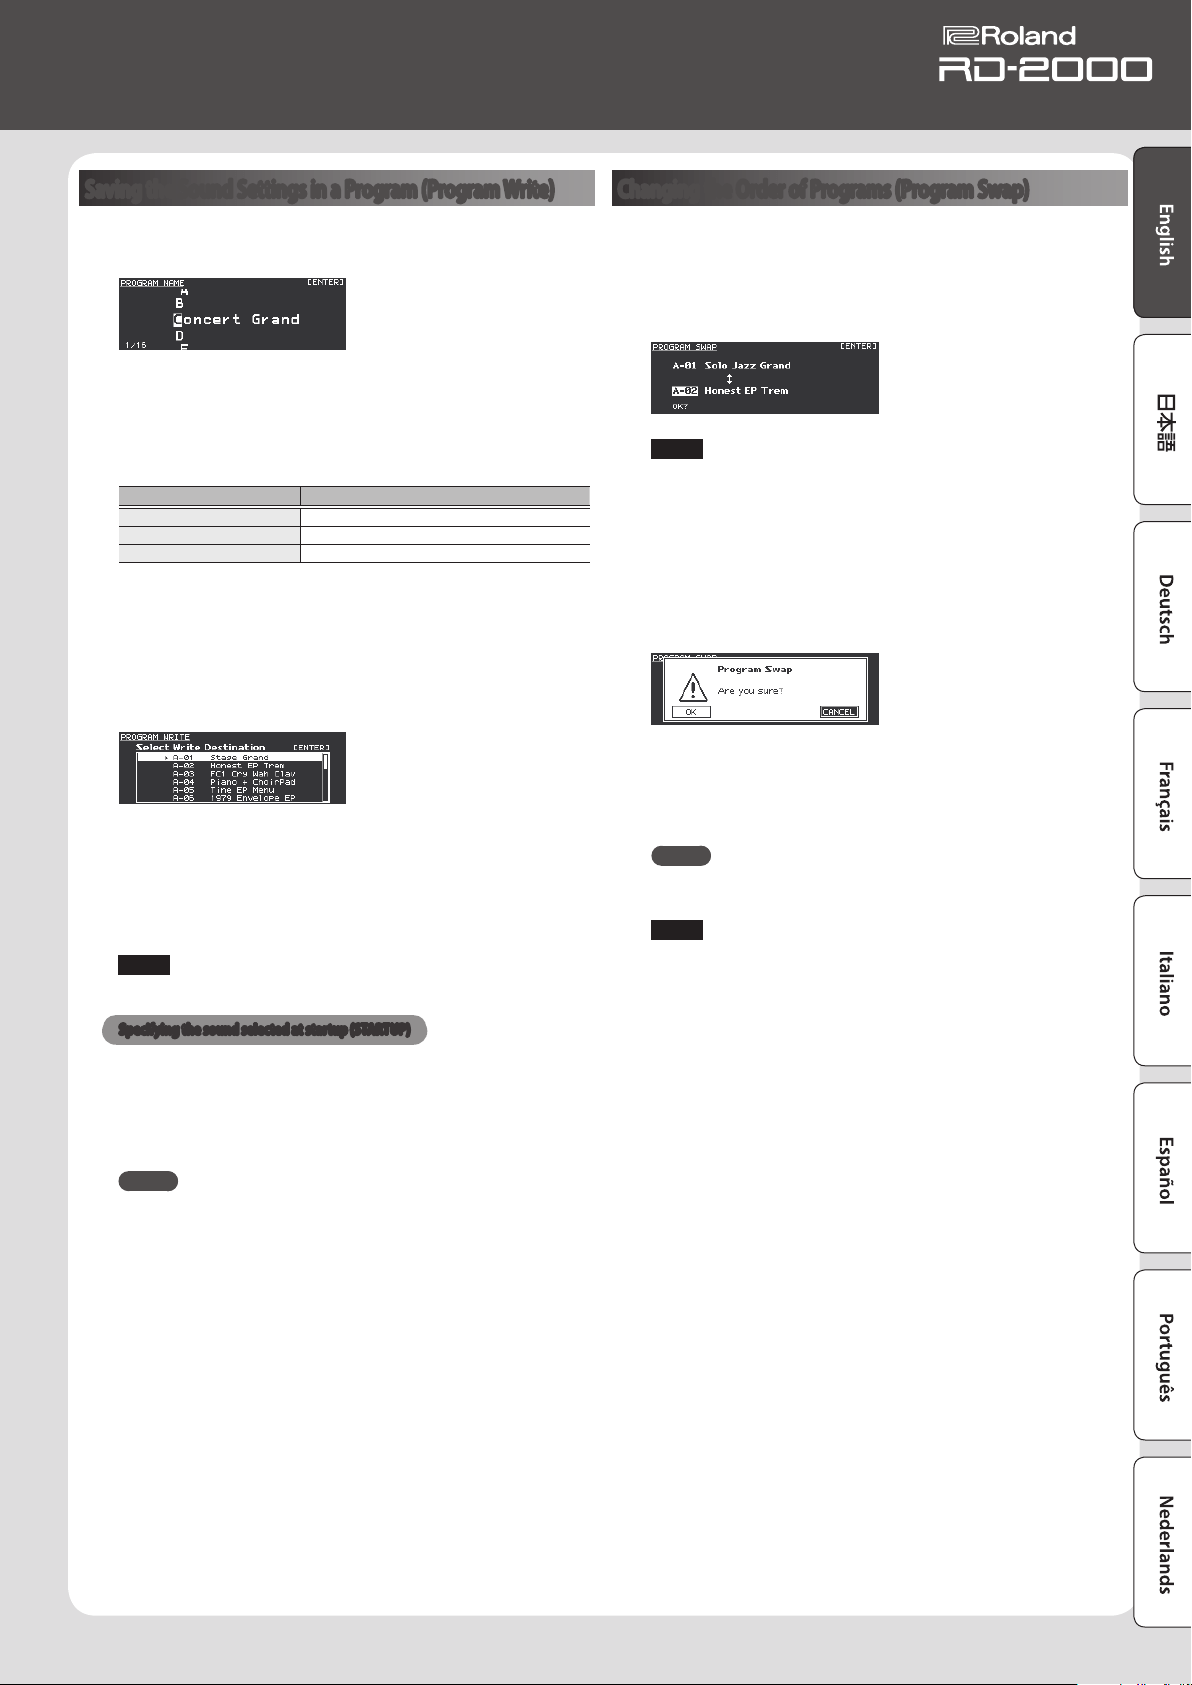
23
Owner’s Manual
Saving the Sound Settings in a Program (Program Write)
1. Press the [WRITE] button to make it light.
The PROGRAM NAME screen appears.
2. Use the cursor [
K
] [
J
] buttons to move the cursor to the position
at which you want to enter a character.
3. Use the [DEC] [INC] buttons or the value dial to enter the
characters.
Operation Explanation
[SHIFT] + [
K
] button
Delete one character (DELETE)
[SHIFT] + [
J
] button
Insert one space (INSERT)
[
H
] [
I
] buttons
Switch uppercase/lowercase
4. Repeat steps 2–3 to input the name.
5. When you have nished entering the name, press the [ENTER]
button.
6. Select the save-destination Program number, either by using
the [DEC] [INC] buttons or the value dial.
7. When you have specied the save-destination, press the
[ENTER] button.
A conrmation message appears.
8. Move the cursor to “OK” and press the [ENTER] button.
The program is saved.
NOTE
Never switch o the power while “Executing...” appears in the display.
Specifying the sound selected at startup (STARTUP)
The RD-2000 lets you specify the state (sound) in which it will power-
on.
1. Select the desired sound.
Selecting a TONE
&
“Selecting a tone” (p. 14)
Selecting a PROGRAM
&
“Selecting a program” (p. 15)
MEMO
When you register to STARTUP, it will also be called when you press
the [ONE TOUCH PIANO] button.
Even if you register the program, it’s called as the TONE.
When you register the program, the PROGRAM NAME is discarded.
2. Hold down the [WRITE] button and press the [ONE TOUCH
PIANO] button.
3. Move the cursor to “OK” and press the [ENTER] button.
The current setting will be saved to STARTUP.
The next time you start the RD-2000, it will start up with the STARTUP
condition (sound) that you saved.
Changing the Order of Programs (Program Swap)
You can arrange the Programs into the order you like.
It is convenient to arrange Programs in the order in which you’ll be
using them for your live performance.
1. From the MENU screen, choose “Program Utility”
0
“ S wa p.”
The Program Swap screen appears.
NOTE
You can’t use the Program Swap function in the following situations.
5 In the Menu screen, Write screen, or Demo screen.
5 When RHYTHM, AUDIO PLAY, or AUDIO REC are operating.
2. You can use the [INC] [DEC] buttons and value dial to change the
swap-destination Program.
3. Press the [ENTER] button.
A conrmation message appears.
4. Move the cursor to “OK” and press [ENTER] button to execute
the swap.
Repeat steps 2–4 as necessary.
If you decide to cancel Program Swap, press the [EXIT] button.
MEMO
When the Program Swap operation is completed, the swap-source
program number is selected.
NOTE
Never switch o the power while “Executing...” appears in the display.

24
Using the Convenient Functions in Performances
Playing Rhythm
1. Press the [RHYTHM/SONG] button to make it light.
The Song or Rhythm screen appears.
Each time you press the [RHYTHM/SONG] button, you’ll alternate
between the Song screen and the Rhythm screen.
2. Press the [RHYTHM/SONG] button several times to access the
Rhythm screen.
3. Press the [PLAY] button to make it light.
The rhythm will begin playing.
To stop the rhythm, press the [STOP/RESET] button.
NOTE
While the rhythm is playing, pressing the [SONG/RHYTHM] button
will not switch to the SONG screen.
Changing the rhythm pattern
1. In the Rhythm screen, move the cursor to the rhythm number in
the screen.
2. Use the [DEC] [INC] buttons or value dial to change the patterns,
and press the [ENTER] button.
For more about the rhythm patterns, refer to “Sound List” (PDF). For
details on how to obtain the PDF, refer to “Obtaining PDF Manuals” on
the front cover.
MEMO
A recommended drum kit will be selected for each rhythm pattern.
Changing the rhythm tempo or volume
1. In the Rhythm screen, move the cursor to Tempo or Rhythm
Volume.
2. Use the [DEC] [INC] buttons or the value dial to adjust the tempo
or rhythm volume.
Outputting to SUB OUT
1. In the Rhythm screen, move the cursor to Rhythm Output
Assign.
2. Use the [DEC][INC] buttons or the value dial to change the
output destination.
Recording Audio
Connecting the USB ash drive
1. Connect your USB ash drive (sold separately) to the USB
MEMORY port located on the back of the RD-2000.
Preparing to record
NOTE
Do not disconnect the USB ash drive during audio recording. Doing
so may cause all the data in the USB ash drive to be lost.
1. Select the tone or Program that you want to play (p. 14, p. 15).
2. Press the [RHYTHM/SONG] button several times to access the
SONG screen.
3. Hold down the [SHIFT] button and press the [RHYTHM/SONG]
button to initiate record-standby.
If the rhythm was sounding, it will stop. The [RHYTHM/SONG] button
will light, and the [PLAY] button will blink.
If you want to cancel recording, press the [STOP/RESET] button.
Start recording
1. Press the [PLAY] button.
The [PLAY] button will light, and recording will start.
Stop recording
1. Press the [STOP/RESET] button.
Recording will stop, and the recorded data will be saved on the USB
ash drive.
Recorded audio le format
File Extension WAV
Sampling Frequency 44.1 kHz
Bit Depth 16 -bit
Deleting the recorded data
1. Press the [PLAY] button to audition the song you recorded.
Press the [STOP/RESET] button once again to stop playback.
2. In the Song screen, move the cursor to Song Delete and press
the [ENTER] button.
3. Move the cursor to “OK” and press the [ENTER] button.
About USB ash drives
If you’re using a new USB ash drive, you must rst initialize (format)
it on the RD-2000. For details, refer to “Formatting Memory (Format)”
(p. 26).
NOTE
5 Never insert or remove the USB ash drives while this unit is
turned on. Doing so may corrupt the unit’s data or the data on
the ash drives.
5 Use a commercially available USB ash drive or a USB ash
drive sold by Roland. However, we cannot guarantee that all
commercially available USB ash drives will work with this unit.
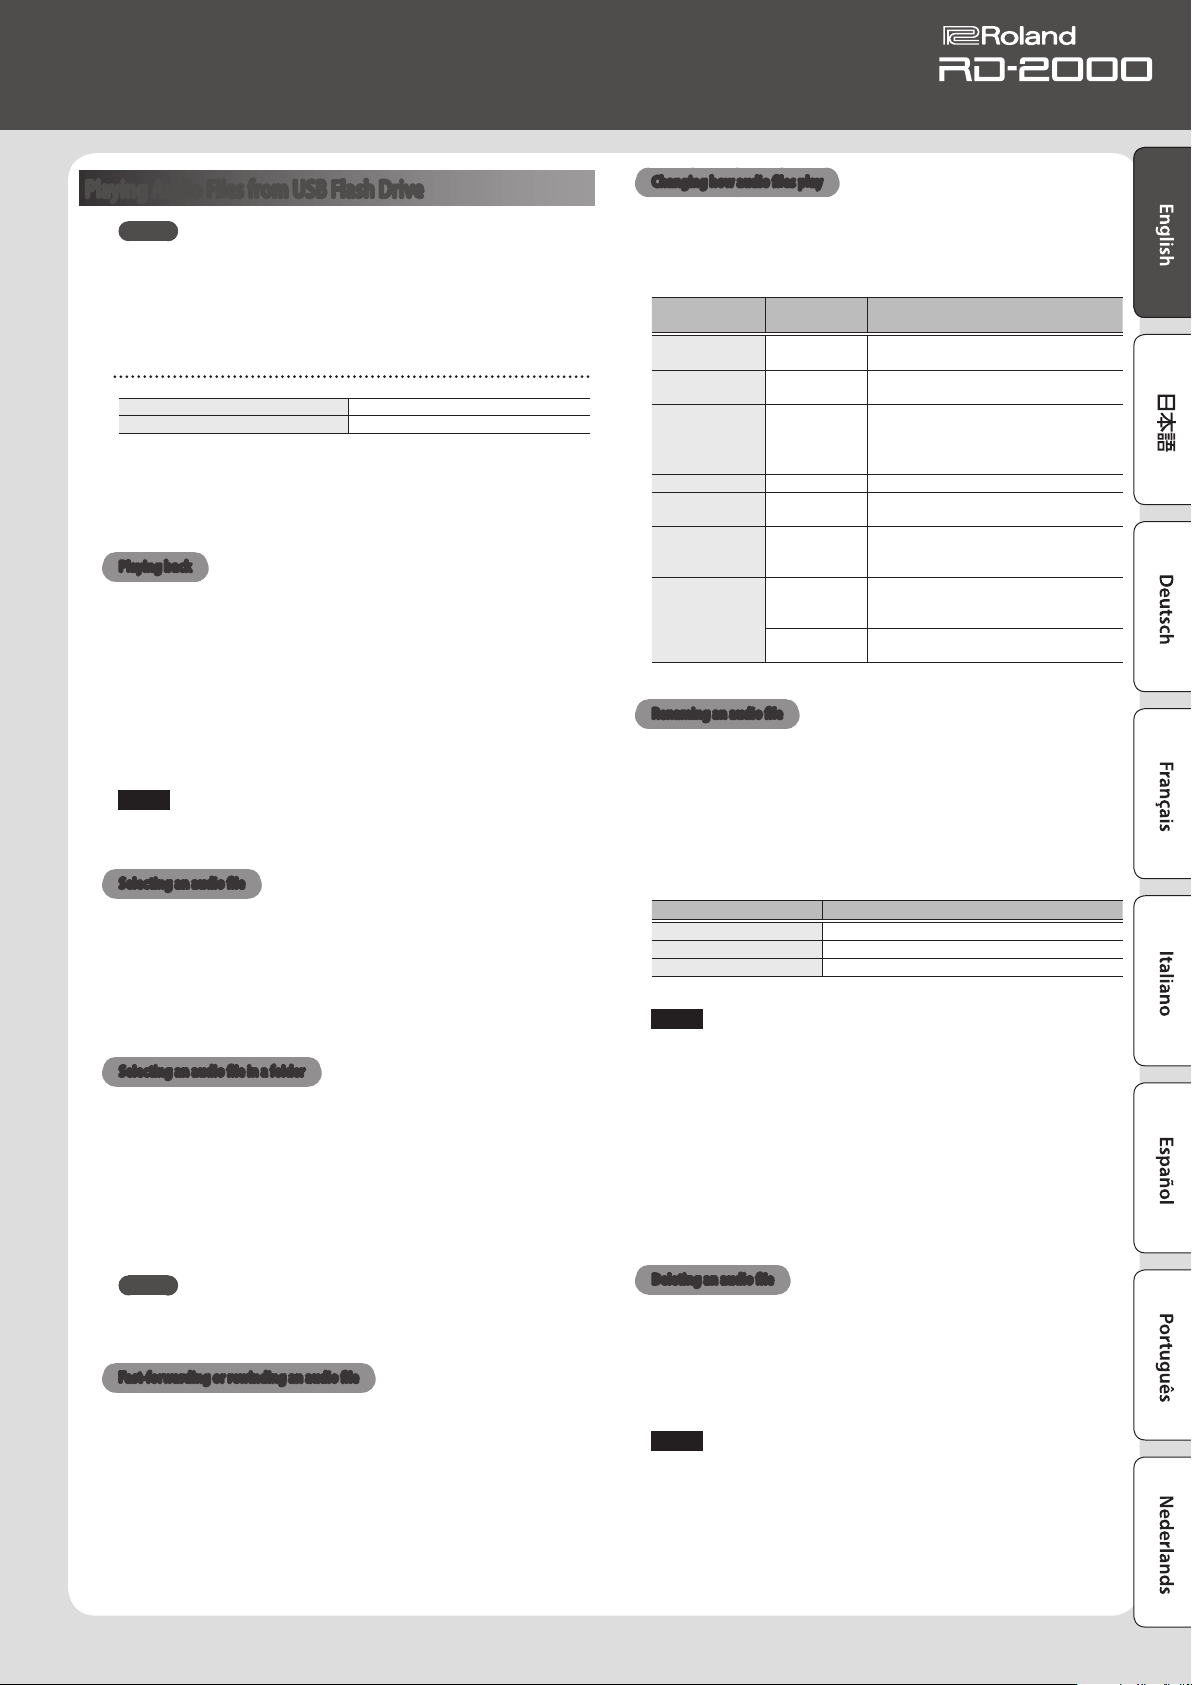
25
Owner’s Manual
Playing Audio Files from USB Flash Drive
MEMO
5 If the USB ash drive contains numerous song les, it may take
some time for the data to be loaded.
5 Use single-byte alphanumeric characters for the le name.
5 A maximum of 200 les can be recognized within each folder.
WAV format les that can be played
Sampling Frequency 44.1 kHz
Bit Depth 16 -bit
* Changing the Play Speed or Playback Transpose of an audio le
places a signicant processing load on the RD-2000; in some
cases this could make the RD-2000 unable to completely process
the performance data from the keyboard.
Playing back
1. Press the [RHYTHM/SONG] button to make it light.
The Rhythm or Song screen appears.
Each time you press the [RHYTHM/SONG] button, you’ll alternate
between the RHYTHM screen and the SONG screen.
2. Press the [RHYTHM/SONG] button several times to access the
Song screen.
3. Press the [PLAY] button to make it light; the audio le will play.
To stop the audio le playback, press the [STOP/RESET] button.
NOTE
If an audio le is playing, pressing the [RHYTHM/SONG] button will
not switch to the Rhythm screen.
Selecting an audio le
1. In the Song screen, move the cursor to the song number in the
screen.
2. Use the [DEC] [INC] buttons or the value dial to select a song
number.
If there is no playable song, the song number will be shown as “---” and
the [INC] [DEC] buttons will not work.
Selecting an audio le in a folder
1. Use the [DEC] [INC] buttons or the value dial to select a folder.
The folder icon will be displayed.
2. Press the [ENTER] button.
The audio les inside the folder will be displayed.
3. Use the [DEC] [INC] buttons or the value dial to select an audio
le.
To exit the folder, choose “up” and press the [ENTER] button.
MEMO
5 Use single-byte alphanumeric characters for the le name.
5 A maximum of 200 les can be recognized within each folder.
Fast-forwarding or rewinding an audio le
1. In the Song screen, move the cursor to the Time Position.
2. Use the [DEC] [INC] buttons or the value dial to change the
value.
The playback position will change according to the indication.
Changing how audio les play
1. In the Song screen, move the cursor to the various items.
2. Use the [DEC] [INC] buttons or the value dial to change the
value.
Parameter
[
K
] [
J
]
Value
[DEC] [INC]
Explanation
Speed 75%–125%
Lets you change the playback speed of
the song.
Playback
Transpose
-6–0–5
Lets you shift the playback key of a song in
semitone steps.
Time Position 00’00”–
Species the time location at which
playback starts (when stopped).
Indicates the elapsed playback time
(while playing).
Audio Volume 0–127 Sets the volume for audio le playback.
Audio Output
Assign
MAIN, SUB Species the audio output destination.
Center Cancel OFF, ON
Causes sounds located in the center (e.g.,
vocals or melodic instruments) to be
reduced in volume.
Play Mode
ONE SONG
When you play back a song, only one song
will play; playback will stop at the end of
that song.
ALL SONG
The songs in USB ash drive will play
consecutively.
Renaming an audio le
1. In the Song screen, choose “Song Rename” and press the
[ENTER] button.
2. Use the cursor [
K
] [
J
] buttons to move the cursor to the position
at which you want to enter a character.
3. As necessary, use the [DEC] [INC] buttons or the value dial to
enter a name.
Operation Explanation
[SHIFT] + [
K
] button
Delete one character (DELETE)
[SHIFT] + [
J
] button
Insert one space (INSERT)
[
H
] [
I
] buttons
Switch uppercase/lowercase
NOTE
You can’t save an audio le with a name that starts with a “. (period).”
Do not use a “. (period)” at the beginning of the name.
4. Repeat steps 2–3 to enter the name.
If you press the [EXIT] button, the rename operation will be cancelled
and you’ll return to the previous screen.
5. Press the [ENTER] button.
A conrmation message appears.
6. Move the cursor to “OK” and press the [ENTER] button.
The song name is conrmed.
Deleting an audio le
1. In the Song screen, choose “Song Delete” and press the [ENTER]
button.
A conrmation message appears.
2. Move the cursor to “OK” and press the [ENTER] button.
The song will be deleted.
NOTE
5 Never turn o the power while deletion is in progress.
5 Do not disconnect the USB ash drive while deletion is in
progress.
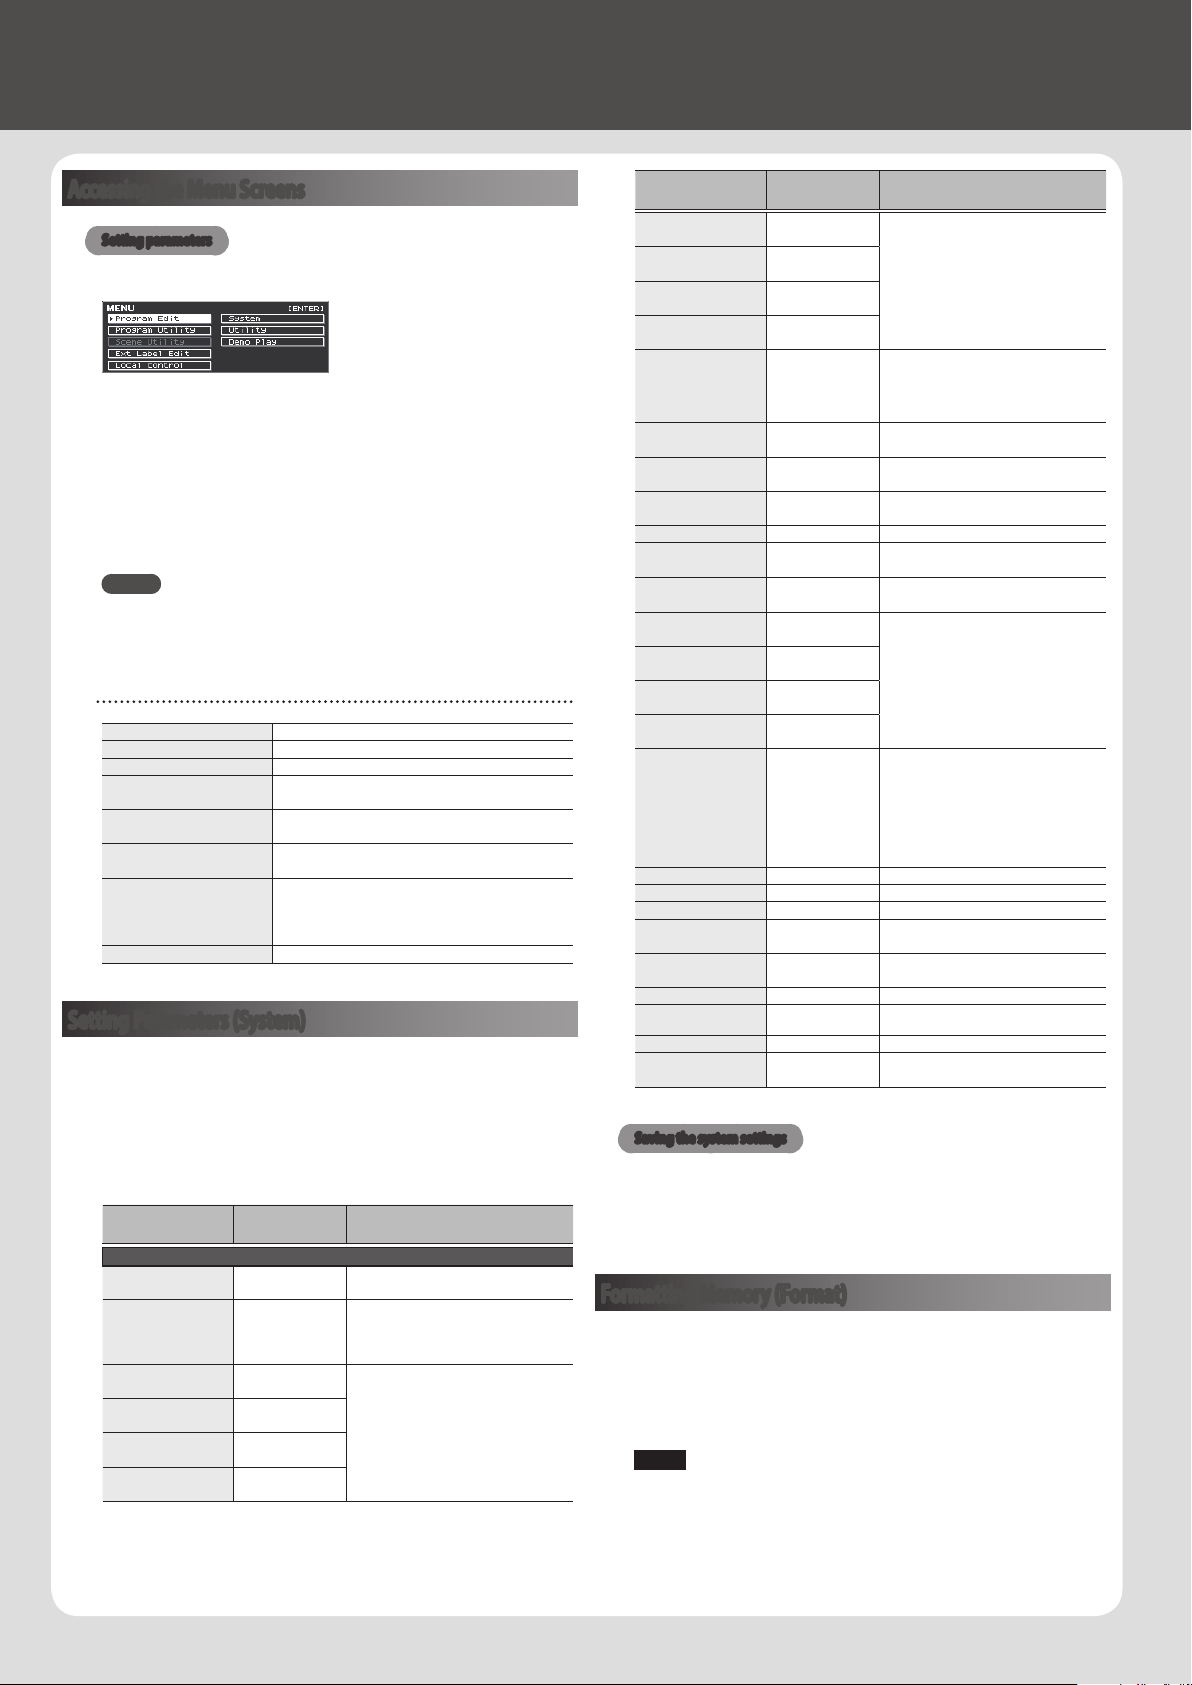
26
Various Settings
Accessing the Menu Screens
Setting parameters
1. Press the [MENU] button.
2. Use the cursor buttons to select the item that you want to edit,
and press the [ENTER] button.
The corresponding edit screen appears.
3. Select the parameter that you want to edit, and use the [DEC]
[INC] buttons or the value dial to edit the value.
4. When you’ve nished making settings, press the [EXIT] button
several times to return to the Tone screen or the Program screen.
MEMO
The following settings will be stored as common settings for the
entire RD-2000 when you press the [WRITE] button in an edit screen.
5 System
Editable items
Program Edit Edit a program.
Program Utility Manage program les and songs.
Scene Utility Initialize a scene or enter a memo.
Ext Label Edit
Assign labels to external zones. The label is shown
as the external device name in various screens.
Local Control
Specify the connection between the controller
section and the sound engine.
System
Make settings that aect the operating
environment of the entire RD-2000.
Utility
Make settings that specify how your RD-2000
performance will be recorded on an external
sequencer, or initialize the RD-2000 itself or a USB
ash drive.
Demo Play Play demo songs.
Setting Parameters (System)
Functions that aect the overall operating environment of the RD-2000
are called “system functions.”
1. In the MENU screen, select “SYSTEM” and press the [ENTER]
button.
The SYSTEM EDIT screen appears.
2. Use the cursor [
K
] [
J
] buttons to switch tabs.
Parameter
[
H
] [
I
]
Value
[DEC] [INC]
Explanation
SYSTEM tab
Master Tune
415.3–440.0–
466.2 [Hz]
Tuning to other instruments’ pitches
Control Destination
SELECT,
PROGRAM
Specifying the target of knobs and other
controllers
SELECT: Only the selected zone
PROGRAM: Program settings
EQ Mode
PROGRAM,
REMAIN
Specifying whether, when you switch
programs, the settings of the newly selected
program are applied (PROGRAM) or the
settings prior to the change are retained
(REMAIN)
Select Button Mode
PROGRAM,
REMAIN
Pedal Mode
PROGRAM,
REMAIN
Wheel Mode
PROGRAM,
REMAIN
Parameter
[
H
] [
I
]
Value
[DEC] [INC]
Explanation
Assign 1-9 Mode
PROGRAM,
REMAIN
Specifying whether, when you switch
programs, the settings of the newly selected
program are applied (PROGRAM) or the
settings prior to the change are retained
(REMAIN)
Delay Mode
PROGRAM,
REMAIN
Reverb Mode
PROGRAM,
REMAIN
Rhythm Mode
PROGRAM,
REMAIN
Key Touch Mode
TONE/PROGRAM,
REMAIN
Specifying whether, when you switch tones
or programs, the settings of the newly
selected program or tone are applied
(TONE/PROGRAM) or the settings prior to
the change are retained (REMAIN)
Tone/Program
Remain
OFF, ON
Retaining the current tone even when tones
are switched
Tone Ext Zone
Remain
OFF, ON
Retaining the external zone settings even
when zones are switched
Program Control
Channel
OFF, 1–16
Using program change messages to switch
program
USB Driver VENDER, GENERIC
Selecting the USB driver
USB MIDI Thru
Switch
OFF, ON
Selecting the USB MIDI thru switch
MIDI OUT2 Port
Mode
OUT, THRU
Selecting the function of the MIDI THRU/
OUT 2 connector
Damper Polarity
STANDARD,
REVERSE
Switching the pedal’s polarity
FC1 Polarity
STANDARD,
REVERSE
FC2 Polarity
STANDARD,
REVERSE
EXT Pedal Polarity
STANDARD,
REVERSE
Temperament
EQUAL, JUST
MAJ, JUST MIN,
PYTHAGOREAN,
KIRNBERGER,
MEANTONE,
WERCKMEISTER,
ARABIC
Setting the Tuning Method
Temperament Key C–B
Sets the keynote.
Clock Out OFF, ON
Transmitting synchronization messages
Hi-Res Velocity Out OFF, ON
Transmitting high-resolution velocity data
Rhythm MIDI
Output Port
ALL, OUT1, OUT2,
USB
Selecting the MIDI output port for rhythm
Rhythm MIDI Out
Channel
OFF, 1–16
Selecting the MIDI output channel for
rhythm
Audio Volume 0–127
Adjusting the playback volume of audio les
Output Mix/Parallel MIX, PARALLEL
&
“Temporarily outputting from the MAIN
OUT jacks” (p. 19)
LCD Brightness 1–10
Adjusting the brightness of the display
Auto O
OFF, 30 [min],
240 [min]
Making the power automatically turn o
after a time
Saving the system settings
1. In the SYSTEM EDIT screen, press the [WRITE] button.
A conrmation message appears.
2. Move the cursor to “OK” and press the [ENTER] button.
If you decide to cancel, press the [EXIT] button.
Formatting Memory (Format)
“Formatting” is the operation of deleting all Program les from user
memory or initializing a USB ash drive so that it can be used with the
RD-2000.
USB ash drive cannot be used with the RD-2000 unless it is formatted
suitably for the RD-2000.
Before using a new USB ash drive, you’ll need to format it.
NOTE
When you format the USB ash drive, all data previously saved on
that memory will be erased. Before you carry out a format, make sure
27
Owner’s Manual
that the USB ash drive does not contain important data you need
to keep.
1. In the MENU screen, select “Utility” and press the [ENTER]
button.
2. Select “Format USB Memory” and then press the [ENTER] button.
A conrmation message appears.
If you decide to cancel the Format operation, press the [EXIT] button.
3. To execute the Format operation, press the [ENTER] button.
4. Move the cursor to “OK” and press the [ENTER] button once
again to execute the Format operation.
NOTE
5 Never turn o the unit while the screen indicates “Executing...”
5 Never turn o the power or disconnect the USB ash drive while
reading or writing is in progress.
Returning to the Factory Settings (Factory Reset)
The settings stored in the RD-2000 can be returned to their factory
settings.
1. In the MENU screen, select “Utility” and press the [ENTER]
button.
2. Select “Factory Reset.”
3. Press the [ENTER] button.
A conrmation message appears.
4. Move the cursor to “OK” and press the [ENTER] button.
Factory reset is executed.
If you chose “Factory Reset All,” turn the power of the RD-2000 o, and
then on again.
NOTE
Never turn o the power during Factory Reset (while “Executing...
Don’t Power OFF” appears in the display).
Making the Power Automatically Turn O After a Time
(Auto O )
&
Refer to “If you don’t want the power to turn o automatically,
change the “Auto O” setting to “O”” (p. 11).
Listening to the Demo Songs
The RD-2000 features internal demo songs that exhibit the special
capabilities of the instrument.
NOTE
5 All rights reserved. Unauthorized use of this material for purposes
other than private, personal enjoyment is a violation of applicable
laws.
5 No data for the music that is played will be output from MIDI OUT
jack.
5 When you enter demo mode, various settings are set to their
power-on state. If there are settings that you want to keep, save
them as a program (p. 23).
5 The RD-2000’s keyboard will not produce sound while the demo
songs are playing.
1. Hold down the [SPLIT] button and press the [TRANSPOSE]
button.
The Demo screen appears.
2. Use cursor buttons to select a demo song.
3. Press the [ENTER] button to start demo song playback.
4. To stop the demo song mid-way, press the [ENTER] button.
While the song is stopped, press the [EXIT] button to return to the
TONE screen.
Backing Up RD-2000 Data to a USB Flash Drive
(Backup Save)
1. In the UTILITY screen, select “Backup Save” and press the
[ENTER] button.
The BACKUP SAVE screen appears.
2. Enter a le name.
MEMO
For details on how to enter a name, refer to “Saving the Sound
Settings in a Program (Program Write)” (p. 23).
3. When you have entered the le name, press the [ENTER] button.
A conrmation message appears.
If you decide to cancel, press the [EXIT] button.
4. Move the cursor to “OK” and press the [ENTER] button.
When the backup is completed, a message appears.
Restoring Backup Data from a USB Flash Drive to the RD-2000
(Backup Load)
Here’s how backup data can be written back into the RD-2000.
The RD-2000 can also read Live Set Files that were created on the
RD-800.
NOTE
5 All user data is rewritten when you execute the Load operation.
If the RD-2000 contains important data that you want to keep,
back it up using a dierent name on a USB ash drive before you
execute the Load operation.
5 Never turn o the power or disconnect the USB ash drive while
the screen indicates “Processing...”
1. In the UTILITY screen, move the cursor to “Backup Load” and
press the [ENTER] button.
The BACKUP LOAD screen appears.
2. Use the [DEC] [INC] buttons or the value dial to move the cursor
to the le that you want to load.
3. Use the [DEC] [INC] buttons or the value dial to set the Load
System Parameters setting.
If NO: Programs and scenes are loaded, but system settings are not
loaded.
If YES: In addition to programs and scenes, system settings are also
loaded.
NOTE
Regardless of this setting, system settings are not read if you selected
an RD-800 Live Set File.
4. Press the [ENTER] button.
A conrmation message appears.
If you decide to cancel, press the [EXIT] button.
5. Move the cursor to “OK” and press the [ENTER] button.
When the load is completed, a message appears.
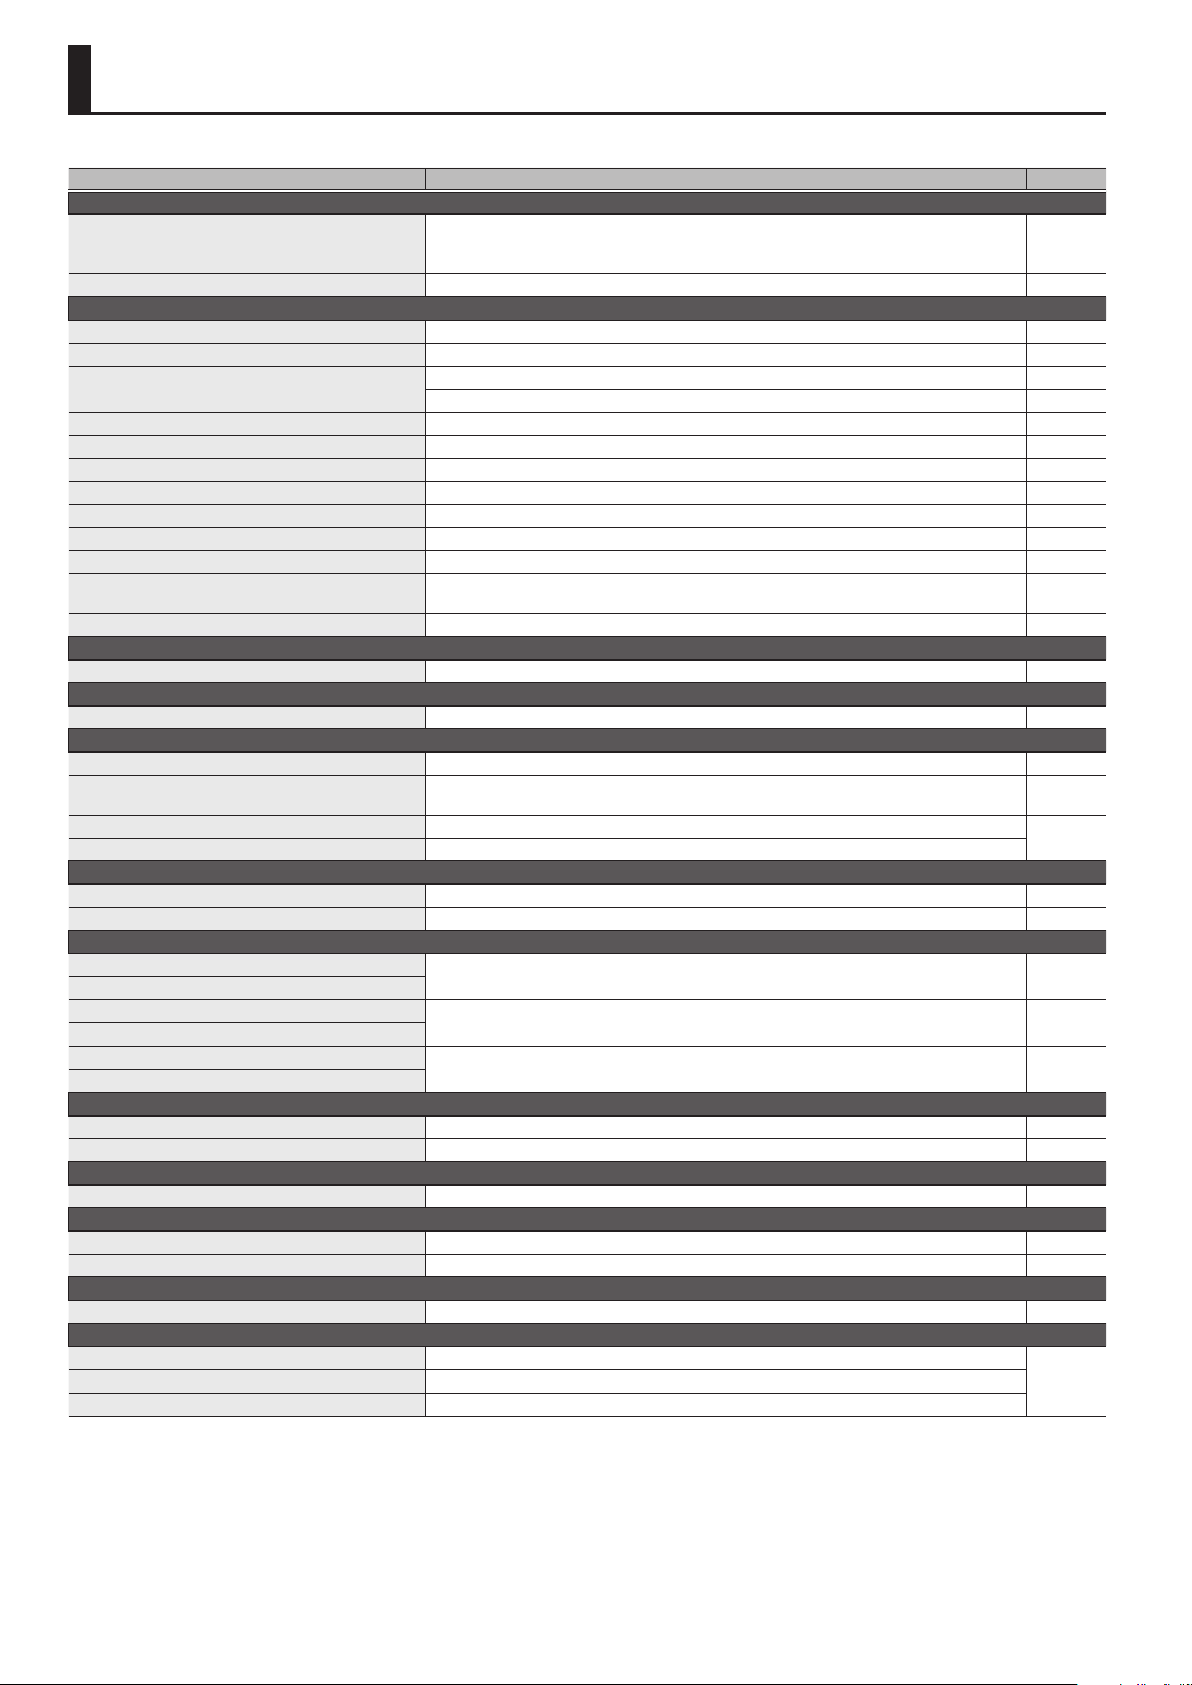
List of Shortcut Keys
* “[A]+[B]” indicates the operation of “holding down the [A] button and pressing the [B] button.”
Shortcut Explanation Page
Basic operation
[SHIFT] + [DEC] [INC], Value dial
Makes the value change more greatly.
When switching tones, the rst sound in the category is selected. When switching Programs, the rst
sound in the bank is selected.
p. 14
[SHIFT] + [
K
] [
J
]
If the ZONE EDIT screen is shown, move between tabs. p. 21
Editing a tone or program
[TRANSPOSE] + keyboard, [DEC] [INC], Value dial Species the transposition setting of the entire keyboard. p. 14
[SPLIT] + keyboard Species the split point. p. 15
[RHYTHM/SONG] + [DEC] [INC]
When rhythm is selected, species the rhythm volume.
When an audio song is selected, species the audio volume. p. 25
[SHIFT] + ZONE LEVEL slider Jumps to the VOL (Volume) item of the ZONE EDIT screen.
[SHIFT] + [TRANSPOSE] Jumps to the C.Tune (Coarse Tune) item of the ZONE EDIT screen.
[SHIFT] + [SPLIT] Jumps to the KR.LWR (Keyboard Range Lo) item of the ZONE EDIT screen.
[SHIFT] + SELECT [1]–[8], [USB AUDIO] Jumps to the ZONE EDIT screen.
[SHIFT] + INT [1]–[8] Exchanges the INTERNAL/EXTERNAL assignment of the selected zone.
[SHIFT] + [USB AUDIO] Jumps to the USB AUDIO tab of the SYSTEM EDIT screen.
[SHIFT] + [SCENE] For Tone Wheel Organ sounds, turns HARMONIC BAR mode ON.
[EXIT] + ZONE LEVEL slider [1]–[8], USB-AUDIO slider,
knob
Shows the current value of each slider or knob, allowing you to match the setting (Status & Catch).
[SHIFT] + [STOP/RESET] Transmits an All Note O message to all parts (Panic function).
Reverb
[SHIFT] + REVERB knob Jumps to the Reverb screen. p. 16
Tone color
[SHIFT] + TONE COLOR knob Jumps to the TON CLR (Tone Color Control Destination) item of the ZONE EDIT screen. p. 20
EQ/delay/assign
[SHIFT] + each EQ knobs (LOW, MID2, MID3, HIGH) Jumps to the EQ screen. p. 17
[SHIFT] + each DELAY knobs (TYPE, LEVEL, FEEDBACK,
TIME)
Jumps to the Delay screen. p. 16
[SHIFT] + each ASSIGN knobs (1–8) Jumps to the KNOB 1--8 item of the ASSIGN screen in PROGRAM EDIT.
p. 17
[SHIFT] + ASSIGN [9] Jumps to the SWITCH 9 item of the ASSIGN screen in PROGRAM EDIT.
Modulation FX
[SHIFT] + MOD FX [TYPE], [DEPTH], [RATE] knob Jumps to the Modulation FX screen of the ZONE that’s selected in Modulation FX Control Destination.
[SHIFT] + MOD FX [ON/OFF] Jumps to the MOD FX (Modulation FX Control Destination) item of the ZONE EDIT screen.
Tremolo/amp simulator
TREMOLO [ON/OFF] + [DEC] [INC], Value dial
Changes the tremolo/amp simulator type of the zone that’s selected by the SELECT button (or
Tremolo/Amp Control Destination).
p. 17
AMP SIM [ON/OFF] + [DEC] [INC], Value dial
[SHIFT] + TREMOLO [TYPE], [DEPTH], [RATE] knob
Jumps to the Tremolo/Amp Simulator screen of the ZONE EDIT screen.
[SHIFT] + AMP SIM [DRIVE] knob
[SHIFT] + TREMOLO [ON/OFF]
Jumps to the TR/AMP (Tremolo/Amp Control Destination) item of the ZONE EDIT screen.
[SHIFT] + AMP SIM [ON/OFF]
Pitch bend lever/modulation lever
[SHIFT] + pitch bend lever Jumps to the PCH BND (Pitch Bend Control Switch) item of the ZONE EDIT screen.
[SHIFT] + modulation lever Jumps to the MOD CTL (Modulation Control Switch) item of the ZONE EDIT screen.
Mod wheel 1/2
[SHIFT] + [MOD WHEEL 1/2] Jumps to the ASSIGN screen MOD WHEEL item of PROGRAM EDIT.
Pedal
[SHIFT] + pedal (DAMPER) Jumps to the Damper (Damper Control Switch) item of the ZONE EDIT screen.
[SHIFT] + pedal (FC1, FC2, EXT) Jumps to the Pedal screen.
Panel lock
[MENU] + [ENTER] Enables panel lock. p. 14
When entering a name
[
H
] [
I
]
Switch uppercase/lowercase.
p. 23, p. 25
[SHIFT] + [
K
]
Delete one character (DELETE).
[SHIFT] + [
J
]
Insert one space (INSERT).
For the USA
FEDERAL COMMUNICATIONS COMMISSION
RADIO FREQUENCY INTERFERENCE STATEMENT
This equipment has been tested and found to comply with the limits for a Class B digital device, pursuant to Part 15 of the FCC Rules.
These limits are designed to provide reasonable protection against harmful interference in a residential installation. This equipment
generates, uses, and can radiate radio frequency energy and, if not installed and used in accordance with the instructions, may cause
harmful interference to radio communications. However, there is no guarantee that interference will not occur in a particular
installation. If this equipment does cause harmful interference to radio or television reception, which can be determined by turning
the equipment off and on, the user is encouraged to try to correct the interference by one or more of the following measures:
– Reorient or relocate the receiving antenna.
– Increase the separation between the equipment and receiver.
– Connect the equipment into an outlet on a circuit different from that to which the receiver is connected.
– Consult the dealer or an experienced radio/TV technician for help.
This device complies with Part 15 of the FCC Rules. Operation is subject to the following two conditions:
(1) this device may not cause harmful interference, and
(2) this device must accept any interference received, including interference that may cause undesired operation.
This equipment requires shielded interface cables in order to meet FCC class B limit.
Any unauthorized changes or modifications not expressly approved by the party responsible for compliance could void the user’s
authority to operate the equipment.
WARNING
This product contains chemicals known to cause cancer, birth defects and other reproductive harm, including lead.
For C.A. US
(
Proposition 65
)
For Canada
CAN ICES-3 (B)/NMB-3 (B)
For Korea
2036-1 Nakagawa, Hosoe-cho, Kita-ku, Hamamatsu, Shizuoka 431-1304, JAPAN
ENA 23 Zone 1 nr. 1620 Klaus-Michael Kuehnelaan 13, 2440 Geel, BELGIUMImporter:
Manufacturer:
For the USA
DECLARATION OF CONFORMITY
Compliance Information Statement
Model Name :
Type of Equipment :
Responsible Party :
Address :
Telephone :
RD-2000
Digital Piano
Roland Corporation U.S.
5100 S. Eastern Avenue Los Angeles, CA 90040-2938
(323) 890-3700
GR
SK
CZ
SI
LV
LT
EE
PL
HU
FI
SE
NO
DK
NL
PT
ES
IT
DE
FR
UK
For EU Countries
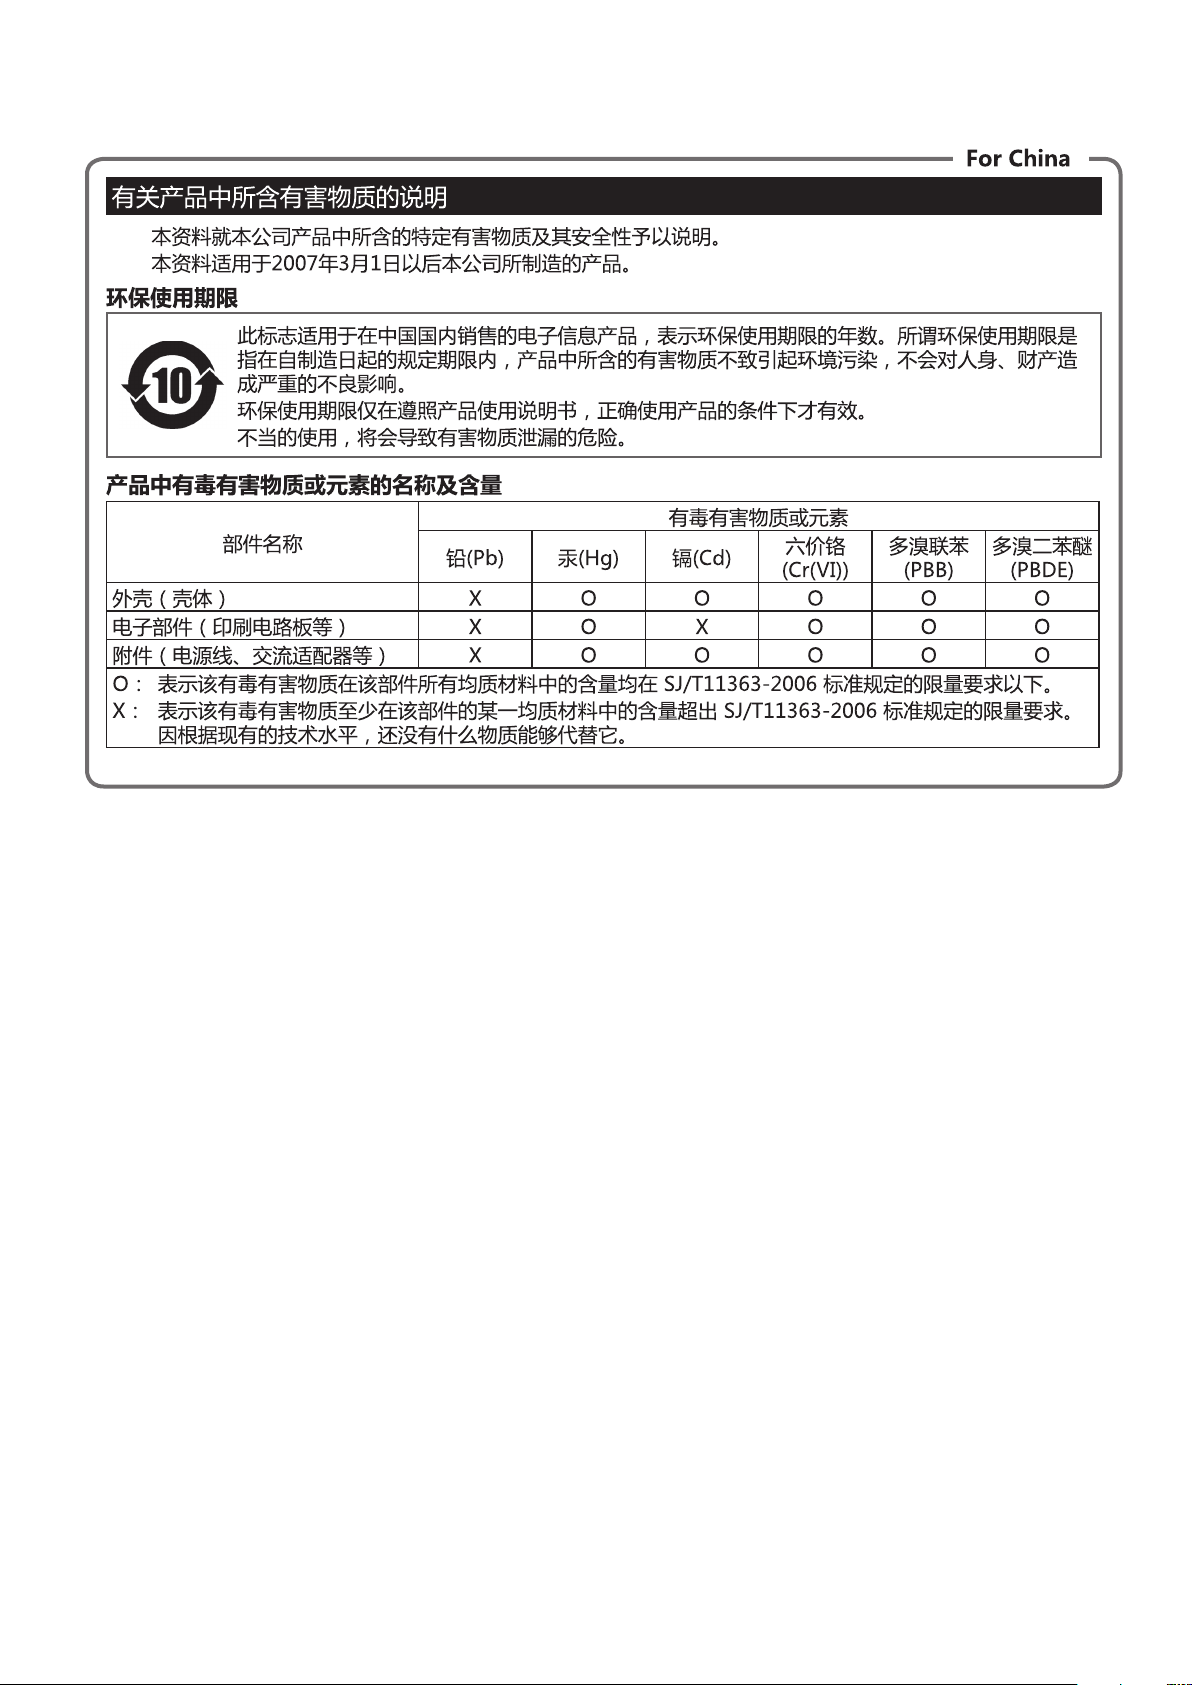
'16. 10. 01 現在(Roland)
製品に関するお問い合わせ先
050-3101-2555
ローランド・ホームページ
https://www.roland.com/jp/
電話受付時間: 月曜日~金曜日 10:00~17:00(弊社規定の休日を除く)
※IP電話からおかけになって繋がらない場合には、お手数ですが、電話番号の前に“0000”
(ゼロ4回)をつけてNTTの一般回線からおかけいただくか、携帯電話をご利用ください。
※上記窓口の名称、電話番号等は、予告なく変更することがありますのでご了承ください。
お問い合わせの窓口
最新サポート情報
製品情報、イベント/キャンペーン情報、サポートに関する情報など
ローランドお客様相談センター
ボス・ホームページ
https://www.boss.info/jp/
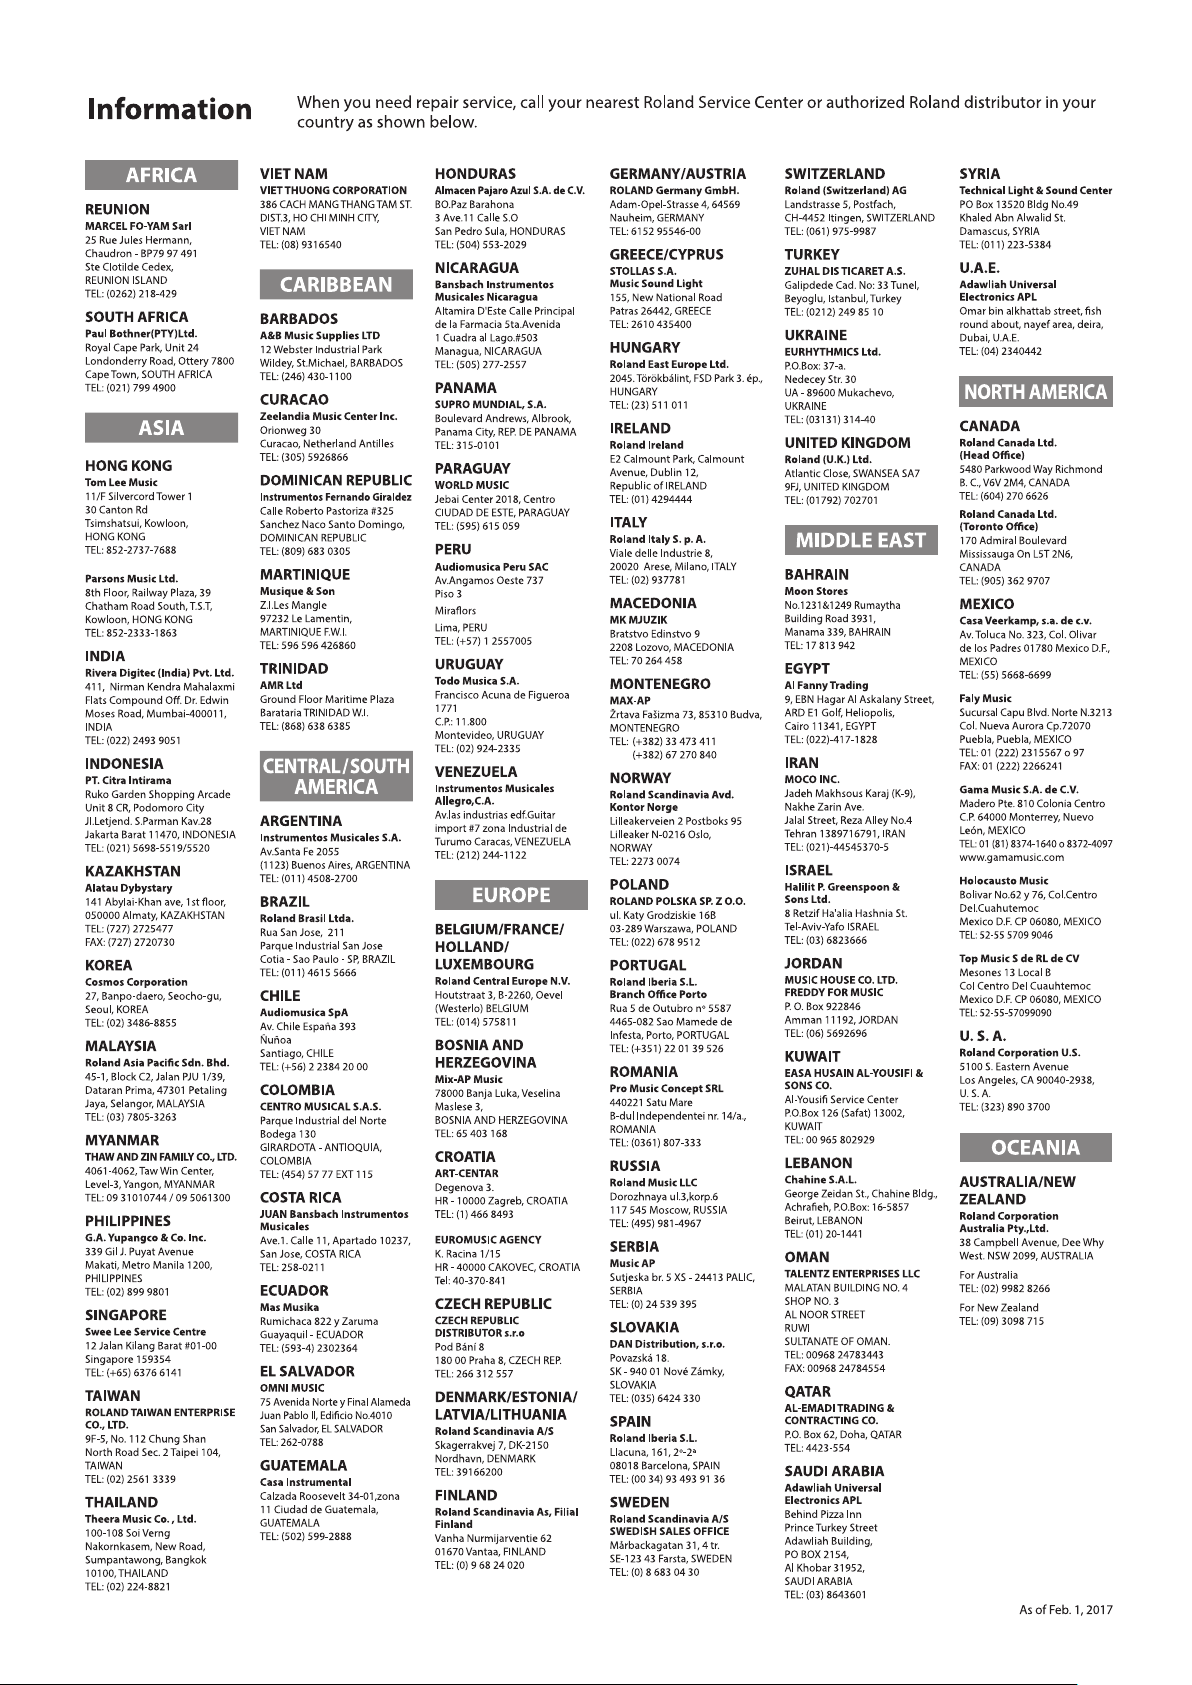

* 5 1 0 0 0 5 1 7 8 8 - 0 2 *