Loading ...
Loading ...
Loading ...
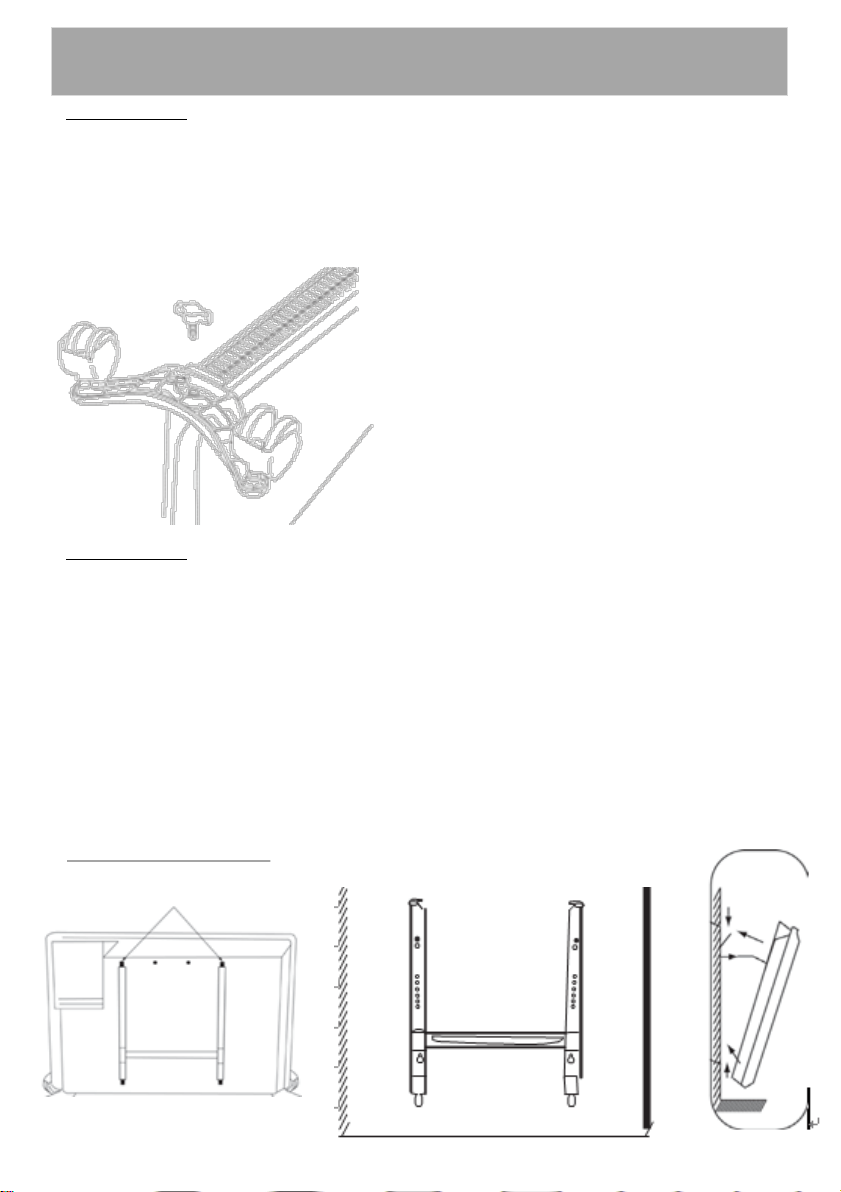
FREE STANDING
1. Ensure the heater is unplugged and power switches are off.
2. Set heater upside down.
3. Align the screw hole on the Castor Wheel bracket with the screw hole on the base of the heater.
4. Attach Castor wheel bracket with the winged screws provided and ensure the bracket sits firmly in
place (do not over tighten). Firmly press Castor Wheels into the slots provided on the Castor Wheel
bracket.
5. Set heater upright and plug into a standard 240 volt AC electrical outlet.
The screw pack to attach the feet to your heater will be taped to either one of the feet for your heater.
WALL MOUNTED
1. Make sure the heater is unplugged and power switches are off.
2. Position the panel heater within one metre of a wall socket. Do not mount in front of or below the wall
socket. Ensure there is at least 150mm clearance on all sides of the heater.
3. Detach the mounting bracket from the back of the panel heater by unscrewing the two locking screws
(located on the top of the mounting bracket).
4. Position the mounting bracket on the wall and mark the hole positions with a pen or pencil and check
they are horizontal with a spirit level. Ensure the two bottom mount holes are at least 150mm from the
floor and drill holes as required.
5. Secure the mounting bracket to the wall with the four mounting screws. (For masonry walls use the
plastic sheaths).
6. Slot the back of the heater onto the mounting bracket locating the bottom plugs first and secure with
two locking screws.
7. Plug heater into a standard 240 volt AC electrical outlet.
WALL MOUNTING POSITION
Installing Your Panel Heater
Loading ...
Loading ...
Loading ...