1
M.2 to U.2 Adapter for M.2
PCIe NVMe SSD, SFF-8639
Model: P970-U2M2
1111 W. 35th Street, Chicago, IL 60609 USA • tripplite.com/support
Copyright © 2022 Tripp Lite. All rights reserved.
Quick Start Guide
Este manual está disponible en español en la página de Tripp Lite:
tripplite.com
Ce manuel est disponible en français sur le site Web de Tripp Lite :
tripplite.com
Русскоязычная версия настоящего руководства представлена на
веб-сайте компании Tripp Lite по адресу: tripplite.com
Dieses Handbuch ist in deutscher Sprache auf der Tripp Lite-Website
verfügbar: tripplite.com
WARRANTY REGISTRATION
Register your product today and be
automatically entered to win an ISOBAR
®
surge protector in our monthly drawing!
tripplite.com/warranty

2
• Enhance your PC’s speed and increase internal storage by
adding an M.2 NVMe SSD via an available U.2 (SFF-8639)
compatible interface on your motherboard
• Supports B+M Key SATA M.2 SSD and M-Key NVMe M.2
SSD
• Compatible with 2242, 2260 and 2280 SSD sizes
• Compatible with Tripp Lite’s PCE-U2-PX4 (sold separately)
U.2 to PCIe adapter to assemble an NVMe M.2 SSD into a
motherboard’s PCIe port
• PCle M.2 SSD speeds provide ultra-fast data access to your
computer
• Compatible with PCle 3.0 motherboards; backward
compatible with PCle 2.0 and PCle 1.0
• Compatible with Windows 7 and above and macOS High
Sierra and above
• No external power required
Features

3
• P970-U2M2 M.2 to U.2 PCIe NVMe SSD Adapter
• SSD Mounting Hardware
• Quick Start Guide
• Computer with an available U.2 port on its motherboard (or
M.2 to U.2 adapter, such as Tripp Lite’s PCE-U2-PX4, sold
separately. See tripplite.com for details.)
• B-Key or B+M Key SATA M.2 SSD or M-Key NVMe M.2 SSD
• Computer running Windows 7 or above, or macOS High
Sierra and above
Optional Hardware
• PCE-U2-PX4 U.2 to PCIe Adapter (Sold Separately)
Package Contents
System Requirements
4
Notes:
• The following installation diagrams and instructions refer to the
P970-U2M2 being used with Tripp Lite’s PCE-U2-PX4 U.2 to
PCIe Adapter (sold separately) to establish an M.2 module in a
computer’s PCIe port. The P970-U2M2 can be used directly with a
motherboard that features an available U.2 port or other M.2-to-U.2
docks.
• PCI Express cards are static-sensitive devices that require proper
handling. An anti-static ESD wrist strap (such as Tripp Lite’s P999-
000, sold separately) or similar device should always be used when
handling.
• Handle the card with care when installing. Hold it by the edges and
not the interface connectors.
• When disconnecting the drive, go through the proper disconnection
steps of your operating system to safely remove it. Removing the
drive prior to proper disconnection can result in losing or corrupting
data stored on the drive.
• Ifyourdrivehasnotbeenformatted,youwillrstneedtoformatit
using your computer’s disk management utility to copy and access
les.
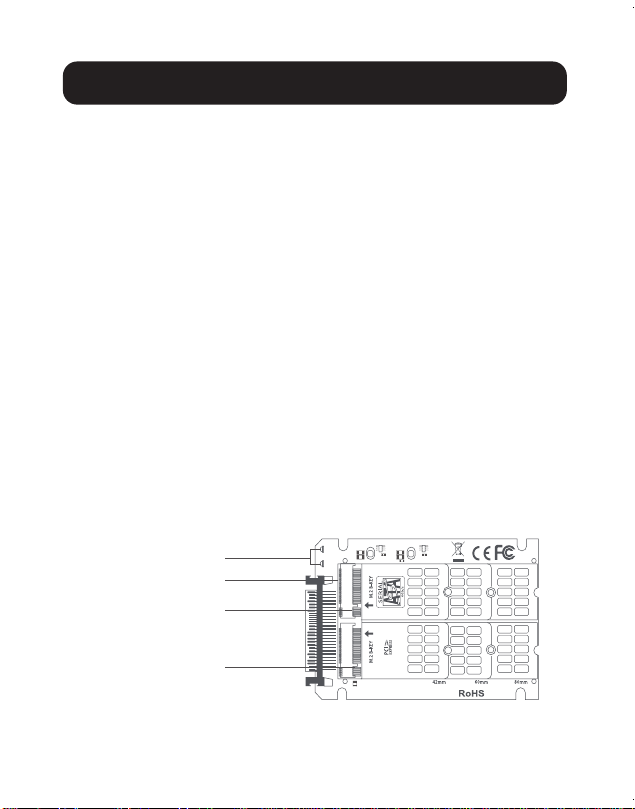
Installation
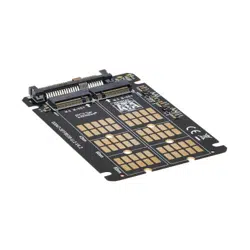
LED
M.2 B-KEY
U.2 Transport
interface
M.2 M-KEY

5
Installation
1. Connect an M-Key M.2 and/or B-Key M.2 SSD, or B+M Key
SSD, to the appropriate slots on the P970-U2M2.
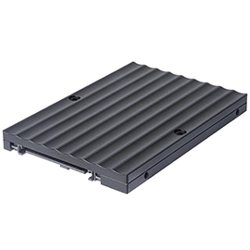
2. Secure the SSD into place using the included SSD
mounting hardware.
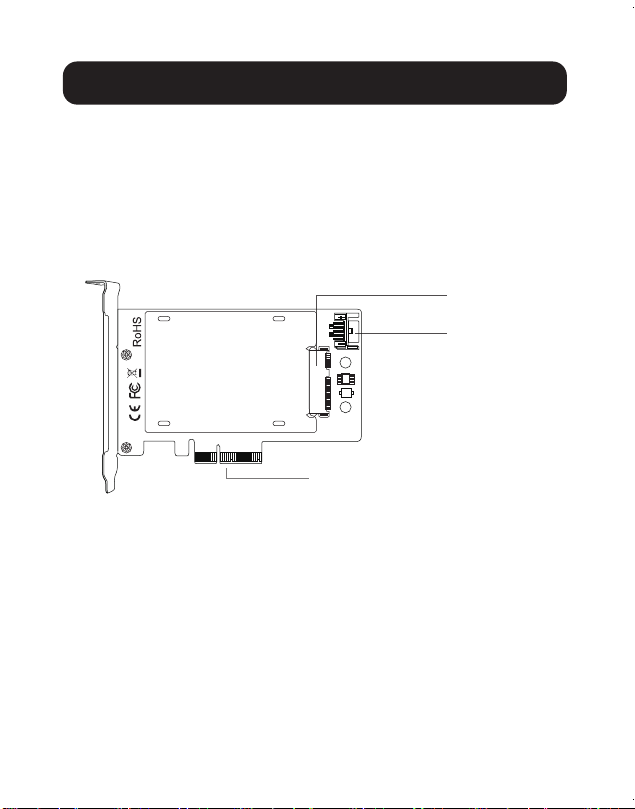
6
Installation
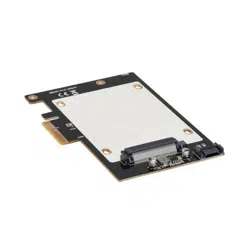
3. Connect the U.2 connector of the P970-U2M2 into the U.2
input slot of the PCE-U2-PX4 (sold separately). Be sure
to follow the instructions in the notes above to ensure the
equipment is not damaged by static discharge or improper
handling.
Note: The P970-U2M2 inserts into the U.2 slot of the PCE-U2-PX4
with the M.2 SSD(s) facing downward.
U.2 connector
SATA interface
PCIe×4 interface
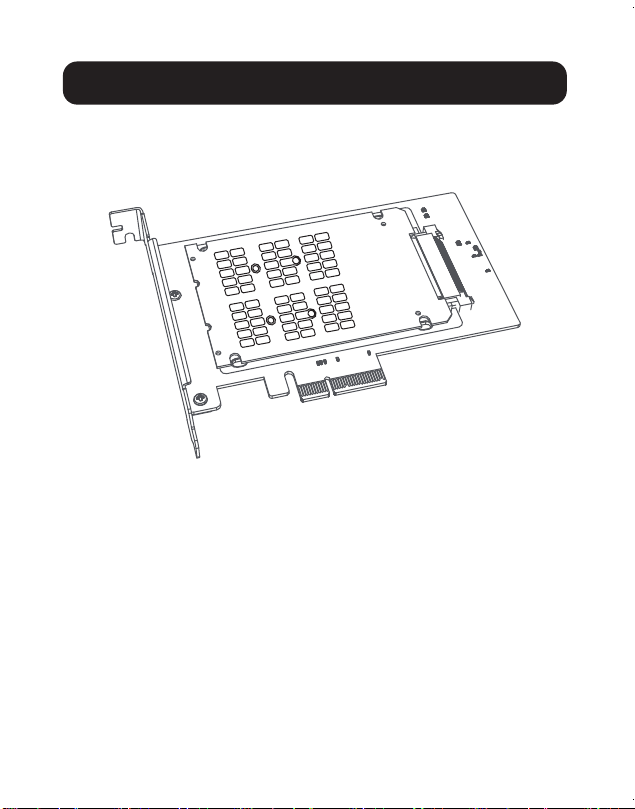
7
Installation
4. Secure the P970-U2M2 into place with the PCE-U2-PX4
using the mounting hardware that is included with the PCE-
U2-PX4 (sold separately)
5. Power down the desired computer and unplug its power
cord. Then, disconnect all peripheral devices (monitor,
keyboard, mouse, etc.).
6. Remove the cover from your PC to locate the motherboard
and available PCI Express ports.
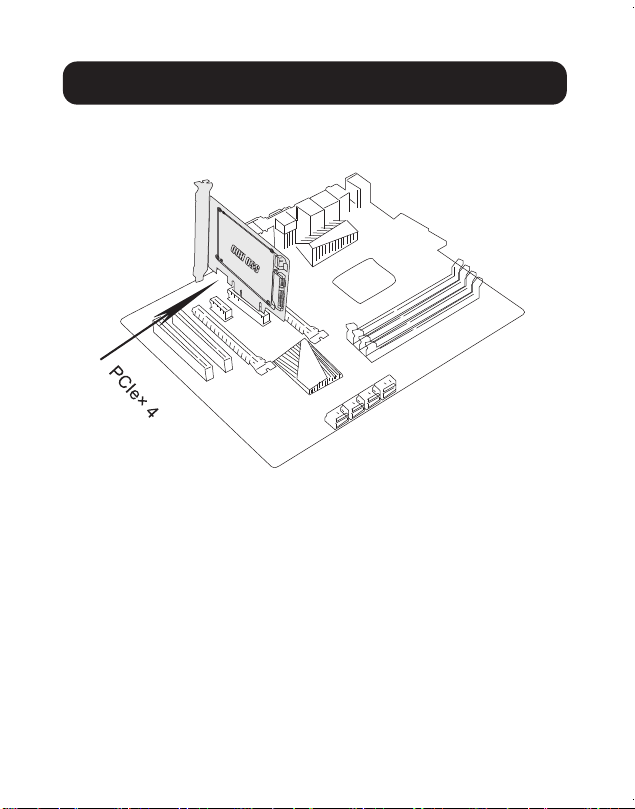
8
Installation
7. Insert the PCIe x4 interface of the PCE-U2-PX4 into the
open PCI Express port of the computer’s motherboard.
8. Connect the 7-pin SATA cable included with the PCE-U2-
PX4 between the SATA interface port on the PCE-U2-PX4
and the 7-pin SATA port on the computer’s motherboard.
9
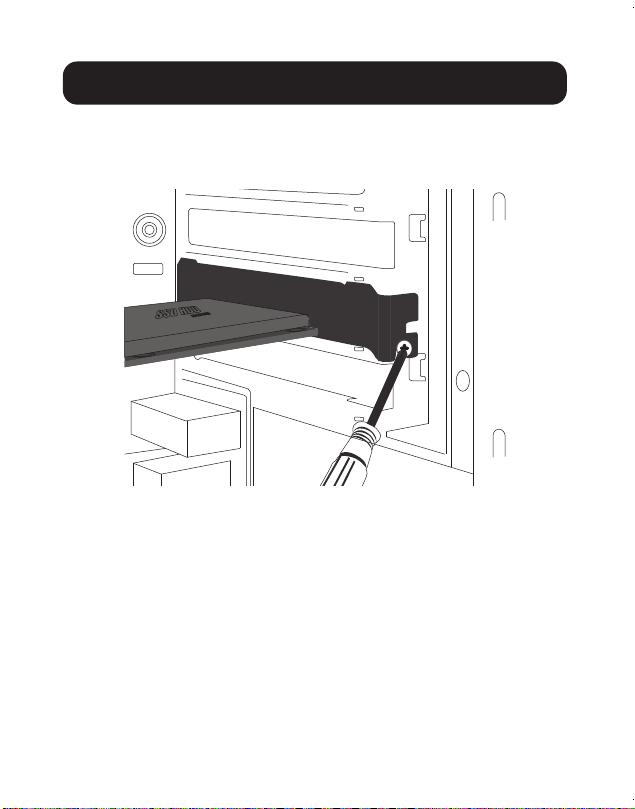
Installation
9. Fix the full-prole bracket of the PCE-U2-PX4 into place
in the computer’s tower panel using the bracket screws
included with the PCE-U2-PX4 (if applicable).
10. Place the cover back onto the computer and reconnect its
power cord and peripheral devices.
11. Your adapter is now ready for use.

10
Operation
1. After turning your computer back on, locate the
“Computer Management” system tool and go to the “Disk
Management” dropdown menu to nd the new disk.
2. Before formatting the new disk, make sure to delete the
volume.
3. Right-click the External Disk icon you want to format. Click
on “New Simple Volume”.
4. Follow the instructions on the screen, choose the partition
size and click “Next” to nish.
5. The new hard disk volume will be found in the list of drive
locations on your computer.
6. Once found, it is ready for use.
11
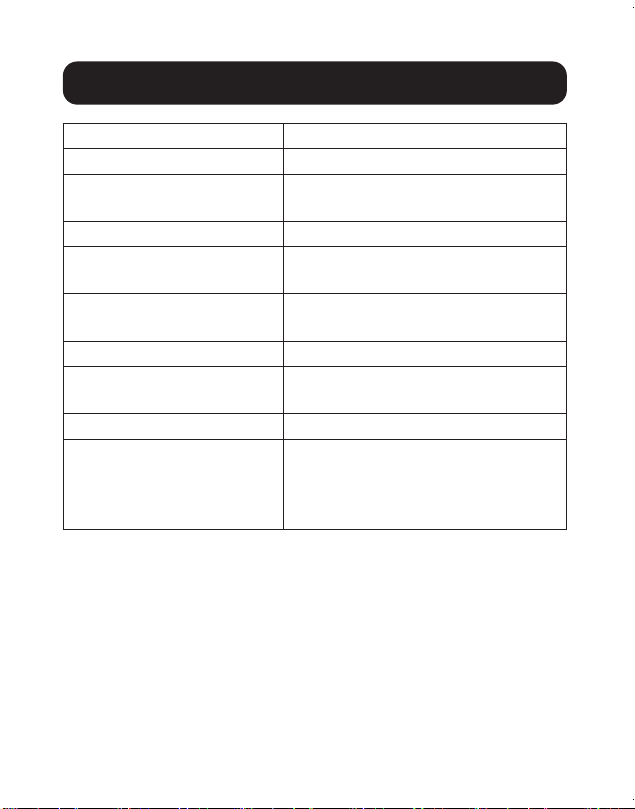
Specications
Drive Connection U.2 SFF-8639 to M.2 NVMe/SATA
PCle Card Connection PCIe X4
Supported SSD B-Key, B+M Key or M-Key
(NVMe) M.2
Supported Drive Sizes M.2 2242, 2260 or 2280
Operating Temperature
Range
50°F to 158°F
(10°C to 70°C)
Storage Temperature
Range
32°F to 149°F
(0°C to 65°C)
Relative Humidity 10 to 80% RH, Non-Condensing
Unit Dimensions
[L x W x H]
3.9 x 2.6 x 0.22 in.
(99 x 66 x 5.5 mm)
Certications FCC, CE
Supported Operating
Systems
Windows (7, 8.1, 10, 11),
Mac (macOS High Sierra and
above; older macOS versions do
not support NVMe)

12
1111 W. 35th Street, Chicago, IL 60609 USA • tripplite.com/support
22-06-267 93458F_RevA
Warranty and Product Registration
1-YEAR LIMITED WARRANTY
Tripp Lite warrants its products to be free from defects in materials and workmanship for a period of one
(1) year from the date of initial purchase. Tripp Lite’s obligation under this warranty is limited to repairing
or replacing (at its sole option) any such defective products. To obtain service under this warranty, you
must obtain a Returned Material Authorization (RMA) number from Tripp Lite or an authorized
Tripp Lite service center. Products must be returned to Tripp Lite or an authorized Tripp Lite service
center with transportation charges prepaid and must be accompanied by a brief description of the
problem encountered and proof of date and place of purchase. This warranty does not apply to
equipment, which has been damaged by accident, negligence or misapplication or has been altered or
modied in any way.
EXCEPT AS PROVIDED HEREIN, TRIPP LITE MAKES NO WARRANTIES, EXPRESS OR IMPLIED,
INCLUDING WARRANTIES OF MERCHANTABILITY AND FITNESS FOR A PARTICULAR PURPOSE.
Some states do not permit limitation or exclusion of implied warranties; therefore, the aforesaid
limitation(s) or exclusion(s) may not apply to the purchaser.
EXCEPT AS PROVIDED ABOVE, IN NO EVENT WILL TRIPP LITE BE LIABLE FOR DIRECT,
INDIRECT, SPECIAL, INCIDENTAL OR CONSEQUENTIAL DAMAGES ARISING OUT OF THE USE
OF THIS PRODUCT, EVEN IF ADVISED OF THE POSSIBILITY OF SUCH DAMAGE. Specically,
Tripp Lite is not liable for any costs, such as lost prots or revenue, loss of equipment, loss of use of
equipment, loss of software, loss of data, costs of substitutes, claims by third parties, or otherwise.
PRODUCT REGISTRATION
Visit tripplite.com/warranty today to register your new Tripp Lite product. You’ll be automatically entered
into a drawing for a chance to win a FREE Tripp Lite product!*
* No purchase necessary. Void where prohibited. Some restrictions apply. See website for details.
Use of this equipment in life support applications where failure of this equipment can reasonably
be expected to cause the failure of the life support equipment or to signicantly aect its safety or
eectiveness is not recommended.
Tripp Lite has a policy of continuous improvement. Specications are subject to change without notice.
Photos and illustrations may dier slightly from actual products.