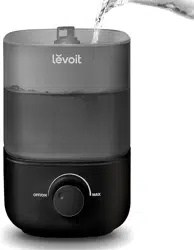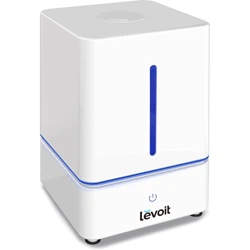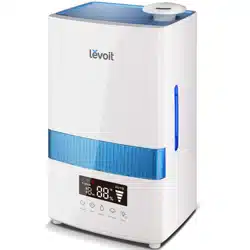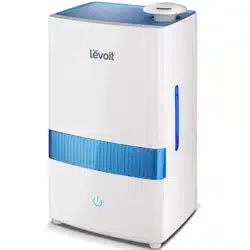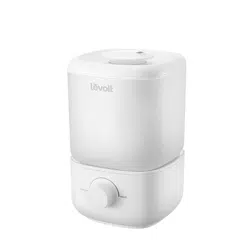
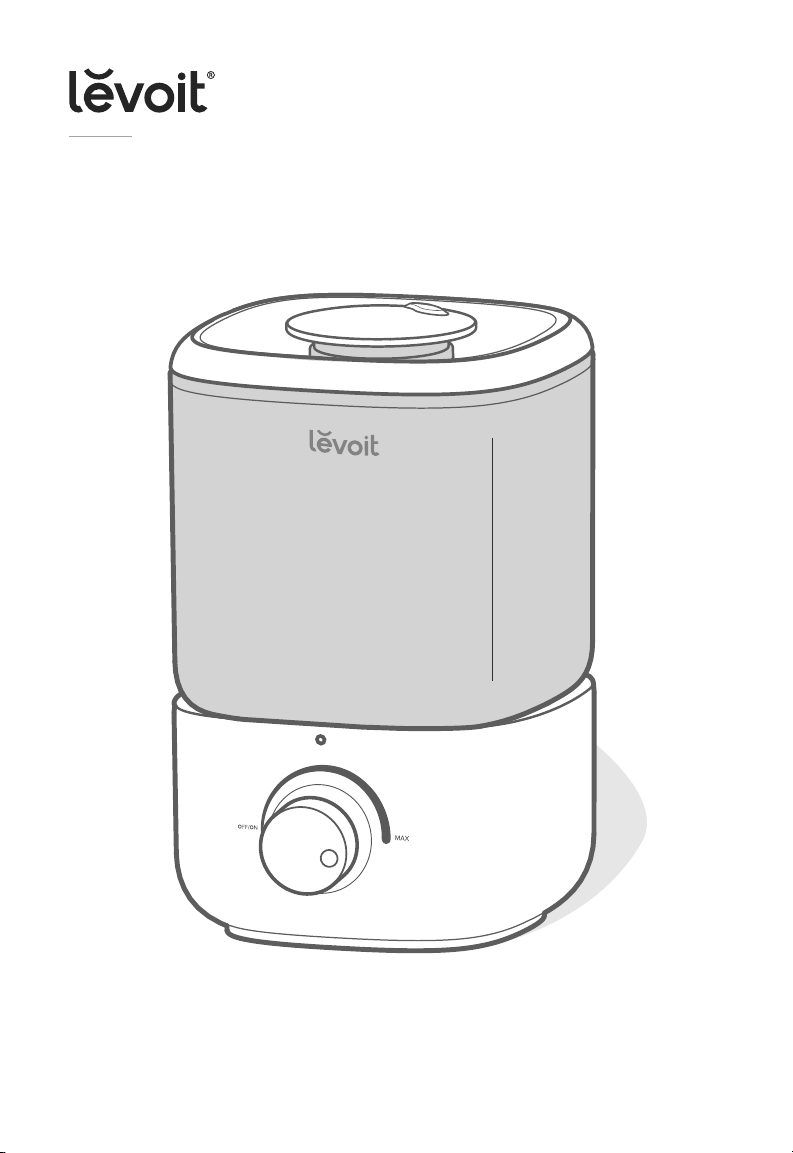
Levoit LUH-A251-WUS Classic 160 Ultrasonic Cool Mist Humidifier

Product's Documents

Below are documents related to this product, you can read online or download:
LUH-A251-WUS photo

USER MANUAL

This is the main product document for model LUH-A251-WUS.

The file format is pdf, 10 pages, you can download this manual here .

background
M
A
X
M
A
X
Levoit Classic 160 Ultrasonic Cool Mist Humidier
Questions or Concerns?
Please contact us MonFri, 9:00 am5:00 pm PST/PDT
at [email protected] or at 1-888-726-8520.
USER MANUAL
1000
SAFETY INFORMATION
• Only
described in this manual.
• 
that it will not be knocked over.
Do not place near large pieces of

• 

removing the plug from the outlet.
• Do not
environments.
• 
from children.
• Do not open the base or remove
the water level sensor for self-
servicing.
• Always
the power outlet before cleaning


• Always make sure to place the

before operation.
• Only
water. Never

• Do not
sources of heat, such as stovetops,
ovens, or radiators.
• Do not

• Do not use other items as
replacement parts for this product.
• Do not cover the nozzle while


To reduce the risk of re, electric shock, or other injury, follow all instructions
and safety guidelines.
General Safety
• Remove the water tank from the

• Do not
base, power cord, or plug in water.


it and contact Customer Support

• 


or mental capabilities, or lack of
experience and knowledge, unless

or instruction concerning use of the


• 

• Children should not clean or
perform maintenance on the

• Children should be supervised to


• Not for commercial use.
Household use only.
READ AND SAVE THESE
INSTRUCTIONS
Power & Cord
Electromagnetic Fields (EMF)
Caution: Risk of Leaks and
Electric Shock
• 
a polarized socket.
• Do not handle the power cord or
plug with wet hands. Keep the plug

• 



reduce the risk of electric shock. If

do not
use the plug in that outlet. Do not

• 


persons in order to avoid an electric

Customer Support



the instructions in this user manual,
the appliance is safe to use based on

• Do not add supplemental water

or base chamber. This will damage

SAFETY INFORMATION (CONT.)
1 × 
1 × Pre-Installed Water Filter Sponge
1 × Cleaning Brush
1 × User Manual
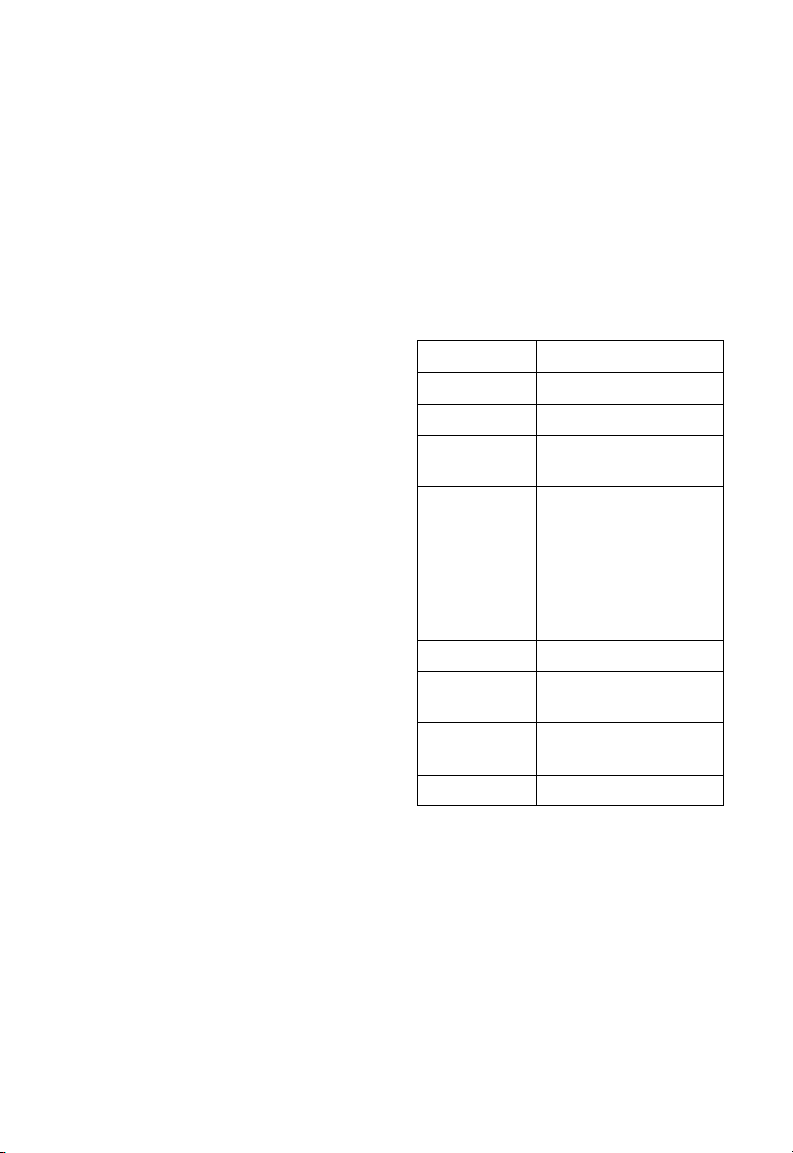
Specifications
Package Contents
Model 
Power Supply 
Rated Power 
Water Tank
Capacity

Max Runtime

minimum mist setting
Note: The humidier may
run for a longer or shorter
time depending on the
environmental temperature
and humidity.
Noise Level <
Eective
Range

Dimensions


Weight 
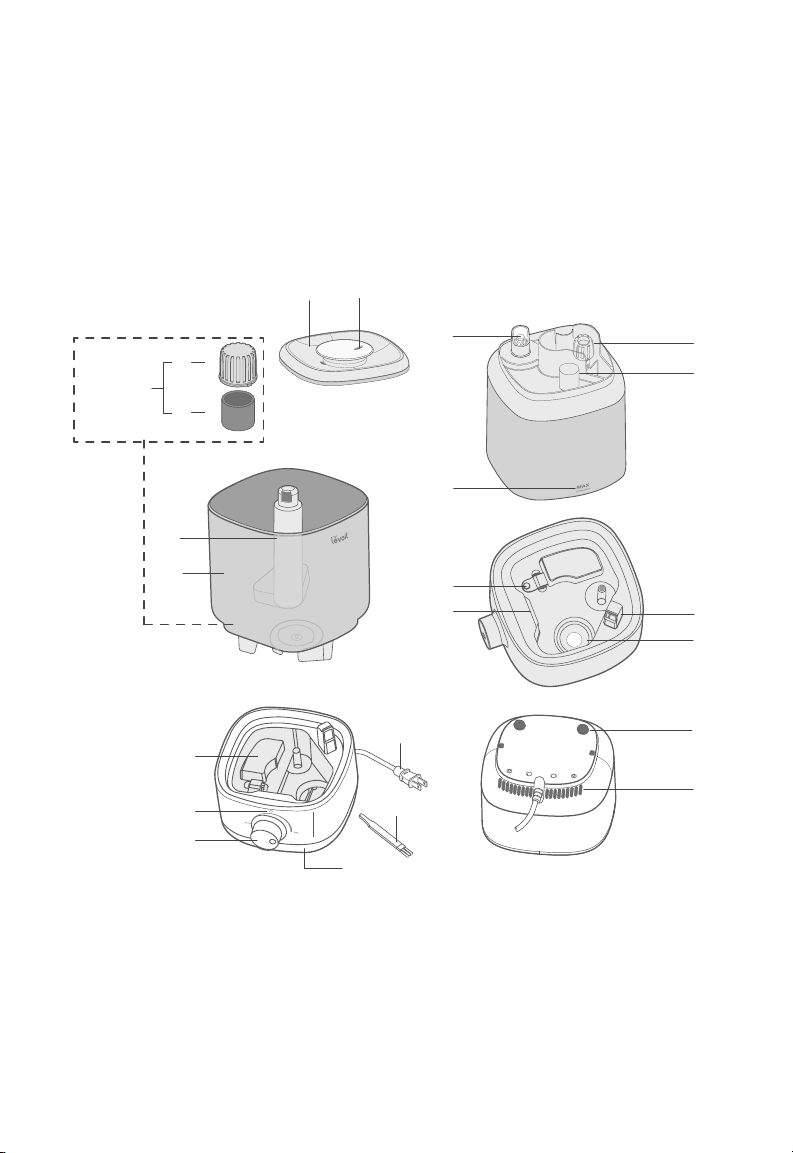
GETTING TO KNOW YOUR HUMIDIFIER
A. Nozzle
B. Water Tank Cover
C. Water Filter Housing
D. Water Filter
E. Mist Tube
F. Water Tank
G. Float
H. 
I. Control Knob
J. Base
K. Cleaning Brush
L. Power Cord
M. 
N. 
O. Noise Silencer
P. 
Q. 
R. Float Brackets
S. Transducer
T. 
U. Feet
V. 
CONTROLS
Control Knob
• Rotate clockwise to turn on the

• 

Rell Indicator Light
• The red light turns on when the water


• The red light turns o when the water
tank is lled.
Note:
There is a clicking sound when
the humidier turns on/o.
1 2 3
Water tank, upside down
A
B
D
C
The water
lter
assembly
F
E
M
L
K
J
G
H
I
O
N
P
Q
R
S
T
U
V
CUSTOMER SUPPORT


Customer Support Team.
Arovast Corporation


Email: support@levoit.com
Toll-Free: 
MonFri, 9:00 am5:00 pm PST/PDT
Support Hours


4
GETTING STARTED
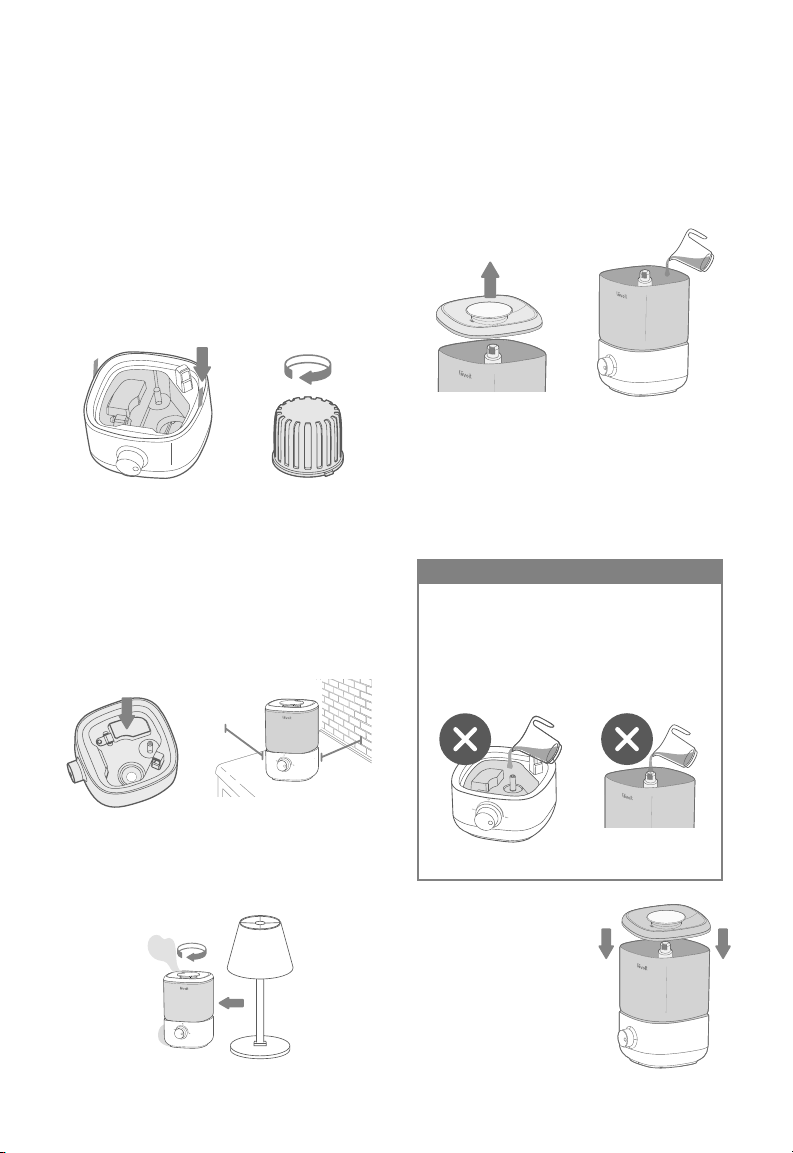
1. Remove all packaging.
2. 
remove all tape. [Figure 1.1]
3. 
Cleaning
Figure 1.3
Figure 1.1
Figure 1.4
Figure 1.5
Figure 1.2
Note:
• Check to make sure that the water lter
is correctly in place. If not, then rotate
the lter clockwise to secure it in place.
[Figure 1.2]
4. 

walls. The surface must be water-resistant.
[Figure 1.4]
5. 
furniture, bedding, and appliances. [Figure 1.5]
• Check to make sure that the oat is
securely in place. [Figure 1.3]
12 in /
30 cm
12 in /
30 cm
Filling & Refilling
1. 
2. 
nozzle and pulling upward. [Figure 1.6]
3. Fill the tank with room-temperature water.
[Figure 1.7]
Figure 1.6 Figure 1.7
4. Replace the water
tank cover.
Note:
• We recommend using puried or distilled water
to ll the tank.
• Do not ll past the tank’s max water line.
• Do not ll with hot water.
Figure 1.8
Figure 1.9
• Never add essential oils into the water
tank or base chamber.
• Do not
chamber. [Figure 1.8]
• Do not add water through the mist tube.
[Figure 1.9]
CAUTION
Note: Make sure the water tank is clean before lling.
Figure 1.10
Note:
Make sure the
nozzle on the water tank
cover is placed over
the mist tube, or the
humidier may not work
correctly. [Figure 1.10]
1.000
1.000

background
M
A
X
M
A
X
Levoit Classic 160 Ultrasonic Cool Mist Humidier
Questions or Concerns?
Please contact us MonFri, 9:00 am5:00 pm PST/PDT
at support@levoit.com or at 1-888-726-8520.
USER MANUAL
1000
SAFETY INFORMATION
• Only
described in this manual.
• 
that it will not be knocked over.
Do not place near large pieces of

• 

removing the plug from the outlet.
• Do not
environments.
• 
from children.
• Do not open the base or remove
the water level sensor for self-
servicing.
• Always
the power outlet before cleaning


• Always make sure to place the

before operation.
• Only
water. Never

• Do not
sources of heat, such as stovetops,
ovens, or radiators.
• Do not

• Do not use other items as
replacement parts for this product.
• Do not cover the nozzle while


To reduce the risk of re, electric shock, or other injury, follow all instructions
and safety guidelines.
General Safety
• Remove the water tank from the

• Do not
base, power cord, or plug in water.


it and contact Customer Support

• 


or mental capabilities, or lack of
experience and knowledge, unless

or instruction concerning use of the


• 

• Children should not clean or
perform maintenance on the

• Children should be supervised to


• Not for commercial use.
Household use only.
READ AND SAVE THESE
INSTRUCTIONS
Power & Cord
Electromagnetic Fields (EMF)
Caution: Risk of Leaks and
Electric Shock
• 
a polarized socket.
• Do not handle the power cord or
plug with wet hands. Keep the plug

• 



reduce the risk of electric shock. If

do not
use the plug in that outlet. Do not

• 


persons in order to avoid an electric

Customer Support



the instructions in this user manual,
the appliance is safe to use based on

• Do not add supplemental water

or base chamber. This will damage

SAFETY INFORMATION (CONT.)
1 × 
1 × Pre-Installed Water Filter Sponge
1 × Cleaning Brush
1 × User Manual
Specifications
Package Contents
Model 
Power Supply 
Rated Power 
Water Tank
Capacity

Max Runtime

minimum mist setting
Note: The humidier may
run for a longer or shorter
time depending on the
environmental temperature
and humidity.
Noise Level <
Eective
Range

Dimensions


Weight 
GETTING TO KNOW YOUR HUMIDIFIER
A. Nozzle
B. Water Tank Cover
C. Water Filter Housing
D. Water Filter
E. Mist Tube
F. Water Tank
G. Float
H. 
I. Control Knob
J. Base
K. Cleaning Brush
L. Power Cord
M. 
N. 
O. Noise Silencer
P. 
Q. 
R. Float Brackets
S. Transducer
T. 
U. Feet
V. 
CONTROLS
Control Knob
• Rotate clockwise to turn on the

• 

Rell Indicator Light
• The red light turns on when the water


• The red light turns o when the water
tank is lled.
Note:
There is a clicking sound when
the humidier turns on/o.
1 2 3
Water tank, upside down
A
B
D
C
The water
lter
assembly
F
E
M
L
K
J
G
H
I
O
N
P
Q
R
S
T
U
V
CUSTOMER SUPPORT


Customer Support Team.
Arovast Corporation


Email: support@levoit.com
Toll-Free: 
MonFri, 9:00 am5:00 pm PST/PDT
Support Hours


4
GETTING STARTED
1. Remove all packaging.
2. 
remove all tape. [Figure 1.1]
3. 
Cleaning
Figure 1.3
Figure 1.1
Figure 1.4
Figure 1.5
Figure 1.2
Note:
• Check to make sure that the water lter
is correctly in place. If not, then rotate
the lter clockwise to secure it in place.
[Figure 1.2]
4. 

walls. The surface must be water-resistant.
[Figure 1.4]
5. 
furniture, bedding, and appliances. [Figure 1.5]
• Check to make sure that the oat is
securely in place. [Figure 1.3]
12 in /
30 cm
12 in /
30 cm
Filling & Refilling
1. 
2. 
nozzle and pulling upward. [Figure 1.6]
3. Fill the tank with room-temperature water.
[Figure 1.7]
Figure 1.6 Figure 1.7
4. Replace the water
tank cover.
Note:
• We recommend using puried or distilled water
to ll the tank.
• Do not ll past the tank’s max water line.
• Do not ll with hot water.
Figure 1.8
Figure 1.9
• Never add essential oils into the water
tank or base chamber.
• Do not
chamber. [Figure 1.8]
• Do not add water through the mist tube.
[Figure 1.9]
CAUTION
Note: Make sure the water tank is clean before lling.
Figure 1.10
Note:
Make sure the
nozzle on the water tank
cover is placed over
the mist tube, or the
humidier may not work
correctly. [Figure 1.10]
1.000
1.000
background
M
A
X
M
A
X
Levoit Classic 160 Ultrasonic Cool Mist Humidier
Questions or Concerns?
Please contact us MonFri, 9:00 am5:00 pm PST/PDT
at support@levoit.com or at 1-888-726-8520.
USER MANUAL
1000
SAFETY INFORMATION
• Only
described in this manual.
• 
that it will not be knocked over.
Do not place near large pieces of

• 

removing the plug from the outlet.
• Do not
environments.
• 
from children.
• Do not open the base or remove
the water level sensor for self-
servicing.
• Always
the power outlet before cleaning


• Always make sure to place the

before operation.
• Only
water. Never

• Do not
sources of heat, such as stovetops,
ovens, or radiators.
• Do not

• Do not use other items as
replacement parts for this product.
• Do not cover the nozzle while


To reduce the risk of re, electric shock, or other injury, follow all instructions
and safety guidelines.
General Safety
• Remove the water tank from the

• Do not
base, power cord, or plug in water.


it and contact Customer Support

• 


or mental capabilities, or lack of
experience and knowledge, unless

or instruction concerning use of the


• 

• Children should not clean or
perform maintenance on the

• Children should be supervised to


• Not for commercial use.
Household use only.
READ AND SAVE THESE
INSTRUCTIONS
Power & Cord
Electromagnetic Fields (EMF)
Caution: Risk of Leaks and
Electric Shock
• 
a polarized socket.
• Do not handle the power cord or
plug with wet hands. Keep the plug

• 



reduce the risk of electric shock. If

do not
use the plug in that outlet. Do not

• 


persons in order to avoid an electric

Customer Support



the instructions in this user manual,
the appliance is safe to use based on

• Do not add supplemental water

or base chamber. This will damage

SAFETY INFORMATION (CONT.)
1 × 
1 × Pre-Installed Water Filter Sponge
1 × Cleaning Brush
1 × User Manual
Specifications
Package Contents
Model 
Power Supply 
Rated Power 
Water Tank
Capacity

Max Runtime

minimum mist setting
Note: The humidier may
run for a longer or shorter
time depending on the
environmental temperature
and humidity.
Noise Level <
Eective
Range

Dimensions


Weight 
GETTING TO KNOW YOUR HUMIDIFIER
A. Nozzle
B. Water Tank Cover
C. Water Filter Housing
D. Water Filter
E. Mist Tube
F. Water Tank
G. Float
H. 
I. Control Knob
J. Base
K. Cleaning Brush
L. Power Cord
M. 
N. 
O. Noise Silencer
P. 
Q. 
R. Float Brackets
S. Transducer
T. 
U. Feet
V. 
CONTROLS
Control Knob
• Rotate clockwise to turn on the

• 

Rell Indicator Light
• The red light turns on when the water


• The red light turns o when the water
tank is lled.
Note:
There is a clicking sound when
the humidier turns on/o.
1 2 3
Water tank, upside down
A
B
D
C
The water
lter
assembly
F
E
M
L
K
J
G
H
I
O
N
P
Q
R
S
T
U
V
CUSTOMER SUPPORT


Customer Support Team.
Arovast Corporation


Toll-Free: 
MonFri, 9:00 am5:00 pm PST/PDT
Support Hours


4
GETTING STARTED
1. Remove all packaging.
2. 
remove all tape. [Figure 1.1]
3. 
Cleaning
Figure 1.3
Figure 1.1
Figure 1.4
Figure 1.5
Figure 1.2
Note:
• Check to make sure that the water lter
is correctly in place. If not, then rotate
the lter clockwise to secure it in place.
[Figure 1.2]
4. 

walls. The surface must be water-resistant.
[Figure 1.4]
5. 
furniture, bedding, and appliances. [Figure 1.5]
• Check to make sure that the oat is
securely in place. [Figure 1.3]
12 in /
30 cm
12 in /
30 cm
Filling & Refilling
1. 
2. 
nozzle and pulling upward. [Figure 1.6]
3. Fill the tank with room-temperature water.
[Figure 1.7]
Figure 1.6 Figure 1.7
4. Replace the water
tank cover.
Note:
• We recommend using puried or distilled water
to ll the tank.
• Do not ll past the tank’s max water line.
• Do not ll with hot water.
Figure 1.8
Figure 1.9
• Never add essential oils into the water
tank or base chamber.
• Do not
chamber. [Figure 1.8]
• Do not add water through the mist tube.
[Figure 1.9]
CAUTION
Note: Make sure the water tank is clean before lling.
Figure 1.10
Note:
Make sure the
nozzle on the water tank
cover is placed over
the mist tube, or the
humidier may not work
correctly. [Figure 1.10]
1.000
1.000
background
M
A
X
M
A
X
Levoit Classic 160 Ultrasonic Cool Mist Humidier
Questions or Concerns?
Please contact us MonFri, 9:00 am5:00 pm PST/PDT
at support@levoit.com or at 1-888-726-8520.
USER MANUAL
1000
SAFETY INFORMATION
• Only
described in this manual.
• 
that it will not be knocked over.
Do not place near large pieces of

• 

removing the plug from the outlet.
• Do not
environments.
• 
from children.
• Do not open the base or remove
the water level sensor for self-
servicing.
• Always
the power outlet before cleaning


• Always make sure to place the

before operation.
• Only
water. Never

• Do not
sources of heat, such as stovetops,
ovens, or radiators.
• Do not

• Do not use other items as
replacement parts for this product.
• Do not cover the nozzle while


To reduce the risk of re, electric shock, or other injury, follow all instructions
and safety guidelines.
General Safety
• Remove the water tank from the

• Do not
base, power cord, or plug in water.


it and contact Customer Support

• 


or mental capabilities, or lack of
experience and knowledge, unless

or instruction concerning use of the


• 

• Children should not clean or
perform maintenance on the

• Children should be supervised to


• Not for commercial use.
Household use only.
READ AND SAVE THESE
INSTRUCTIONS
Power & Cord
Electromagnetic Fields (EMF)
Caution: Risk of Leaks and
Electric Shock
• 
a polarized socket.
• Do not handle the power cord or
plug with wet hands. Keep the plug

• 



reduce the risk of electric shock. If

do not
use the plug in that outlet. Do not

• 


persons in order to avoid an electric

Customer Support



the instructions in this user manual,
the appliance is safe to use based on

• Do not add supplemental water

or base chamber. This will damage

SAFETY INFORMATION (CONT.)
1 × 
1 × Pre-Installed Water Filter Sponge
1 × Cleaning Brush
1 × User Manual
Specifications
Package Contents
Model 
Power Supply 
Rated Power 
Water Tank
Capacity

Max Runtime

minimum mist setting
Note: The humidier may
run for a longer or shorter
time depending on the
environmental temperature
and humidity.
Noise Level <
Eective
Range

Dimensions


Weight 
GETTING TO KNOW YOUR HUMIDIFIER
A. Nozzle
B. Water Tank Cover
C. Water Filter Housing
D. Water Filter
E. Mist Tube
F. Water Tank
G. Float
H. 
I. Control Knob
J. Base
K. Cleaning Brush
L. Power Cord
M. 
N. 
O. Noise Silencer
P. 
Q. 
R. Float Brackets
S. Transducer
T. 
U. Feet
V. 
CONTROLS
Control Knob
• Rotate clockwise to turn on the

• 

Rell Indicator Light
• The red light turns on when the water


• The red light turns o when the water
tank is lled.
Note:
There is a clicking sound when
the humidier turns on/o.
1 2 3
Water tank, upside down
A
B
D
C
The water
lter
assembly
F
E
M
L
K
J
G
H
I
O
N
P
Q
R
S
T
U
V
CUSTOMER SUPPORT


Customer Support Team.
Arovast Corporation


Email: support@levoit.com
Toll-Free: 
MonFri, 9:00 am5:00 pm PST/PDT
Support Hours


4
GETTING STARTED
1. Remove all packaging.
2. 
remove all tape. [Figure 1.1]
3. 
Cleaning
Figure 1.3
Figure 1.1
Figure 1.4
Figure 1.5
Figure 1.2
Note:
• Check to make sure that the water lter
is correctly in place. If not, then rotate
the lter clockwise to secure it in place.
[Figure 1.2]
4. 

walls. The surface must be water-resistant.
[Figure 1.4]
5. 
furniture, bedding, and appliances. [Figure 1.5]
• Check to make sure that the oat is
securely in place. [Figure 1.3]
12 in /
30 cm
12 in /
30 cm
Filling & Refilling
1. 
2. 
nozzle and pulling upward. [Figure 1.6]
3. Fill the tank with room-temperature water.
[Figure 1.7]
Figure 1.6 Figure 1.7
4. Replace the water
tank cover.
Note:
• We recommend using puried or distilled water
to ll the tank.
• Do not ll past the tank’s max water line.
• Do not ll with hot water.
Figure 1.8
Figure 1.9
• Never add essential oils into the water
tank or base chamber.
• Do not
chamber. [Figure 1.8]
• Do not add water through the mist tube.
[Figure 1.9]
CAUTION
Note: Make sure the water tank is clean before lling.
Figure 1.10
Note:
Make sure the
nozzle on the water tank
cover is placed over
the mist tube, or the
humidier may not work
correctly. [Figure 1.10]
1.000
1.000
background
M
A
X
M
A
X
Levoit Classic 160 Ultrasonic Cool Mist Humidier
Questions or Concerns?
Please contact us MonFri, 9:00 am5:00 pm PST/PDT
at support@levoit.com or at 1-888-726-8520.
USER MANUAL
1000
SAFETY INFORMATION
• Only
described in this manual.
• 
that it will not be knocked over.
Do not place near large pieces of

• 

removing the plug from the outlet.
• Do not
environments.
• 
from children.
• Do not open the base or remove
the water level sensor for self-
servicing.
• Always
the power outlet before cleaning


• Always make sure to place the

before operation.
• Only
water. Never

• Do not
sources of heat, such as stovetops,
ovens, or radiators.
• Do not

• Do not use other items as
replacement parts for this product.
• Do not cover the nozzle while


To reduce the risk of re, electric shock, or other injury, follow all instructions
and safety guidelines.
General Safety
• Remove the water tank from the

• Do not
base, power cord, or plug in water.


it and contact Customer Support

• 


or mental capabilities, or lack of
experience and knowledge, unless

or instruction concerning use of the


• 

• Children should not clean or
perform maintenance on the

• Children should be supervised to


• Not for commercial use.
Household use only.
READ AND SAVE THESE
INSTRUCTIONS
Power & Cord
Electromagnetic Fields (EMF)
Caution: Risk of Leaks and
Electric Shock
• 
a polarized socket.
• Do not handle the power cord or
plug with wet hands. Keep the plug

• 



reduce the risk of electric shock. If

do not
use the plug in that outlet. Do not

• 


persons in order to avoid an electric

Customer Support



the instructions in this user manual,
the appliance is safe to use based on

• Do not add supplemental water

or base chamber. This will damage

SAFETY INFORMATION (CONT.)
1 × 
1 × Pre-Installed Water Filter Sponge
1 × Cleaning Brush
1 × User Manual
Specifications
Package Contents
Model 
Power Supply 
Rated Power 
Water Tank
Capacity

Max Runtime

minimum mist setting
Note: The humidier may
run for a longer or shorter
time depending on the
environmental temperature
and humidity.
Noise Level <
Eective
Range

Dimensions


Weight 
GETTING TO KNOW YOUR HUMIDIFIER
A. Nozzle
B. Water Tank Cover
C. Water Filter Housing
D. Water Filter
E. Mist Tube
F. Water Tank
G. Float
H. 
I. Control Knob
J. Base
K. Cleaning Brush
L. Power Cord
M. 
N. 
O. Noise Silencer
P. 
Q. 
R. Float Brackets
S. Transducer
T. 
U. Feet
V. 
CONTROLS
Control Knob
• Rotate clockwise to turn on the

• 

Rell Indicator Light
• The red light turns on when the water


• The red light turns o when the water
tank is lled.
Note:
There is a clicking sound when
the humidier turns on/o.
1 2 3
Water tank, upside down
A
B
D
C
The water
lter
assembly
F
E
M
L
K
J
G
H
I
O
N
P
Q
R
S
T
U
V
CUSTOMER SUPPORT


Customer Support Team.
Arovast Corporation


Email: support@levoit.com
Toll-Free: 
MonFri, 9:00 am5:00 pm PST/PDT
Support Hours


4
GETTING STARTED
1. Remove all packaging.
2. 
remove all tape. [Figure 1.1]
3. 
Cleaning
Figure 1.3
Figure 1.1
Figure 1.4
Figure 1.5
Figure 1.2
Note:
• Check to make sure that the water lter
is correctly in place. If not, then rotate
the lter clockwise to secure it in place.
[Figure 1.2]
4. 

walls. The surface must be water-resistant.
[Figure 1.4]
5. 
furniture, bedding, and appliances. [Figure 1.5]
• Check to make sure that the oat is
securely in place. [Figure 1.3]
12 in /
30 cm
12 in /
30 cm
Filling & Refilling
1. 
2. 
nozzle and pulling upward. [Figure 1.6]
3. Fill the tank with room-temperature water.
[Figure 1.7]
Figure 1.6 Figure 1.7
4. Replace the water
tank cover.
Note:
• We recommend using puried or distilled water
to ll the tank.
• Do not ll past the tank’s max water line.
• Do not ll with hot water.
Figure 1.8
Figure 1.9
• Never add essential oils into the water
tank or base chamber.
• Do not
chamber. [Figure 1.8]
• Do not add water through the mist tube.
[Figure 1.9]
CAUTION
Note: Make sure the water tank is clean before lling.
Figure 1.10
Note:
Make sure the
nozzle on the water tank
cover is placed over
the mist tube, or the
humidier may not work
correctly. [Figure 1.10]
1.000
1.000
background
1000
5 6
USING YOUR HUMIDIFIER
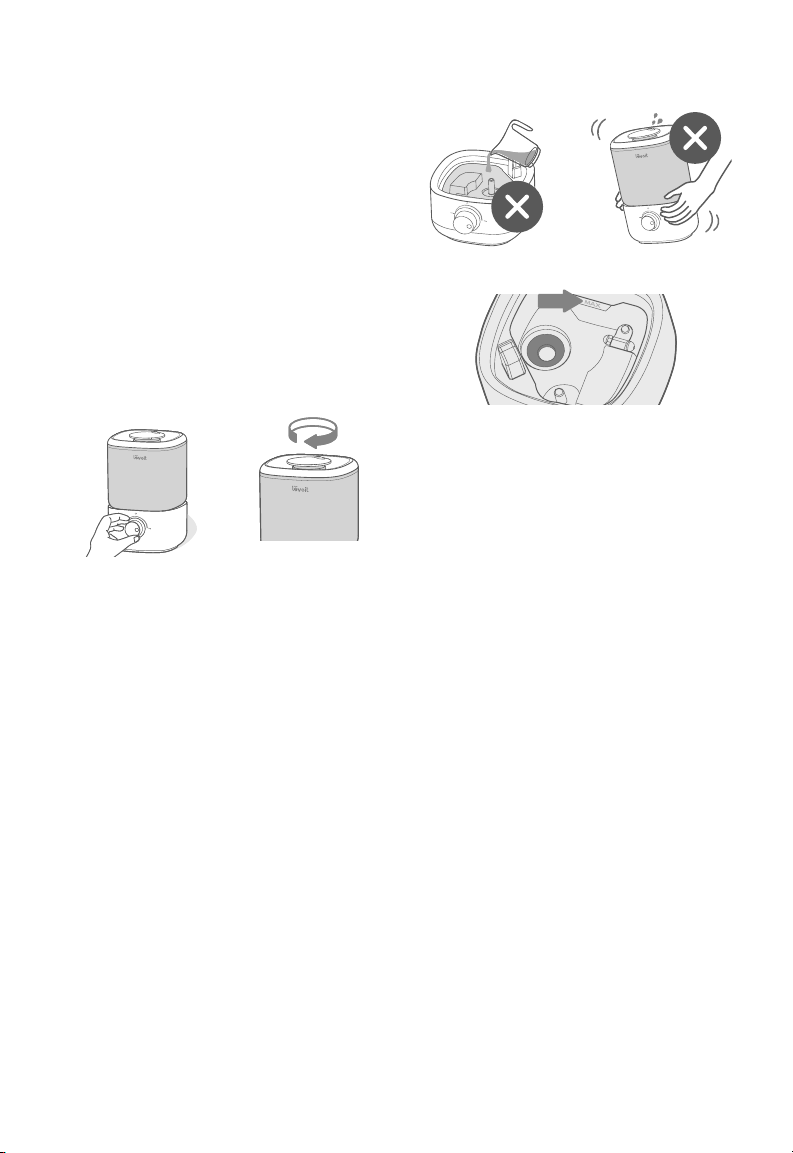
1. 

[Figure 2.1]
2. 
mist. [Figure 2.2]
3. 


4. Rotate the Control Knob counterclockwise to

Figure 2.1 Figure 2.2
Note: If there is no water in the tank or the
tank is removed, the humidier will stop
misting and the Rell Indicator Light will turn
on. Rell the tank and properly place it on the
base to use your humidier.
Note: Do not immerse the air outlet or air
inlet in water.
Figure 2.3
Figure 2.4
Figure 2.5
Important Tips


there is too much water in the base chamber,

• Never
chamber. [Figure 2.3]
• Only add water to the water tank. The

amount of water into the base chamber.
• 
[Figure 2.4]
release too much water into the base chamber.
• 
it, and remove the water tank.
• 

there is too much water in the base chamber.
Pour out extra water if water is over the max
line. [Figure 2.5]
Note: The max water line is only for this purpose.
Do not pour water into the base chamber.
Figure 3.1
Figure 3.2 Figure 3.3
CARE & MAINTENANCE
Note:
• All maintenance should be done on a water-
resistant surface, such as a kitchen counter.
• Change the water daily to avoid bacteria growth.
• Use a tissue or cloth to clean the nozzle regularly.
• If not using the humidier for 3 days or longer,
do not leave water inside. Clean and dry the
humidier instead.
Note: When pouring out water, hold down the
Note:
• The water tank, cover, water lter
and housing, mist tube, and oat are
dishwasher safe. Make sure the water
temperature is below 158°F / 70°C
• Do not wash the base in the dishwasher,
as the electronics will be damaged.
• Never immerse the base in water or liquid.
• Do not immerse the air outlet or air inlet in
water.
Cleaning


For detailed dishwasher cleaning instructions,
contact Customer Support
3. Remove the water tank from the base and

chamber. [Figure 3.1]
1. 
2. Remove the water tank cover.
Cleaning (cont.)
1
000
1
000
4. 

[Figure 3.2]
5. 



be removed.
6. 

[Figure 3.3]
a. 
dishwasher. Do not wash the base in the
dishwasher.
7. Rinse the base chamber with room temperature
water.
1. 
it counterclockwise and lifting it out. [Figure 3.4]
2. 
white vinegar. [Figure 3.5]
Figure 3.4 Figure 3.5
Descaling Your Humidifier
Figure 3.8 Figure 3.9
Figure 3.6 Figure 3.7
3. Replace the tank cover and swish the vinegar
around the tank. [Figure 3.6]
4. Place the tank on the base and soak for



[Figure 3.7]
5. Remove the tank, remove the tank cover, and
[Figure 3.8]
6. Flip the tank over and remove the noise
silencer. To remove the noise silencer, press

[Figure 3.9]
8. 
Reassembling
7. 
[Figure 3.10] and


allow the shaft to be removed. [Figure 3.11]
Figure 3.10
Figure 3.11
Product


Model 
For your own reference, we strongly recommend that you record
your order ID and date of purchase.
Date of Purchase
Order ID
WARRANTY INFORMATION
87
9
Figure 3.13
Figure 3.16 Figure 3.17
3. 
a. 
facing up. [Figure 3.16]
b. Insert the smaller prong into the closed
[Figure 3.17]
c. Place the larger prong into the open
Ushaped
4. 
5. 
the tank cover on the water tank.
Storing
The Water Filter Assembly




clogging the water outlet valve and entering the
base chamber. Large particles in the water can cause




needs to be replaced. For more information, contact
Customer Support
Figure 3.15
Figure 3.14
Descaling Your Humidier (cont.)
8. 
silencer in a small container. Fill with enough

[Figure 3.12]
Reassembling
1. Flip the water tank over and place the noise
silencer back into the tank. [Figure 3.14]
2. 
tank and rotate it clockwise to secure it in place.
[Figure 3.15]
Problem Possible Solution
Humidier doesn’t
turn on, or turns o
unexpectedly.


Humidier produces
an unusual smell.

Care & Maintenance
Humidier makes
a loud or unusual
noise.
Getting Started
Set mist level to a lower setting.


TCustomer Support
White scale (mineral
buildup) appears
around the humidier.

mineral content.
Care & Maintenance
Water leaks from the
humidier.
Make sure the silicone sealing ring around the water outlet valve is secure.


Do not 

Check the water tank for leaks. If there are leaks, contact Customer Support
Condensation forms
around humidier or
windows.

in the room.
Mold grows inside
the humidier.
Care & Maintenance
Rell Indicator Light
turns on.
Fill the water tank.


Customer Support
Problem Possible Solution
Little or no mist
comes out.
Turn the mist level to a higher setting.
Fill the water tank.




Make sure the nozzle is not blocked or clogged.




detergent.

Figure 3.12
Levoit Limited Product Warranty

up to date with important product information such as product updates,
limited warranties, usage and maintenance recommendations, and


Two (2) Year Limited Consumer Product Warranty

from defects in material and workmanship for a period of 2 years from
the date of original purchase


Your Limited Warranty Benefits





store credit in the amount of the purchase price.
Who is Covered?


the product, regardless of whether the product transferred ownership

purchaser must provide verification of the defect or malfunction and proof

Be Aware of Unauthorized Dealers or Sellers




Please be aware, products purchased from an unauthorized website





our Customer Support Team via support@levoit.com.
What’s Not Covered?
• Normal wear and tear, including parts that might wear out over


• 
illegible.
• If the model number, serial number or production date code on
the product has been altered, removed or made illegible.
• If the product has been modified from its original condition.
• If the product has not been used in accordance with directions
and instructions in the user manual.
• 

the user manual.
• 

• 


• Damages or defects occurring during commercial use, rental use,

• If the unit has been damaged, including but not limited to



• 
• Damages or defects exceeding the cost of the product.
Claiming Your Limited Warranty Service in 5 Simple Steps:
 
period.
 
of-purchase.
 DO NOT
before contacting us.
 Contact our Customer Support Team via support@levoit.com
5. 

Sole and Exclusive Remedy









Disclaimer of Limited Warranties








Limitations of Liability







OR










INDIRECT.






OTHER RIGHTS YOU MAY HAVE














CHANGES TO THIS POLICY






THIS DEVICE COMPLIES WITH PART 18 OF THE FCC RULES.
FCC SDOC SUPPLIER’S DECLARATION OF CONFORMITY
Federal Communication Commission Interference Statement




Such interference in a residential installation. However, there is no guarantee that interference will not occur in a particular


• Reorient the receiving antenna of radio or television.
• 
• 
• 








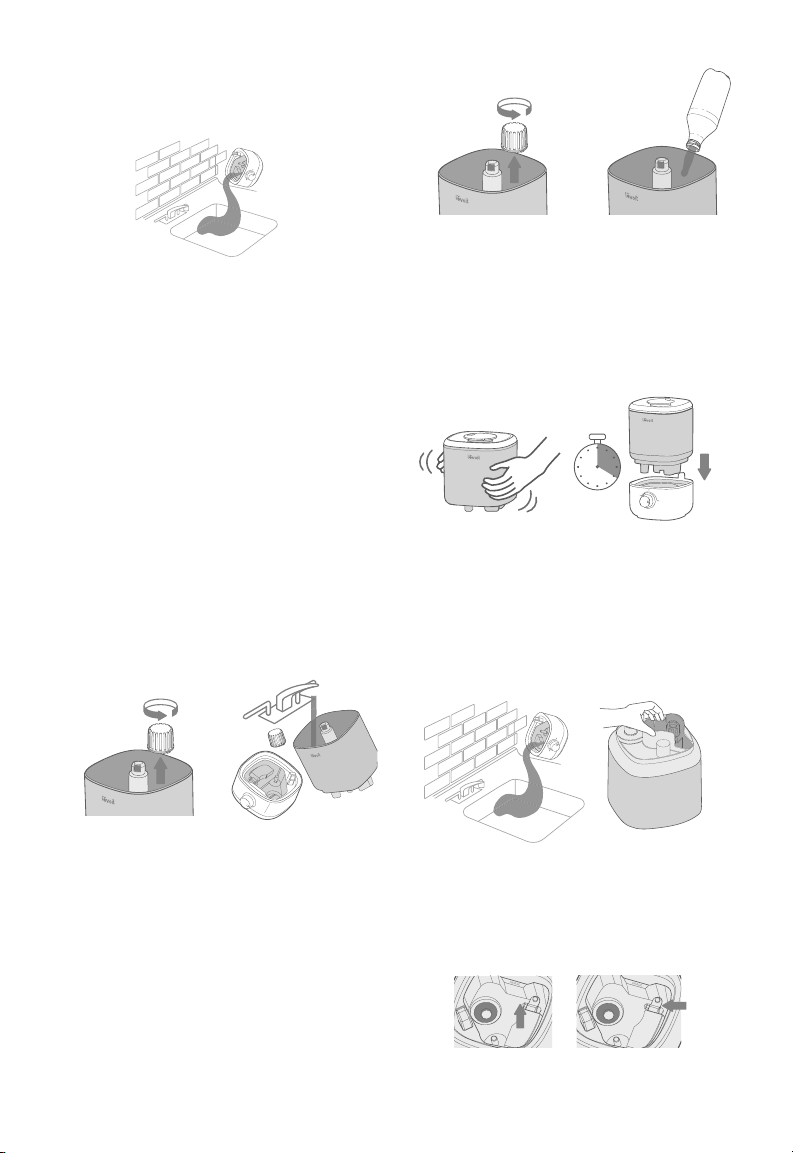
9. Use the cleaning brush and a soft cloth to remove
scale from all parts.
10. 
[Figure 3.13]
11. 

oat to ensure that it does not fall out of the
base chamber.

background
1000
5 6
USING YOUR HUMIDIFIER
1. 

[Figure 2.1]
2. 
mist. [Figure 2.2]
3. 


4. Rotate the Control Knob counterclockwise to

Figure 2.1 Figure 2.2
Note: If there is no water in the tank or the
tank is removed, the humidier will stop
misting and the Rell Indicator Light will turn
on. Rell the tank and properly place it on the
base to use your humidier.
Note: Do not immerse the air outlet or air
inlet in water.
Figure 2.3
Figure 2.4
Figure 2.5
Important Tips


there is too much water in the base chamber,

• Never
chamber. [Figure 2.3]
• Only add water to the water tank. The

amount of water into the base chamber.
• 
[Figure 2.4]
release too much water into the base chamber.
• 
it, and remove the water tank.
• 

there is too much water in the base chamber.
Pour out extra water if water is over the max
line. [Figure 2.5]
Note: The max water line is only for this purpose.
Do not pour water into the base chamber.
Figure 3.1
Figure 3.2 Figure 3.3
CARE & MAINTENANCE
Note:
• All maintenance should be done on a water-
resistant surface, such as a kitchen counter.
• Change the water daily to avoid bacteria growth.
• Use a tissue or cloth to clean the nozzle regularly.
• If not using the humidier for 3 days or longer,
do not leave water inside. Clean and dry the
humidier instead.
Note: When pouring out water, hold down the
Note:
• The water tank, cover, water lter
and housing, mist tube, and oat are
dishwasher safe. Make sure the water
temperature is below 158°F / 70°C
• Do not wash the base in the dishwasher,
as the electronics will be damaged.
• Never immerse the base in water or liquid.
• Do not immerse the air outlet or air inlet in
water.
Cleaning


For detailed dishwasher cleaning instructions,
contact Customer Support
3. Remove the water tank from the base and

chamber. [Figure 3.1]
1. 
2. Remove the water tank cover.
Cleaning (cont.)
1
000
1
000
4. 

[Figure 3.2]
5. 



be removed.
6. 

[Figure 3.3]
a. 
dishwasher. Do not wash the base in the
dishwasher.
7. Rinse the base chamber with room temperature
water.
1. 
it counterclockwise and lifting it out. [Figure 3.4]
2. 
white vinegar. [Figure 3.5]
Figure 3.4 Figure 3.5
Descaling Your Humidifier
Figure 3.8 Figure 3.9
Figure 3.6 Figure 3.7
3. Replace the tank cover and swish the vinegar
around the tank. [Figure 3.6]
4. Place the tank on the base and soak for



[Figure 3.7]
5. Remove the tank, remove the tank cover, and
[Figure 3.8]
6. Flip the tank over and remove the noise
silencer. To remove the noise silencer, press

[Figure 3.9]
8. 
Reassembling
7. 
[Figure 3.10] and


allow the shaft to be removed. [Figure 3.11]
Figure 3.10
Figure 3.11
Product


Model 
For your own reference, we strongly recommend that you record
your order ID and date of purchase.
Date of Purchase
Order ID
WARRANTY INFORMATION
87
9
Figure 3.13
Figure 3.16 Figure 3.17
3. 
a. 
facing up. [Figure 3.16]
b. Insert the smaller prong into the closed
[Figure 3.17]
c. Place the larger prong into the open
Ushaped
4. 
5. 
the tank cover on the water tank.
Storing
The Water Filter Assembly




clogging the water outlet valve and entering the
base chamber. Large particles in the water can cause




needs to be replaced. For more information, contact
Customer Support
Figure 3.15
Figure 3.14
Descaling Your Humidier (cont.)
8. 
silencer in a small container. Fill with enough

[Figure 3.12]
Reassembling
1. Flip the water tank over and place the noise
silencer back into the tank. [Figure 3.14]
2. 
tank and rotate it clockwise to secure it in place.
[Figure 3.15]
Problem Possible Solution
Humidier doesn’t
turn on, or turns o
unexpectedly.


Humidier produces
an unusual smell.

Care & Maintenance
Humidier makes
a loud or unusual
noise.
Getting Started
Set mist level to a lower setting.


TCustomer Support
White scale (mineral
buildup) appears
around the humidier.

mineral content.
Care & Maintenance
Water leaks from the
humidier.
Make sure the silicone sealing ring around the water outlet valve is secure.


Do not 

Check the water tank for leaks. If there are leaks, contact Customer Support
Condensation forms
around humidier or
windows.

in the room.
Mold grows inside
the humidier.
Care & Maintenance
Rell Indicator Light
turns on.
Fill the water tank.


Customer Support
Problem Possible Solution
Little or no mist
comes out.
Turn the mist level to a higher setting.
Fill the water tank.




Make sure the nozzle is not blocked or clogged.




detergent.

Figure 3.12
Levoit Limited Product Warranty

up to date with important product information such as product updates,
limited warranties, usage and maintenance recommendations, and


Two (2) Year Limited Consumer Product Warranty

from defects in material and workmanship for a period of 2 years from
the date of original purchase


Your Limited Warranty Benefits





store credit in the amount of the purchase price.
Who is Covered?


the product, regardless of whether the product transferred ownership

purchaser must provide verification of the defect or malfunction and proof

Be Aware of Unauthorized Dealers or Sellers




Please be aware, products purchased from an unauthorized website





our Customer Support Team via support@levoit.com.
What’s Not Covered?
• Normal wear and tear, including parts that might wear out over


• 
illegible.
• If the model number, serial number or production date code on
the product has been altered, removed or made illegible.
• If the product has been modified from its original condition.
• If the product has not been used in accordance with directions
and instructions in the user manual.
• 

the user manual.
• 

• 


• Damages or defects occurring during commercial use, rental use,

• If the unit has been damaged, including but not limited to



• 
• Damages or defects exceeding the cost of the product.
Claiming Your Limited Warranty Service in 5 Simple Steps:
 
period.
 
of-purchase.
 DO NOT
before contacting us.
 Contact our Customer Support Team via support@levoit.com
5. 

Sole and Exclusive Remedy









Disclaimer of Limited Warranties








Limitations of Liability







OR










INDIRECT.






OTHER RIGHTS YOU MAY HAVE














CHANGES TO THIS POLICY






THIS DEVICE COMPLIES WITH PART 18 OF THE FCC RULES.
FCC SDOC SUPPLIER’S DECLARATION OF CONFORMITY
Federal Communication Commission Interference Statement




Such interference in a residential installation. However, there is no guarantee that interference will not occur in a particular


• Reorient the receiving antenna of radio or television.
• 
• 
• 








9. Use the cleaning brush and a soft cloth to remove
scale from all parts.
10. 
[Figure 3.13]
11. 

oat to ensure that it does not fall out of the
base chamber.
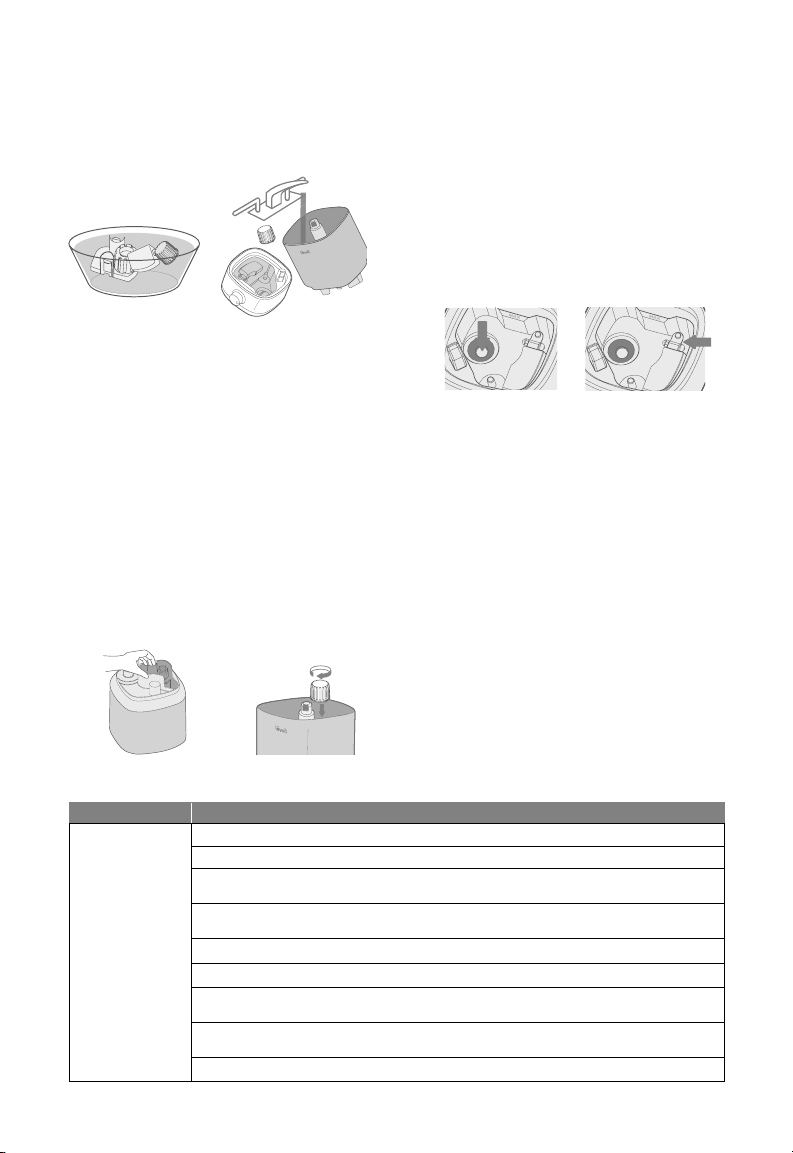

background
1000
5 6
USING YOUR HUMIDIFIER
1. 

[Figure 2.1]
2. 
mist. [Figure 2.2]
3. 


4. Rotate the Control Knob counterclockwise to

Figure 2.1 Figure 2.2
Note: If there is no water in the tank or the
tank is removed, the humidier will stop
misting and the Rell Indicator Light will turn
on. Rell the tank and properly place it on the
base to use your humidier.
Note: Do not immerse the air outlet or air
inlet in water.
Figure 2.3
Figure 2.4
Figure 2.5
Important Tips


there is too much water in the base chamber,

• Never
chamber. [Figure 2.3]
• Only add water to the water tank. The

amount of water into the base chamber.
• 
[Figure 2.4]
release too much water into the base chamber.
• 
it, and remove the water tank.
• 

there is too much water in the base chamber.
Pour out extra water if water is over the max
line. [Figure 2.5]
Note: The max water line is only for this purpose.
Do not pour water into the base chamber.
Figure 3.1
Figure 3.2 Figure 3.3
CARE & MAINTENANCE
Note:
• All maintenance should be done on a water-
resistant surface, such as a kitchen counter.
• Change the water daily to avoid bacteria growth.
• Use a tissue or cloth to clean the nozzle regularly.
• If not using the humidier for 3 days or longer,
do not leave water inside. Clean and dry the
humidier instead.
Note: When pouring out water, hold down the
Note:
• The water tank, cover, water lter
and housing, mist tube, and oat are
dishwasher safe. Make sure the water
temperature is below 158°F / 70°C
• Do not wash the base in the dishwasher,
as the electronics will be damaged.
• Never immerse the base in water or liquid.
• Do not immerse the air outlet or air inlet in
water.
Cleaning


For detailed dishwasher cleaning instructions,
contact Customer Support
3. Remove the water tank from the base and

chamber. [Figure 3.1]
1. 
2. Remove the water tank cover.
Cleaning (cont.)
1
000
1
000
4. 

[Figure 3.2]
5. 



be removed.
6. 

[Figure 3.3]
a. 
dishwasher. Do not wash the base in the
dishwasher.
7. Rinse the base chamber with room temperature
water.
1. 
it counterclockwise and lifting it out. [Figure 3.4]
2. 
white vinegar. [Figure 3.5]
Figure 3.4 Figure 3.5
Descaling Your Humidifier
Figure 3.8 Figure 3.9
Figure 3.6 Figure 3.7
3. Replace the tank cover and swish the vinegar
around the tank. [Figure 3.6]
4. Place the tank on the base and soak for



[Figure 3.7]
5. Remove the tank, remove the tank cover, and
[Figure 3.8]
6. Flip the tank over and remove the noise
silencer. To remove the noise silencer, press

[Figure 3.9]
8. 
Reassembling
7. 
[Figure 3.10] and


allow the shaft to be removed. [Figure 3.11]
Figure 3.10
Figure 3.11
Product


Model 
For your own reference, we strongly recommend that you record
your order ID and date of purchase.
Date of Purchase
Order ID
WARRANTY INFORMATION
87
9
Figure 3.13
Figure 3.16 Figure 3.17
3. 
a. 
facing up. [Figure 3.16]
b. Insert the smaller prong into the closed
[Figure 3.17]
c. Place the larger prong into the open
Ushaped
4. 
5. 
the tank cover on the water tank.
Storing
The Water Filter Assembly




clogging the water outlet valve and entering the
base chamber. Large particles in the water can cause




needs to be replaced. For more information, contact
Customer Support
Figure 3.15
Figure 3.14
Descaling Your Humidier (cont.)
8. 
silencer in a small container. Fill with enough

[Figure 3.12]
Reassembling
1. Flip the water tank over and place the noise
silencer back into the tank. [Figure 3.14]
2. 
tank and rotate it clockwise to secure it in place.
[Figure 3.15]
Problem Possible Solution
Humidier doesn’t
turn on, or turns o
unexpectedly.


Humidier produces
an unusual smell.

Care & Maintenance
Humidier makes
a loud or unusual
noise.
Getting Started
Set mist level to a lower setting.


TCustomer Support
White scale (mineral
buildup) appears
around the humidier.

mineral content.
Care & Maintenance
Water leaks from the
humidier.
Make sure the silicone sealing ring around the water outlet valve is secure.


Do not 

Check the water tank for leaks. If there are leaks, contact Customer Support
Condensation forms
around humidier or
windows.

in the room.
Mold grows inside
the humidier.
Care & Maintenance
Rell Indicator Light
turns on.
Fill the water tank.


Customer Support
Problem Possible Solution
Little or no mist
comes out.
Turn the mist level to a higher setting.
Fill the water tank.




Make sure the nozzle is not blocked or clogged.




detergent.

Figure 3.12
Levoit Limited Product Warranty

up to date with important product information such as product updates,
limited warranties, usage and maintenance recommendations, and


Two (2) Year Limited Consumer Product Warranty

from defects in material and workmanship for a period of 2 years from
the date of original purchase


Your Limited Warranty Benefits





store credit in the amount of the purchase price.
Who is Covered?


the product, regardless of whether the product transferred ownership

purchaser must provide verification of the defect or malfunction and proof

Be Aware of Unauthorized Dealers or Sellers




Please be aware, products purchased from an unauthorized website





our Customer Support Team via support@levoit.com.
What’s Not Covered?
• Normal wear and tear, including parts that might wear out over


• 
illegible.
• If the model number, serial number or production date code on
the product has been altered, removed or made illegible.
• If the product has been modified from its original condition.
• If the product has not been used in accordance with directions
and instructions in the user manual.
• 

the user manual.
• 

• 


• Damages or defects occurring during commercial use, rental use,

• If the unit has been damaged, including but not limited to



• 
• Damages or defects exceeding the cost of the product.
Claiming Your Limited Warranty Service in 5 Simple Steps:
 
period.
 
of-purchase.
 DO NOT
before contacting us.
 Contact our Customer Support Team via support@levoit.com
5. 

Sole and Exclusive Remedy









Disclaimer of Limited Warranties








Limitations of Liability







OR










INDIRECT.






OTHER RIGHTS YOU MAY HAVE














CHANGES TO THIS POLICY






THIS DEVICE COMPLIES WITH PART 18 OF THE FCC RULES.
FCC SDOC SUPPLIER’S DECLARATION OF CONFORMITY
Federal Communication Commission Interference Statement




Such interference in a residential installation. However, there is no guarantee that interference will not occur in a particular


• Reorient the receiving antenna of radio or television.
• 
• 
• 








9. Use the cleaning brush and a soft cloth to remove
scale from all parts.
10. 
[Figure 3.13]
11. 

oat to ensure that it does not fall out of the
base chamber.
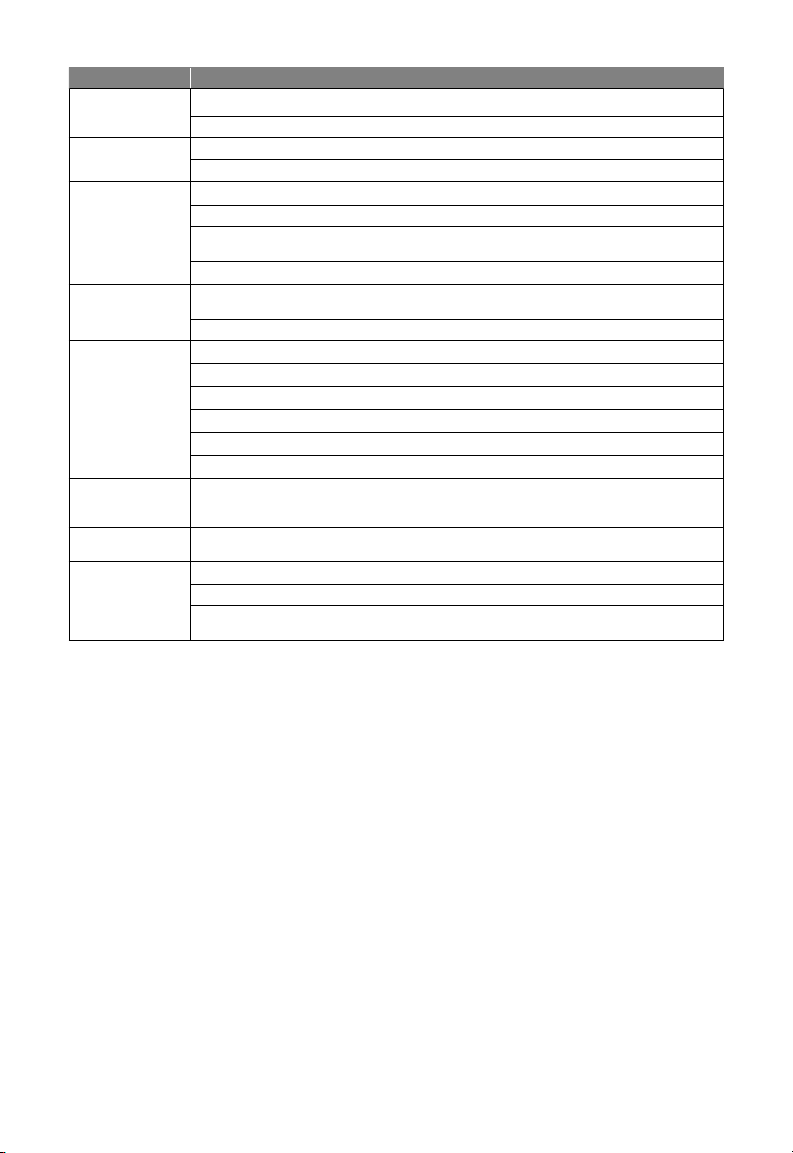

background
1000
5 6
USING YOUR HUMIDIFIER
1. 

[Figure 2.1]
2. 
mist. [Figure 2.2]
3. 


4. Rotate the Control Knob counterclockwise to

Figure 2.1 Figure 2.2
Note: If there is no water in the tank or the
tank is removed, the humidier will stop
misting and the Rell Indicator Light will turn
on. Rell the tank and properly place it on the
base to use your humidier.
Note: Do not immerse the air outlet or air
inlet in water.
Figure 2.3
Figure 2.4
Figure 2.5
Important Tips


there is too much water in the base chamber,

• Never
chamber. [Figure 2.3]
• Only add water to the water tank. The

amount of water into the base chamber.
• 
[Figure 2.4]
release too much water into the base chamber.
• 
it, and remove the water tank.
• 

there is too much water in the base chamber.
Pour out extra water if water is over the max
line. [Figure 2.5]
Note: The max water line is only for this purpose.
Do not pour water into the base chamber.
Figure 3.1
Figure 3.2 Figure 3.3
CARE & MAINTENANCE
Note:
• All maintenance should be done on a water-
resistant surface, such as a kitchen counter.
• Change the water daily to avoid bacteria growth.
• Use a tissue or cloth to clean the nozzle regularly.
• If not using the humidier for 3 days or longer,
do not leave water inside. Clean and dry the
humidier instead.
Note: When pouring out water, hold down the
Note:
• The water tank, cover, water lter
and housing, mist tube, and oat are
dishwasher safe. Make sure the water
temperature is below 158°F / 70°C
• Do not wash the base in the dishwasher,
as the electronics will be damaged.
• Never immerse the base in water or liquid.
• Do not immerse the air outlet or air inlet in
water.
Cleaning


For detailed dishwasher cleaning instructions,
contact Customer Support
3. Remove the water tank from the base and

chamber. [Figure 3.1]
1. 
2. Remove the water tank cover.
Cleaning (cont.)
1
000
1
000
4. 

[Figure 3.2]
5. 



be removed.
6. 

[Figure 3.3]
a. 
dishwasher. Do not wash the base in the
dishwasher.
7. Rinse the base chamber with room temperature
water.
1. 
it counterclockwise and lifting it out. [Figure 3.4]
2. 
white vinegar. [Figure 3.5]
Figure 3.4 Figure 3.5
Descaling Your Humidifier
Figure 3.8 Figure 3.9
Figure 3.6 Figure 3.7
3. Replace the tank cover and swish the vinegar
around the tank. [Figure 3.6]
4. Place the tank on the base and soak for



[Figure 3.7]
5. Remove the tank, remove the tank cover, and
[Figure 3.8]
6. Flip the tank over and remove the noise
silencer. To remove the noise silencer, press

[Figure 3.9]
8. 
Reassembling
7. 
[Figure 3.10] and


allow the shaft to be removed. [Figure 3.11]
Figure 3.10
Figure 3.11
Product


Model 
For your own reference, we strongly recommend that you record
your order ID and date of purchase.
Date of Purchase
Order ID
WARRANTY INFORMATION
87
9
Figure 3.13
Figure 3.16 Figure 3.17
3. 
a. 
facing up. [Figure 3.16]
b. Insert the smaller prong into the closed
[Figure 3.17]
c. Place the larger prong into the open
Ushaped
4. 
5. 
the tank cover on the water tank.
Storing
The Water Filter Assembly




clogging the water outlet valve and entering the
base chamber. Large particles in the water can cause




needs to be replaced. For more information, contact
Customer Support
Figure 3.15
Figure 3.14
Descaling Your Humidier (cont.)
8. 
silencer in a small container. Fill with enough

[Figure 3.12]
Reassembling
1. Flip the water tank over and place the noise
silencer back into the tank. [Figure 3.14]
2. 
tank and rotate it clockwise to secure it in place.
[Figure 3.15]
Problem Possible Solution
Humidier doesn’t
turn on, or turns o
unexpectedly.


Humidier produces
an unusual smell.

Care & Maintenance
Humidier makes
a loud or unusual
noise.
Getting Started
Set mist level to a lower setting.


TCustomer Support
White scale (mineral
buildup) appears
around the humidier.

mineral content.
Care & Maintenance
Water leaks from the
humidier.
Make sure the silicone sealing ring around the water outlet valve is secure.


Do not 

Check the water tank for leaks. If there are leaks, contact Customer Support
Condensation forms
around humidier or
windows.

in the room.
Mold grows inside
the humidier.
Care & Maintenance
Rell Indicator Light
turns on.
Fill the water tank.


Customer Support
Problem Possible Solution
Little or no mist
comes out.
Turn the mist level to a higher setting.
Fill the water tank.




Make sure the nozzle is not blocked or clogged.




detergent.

Figure 3.12
Levoit Limited Product Warranty

up to date with important product information such as product updates,
limited warranties, usage and maintenance recommendations, and


Two (2) Year Limited Consumer Product Warranty

from defects in material and workmanship for a period of 2 years from
the date of original purchase


Your Limited Warranty Benefits





store credit in the amount of the purchase price.
Who is Covered?


the product, regardless of whether the product transferred ownership

purchaser must provide verification of the defect or malfunction and proof

Be Aware of Unauthorized Dealers or Sellers




Please be aware, products purchased from an unauthorized website





our Customer Support Team via support@levoit.com.
What’s Not Covered?
• Normal wear and tear, including parts that might wear out over


• 
illegible.
• If the model number, serial number or production date code on
the product has been altered, removed or made illegible.
• If the product has been modified from its original condition.
• If the product has not been used in accordance with directions
and instructions in the user manual.
• 

the user manual.
• 

• 


• Damages or defects occurring during commercial use, rental use,

• If the unit has been damaged, including but not limited to



• 
• Damages or defects exceeding the cost of the product.
Claiming Your Limited Warranty Service in 5 Simple Steps:
 
period.
 
of-purchase.
 DO NOT
before contacting us.
 Contact our Customer Support Team via support@levoit.com
5. 

Sole and Exclusive Remedy









Disclaimer of Limited Warranties








Limitations of Liability







OR










INDIRECT.






OTHER RIGHTS YOU MAY HAVE














CHANGES TO THIS POLICY






THIS DEVICE COMPLIES WITH PART 18 OF THE FCC RULES.
FCC SDOC SUPPLIER’S DECLARATION OF CONFORMITY
Federal Communication Commission Interference Statement




Such interference in a residential installation. However, there is no guarantee that interference will not occur in a particular


• Reorient the receiving antenna of radio or television.
• 
• 
• 








9. Use the cleaning brush and a soft cloth to remove
scale from all parts.
10. 
[Figure 3.13]
11. 

oat to ensure that it does not fall out of the
base chamber.


background
5 6
USING YOUR HUMIDIFIER
1. 

[Figure 2.1]
2. 
mist. [Figure 2.2]
3. 


4. Rotate the Control Knob counterclockwise to

Figure 2.1 Figure 2.2
Note: If there is no water in the tank or the
tank is removed, the humidier will stop
misting and the Rell Indicator Light will turn
on. Rell the tank and properly place it on the
base to use your humidier.
Note: Do not immerse the air outlet or air
inlet in water.
Figure 2.3
Figure 2.4
Figure 2.5
Important Tips


there is too much water in the base chamber,

• Never
chamber. [Figure 2.3]
• Only add water to the water tank. The

amount of water into the base chamber.
• 
[Figure 2.4]
release too much water into the base chamber.
• 
it, and remove the water tank.
• 

there is too much water in the base chamber.
Pour out extra water if water is over the max
line. [Figure 2.5]
Note: The max water line is only for this purpose.
Do not pour water into the base chamber.
Figure 3.1
Figure 3.2 Figure 3.3
CARE & MAINTENANCE
Note:
• All maintenance should be done on a water-
resistant surface, such as a kitchen counter.
• Change the water daily to avoid bacteria growth.
• Use a tissue or cloth to clean the nozzle regularly.
• If not using the humidier for 3 days or longer,
do not leave water inside. Clean and dry the
humidier instead.
Note: When pouring out water, hold down the
Note:
• The water tank, cover, water lter
and housing, mist tube, and oat are
dishwasher safe. Make sure the water
temperature is below 158°F / 70°C
• Do not wash the base in the dishwasher,
as the electronics will be damaged.
• Never immerse the base in water or liquid.
• Do not immerse the air outlet or air inlet in
water.
Cleaning


For detailed dishwasher cleaning instructions,
contact Customer Support
3. Remove the water tank from the base and

chamber. [Figure 3.1]
1. 
2. Remove the water tank cover.
Cleaning (cont.)
1
000
1
000
4. 

[Figure 3.2]
5. 



be removed.
6. 

[Figure 3.3]
a. 
dishwasher. Do not wash the base in the
dishwasher.
7. Rinse the base chamber with room temperature
water.
1. 
it counterclockwise and lifting it out. [Figure 3.4]
2. 
white vinegar. [Figure 3.5]
Figure 3.4 Figure 3.5
Descaling Your Humidifier
Figure 3.8 Figure 3.9
Figure 3.6 Figure 3.7
3. Replace the tank cover and swish the vinegar
around the tank. [Figure 3.6]
4. Place the tank on the base and soak for



[Figure 3.7]
5. Remove the tank, remove the tank cover, and
[Figure 3.8]
6. Flip the tank over and remove the noise
silencer. To remove the noise silencer, press

[Figure 3.9]
8. 
Reassembling
7. 
[Figure 3.10] and


allow the shaft to be removed. [Figure 3.11]
Figure 3.10
Figure 3.11
Product


Model 
For your own reference, we strongly recommend that you record
your order ID and date of purchase.
Date of Purchase
Order ID
WARRANTY INFORMATION
87
9
Figure 3.13
Figure 3.16 Figure 3.17
3. 
a. 
facing up. [Figure 3.16]
b. Insert the smaller prong into the closed
[Figure 3.17]
c. Place the larger prong into the open
Ushaped
4. 
5. 
the tank cover on the water tank.
Storing
The Water Filter Assembly




clogging the water outlet valve and entering the
base chamber. Large particles in the water can cause




needs to be replaced. For more information, contact
Customer Support
Figure 3.15
Figure 3.14
Descaling Your Humidier (cont.)
8. 
silencer in a small container. Fill with enough

[Figure 3.12]
Reassembling
1. Flip the water tank over and place the noise
silencer back into the tank. [Figure 3.14]
2. 
tank and rotate it clockwise to secure it in place.
[Figure 3.15]
Problem Possible Solution
Humidier doesn’t
turn on, or turns o
unexpectedly.


Humidier produces
an unusual smell.

Care & Maintenance
Humidier makes
a loud or unusual
noise.
Getting Started
Set mist level to a lower setting.


TCustomer Support
White scale (mineral
buildup) appears
around the humidier.

mineral content.
Care & Maintenance
Water leaks from the
humidier.
Make sure the silicone sealing ring around the water outlet valve is secure.


Do not 

Check the water tank for leaks. If there are leaks, contact Customer Support
Condensation forms
around humidier or
windows.

in the room.
Mold grows inside
the humidier.
Care & Maintenance
Rell Indicator Light
turns on.
Fill the water tank.


Customer Support
Problem Possible Solution
Little or no mist
comes out.
Turn the mist level to a higher setting.
Fill the water tank.




Make sure the nozzle is not blocked or clogged.




detergent.

Figure 3.12
Levoit Limited Product Warranty

up to date with important product information such as product updates,
limited warranties, usage and maintenance recommendations, and


Two (2) Year Limited Consumer Product Warranty

from defects in material and workmanship for a period of 2 years from
the date of original purchase


Your Limited Warranty Benefits





store credit in the amount of the purchase price.
Who is Covered?


the product, regardless of whether the product transferred ownership

purchaser must provide verification of the defect or malfunction and proof

Be Aware of Unauthorized Dealers or Sellers




Please be aware, products purchased from an unauthorized website





our Customer Support Team via [email protected].
What’s Not Covered?
• Normal wear and tear, including parts that might wear out over


• 
illegible.
• If the model number, serial number or production date code on
the product has been altered, removed or made illegible.
• If the product has been modified from its original condition.
• If the product has not been used in accordance with directions
and instructions in the user manual.
• 

the user manual.
• 

• 


• Damages or defects occurring during commercial use, rental use,

• If the unit has been damaged, including but not limited to



• 
• Damages or defects exceeding the cost of the product.
Claiming Your Limited Warranty Service in 5 Simple Steps:
 
period.
 
of-purchase.
 DO NOT
before contacting us.
 Contact our Customer Support Team via [email protected]
5. 

Sole and Exclusive Remedy









Disclaimer of Limited Warranties








Limitations of Liability







OR










INDIRECT.






OTHER RIGHTS YOU MAY HAVE














CHANGES TO THIS POLICY






THIS DEVICE COMPLIES WITH PART 18 OF THE FCC RULES.
FCC SDOC SUPPLIER’S DECLARATION OF CONFORMITY
Federal Communication Commission Interference Statement




Such interference in a residential installation. However, there is no guarantee that interference will not occur in a particular


• Reorient the receiving antenna of radio or television.
• 
• 
• 








9. Use the cleaning brush and a soft cloth to remove
scale from all parts.
10. 
[Figure 3.13]
11. 

oat to ensure that it does not fall out of the
base chamber.



Description

Key Features:

  • True HEPA Filtration: Effectively captures 99.97% of airborne particles as small as 0.3 microns, including dust, pollen, pet dander, and smoke.
  • Activated Carbon Filter: Reduces odors from pets, cooking, and smoke, enhancing overall air quality.
  • Compact and Lightweight Design: Ideal for small to medium-sized rooms, making it easy to move from room to room.
  • Quiet Operation: Operates at a low noise level, allowing for peaceful use in bedrooms, offices, or nurseries.
  • Multiple Fan Speeds: Offers adjustable fan speeds to customize air purification based on your needs.
  • User-Friendly Controls: Simple interface with easy-to-use buttons for straightforward operation.
  • Filter Replacement Indicator: Alerts users when it’s time to change the filter, ensuring the purifier operates at peak efficiency.
  • Child Lock Feature: Prevents accidental adjustments, making it safe for homes with children.

Specifications

Levoit LUH-A251-WUS Questions and Answers


#1 Where can buy replacement filter?

Replacement filter 's model number is LV-H132-RF.
You can search on Amazon , Ebay...

Questions and Answers

Related Products