
Loading ...
Loading ...
Loading ...
SONANCE
|
PROFESSIONAL SERIES SURFACE MOUNT
|
INSTALLATION MANUAL 5
INSTALLING THE SPEAKERS
The best performance is obtained by placing the left and right
speakers at ear level, 6 – 10 feet apart. The speakers should be
facing the listeners. If you are mounting the speakers above or
below ear level, pivot them up or down to direct the sound towards
the listeners.
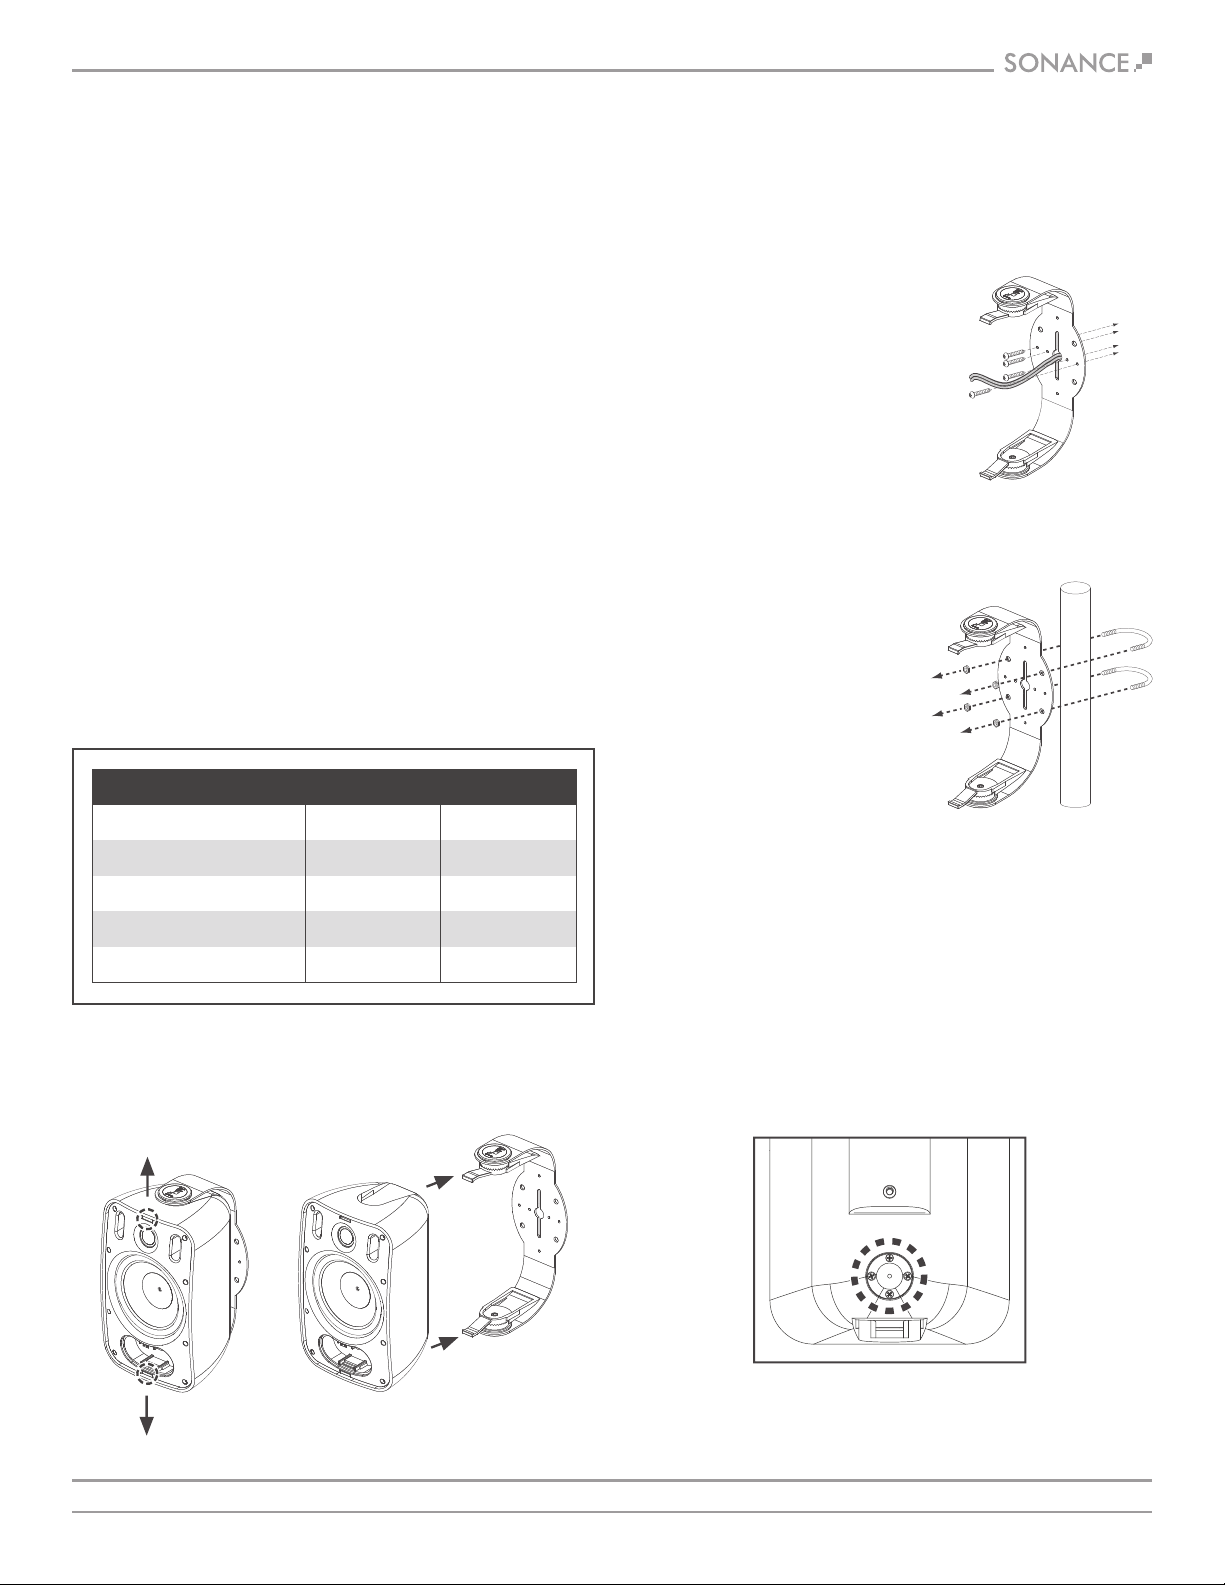
1. Remove the speakers from the mounting brackets by pulling the
tabs on the front panels away from each other (see figure 6).
2. Run the speaker wires from the amplifier to the speaker locations
and through the holes in the mounting brackets.
NOTE: BE SURE TO LEAVE ENOUGH WIRE AT THE SPEAKER LOCATION
TO FEED THROUGH THE TUNNEL IN THE SPEAKER ENCLOSURE AND
WIRE TO THE EUROBLOCK CONNECTOR ON THE FRONT.
4. If the installation requires that
the speakers be mounted on
poles you can attach the bracket
to poles using 2.5” U-bolts
(not included, see figure 8).
5. Feed the speaker wires from the brackets into the wire entry
grommets on the backs of the speakers, through the wire tunnels
and out the openings on the speakers’ front panels (see figure 9).
• The grommet forms a water-resistant seal around the speaker wire.
• Make sure there is enough slack in the wire to allow the speaker
to pivot on the bracket.
PAINTING THE GRILLES & SPEAKER SHELL
Sonance Professional Series Surface Mount speakers feature a tough
polypropylene enclosure that can be painted. Sonance recommends
using a weather-resistant outdoor paint and a spray gun.
1. If they have already been installed, remove the grilles from
the speakers.
2. To protect the speaker driver units during painting, place the
grilles on a piece of cardboard and trace around their outlines.
Then cut the cardboard just inside of the trace line and fit these
“paint plugs” into the speakers’ baffles. (Be careful not to
damage the driver components while fitting the paint plugs.)
3. Paint the speakers the desired color according to the paint
manufacturer’s instructions. Remove the paint plugs after the
paint has thoroughly dried.
4. Paint the grille separately from the speaker using very thin paint
(5:1 ratio). Avoid plugging the grille holes with excess paint.
3. Attach the mounting bracket
to the mounting surface using
hardware (not included) that
is appropriate for the type
of surface (see figure 7).
FIGURE 6:
PULL TABS AWAY FROM EACH OTHER
AND SLIDE SPEAKER OFF BRACKET
FIGURE 7:
ATTACH BRACKET
FIGURE 8:
ATTACHING THE
BRACKET TO A POLE
FIGURE 9:
WIRE ENTRY GROMMET
Bracket Carrying Capacity
PS-S43T
KGS
2.81
3.63
4.88
7.02
POUNDS
6.19
8.00
10.76
15.48
MODEL
PS-S53T
PS-S63T
PS-S83T / PS-S83WT
FIGURE 5: BRACKET CARRYING CAPACITY
Loading ...
Loading ...
Loading ...