
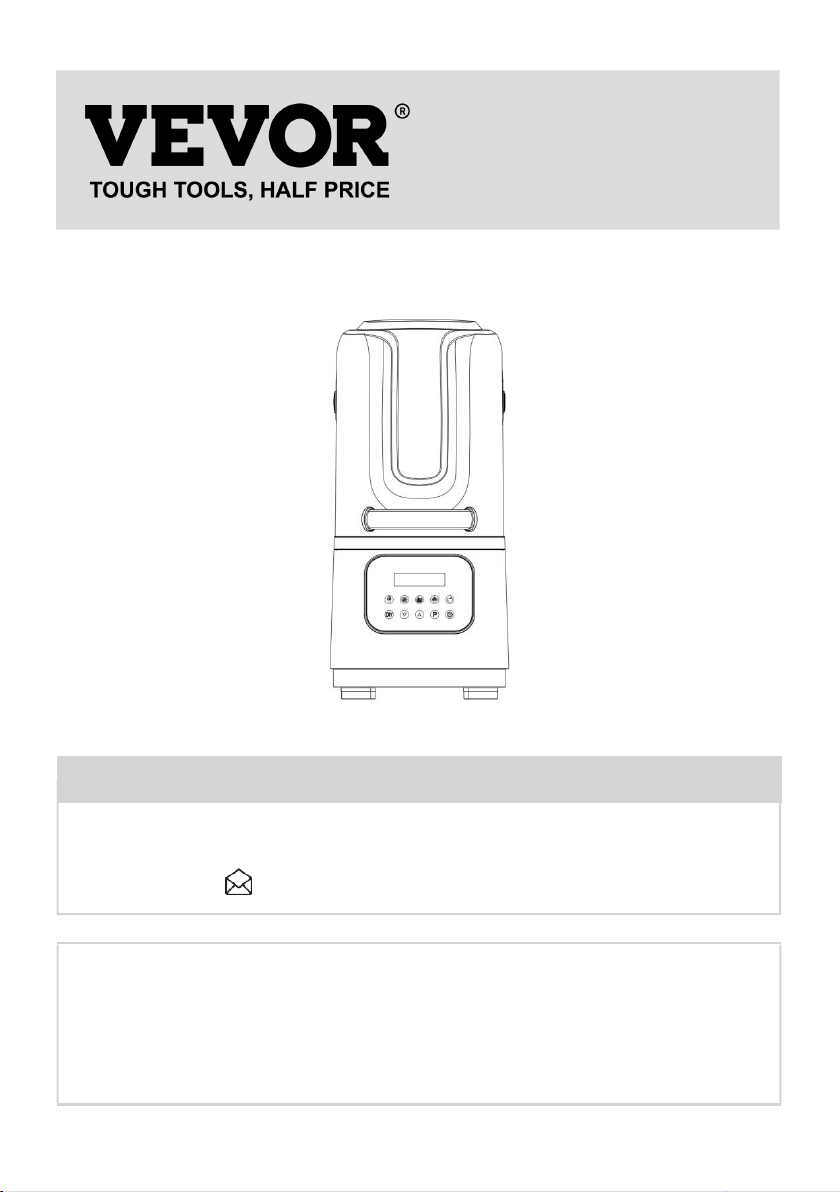
Technical Support and E-Warranty Certificate www.vevor.com/support
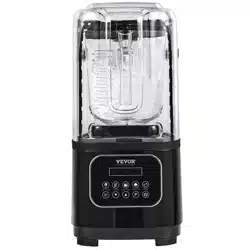
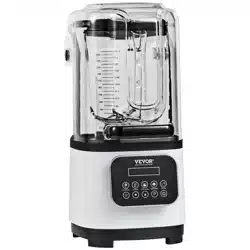
SAND-ICE MIXER WITH
SOUND INSULATION COVER
INSTRUCTION MANUAL
MODEL:HS-212C-US-B/HS-212C-AU-B/
HS-212C-US-W/HS-212C-AU-W
We continue to be committed to provide you tools with competitive price.
"Save Half", "Half Price" or any other similar expressions used by us only represents an
estimate of savings you might benefit from buying certain tools with us compared to the major
top brands and doses not necessarily mean to cover all categories of tools offered by us. You
are kindly reminded to verify carefully when you are placing an order with us if you are
actually saving half in comparison with the top major brands.

- 1 -
MODEL:HS-212C-US-B/HS-212C-AU-B/
HS-212C-US-W/HS-212C-AU-W
Have product questions? Need technical support? Please feel free to
contact us:
CustomerService@vevor.com
NEED HELP? CONTACT US!
This is the original instruction, please read all manual instructions
carefully before operating. VEVOR reserves a clear interpretation of our
user manual. The appearance of the product shall be subject to the
product you received. Please forgive us that we won't inform you again if
there are any technology or software updates on our product.
SAND-ICE MIXER
WITH SOUND
INSULATION COVER

- 2 -
Warning-To reduce the risk of injury, user must read
instructions manual carefully.
IMPORTANT CAUTION
Product in the long-term start-up operation or use in the presence of
someone, such as long-term or personnel leave, out of the plug please
pull up.
Please use a 10A+ current rating socket with ground wire. Do
not use the same socket with other appliances, or abnormality
might occur, leading to a fire.
No Modification Except for maintenance technician, no
dissembling and repair is allowed to avoid fire, electric shock, or
injury. When the machine is working, do not use any fabric or
things to cover the steam outlet so as not to cause any machine
damage or accidents.
Do not use alternating voltage above 220V to avoid fire or
electric shock. Do not use any damaged wire. Do not operate in
the following ways to not cause fire or electricity shock from the
electric wire's damage: forcibly bending wire, close to high
temperature, binding, carrying heavy loads, etc.
The plug shall be plugged into the socket so as not to cause fire,
electronic shock, and short circuits.
Do not plug when your hands are wet so as to avoid electric
shock and injury.
When there's dust in the plug, please clean it in time so as not to
cause fire.

- 3 -
When the plug is damaged or the socket is wet, do not use it to
avoid fire, electric shock, or short circuit.
Please keep your hands or face away from the machine when it
is working.
Do not let children operate the machine alone. Please put the
machine in a place children can not reach so as not to get
electrified.
When the power line cord is damaged,specified line cord shall
be used or specified elements bought from its producer or
maintenance store shall be used to switch the damaged ones.
This product is only to be used indoor.
Moving or shaking is forbidden when the product is working.
Do not put the product in a place that is unstable, wet, or close to
another electricity or fire source; otherwise, damage or accident
may be incurred.
Whether the cup is placed on the table or not.
Do not use your hand to fetch food from that cup because the blade is
sharp and easy to cut.
To pour food out, remove the cup from the frame.
Be careful to touch the switch before and after start-up.
Utensils cannot be immersed in water.
Care should be taken when handling
cutting blades especially when removing
blades from containment cups, emptying
containment cups, and during cleaning.

- 4 -
SAFETY MATTERS
Remember to pull off the plug when not in use.
Do not lift the lid of the cup until the stirring knife has completely stopped
rotating.
Be sure to separate the frame from the cup when cleaning and make sure
to pull off the plug first.
Do not immerse the motor base in water or put it in the dishwasher for
cleaning.
Keep a proper distance to prevent the child from improper movement and
causing danger when the child is not allowed to be nearby during the
start-up.
If the power cord is damaged, it must be replaced
by a professional in the manufacturer's maintenance department or
similar department in order to avoid danger.
SAVE THESE INSTRUCTIONS.
TECHNICAL PARAMETER
Model
HS-212C-US-B
HS-212C-AU-B
HS-212C-US-W
HS-212C-AU-W
Colour
Black
Black
White
White
Rated
Voltage
120V~
220-240V~
120V~
220-240V~
Rated
Frequency
60Hz
50-60Hz
60Hz
50-60Hz
Rated Power
1600W
1600W
1600W
1600W
Max Power
2200W
2200W
2200W
2200W
Rated
Capacity
2.0L
2.0L
2.0L
2.0L
Rotational
Speed
26000RPM
±15%
26000RPM
±15%
26000RPM
±15%
26000RPM
±15%

- 5 -
PRODUCT STRUCTURE
- 6 -
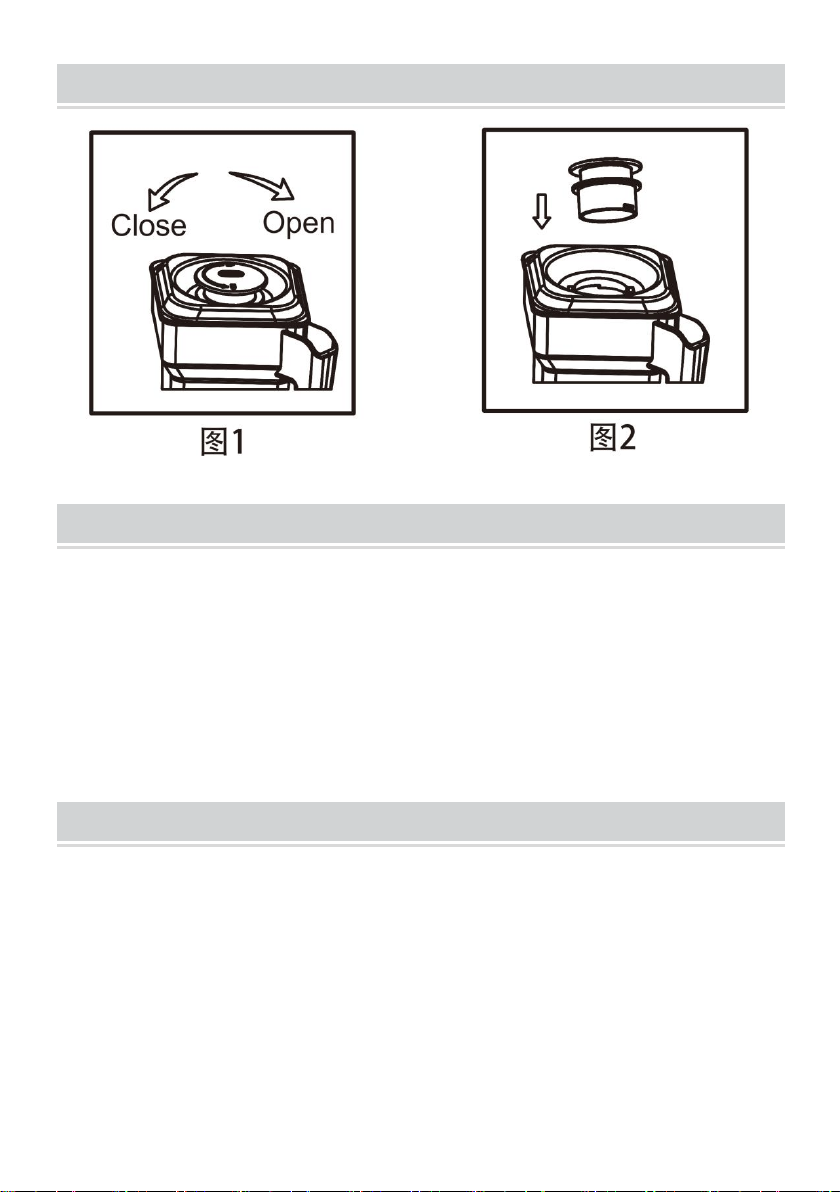
OPENING DIAGRAM
CLEANING METHOD
When cleaning and maintenance,be sure to unplug the plug.
Carefully scrub with a sponge or rag, and dry it with a cup.
Do not reach into the cleaning in the cup. Wipe the rotation shaft with a dry
cloth (remember!Water is not rinsed).
When it is not easy to wipe, it can be wiped with a neutral lotion and then
rub it to clean with a dry cloth.
FANLT HANDLING
Can you get started?
1.Please check if the plug falls off ?
2. Please check if the feeding or automatic switch is shorted.
3.Please check if it is a power outage.
4.The cover is covered; is it touching the security switch?
There is no problem with the above situation, please send the
maintenance center,do not handle itself.

- 7 -
PRODUCT USE INSTRUCTIONS
★ The function key of this product is a touch mode, first turn
on the power, put a cup(cup handle toward the front), cover the
active cover, point the start/ stop function key (with switch
pattern key)Other functional lights.
Ingredients
1. Place the ingredients into the conditioning cup,the order of ingredients into the
cup:generally put soft ingredients, then put hard ingredients,then put liquid
ingredients,
ingredients should not exceed the main standard scale of the
conditioning cup,otherwise stir.
2.
Cover the cup cover, confirm that the cup cover and
conditioning cup are strict,in the
addition of the small cup the stirring rod during the stiring, replace the small
amount.
3.
Place the cup and follow the connector.
PRODUCT FUNCTION OPERATION
1. ICE CRUSH
1.1 When the system is on standby, touch the corresponding ice rustling
function, and then touch the "start / cancel" switch to start the system in
operation
1.2 workflow:[Working Time:40S]Start work, motor 1 gear start 1S, and
then directly with 9 gear work 3S,motor stop 2S (after the motor completely
stop, then enter the next cycle of work).Continuous cycle work was ended
after 7 cycles

- 8 -
2. CLEAN
2.1 When the system is on standby, touch the corresponding cleaning
function and then touch the "start / cancel" switch to start the
system.
2.2 Workflow:[Working time:30S]
To start work, the motor press 1 gear 2S, then switch to 9 gear
13S, continuous operation 2 cycle times.
3. JUICE
3.1 When the system is on standby, touch the corresponding juice
function and touch the"start /cancel"switch before the system starts
working.
3.2 Workflow:[Working time:45S]
At work, the motor presses 1 gear work 12 S, then switch to 5 gear
work 8 S, then switch to 9 gear work 15 S, then cycle the motor at 1
gear work 2 S, then switch to 5 gear work 8 S, and then switch to 9
gear work until the end.
4. SMOOTHIE
4.1 When the system is on standby,touch the corresponding shake
function and touch the "start/cancel" switch before the system starts
working.
4.2 Workflow:[Working time:40S]
At work, the motor is switched to 1 gear work 2 S, then switches to 5
gear work 12 S, then to 1 gear work 2 S,then to 5 gear work 8 S,and
then to 9 gear until the end.
5. GRIND
5.1 When the system is on standby,touch the corresponding
grinding function and then touch the "start / cancel" switch for the
system.

- 9 -
5.2 Workflow:[Working time:36S]
Start work,the motor starts 3 gear work 6S,then switch to 9 gear
work 12 S,continuous cycle work after 2 times.
6. DIY
6.1 A、When the system is on standby,touch the corresponding DIY
function icon and + /- icon and switch icon are flashing, the default
gear is in three gear and 60 seconds,when touching the +/- icon is
added, one step in 5 seconds(change within 10-90S),press the cycle
change;after the time adjustment,touch the key to work;
B、Touch the DIY function to enter the gear adjustment again;the
corresponding icon and +/- icon and switch icon are flashing,when
touching the +/- icon changes from 1-9;touch the key
operation,working time is set in the last step;
6.2When working in the corresponding DIY state, the DIY and + / -
icon are always bright, and the gear position can be adjusted when
the + / - icon is touched;
7. PULSE(30S)
A
、
In the standby state,long press the "P"function, the buzzer prompt
1 sound, the corresponding icon is always bright,the motor starts to
work,
The working time is 30S;the motor works at 0.5S and then switches
to 9 gear;when the speed reaches the 9 gear, the motor stops
working immediately.
(Each long click point cleaning limit working time is 30 seconds, 30
seconds after automatically exit the work, need to long key again to
enter the work).
B
、
In standby mode "P" function, then press the key, enter the
intelligent working state, 30S; the motor first press 1 gear 0.5S,and
then switch to 9 gear; when the speed reaches 9 gear, always press
this speed;

- 10 -
MAKING FRUIT SAND ICE
Fruit sand ice
1. Add materials: ice, fruit, water, and three are not.
2. Cover the cover after pouring the material into the stirring cup. If you want to
make a thicker drink, please insert the stir bar in the upper cover.
3. Select the sandbar key (or other function keys)until the working time is
completed.
4. Take the stirring of fruit sand ice; if the water is less, the stir bar can be used
with stirring.
5. Note: When considering sand, you must add enough moisture. Please follow
the proportion of fruits and water. Otherwise, the cup food cannot scroll through
effective stirring.
Please follow the proportion of fruits and water, otherwise the cup food
cannot scroll through effective stirring.
TROUBLESHOOTING AND MAINTENANCE
Security rule
1. When not in use, remember must unplug the plug.
2. Be sure to wait until the stir-overs stop before the rotation can
open the cup.
When cleaning, be sure to separate the seat and container. First,
confirm the unplugged.
3. Disable the motor base to be immersed in water or
put it in the dishwasher.
- 11 -
Simple troubleshooting
Fault condition
Exclusion method
1.Not working
a.Check if the power is inserted.
b.Check that the high and low connector is inserted.
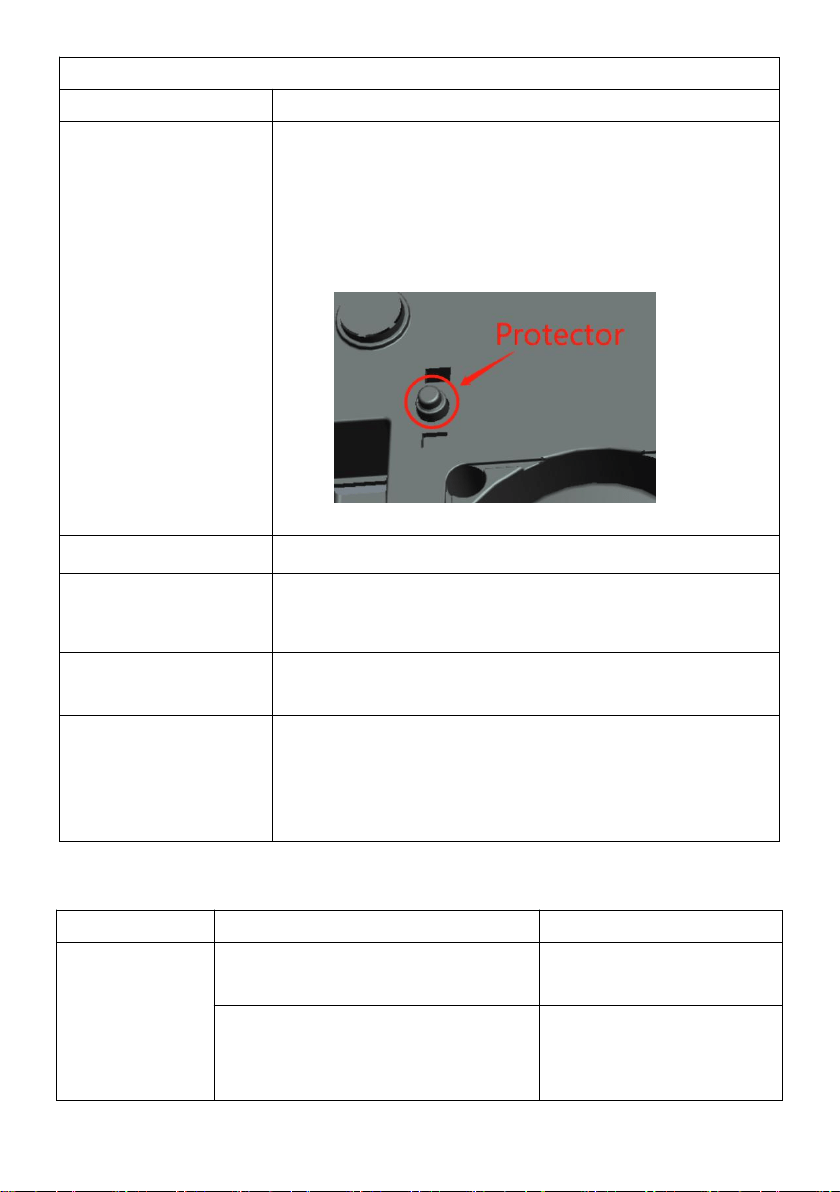
c.Check whether the protector at the bottom of the
machine is disconnected. If so, press the protector
button to restore the machine to work.
2.No work lights
Check that there is an ON/OFF Power switch
3.Overflow
a.Add too much ingredients and water.
b.Water supply is over over capacity requiements.
4.Vegetable fruit is
not crushed
a.Excessive ingredients.
5.Midway motor
stirring stop
a.More continuous use times make the motor
temperature control.
b.It is necessary to stop using cooling for about 20
minutes.
Situation
Possible cause
Exclusion
Do not move
Power supply is not
inserted
Insert the plug into a
compliant socket
Motor protection device
jump
Let the host placed a
ventilated place for 20
minutes cooling
- 12 -
Vibrate
Host imbalance
Let the host placed in
the plane
Conditioning Cup is not
completely placed on the
host
Place the Cup is really
placed on the host
Excessive ingredient
Please adjust the
amount of ingredients
Cup covered
Survival exceeds sections
Please adjust the
water
Cup cover
water
unplanned positioning
Place the cup cover on
the conditioning cup
Note:
Above are common trouble analysis and troubleshooting methods. For
other troubles, please contact our customer service department, or go
directly to our designated repair point for repair. Do not dismantle and
repair yourself.
Correct Disposal :
This product is subject to the provision of European Directive
2012/19/EC. The symbol showing a wheelie bin crossed
through indicates that the product requires separate refuse
collection in the European Union. This applies to the product
and all accessories marked with this symbol. Products marked
as such may not be discarded with normal domestic waste, but
must be taken to a collection point for recycling electrical and
electronic devices
Made In China