
Loading ...
Loading ...
Loading ...
25 — English
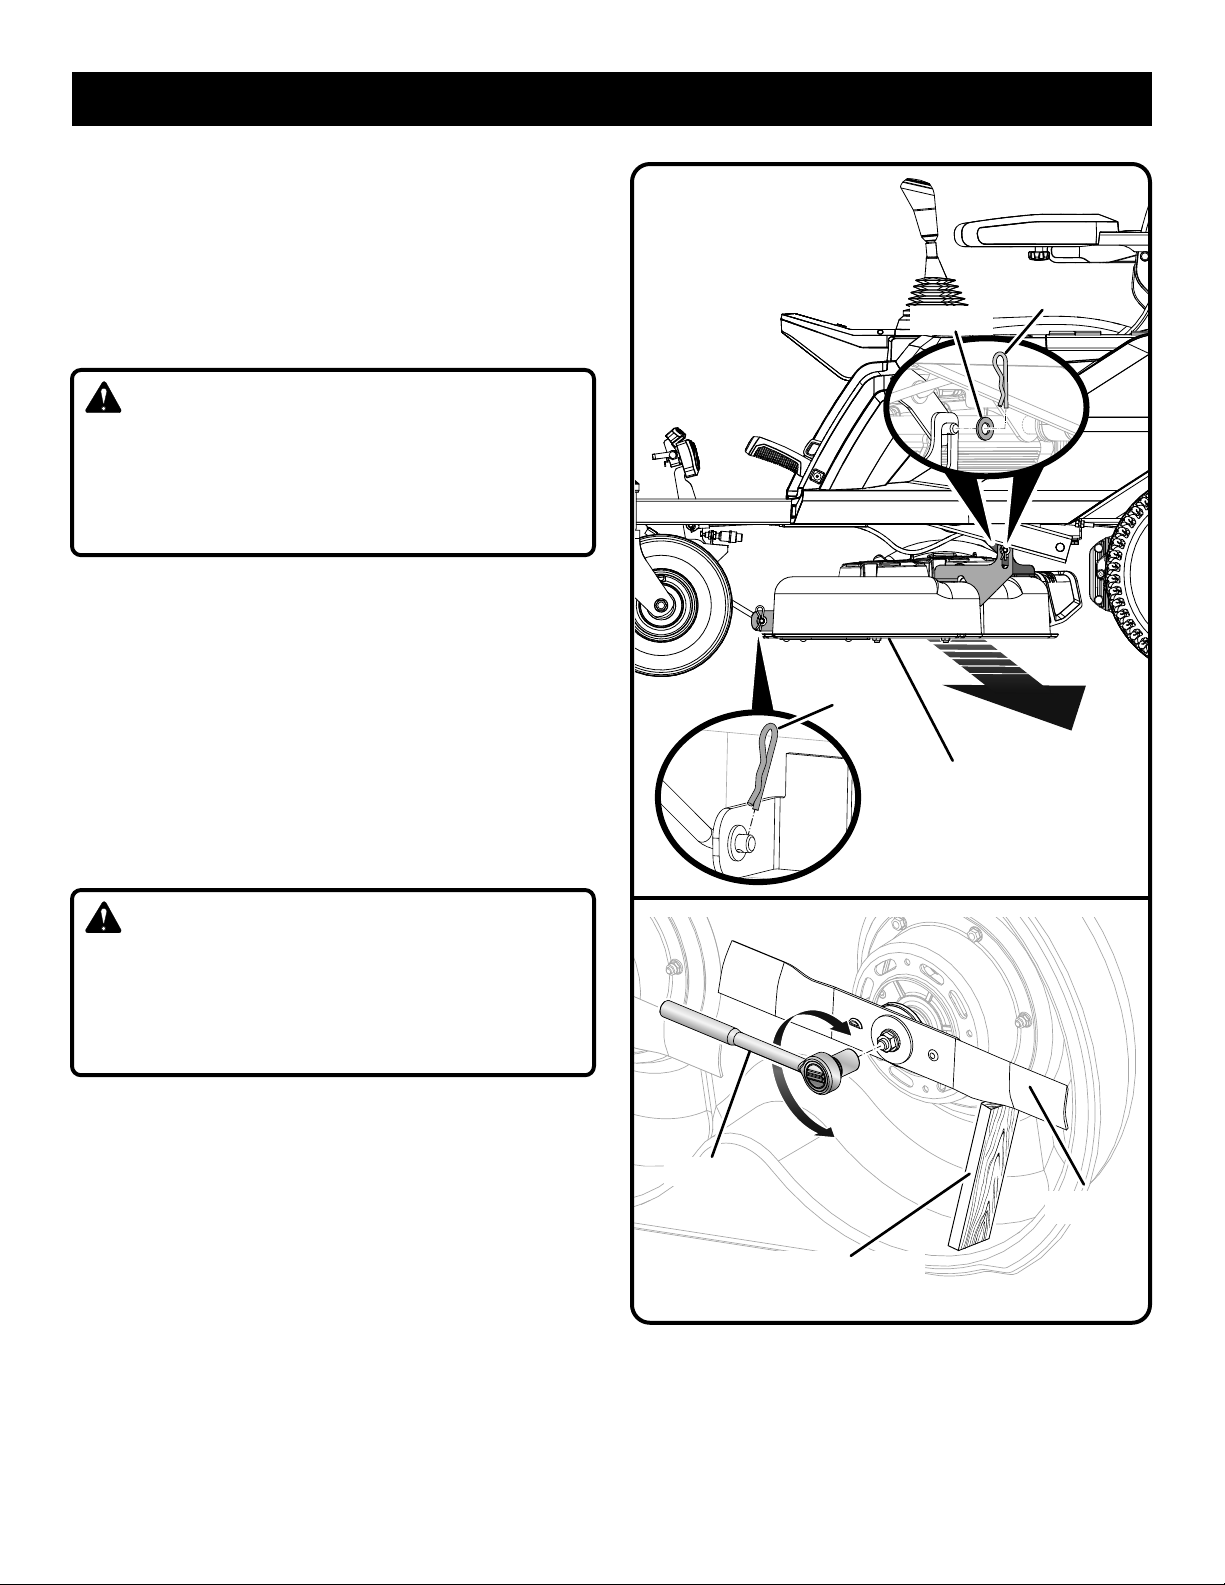
Fig. 22
BLOCK OF WOOD
BLADES
WRENCH
CUTTING
DECK
PIN
Fig. 21
PIN
WASHER
Remove the three hitch pins and washers that secure the
cutting deck in place.
Slide the deck out from under the mower.
Reverse the process to reattach the cutting deck to the
mower.
REPLACING CUTTING BLADES
See Figures 22 - 23.
WARNING:
Only use replacement blades and blade bolts authorized
by the manufacturer of your riding mower. Unauthorized
blades and/or blade bolts could break, allowing the blade
to come loose, resulting in possible serious personal
injury and damage to the mower.
NOTE: Make certain all parts are replaced in the exact order
in which they were removed.
Move the mower to a level surface. Make sure joystick
is in the locked, neutral position and blade engage knob
is down.
Stop the motor, remove the start key, and set the parking
brake.
Raise the height of the cutting deck to its highest position
to allow access to blades.
NOTE: If necessary, raise the mower by placing on a lift
or using a jack and jack stands to gain access to the
blades.
WARNING:
If raising the mower to access the blades, make sure the
mower is properly secured and the parking brake is set
before proceeding. Failure to properly secure the mower
could cause it to fall, resulting in death or possible seri-
ous personal injury.
Wedge a block of wood between the blade and mower
deck to prevent the blade from turning.
Loosen the blade nut by turning it counterclockwise (as
viewed from bottom of mower) using a 15 mm wrench
or socket (not provided).
Remove the blade nut, spring washer, and blade.
Place the new blade on the shaft against the corresponding
blade posts. Ensure blade is properly seated with shaft
going through center blade hole and the two blade posts
inserted into their respective holes on the blade. Make
sure it is installed with the curved ends pointing up toward
the mower deck and not down toward the ground. When
seated properly, the straight sides should be aligned and
the blade should be flat against the blade posts.
Replace the spring washer, then thread the blade nut on
the shaft and finger tighten.
MAINTENANCE
Loading ...
Loading ...
Loading ...