Loading ...
Loading ...
Loading ...
26 49-1000329 Rev. 6
Installation Instructions
INSTALLING THE REFRIGERATOR
REFRIGERATOR LOCATION
Ŷ Do not install the refrigerator where the
temperature will go below 60°F (16°C) because
it will not run often enough to maintain proper
temperatures.
Ŷ Do not install the refrigerator where the
temperature will go above 100°F (37°C) because
it will not perform properly.
Ŷ Do not install the refrigerator in a location exposed
to water (rain, etc.) or direct sunlight.
Ŷ Install it on a floor strong enough to support it fully
loaded.
CLEARANCES
Allow the following clearances for ease of
installation, proper air circulation and plumbing and
electrical connections.
6LGHV ´PP
7RS ´PP&DELQHW+LQJH&RYHU
%DFN ´PP
REMOVING THE REFRIGERATOR
DOORS
Ŷ IMPORTANT NOTE:7KLVUHIULJHUDWRULV´
(943 mm) deep (refer to chart on previous page).
Doors and passageways leading to the installation
ORFDWLRQPXVWEHDWOHDVW´PPZLGH
in order to leave the doors and handles attached
to the refrigerator while transporting it into the
installation location. If passageways are less
WKDQ´PPWKHUHIULJHUDWRUGRRUVDQG
handles can easily be scratched and damaged.
The top cap and doors can be removed to allow
the refrigerator to be safely moved indoors. If
SDVVDJHZD\VDUHOHVVWKDQ´PP
start with Step 1.
Ŷ If it is not necessary to remove doors, skip to Step
11. Leave tape and all packaging on doors until the
refrigerator is in the final location.
Ŷ NOTE:8VHDSDGGHGKDQGWUXFNWRPRYHWKLV
refrigerator. Place the refrigerator on the hand
truck with a side against the truck. We strongly
recommend that TWO PEOPLE move and
complete this installation.
INSTALLATION INSTRUCTIONS
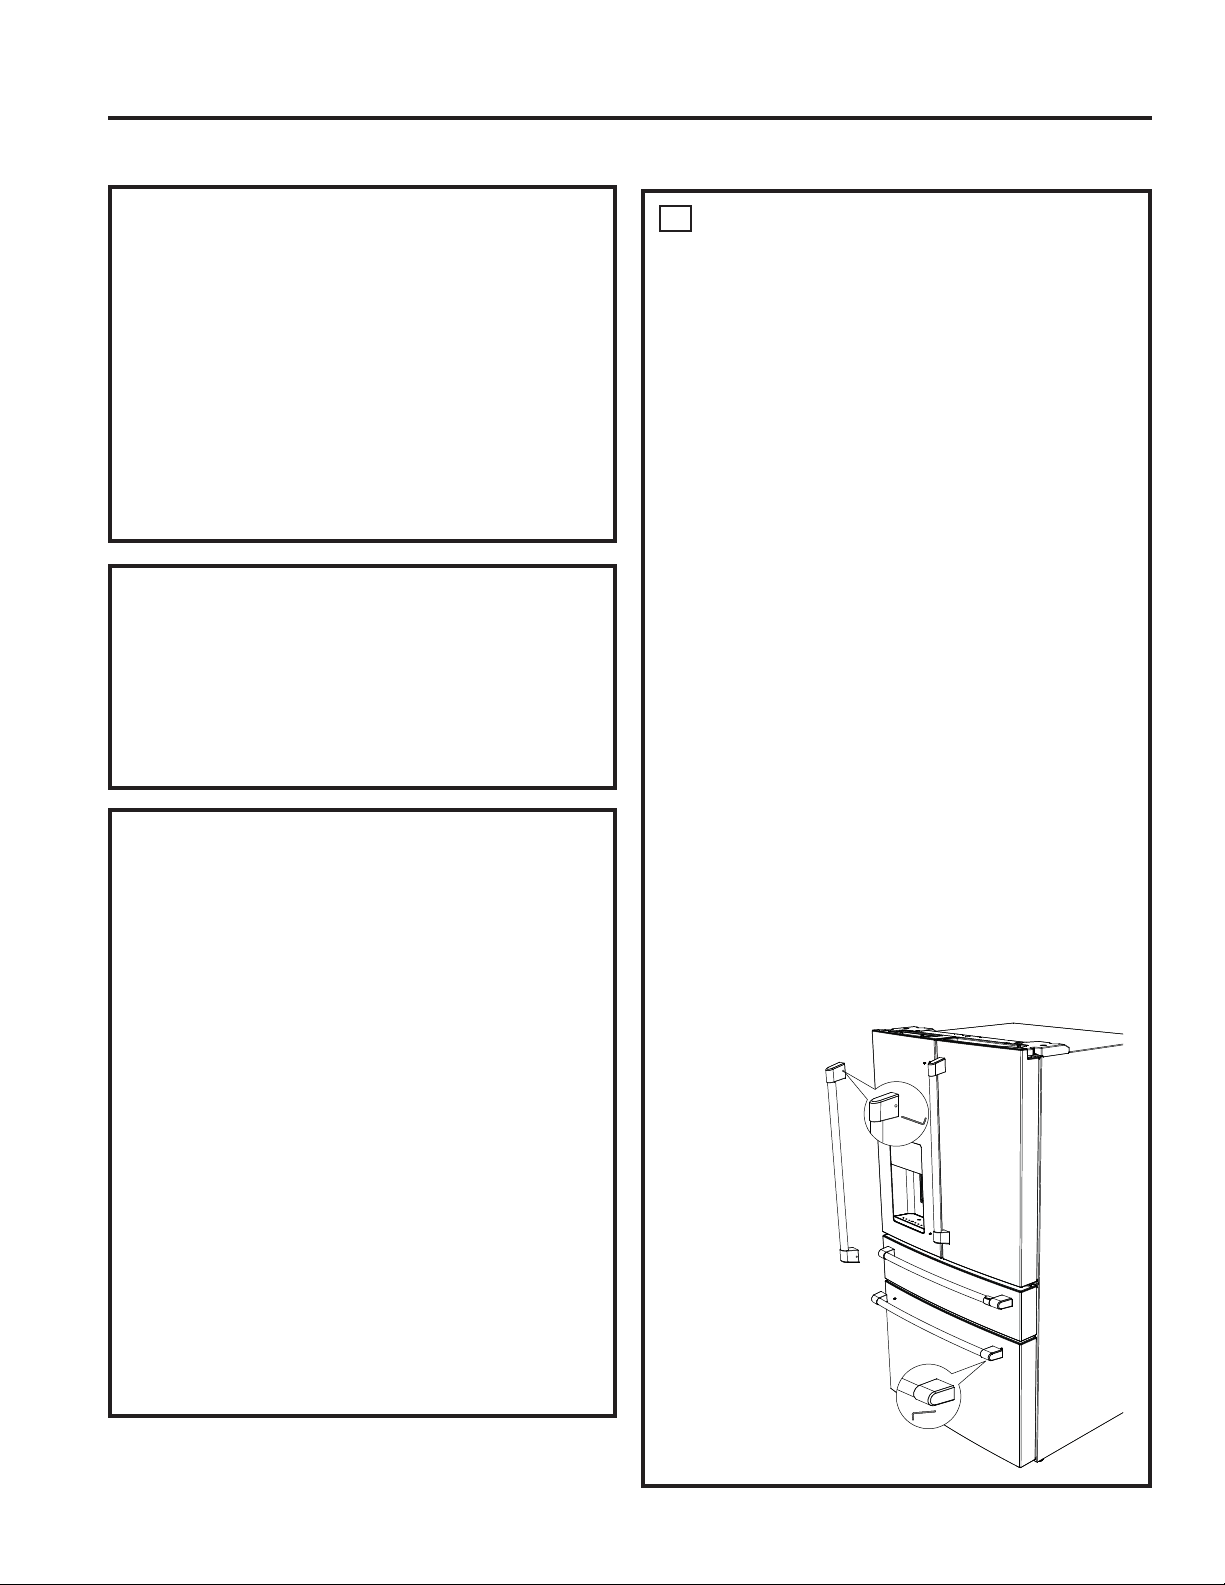
1
REFRIGERATOR AND FREEZER
HANDLE INSTALLATION
(on some models)
Before You Start….
Ŷ To avoid injury, wear closed-toe shoes when
installing the handles.
Ŷ While installing the handle, grasp the handle
firmly to ensure it does not fall or scratch the
appliance’s finish.
Ŷ IMPORTANT: To make sure the handles are
accurately installed, please review the instructions
and graphics before you begin installation.
Ŷ IMPORTANT: Do not use power tools to tighten
set screws.
Tools Provided:
Ŷ´KH[NH\
Handle appearance may vary based on model;
however, the installation process is the same.
1. Remove any protective film from the door
or drawer fronts before installing handles (if
applicable).
2. Remove handle from packaging and locate the
SURYLGHG´KH[NH\
3. Place the handle over the mounting fasteners
until it is flush against the surface of the door.
4. Tighten both set screws in the handle end
FDSVE\WXUQLQJWKH´KH[NH\FORFNZLVHXQWLO
the handle will not hang loose or fall from its
mounting. Do not fully tighten yet.
5. IMPORTANT:
Hold the
handle firmly
against the
door, make
sure there
are no gaps
between the
handle end
caps and the
door, and fully
tighten the set
screws.
To remove the
handles, reverse
the installation
process.
Loading ...
Loading ...
Loading ...