B
P0803251-00
P0803251-00
GWK G40 Pressure Washer + Surface Cleaner
5100378UK
技术要求:
2.12P, 内容见电子档;
3.单色印刷,要求无色差、无污点;色块要求在最外侧
4.骑马钉,裁切均匀、无连页;
5.以封样为准;
6.料件需符合格力博HSF文件(编号:GLB-CGR-146) 里关于环保和有害物质的具体要求。
1.材质要求:60g双胶纸
常州格力博集团
说明书
黄潇笑
刘小娟
周艳
王小妮
李海平
21.01
版本号
重要度等级
工艺
审核
校对
设计
标记
处数
签名
日期
阶段标记
视角标记
重量 比例
批准
审定
标准化
日期
更改文件号
SCALE: A5
210mm
145mm
A BS
B
B
G40
PWA111
OPERATOR MANUALPRESSURE WASHER

G40
PWA111
OPERATOR MANUALPRESSURE WASHER


1 Description......................................... 2
1.1 Purpose.............................................................. 2
1.2 Product overview...............................................2
2 General power tool safety
warnings............................................. 2
3 General power tool safety
warnings............................................. 2
4 Electrical safety warnings.................2
5 Pressure washer safety warnings..... 3
6 Symbols on the product.................... 3
7 Risk levels...........................................4
8 Recycle................................................4
9 Installation......................................... 4
9.1 Unpack the machine.......................................... 4
9.2 Install the spray wand........................................ 4
9.3 Install the gun holder......................................... 4
9.4 Install the water inlet connector.........................4
9.5 Install the front pedestal.................................... 4
9.6 Install the high pressure hose.............................5
10 Operation........................................... 5
10.1 Connect the water supply to the machine..........5
10.2 Use the gun........................................................ 5
10.3 Install the nozzle................................................5
10.4 Install the detergent tank....................................5
10.5 Start the machine............................................... 6
10.6 Stop the machine............................................... 6
11 Maintenance.......................................6
11.1 Nozzle maintenance...........................................6
12 Transportation and storage.............. 6
12.1 Move the machine............................................. 6
12.2 Store the machine.............................................. 6
13 Troubleshooting.................................7
14 Technical data....................................8
15 Warranty............................................ 8
16 EC Declaration of conformity.......... 8
1
English
EN
1 DESCRIPTION
1.1 PURPOSE
The machine is used to clean vehicles, boats, buildings by the
removal of stubborn dirt with clean water and chemical
detergents.
For domestic use only, not for professional use, and for
operation at temperature above 0°C.
1.2 PRODUCT OVERVIEW
1
Upper handle
2
Spray wand
3
Gun
4
Water inlet
5
Wheel assembly
6
High pressure hose
7
Cord retainer
8
Trigger safety button
9
Spring button
10
Inlet coupler
11
Gun holder
12
Pedestal
13
Nozzle lock button
14
Adjustable nozzle
15
Spray tip cleaning
tool
16
Garden hose
17
Detergent tank
18
Hose reeler
19
Trigger
20
Power switch
2 GENERAL POWER TOOL
SAFETY WARNINGS
WARNING
Read all safety warnings and all instructions. Failure to
follow the warnings and instructions may result in electric
shock, fire and/or serious injury.
Save all warnings and instructions for future reference.
The term "power tool" in the warnings refers to your mains-
operated (corded) power tool or battery-operated (cordless)
power tool.
3 GENERAL POWER TOOL
SAFETY WARNINGS
• The machine is not intended for use by persons (including
children) with reduced physical, sensory or mental
capabilities, or lack of experience and knowledge, unless
they have been given supervision or instruction
concerning use of the appliance by a person responsible
for their safety. Children should be supervised to ensure
that they do not play with the appliance.
• Learn the machine's applications and limitations as well
as the specified potential hazards related to this tool by
studying this manual.
• Never operate the machine with any guard or cover
removed or damaged.
• Do not operate the product while under the influence of
drugs, alcohol, or any medication.
• Do not wear loose clothing, gloves, neckties, or jewellery.
They can get caught and draw you into moving parts.
• Rubber gloves and non-skid footwear are recommended
when working outdoors. Also wear protective hair
covering to contain long hair. Wear footwear that will
protect your feet and improve your grip on slippery
surfaces.
• Don't overreach or stand on unstable support. Keep
proper footing and balance at all times.
• Check the work area before each use. Remove all objects
such as rocks, broken glass, nails, wire, or string which
can be thrown or become entangled in the machine.
• Avoid dangerous environments. Don’t expose to rain.
Keep work area well lit.
• Before starting any cleaning operation, close doors and
windows. Clear the area to be cleaned of debris, toys,
outdoor furniture, or other objects that could create a
hazard.
• Don’t use the appliance within range of persons unless
they wear protective clothing.
4 ELECTRICAL SAFETY
WARNINGS
• The electric supply connection shall be made by a
qualified electrician and comply with IEC60364-1.
• Only connect this machine to a supply circuit protected
by a residual current device (RCD) with a tripping current
of not more than 30mA.
• Disconnect from the electrical power supply before
carrying out user maintenance.
• Use only extension cords that have watertight
connections and are intended for outdoor use. Use only
extension cords having an electrical rating not less than
the rating of the product. Examine extension cord before
using and replace if damaged. Do not abuse extension
cord and do not pull on any cord to disconnect. Keep cord
away from heat and sharp edges. Always disconnect the
extension cord from the receptacle before disconnecting
the product from the extension cord.
• Do not use the appliance if a supply cord or important
parts of the appliance are damaged, e.g. safety devices,
high pressure hoses, trigger gun.
• Inadequate extension cords can be dangerous.
• To reduce the risk of electrocution, keep all connections
dry and off the ground. Do not touch plug with wet hands.
• Do not abuse the cord. Never use the cord to carry the
product or to disconnect the plug from an outlet. Keep
cord away from heat, oil, sharp edges, or moving parts.
Replace damaged cords immediately. Damaged cords
increase the risk of electric shock.
• Inspect extension cords periodically and replace if
damaged. Keep handles dry, clean, and free from oil or
grease.
2
English
EN
5 PRESSURE WASHER SAFETY
WARNINGS
• Do not direct the jet against yourself or others in order to
clean clothes or footwear.
• High pressure jets can be dangerous if subject to misuse.
The jet must not be directed at persons, animals, electrical
devices, or the machine itself.
• To ensure appliance safety, use only original spare parts
from the manufacturer or approved by the manufacturer.
• Use only recommended accessories. The use of improper
accessories may cause risk of injury.
• When servicing use only identical replacement parts. Use
of any other parts may create a hazard or cause product
damage.
• Do not use product if switch does not turn it off. Have
defective switches replaced by an authorized service
centre.
• Do not use the appliance if a supply cord or important
parts of the appliance are damaged, e.g. safety devices,
high pressure hoses, trigger gun.
• Use correct product. Don’t force product or attachment to
do a job it was not designed for. Don’t use it for a purpose
not intended.
• Never leave product running unattended. Turn power off.
Don’t leave product until it comes to a complete stop.
• Keep the motor free of grass, leaves, or grease to reduce
the chance of a fire hazard.
• Keep the motor away from flammables and other
hazardous materials.
• Keep product dry, clean, and free from oil and grease.
Always use a clean cloth when cleaning. Never use brake
fluids, gasoline, petroleum-based products, or any
solvents to clean product.
• Do not use acids, alkalines, solvents, flammable material,
bleaches, or industrial grade solutions in this product.
These products can cause physical injuries to the operator
and irreversible damage to the machine.
• This Appliance has been designed for use with the
cleaning agent supplied or recommended by the
manufacturer. The use of other cleaning agents or
chemicals may adversely affect the safety of the
appliance.
• Check bolts and nuts for looseness before each use. A
loose bolt or nut may cause serious motor problems.
• ONLY use cold water.
• Make sure minimum clearance of 1 metre is maintained
from combustible materials.
• Connect pressure washer only to an individual branch
circuit.
• Don't overtilt the unit.
• Hold the gun and lance securely with both hands.
• Expect the gun to move when the trigger is pulled due to
reaction forces. Failure to do so could cause loss of
control and injury to yourself and others.
• Save these instructions. Refer to them frequently and use
them to instruct other users. If you lend someone this
product, lend them these instructions also.
WARNING
High pressure hoses, fittings and couplings are important for
the safety of the appliance. Use only hoses, fittings and
couplings recommended by the manufacturer.
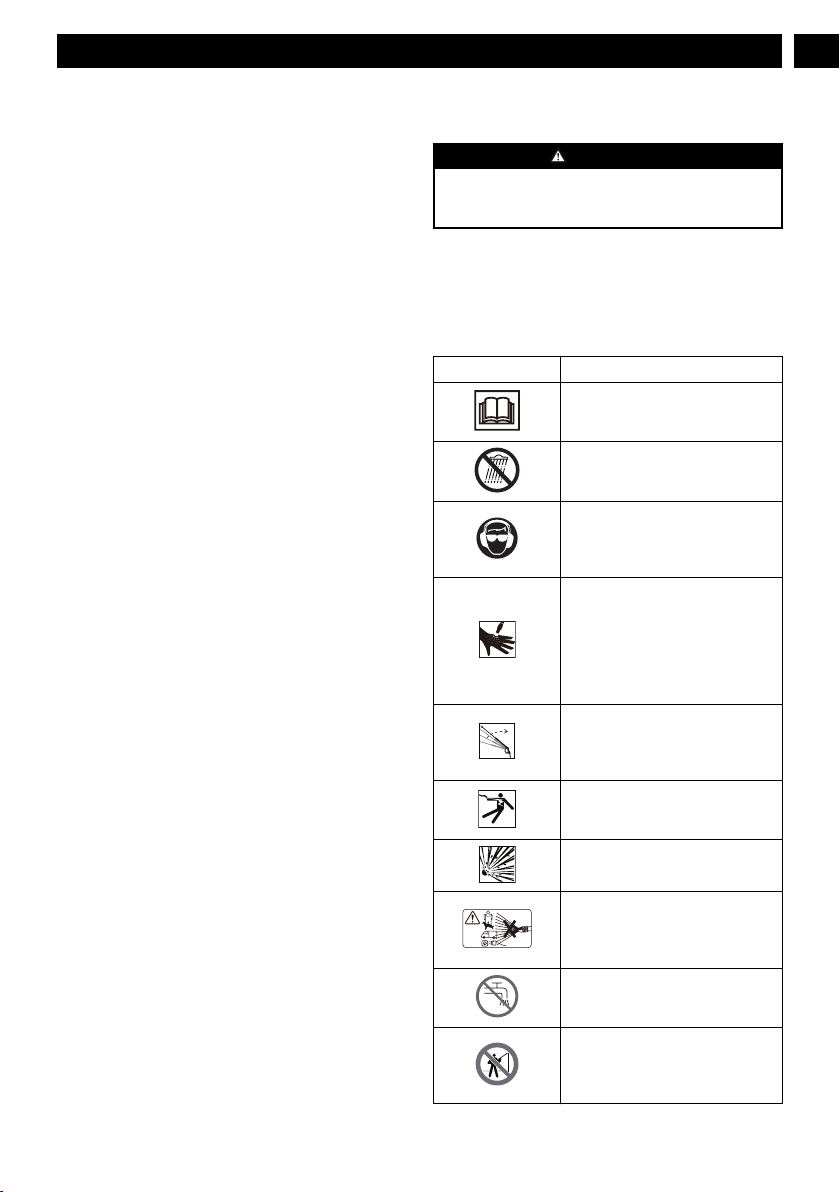
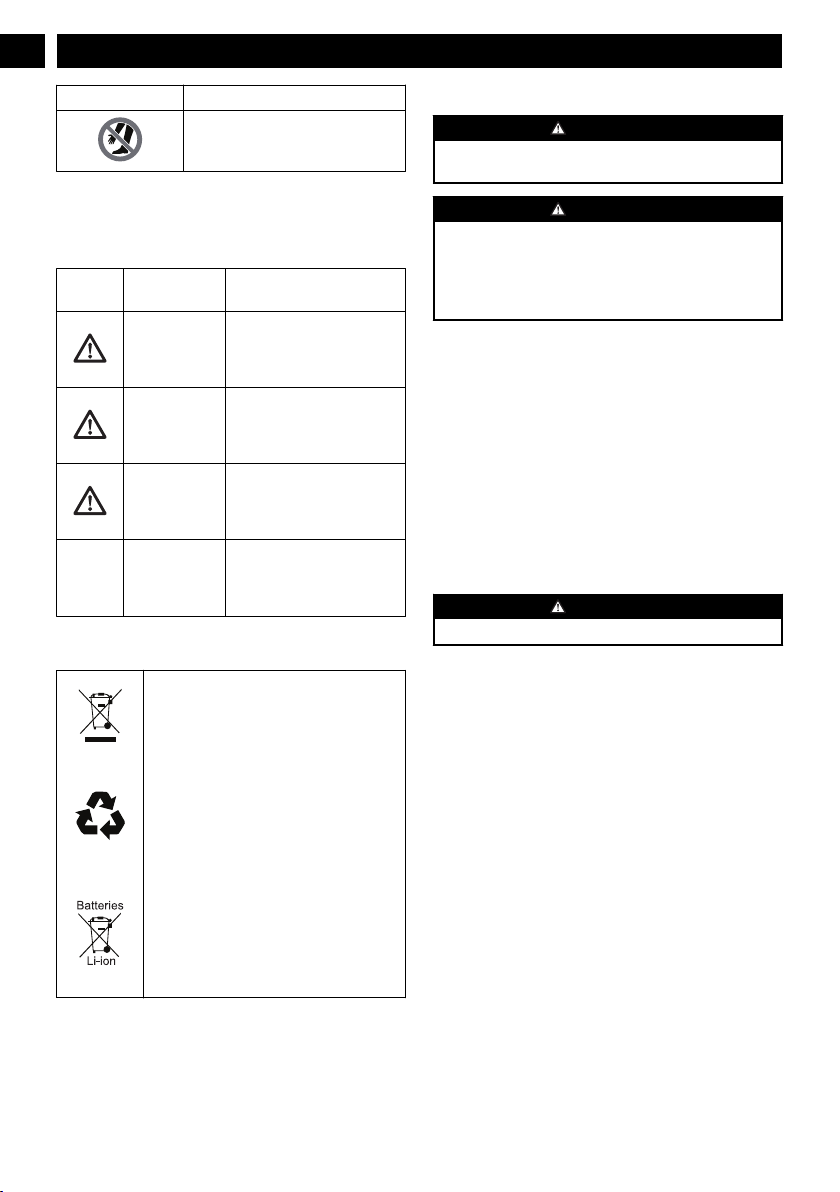
6 SYMBOLS ON THE PRODUCT
Some of the following symbols may be used on this tool.
Please study them and learn their meaning. Proper
interpretation of these symbols will allow you to operate the
tool better and safer.
Symbol Explanation
To reduce the risk of injury, user must
read and understand operator’s man-
ual before using this product.
Do not expose the product to rain or
moist conditions.
Always wear safety goggles or safety
glasses with side shields and, as nec-
essary, a full face shield when operat-
ing this product.
To reduce the risk of injection or in-
jury, never direct a water stream to-
wards people or pets or place any
body part in the stream. Leak ing ho-
ses and fittings are also capable of
causing injection injury. Do not hold
hoses or fittings.
To reduce the risk of injury from
kickback, hold the spray lance se-
curely with both hands when the ma-
chine is on.
Failure to use in dry conditions and to
observe safe practices can result in
electric shock.
Fuel and its vapours are explosive
and can cause severe burns or death.
Warning! Never point the gun to hu-
man, animals, the machine body,
power supply or any electric applian-
ces.
Appliance not suitable for connection
to the drinking water mains without
backflow preventer.
Only use cleaning deck on flat, hori-
zontal surfaces. Never lift cleaning
deck from the cleaning surface while
operating the pressure washer.
3
English
EN
Symbol Explanation
Keep hands and feet away from the
cleaning deck while the pressure
washer is running.
7 RISK LEVELS
The following signal words and meanings are intended to
explain the levels of risk associated with this product.
SYM-
BOL
SIGNAL MEANING
DANGER Indicates an imminently haz-
ardous situation, which, if not
avoided, will result in death
or serious injury.
WARNING Indicates a potentially hazard-
ous situation, which, if not
avoided, could result in death
or serious injury.
CAUTION Indicates a potentially hazard-
ous situation, which, if not
avoided, may result in minor
or moderate injury.
CAUTION (Without Safety Alert Sym-
bol) Indicates a situation that
may result in property dam-
age.
8 RECYCLE
Separate collection. You must not discard
with usual household waste. If it is necessa-
ry to replace the machine, or if it is no more
use to you, do not discard it with household
waste.
Separate collection of used machine and
packaging let you recycle materials and use
them again. Use of the recycled materials
helps prevent environmental pollution and
decreases the requirements for raw materi-
als.
At the end of their useful life, discard batter-
ies with a precaution for our environment.
The battery contains material that is danger-
ous to you and the environment. You must
remove and discard these materials separate-
ly at a location that accepts lithium-ion bat-
teries.
9 INSTALLATION
9.1 UNPACK THE MACHINE
WARNING
Make sure that you correctly assemble the machine before
use.
WARNING
• If the parts have damage, do not use the machine.
• If you do not have all the parts, do not operate the
machine.
• If the parts are damaged or missing, speak to the service
center.
1. Open the package.
2. Read the documentation in the box.
3. Remove all the unassembled parts from the box.
4. Remove the machine from the box.
5. Discard the box and package in compliance with local
regulations.
9.2 INSTALL THE SPRAY WAND
Figure 2.
1. Push the end of the spray wand into the gun handle.
2. Turn the spray wand clockwise until the tabs lock into
position.
WARNING
Make sure that the connection has no leakage.
9.3 INSTALL THE GUN HOLDER
Figure 3.
1. Engage the gun holder into the slot until it locks into its
tabs.
9.4 INSTALL THE WATER INLET
CONNECTOR
Figure 4.
1. Install the water inlet connector onto the water inlet
coupler.
2. Turn the water inlet connector clockwise until it is tight.
9.5 INSTALL THE FRONT PEDESTAL
Figure 4.
1. Aligh the screw sleeves of the pedestal with the screw
holes.
2. Push the screws through the screw sleeves and tighten
them.
4
English
EN

9.6 INSTALL THE HIGH PRESSURE
HOSE
Figure 5.
1. Release the high pressure hose from the hose reeler.
2. Push one end of the high pressure hose into the inlet
coupler.
10 OPERATION
WARNING
Make sure that all the connections are tight and have no
leakage before operation.
10.1 CONNECT THE WATER SUPPLY
TO THE MACHINE
For easy operation, please use a self-coiling garden hose (not
provided).
WARNING
When you operate the self-coiling hose, make sure that the
hose has no blockage.
WARNING
• The water supply must come from the water main
• Do not use hot water
• Do not use water from ponds or lakes
WARNING
Do the local regulations when you connect the garden hose
to the water supply. Direct connection through a receiver
tank or backflow preventer is usually permitted.
CAUTION
Inspect the filter in the water inlet connector before you
connect the garden hose
• If the filter is damaged, do not use the machine until the
filter is replaced.
• If the filter is dirty, clean the filter.
Figure 6.
1. Uncoil the garden hose.
2. Let the water flow through the garden hose for 30
seconds.
3. Turn the water supply off.
4. Install and tighten the end of the garden hose to the water
inlet connector.
CAUTION
There must be a minimum of 3 m of free hose between the
water inlet and the water supply.
10.2 USE THE GUN
Figure 2.
WARNING
For safe control, keep your hands on the gun at all times.
• Pull and hold the gun trigger to start the machine.
• Release the gun trigger to stop water flow through the
nozzle.
10.2.1 UNLOCK THE GUN TRIGGER
• Push backward the trigger safety button.
10.2.2 LOCK THE GUN TRIGGER
• Push forward the trigger safety button.
10.3 INSTALL THE NOZZLE
Figure 7.
WARNING
Before you change the nozzle:
1. Pull the gun trigger to release water pressure.
2. Lock the trigger safety button on the gun.
3. Stop the mahcine.
WARNING
Do not point the spray wand at your face or others'.
1. Push and hold the lock button on the spray wand.
2. Align the pin on the nozzle with the hole on the spray
wand.
3. Install the nozzle onto the spray wand.
4. Rotate the nozzle to adjust the spray shape.
10.4 INSTALL THE DETERGENT TANK
Figure 8.
WARNING
Do not use household detergents, acids, alkalines, bleaches,
solvents, flammable material, or industrial grade solutions,
which can do damage to the pump.
WARNING
Do the instructions on the solution bottle to prepare
detergent.
NOTE
If it is necessary, use a funnel to prevent the spill of
detergent. Clean and dry the spilled detergent when you fill
it.
1. Put the detergent into the detergent tank.
5
English
EN
2. Push and hold the lock button on the spray wand.
3. Install the detergent tank onto the spray wand.
NOTE
Do not let detergent dry on the surface to prevent streaks.
10.5 START THE MACHINE
Figure 9.
CAUTION
Do not operate without the water supply connected.
CAUTION
Before you start the machine:
1. Turn the water supply on.
2. Pull the gun trigger to release air pressure.
3. If a stable stream of water comes out from the gun,
release the gun trigger.
1. Connect the machine to the power supply.
2. Set the power switch to the “ON” ( | ) position.
3. Turn the water supply on.
4. Pull the gun trigger.
10.6 STOP THE MACHINE
1. Release the gun trigger.
2. Set the power switch to the "OFF" (O) position.
WARNING
If you do not use the machine:
• Stop the machine.
• Turn the water supply off.
• Disconnect the power cord from the outlet.
• Pull the gun trigger to release the remaining pressure
from the machine.
• Lock the trigger safety button.
11 MAINTENANCE
WARNING
Before maintenance, make sure that you
• stop the machine.
• wait until all the moving parts stop.
• disconnect the plug from the power source.
WARNING
Do not use strong solvents or detergents on the plastic
housing or components.
WARNING
Do not let brake fluids, gasoline, petroleum-based materials
touch the plastic parts. Chemicals can cause damage to the
plastic, and make the plastic unserviceable.
WARNING
Replace the power cord by an approved service center.
11.1 NOZZLE MAINTENANCE
Figure 7.
If there is too much pump pressure, the nozzle can become
clogged, you can feel a pulsing sensation while you pull the
gun trigger.
11.1.1 REMOVE THE NOZZLE
1. Push and hold the lock button on the spray wand.
2. Remove the nozzle from the spary wand.
11.1.2 CLEAN THE NOZZLE
1. Use a straight paper clip or cleaning tool to clean the
spray tip.
2. Flush and clean the unwanted materials out of the nozzle
with the garden hose.
3. Install the clean nozzle to the spray wand.
12 TRANSPORTATION AND
STORAGE
WARNING
Disconnect the power cord before transportation and
storage.
12.1 MOVE THE MACHINE
• Point the spray wand in a safe direction.
• Only hold the machine with the handgrip.
12.2 STORE THE MACHINE
WARNING
Make sure that the gun, the high pressure hose and the
pump are dry.
WARNING
Make sure that children cannot come near the machine.
NOTE
Use a recommended pump protector to prevent cold
weather damage during storage in winter.
• Disconnect the garden hose from machine.
• Wind the high pressure hose.
6
English
EN

• Clean housing and the plastic components with a moist
and soft cloth.
• Make sure that the machine does not have loose or
damaged parts. If it is necessary, do these steps/
instructions:
• replace the damaged parts.
• tighten the bolts.
• speak to a person of an approved service center.
• Store the machine in a dry, isolated and frost-free area.
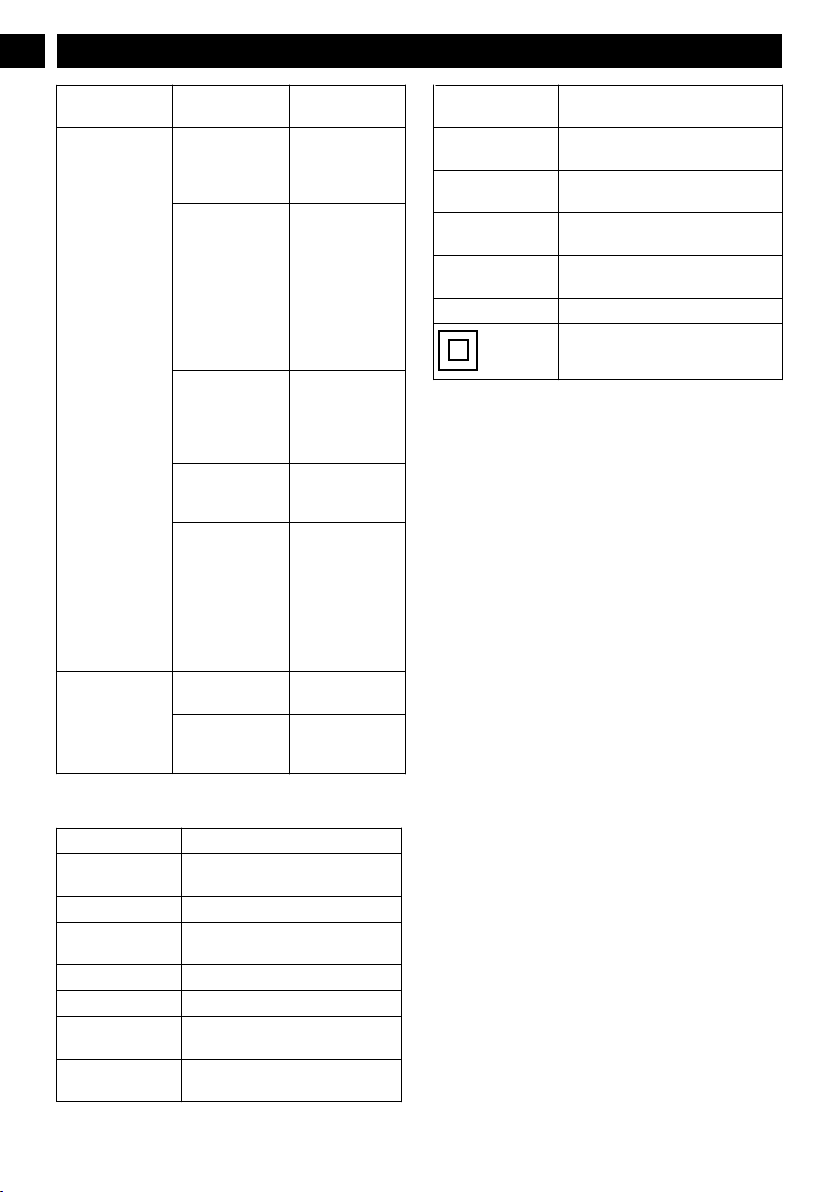
13 TROUBLESHOOTING
PROBLEM POSSIBLE
CAUSE
SOLUTION
The motor does
not start.
The power switch
is off.
Set the power
switch to the
“ON” ( | ) posi-
tion.
You do not plug
the power cord.
Connect the power
cord to the power
supply.
Electrical outlet
does not supply
sufficient power.
Try another elec-
trical outlet.
The circuit breaker
is tripped.
Let it cool, and
start the machine
again.
The power switch
is on, but you do
not pull the gun
trigger.
Pull the gun trig-
ger.
The machine does
not get high pres-
sure.
The diameter of
garden hose is too
small.
Replace with a 1”
(25 mm) or 5/8”
(16 mm) garden
hose.
The garden hose is
blocked.
Make sure that the
garden hose is free
from blockage.
The water supply
is not sufficient.
Open the water
suppy fully.
You do not install
the nozzle onto the
spray wand.
Install the nozzle
onto the spray
wand.
The water intake
filter is blocked.
Remove the filter
and make it clean
in warm water.
PROBLEM POSSIBLE
CAUSE
SOLUTION
The output pres-
sure varies high
and low.
The water supply
is not sufficient.
Open water suppy
fully. Make sure
the garden hose is
free from block-
age.
The pump absorbs
air.
1. Make sure that
the hoses and
fittings have
no problem.
2. Turn the ma-
chine off.
3. Pull the gun
trigger until a
stable flow of
water comes
out through
the nozzle.
The water intake
filter is clogged.
Remove the filter
and clean it in
warm water.
The supply volt-
age is low.
Make sure that on-
ly the pressure
washer operates
on the circuit.
The gun, hose or
nozzle are calci-
fied.
Operate distilled
vinegar through
detergent tank.
7
English
EN
PROBLEM POSSIBLE
CAUSE
SOLUTION
The motor buzzes,
but you can not
start the machine.
The supply volt-
age is low.
Make sure that on-
ly the pressure
washer operates
on the circuit.
The system has re-
maining pressure.
1. Stop the ma-
chine.
2. Pull the gun
trigger on
spray wand to
release pres-
sure
3. Start the ma-
chine.
The voltage de-
creases across ex-
tension cord.
Disconnect the ex-
tension cord, and
connect the ma-
chine directly into
the outlet.
You do not use the
machine for a long
time.
Speak to a person
of an approved
service center.
There is remaining
friction in compo-
nents. You can
hear a hum.
1. Disconnect the
water supply.
2. Turn the ma-
chine on for 2
or 3 seconds.
3. Repeat the
above step for
several times.
There is no water. The water supply
is off.
Turn the water
supply on.
The garden hose is
blocked.
Make sure that the
garden hose is free
from blockage.
14 TECHNICAL DATA
Model No. G40
Rated Voltage 220-240V ~ 50Hz
Rated Pressure 10 MPa
Permissible Pres-
sure
13.5 MPa
Power Rating 1900 W
Rated Water Flow 6.5 l/min
Maximum Water
Flow
7 l/min
Maximum Water In-
let Pressure
0.7 MPa
Maximum Water In-
let Temperature
40 °C
Measured sound
pressure level
L
pA
= 82 dB(A),
K
pA
= 3 dB(A)
Measured sound
power level
L
wA
= 90.1 dB(A)
Guaranteed sound
power level
L
wA.d
= 94 dB(A)
Vibration < 2.5 m/s
2
, K =
Protection Degree IPX 5
Double-insulated construction.
15 WARRANTY
(The full warranty terms and conditions can be found on
Greenworks website https://www.greenworkstools.eu)
The Greenworks warranty is 3 years on the product, and 2
years on batteries (consumer/private usage) from the date of
purchase. This warranty covers manufacturing faults. A faulty
product under warranty might be either repaired or replaced.
A unit that has been misused or used in other ways then
described in the owner’s manual might be rejected for
warranty. Normal wear, and wear parts are not considered as
warranty. The original manufacturer warranty is not affected
by any additional warranty offered by a dealer or retailer.
A faulty product must be returned to the point of purchase in
order to claim for warranty, together with the proof of
purchase (receipt).
16 EC DECLARATION OF
CONFORMITY
Name and address of the manufacturer:
Name: GLOBGRO AB
Globe Group Europe
Address: Riggaregatan 53, 211 13 Malmö, Sweden
Name and address of the person authorised to compile the
technical file:
Name: Peter Söderström
Address: Riggaregatan 53, 211 13 Malmö, Sweden
Herewith we declare that the product
Category: Pressure washer
Model: G40(PWA111)
Serial number: See product rating label
8
English
EN
1.5 m/s
2

Year of Construction: See product rating label
• is in conformity with the relevant provisions of the
Machinery Directive 2006/42/EC
• is in conformity with the provisions of the following
other EC-Directives:
• 2014/30/EU
• 2000//14/EC&2005/88/EC
• 2011/65/EU&(EU)2015/863
Furthermore, we declare that the following (parts/clauses of)
European harmonised standards have been used:
EN 60335-1; EN 60335-2-79; EN 62233; EN 55014-1; EN
55014-2; EN 61000-3-3; EN 61000-3-2; EN ISO 3744; ISO
11094; IEC 62321-3-1; IEC 62321-4; IEC 62321-5; IEC
62321-6; IEC 62321-7-1; IEC 62321-7-2; IEC 62321-8
Conformity assessment method to Annex V/ Directive
2000/14/EC
Measured sound power level L
WA
: 90.1 dB(A)
Guaranteed sound power level L
WA.d
: 94 dB(A)
Place, date: Signature: Ted Qu, Quality Director
Malmö, 04.04.2020
9
English
EN