Loading ...
Loading ...
Loading ...
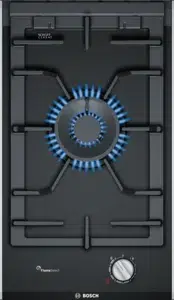
en Getting to know your appliance
6
It is essential to ensure that all the burner parts and pan
supports are correctly installed for the appliance to
work correctly. Do not swap the burner caps around.
Always remove the pan supports carefully. When
moving a pan support, the pan supports next to it may
also move.
Residual heat indicator
Every burner on the hob has a residual heat indicator
that indicates whether it is hot or warm.
If • appears in the display the burner is still hot. As the
burner cools down further, the display changes to œ.
The display remains lit until the burner has cooled
sufficiently. Do not touch the respective burner if this
indicator is lit.
Accessories
Depending on the model, the hob may include the
following accessories. These can also be acquired from
the Technical Assistance Service.
These appliances can be combined with conventional
hobs of the same make, using the joint accessory. See
the catalogue for details.
--------
Code
The manufacturer accepts no liability if these
accessories are not used or are used incorrectly.
Inner flame on low power.
Burner parts
1 Ignition plug
2 Thermocouple
3 Burner ring
4 Burner cup
5 Burner cap
Additional wok grid
Only suitable for use on wok
burners. Use cookware with a
rounded base.
To extend the service life of the
appliance, we recommend using
the additional wok grid.
Additional espresso maker
grid
Only suitable for user on the
inner flame of the wok burner.
Use cookware with a diameter
of less than 22 cm.
Additional espresso maker
grid
Only suitable for use on the
smallest burner. Use cookware
with a diameter of less than
12 cm.
Simmer plate
This accessory part is only suita-
ble for simmering. It can be used
with the economy burner or the
standard-output burner. If your
hob has several standard-output
burners, we recommend placing
the simmer plate on the rear or
front-right standard-output burner.
Place the accessory component
with the projections facing
upwards on the holder; never
place it directly on the burner.
HEZ233720 Additional wok grid
HEZ298113 Additional espresso maker grid for the
wok burner
HEZ298114 Additional espresso maker grid for the
smallest burner
HEZ298105 Simmer Plate
Gas burners en
7
ÄGas burners
Gas bur ner s
Switching on manually
1. Press the control knob for the selected burner and
turn it anticlockwise to the highest power setting.
2. Hold an igniter or a naked flame (such as a lighter or
a match) against the burner.
Automatic ignition
If the hob has automatic ignition (ignition plugs):
1. Press the control knob for the selected burner and
turn it anticlockwise to the highest power level.
While the control knob is held down, all the burners
will generate sparks and the ³ symbol will appear on
the display. The flame ignites. Wait a few seconds.
2. Release the control knob.
3. Turn the control knob to the required position.
If the burner does not ignite, switch it off and repeat the
steps described above. This time, hold the control knob
down for longer (up to 10 seconds).
:Warning – Risk of deflagration!
If the flame does not ignite after 10 seconds, switch off
the burner and open a window or the door to the room.
Wait at least one minute before switching the burner on
again.
Note: It is important to keep the appliance clean. If the
ignition plugs are dirty, this may cause ignition
problems. Clean the ignition plugs regularly with a
small, non-metallic brush. Take care to prevent the
ignition plugs from suffering any heavy knocks.
Safety system
Your hob is equipped with a safety system
(thermocouple) that cuts off the gas when the burners
are accidentally switched off.
To ensure that this device is active:
1. Switch on the burner as usual.
2. Without releasing the control knob, press and hold it
down firmly for 4 seconds after lighting the flame.
Switching off a burner
Turn the control knob clockwise to position 0. The ‹
symbol will appear in the display and the residual heat
indicator will appear after a few seconds.
A few seconds after the burner is switched off, a sound
(thud) will be produced. This is not a fault - this means
that the safety device is no longer operating.
Warnings
It is normal to hear a soft whistling noise while the
burner is operating.
When first used, it is normal for the burner to give off
odours. This does not pose any risk and does not
indicate a malfunction. They will disappear in time.
An orange-coloured flame is normal. This is caused by
the presence of dust in the atmosphere, spilt liquids, etc.
If the burner flames are accidentally blown out, switch
off the burner operating control knob and do not try to
relight it for at least 1 minute.
JSettings table and tips
Set t i ngs t abl e and t i ps
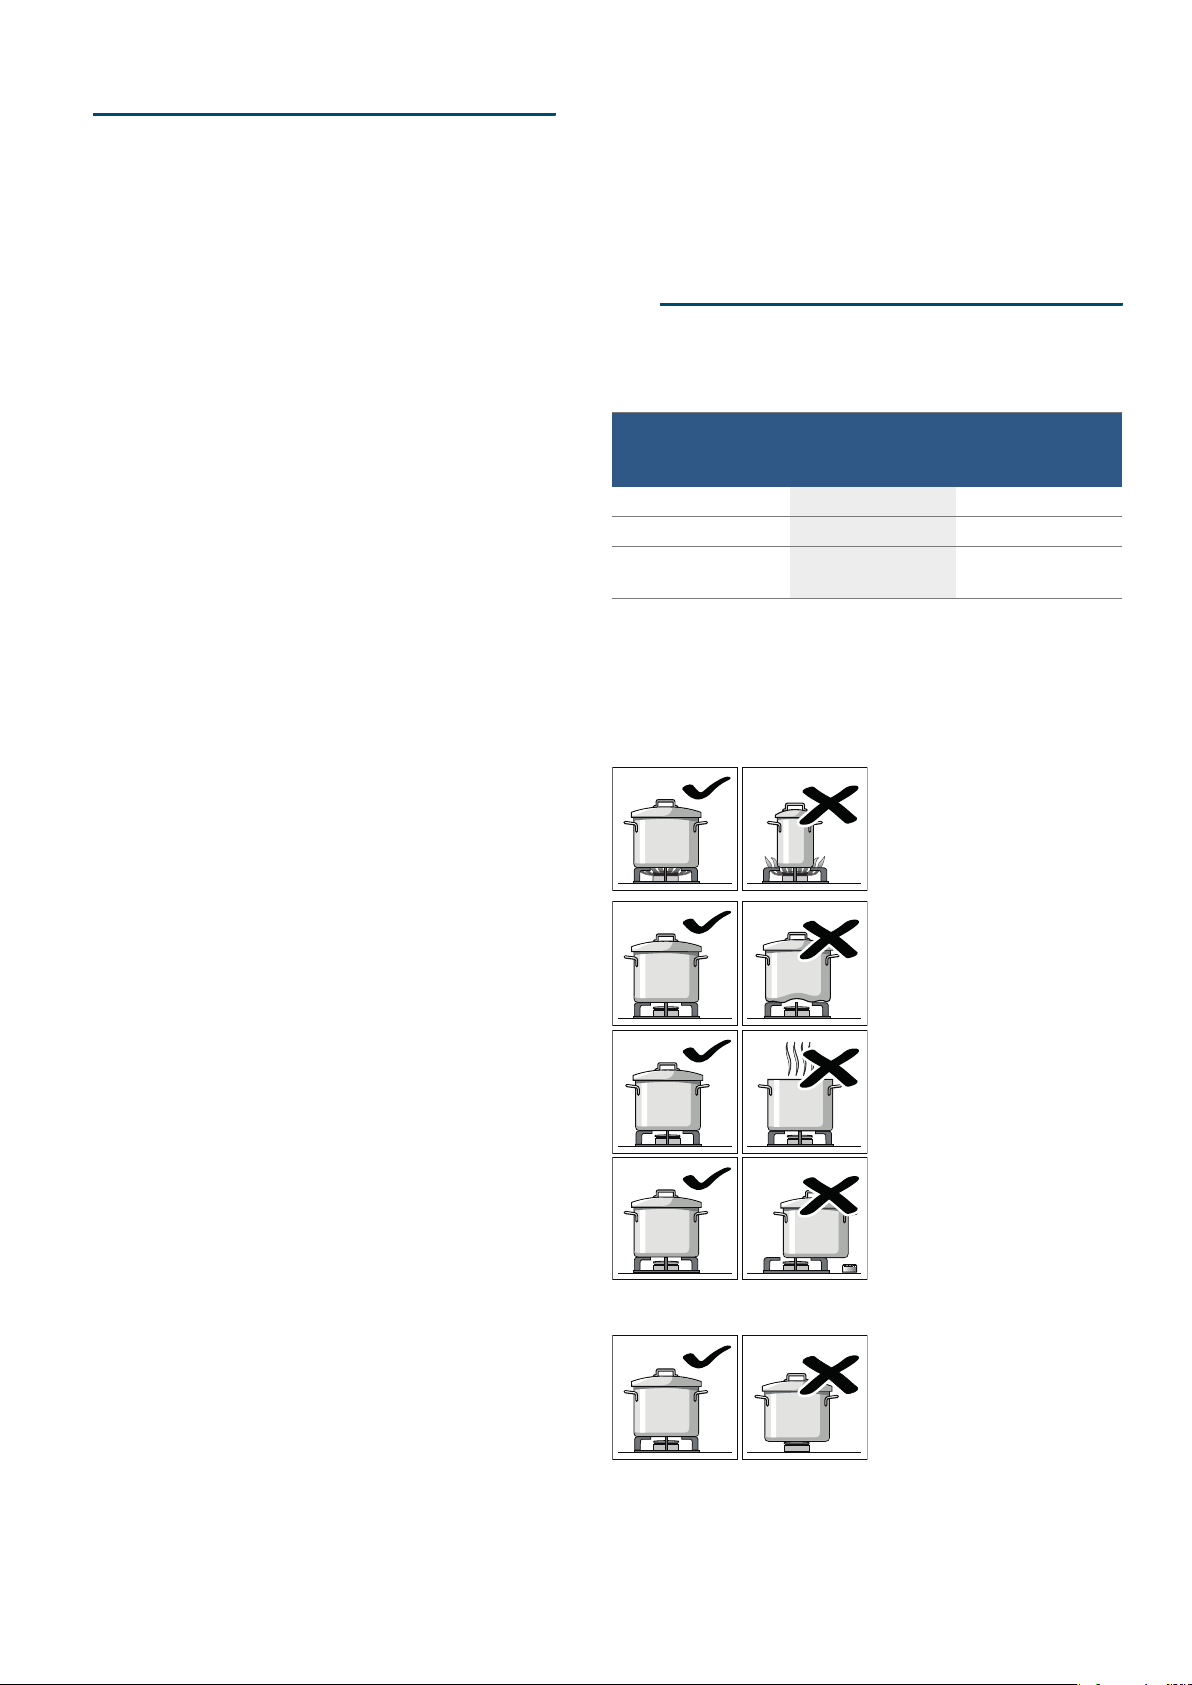
Suitable pans
The cookware must not overhang the edge of the hob.
Precautions for use
The following advice is intended to help you save
energy and prevent pan damage:
Burner Minimum diameter
of the cookware
base
Maximum diameter
of the cookware
base
Dual-wok burner 22 cm 30 cm
High-output burner 20 cm 26 cm
Standard-output
burner
12 cm 22 cm
Use pans which are the
right size for each burner.
Do not use small pans on
large burners. The flame
must not touch the sides of
the pan.
Do not use damaged pans,
which do not sit evenly on
the hob. Pans may tip over.
Only use pans with a thick,
flat base.
Do not cook without using a
lid and make sure the lid is
properly fitted. This wastes
energy.
Always centre the pan over
the burner, not to one side.
Otherwise it could tip over.
Do not place large pans on
the burners near the control
knobs. These may be
damaged by the very high
temperatures.
Place the pans on the pan
supports, never directly on
the burner.
Make sure that the pan
supports and burner caps
are correctly positioned
before using the appliance.
Loading ...
Loading ...
Loading ...