Loading ...
Loading ...
Loading ...
4 55ATTACHMENT TO BARBECUE (DISCOVERY BARBECUES ONLY)4 ATTACHMENT TO BARBECUE (SIGNATURE BARBECUES ONLY)
ATTACHMENT TO BARBECUE (SIGNATURE BARBECUES ONLY) ATTACHMENT TO BARBECUE (DISCOVERY BARBECUES ONLY)
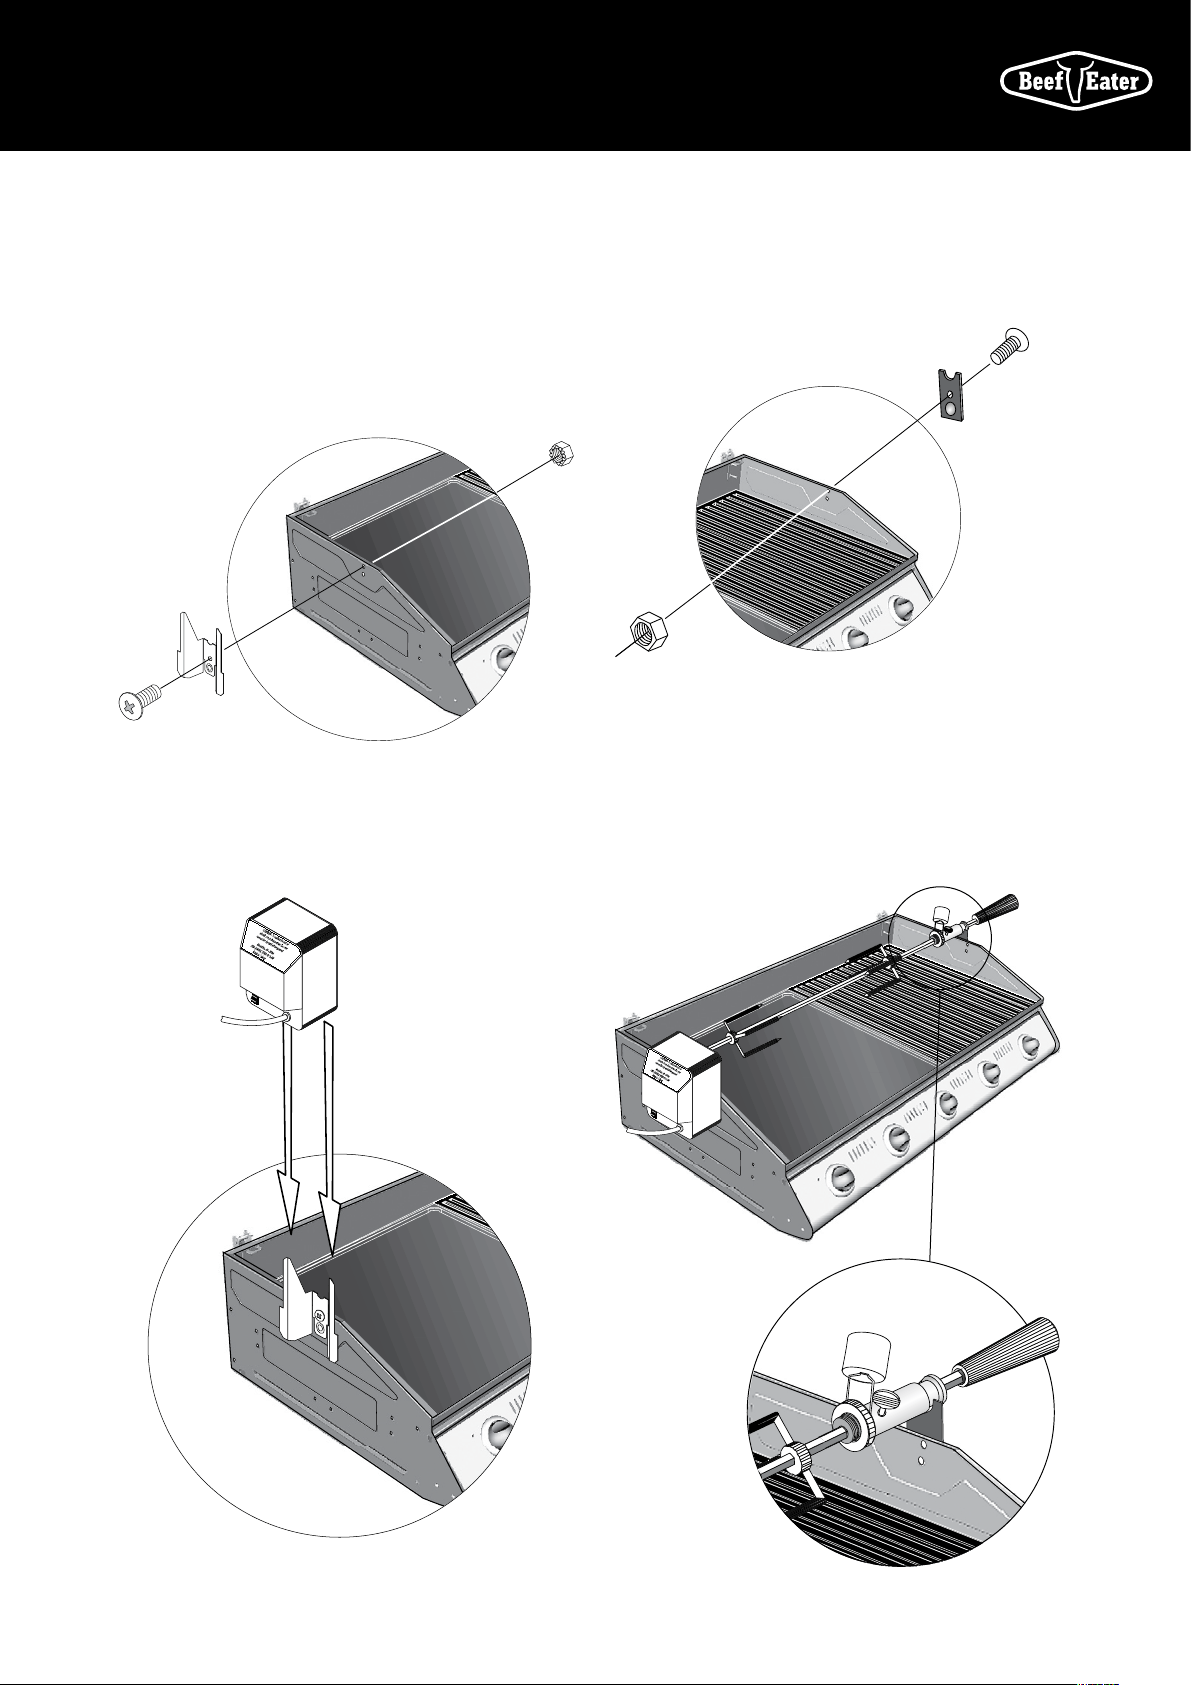
Step 1
First, attach the motor mounting bracket to the left side of
the roasting hood.
Use the bracket which has two holes diagonally apart.
The cylindrical spacers are used to separate the bracket
from the hood.
Step 2
Then, slide the motor onto the bracket.
Note the cable is towards the top.
Step 1
First, attach the motor mounting bracket to the left side of
the roasting hood.
Use the bracket which has one screw hole only. The bracket
is secured to the barbecue with a single nut and screw. The
dome shaped bump in the bracket presses into the barbecue
body and prevents the bracket from rotating.
Step 2
Then slide the motor onto the bracket. Note the cable is
towards the bottom.
Step 3
Attach a bracket to the right side of the barbecue body.
Similarly to the other side, use a single nut and screw.
Step 4
Fit the shaft onto the roasting hood.
First insert the pointed end into the motor.
On the other end of the shaft, the groove of the collar rests
directly onto the mounting bracket. You may need to loosen
the wing nut on the collar to reposition it if necessary.
Step 3
Fit the shaft onto the roasting hood.
First insert the pointed end into the motor.
On the other end of the shaft, the groove of the collar
rests directly onto the lower section of the roasting hood.
You may need to loosen the wing nut on the collar to
reposition it if necessary.
Loading ...
Loading ...
Loading ...