Loading ...
Loading ...
Loading ...
CI_i:i¸,_::i_i_i:i__i:::__iii_ii__iiii_i!i__:i_ii:_
1. Using a 4" (102 mm) clamp, connect vent to exhaust outlet
in dryer. If connecting to existing vent, make sure the vent is
clean. The dryer vent must fit over the dryer exhaust outlet
and inside the exhaust hood. Make sure the vent is secured
to exhaust hood with a 4" (102 mm) clamp.
2. Using two or more people, move dryer to desired installation
location. Do not crush or kink vent. Make sure dryer is level.
1. With dryer in final position, place level on top of the dryer, first
side to side; then front to back. If the dryer is not level, adjust
the legs of the dryer up or down until the dryer is level.
2. Using a Torx T20 security driver, open the control panel and
rest it on the bottom edge of the opening.
3. For added security between the upper dryer and the collar,
insert the cotter pin through the connecting bolt.
4. Close the control panel.
5. Plug in dryer or reconnect power.
6 Check dryer operation.
Select a full heat cycle, let the dryer run for at least five
minutes. Dryer wilt stop when time is used up.
NOTE: Dryer door must be closed for dryer to operate. When
door is opened, dryer stops, but time continues to count
down. To restart dryer, close door and reselect cycle.
7. Now start the dryer and allow it to complete a full heat cycle
to make sure it is working properly.
REVERSINGTHEDOORSWING(OPTIONAL)
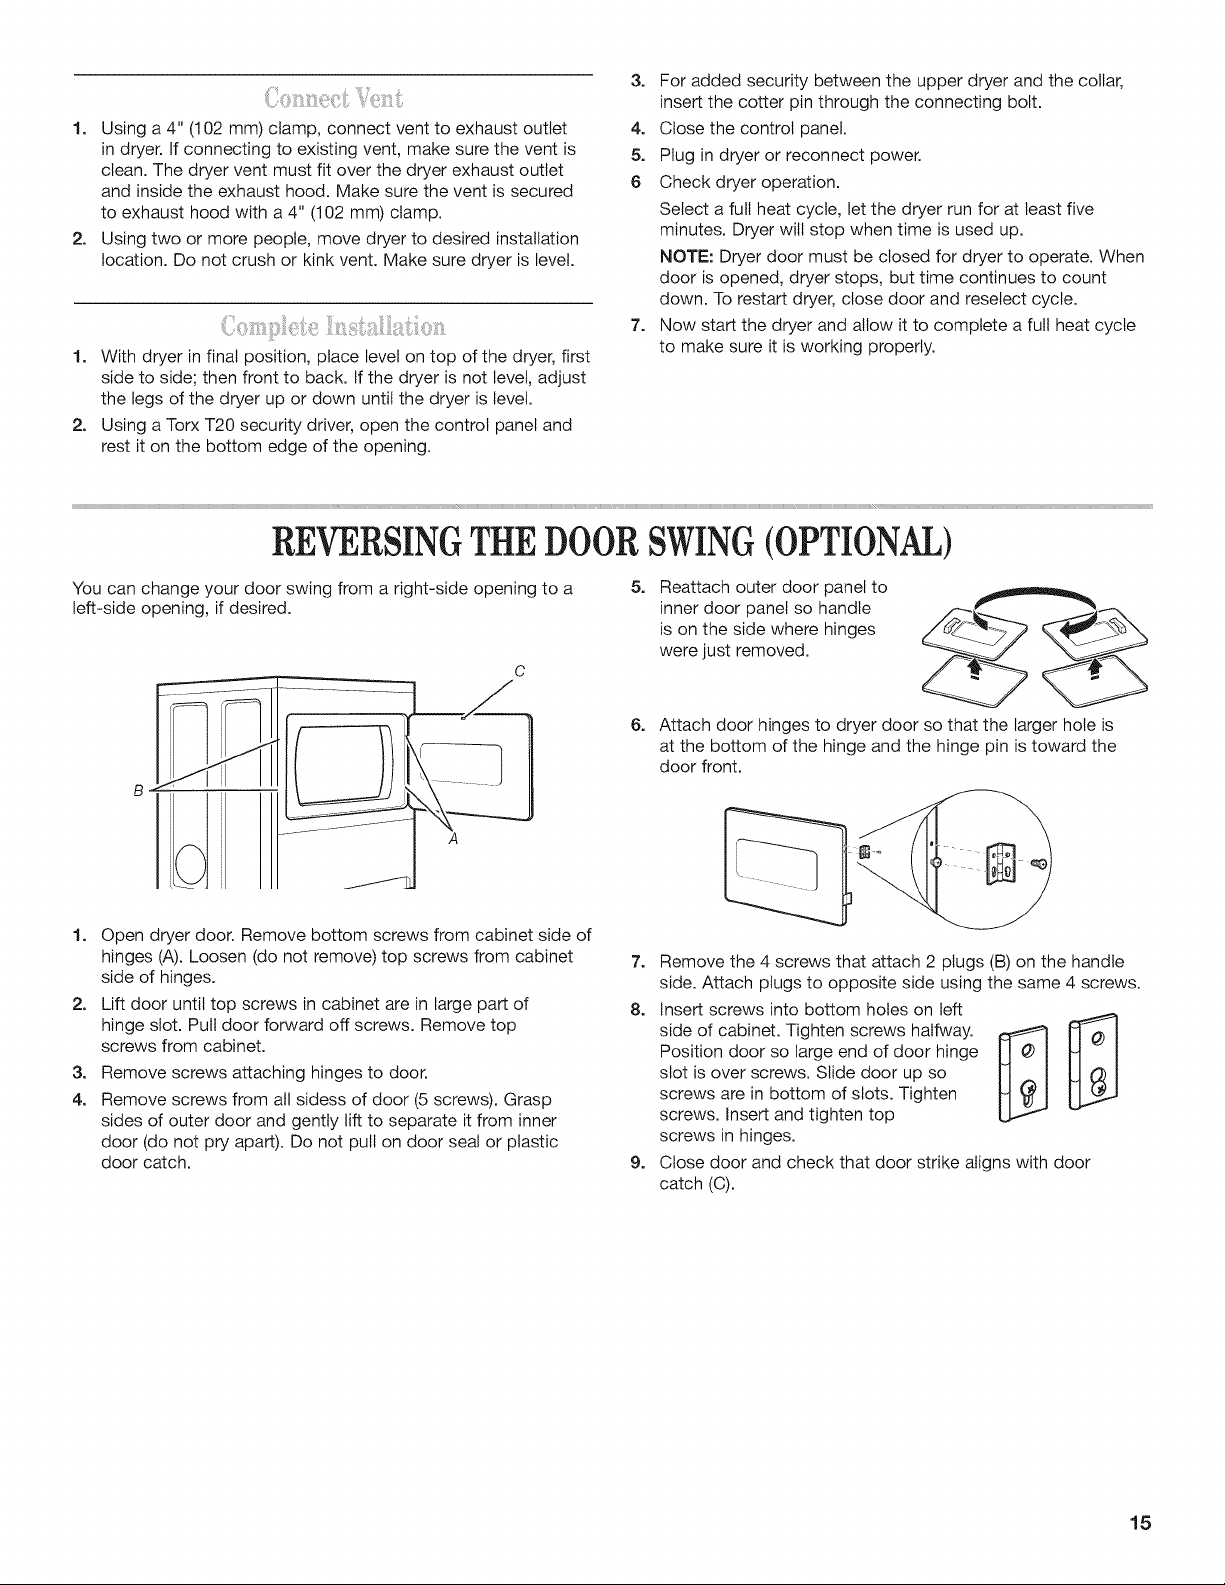
You can change your door swing from a right-side opening to a
left-side opening, if desired.
C
A
5_
6_
Reattach outer door panel to
inner door panel so handle
is on the side where hinges
were just removed.
Attach door hinges to dryer door so that the larger hole is
at the bottom of the hinge and the hinge pin is toward the
door front.
1. Open dryer door. Remove bottom screws from cabinet side of
hinges (A). Loosen (do not remove) top screws from cabinet
side of hinges.
2. Lift door until top screws in cabinet are in large part of
hinge slot. Pull door forward off screws. Remove top
screws from cabinet.
3. Remove screws attaching hinges to door.
4. Remove screws from all sidess of door (5 screws). Grasp
sides of outer door and gently lift to separate it from inner
door (do not pry apart). Do not pull on door seal or plastic
door catch.
7. Remove the 4 screws that attach 2 plugs (B) on the handle
side. Attach plugs to opposite side using the same 4 screws.
8. Insert screws into bottom holes on left
side of cabinet. Tighten screws halfway.
Position door so large end of door hinge
slot is over screws. Slide door up so
screws are in bottom of slots. Tighten
screws. Insert and tighten top
screws in hinges.
9. Close door and check that door strike aligns with door
catch (C).
15
Loading ...
Loading ...
Loading ...