Loading ...
Loading ...
Loading ...
Troubleshooting guide (cont'd)
Leakage Checkpoints
Use this guide to check a "Leaking" water heater. Many suspected
"Leakers" are not leaking tanks. Often the source of the water
can be found and corrected.
If you are not thoroughly familiar with electric codes, the water
heater, and safety practices, contact a Sears Service Center to
check the water heater•
J _, CAUTION
1
Read this manual first. Then before checking the /
water heater make sure the electric supply has been J
turned "OFF", and never turn the electric supply|
"ON" before the tank is completely full of water. 1
J ACAUT,ON 1
Never use this water heater unless it is completely I
full of water. To prevent damage to the tank andl
heating element, the tank must be filled with water.
The water must flow from the hot water faucet|
before turning "ON" power. J
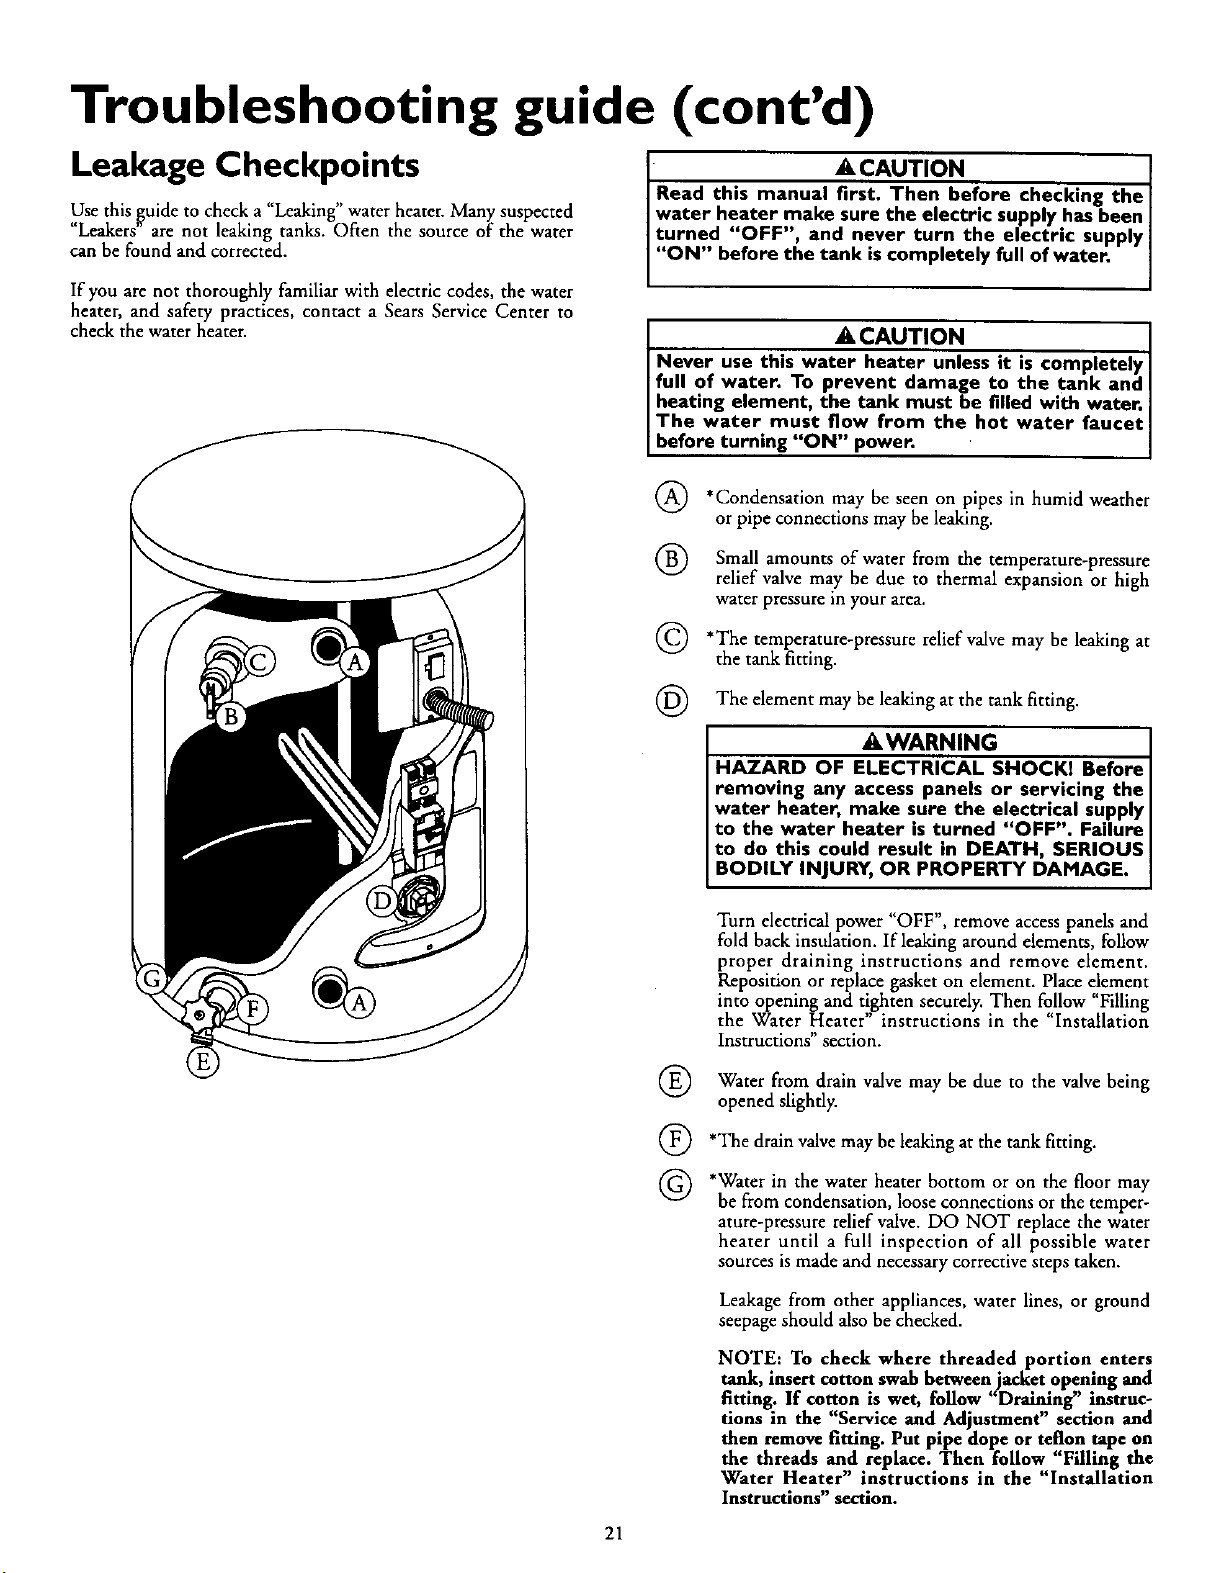
(_) may seen on pipes in humid weather
*Condensation be
or pipe connections may be leaking.
(_ Small amounts of water from the temperature-pressure
relief valve ma.y be due to thermal expansion or high
water pressure m your area.
(_ *The temperarure-pressure relief valve may be leaking at
the tank fitting.
(_ The element may be leaking at the tank fitting.
_,WARNING
HAZARD OF ELECTRICAL SHOCK1 Before
removing any access panels or servicing the
water heater, make sure the electrical supply
to the water heater is turned "OFF", Failure
to do this could result in DEATH, SERIOUS
BODILY INJURY, OR PROPERTY DAMAGE.
®
®
©
Turn electrical power "OFF", remove access panels and
fold back insulation. If leaking around elements, follow
proper draining instructions and remove element.
Reposition or replace gasket on element. Place element
into opening and tighten securely. Then follow "Filling
the Water Heater" instructions in the "Installation
Instructions section.
Water from drain valve may be due to the valve being
opened slightly.
*The drain valve may be leaking at the tank fitting.
*Water in the water heater bottom or on the floor may
be from condensation, loose connections or the temper-
ature-pressure relief valve. DO NOT replace the water
heater until a full inspection of all possible water
sources is made and necessary corrective steps taken.
Leakage from other appliances, water lines, or ground
seepage should also be checked.
NOTE: To check where threaded portion enters
tank, insert cotton swab between jacket opening and
fitting. If cotton is wet, follow "Draining" instruc-
tions in the "Service and Adjustment" section and
then remove fitting. Put pipe dope or teflon tape on
the threads and replace. Then follow "Filling the
Water Heater" instructions in the "Installation
Instructions" section.
21
Loading ...
Loading ...
Loading ...