Loading ...
Loading ...
Loading ...
14
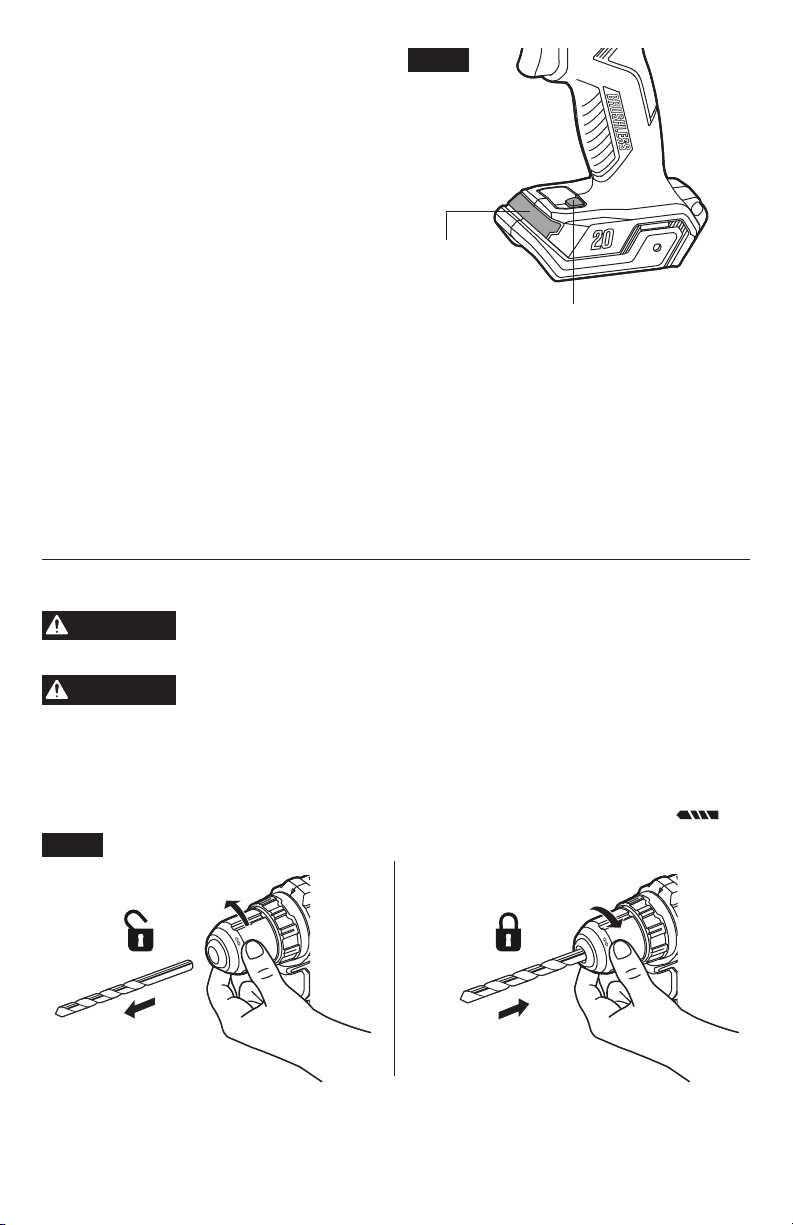
WORKLIGHT (Fig. 7)
Y
our tool is equipped with a WORKLIGHT light,
located on the base of the tool. This provides
additional light on the surface of the workpiece
for operation in lower-light areas.
The WORKLIGHT will illuminate by default
when the tool is turned on OR if the
WORKLIGHT button is pressed without turning
the tool on.
The WORKLIGHT could be turned off manually
by pressing the WORKLIGHT button when the
tool is not running.
NOTE:
WORKLIGHT will turn off automatically
after 10 seconds of inactivity if the
WORKLIGHT is turned on by squeezing on the
variable-speed trigger switch. WORKLIGHT will
turn off automatically after 10 minutes of inactivity if the WORKLIGHT is turned on by pressing
the WORKLIGHT button.
NOTE:
For safety reasons, the WORKLIGHT button is disabled while the tool is running.
The WORKLIGHT will rapidly ash when the tool and/or battery pack becomes overloaded or
too hot and the internal sensors will turn the tool off. Rest the tool for a while or place the tool
and battery pack separately under air ow for cooling.
The WORKLIGHT will ash more slowly to indicate that the battery pack charge is low.
Recharge the battery pack.
Installing and Removing Bits (Fig. 8a & 8b)
WARNING
Do not use the power of the drill driver while grasping chuck to
loosen or tighten the bit.
Friction burn or hand injury is possible if
attempting to grasp the spinning chuck.
WARNING
Do not use bits with damaged shanks.
Your tool is equipped with a keyless chuck to tighten or release drill bits
in the chuck jaws. The arrow on the chuck indicates the direction in which to rotate the chuck
body in order to lock ("CLOSE") or unlock ("OPEN") the chuck jaws on the drill bit.
a. Lock the trigger switch “OFF” on the tool by placing the direction-of-rotation selector in the
center position.
b. Remove the battery pack and rotate the torque-adjustment ring to the drill setting “
”.
OPEN
CLOSE
OPEN
CLOSE
Fig. 8a
Unlock ("OPEN") Lock ("CLOSE")
Fig. 7
WORKLIGHT
WORKLIGHT Button
Loading ...
Loading ...
Loading ...