Loading ...
2
PLANNING
This heater is intended to be used to suppply
supplemental heat from a wall location in new or
existing construction.
The heater can be operated using its built-in ther-
mostat or a remote thermostat (Broan Model 86W
Line-Voltage Thermostat - purchase separately).
Plan to supply the heater with proper line voltage
and appropriate power cable.
NOTE: Power can be tapped from a nearby circuit
depending on the heater wattage required and the
amperage rating of the circuit.
The table below lists the ratings for each model.
MODELS VOLTS AMPS WATTS BTU/HR
170 120 8.33/4.16 1000/500 3413/1707
240 4.16 1000 3413
208 3.61 750 2560
174 120 12.5/6.25 1500/750 5120/2560
240 6.25 1500 5120
208 5.41 1125 3840
178 240 8.33/4.16 2000/1000 6827/3413
208 7.21/3.61 1500/750 5120/2560
BOLD ratings are factory wired. See “OPTIONAL
WIRING CONVERSIONS” section on page 3 for
wattage and voltage conversion instructions.
Heater can be converted to half-wattage to avoid
overloading such circuits.
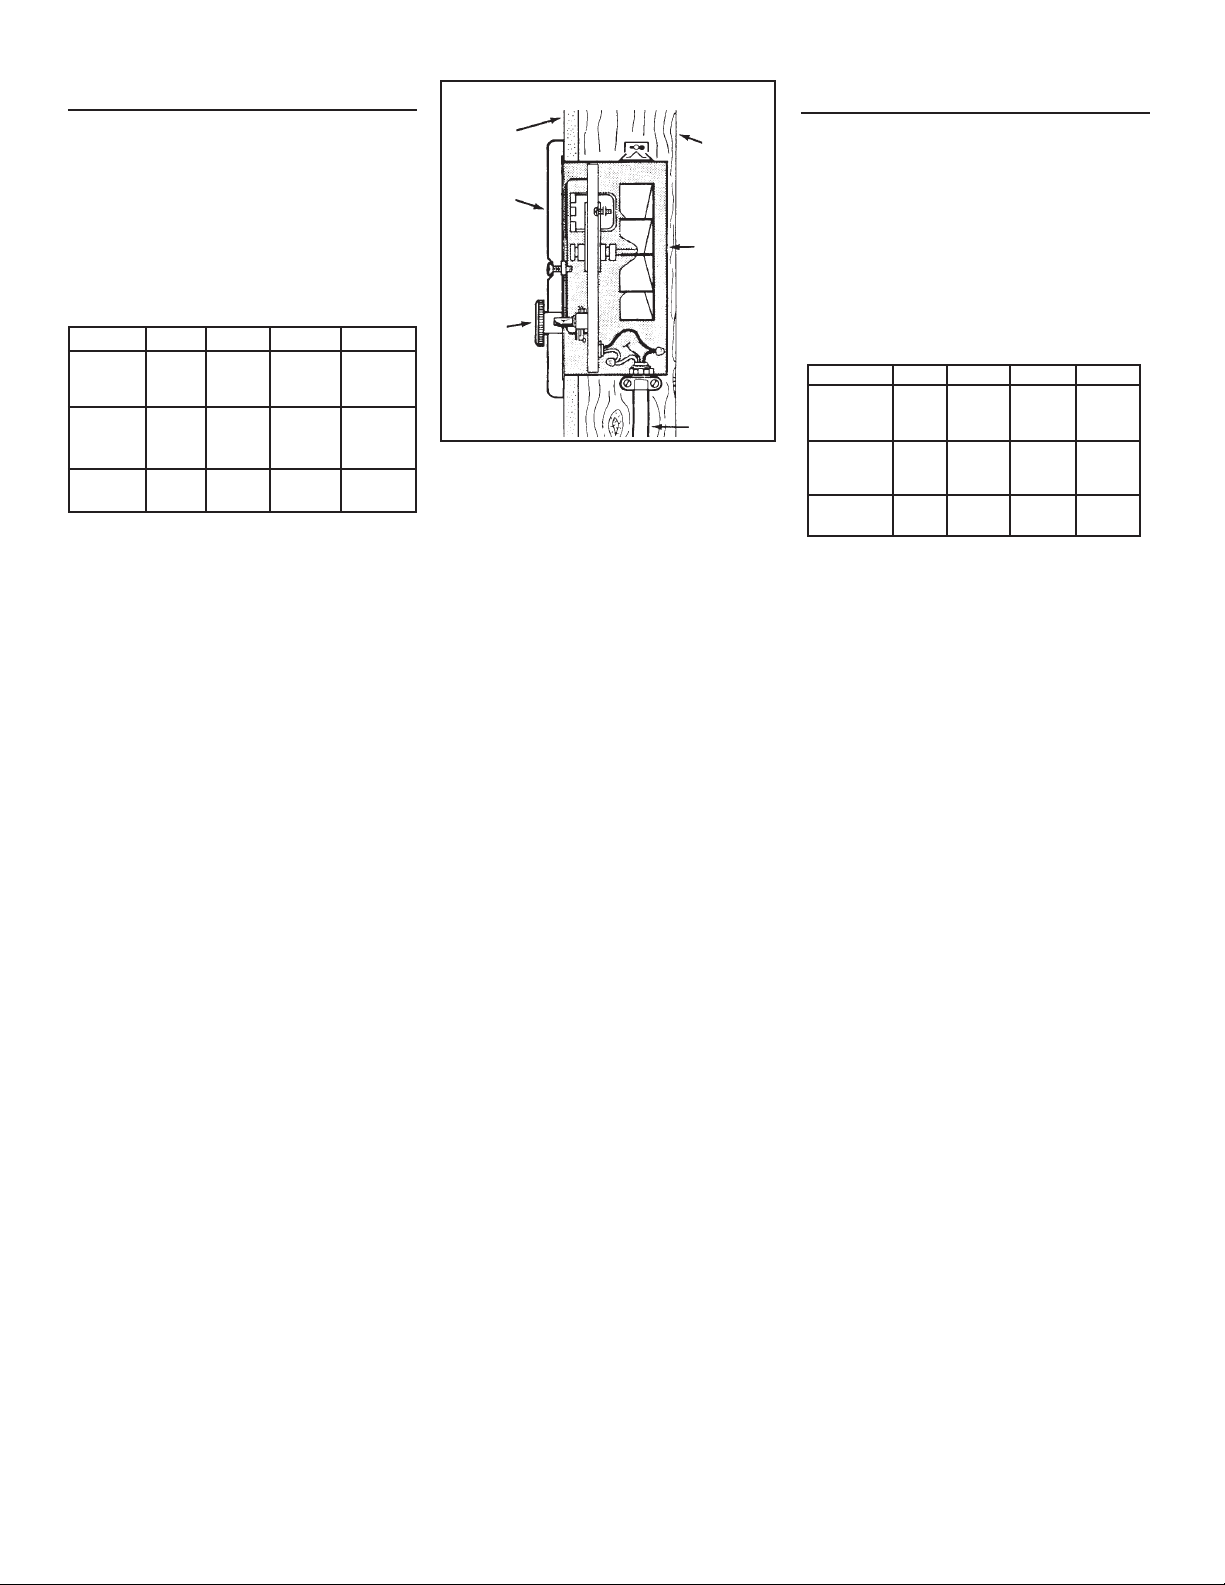
Follow these basic steps when installing this heater.
• Nail housing to studs.
• Connect power cable.
• Fasten heater assembly and grille to housing.
(FIG. 1)
PLANIFICACION
Este calentador ha sido diseñado para proporcionar
calefacción adicional desde la pared en una construc-
ción nueva o una ya existente.
El calentador se puede poner en funcionamiento
usando su termostato incorporado o un termostato
a distancia (termostato de tensión de línea Broan
modelo 86W - adquiéralo en forma separada).
Planifique ponerele al calentador la tensión eléctrica
y cable de potencia apropiados.
NOTA: La potencia se puede tomar de un circuito
cercano dependiendo del vatiaje requerido en el
calentador y el amperaje del circuito.
La tabla que aparece a continuación enumera las
corrientes nominales para cada modelo.
Las corrientes nominales en letras oscuras indi-
can cableados en fábrica. En la página 3, sección
“CONVERSIONES DE CABLEADO OPCIONAL”
encontrará las instrucciones de conversión de
vatiaje y voltaje.
El calentador se puede convertir a medio vatiaje para
evitar la sobrecarga de dichos circuitos.
Al instalar este calentador, siga estos pasos básicos:
• Clave la caja a las vigas de pared.
• Conecte el cable de potencia
• Fije el equipo del calentador y rejilla a la caja.
(FIG. 1)
MODELOS
VOLTIOS
AMPS VATIOS BTU/HR
170 120 8.33/4.16 1000/500 3413/1707
240 4.16 1000 3413
208 3.61 750 2560
174 120 12.5/6.25 1500/750 5120/2560
240 6.25 1500 5120
208 5.41 1125 3840
178 240 8.33/4.16 2000/1000 6827/3413
208 7.21/3.61 1500/750 5120/2560
FIG. 1
GRILLE
REJILLA
BUILT-IN
THERMOSTAT
TERMOSTATO
INCORPORADO
WALL
STUD
VIGA DE
PARED
POWER
CABLE
CABLE DE
POTENCIA
ELECTRICA
HEATER
HOUSING
CAJA DEL
CALENTADOR
DRYWALL
PARED DE
YESO
Loading ...
Loading ...
Loading ...