

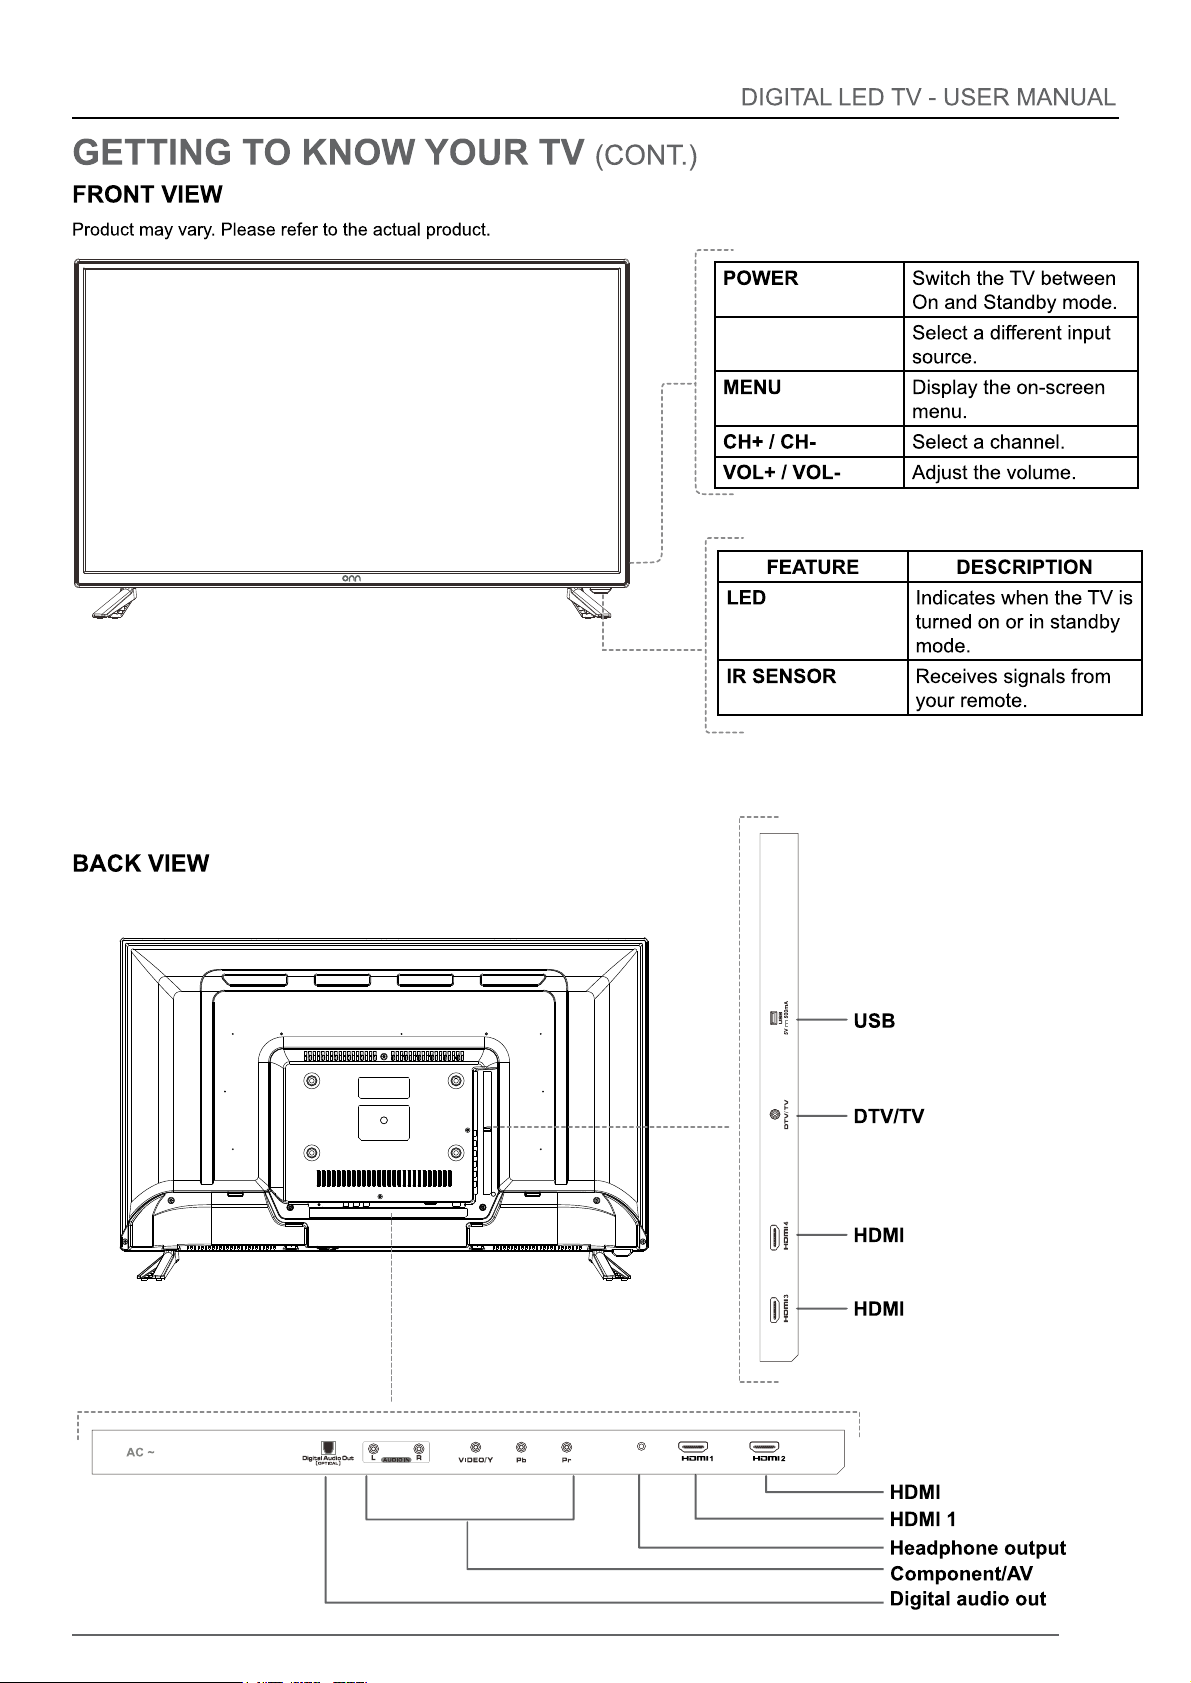
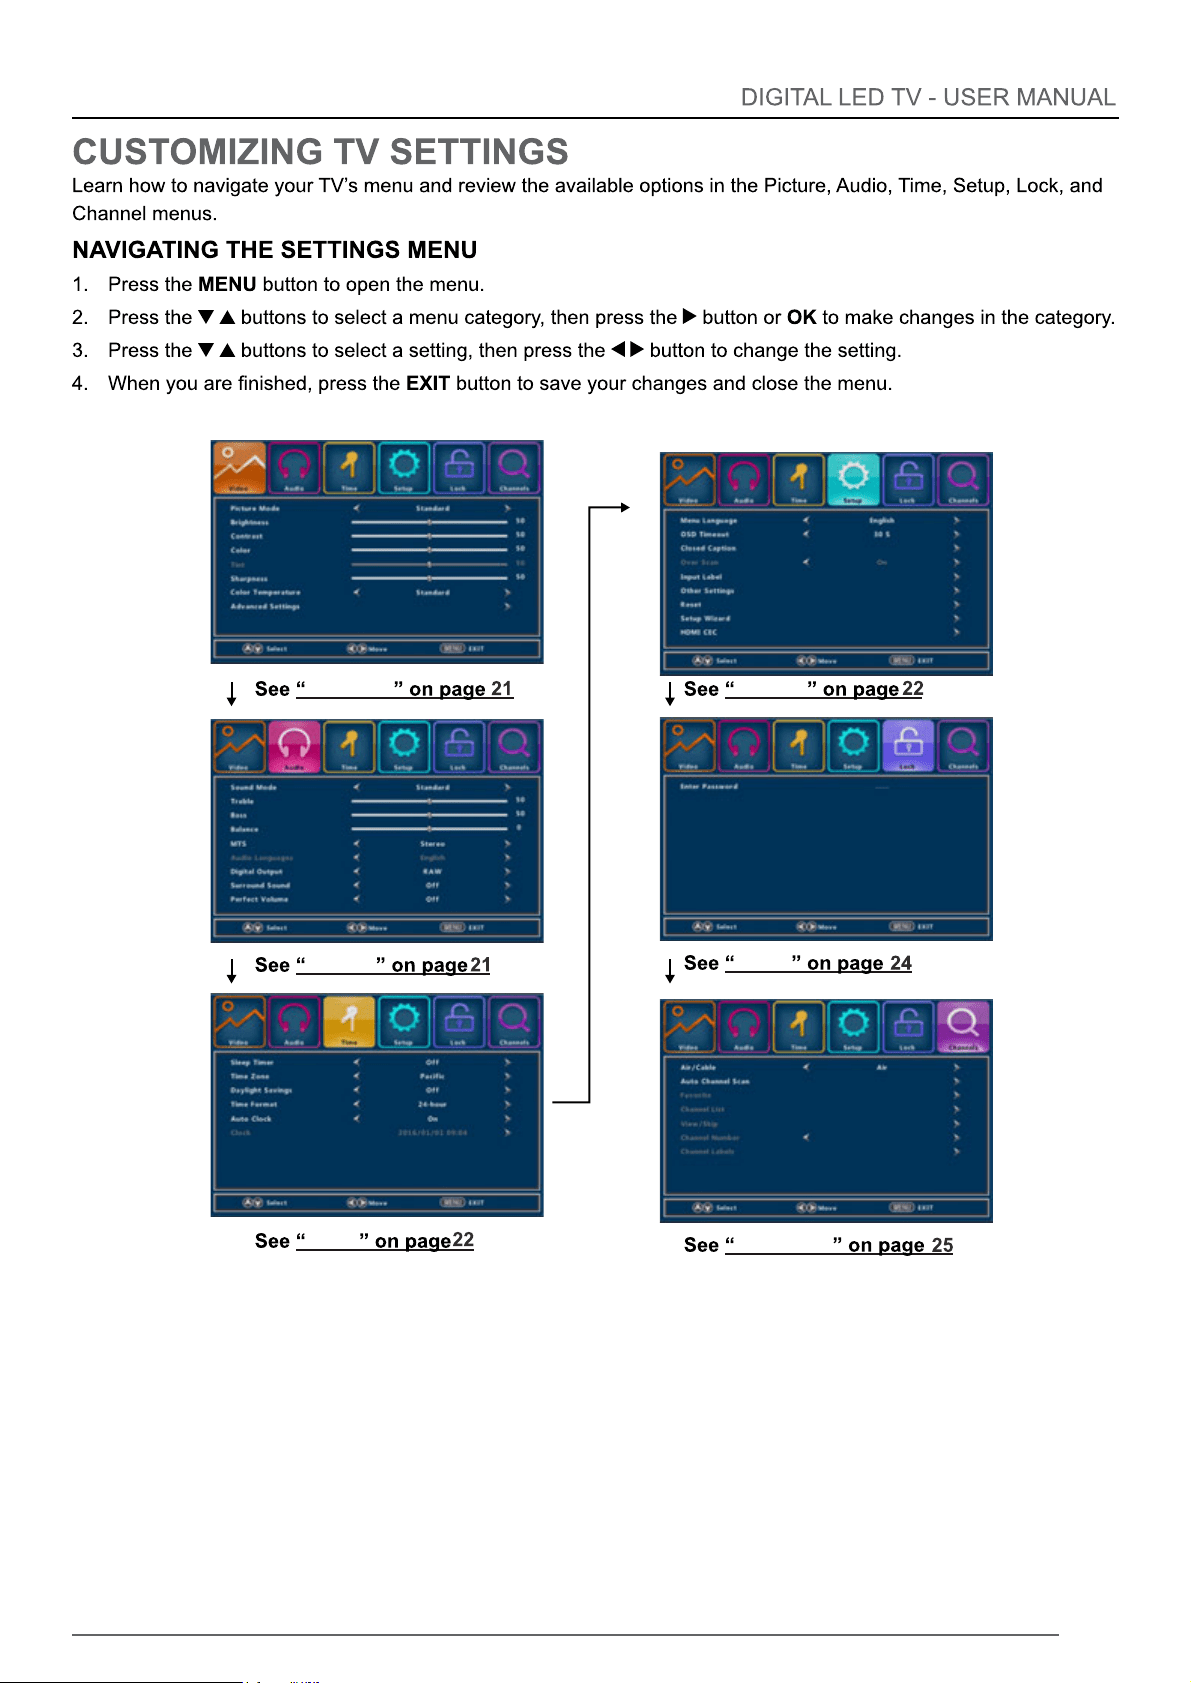
3
4
5
5
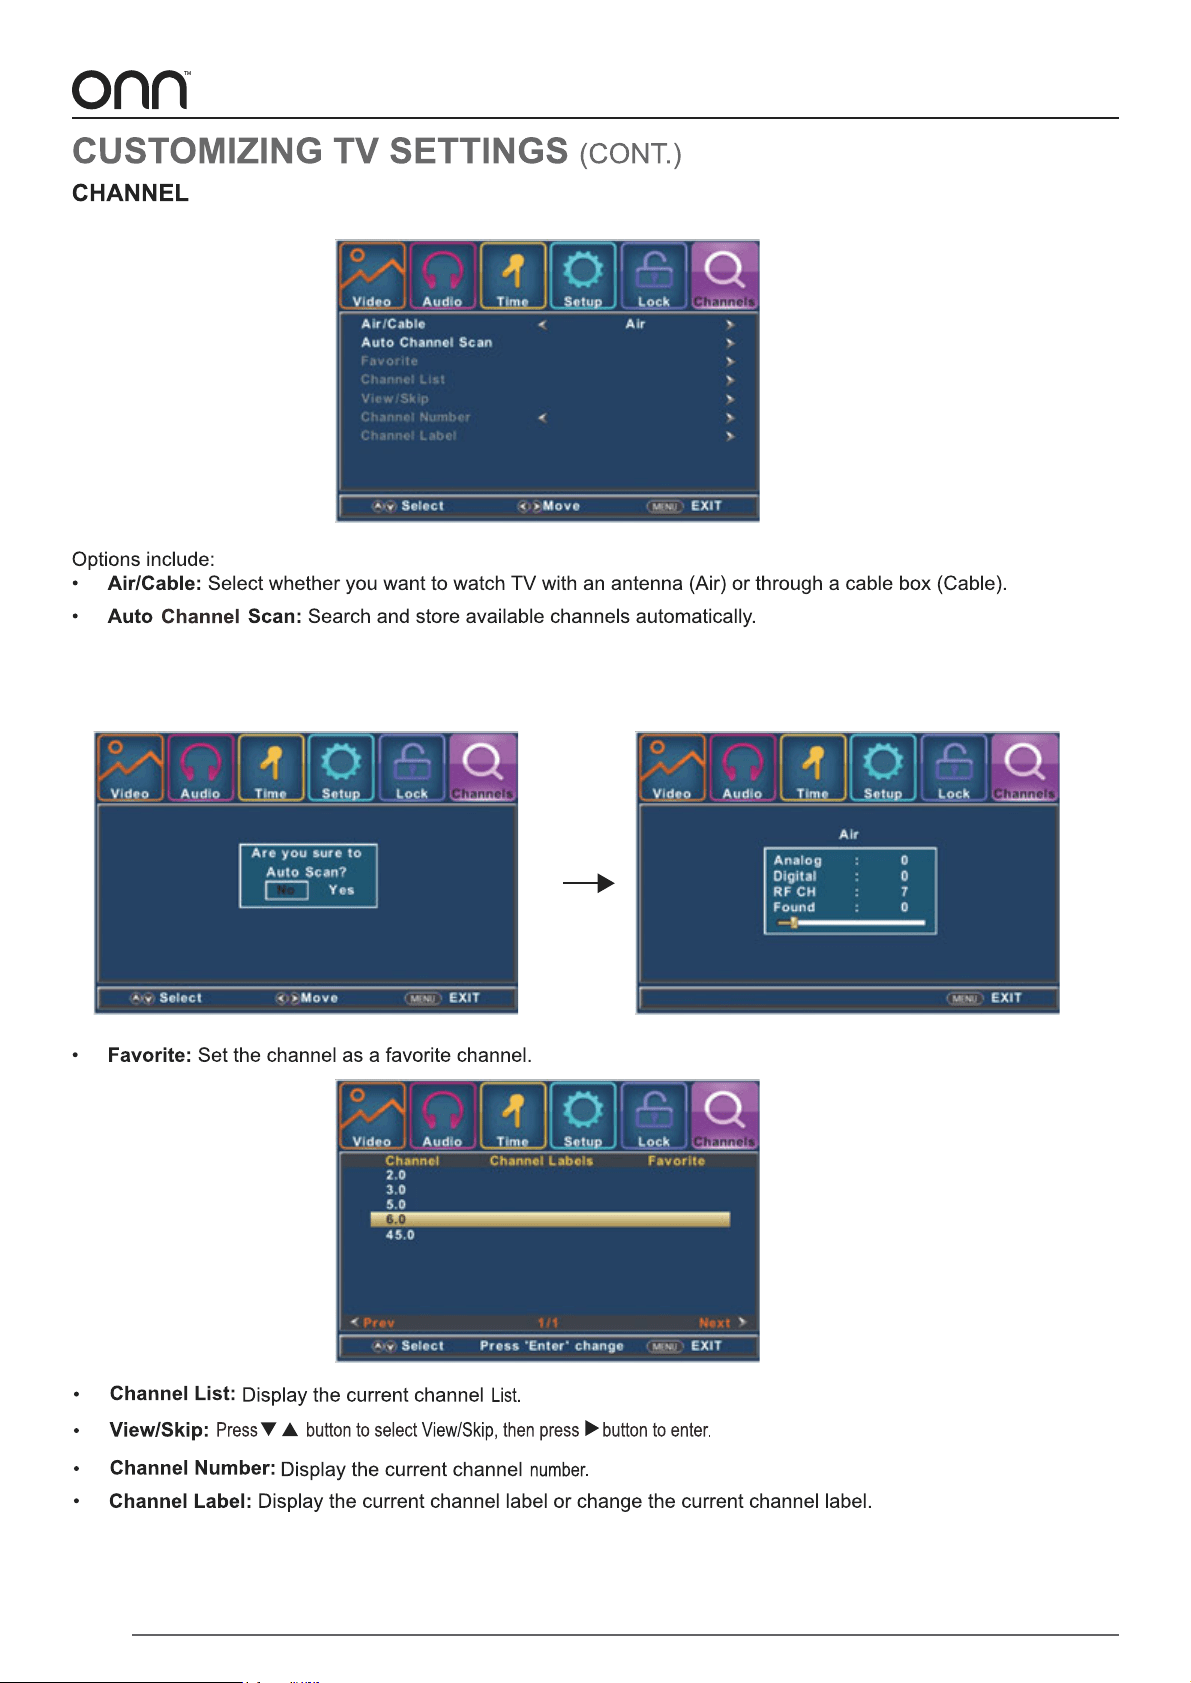
6
6
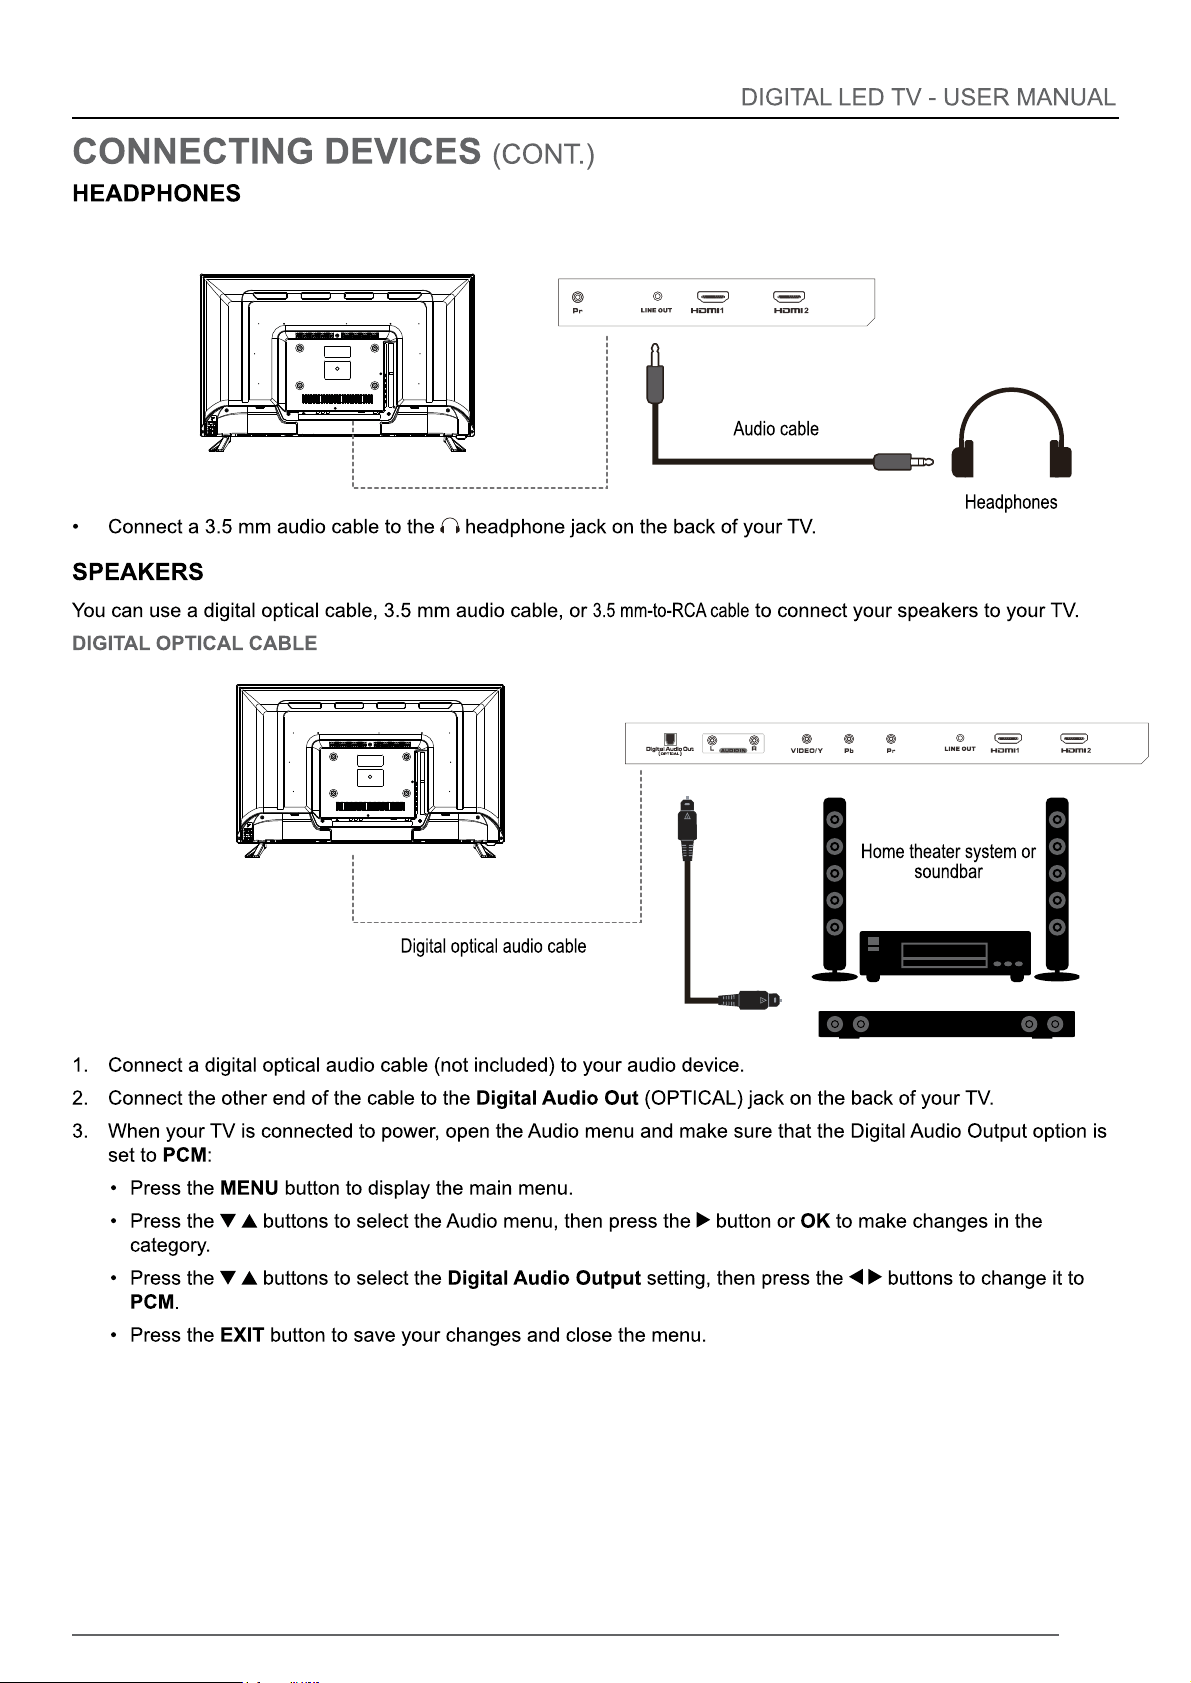
7
9
9
9
10
10
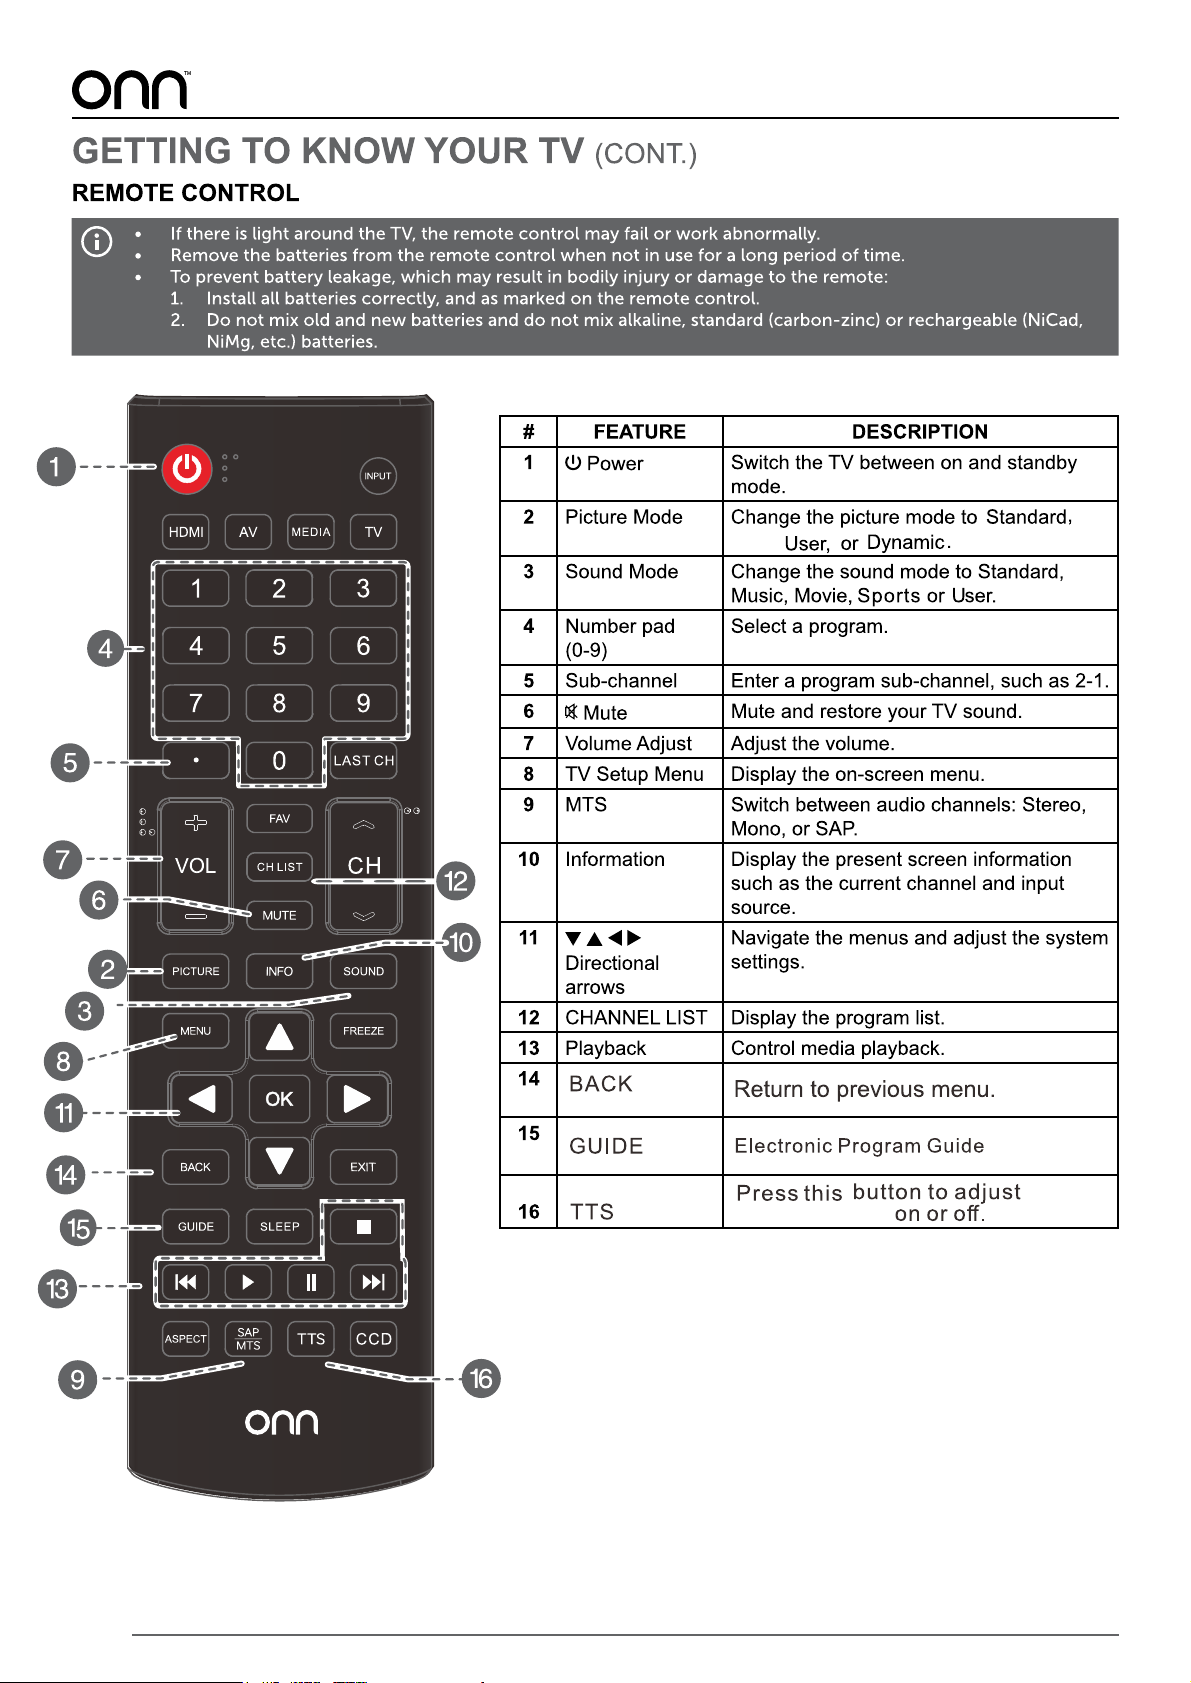
12
12
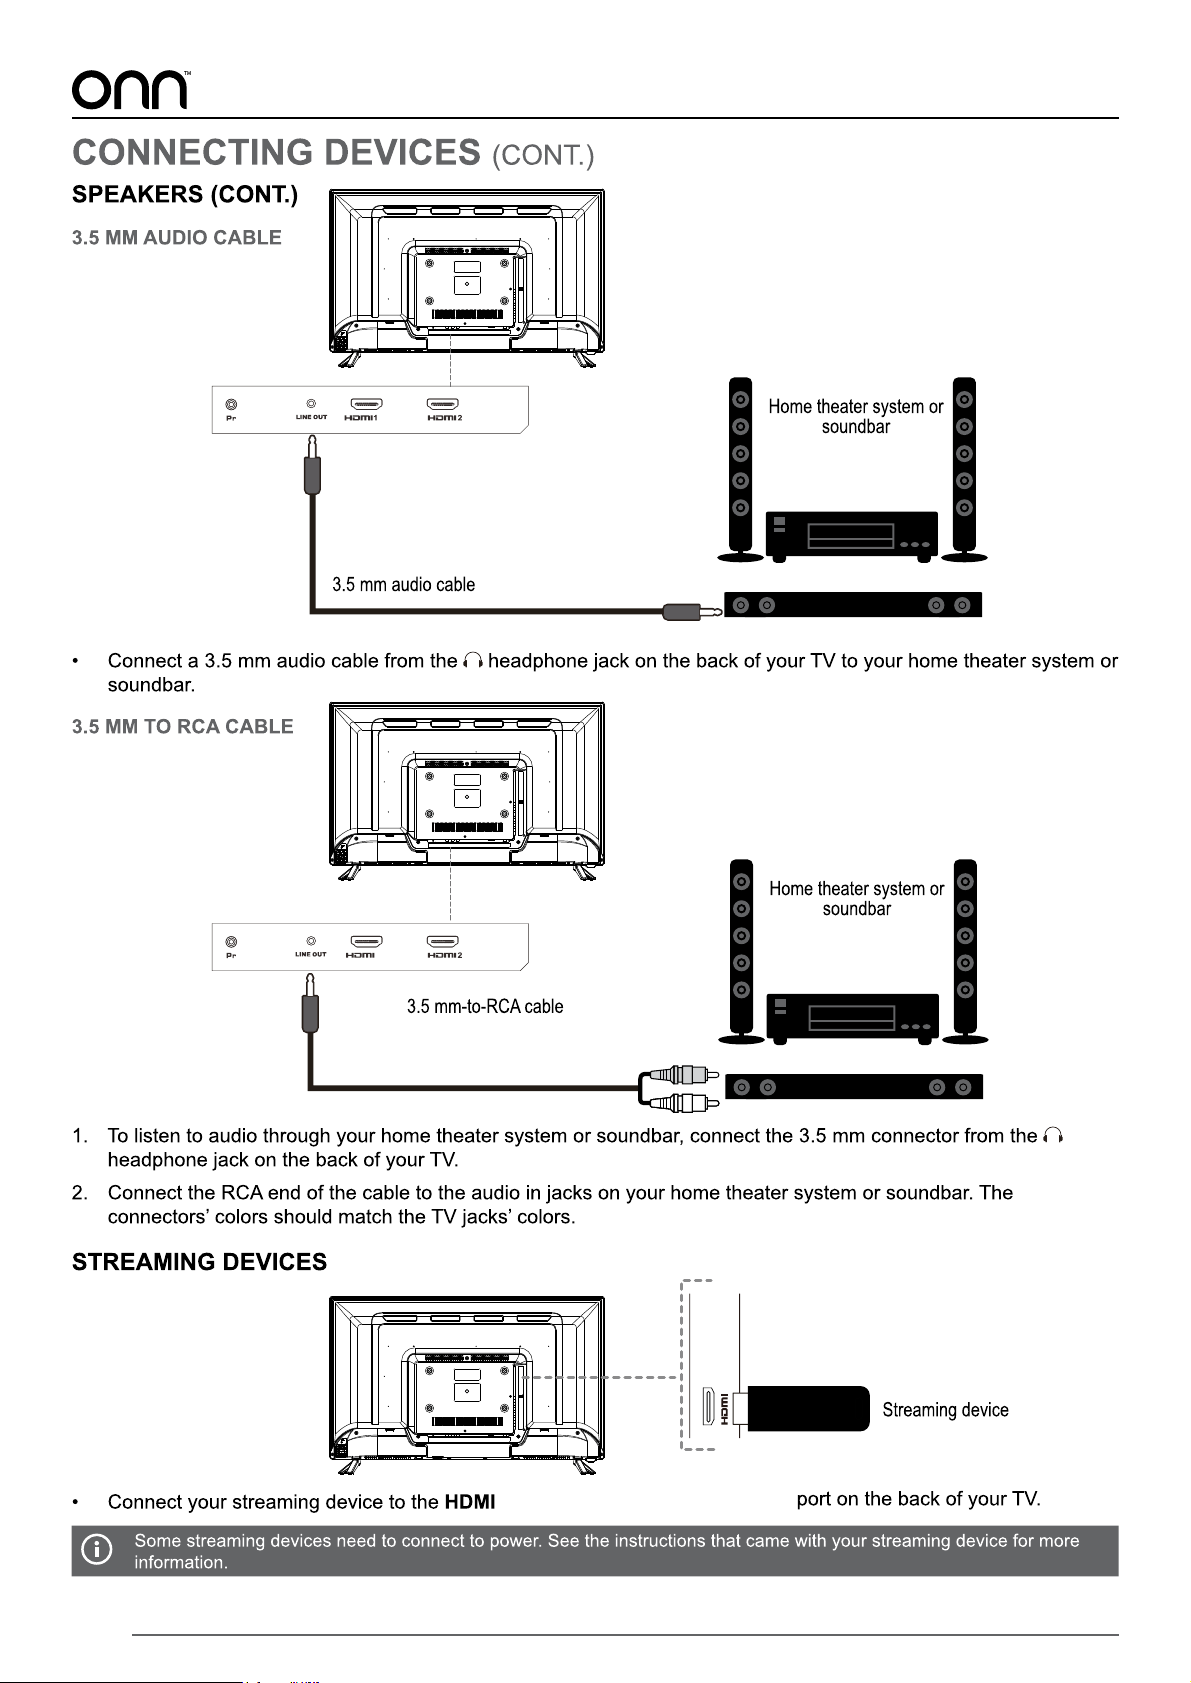
14
15
15
16
16
17
18
18
18
19
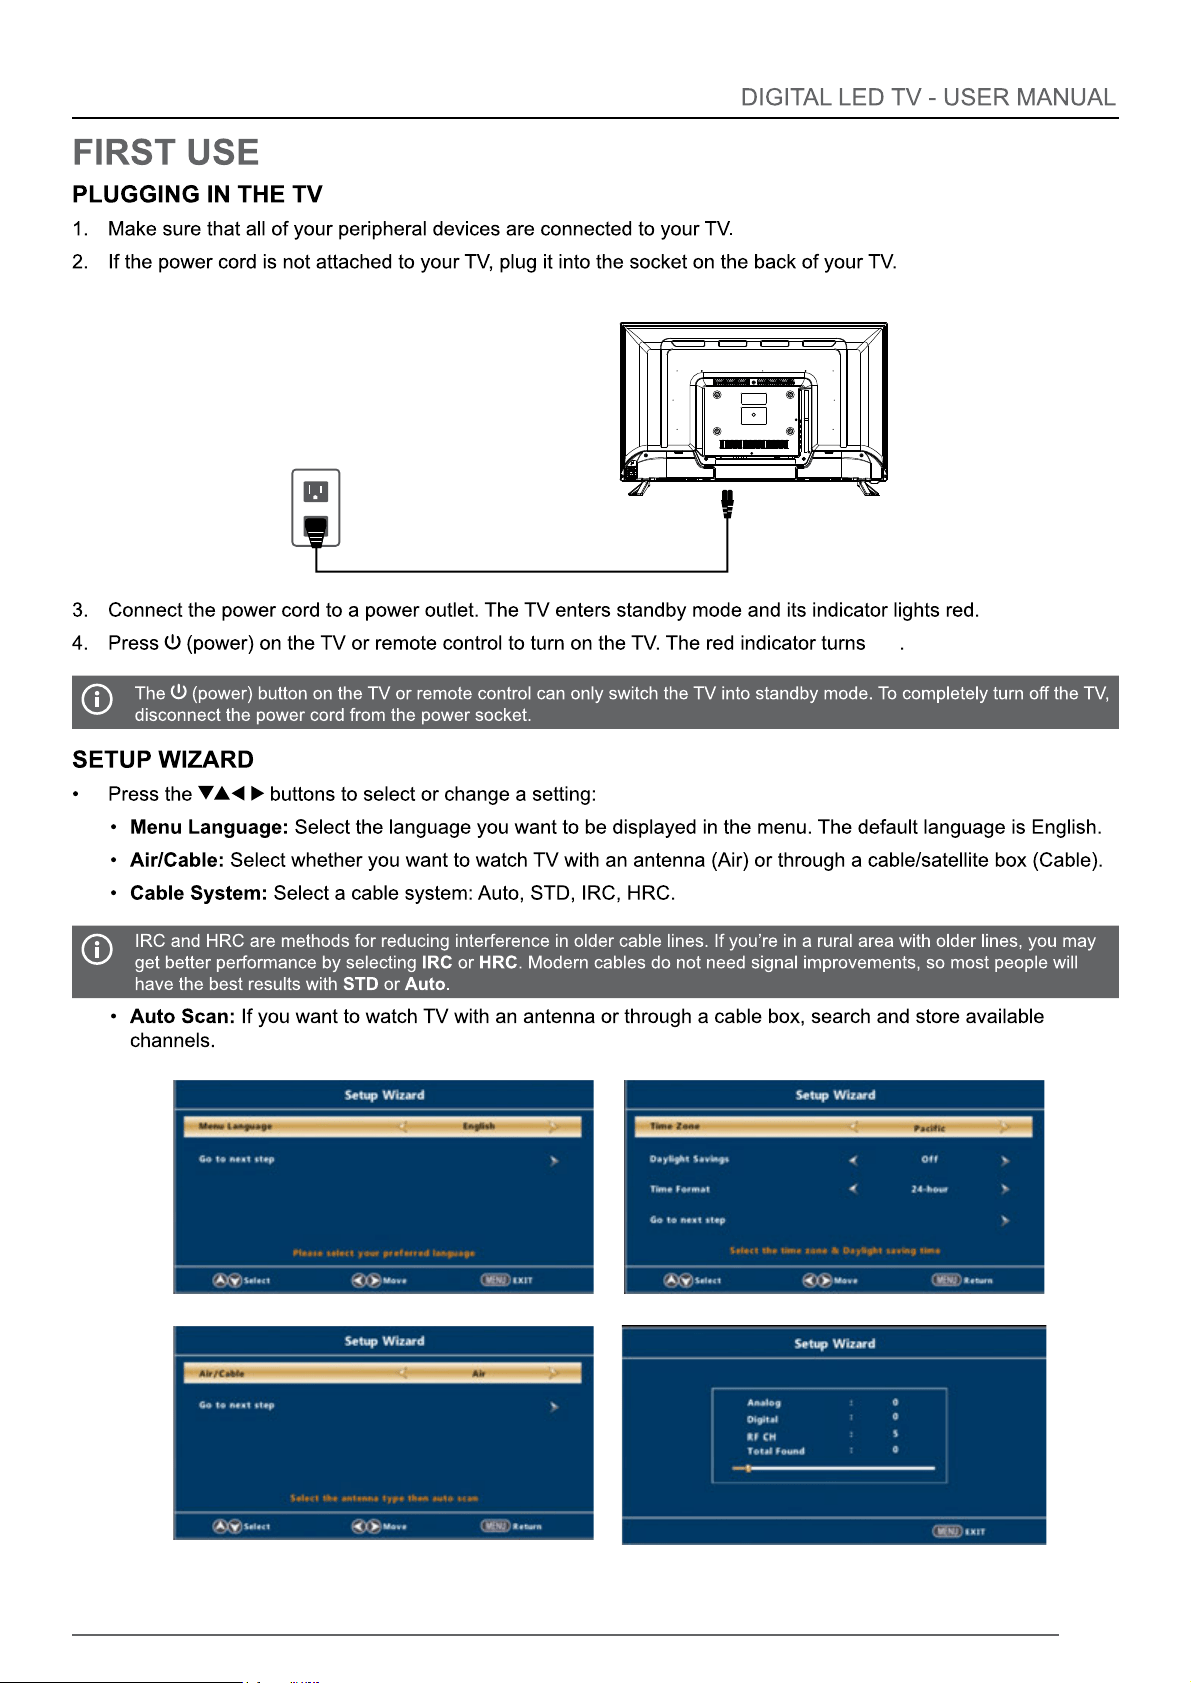
19
19
19
19
19
20
20
21
21
22
22
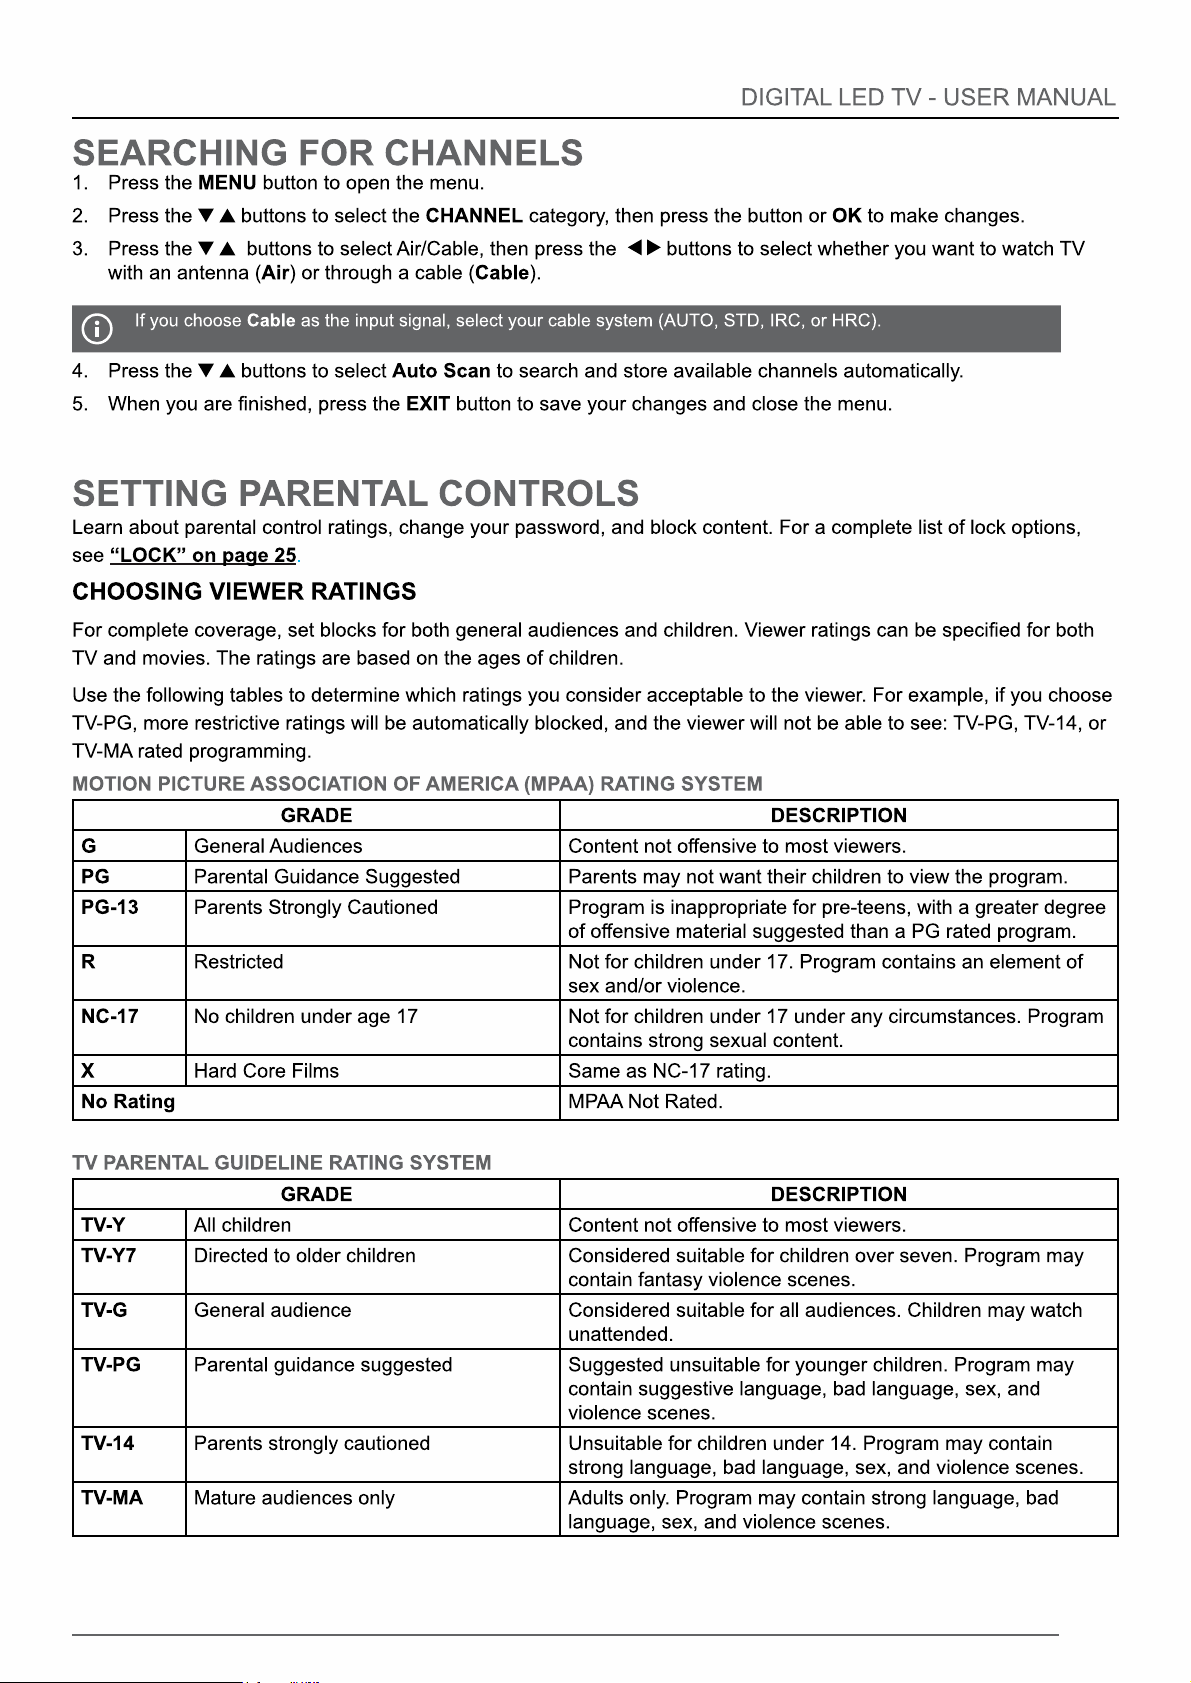
24
25
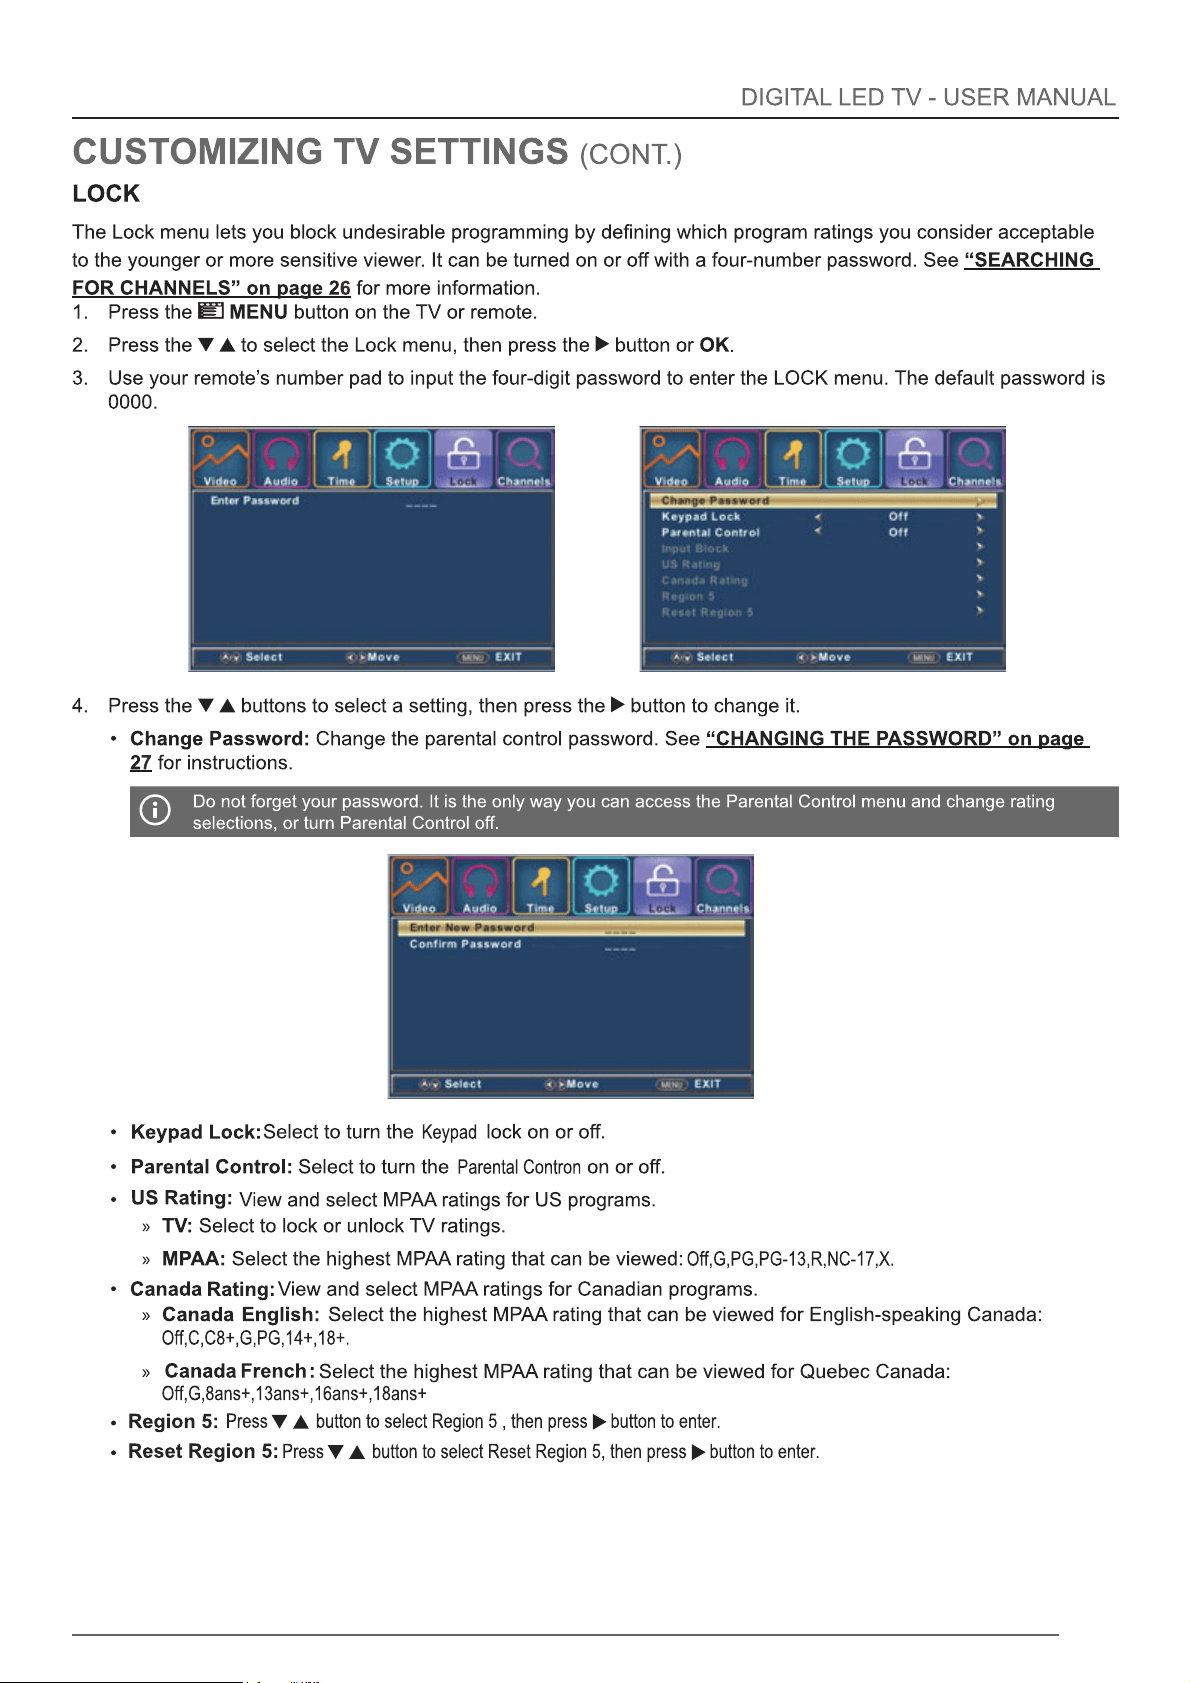
26
26
26
27
27
28
28
29
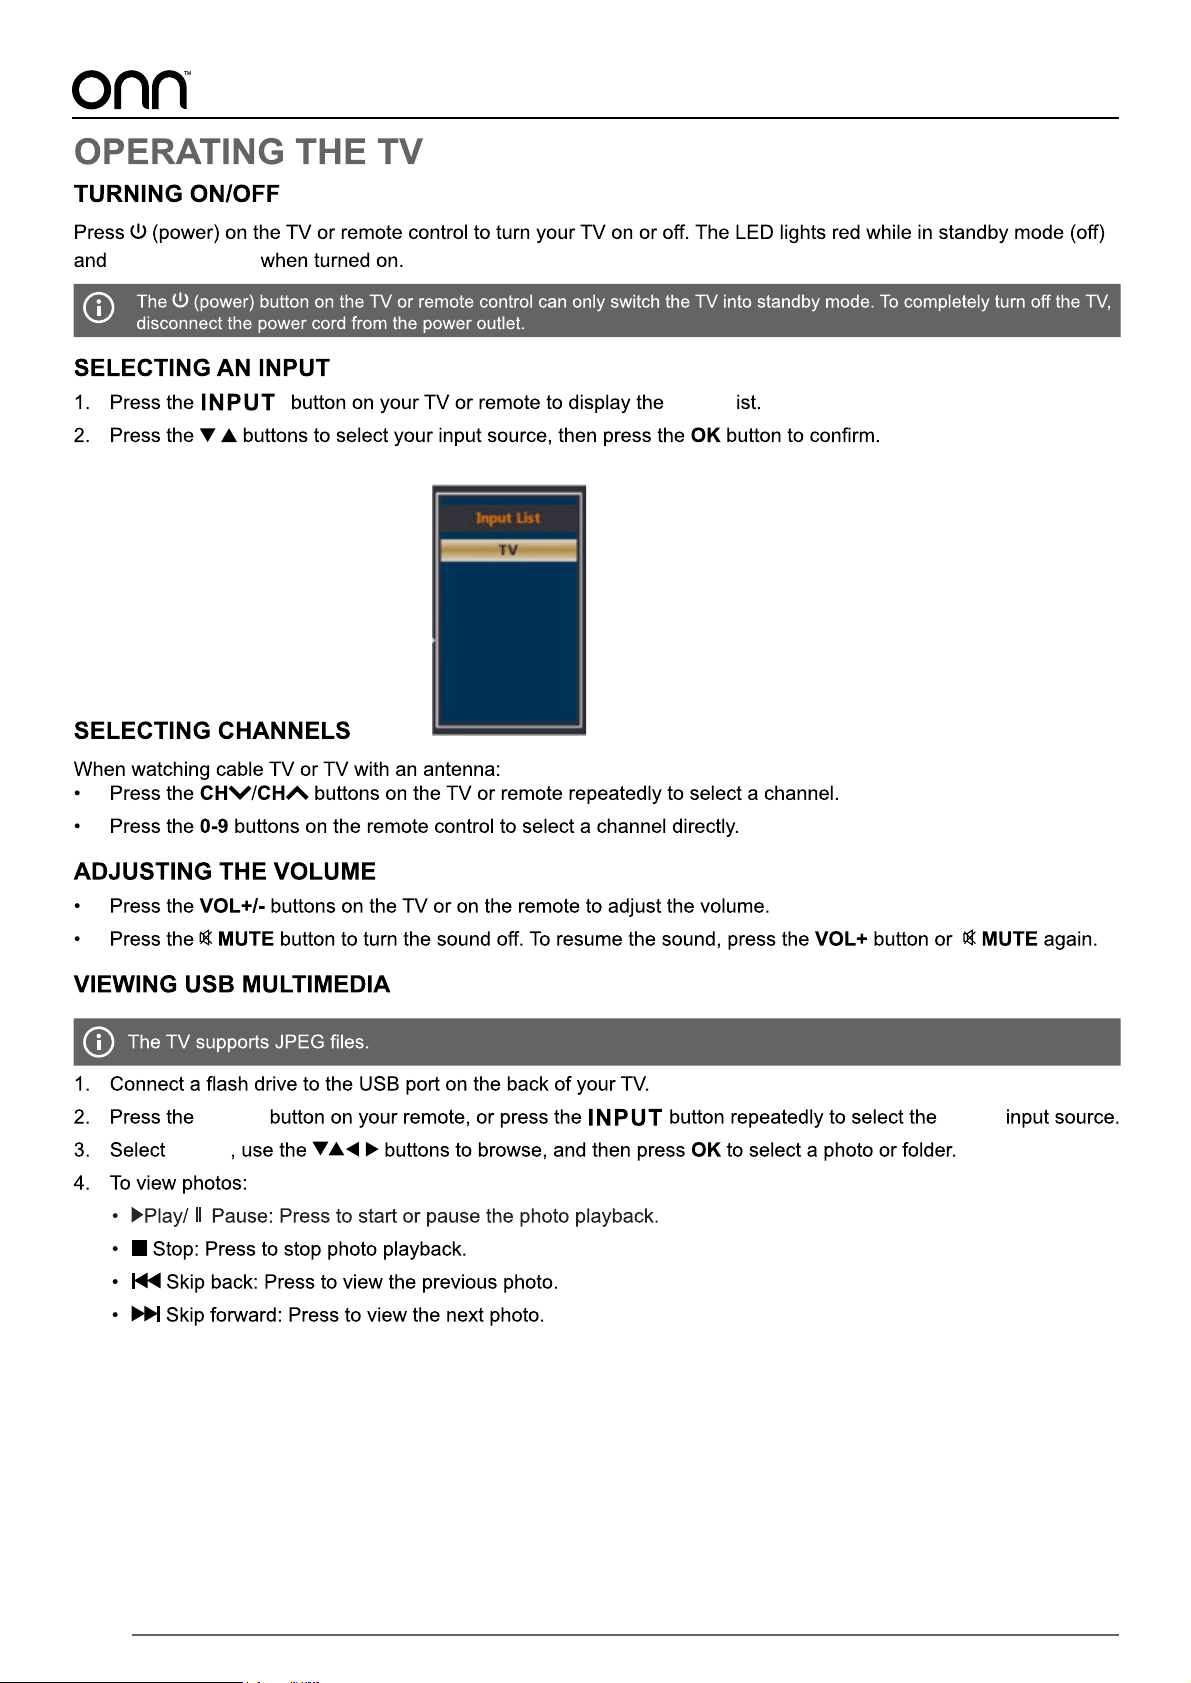
31
3
4
5
3
4
LINE OUT
(ARC)
INPUT
6
2
(ARC)
7
Soft,
Voice Guidance
8
24
25
26
27
LAST CH
INPUT
CCD
channel
9
10
LI NE OUT (A RC)
(A RC)
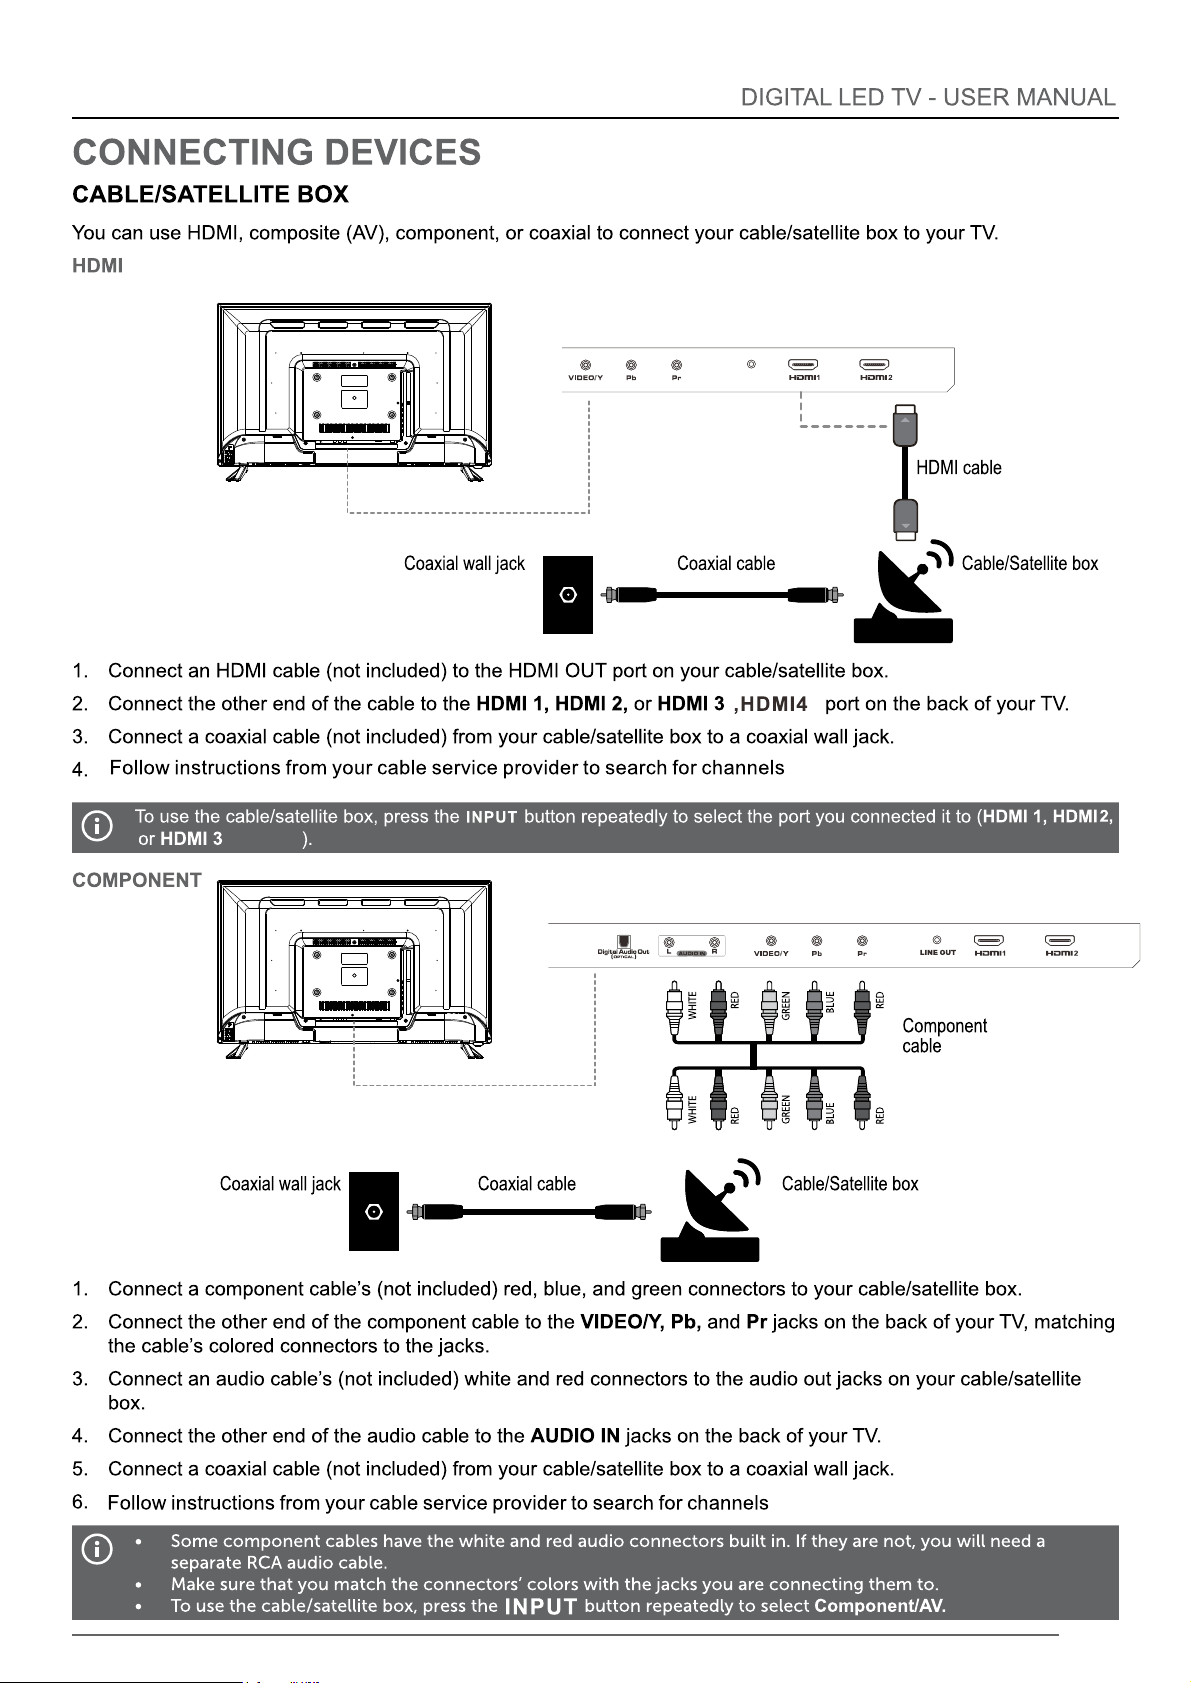
,HDMI4
If you are connecting your TV to a coaxial wall jack,
go to your TV channel settings and switch to “Cable” input
11

12
HDMI4
13
1 2
1 2
14
1 HDMI2,or HDMI3 ,HDMI4

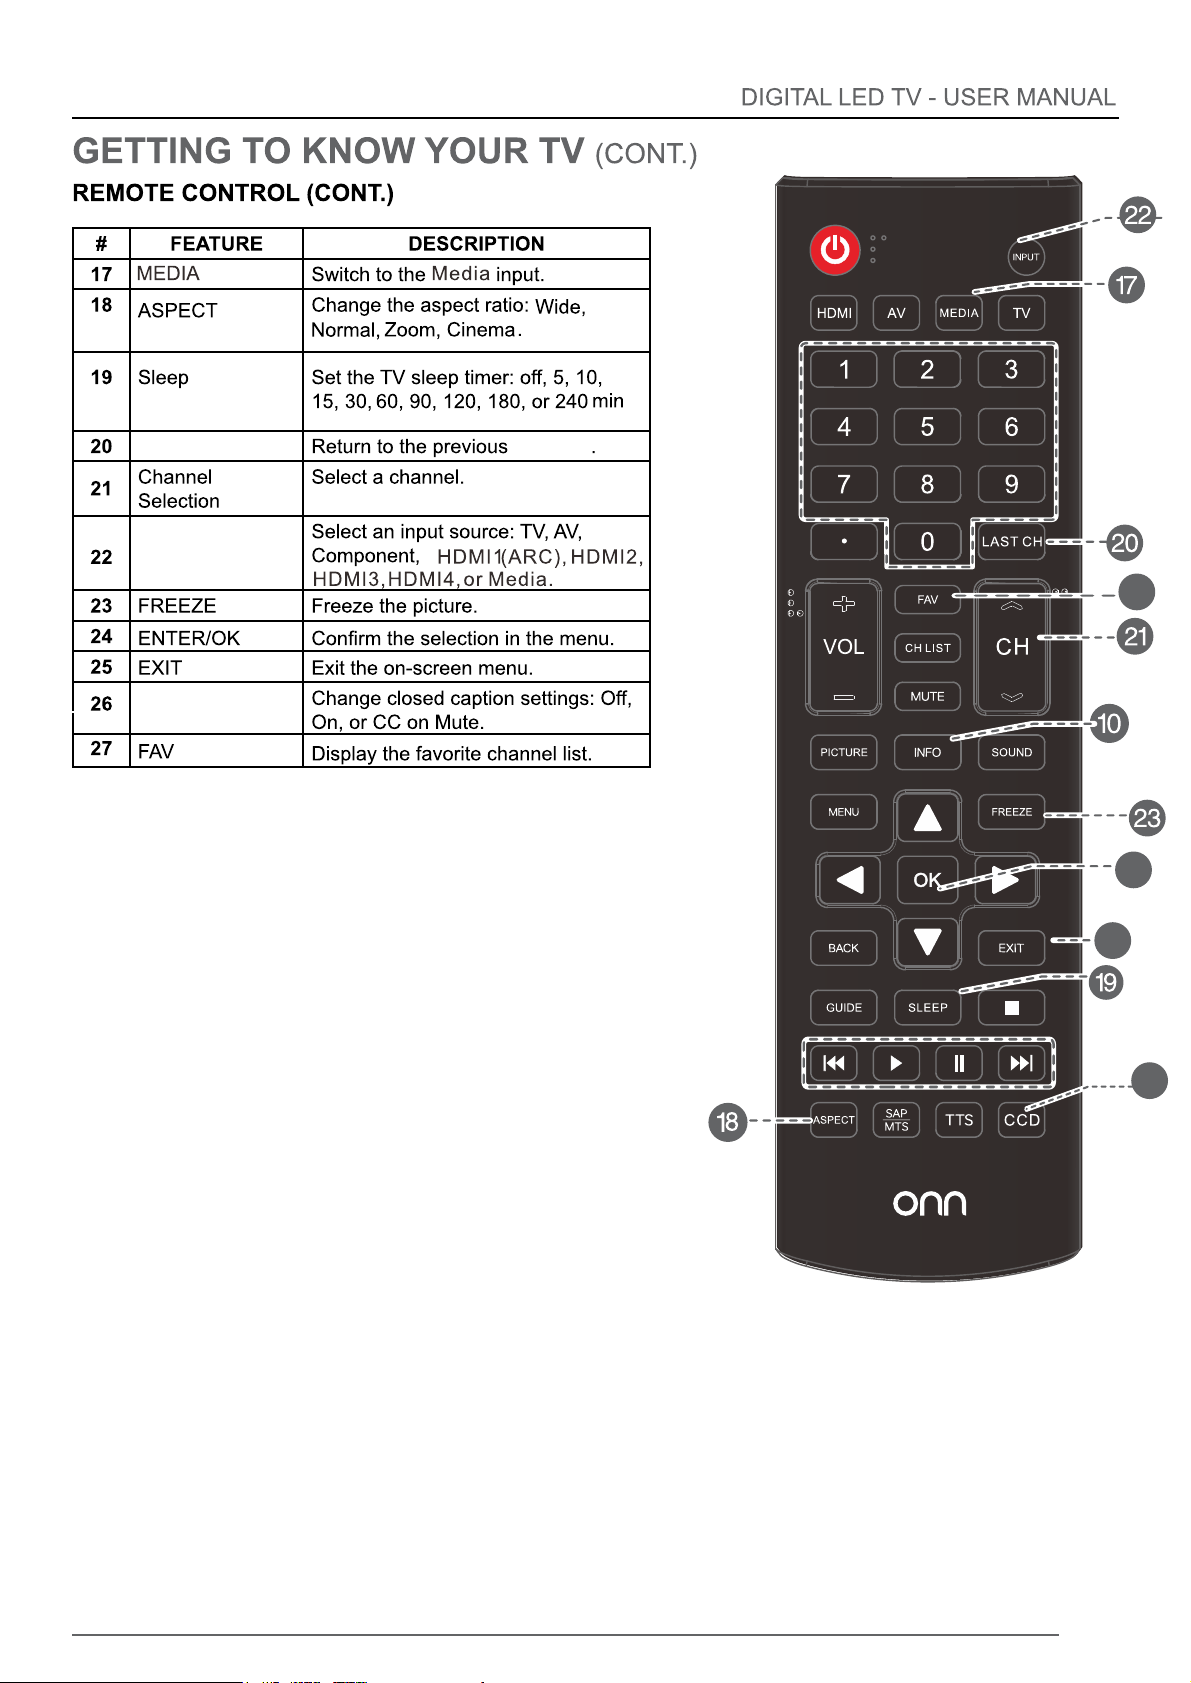
15
HDMI2,or HDMI3,HDMI4
MEDIA Media
16
(ARC)
(A RC)
17
1 HDMI2,or HDMI3,HDMI4
(ARC)
(ARC)
18
off
MEDIA
MEDIA
19
the LED light off
L
Media
HDMI4
HDMI3
HDMI2
HDMI1(ARC)
Component
AV
Photo
Input
20
Video
Audio
Time
Channel
Lock
Setup
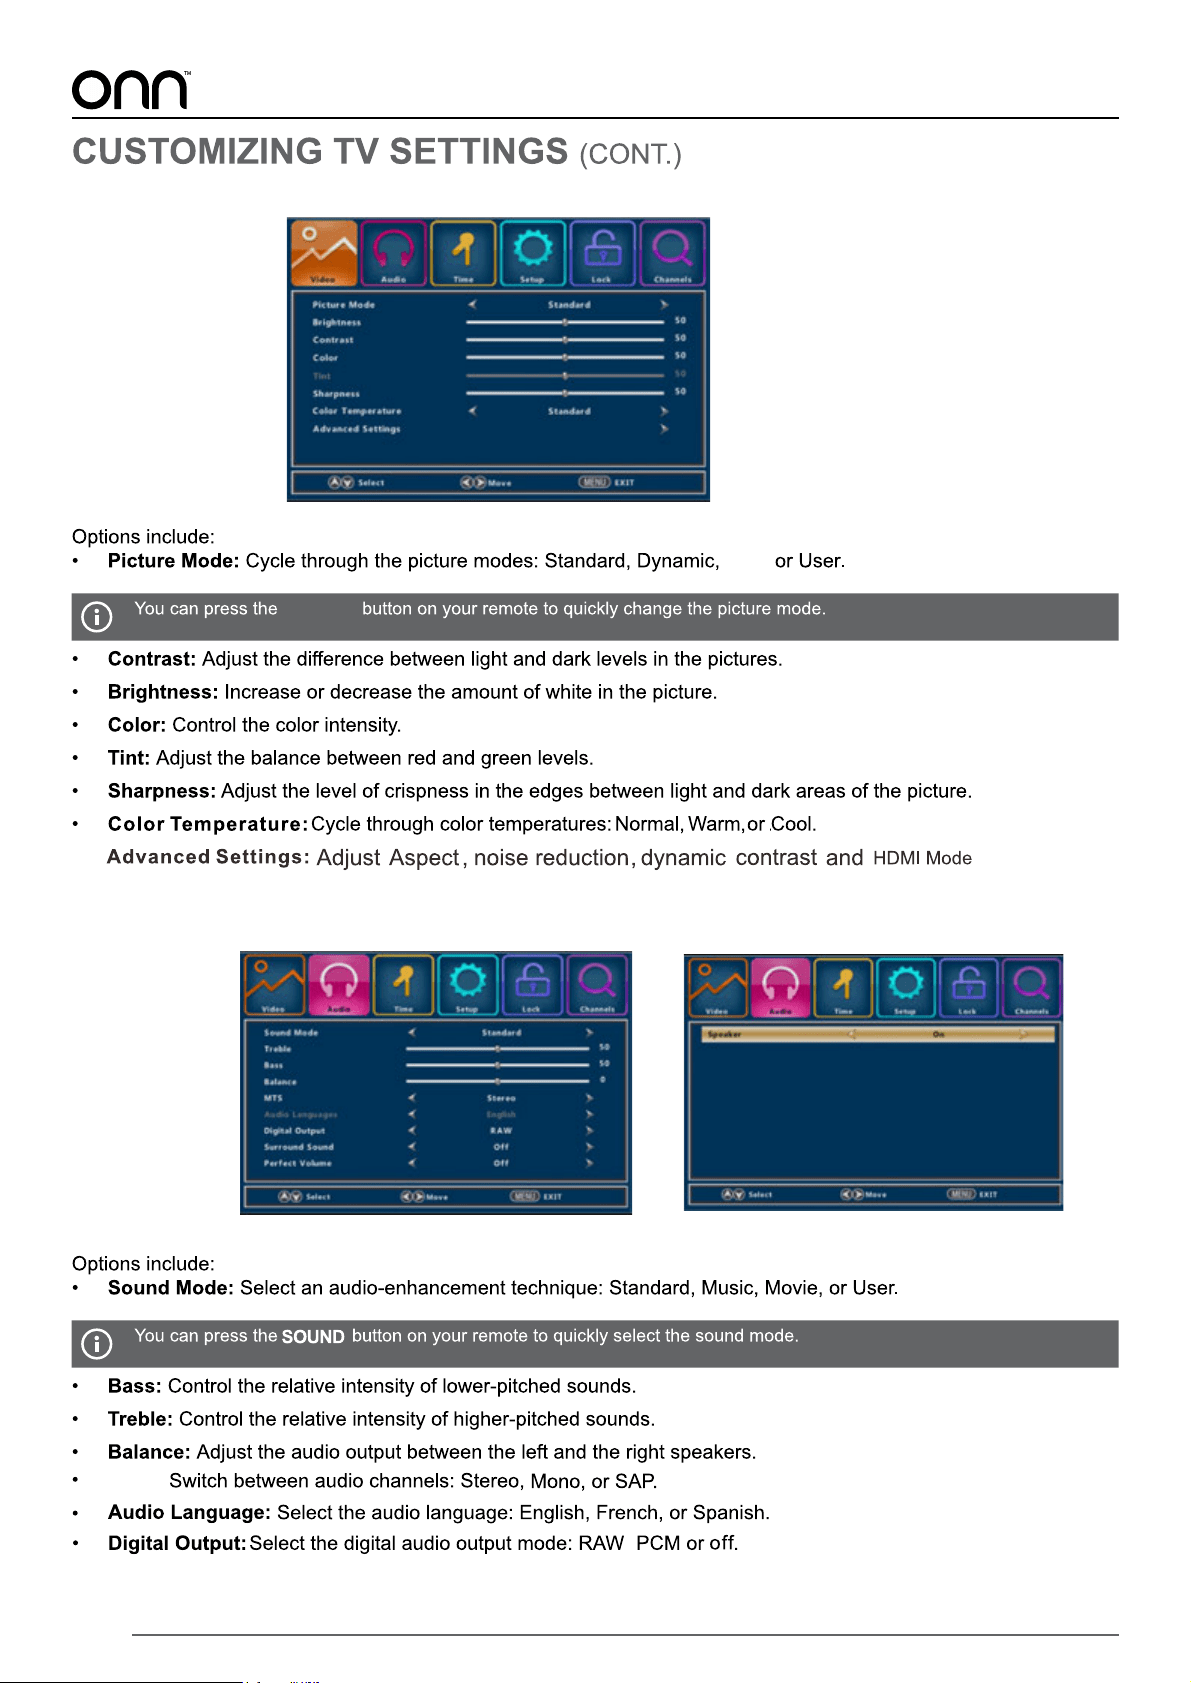
21
Video
Audio
Soft,
PICTURE
MTS:
,
Audio(CONT.)
22
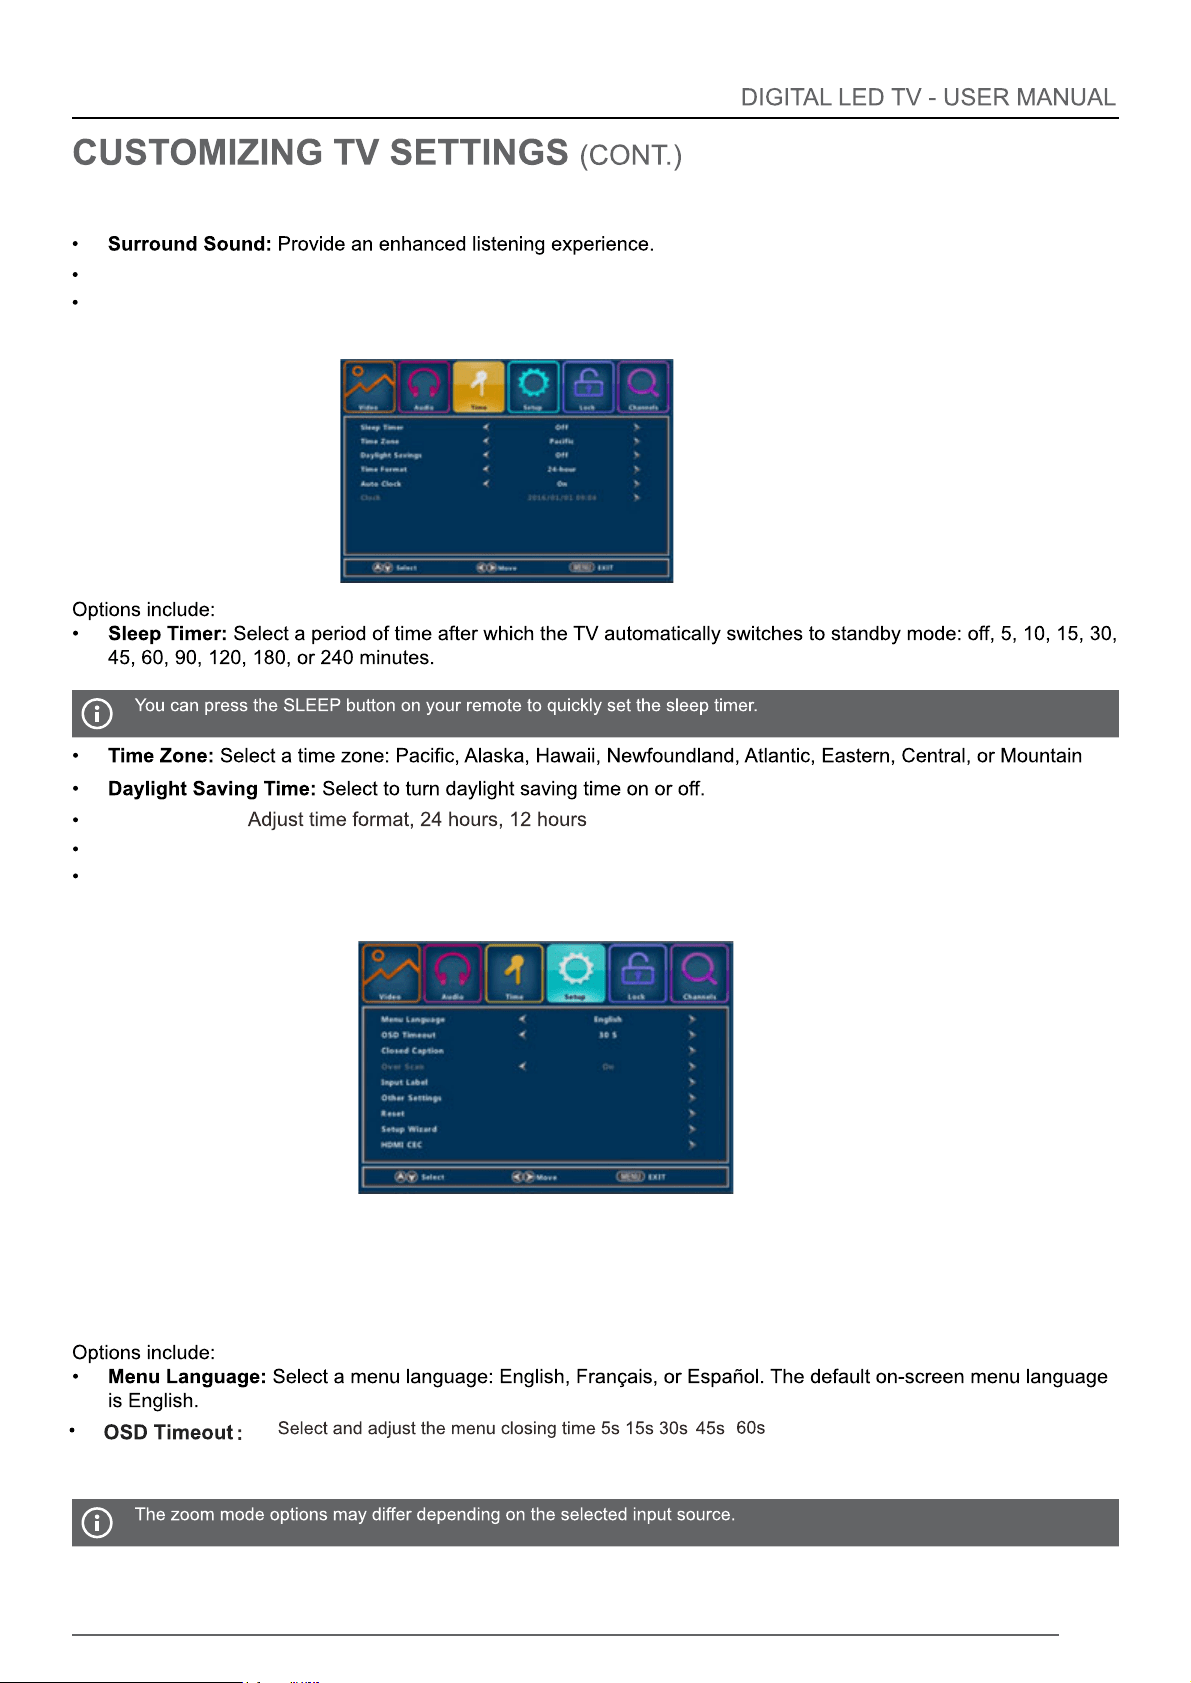
Time
Perfect Volume:
Speaker:
Set on/off the auto volume control
Set on/off the TV speaker
Time Format:
Auto Clock:
Set on/off auto clock
Show the current time
Clock:
Setup

23
Over Scan:
Input Label:
Reset:
HDMI CEC:
CEC Control:
Device Auto Power Off: Auto Standby
TV Auto Power On: Auto TV on
ARC:
ARC
Connect the HDMI device
List
Display HDMI CEC or HDMI ARC device
Set on/off Overscanning of Digital TV
Change lnput Label
Reset all settings to factory default
Other Settings:
Set Audio Only,Demo mode,HDMI 4K
Audio Only:
Turn on/off audio only
Demo mode: Set demo mode as off/2 hours
HDMI 4K:
Set HDMI as standard or Enhancement
device
Connect:
Root Menu:
Set TV RC control HDMI device
24
25
26
27
28
29
30

31