
Loading ...
Loading ...
Loading ...
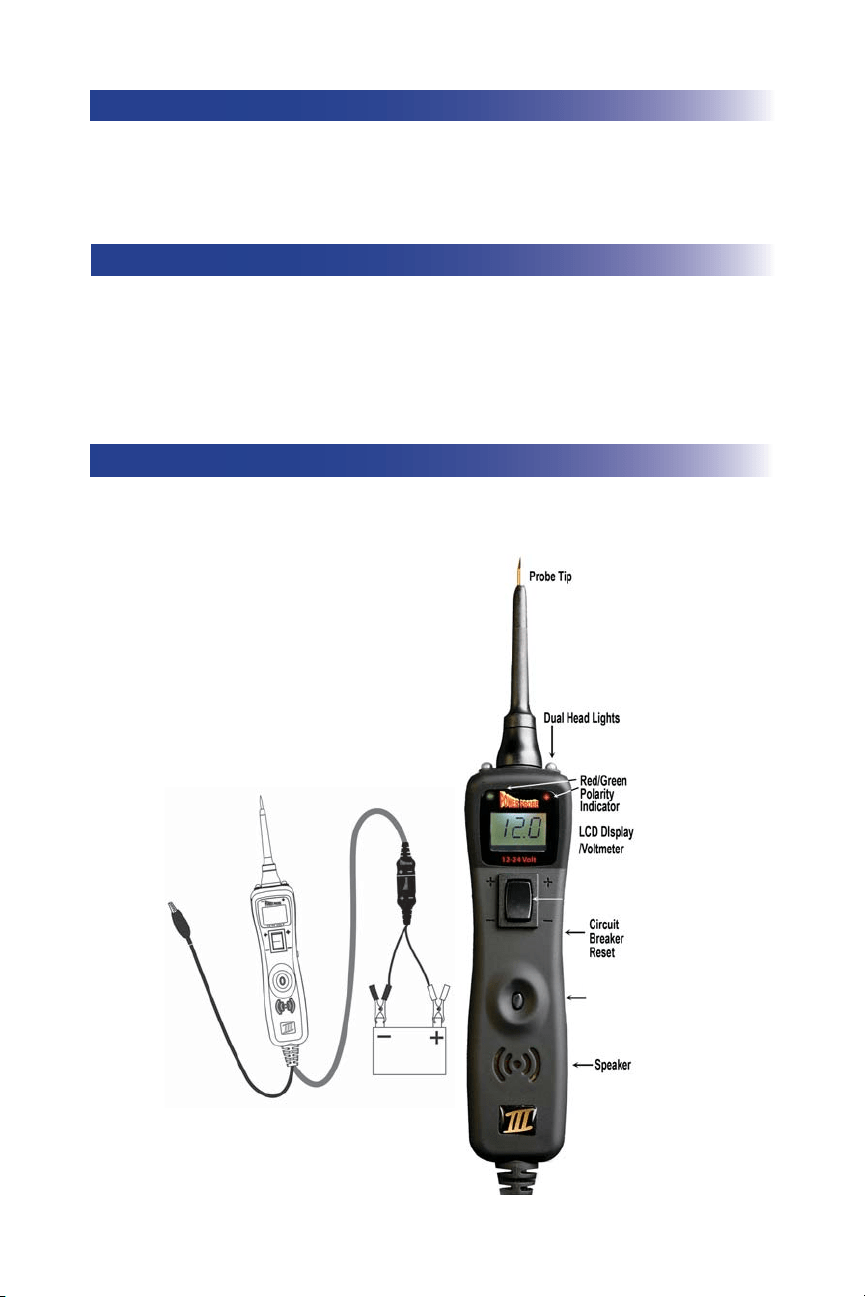
HOOK-UP
/
3
Mode
Button
Power Switch
Unroll the Power Probe cable. Connect the RED battery hook-up clip to the POSITIVE terminal of the
vehicle’s battery. Connect the BLACK battery hook-up clip to the
NEGATIVE terminal of the vehicle’s
battery. When the PP3 is fi rst connected to a battery (power source), it will sound a quick high and then
low beep and go into “Power Probe Mode (PPM) (See Mode #1 on page 10) and the 2 bright white LEDs
(dual head lights) will be on to illuminate the test area of the probe tip.
While the PP3 is in Power Probe Mode, press the power switch forward to activate the tip with a positive
(+) voltage. The positive sign (+) LED should light red and the LCD display will read the battery (supply)
voltage. If the tone feature is turned on, a high pitched tone will sound. Press the power switch rearward
to activate the tip with a
negative (-) voltage. The negative sign (-) LED should light green and the LCD
display will read “0.0” (ground). If the tone feature is turned on, a low pitched tone will sound. The Power
Probe is now ready to use. If the indicator did not light, depress the reset button of the circuit breaker on
the right side of the housing and try the self test again.
QUICK SELF-TEST (PPM)
TURNING THE AUDIO TONE ON/OFF (PPM)
While the PP3 is in Power Probe Mode, just do a quick press of the mode button to toggle the tone on or off.
While quickly pressing (a quick press and release) the mode button, if a short high beep is heard, this means
the audio tone is turned on. If a short low beep is heard, the audio tone is turned off.
Loading ...
Loading ...
Loading ...