
Quick Start Guide
For iOS, macOS and Windows
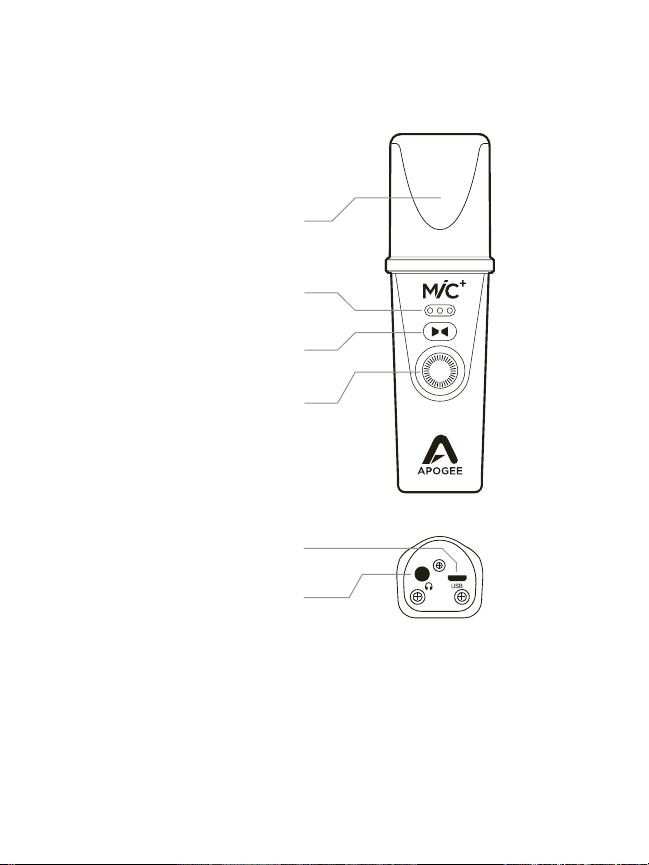
Product Tour Apogee MiC+ Quick Start
Professional cardioid condenser mic capsule
In the box
Connections
3 multicolor LEDs for status, input level
and Blend mode indication
• Apogee MiC Plus
•Desktop tripod
• Microphone stand adapter
•Quick start guide
• USB cable (Type C)
• USB cable (Type A)
• Lightning cable
Headphone output Blend control
for zero latency recording
Input gain adjustment push to mute
USB port
3.5mm headphone output
1
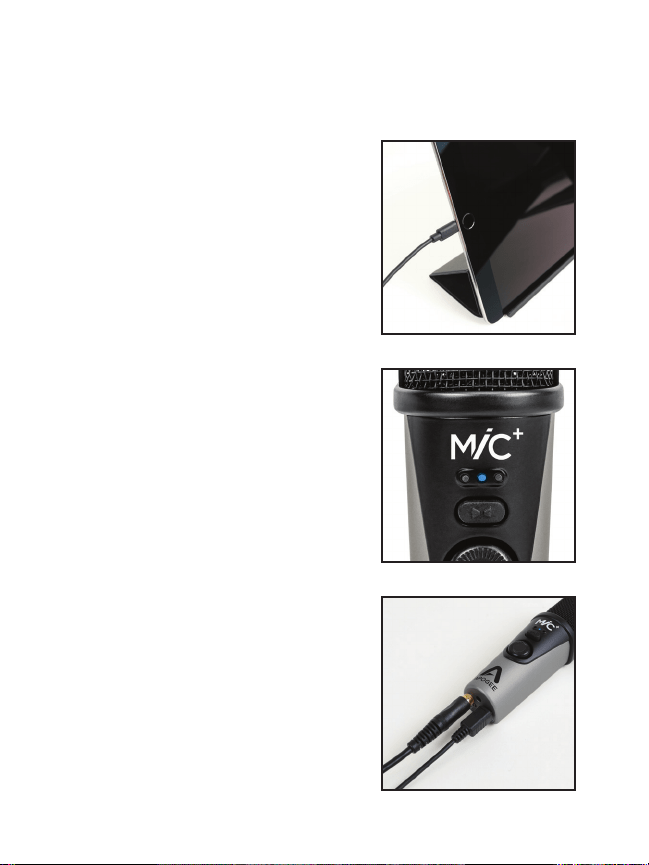
Connect cable
Connectez le câble
Kabel anschließen
Collegare il cavo
Conecta el cable
Ligue o cabo
iOS Apogee MiC+ Quick Start
1
MiC Plus light = Blue
Voyant lumineux de MiC Plus = Bleu
MiC Plus leuchtet = blau
Indicatore luminoso di MiC Plus = Blu
MiC Plus luz = Azul
MiC Plus luz = Azul
2
Connect headphones
Branchez votre casque
Kopfhörer anschließen
Collegare le cue
Conecta los auriculares
Ligue os auscultadores
3
2
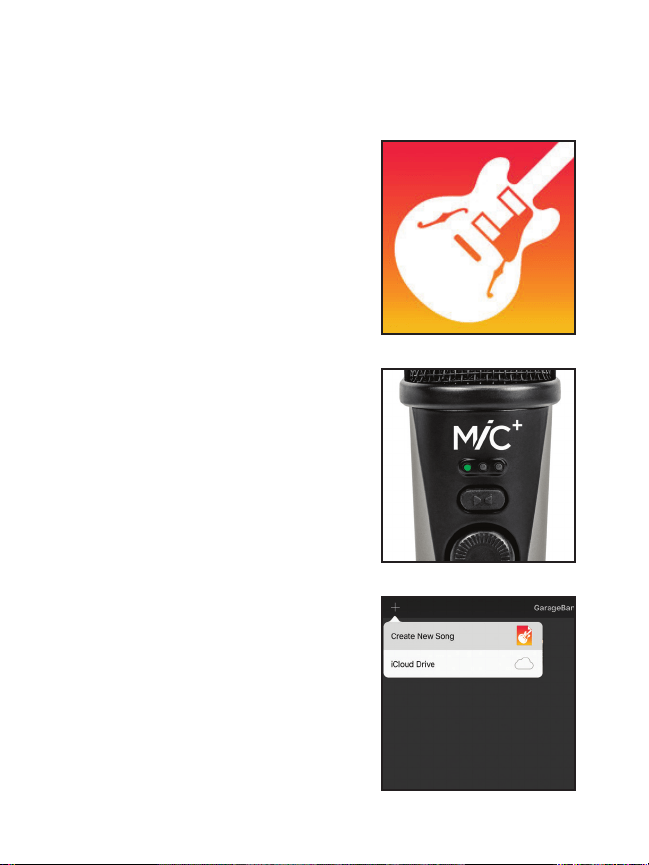
Open GarageBand (Free download from the App Store)
Ouvrez GarageBand (disponible en téléchargement gratuit sur l’App Store)
GarageBand önen (kostenfreier Download aus dem Mac App Store)
Avviare GarageBand (scaricabile gratuitamente dall’App Store)
Abre GarageBand (Descárgalo gratis desde la App store)
Abra a GarageBand (Download gratuito a partir da App Store)
iOS Apogee MiC+ Quick Start
4
MiC Plus light = Green
Voyant lumineux de MiC Plus = Vert
MiC Plus leuchtet = Grün
Indicatore luminoso di MiC Plus = Verde
MiC Plus luz = Verde
MiC Plus luz = Verde
5
Start new project/song
Démarrez un nouveau projet/morceau
Neues Projekt/Song erstellen
Creare un nuovo progetto/brano
Abre un nuevo proyecto/canción
Iniciar novo projeto/música
6
7
8
9
3
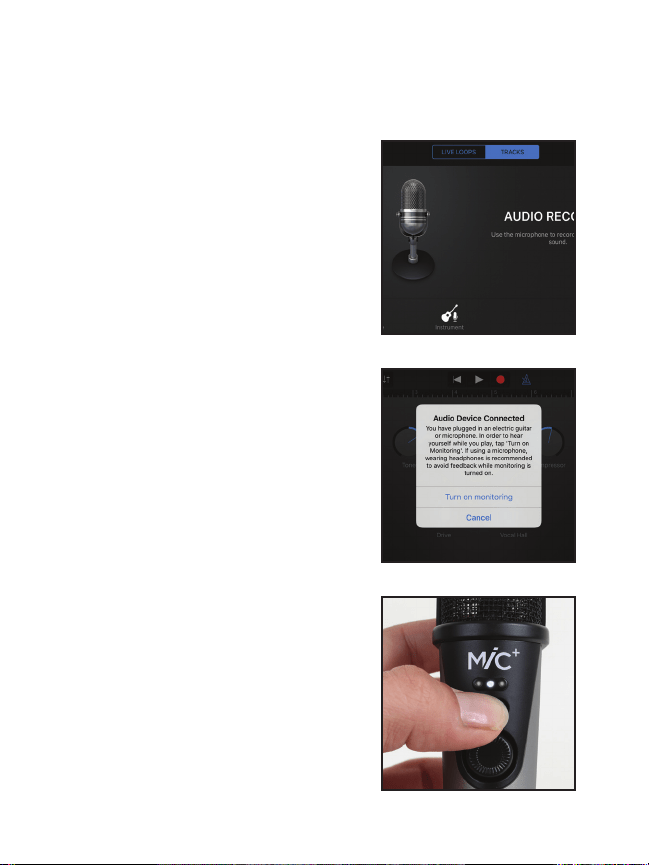
Swipe through tracks selection and choose Audio Recorder
Rendez-vous au niveau de la sélection des pistes et choisissez Audio Recorder
Durch die Track-Auswahl blättern und Audio-Recorder auswählen
Scorrere le tracce disponibili e selezionare Audio Recorder
Navega por la selección de pistas y elige Audio Recorder
Deslize através da seleção de faixas e escolha o Gravador de Áudio
iOS Apogee MiC+ Quick Start
7
Choose “Cancel” when “Audio Device Connected” prompt appears
Choisissez “Annuler” lorsque le message “Périphérique Audio
Connecté” apparaît
Wenn die Meldung „Audio Device Connected“ erscheint, „Cancel“ wählen
Alla comparsa del messaggio “Dispositivo Audio Collegato”
selezionare “Cancella”
Elige “Cancelar” cuando el mensaje “Audio Device Connected” aparezca
Escolha “Cancelar” quando aparecer o aviso “Dispositivo de Áudio Ligado”
8
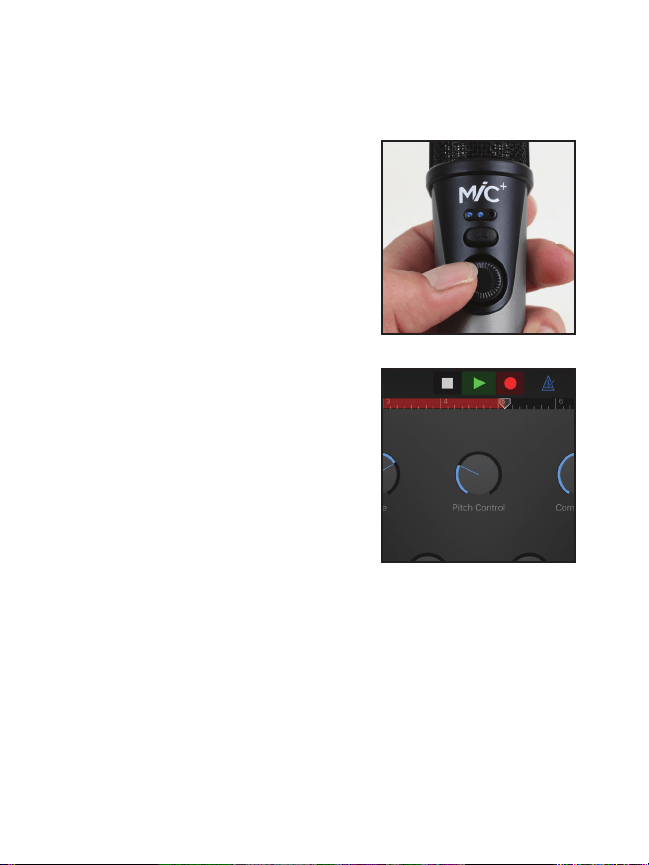
Press blend button until center LED is lit white
Appuyez sur le bouton de mélange jusqu’à ce que le voyant
centrale soit allumé en blanc
Blend-Taste drücken, bis die mittlere LED weiß leuchtet
Premere il pulsante Blend no a quando il LED diventa di
colore bianco
Presiona el botón blend hasta que el LED esté blanco
Prima no botão de mistura até ao LED central estar
iluminado a branco
9
4
Set record level
Fixez le niveau d’enregistrement
Aufnahmepegel einstellen
Impostare il livello di registrazione
Ajusta el nivel de grabación
Dena o nível de gravação
iOS Apogee MiC+ Quick Start
10
Record
Enregistrez
Aufnahme starten
Iniziare la registrazione
Graba
Gravar
11
1
2
3
See the User’s Guide for setup with other recording software: www.apogeedigital.com/support
5
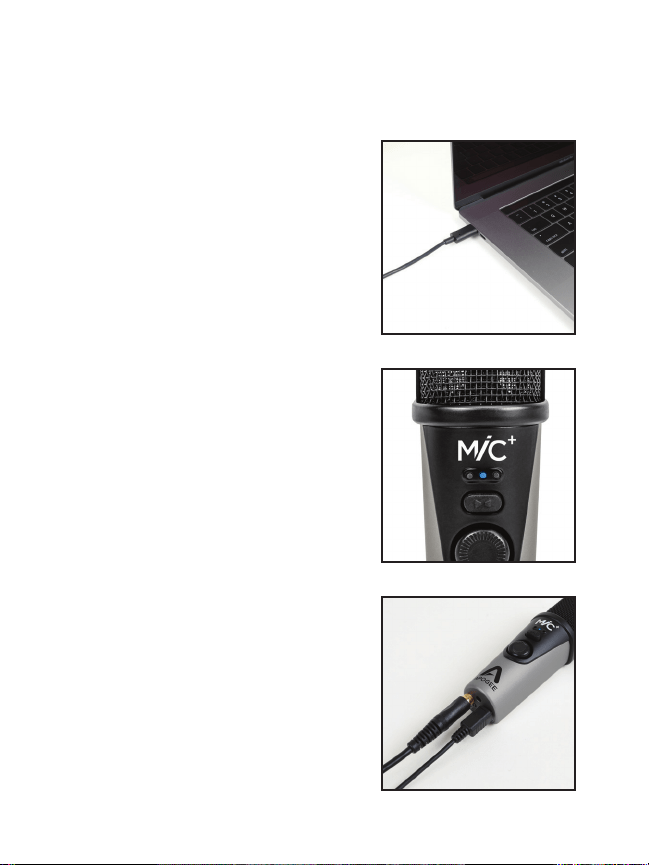
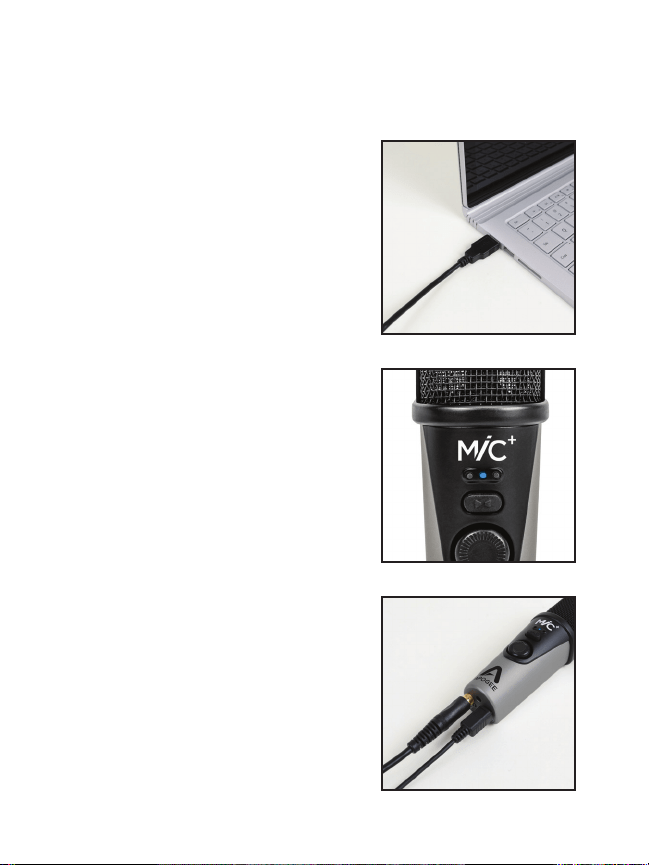
Connect cable
Connectez le câble
Kabel anschließen
Collegare il cavo
Conecta el cable
Ligue o cabo
macOS Apogee MiC+ Quick Start
1
MiC Plus light = Blue
Voyant lumineux de MiC Plus = Bleu
MiC Plus leuchtet = blau
Indicatore luminoso di MiC Plus = Blu
MiC Plus luz = Azul
MiC Plus luz = Azul
2
Connect headphones
Branchez votre casque
Kopfhörer anschließen
Collegare le cue
Conecta los auriculares
Ligue os auscultadores
3
6
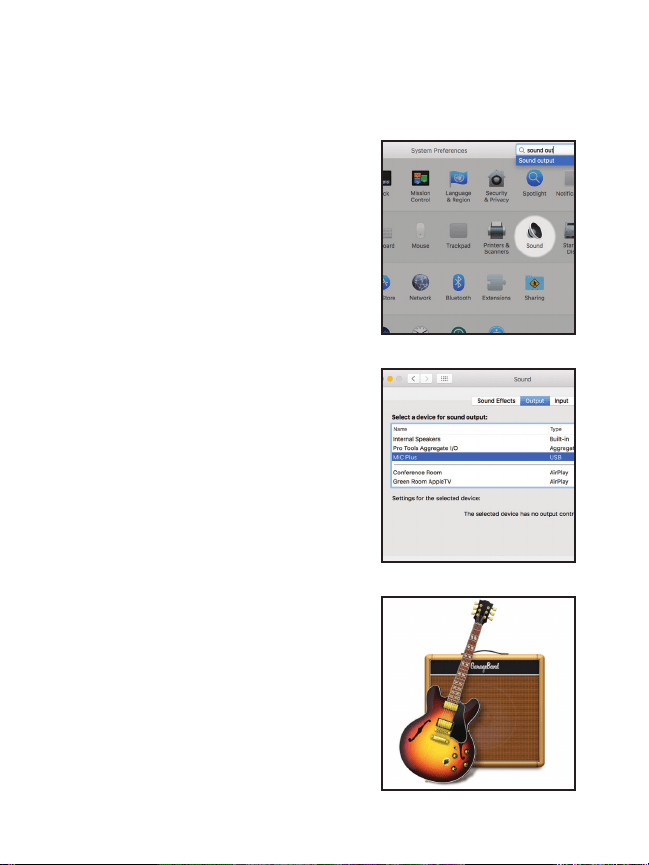
Go to System Preferences
Aller aux Préférences Système
Systemeinstellungen önen
Aprire Preferenze di Sistema
Ve a System Preferences
Vá a Preferências do Sistema
macOS Apogee MiC+ Quick Start
4
Select MiC Plus under the Output Tab
Sélectionnez MiC Plus sous l’onglet Sortie
MiC Plus im Reiter Ausgabe auswählen
Nel menu Suono, cliccare la tabella Uscita e selezionare MiC Plus
Selecciona MiC Plus bajo la tabulación Output
Selecione o MiC Plus sob o Separador de Saída
5
Open GarageBand (Free download from the Mac App Store)
Ouvrez GarageBand (disponible en téléchargement gratuit sur l’App Store)
GarageBand önen (kostenfreier Download aus dem Mac App Store)
Avviare GarageBand (scaricabile gratuitamente dall’App Store)
Abre GarageBand (Descárgalo gratis desde la App store)
Abra a GarageBand (Download gratuito a partir da App Store)
6
7
8
9
7
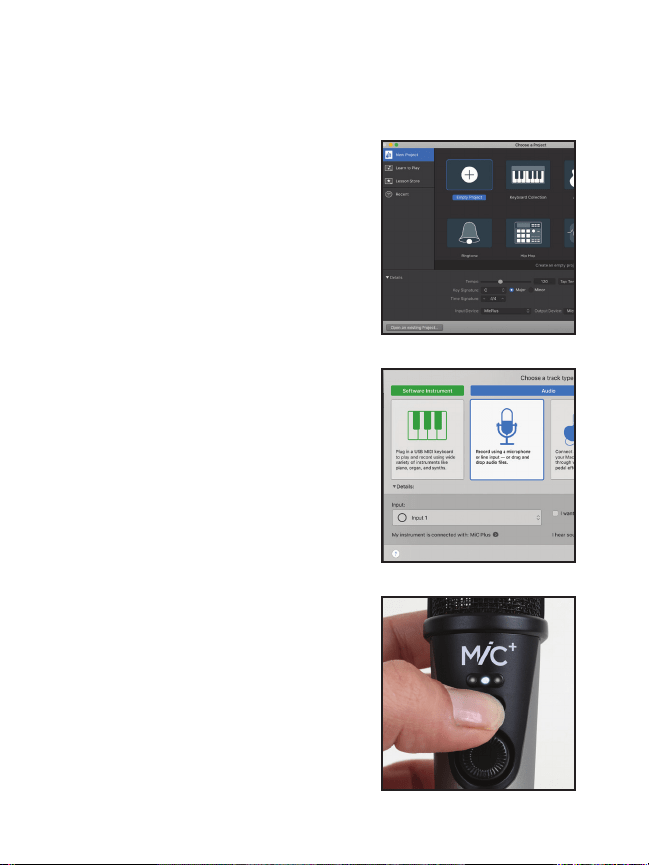
Start new project/song (Click the details arrow, select MiC Plus as
Input and Output Device)
Démarrez un nouveau projet/morceau (Cliquez sur la èche Détails,
sélectionnez MiC Plus comme périphérique entrant et de sortie)
Neues Projekt/Song erstellen (Details-Pfeil anklicken und MiC Plus als
Ein- und Ausgabegerät anwählen)
Creare un nuovo progetto / brano (in aggiunta, cliccare “Dettagli” e
selezionare MiC Plus come dispositivo di ingresso e uscita)
Abre un nuevo proyecto/canción (Haz click en la echa de detalles,
selecciona MiC Plus como dispositivo de entrada y salida)
Inicie o novo projeto/música (Clique na seta de detalhes, selecione o
MiC Plus como o Dispositivo de Entrada e Saída)
macOS Apogee MiC+ Quick Start
7
Create an audio track
Créez une piste audio
Audiospur erzeugen
Creare una traccia audio
Crea una pista de Audio
Crie uma faixa de áudio
8
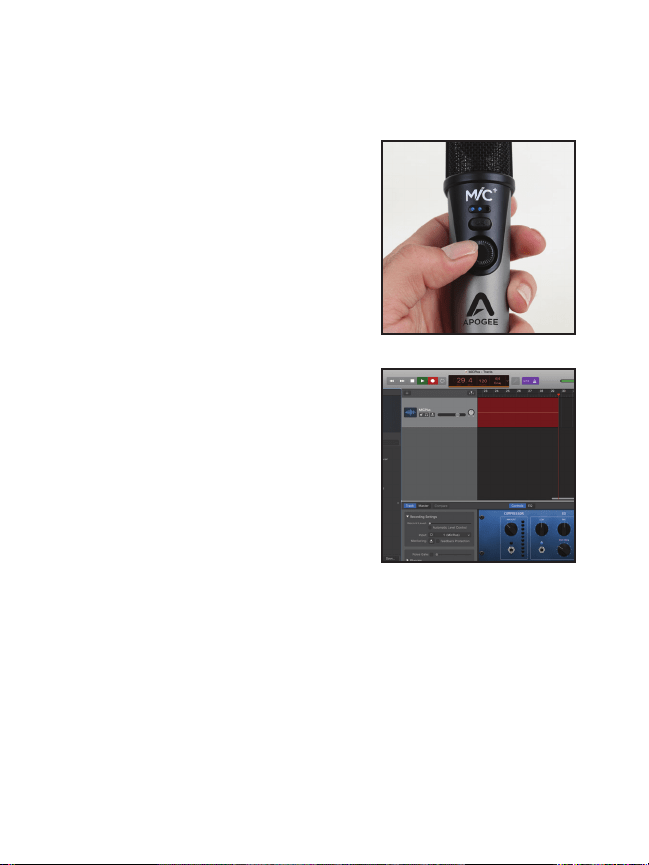
Press blend button until center LED is lit white
Appuyez sur le bouton de mélange jusqu’à ce que le voyant centrale
soit allumé en blanc
Blend-Taste drücken, bis die mittlere LED weiß leuchtet
Premere il pulsante Blend no a quando il LED diventa di
colore bianco
Presiona el botón blend hasta que el LED esté blanco
Prima no botão de mistura até ao LED central estar iluminado
a branco
9
8
Set your Record level
Fixez votre niveau d’enregistrement
Aufnahmepegel einstellen
Impostare il livello di registrazione
Ajusta el nivel de grabación
Dena o nível de gravação
macOS Apogee MiC+ Quick Start
10
Record
Enregistrez
Aufnahme starten
Iniziare la registrazione
Graba
Gravar
11
See the User’s Guide for setup with other recording software: www.apogeedigital.com/support
9
Connect cable
Connectez le câble
Kabel anschließen
Collegare il cavo
Conecta el cable
Ligue o cabo
Windows Apogee MiC+ Quick Start
1
MiC Plus light = Blue
Voyant lumineux de MiC Plus = Bleu
MiC Plus leuchtet = blau
Indicatore luminoso di MiC Plus = Blu
MiC Plus luz = Azul
MiC Plus luz = Azul
2
Connect headphones
Branchez votre casque
Kopfhörer anschließen
Collegare le cue
Conecta los auriculares
Ligue os auscultadores
3
10
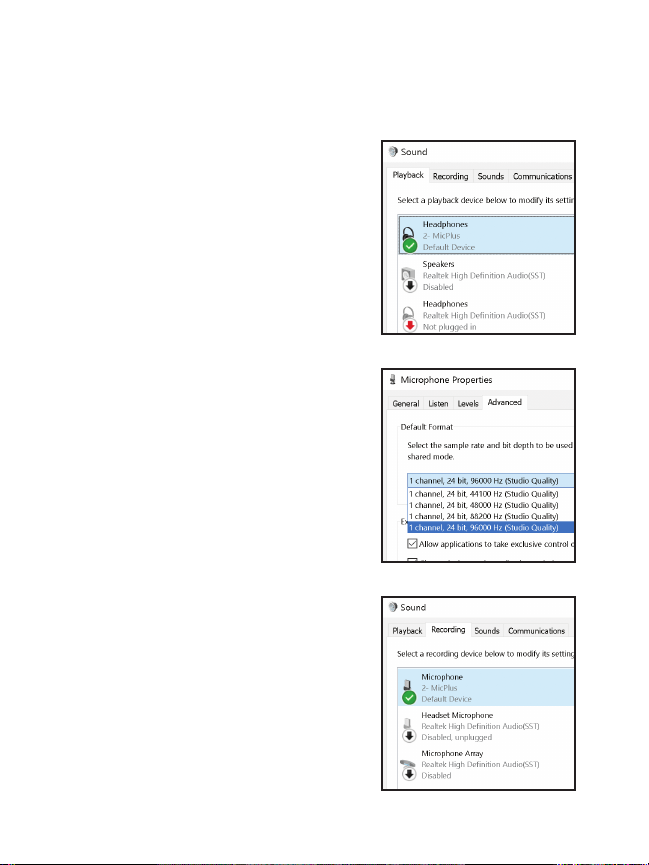
Open Sound Control Panel and set Playback to MiC Plus
Ouvrez le Panneau de Conguration Son et sélectionnez MiC Plus
comme périphérique de lecture
Kontrollfeld Sound önen und MiC Plus für die Wiedergabe auswählen
Aprire il pannello di controllo Audio e impostare MiC Plus come
dispositivo di riproduzione
Abre el Sound Control Panel y selecciona Playback en MiC Plus
Abra o Painel de Controlo de Som e dena Reproduzir para o MiC Plus
Windows Apogee MiC+ Quick Start
4
Click on Properties for Playback, Select the Advanced Tab, set sample
rate to 96k
Cliquez sur le bouton Propriétés pour la Lecture, Sélectionnez l’onglet
Statistiques avancées, xez le taux d’échantillonnage à 96 kHz
Eigenschaften für die Wiedergabe anklicken und die Samplingrate im
Reiter Erweitert auf 96 kHz einstellen
Cliccare il pulsante Proprietà del menu Riproduzione, selezionare la
tabella Avanzate, e impostare la frequenza di campionamento su 96k
Haz click en Properties for Playback, Selecciona Advanced Tab, y ajusta
la frecuencia de muestreo a 96k
Clique em Propriedades para Reproduzir, Selecione o Separador
Avançado e dena a taxa de amostragem para 96k
5
Click on Recording Tab, Select MiC Plus
Cliquez sur l’onglet Enregistrement, Sélectionnez MiC Plus
Reiter Aufnahme anklicken und MiC Plus auswählen
Selezionare la tabella Registrazione e selezionare MiC Plus
Haz click en Recording Tab, Selecciona MiC Plus
Clique no Separador de Gravação, Selecione o MiC Plus
6
7
8
9
11
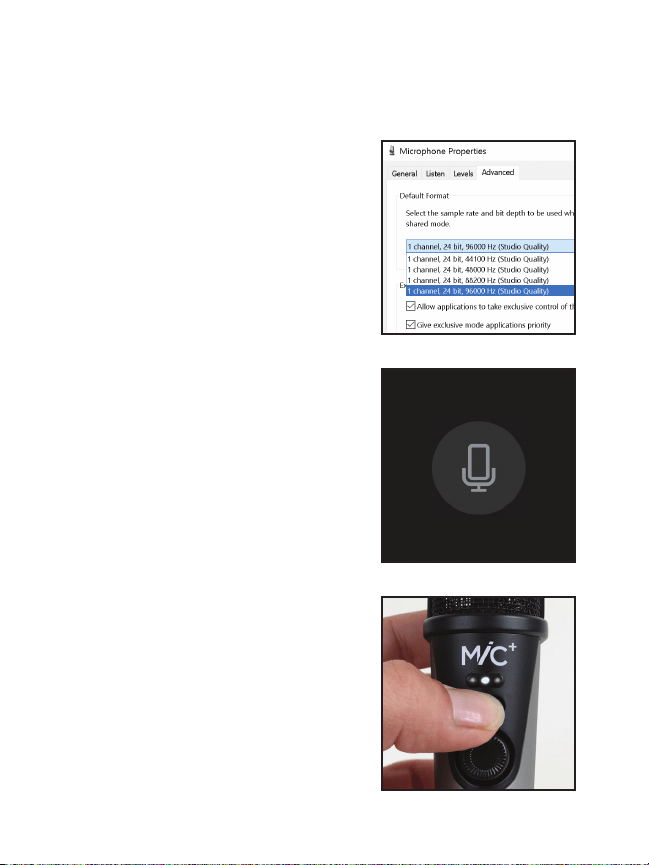
Click on Properties for Recording, Select the Advanced Tab, set sample
rate to 96k
Cliquez sur le bouton Propriétés pour l’Enregistrement, Sélectionnez
l’onglet Statistiques avancées, xez le taux d’échantillonnage à 96 kHz
Eigenschaften für die Aufnahme anklicken und die Samplingrate im
Reiter Erweitert auf 96 kHz einstellen
Cliccare il pulsante Proprietà del menu Registrazione, selezionare la
tabella Avanzate, e impostare la frequenza di campionamento su 96k
Haz click en Properties for Recording, Selecciona Advanced Tab y
ajusta la frecuencia de muestreo a 96k
Clique em Propriedades para Gravar, Selecione o Separador Avançado
e dena a taxa de amostragem para 96k
Windows Apogee MiC+ Quick Start
7
Open Voice Recorder, MiC Plus light = Green
Ouvrez Voice Recorder, Voyant lumineux de MiC Plus = Vert
Audiorecorder önen, MiC Plus leuchtet = Grün
Avviare Registratore Vocale, Indicatore luminoso di MiC Plus = Verde
Abre el Voice Recorder, MiC Plus luz = Verde
Ative o Gravador de Voz, MiC Plus luz = Verde
8
Press blend button until center LED is lit white
Appuyez sur le bouton de mélange jusqu’à ce que le voyant centrale
soit allumé en blanc
Blend-Taste drücken, bis die mittlere LED weiß leuchtet
Premere il pulsante Blend no a quando il LED diventa di
colore bianco
Presiona el botón blend hasta que el LED esté blanco
Prima no botão de mistura até ao LED central estar iluminado
a branco
9
12
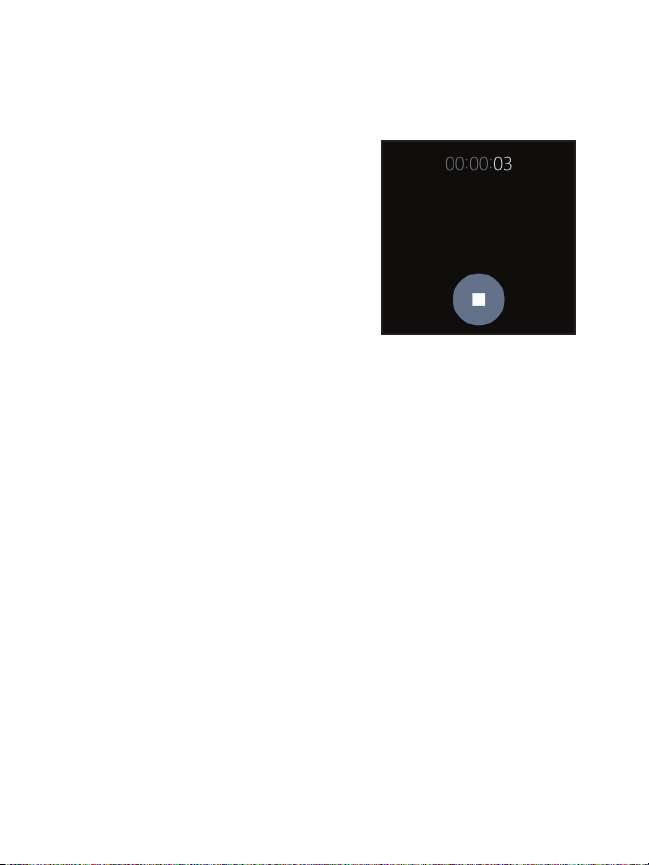
Record
Enregistrez
Aufnahme starten
Iniziare la registrazione
Graba
Gravar
Windows Apogee MiC+ Quick Start
10
See the User’s Guide for setup with other recording software: www.apogeedigital.com/support

13

14
Declarations of Conformity
This device complies with Part 15 of the FCC Rules. Operation is subject to
the following two conditions:
(1) This device may not cause harmful interference and (2) This device must
accept any interference received, including interference that may cause
undesired operation. This equipment has been tested and found to comply
with the limits of a Class B digital device, pursuant to Part 15 of the FCC
Rules.
CAUTION: Changes or modications not expressly approved by Apogee
Electronics Corporation compliance could void the user’s authority to
operate the equipment.
Rating: 3.3-5V 100mA USB 2.0
Industry Canada Notice
This Class B digital apparatus meets all requirements of the Canadian
Interference-Causing Equipment Regulations. Cet appareil numérique
de la classe B respecte toutes les exigences du Règlement sur le matérial
brouilleur du Canada.
Declaration of Conformity – CE
Apogee Electronics Corporation hereby declares that the product, MiC Plus,
to which this declaration relates, is in material conformity with the following
standards or other normative documents:
(EN50081-1/EN55022; 1995) and (EN50082-1/IEC 801-2, 3, 4; 1992)
following the provisions of: (73/23/EEC – Low Voltage Directive) and
(89/336/EEC – EMC Directive)
Declaration of Conformity – CE
Apogee Electronics Corporation hereby declares that the product, MiC Plus,
to which this declaration relates, is in material conformity with the following
standards or other normative documents:

15
(EN50081-1/EN55022; 1995) and (EN50082-1/IEC 801-2, 3, 4; 1992)
following the provisions of: (73/23/EEC – Low Voltage Directive)
and (89/336/EEC – EMC Directive)
Declaration of Conformity – Japan
Apogee Electronics Corporation hereby declares that MiC Plus, to which this
declaration relates, is in material conformity with the VCCI Class A standard.
Declaration of Conformity – Australia
Apogee Electronics Corporation hereby declares that the MiC Plus is in
material conformity with AN/NZS standard requirements.
“Made for iPod,” “Made for iPhone,” and “Made for iPad” mean that an
electronic accessory has been designed to connect specically to iPod,
iPhone, or iPad, respectively, and has been certied by the developer
to meet Apple performance standards. Apple is not responsible for the
operation of this device or its compliance with safety and regulatory
standards. Please note that the use of this accessory with iPod, iPhone, or
iPad may aect wireless performance.

16
Registration Information
Be sure to register your MiC Plus by completing the on-line registration
form at our Web site: www.apogeedigital.com/register
The benets of registering include access to free, expert technical support
by email or phone, important email notications regarding new features
and important updates, and new Apogee product notications before
they’re announced to the public.
Please address any inquiries to your dealer or directly to Apogee at:
APOGEE ELECTRONICS CORPORATION
1715 Berkeley St Santa Monica,CA 90404, USA
TEL: (310) 584-9394, FAX: (310) 584-9385
Web site:
www.apogeedigital.com
Knowledgebase:
www.apogeedigital.com/knowledgebase
Support:
www.apogeedigital.com/support

17

© 2017, Apogee Electronics Corp. All Rights Reserved
PN: 0070-0010-0000 Rev. 1.0 | AN: 2740-0020-0000 Rev. 1.0
Quick Start Guide