Loading ...
Loading ...
Loading ...
1. Before each use, inspect the general condi-
tion of the jack. Check for broken, cracked,
or bent parts, loose or missing parts, and
any condition that may affect the proper
operation of the product. Any jack that ap-
pears damaged in anyway must be removed
from service. Have the problem corrected
before further use. DO NOT use damaged
equipment.
2. Replace worn or damaged parts with Perfor-
mance Tool replacement parts. Be sure that
only qualied personnel perform repairs.
3. Before each use, thoroughly test the jack
for proper operation prior to its actual use. If
the jack appears not to be working properly,
follow bleeding instructions.
4. When jack is not in use, ram and pump pis-
ton should be in fully down position to keep
their machined surfaces free from corrosion.
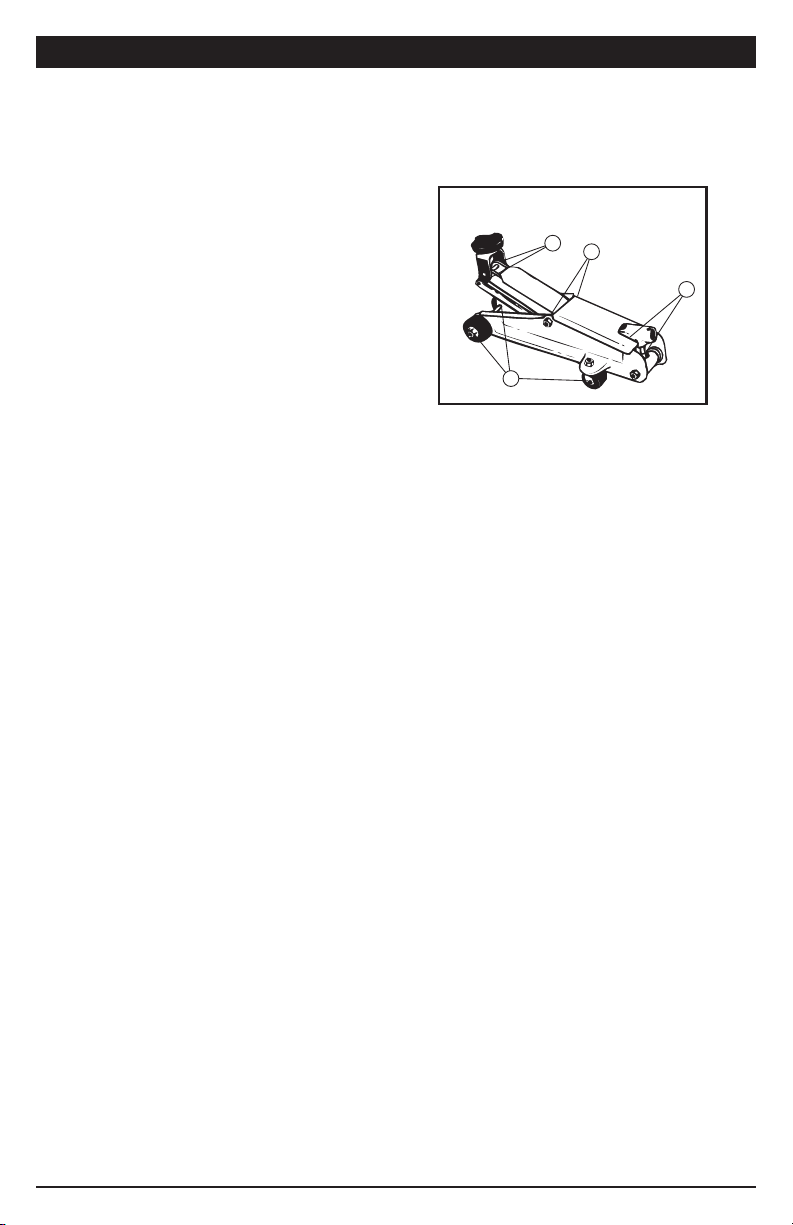
5. Keep jack clean and well lubricated at points
illustrated in gure 3.
1
2
3
4
Figure 3
CARE & MAINTENANCE
Monthly maintenance is recommended. Lubrication is critical to jacks as they support
heavy loads. Any restriction due to dirt, rust, etc. can cause either slow movement or
cause extremely rapid jerks, damaging the internal components. The following steps are
designed to keep the jack maintained and operational.
6. For best results, use only hydraulic uid with
a rating of SAE 20 for rells.
7. Change the hydraulic oil at least once every
three years:
a. Fully retract the ram by turning the release
valve counter-clockwise.
b. Loose the four top plate retaining screws (no
need screw out) and remove the top plate
vertically.
c. With the jack in the level position, remove the
oil ller plug.
d. The proper oil volume should be the maxi-
mum distance from the oil surface level to
the top of oil tank should be less than 13mm.
If the oil is not enough, please add high quali-
ed hydraulic oil.
e. Replace the oil ller plug.
f. After adding oil, please checking if the jack
can reach the maximum height with seven
pumps, if not, please purge air from the
hydraulic unit as required.
g. Cover the top plate, please make sure the
four grooves in the top plate mate four retain-
ing screws. Then tightening the four screws.
CHANGING OIL
a. Fully retract the ram by turning the release
valve counter-clockwise.
b. Loose the four top plate retaining screws (no
need screw out) and remove the top plate
vertically.
c. Unscrew the hexagon socket screw, and take
out the oil tank vertically by hand.
d. Remove the oil ller plug and turn the oil tank
up-side down. Press the oil valve (please
note never cover the hole on the oil valve
when pressing it) and then empty the oil tank.
HOW TO PRESS THE OIL VALVE
Note: Dispose of hydraulic oil in accordance with
local regulations.
1. Add 400ml high qualied hydraulic oil to the
oil tank.
2. Replace the oil ller plug, put the oil tank
back to the pump base and lock it by the
hexagon screw.
3. Recover the top plate, then tighten the retain-
ing screws.
4. After adding oil, please check if there any air
in the hydraulic system. Close the release
valve clockwise, pumping the handle with full
stroke, if the jack can’t reach the maximum
height with 7 pumps, do purging process.
5
Loading ...
Loading ...
Loading ...