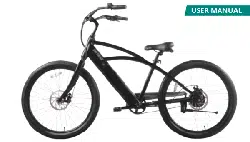
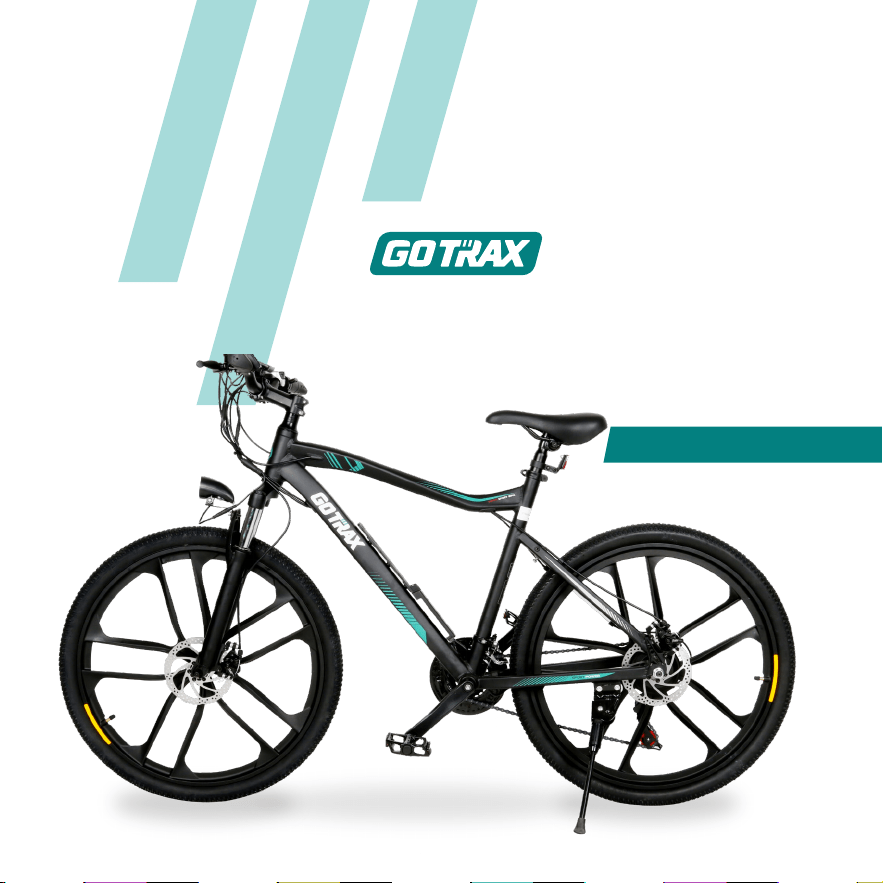
EBE2
USER MANUAL
ELECTRIC BIKE


This user manual will help you assemble
and operate your new electric scooter. Be
sure to read ALL OF THE INFORMATION in
this manual before riding.
NOTE TO ALL RIDERS UNDER 18 YEARS
OF AGE: It’s very important that you get
parental permission before riding your
electric scooter.
Congratulations
on your purchase!

Don’t Ride Until You Read This:
ALWAYS wear a helmet when riding your electric bike.
Make sure your electric bike has a full battery before taking it out to ride.
Always be aware of local road laws, and follow them.
Do not ride the bike under the inuence of drugs or alcohol.
Always respect pedestrians.
Do not ride under wet conditions. The electric bike may slide from under your
feet causing injury. Wet conditions may damage the electronics and void the
warranty.

1. Avoid water - The electric bike is not waterproof. The electronics may be damaged
due to water and water damage is not covered by our warranty. Riding in wet
conditions is also very dangerous and may result in injury.
2. Avoid prolonged exposure to sun or rain and avoid storage in places with high
temperatures or corrosive gas.
3. Abuse - We do not cover physical damage due to negligent care and extreme riding.
4. Whenever you ride the GOTRAX Electric Bike, you risk severe injury or even death
from loss of control, collisions, and falls. Use caution and ride at your own risk.
5. Do not modify the product from the manufacturers original design.
6. Do not exceed the posted speed limit and obey all trac laws.
7. Avoid touching the charging port directly and do not let it make contact with a
metal object.
8. Keep hands and all body parts away from moving parts while operating the
electric bike.
9. Before riding - be sure to check the electric bike over and make sure the electric
bike is operating correctly before each use.
10. Before riding - be sure to check that the braking system is functioning properly;
also be sure to check that all safety labels are in place and you understand the
safety warnings.
11. Before riding - be sure that any and all axle guards, chain guards, or other covers
or guards supplied by the manufacturer are in place and in serviceable condition.
12. Before riding - be sure to check that the tires are in good condition, inated
properly, and have sucient tread remaining.
Warning Message

13. Never exceed the 264 lb (120 kg) maximum load rating.
14. The electric bike should never be used by children under the age of 16.
15. Maximum Speed - Your electric bike goes the maximum speed of 20 mph.
16. Make note that additional insurance may be required to cover situations you
encounter while riding an electric bike. It is recommended that you contact an
insurance company or broker for advice and consultation.
17. To conserve electricity, use assist mode and avoid zero starting, frequent braking,
driving against the wind, carrying heavy loads including other people and riding with
insucient air pressure.
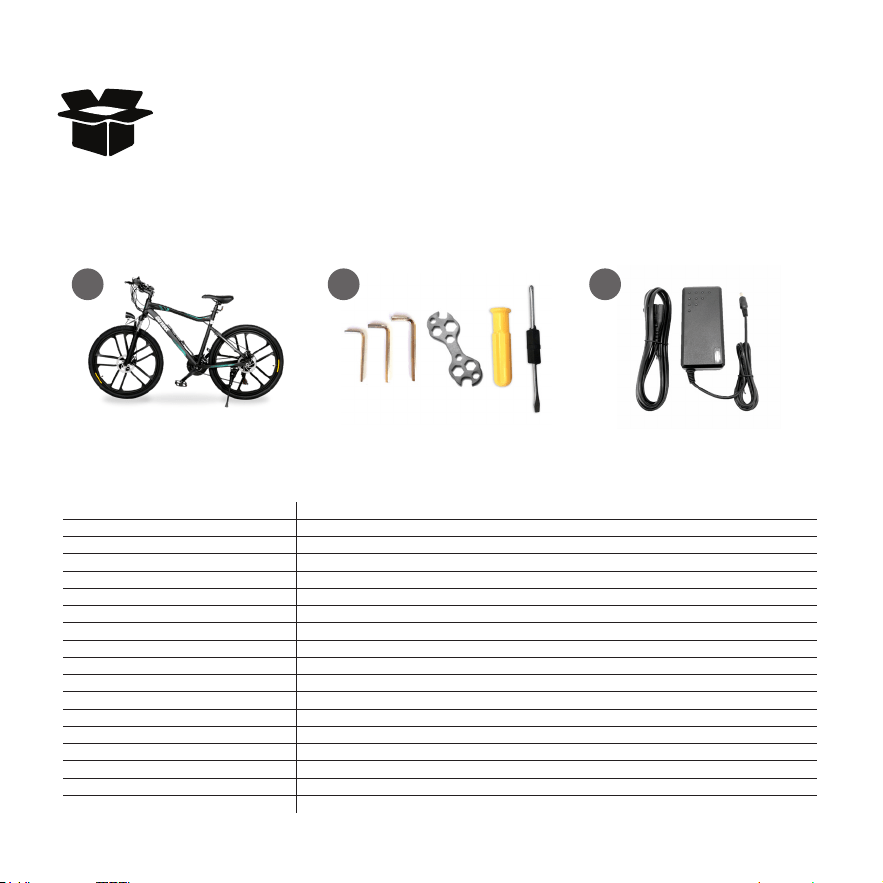
Remove all packaging material, then inspect each item for any accidental damage
that may have occurred during shipping. You should nd each of these items in
your box:
Unpacking and Product Specs
1
3
2
ELECTRIC BIKE TOOLS: (1) LARGE WRENCH, (3)
ALLEN WRENCHES,
(1) SCREWDRIVER
BATTERY CHARGER
ITEM SPECIFICATIONS
Model EBE2
Product Dimensions 173x63x107 (cm)
Package Dimensions 139x24x72 (cm)
Max Load 264 lbs (120 kg)
Package Weight 62 lbs (28 kg)
E Bike Weight 49 lbs (22 kg)
Max Speed 20 mph
Battery/Charger Input 100-240V 50/60HZ AC Plug; Output 42V2A DC2.1
Pedal-Assist Mode Approx 43-50 miles (70-80 km)
Pure Electric Mode Approx 22-24 miles (36-40 km)
Max Angle of Climb 14 degrees
Charging Time 6-7 hours
Tire Pressure 45-65 PSI
Bell/Horn Electric Horn Installed
Charging Port Output Voltage 5V1A
Frame Material 6061 Aluminum Alloy
IP Level Ipx4

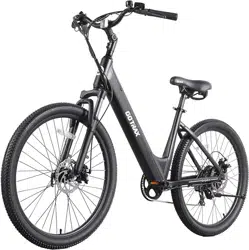
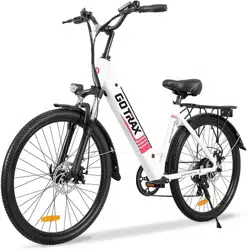
Get To Know Your E-Bike
Saddle
Seat Post
Motor
Wheel Chain
Crankset
Pedals
Battery
Tire
Disc Brake
Suspension Front
Front Light
Stem
LCD Display
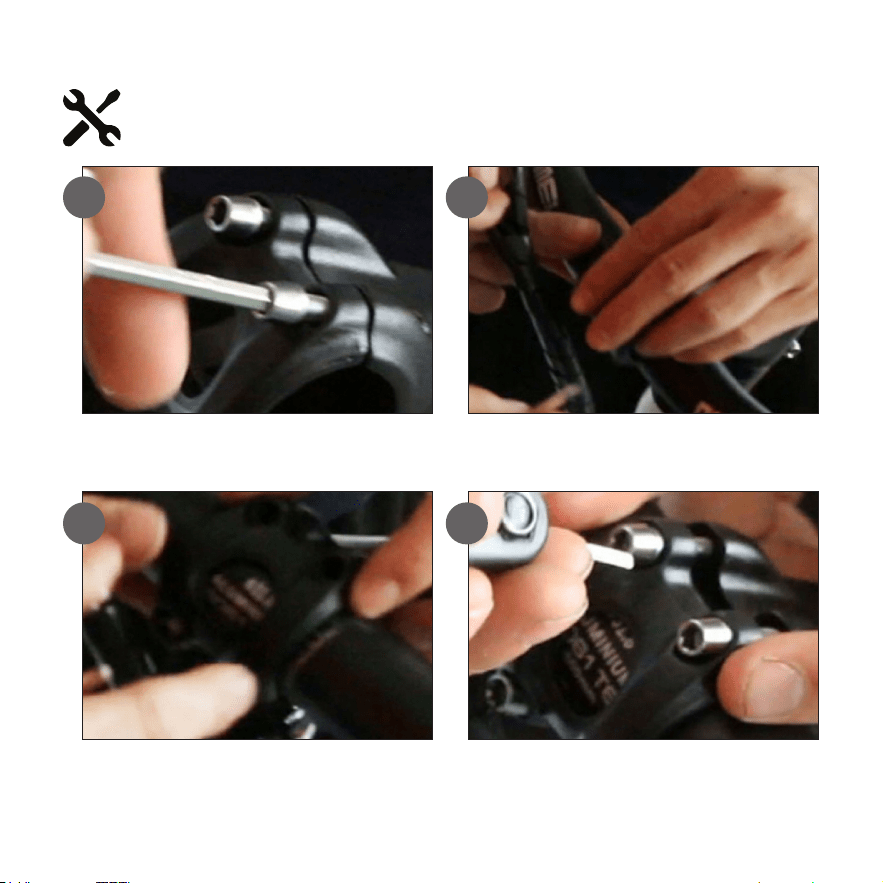
1
Installing the Handlebar
2
Use tools to loosen screws from
fasteners
Adjust the position of the handlebar
3
4
Fasten the handlebar Tighten the screws

1
Adjusting the Seat Tube
2
Push the saddle down Open the folder of the seat tube
3
4
Adjust and rotate the seat Finally lock the folding mechanism
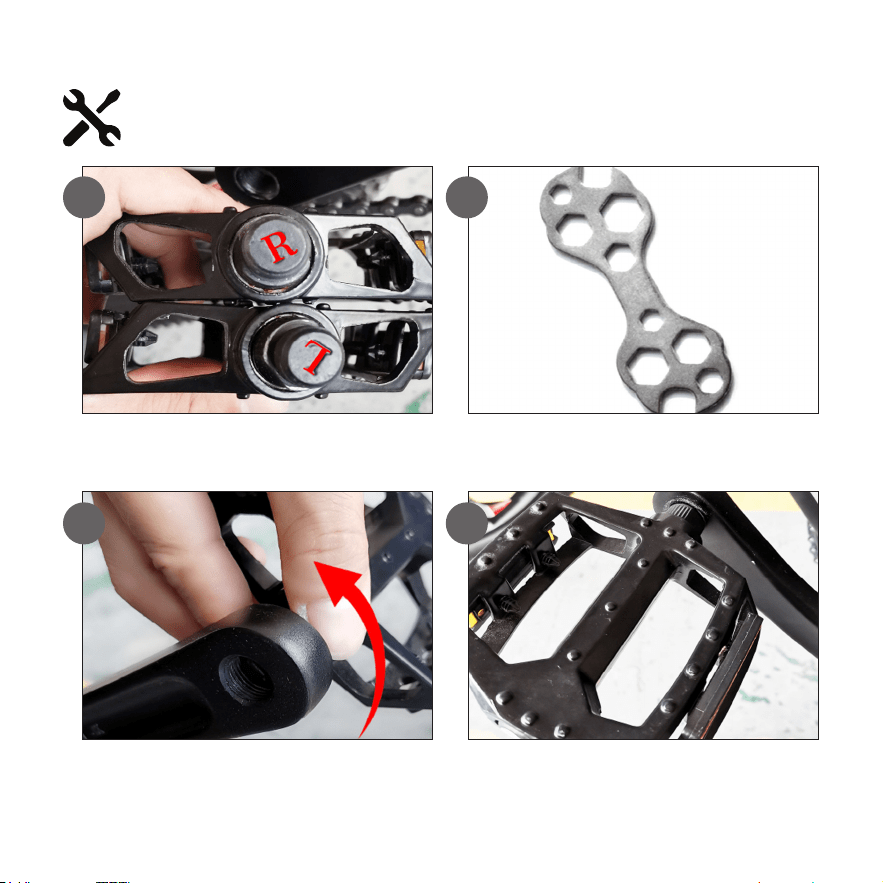
1
Mounting Pedal
2
Please check the L and R marks on
pedals
Take the wrench from the tool box
3
4
R means it should be installed on the
right side, L means it should be installed
on the left side
Tighten the nuts counterclockwise

1
Installing the front wheel
2
Fixed well front fork The front fork is aligned to both ends of
the bearing. The disc brake is on the left
3
4
Install the quick release and nut then
tighten well
Twist the wrench upward and check the
operation of the wheel
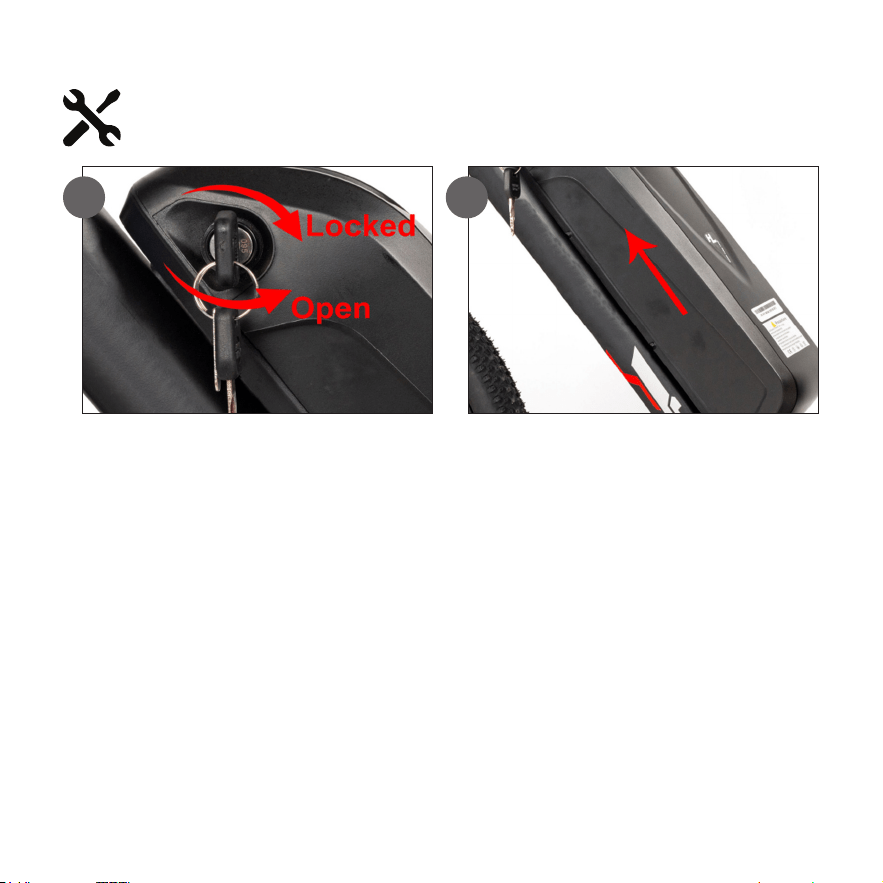
1
Removing the Battery
2
Open the battery key Remove the battery

Before using the electric bike, you must fully charge the battery.
Charge Your E-Bike: Method 1
1. Locate the charging port on the left side of the frame on the removable battery
2. Plug the charger into a power supply
3. A red light indicates the battery is charging, green indicates the battery is full
4. Charging Time: 6-7 hours
Charging
Port

Charge Your E-Bike: Method 2
Remove the battery charger from the e-bike
(as detailed on page 13)
Locate the charging port near the top of the
battery.
A red light indicates the battery is
charging, green indicates the battery is full
1
3
2
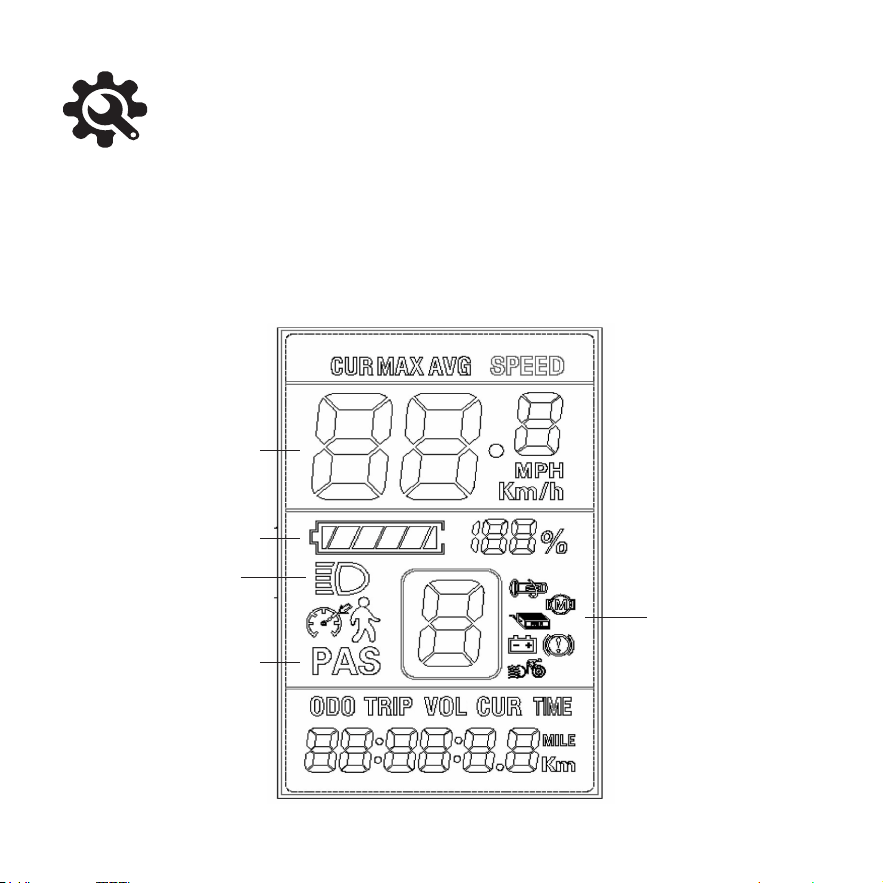
E-Bike Console Functions
Display Includes: Speed, battery, error indication and mileage
Control and Settings: Power switch, wheel diameter, idle time for auto-hibernation,
backlight brightness setting, start mode setting, drive mode setting, voltage level setting,
controller current limit setting
Communications Protocol: UART
Light
Battery Level
Multi-function:
• Total Mileage
• Trip Mileage
• Error Code
• Power (WATT)
• Maintenance
Max Speed/
Average Speed
Vehicle Mode/
Power Strong
Power Mode

6 KM/H Booster Assist Constant Speed Service
Electric Assisted Mode Battery LED
Brake Indicator Controller Failure
Motor Failure Throttle Failure
OVERVIEW OF KEYS
1. Long press "M" to turn o the panel when it's on. Short press the up key + to increase
the PAS level, short press the down key - to decrease the PAS level.
2. Change the speed display by long pressing M and the up + key
3. Open the front light by long pressing the up + key
4. Turn on the "M" LCD display with a long press

We frequently update our user manuals at GOTRAX.com, and reserve the rights to
update and change manuals online.
Please contact our customer service team if you are experiencing problems or need more
detailed information. They can be reached at GOTRAX.com
1. Users should operate in accordance with the product manual. In case of any
performance fault caused by production quality, the company shall perform the
obligations of the three guarantees in accordance with the provisions of relevant laws
and regulations of the state.
2. The company is still responsible for the after-sales service of the faults beyond three
guarantees and the major components in the three guarantees, but there will be a
cost for repair.
3. If the battery replacement is over the warranty time, our company will supply the
battery at factory price. To ensure safety, and avoid pollution.
For additional warranty information, please visit GOTRAX.com.
Troubleshooting & Warranty

WWW.GOTRAX.COM
#RideGOTRAX
LVHL26A (EO2)| EN15194 | FCC-PART15
This product has passed the CE certication

GOLABS, INC
GOTRAX.com
2201 Luna Rd.
Carrollton, TX 75006