

Congratulations
on your purchase!
This user manual will help you assemble and
operate your new electric bicycle. Be sure to
read ALL OF THE INFORMATION in this
manual before riding.
NOTE TO ALL RIDERS UNDER THE AGE OF 18:
It’s very important that you get parental
permission before riding your electric bicycle.
WARNING: Lithium-ion Batteries and/or products that contain
Lithium-ion Batteries can expose you to chemicals including cobalt
lithium nickel oxide, and nickel, which are known to the State of
California to cause cancer and birth defects or other reproductive
harm. For more information, go to www.P65Warnings.ca.gov

13. Never exceed the 264lbs (120 kg) maximum load rating.
14. The electric bike should never be used by children under the age of 16.
15. Maximum Speed - Your electric bike goes the maximum speed of 15.5mph.
16. Make note that additional insurance may be required to cover situations you
encounter while riding an electric bike. It is recommended that you contact an
insurance company or broker for advice and consultation.
17. To conserve electricity, use assist mode and avoid zero starting, frequent braking,
driving against the wind, carrying heavy loads including other people and riding with
insufficient air pressure.

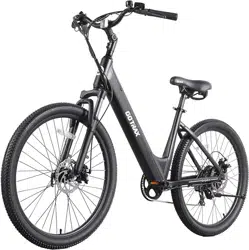
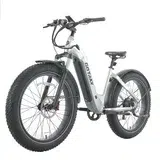
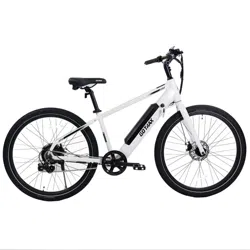
Unpacking and Product Specs
Remove all packaging material, then inspect each item for any accidental damage
that may have occurred during shipping. You should find each of item in your box:
ELECTRIC BIKE TOOLS: (2) LARGE WRENCH,
(4) ALLEN WRENCHES,
(1) SCREWDRIVER
BATTERY CHARGER
1760x610x1190 mm (69.2x24x46.8 in)
ENDURAII
1450x240x800 mm (57x9.4x31.4 in)
120 kg (264 Ibs)
24.5 kg (54 Ibs)
25 km (15.5 mph)
36V 7.8Ah
Input 100-240V 50/60Hz AC plug; output 42V 2A DC2.1
35-45 km (22-28 miles)
27 km (16.7 miles)
4-5hours
25-45P.S.I
Product Dimensions
Model
Package Dimensions
Max Load
Package Weight
E Bike Weight
Max Speed
Battery/Charger
Battery Specifications
Pedal-Assist Mode
Pure Electric Mode
Max Angle of Climb
Charging Time
Tire Pressure
Bell/Horn
Bell
Frame Material
IP Level IPX4
14 degrees
6061 Aluminum Alloy
31 kg (67 Ibs)

Charger Port
LED Display
Get to Know Your E-Bike

Installing the Handlebar
Use tools to loosen screws from fasteners,Lnsert the handlebar into
fork tube.
Adjust the handlebar to the appropriate Angle, and lock the screw fixing
the handlebar. (The handle must be centered and fixed.)
1
2

Adjust the vertical Angle between the transverse handle and the front
wheel, and lock the fixing rod screws.
Use the tools to lock the rod retainer screws.
3
4

Adjusting the Seat Tube
Push the saddle down.
Adjusting and rotate the seat. Finally lock the folder.
Open the folder of the seat tube.
2
3 4
1

Installing Pedals
Please check the L and R marks.
R means it should be install in
right side, L means it should be
install in left side.
Tighten the nut counterclockwise.
Take the wrench from the tool box.
1 2
3 4
Installing Front Fender and Headlight
Use screw to lock the front
fender and headlight.
Use screw to lock the right bracket
of the front fender.
Use screw to lock the left bracket
of the front fender.
2
3
1

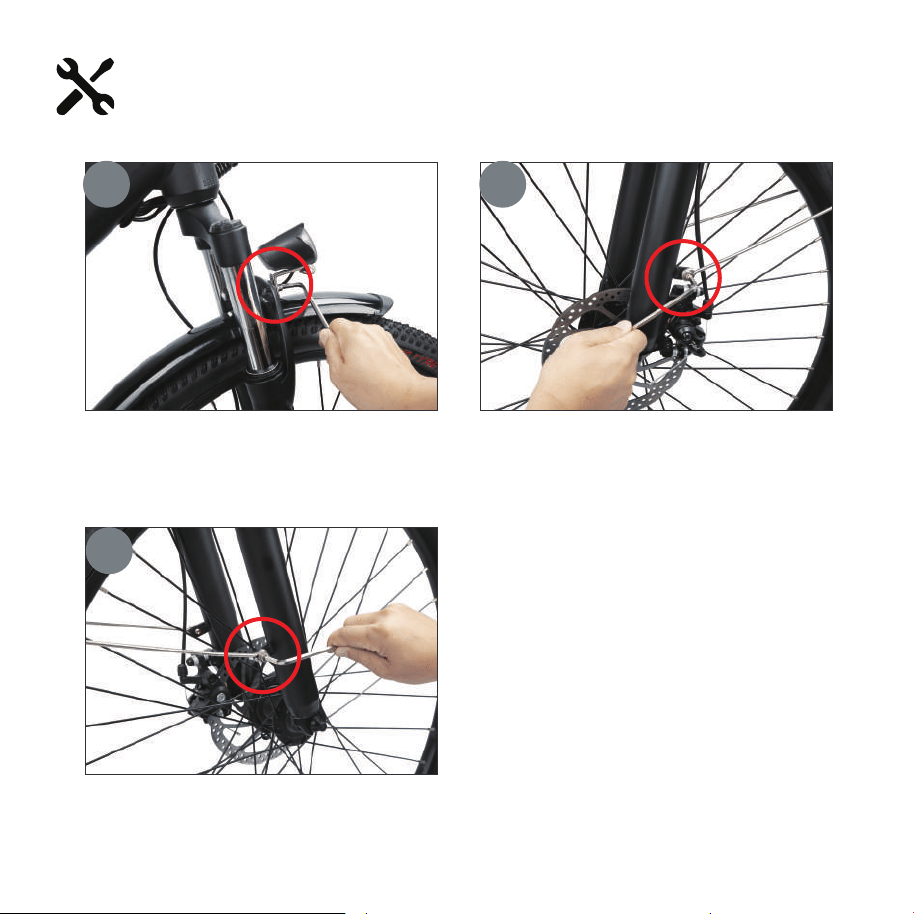
Installing the Front Wheel
Fixed wheel front fork.
Install the quick release and then
tighten well.
Twist the wrench upward check
the operation of the wheel.
The front fork is aligned to both
ends of the bearing. The disc brake
is on the left.
1 2
3 4

Open the battery key.
After taking out the battery. Remove the battery.
Take the battery out.
2
3 4
1
Removing the Battery
Open

Take out the battery.
Plug one end of the charge into
the battery and the other end
into the power supply.
Red light shows the battery is
charging green light is full.
You can take the battery to your
company or home to charge it.
2
3 4
1
Charge the Battery
Step1
Step2

Charge Your E-Bike

1. Exterior Parameters
Shell Material: ABS
Working Temperature: -20 -60 with guaranteed mechanical performance.
ON/OFF
MODE
810
L
H
LOW
MED
HIGH
LIGHT
Front View
Side View
Side View of the Supporter Ring

When the battery is fully charged , 4 power indicators
lights are on (full power status), and the indicator lights will turn off one by one
according to the power gradually decreasing. When the battery is low ,
the last indicator light will flash continuously, indicating that the battery needs
to be charged in time.
a. Start
Press and hold for 2-3 seconds to power on/off.
b. Battery Level Indicators

After the power is turned on, press the button for the first time, the gear
indicator LOW will light up, representing the first gear (low speed mode).
Press the button for the second time, the gear indicator will switch from
LOW to MED, representing the second gear (medium speed mode).
Press the button for the third time, the gear indicator will be switch from
MED to HIGH, representing the 3rd gear (high speed mode).
Press the button for the fourth time, the gear indicator will light off and
switch to gear 0, the motor will have no power output. (This cycle sets the
current desired gear).
c. Gear Setting
Boot default 0 gear
Gear indicator has no light indication which means the motor has no power
output.

e. Turn on / off the battery power
The battery is power off when receive. Please press the "Black Button" at the bottom
of the battery to turn it on.
ON OFF
In the power-on state, press and hold the button for 2-3 seconds to
turn on the headlights.
Press and hold the button again for 2-3 seconds to turn off the
headlights.
d. Light Control

electric bike
50/60Hz AC Power Supply. Be sure to keep the input plug in contact with the AC
outlet.