Table of Contents
3
EN
1 Description 13
1.1 General description 13
1.2 Control panel 14
2Use 17
2.1 Warnings 17
2.2 Using the cooktop 18
2.3 Special features 27
2.4 Additional functions 28
2.5 User menu 32
2.6 Error codes 35
3 Cleaning and maintenance 36
3.1 Warnings 36
3.2 Surface cleaning 36
3.3 Weekly routine cleaning 36
3.4 Food stains or residues 36
3.5 What to do if... 37
IMPORTANT INSTRUCTIONS
WARNING: If the instructions contained in this manual are not followed
precisely, fire or explosion may result causing property damage, personal
injury, or loss of life.
READ AND SAVE THESE INSTRUCTIONS - Your safety and the safety of
others are very important.
We have provided many important safety messages throughout this manual and
on the appliance.
Read all the instructions before using the appliance and always obey all safety
messages.
Important Safety Instructions
4
The safety messages will inform you of potential hazards, on how to avoid the risk of injury,
and what can occur if the instructions are not followed.
IMPORTANT: Observe all codes and ordinances in force.
Do not store or use gasoline or other flammable vapors, liquids or materials near this or any
other appliance.
RECOGNIZE SAFETY INFORMATION
This is a safety alert symbol. This symbol alerts you to potential hazards that can
result in severe personal injury or loss of life.
UNDERSTAND SIGNAL WORDS
A signal word - DANGER, WARNING or CAUTION - is used with the safety alert
symbol. DANGER denotes the most serious hazards. It means you could lose your
life or be seriously injured if you do not immediately
follow the instructions.
WARNING means you could lose your life or be seriously injured if the instructions
are not followed. CAUTION indicates a potentially hazardous situation which, if
not avoided, could result in minor to moderate injury.
WARNING
• This appliance is intended for use in the home only.
• Use this appliance only for its intended purpose. The
manufacturer cannot be held liable for damage caused by
improper use of this appliance.
• This appliance complies with current safety regulations.
Improper use of this appliance can result in personal injury
and material damage.
• Read all the instructions before installing or using the
appliance for the first time.
• Keep these operating instructions in a safe place and pass
them on to any future user.
WARNING: For your safety, the instructions contained in this manual must be
followed to minimize the risk of fire or explosion and to prevent property damage,
personal injury, or loss of life.
NOTES: This appliance is NOT designed for installation in manufactured (mobile)
homes or in recreational vehicles (RVs).
DO NOT install this appliance outdoors.
Do not use this product near water (for example: near a kitchen sink, in a wet
basement, near a swimming pool or similar locations).

Important Safety Instructions
EN
5
• Read all instructions.
• Read and follow the specific
“precautions to avoid possible
exposure to excessive microwave
energy” found in this manual.
• Proper installation is your
responsibility. Have a qualified
technician install and ground this
appliance in accordance with these
installation instructions.
• It is the responsibility of the installer to
comply with installation information
specified on the model/serial ID
plate. The ID plates are visibly
located under the appliance. These
ID plates must never be removed.
• Proper installation is your
responsibility. Make sure your
appliance is properly installed and
grounded by a qualified installer.
• WARNING: NEVER use this
appliance as a space heater for
heating or warming a room. Doing so
may result in the appliance
overheating.
• DO NOT LEAVE CHILDREN
UNATTENDED: Children should not
be left alone or unattended in the
area where the appliance is being
used. Never allow children to sit or
stand on any part of the appliance.
• The use of this appliance by children
who are 8 years of age or older and
by persons with reduced physical,
sensory, or mental abilities or who
lack experience and knowledge is
permitted when supervised or given
instructions by adults responsible for
their safety.
• Children should not play with the
appliance.
• Keep children under the age of eight
at a safe distance unless they are
constantly supervised.
• Do not allow children younger than
8 years of age to approach the
appliance during operation.
• Cleaning and maintenance should not
be performed by children without
supervision.
WARNING
To reduce the risk of fire, electrical shock, personal injury, or
damage when using the appliance, follow basic safety
precautions, including the following:

Important Safety Instructions
6
• This appliance and its accessible parts
get very hot during use.
• Do not touch the heating elements
during use.
• DO NOT TOUCH SURFACE UNITS
OR AREAS NEAR UNITS – Surface
units may be hot even though they
are dark in color. Areas near surface
units may become hot enough to
cause burns. During and after use, do
not touch, or let clothing or other
flammable materials come in contact
with surface units or areas near units
until they have had sufficient time to
cool. Among these areas are the
cooktop and surfaces facing the
cooktop. Surface units may be hot
even though they are dark in color.
• DO NOT HEAT UNOPENED FOOD
CONTAINERS: A buildup of
pressure can cause the containers to
burst.
• Do not use water on grease fires -
smother fire or flame or use a dry
chemical or foam-type extinguisher.
• CAUTION: Do not store items of
interest to children in cabinets above
a cooktop or on the backguard of a
cooktop - children climbing on the
cooktop to reach items could be
seriously injured.
• WEAR PROPER APPAREL: Loose-fitting
or hanging garments should never be
worn while using the appliance.
• Do not store or use gasoline or other
flammable vapors, liquids or
materials near this or any other
appliance.
• For safety reasons and to avoid
damage to your appliance, never sit,
stand, or lean on the appliance.
• Do not leave the packing materials
around the home. Sort the various
items of waste and take them to the
nearest specialized waste collection
facility.
• Do not use any part of the appliance
for storage. Flammable materials can
ignite and plastic items may melt or
burst into flame.
• Be aware of how rapidly the cooking
zones heat up. Avoid heating pans
when they are empty, there is a
danger of them overheating.
• Use only dry potholders - Moist or
damp potholders on hot surfaces
may cause burns due to steam. Do
not allow potholders to touch hot
heating elements. Do not use a towel
or other bulky cloth.

Important Safety Instructions
EN
7
• Fats and oils can catch fire if they
overheat. Do not leave the appliance
unattended while preparing foods
containing oils or fats. If fats or oils
catch fire, never use water to
extinguish the fire. Place a lid on the
pan and turn off the relevant cooking
zone.
• Do not use the Booster and Double
Booster functions to heat fats or oils,
as this is a fire hazard.
• Cooking must always be monitored.
Short cooking processes must be
continuously monitored.
• Activate the control lock in the
presence of children or pets able to
reach the cooktop.
• Do not place metal objects, such as
dishes or cutlery, on the surface of the
cooktop during use as they may
overheat.
• Do not insert sharp metal objects
(knives and utensils) into the slots.
• DO NOT USE FLAMMABLE
PRODUCTS TO CLEAN THE
APPLIANCE.
• Do not use or store flammable
materials near the appliance or
directly under the cooktop.
• Fire hazard: Do not store anything on
the cooking surfaces.
• Never Leave Surface Units
Unattended at High Heat Settings –
Boiling over causes smoke and
greasy spillovers that may ignite.
• Make Sure Reflector Pans or Drip
Bowls Are in Place – Absence of
these pans or bowls during cooking
may subject wiring or components
underneath to damage.
• Protective Liners – Do not use
aluminum foil to line surface unit drip
bowls or oven bottoms, except as
suggested in the manual. Improper
installation of these liners may result in
a risk of electric shock, or fire.
• Glazed Cookware – Only certain
types of glass, glass/ceramic,
ceramic, earthenware, or other
glazed cookware are suitable for
cooktop service without breaking due
to the sudden change in temperature.
• Use Proper Pan Size – This appliance
is equipped with one or more surface
units of different size. Select pans
having flat bottoms large enough to
cover the surface unit heating
element. The use of undersized pans
will expose a portion of the heating
element to direct contact and may
cause clothing to catch on fire. Using
the proper sized pan for the burner
will also improve efficiency.

Important Safety Instructions
8
• DO NOT USE AEROSOL SPRAYS IN
THE VICINITY OF THIS APPLIANCE
WHILE IT IS IN USE.
• Turn off the appliance after use.
• Switch the plates off after use. Never
rely only on the cookware detector.
• After use, turn off the cooking zones.
They will remain hot for a certain
period of time after switching them
off. Do not touch the surfaces of the
cooktop.
• DO NOT COOK ON BROKEN
COOKTOP — IF THE COOKTOP
BREAKS, CLEANING SOLUTIONS
AND SPILLOVERS CAN PENETRATE
THE BROKEN COOKTOP AND
CREATE A RISK OF ELECTRIC
SHOCK. CONTACT A QUALIFIED
TECHNICIAN IMMEDIATELY.
• CLEAN COOKTOP WITH
CAUTION – IF A WET SPONGE
OR CLOTH IS USED TO WIPE
SPILLS ON A HOT COOKING
AREA, BE CAREFUL TO AVOID
STEAM BURN. SOME CLEANERS
CAN PRODUCE NOXIOUS FUMES
IF APPLIED TO A HOT SURFACE.
• Supervise children carefully as they
cannot see the residual heat indicator
easily. Even after being turned off, the
cooking zone remains hot for a
certain amount of time. Make sure
that children never touch them.
• Do not place hot pans on the control
panel.
• Do not sit on the appliance.
• Do not use the cooktop as a work
surface.
• Do not block openings, ventilation
slots and heat dissipation vents.
• Cookware or griddles must be
positioned inside the perimeter of the
cooktop.
• All cookware must have smooth, flat
bottoms.
• If liquids boil over or spill, remove the
excess from the cooktop.
• Do not place materials or substances
which may melt (plastic or aluminum
foil) on the cooktop during cooking.
• Place the cookware directly on the
glass ceramic surface.
• Do not place empty pots and pans on
the cooking zones when the cooking
zones are switched on.

Important Safety Instructions
EN
9
• Take care not to spill acid substances
such as lemon juice or vinegar on the
cooktop.
• Do not spill sugar or sweet mixtures
onto the cooktop during cooking.
• Remove any traces of liquid from the
cover, if fitted, before opening it.
• Let the cooking surface cool down
before closing the cover.
• Cookware Handles Should Be Turned
Inward and Not Extend Over
Adjacent Surface Units. To reduce the
risk of burns, igniting flammable
materials and spillage due to
unintentional contact with the
cookware, the cookware handles
should be positioned so that they are
turned inward, and do not extend
over adjacent surface units.
• Do Not Cook on Broken Cooktop – If
cooktop should break, cleaning
solutions and spillovers may
penetrate the broken cooktop and
create a risk of electric shock.
Contact a qualified technician
immediately.
• Do not use abrasive or corrosive
detergents on the glass parts (e.g.
powder products, stain removers or
metal scouring pads).
• Do not use rough or abrasive
materials or sharp metal scrapers.
• Do not use cleaning products
containing chlorine, ammonia or
bleach on the steel parts or those with
metallic surface finishes (e.g.
anodizing, nickel or chrome plating).
• Do not use steam jets to clean the
appliance.
• Avoid letting heavy objects fall on the
cooktop surface.
• If cracks form, or if the glass ceramic
cooking surface breaks, turn the
appliance off immediately.
Disconnect the power supply and call
Technical Support.
• Do not use the cooktop if an oven
installed underneath is undergoing
the self-cleaning process.
• Do not touch or clean the cooktop
during operation or when the residual
heat warning lights are on.
• The glass ceramic surface is highly
resistant to impact. However, prevent
hard, solid objects from falling on the
cooking surface, as they may cause it
to break if they are sharp.

Important Safety Instructions
10
• People who have pacemakers or
other similar devices must make sure
that the operation of these devices is
not affected by the inductive field, the
frequency range of which is between
20 and 50 kHz.
• In conformity with the provisions
regarding electromagnetic
compatibility, the electromagnetic
induction cooktop comes under
group 2 and class B (EN 55011).
• This appliance complies with the
current standards and directives
regarding safety and
electromagnetic compatibility.
However, people who wear
pacemakers should maintain a
minimum distance of 8-12 inches
(20-30 cm) between the pacemaker
and the appliance when it is in
operation. Contact the pacemaker
manufacturer for further information.
• ONLY QUALIFIED SERVICE
PERSONNEL SHOULD PERFORM
REPAIRS. Service personnel must
disconnect the power supply before
servicing this unit.
• Move the appliance into the desired
position with the help of a second
person.
• Check that the surrounding cabinetry
material is heat-resistant.
• Check that the cabinetry has the
required openings.
• To avoid possible overheating, the
appliance must not be installed
behind a decorative door or a panel.
• The power cord must only be installed
or replaced by a qualified technician.
• Use cables that can withstand
temperatures of at least 90°C.
• ELECTRICAL GROUNDING IS
REQUIRED. It is the customer’s
responsibility to:
1. Contact a qualified electrician.
2. Ensure that the electrical system is
adequate and in compliance with
the National Electrical Code
ANSI / NFPA 70 Electrical Code
– latest edition – or the
CANADIAN ELECTRICAL CODE,
C22.11 – 1982 and C22.2 No.
01982 – or latest edition – and
all local codes and ordinances.
• Always check that the controls are in
the “zero” (off) position when the
appliance is not in use.
• Do not attempt to repair or replace
any part of this appliance unless
specifically recommended in this
manual. All other servicing should be
done by a qualified technician.
Important Safety Instructions
EN
11
• Use only dry potholders - Moist or
damp potholders on hot surfaces
may cause burns due to steam. Do
not allow potholders to touch hot
heating elements. Do not use a towel
or other bulky cloth.
• Do not stand or sit on the appliance.
• Remove all packing materials and
temporary labels from the appliance.
• DO NOT MODIFY THE APPLIANCE.
• Always wear personal protective
equipment before carrying out any
work on the appliance (installation,
maintenance, positioning or
handling).
• Switch off the power supply before
carrying out any work on the
appliance.
• Qualified personnel should carry out
the installation and servicing in
compliance with existing regulations.
• Do not attempt to repair the appliance
yourself or without the intervention of
a qualified technician.
• If the power cord is damaged,
immediately contact the technical
support service to replace the cord.
• Record the model and serial number
on Page 2 of this booklet. The model
and serial numbers are on the
appliance ID plate. The ID plates are
visibly located under the appliance.
THE ID PLATE MUST NOT BE
REMOVED.
State of California Proposition 65 Warnings
NOTES: The California Safe Drinking Water and Toxic Enforcement Act requires
the Governor of California to publish a list of substances known to the State of
California to cause cancer, birth defects or other reproductive harm, and requires
businesses to warn customers of potential exposure to such substances.
WARNING: This product contains a chemical known by the State of California to
cause cancer, birth defects or other reproductive harm.
This appliance can cause low-level exposure to some of the substances listed,
including benzene, formaldehyde, carbon monoxide, toluene, and soot.
Important Safety Instructions
12
• This appliance is designed for
cooking or baking food in the home.
Any other use is inappropriate.
• This appliance is not designed to work
with external timers or remote control
systems.
The manufacturer accepts no liability
for damage to persons or property
caused by:
• use of the appliance in any way other
than stipulated herein;
• failure to comply with the instructions
in the User Manual;
• tampering with any part of the
appliance;
• use of after-market replacement parts.
• This User Manual is an integral part of
the appliance and must be kept intact
and available to users throughout the
life cycle of the appliance.
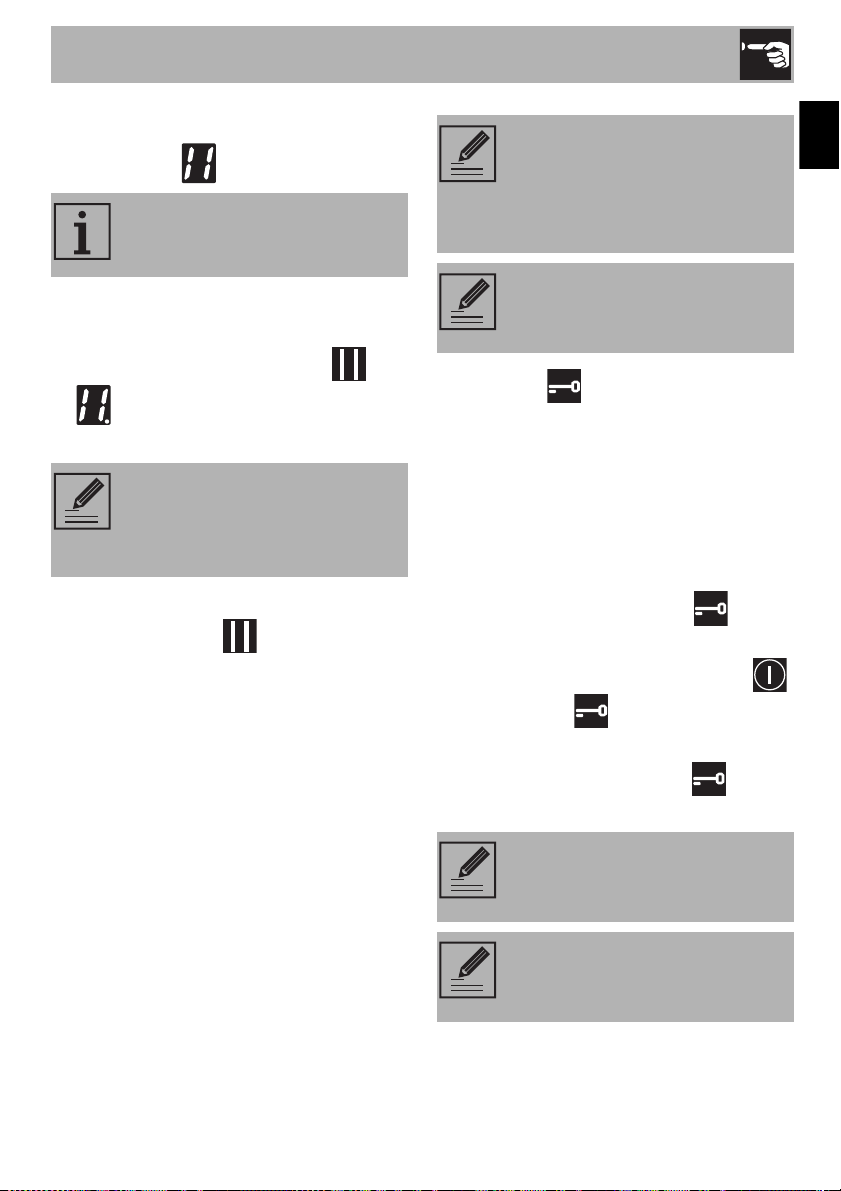
How to read the user manual
This user manual uses the following reading
conventions:
1. Order of use instructions.
• Stand-alone instructions.
SAVE THESE INSTRUCTIONS
Instructions
General information on this user
manual, on safety, and on final
disposal.
Description
Description of the appliance and its
accessories.
Use
Information on the use of the
appliance and its accessories,
cooking advice.
Cleaning and maintenance
Information for proper cleaning and
maintenance of the appliance.
Safety instructions
Information
Description
13
EN
1 Description
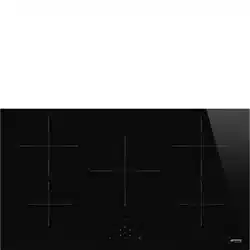
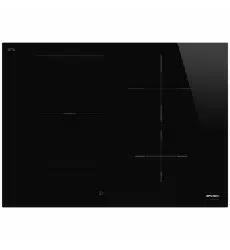
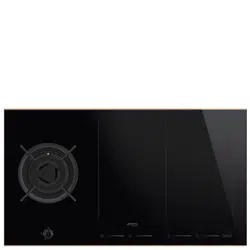
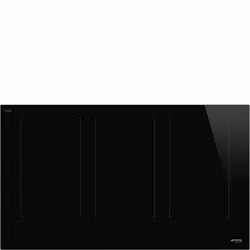
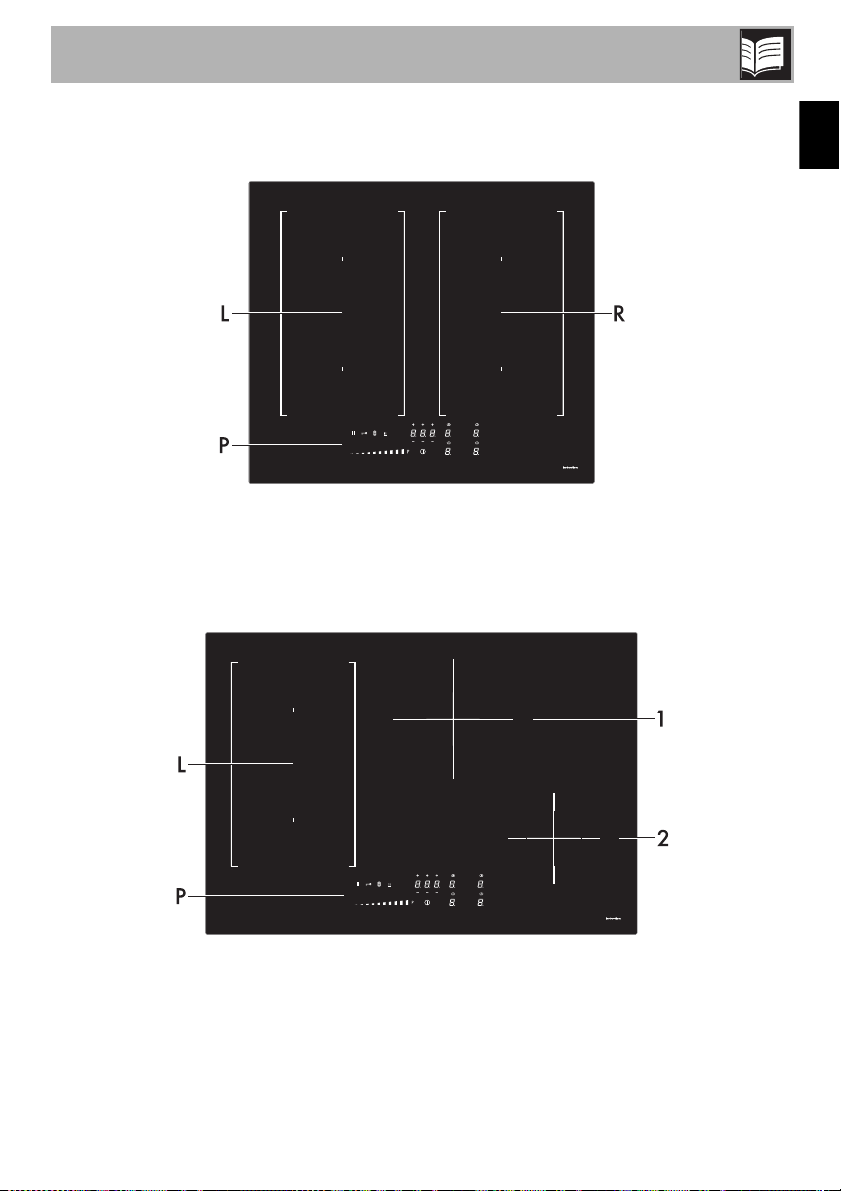
1.1 General description
24 in - 610 mm
L = Left cooking zone
P = Control panel
R = Right cooking zone
30 in - 762 mm
L = Left cooking zone
P = Control panel
1 = Rear central cooking zone
2 = Front right cooking zone
Description
14
36 in - 914 mm
L = Left cooking zone
C = Central cooking zone
P = Control panel
R = Right cooking zone
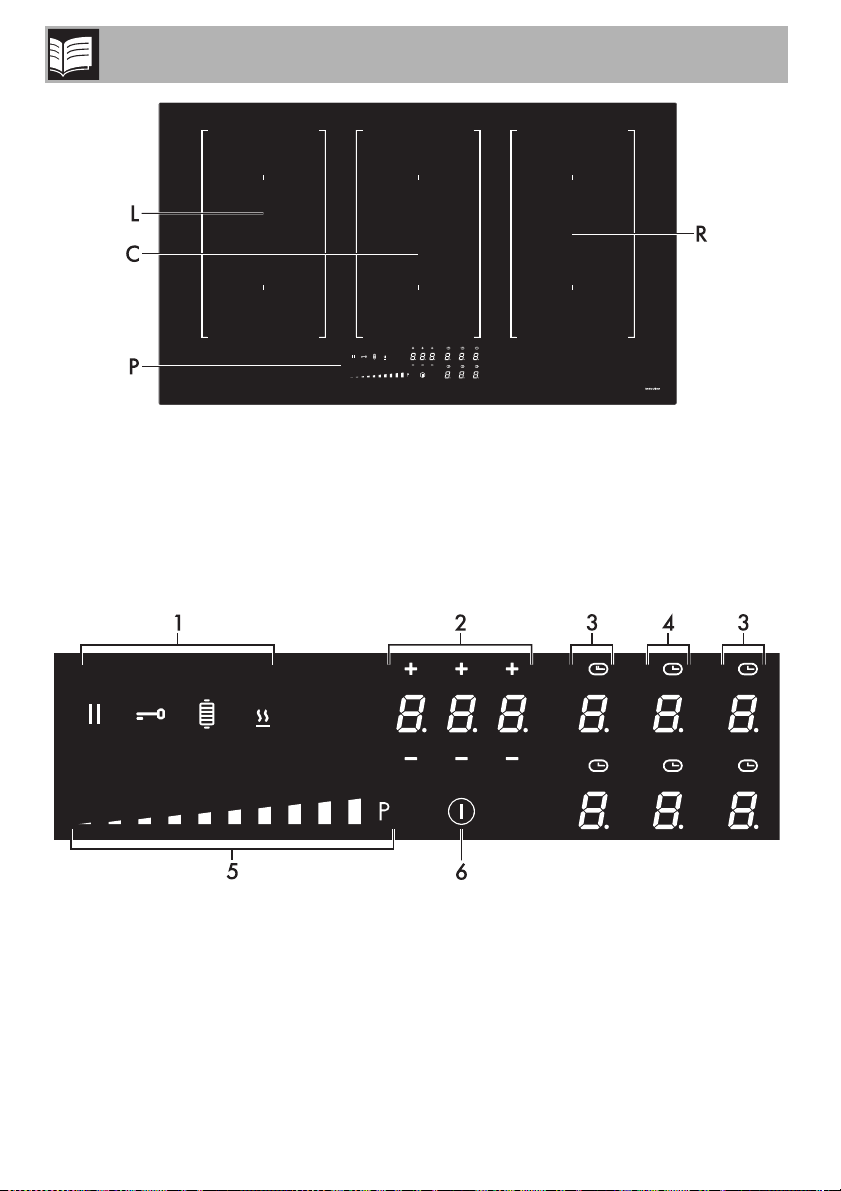
1.2 Control panel
1 Function buttons
2 Timer buttons and display
3 Cooking zone buttons and display
4 (36 in - 914 mm model only)
5 Scroll bar
6 On/Off button
Description
15
EN
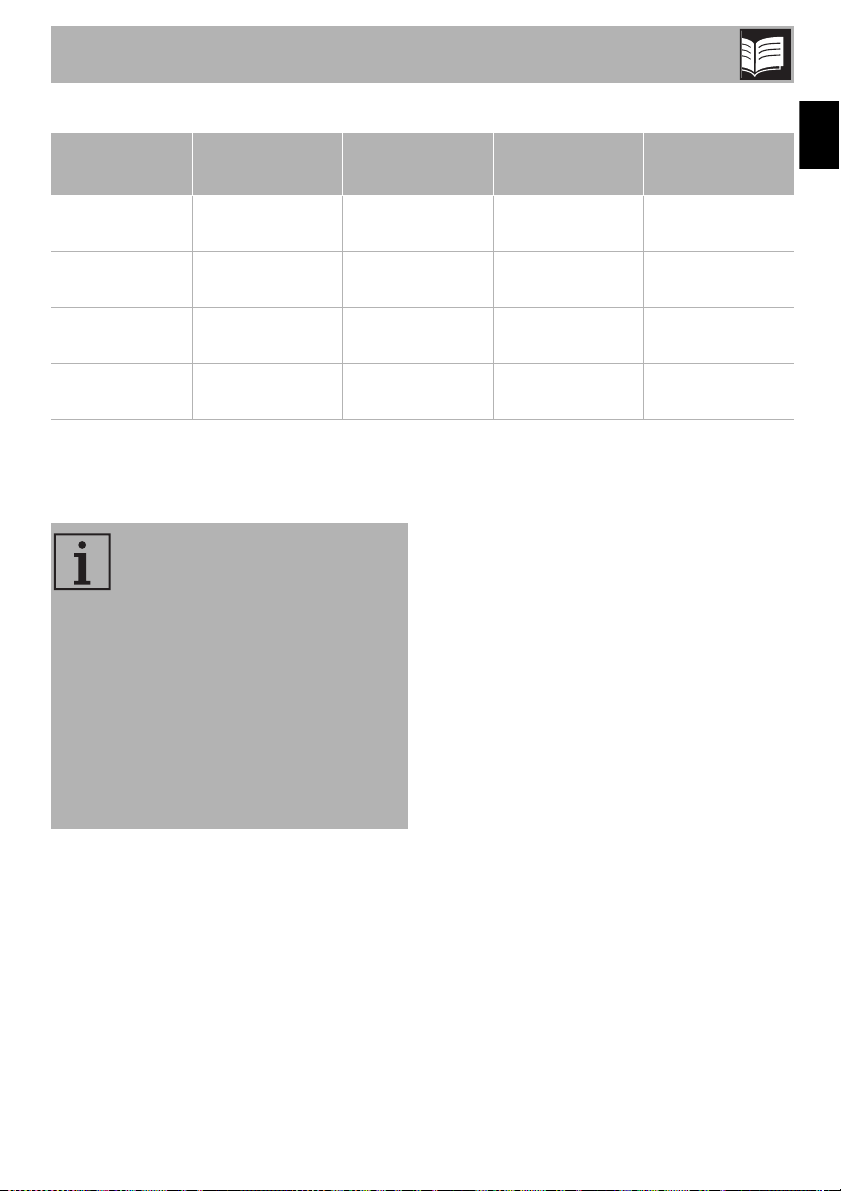
Table of maximum power consumption
* power levels are approximate and may vary according to the pan used or the settings.
Advantages of induction cooking • Energy saving due to the direct
transmission of energy to the pan
(special cookware made of
magnetizable materials is required)
compared to traditional electric cooking.
• Greater safety, as energy is only
transmitted to the pan placed on the
cooktop.
• High efficiency energy transmission from
the induction cooking zone to the base
of the pan.
• Rapid heating speed.
• Reduced danger of burns as the cooking
surface is only heated under the base of
the pan; food that overflows does not
stick.
Zone
Dimensions
H x L
Level 9 Booster Double Booster
Single
71 in x 95 in
2100 W 2500 W 3000 W
180 cm x 240 cm
Multizone
142 in x 95 in
3000 W 3700 W -
360 cm x 240 cm
Zone 1
79 in x 79 in
2300 W 3000 W -
200 cm x 200 cm
Zone 2
63 in x 63 in
1400 W 1700 W 2100 W
160 cm x 160 cm
NOTES: The appliance is fitted
with an induction generator for
each cooking zone. Each
generator, located under the glass
ceramic cooking surface, creates
an electromagnetic field that
induces a thermal current in the
base of the pan. This means the
heat is no longer transmitted from
the cooktop to the pan, but it is
created directly inside the pan by
the inductive current.
Description
16
Power control
The cooktop is fitted with a power control
module that optimizes / limits energy
consumption. If the total set power level
exceeds the maximum allowed limit, the
circuit board will automatically regulate the
power supplied by the hot plates.
The module tries to maintain the maximum
power levels that can be supplied. The
levels that are automatically set by the
control module will be shown on the
display.
NOTES: Priority is given to the last
zone that was set.
NOTES: The power control
module does not affect the total
power consumption of the
appliance.
Use
17
EN
2 Use
2.1 Warnings
High temperature
Burn hazard
• Protect your hands with thermal gloves
during use.
• Do not touch or clean the cooktop
during operation or when the residual
heat warning lights are on.
• Do not place empty pots and pans on
the cooking zones when they are
switched on.
• Do not allow children younger than 8
years of age to approach the appliance
during operation.
• Activate the control lock in the presence
of children or pets able to reach the
cooktop.
• After use, turn off the cooking zones.
They will remain hot for a certain period
of time after switching them off. Do not
touch the surfaces of the cooktop.
High temperature
Danger of fire or explosion
• Do not use or store flammable materials
near the appliance or directly under the
cooktop.
• Do not use cans, unopened containers,
dishes or plastic containers for cooking.
• Do not leave the appliance unattended
during cooking operations that could
release fats or oils.
• In the case of cracks or fractures or if
you cannot switch off the appliance,
disconnect the power supply
immediately and call Customer Service.
Improper use
Risk of damage to surfaces
• Do not use the cooktop if an oven
installed underneath is undergoing the
self-cleaning process.
• Use only pans with perfectly flat and
smooth bases on the cooktop.
• Avoid letting heavy objects fall on the
cooktop surface.
• Do not use the cooktop as a work
surface.
Use
18
2.2 Using the cooktop
All the appliance's commands and controls
are grouped together on the front panel.
The induction cooktop is controlled using
the Touch control sensor buttons. Lightly
touch a symbol on the glass ceramic
surface. Each correct touch is confirmed
with a beep.
Preliminary operations
In order to remove any moisture that has
accumulated during manufacturing, for a
correct operation of the electronic circuits
and the control keypad:
1. Remove the protective film from the
appliance's external surfaces and from
the accessories.
2. Remove any labels (except the
nameplate with the technical data).
3. Fill a pot with water, place it on the
cooking zones and switch them on one
after the other for 3-4 minutes at the
highest setting.
Switching on the cooktop for the first time
When the appliance is used for the first
time, after being connected to the mains the
flashing symbol appears on the
display. It is used to access the appliance’s
technical menu and is intended only for
Technical Support personnel.
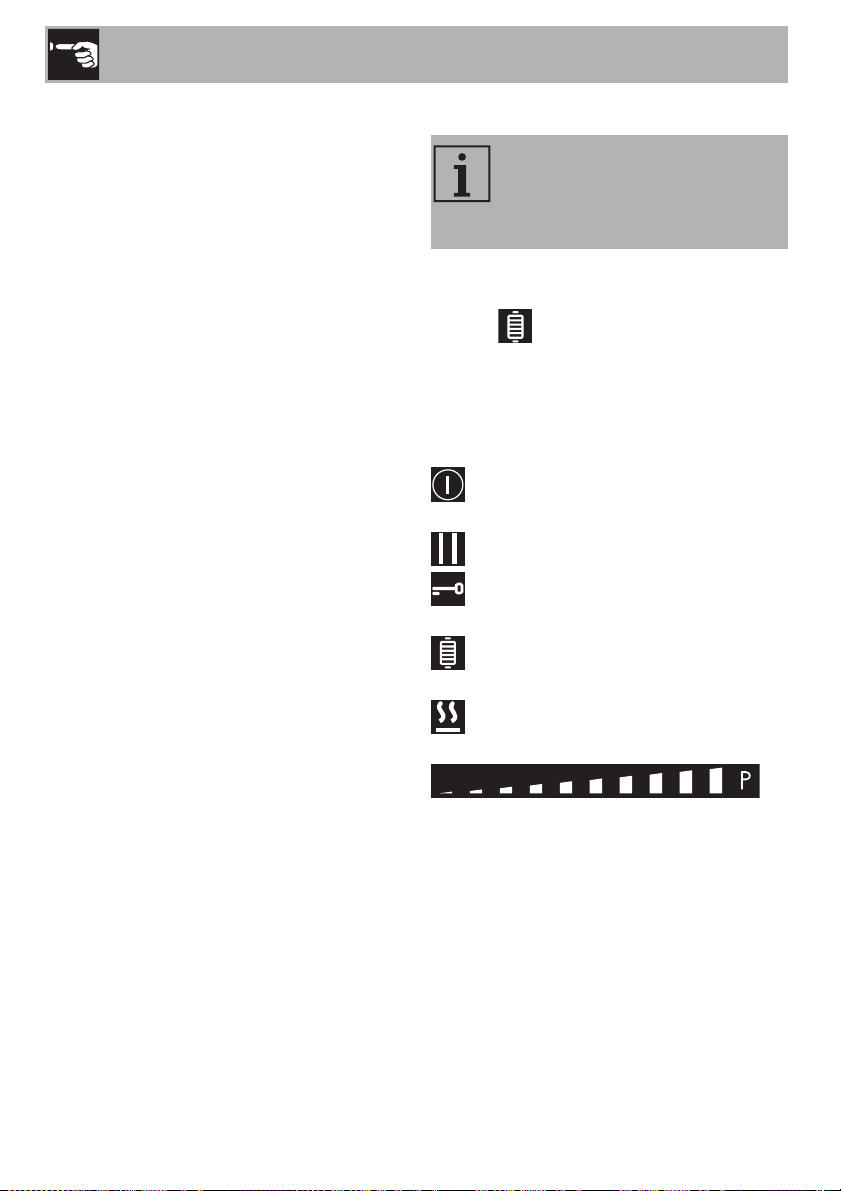
List of symbols
On/Off button: turns the cooktop on or
off.
Pause button: pauses cooking.
Control lock button: prevents
accidental operation of controls.
Grill function button: activates the Grill
function.
Warming function button: activates the
keep warm function.
Scroll bar: increases or decreases the
power level of a cooking zone.
NOTES: During the first connection
to the mains supply, an automatic
check is run that turns on all the
lights for a few seconds.
Use
19
EN
Cooking zones display
The buttons for selecting the cooking zones
and the timer icons above each of them are
located in this zone.
Timer display
The controls for setting the independent
timer and the timer for the cooking zones
are located in this area.
Minimum pan diameter
Make sure that the minimum diameter of the
pans are those indicated in the following
table, for both configurations.
Bear in mind the following:
• Do not exceed the limits of the zones
printed on the cooktop.
• Do not cover the control panel.
• Do not place the pans close to the
edges of the glass.
• If you use a pan with a diameter less
than the one indicated in the “minimum
Ø (inches/cm)” column, it might not be
detected.
Minimum and maximum sizes for a griddle
used in the Multizone configuration
(inches/cm):
Cookware suitable for use in induction
cooking
Cookware used for induction cooking must
be made of metal, have magnetic
properties and a sufficiently large base.
Suitable cookware:
• Enameled steel cookware with thick
bases.
• Cast iron cookware with an enameled
base.
• Cookware made of multilayer stainless
steel, ferritic stainless steel and aluminum
with a special base.
Zone
Ø
minimum
Ø
recommended
Single 5 in - 11 cm 7 in - 18 cm
Multizone 8 in - 19 cm 9 in - 22 cm
Zone 1 5 in - 11 cm 8 in - 19 cm
Zone 2 4 in - 9 cm 6 in - 16 cm
Model inches cm
24 in - 610 mm
30 in - 762 mm
36 in - 914 mm
min. 8 x 8
max 9 x 14
min. 19 x 19
max 22 x 36
NOTES: The Multizone function
can only be activated for zones
marked “L”, “C” and “R” - see
“General description”.
Use
20
Unsuitable cookware:
• Copper, stainless steel, aluminum,
fireproof glass, wood, ceramic and
terracotta cookware.
To understand whether the pan is suitable,
bring a magnet close to the bottom: if it is
attracted to the pan, the pan is suitable for
induction cooking.
If you do not have a magnet, you can put a
small amount of water in the pan, place it
on a cooking zone and start the plate.
If the symbol appears on the display, it
means the pan is not suitable.
Switching the cooktop on and off
Keep the On/Off button pressed for a
few seconds to activate the cooktop.
Press it again to deactivate it.
Overheating protection
If the cooktop is used on full power for a
long time, it may be difficult for the
electronics to cool down if the room
temperature is high.
If the temperature of the internal electronic
components exceeds the safety threshold,
the appliance will switch off automatically
and the following symbols - -
- will be displayed in sequence (see
“Error codes”).
NOTES: Only use cookware that
has a perfectly flat bottom, which is
suitable for induction cooktops.
Using cookware with an uneven
bottom could affect the efficiency
of the heating system and even
prevent the cookware from being
detected on the plate.
NOTES: Make sure that the pans
do not cover the control panel.
NOTES: If a power level is not
selected within a few seconds, the
cooktop will be automatically
deactivated.
Use
21
EN
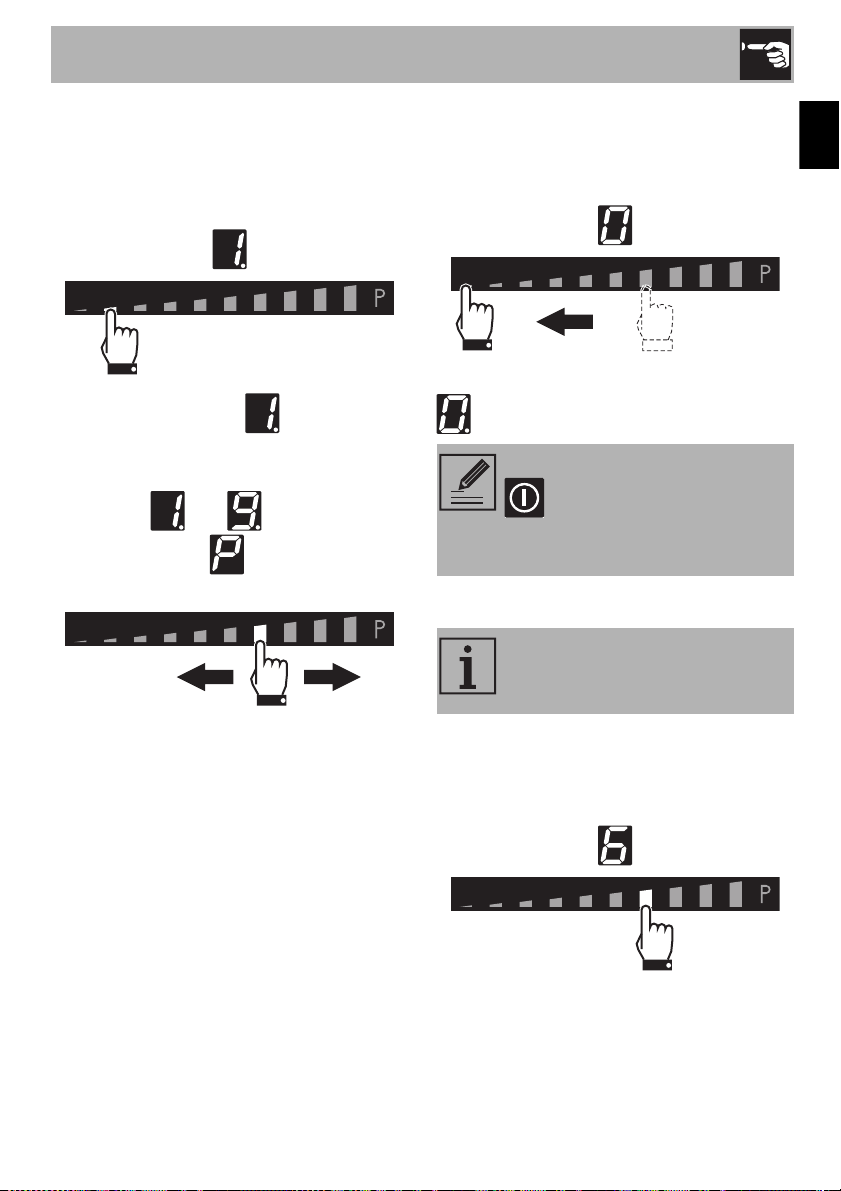
Regulating the cooking zone
After selecting a cooking zone:
1. Place your finger on the left-hand side of
the scroll bar of the cooking zone to be
used.
The power level is now .
2. Slide your finger to the left or right on the
scroll bar to select the power level,
between and or activate the
Booster function (see “Booster
Function”).
The display of the zone being used will
indicate the power level selected.
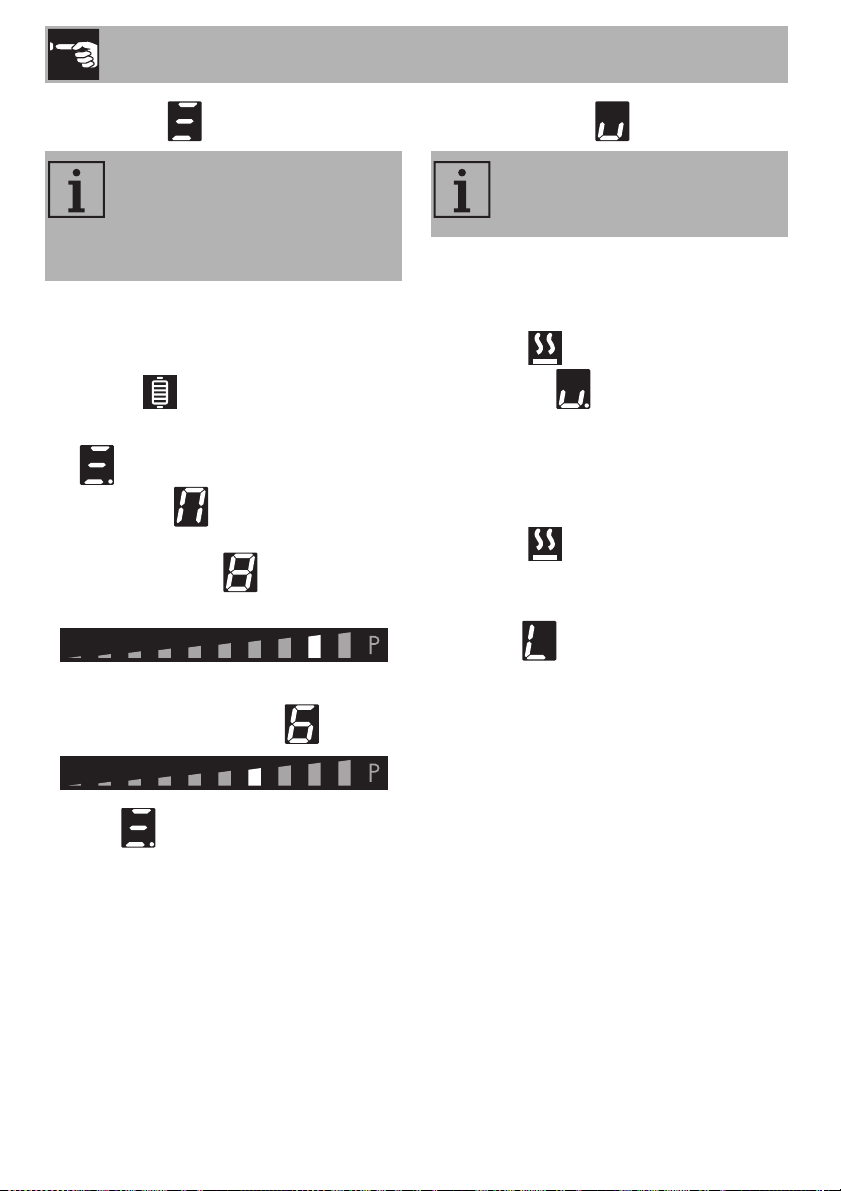
Switching off the cooking zone
1. Slide your finger all the way to the left on
the scroll bar of the cooking zone you
wish to turn off.
The display of the selected zone indicates
.
Quick selection
After switching on the cooktop and
selecting a cooking zone:
• Place a finger at approximately the
power level required on the scroll bar.
NOTES: Hold the On/Off button
down for at least 2 seconds
to switch off all cooking zones at
the same time.
NOTES: This function allows you
to set the cooking zones to the
required power level quickly.
Use
22
Limiting the cooking time
The cooktop is fitted with an automatic
device that limits the time it is used for.
If the cooking zone settings are not
changed, the maximum operating time for
each individual zone will depend on the
power level selected.
When the device for limiting the time of use
is activated, the cooking zone turns off, a
short sound is emitted and if the zone is hot,
the symbol appears on the display.
Booster Function
After switching on the cooktop and
selecting a cooking zone:
1. Place a finger on the left of the scroll bar.
The display of the cooking zone used turns
on: the power level indicated is .
Set power level
Maximum cooking
duration in hours
6
6
-
5
4
- - -
1 ½
Improper use
Burn hazard
• Do not use the Booster and Double
Booster functions to heat fats or oils as
they could catch fire.
NOTES: Through this function, the
maximum deliverable power of the
cooking zone can be used, which
is useful for bringing large amounts
of water to a boil.
Use
23
EN
2. Move your finger to the right of the scroll
bar to select the Booster function .
The display of the cooking zone used will
show .
The Booster function can be activated
quickly.
• After switching on the cooktop, place
your finger at the far right of the scroll
bar of the cooking zone you wish to use
(on the symbol).
Double Booster Function
The Double Booster function allows more
power to be supplied than with the Booster
function.
After activating the Booster function for a
cooking zone, press the symbol at the
far right of the scroll bar. The symbols -
and will be displayed in
sequence.
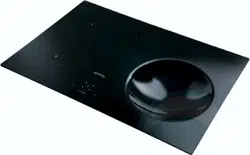
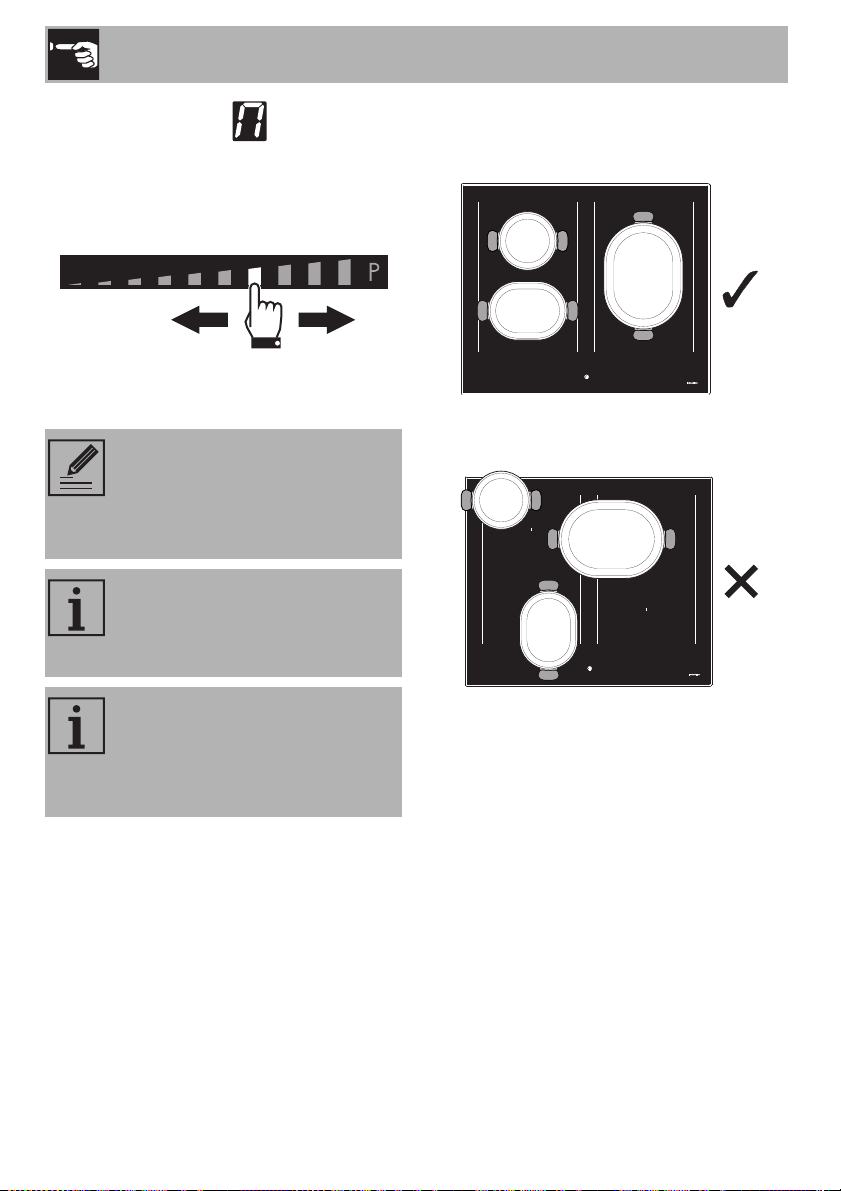
Multizone Function
After switching on the cooktop:
1. Place a finger simultaneously on the
buttons of two cooking zones, one
above the other.
NOTES: The Booster function
remains active for a maximum of 5
minutes, after which the power is
reduced automatically to level 9.
NOTES: There is no Double
Booster Function in cooking zone
1 of the 30-inch (762 mm) model.
NOTES: This function can be used
to operate two cooking zones
(front and rear) when using pans
such as fish kettles or rectangular
pans.
Use
24
After a short beep, the symbol will
appear next to the button of the rear zone.
The Multizone function is now active.
2. Use the left-hand scroll bar to set the
required cooking power.
The same parameters are set for both
cooking zones.
If a large, oval or oblong pan is being
used, make sure that it is placed in the
center of the cooking zone.
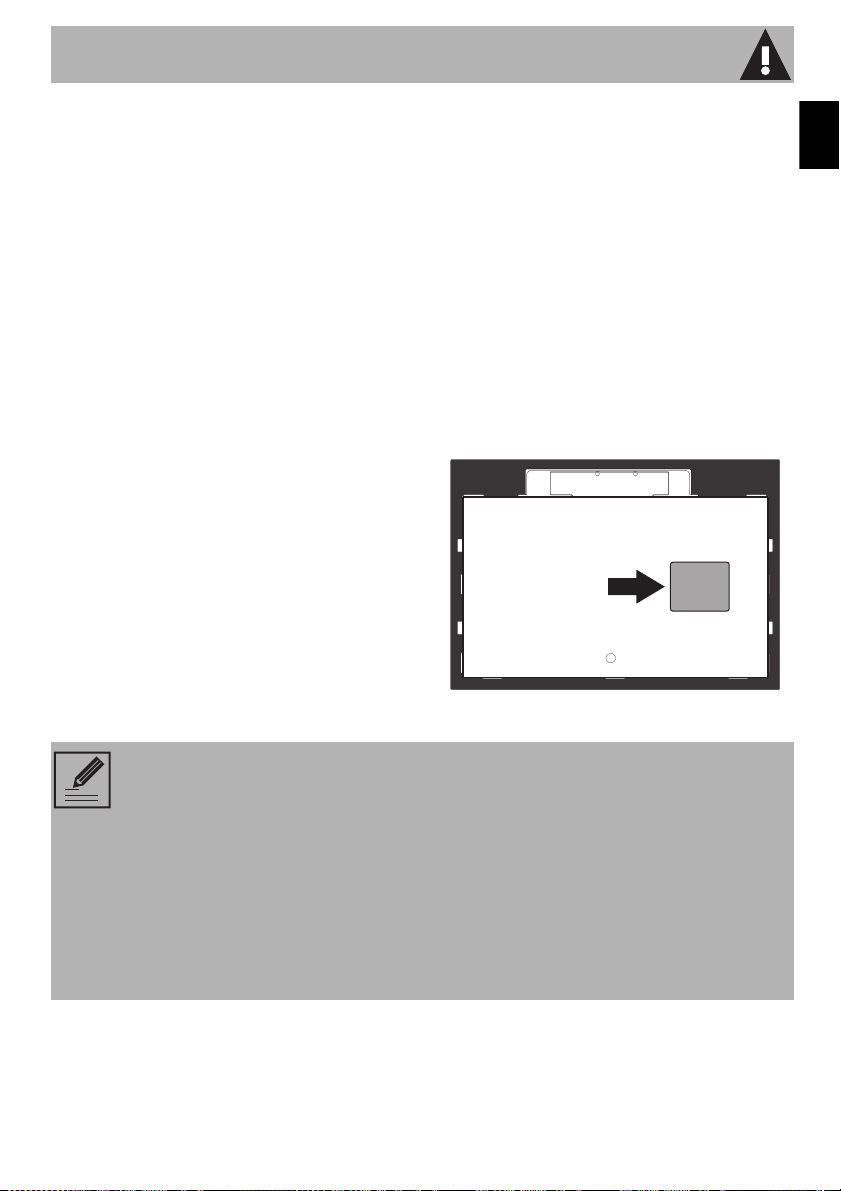
Example of correct pan position
Example of incorrect pan position
NOTES: The Multizone function
can only be activated for zones
that are vertically connected
(zones marked “L”, “C” and “R” -
see “General description”).
NOTES: This function
automatically divides the power
equally between both of the plates
used.
NOTES: It is not possible to
activate the Double Booster
function for the cooking zones on
which the Multizone function is
active.
Use
25
EN
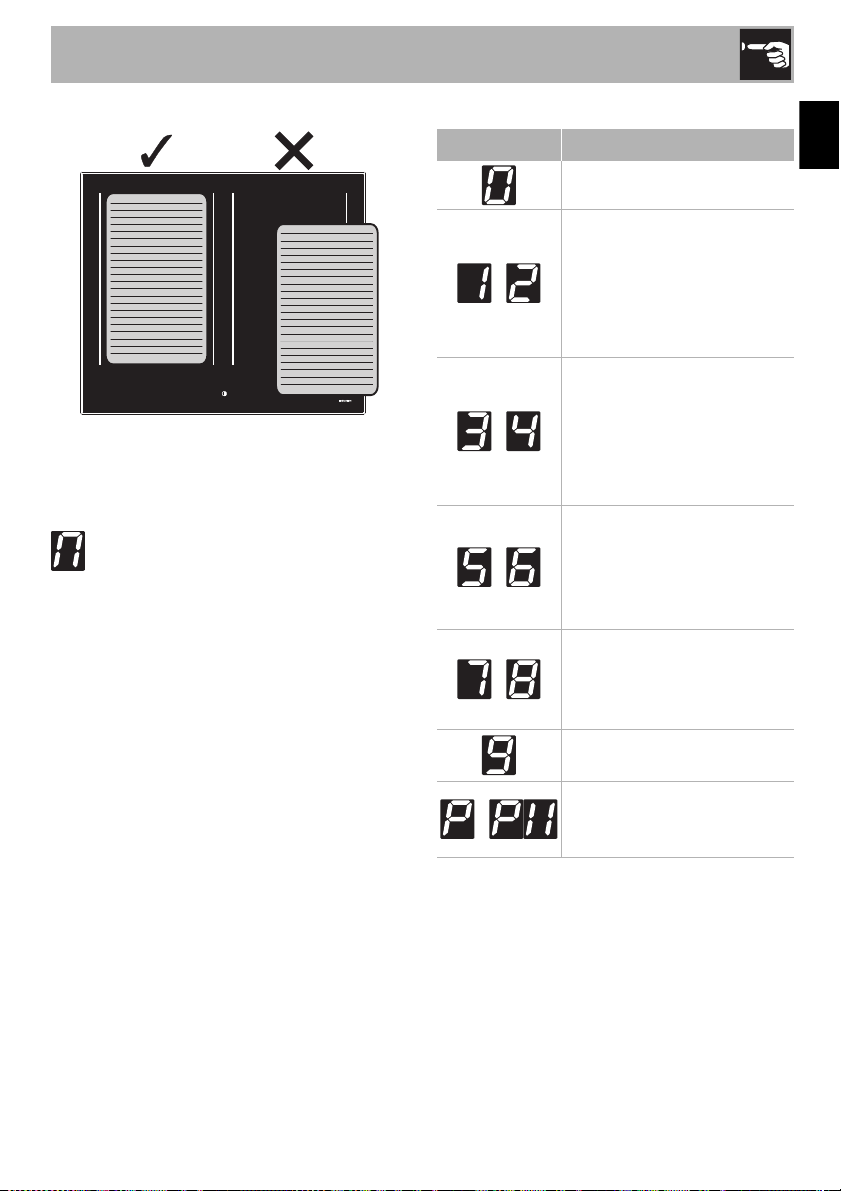
Examples of griddle position
To deactivate the Multizone function:
Press the buttons of the cooking zones
activated in Multizone at the same time. The
symbol disappears and the two zones
can be adjusted separately.
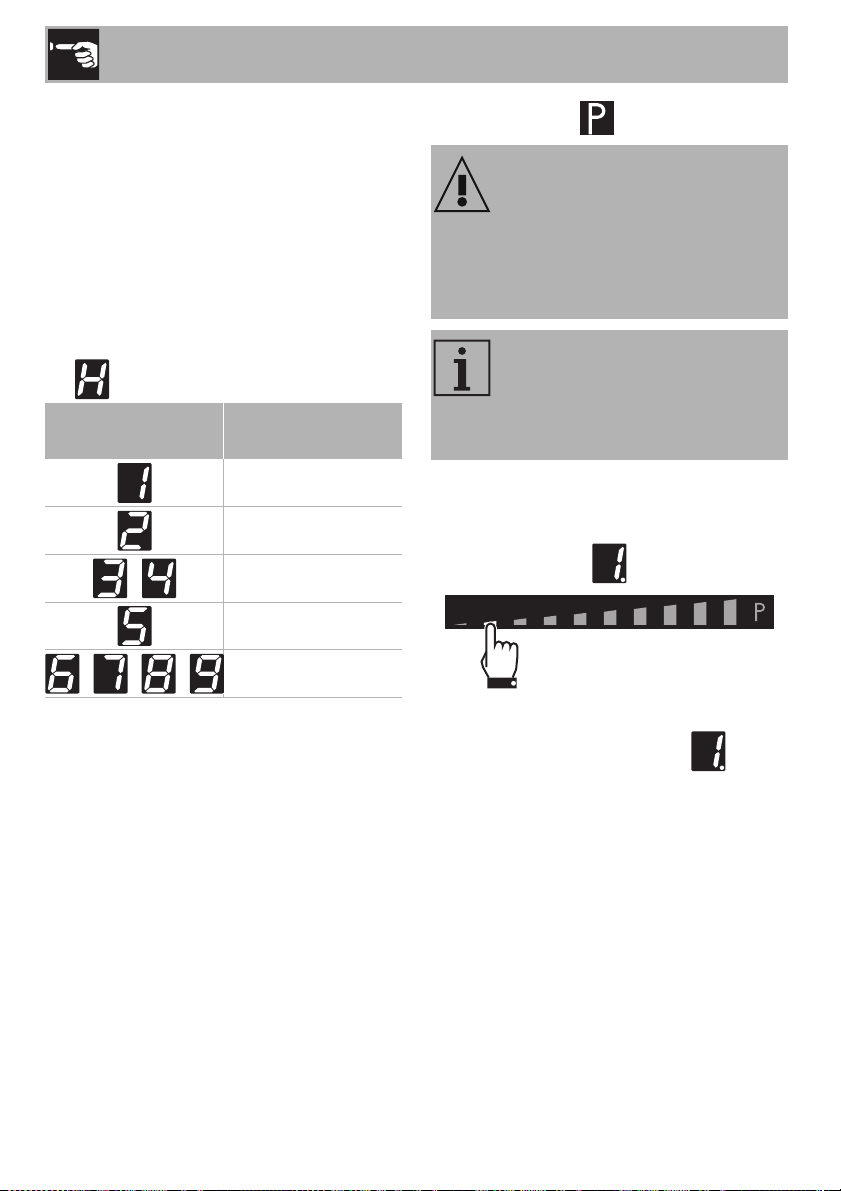
Power levels
The power of the cooking zone can be set
to various levels. The following table shows
the power levels that are suitable for
preparing various types of food. The
settings may vary depending on the amount
of food and consumer taste.
* see Booster and Double Booster function
Power level Suitable for:
OFF position
-
Cooking small amounts
of food (minimum power),
reheating food,
keeping small amounts of
water boiling, and whipping
egg yolk or butter sauces.
-
Cooking solid or liquid foods,
keeping water boiling,
defrosting frozen foods,
making 2- or 3-egg omelets,
fruit and vegetable dishes,
various preparations.
-
Cooking large quantities of
food, roasting larger portions,
stewing meat, fish and
vegetables, simmering food,
making jams, etc.
-
Roasting meat or fish, sautéing
steaks or liver with flour,
browning meat and fish,
eggs, etc.
Roasting, browning,
cooking, etc.
-
Deep-frying potatoes, etc.,
bringing water to boil quickly
(maximum power)*.
Use
26
Residual heat
If the cooking zone is still hot after being
switched off, the symbol will appear on
the display. The symbol will disappear
when the temperature drops below 140°F
(60°C).
Energy saving tips
• The diameter of the base of the pan must
not be greater than the width of the
cooking zone printed on the cooktop.
• Pans must not be placed outside the
perimeter of the cooktop or over the
front control panel.
• When buying a pan, check whether the
diameter indicated refers to the base or
to the top of the pan, as the top is almost
always larger than the base.
• When preparing dishes with long
cooking times, you can save time and
energy by using a pressure cooker,
which also helps to retain vitamins
contained in the food.
• Make sure that the pressure cooker
contains enough liquid, as overheating
caused by the lack of water could
damage the pan and the cooking zone.
• If possible, always cover pans with a
suitable lid.
• Choose the right pan for the quantity of
food to be cooked. A large, half-empty
pan wastes energy.
Improper use
Burn hazard
• Supervise children carefully as they
cannot easily see the residual heat
indicator. In fact, even after being
switched off, the cooking zone remains
hot for a certain period of time. Make
sure that children never touch the
cooktop.
NOTES: Under certain
circumstances, if the cooktop and
an oven are used at the same time,
the maximum power limit of your
electrical system might be
exceeded.
Use
27
EN
2.3 Special features
Pause function
To activate the Pause function:
1. Switch on at least one cooking zone.
2. Press and hold the pause button . The
symbol appears on the displays of
all the cooking zones.
To deactivate the Pause function:
1. Press and hold the button. The pause
symbol that has just been pressed starts
to flash.
2. Press any button apart from the Pause
button.
3. The pause function is deactivated and
the previously set functions are restored.
Control lock
This function is useful as it allows the
appliance to be cleaned while it is in
operation.
To activate the control lock function, there
must be at least one active cooking zone
on the appliance or the Pause function must
be active.
• Press the control lock button for at
least one second.
All the buttons, apart from the On/Off
and control lock buttons, are locked.
To deactivate the control lock:
1. press the control lock button again
for at least one second.
NOTES: This function pauses the
operation of all the cooking zones.
NOTES: The pause function can
be maintained for a maximum of
10 minutes, after which the
appliance switches off.
NOTES: The cooking time
limitation, the residual heat
indicators and the control lock
function remain enabled during the
Pause function.
NOTES: When the power comes
back on after a power failure, the
pause function will be deactivated.
NOTES: When power comes
back on after a power failure, the
control lock will be deactivated.
NOTES: If the appliance is turned
off and on again, the control lock
remains active.
Use
28
Grill Function
To activate the Grill function:
1. Place a griddle or a long pan on the left
zones.
2. Press the button, which will start to
flash.
The symbol appears on the front zone
display and the symbol appears on the
rear zone display. The scroll bar will be set
automatically to level (preheating
phase).
After two minutes of operation, the power
level will be lowered to level .
Press the button and use the scroll bar
to modify the power level at any time.
Warming Function
To activate the Warming function, turn on
the cooktop and then:
1. Select a cooking zone.
2. Press the button to activate the
function, the symbol appears on the
display of the selected cooking zone.
To deactivate the Warming function:
1. Select the cooking zone on which the
function is active.
2. Press the button.
2.4 Additional functions
Child lock
This function us used to prevent functions
from being activated by mistake (e.g. by
children).
To activate the child lock, the appliance
must be on, but with the zones deactivated:
1. Press and hold any cooking zone
display.
The slider bar shows an animation.
2. Release the display and slide your finger
on the bar from left to right.
NOTES: This function is used to
automatically activate the
Multizone function for the left
zones only. It is used when using a
griddle or cooking with long pans.
NOTES: This function allows you
to keep cooked food warm or to
keep water boiling.
Use
29
EN
The child lock function is active and the
symbol appears on the cooking zone
displays.
To deactivate the child lock, with the
appliance switched on:
1. Press and hold any cooking zone
display.
The slider bar shows an animation.
2. Release the display and slide your finger
on the bar from right to left.
Rapid heating
The rapid heating function heats one
cooking zone at maximum power for a
limited time, after which it continues cooking
at the set power level.
After selecting a cooking zone:
• Press and hold a power level (from
to ) for at least 3 seconds.
The symbol appears on the cooking
zone display.
After the heating time has elapsed, the
cooking zone reverts to the previously
selected power level.
This function can be deactivated by
pressing and holding the set power level for
3 seconds or by selecting a lower power
level.
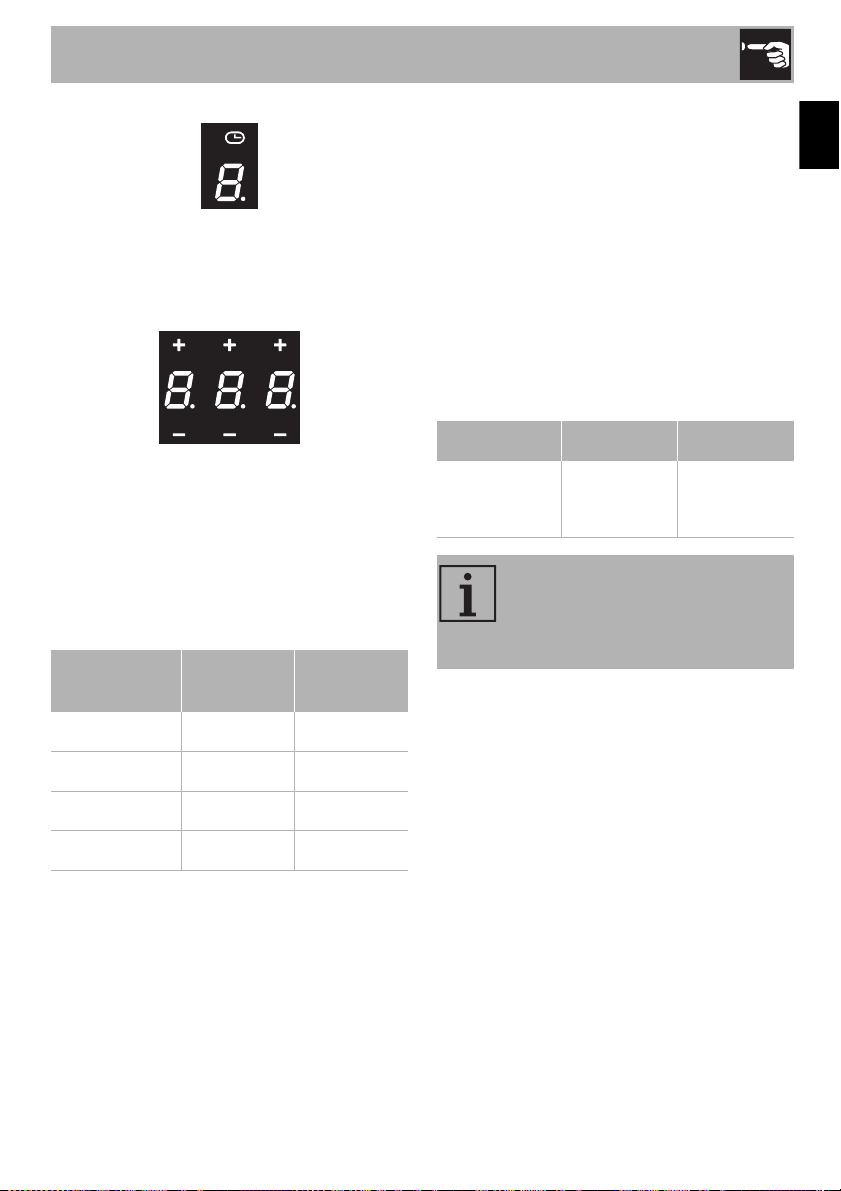
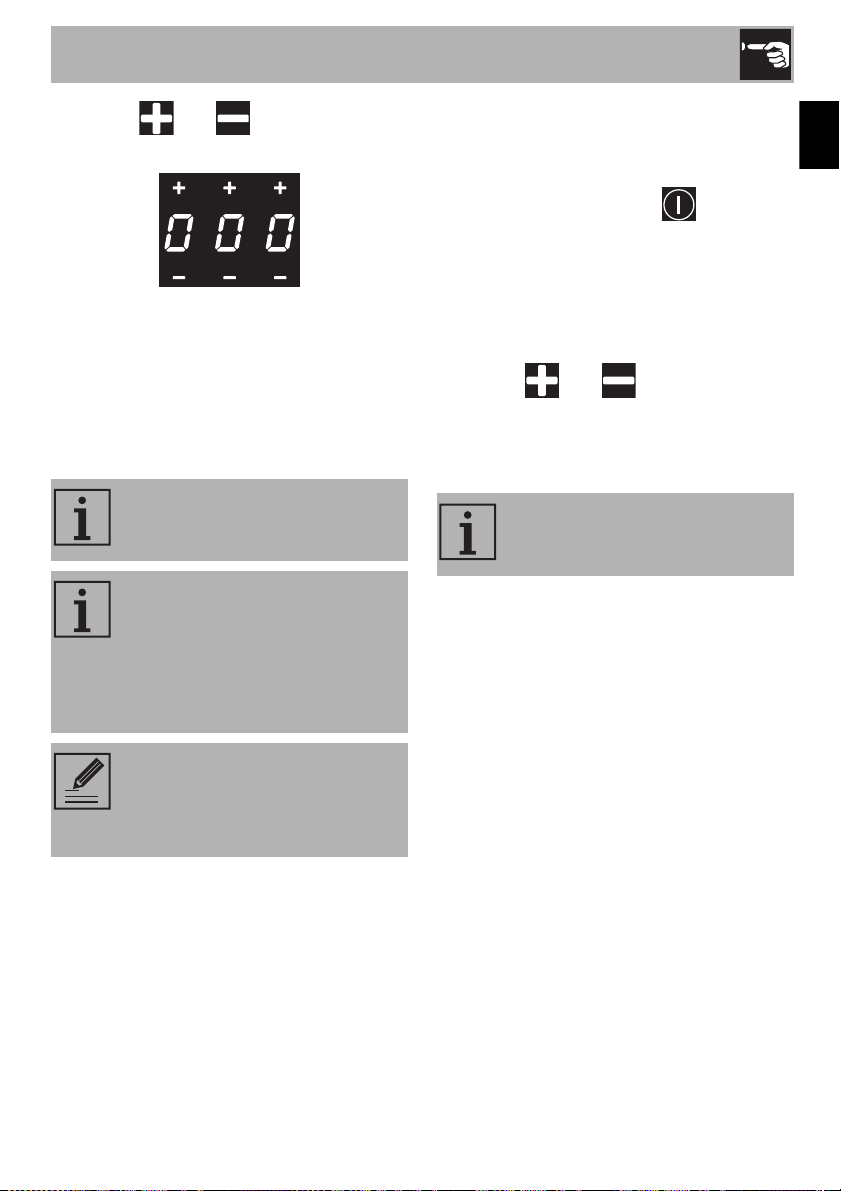
Minute timer
After switching on the cooktop, without
selecting a cooking zone:
1. Touch the central zone of the timer
displays.
NOTES: When power comes
back on after a power failure, the
child lock function will remain
active.
Once deactivated, the child lock
cannot be reactivated. To
reactivate it, you have to turn the
appliance off and then on again.
NOTES: This function is not
available for power levels ,
Booster and Double booster
.
NOTES: This function is used to set
a timer that will emit a sound when
the set time elapses.
Use
30
2. Use the and buttons to select
the required time.
The first digit on the left is used to select the
hours, the middle one to select the tens of
minutes and the one on the right to select
the minutes.
3. The timer will start the countdown after
10 seconds.
4. When the time elapses, a series of beeps
will sound. Press any button to deactivate
them.
Modifying and deactivating the minute
timer
To modify or deactivate the minute timer
during the countdown:
1. Press the On/Off button to activate
the cooktop (if it is in stand-by).
The timer display will indicate the minutes
that were set.
2. Use the and buttons to modify
or reset the timer.
3. After 10 seconds, the timer will start the
new countdown or will be deactivated.
Minute timer on cooking zones
To activate additional minute timers after at
least one cooking zone has been activated:
1. Select a power level.
2. Touch the central zone of the timer
displays.
The flashing symbol appears above
the cooking zone display.
NOTES: Touch the timer display
within 3 seconds of switching on
the appliance, otherwise it will
deactivate and the appliance will
have to be restarted.
NOTES: A maximum of 9 hours
and 59 minutes can be set.
NOTES: The minute timer does not
switch off the cooking zones, it
only warns the user when the set
number of minutes has passed.
NOTES: This function allows you
to set additional independent
timers at the same time, the number
of which depends on the number
of cooking zones available.
Use
31
EN
3. Use the and buttons to select
the required time.
4. Timed cooking will start a few seconds
after the last selection was made.
At the end of the set time, a buzzer warns
the user that timed cooking has finished.
5. Press any button to deactivate the
buzzer.
Modifying or deactivating timed cooking
To modify timed cooking during the
countdown:
1. Press the On/Off button to activate
the cooktop (if it is in stand-by).
2. Press the display button of the timed
cooking zone.
The timer display will indicate the minutes
that were set at the start.
3. Use the and buttons to modify
or reset the timer.
4. After 10 seconds, the timer will start the
new countdown or will be deactivated.
NOTES: A maximum of 9 hours
and 59 minutes can be set.
NOTES: The function can be
activated on multiple cooking
zones at the same time. The time
indicator and the flashing LED refer
to the next cooking zone to be
switched off
NOTES: The minute timer does not
switch off the cooking zones, it
only warns the user when the set
number of minutes has passed.
NOTES: An independent timer can
be set during timed cooking.
Use
32
Recall Function
If the appliance has been switched off
unintentionally, carry out the following
procedure within 6 seconds:
1. Switch on the appliance.
The pause button starts to flash.
2. Press the pause button immediately
to restore the functions that were
previously active.
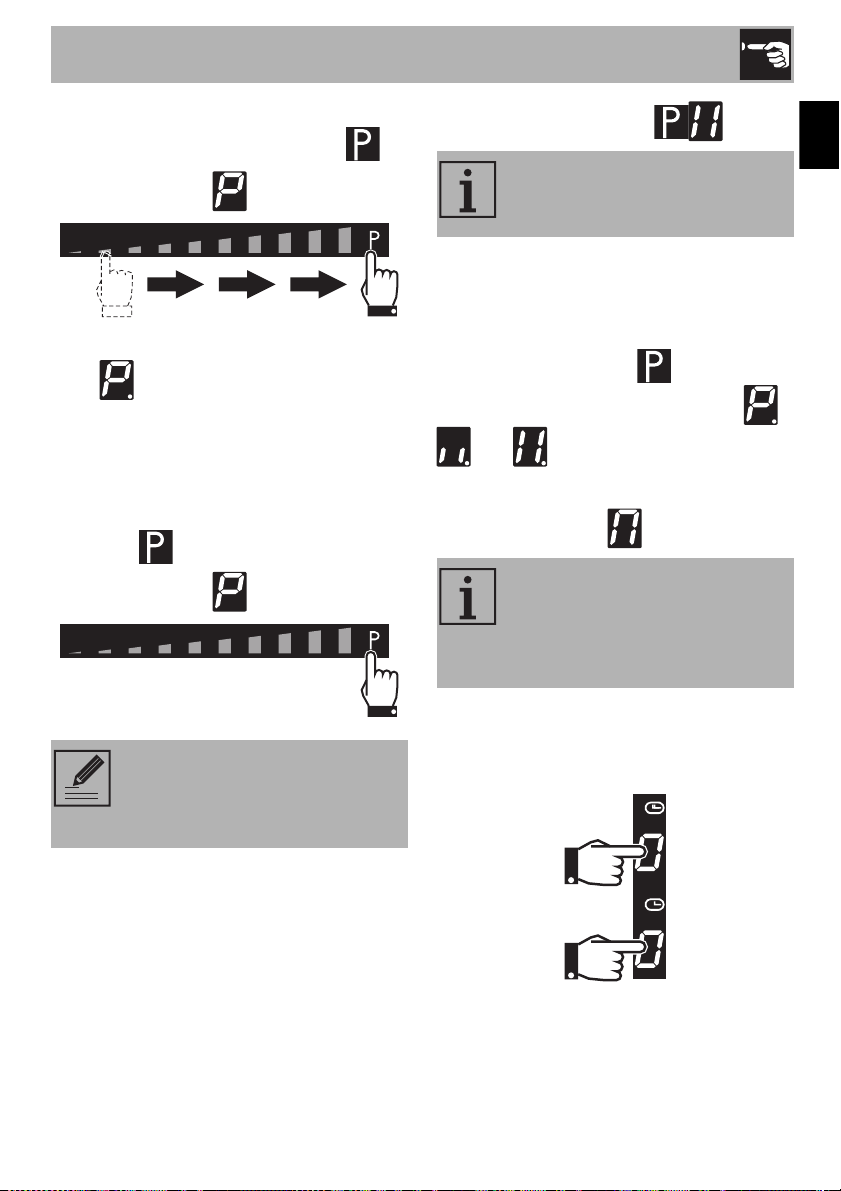
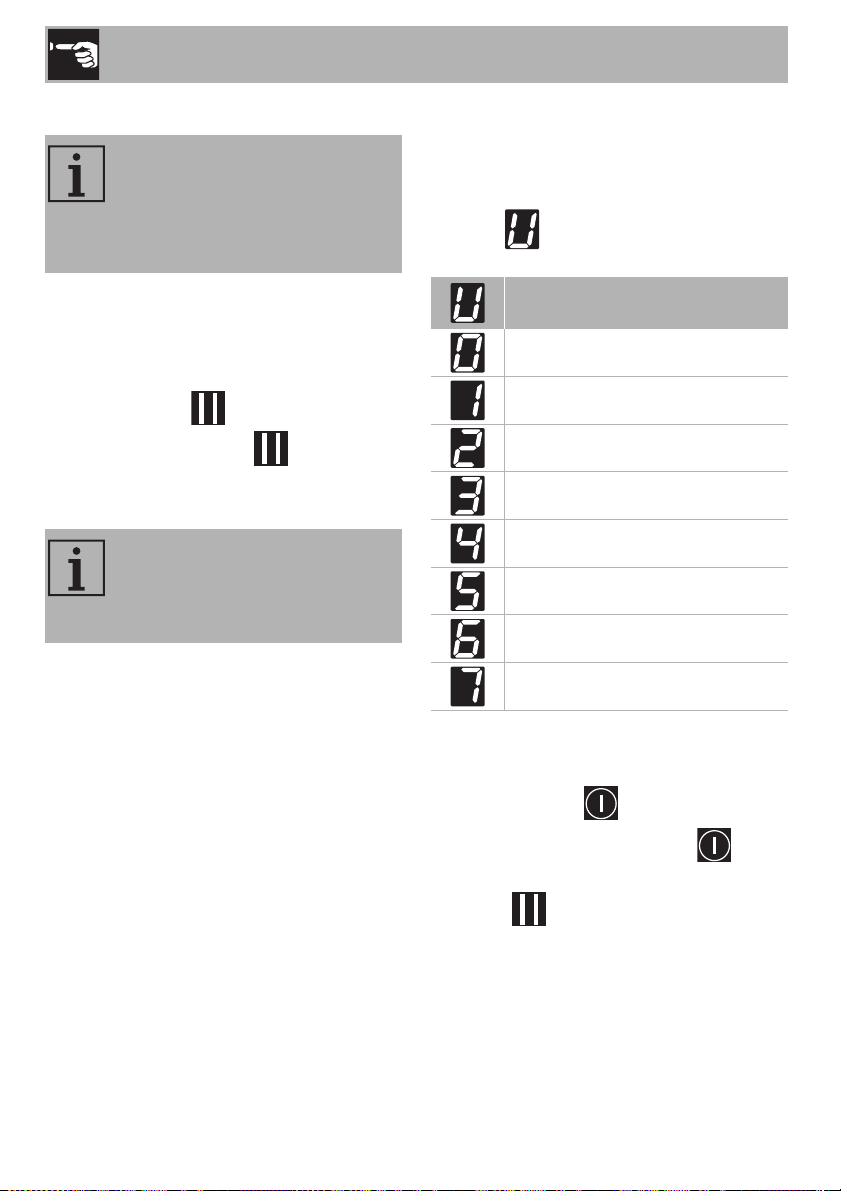
2.5 User menu
The user menu allows you to modify the
operating characteristics of the appliance.
Each option is indicated on the display with
the letter which alternates with a
progressive number.
Accessing the user menu
1. If the cooktop is off, switch it on using the
On/Off button .
2. Then press the On/Off button again
immediately to switch it off: the pause
button starts to flash.
NOTES: This function is used to
restore some functions that have
already been started after the
appliance has been switched off
unintentionally.
NOTES: This function restores the
cooking zones, timer and rapid
heating functions; no other
functions will be restored.
Description
(installers only)
Option disabled
Button volume
Timer alarm volume
Display brightness
Timer animation
Automatic pan detection
Timer alarm duration
Use
33
EN
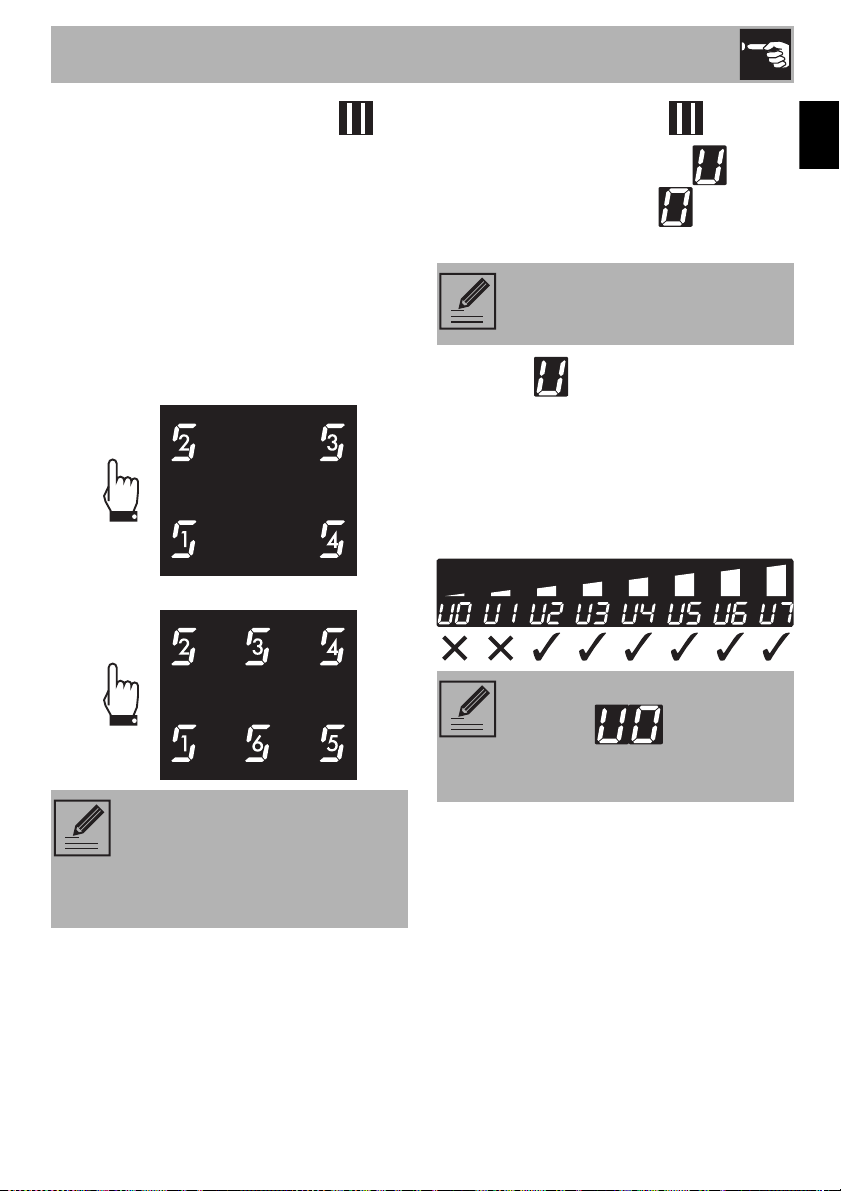
3. Press and hold the pause button .
Some symbols will appear on the
cooking zone displays that must be
pressed in sequence in order to access
the menu options.
4. Press all the buttons of the cooking zones
in sequence in a clockwise direction
starting from the front left. Every effective
touch will be confirmed by a beep.
24 in - 610 mm and 30 in - 762 mm
models:
36 in - 914 mm model:
5. Release the pause button .
The user menu is active and the symbol
alternating with the number will appear
at the top of the cooking zones display.
6. Press the symbol to go back to
selecting the options. The scroll bar
appears in which each segment is
associated with a menu option.
7. Press the segments of the scroll bar
(except the first two) to select the
available options.
NOTES: If the sequence of the
buttons is selected incorrectly, the
cooktop will be turned off and the
procedure for accessing the menu
will have to be repeated.
NOTES: This option is restricted to
the installer.
NOTES: The first segment on the
left (option ) is reserved for
the power limitation procedure
(installer only).
Use
34
Option
Modifies the volume of the button sounds.
• : minimum volume.
• : maximum volume.
Option
Modifies volume of the sound signals when
the timer has ended.
• : minimum volume.
• : maximum volume.
Option
Modifies the brightness of the display.
• : maximum brightness.
• : minimum brightness.
Option
Allows you to display the countdown of the
minute timer and timed cooking in seconds,
from 59 to 0 seconds.
• : animation off.
• : animation on.
NOTES: For technical reasons, the
second segment from the left
(option ) is disabled.
Selecting this option will have no
effect.
NOTES: For each option, press the
value symbol to activate the scroll
bar in order to modify it.
NOTES: Depending on the
adjustment range of each option,
the scroll bar will show only those
segments that correspond to the
adjustments available for each
option.
NOTES: The sound associated
with the On/Off button and
the sounds associated with error
messages cannot be deactivated.
NOTES: The second count is
displayed when the timer is set for
less than 10 minutes.
Use
35
EN
Option
Allows you to activate or deactivate the
automatic pan detection function.
• : automatic detection off.
• : automatic detection on.
Option
Specifies the duration of the alarm when the
timer has ended:
• : alarm duration 120 seconds.
• : alarm duration 10 seconds.
• : alarm off.
Exiting the user menu
There are two ways to exit from the user
menu:
1. Press the pause button . Any
modifications will be discarded and the
cooktop will be switched off.
Or
2. Press and hold the On/Off button
for at least 2 seconds. The modifications
will be saved and the cooktop will be
switched off.
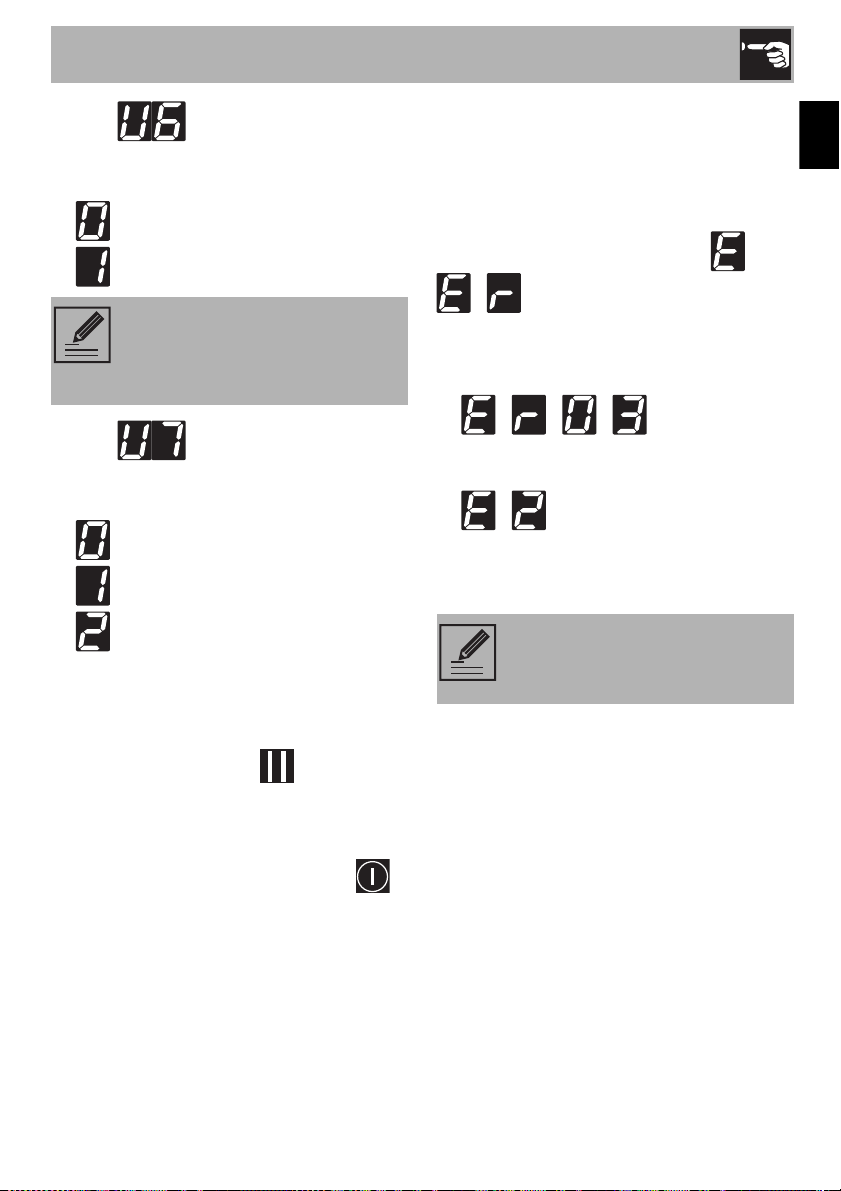
2.6 Error codes
If the appliance malfunctions or operates
incorrectly, the associated error code
appears on the displays of the cooking
zones.
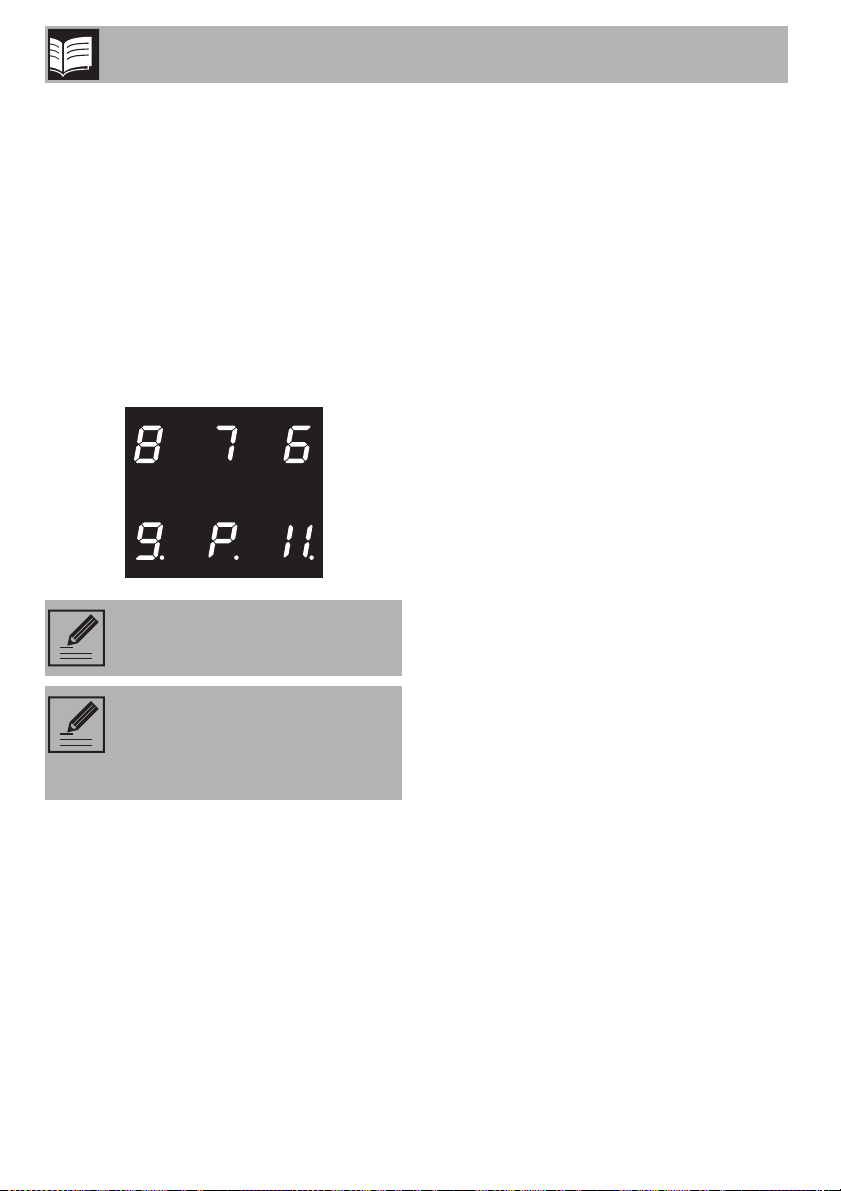
The error codes always start with or
- , followed by a number.
The following error codes can be corrected
without having to contact the Technical
Support Service.
• - - - : Remove any
materials or pans from the area around
the front control panel.
• - : Make sure that the pans are
suitable for induction cooking and that
they are not empty; allow the appliance
to cool down.
For all other errors, make a note of the
code, if possible, and contact Technical
Support.
NOTES: If automatic pan
detection is disabled, the zone has
to be switched on manually when
a pan is placed on the cooktop.
NOTES: If these error codes
appear frequently, contact
Technical Support.

Cleaning and Maintenance
36
3 Cleaning and maintenance
3.1 Warnings
3.2 Surface cleaning
To maintain the surfaces, you must clean
them regularly after each use once they
have cooled down.
3.3 Weekly routine cleaning
Clean and maintain the cooktop once a
week using a standard product for cleaning
glass. Always follow the manufacturer's
directions. The silicone in these products
creates a water- and dirt-repellent
protective film. All the dirt remains on the film
and therefore can be removed easily. Just
wipe the surface with a clean cloth. Make
sure no detergent remains on the cooktop
surface because it will react aggressively
when the cooktop is heated up and can
change its structure.
3.4 Food stains or residues
Any marks left by the use of pans with
aluminum bases can be wiped off with a
damp cloth soaked in vinegar.
Remove any burnt-on residues after
cooking, then rinse with water and dry
thoroughly with a clean cloth.
Grains of sand which may end up on the
cooktop while cleaning lettuce or potatoes
can scratch the cooktop when you move
pans around.
Therefore, make sure that no grains of sand
are left on the cooktop.
Improper use
Risk of damage to surfaces
• Do not use steam jets to clean the
appliance.
• Do not spill sugar or sweet mixtures onto
the cooktop during cooking.
• Do not place materials or substances
which may melt (plastic or aluminum foil)
on the surface during cooking.
• Always keep the cooktop clean and do
not place any objects on the sensor
keys.
• Do not use cleaning products containing
chlorine, ammonia or bleach on the
steel parts or those with metallic surface
finishes (e.g. anodizing, nickel or
chrome plating).
• Do not use abrasive or corrosive
detergents on the glass parts (e.g.
powder products, stain removers or
metal scouring pads). If possible, use
wooden or plastic utensils.

Cleaning and Maintenance
37
EN
Changes in color do not affect the function
and stability of the glass. It is, in fact, not a
question of changes to the cooktop
material, but simply of residues which were
not removed and therefore charred.
Shiny spots can form due to the bases of
pans rubbing on the surface, especially if
they are aluminum, and the use of
unsuitable cleaning agents. They are
difficult to remove using common cleaning
products. You may need to repeat the
cleaning process several times. Using
aggressive detergents or sliding the base of
pans on the surface can, over time, wear
away the decorations of the cooktop and
could cause spots to form.
3.5 What to do if...
The cooktop does not work:
• Check that the cooktop is plugged in
and the main switch is turned on.
• Check that there are no power outages.
• Check that the fuse has not been tripped.
If it has, replace the fuse.
• Check that the thermal-magnetic circuit
breaker of the appliance has not been
tripped. If it has, reset the switch.
The results of cooking are unsatisfactory:
• Check if the cooking temperature is too
high or too low.
The cooktop smokes:
• Allow the cooktop to cool and clean it
after cooking.
• Check that the food has not spilled and
use a larger container if necessary.
The fuses or the thermal-magnetic circuit
breaker of the appliance are triggered
repeatedly:
• Contact Customer Service or an
electrician.
There are fissures and cracks on the
cooktop:
• Switch off the appliance, immediately
disconnect the power supply and call
Customer Service.

PAGE INTENTIONALLY LEFT BLANK