
Loading ...
Loading ...
Loading ...
English
15
tioned between the spindle and the operator to provide maxi-
mum operator protection.
4. Close the guard latch to secure the guard on the gear case
cover. You should be unable to rotate the guard by hand when
the latch is in closed position. Do not operate grinder with a
loose guard or clamp lever in open position.
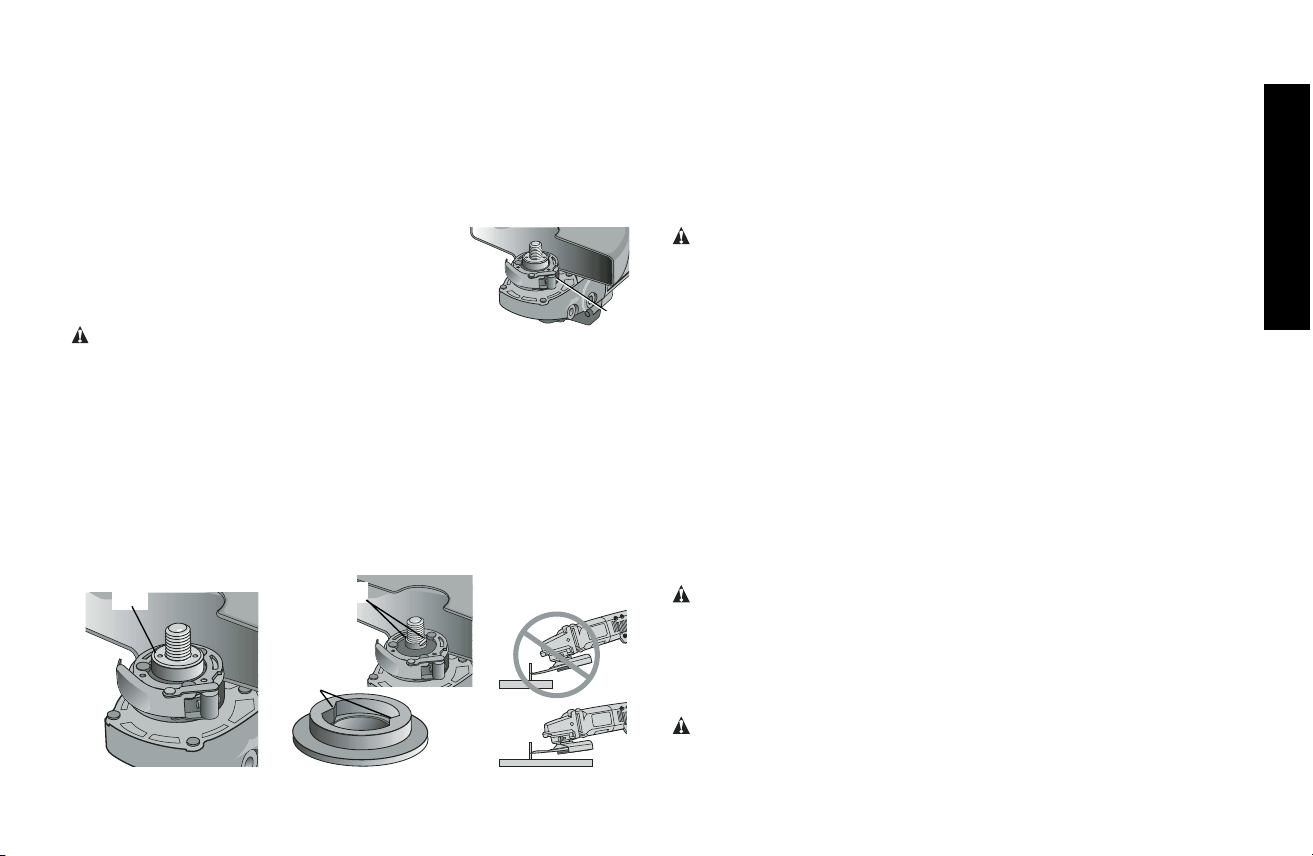
NOTE: The guard is pre-adjusted to the dia-
meter of the gear case hub at the factory. If,
after a period of time, the guard becomes
loose, tighten the adjusting screw (I) with the
clamp lever in the closed position.
CAUTION: Do not tighten adjusting screw
with clamp lever in open position. Undetectable damage to guard
or mounting hub may result.
MOUNTING CUTTING WHEELS
1. Remove Soft Mount (F).
2. Install wheel backing flange, aligning flats on spindle (O) with
flats on backing flange (R).
3. Place the wheel on the backing flange, centering the wheel on
the backing flange pilot.
4. Install the clamp nut, ensuring that the wheel remains centered
on the backing flange.
5. Depress the spindle lock button and tighten clamp nut with
wrench.
6. Reverse the above procedure to remove the wheel.
USING CUTTING WHEELS
WARNING:
Do not use edge grinding/cutting wheels for surface
grinding applications because these wheels are not designed for
side pressures encountered with surface grinding. Wheel breakage
and injury may result.
1. Allow tool to reach full speed before touching tool to work
surface.
2. Apply minimum pressure to work surface, allowing tool to oper-
ate at high speed.
3. Once you begin a cut, maintain the angle of the cutting wheel
to the work surface. This will keep you from bending the wheel
which could result in wheel breakage and injury.
4. Remove the tool from work surface before turning tool off. Allow
the tool to stop rotating before setting it down.
MAINTENANCE
Cleaning
WARNING: Blowing dust and grit out of the motor housing using
clean, dry compressed air is a necessary regular maintenance pro-
cedure. Dust and grit containing metal particles often accumulate on
interior surfaces and could create an electrical shock or electrocu-
tion if not frequently cleaned out. ALWAYS WEAR SAFETY
GLASSES.
CAUTION: Never use solvents or other harsh chemicals for
cleaning the non-metallic parts of the tool. Use a clean, dry rag only.
F
O
R
I
Loading ...
Loading ...
Loading ...