Loading ...
Loading ...
Loading ...

34
START/PAUSE
Press to start or pause the program. You can’t change any setting
except add a garment.
Time Adjust +/Time Adjust–
Press repeatedly to select the drying time. This button only works for
the Quick Dry, Time Dry and Air Fluff cycles.
Wrinkle Care
Press once to add the Wrinkle Care step to the operating
program. The “Wrinkle Care” indicator lit.
Press again to cancel selection.
Wrinkle Care provides approximately 90 minutes of intermittent
tumbling in unheated air at the end of the cycle to reduce wrinkling.
The load is already dry, and can be removed at any time during the
Wrinkle Care cycle.
Damp Dry Signal
This function is useful when you want to take some garments out for
ironing. The unit will beep 6 times when the moisture in the clothes is
good for ironing. At this time, you can take those garments out and
continue drying the other by pressing the “START/PAUSE” button
once.
NOTE: The unit will not stop operating if you don’t take those
garments out for ironing.
Dryness
Press the button to select the dryness level. Different dryness level
will result in different drying time. For clothes to be ironed manually,
a lower dryness level should be selected.
Child Lock
Press and hold the Dryness and Temp. buttons at the same time for
three seconds to turn on the child lock function. Press and hold for
three seconds to turn off the function. Whenthe child lock function is
turned on, the only button that works is the POWER button .
Temp.
Press the button to select the drying temperature.
High - For sturdy cottons or those labeled Tumble Dry.
Medium - For permanent press, synthetics, lightweight cottons, or
items labeled Tumble Dry Medium.
Low - For lower heat than Medium to dry synthetic or washable knit
fabrics.
No Heat - Provides just the air cycle without any heat.
5
7
11
6
9
10
8
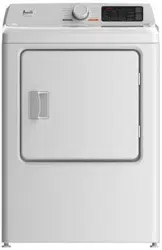
Dryer
Safety
Operation
Requirements
Parts and
Features
Installation
Instructions
Dryer Use
Dryer Care
Troubleshooting
Appendix
Loading ...
Loading ...
Loading ...